I have quickly learned to never turn down a piece of junk! It may not be vision at first sight but it will soon come! My BFF, Lauri, is a true friend! I cannot count how many times she has called me willing to dumpster dive through someones trash if I was interested! That’s where this story begins. Several months ago I got a phone call from Lauri saying ~ I just passed a door on the side of the road….it’s not a whole door but do you want it? Well, duh! Great friend I have ~ she not only loaded it into her car on the side of the road, she also brought it to my house for me! I have had many visions in the past months for this 3/4 of a door but I wasn’t super excited about any of them until this vision! I had a hunch this would make the perfect focal point for my mantel!
I started by taking the hardware off with a Dewalt battery powered drill.
I then marked off a line for cutting…..
and began cutting with a Dewalt battery powered circular saw.
Time for sanding! I lightly sanded all over to make painting easier and to clean off the cobwebs and dust.
I painted her with Behr Cozy Cottage Satin…
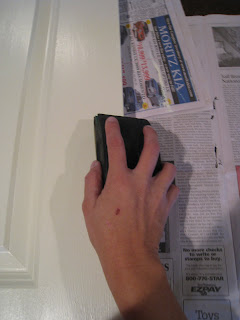
distressed with my 3M sanding block (80 grit paper)
and painted on Minwax Red Mahogany Stain over the distressed edges.
Ralph stopped by for another visit (remember ~ paint on then wipe away)
While I was waiting for her to dry I went to JoAnn’s and found the perfect cardboard T on sale for $4.00 ( T is for our last name)
She looked great with 2 coats of Behr Forever Black!
I used Gorilla Glue to secure the T to the center of the “door”.
I found these two unfinished wooden corner pieces at JoAnn’s for $2.00 ~ painted them with the Behr Cozy Cottage and a touch of Ralph
and secured them to the top corners using Gorilla Glue!
Now for the finishing touch ~ I wanted this to still resemble a door so I purchased a large knob at Hobby Lobby for $3.00. I drilled a hole to screw in the knob.
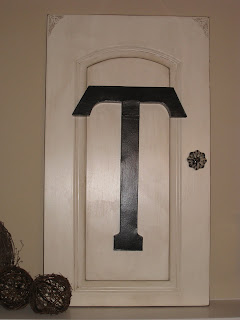
Perfect!
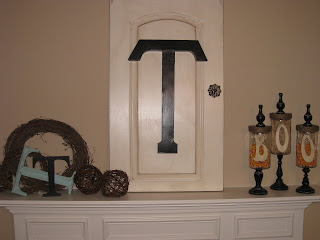
I LOVE my new mantel focal point! It was so easy and almost FREE!!!! If you would like to make one of these and don’t have a junky door laying around you can always buy one at a hardware store and follow these same easy steps! I hope you have been inspired!






You guys get me excited for our town clean up days. The day that the neighborhood puts all their junk…I mean treasures…out on the street. I will be searching for a door and a chair! 🙂 What a great idea!
SOOOO CUTE!!!! I love it! I'm gonna start looking for a door now!! hehehe
Another great project. I love reading your blog as you both have me on the edge, trying to figure out exactly what you're going to do, only to be outwitted by you every time. Love it!! 🙂
I love all of the the added embellishments! Soooo pretty!
OH MY HEAVENS!!! I love this! I just so happen to have about 15 doors laying around that didn't "fit" in my 100 year old house. Now I know what to do with them! THANKS! YEAH!
Another creative idea love it!
Great idea! It looks great! Love the door knob. Thanks for sharing.
Wow, looks great!
I love it! And all of ya'lls ideas! Plus the info included is awesome! Of course, I'd love one. Now I will be on the 'hunt' for a junk old door.
Fabulous!!!!
m ^..^
Darn, I threw out my extra door !! I would love to have made one. 🙁
OMG Ashley, I LOVE it! Wow, that is really impressive. You are quite the talent!
I LOVE this. So clever.
Thanks also for including the color paint that you use, you must have known I was going to ask 🙂
HOW DARLING LOVE IT…. AND RIGHT next to those boo jar's on pedestals I love! GREAT JOB!
I love it! You girls are so creative and handy. I like seeing a woman with power tools. 🙂