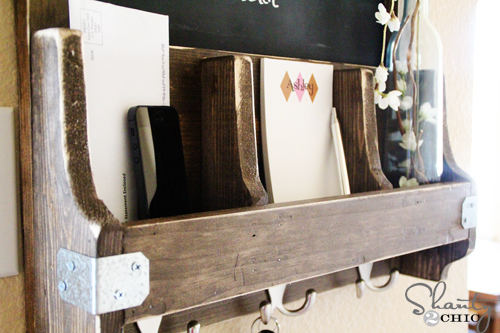
Hey there! I am so EXCITED about this project today! Chalkboards, key hooks and a mixture of galvanized hardware and stained wood are a few of my favorite things and this project has them all!
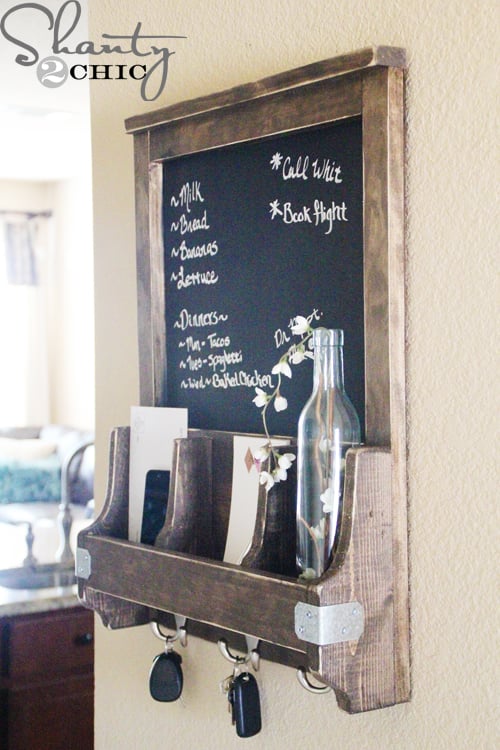 This cutie was SO easy! Don’t let the fancy cuts on the sides fool you! This is a beginner project from start to finish! I was able to make mine for under $20!
Lumber needed:
1 – 1×2 @ 8ft.
1 – 1×3 @ 4ft.
1 – 1×8 @ 4ft.
1 – 1×4 @ 4ft
1 – 2’x4′ Panel of Tempered Hardboard
*This is a great project to put scrap pieces to good use! If you don’t have scraps for the 4ft. boards, make sure to check the scrap boards at the hardware store for a great discount!
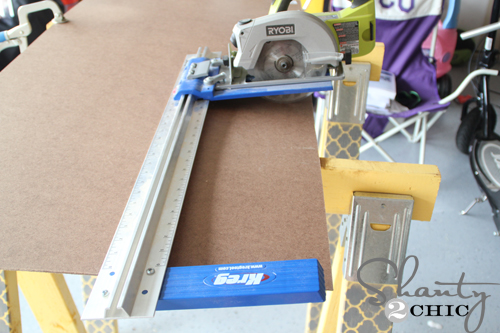 I started by cutting a piece of hardboard at 19″x24″. You won’t even need half of this panel so you can save it for another chalkboard project:) You can have your local hardware store cut this for you! I used my awesome Kreg Jig Rip Cut with my cordless circular saw. The Rip Cut is awesome for cutting down large panels like this!

I sprayed 2 coats of Spray Paint on the hardboard.
While waiting for the Chalkboard paint to dry, I got busy making cuts for the rest of the piece.
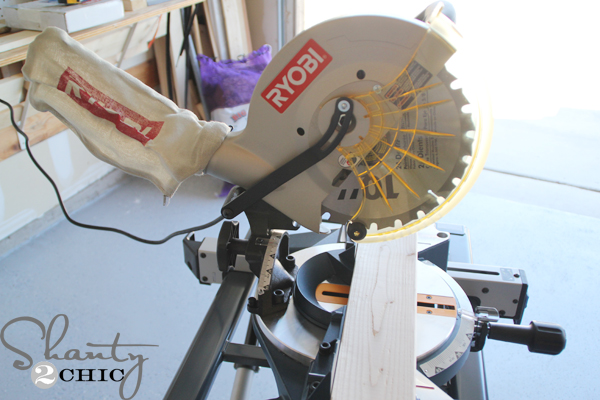 I used my 10″ Compound Miter saw to make my cuts but if you aren’t ready to make the purchase, you can purchase the handsaw below.
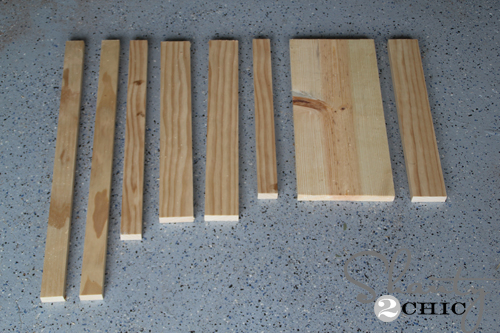
Cut list:
2 – 1×2 @ 24″
1 – 1×2 @ 19″
1 – 1×2 @ 16″
2 – 1×3 @ 17 3/4″
1 – 1×3 @ 16″
1 – 1×8 @ 16″
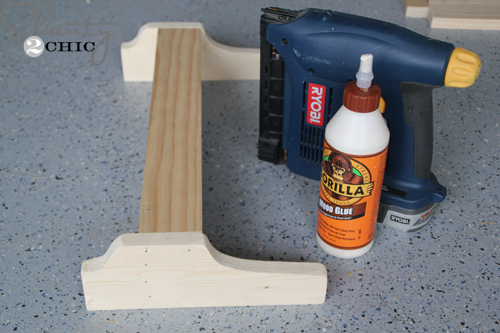
2 – 1×4 @ 10″ (for fancy cuts)
2 – 1×4 @ 6 3/4″ (for fancy cuts)
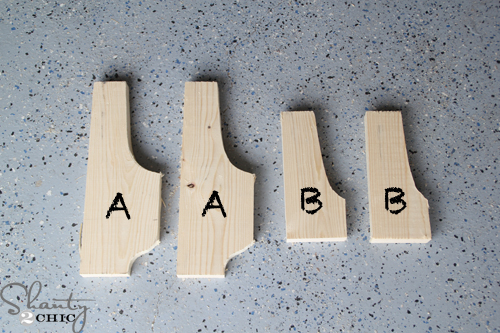 Here’s the part I promised would not be intimidating! Once you make your 1×4 cuts, these fancy cuts are a piece of cake! To make them even easier, I have provided printable templates below. Just print, cut and trace them on your 1×4 boards!


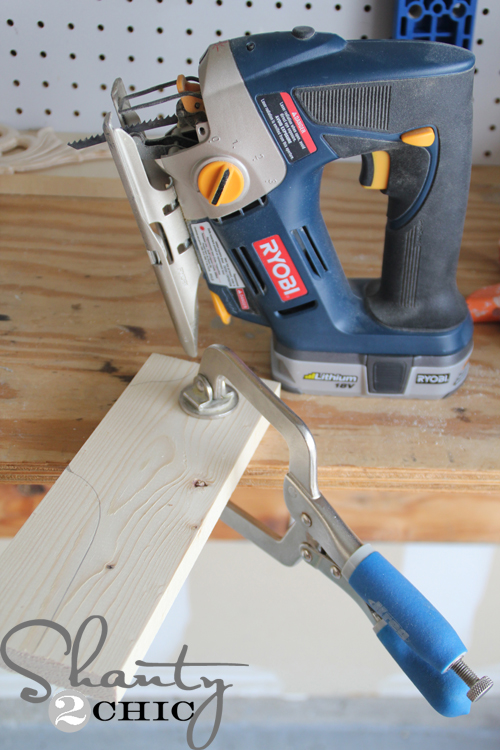 Once you trace the template, clamp the 1×4 down to a sturdy surface and cut away! I love my Ryobi cordless Jigsaw!
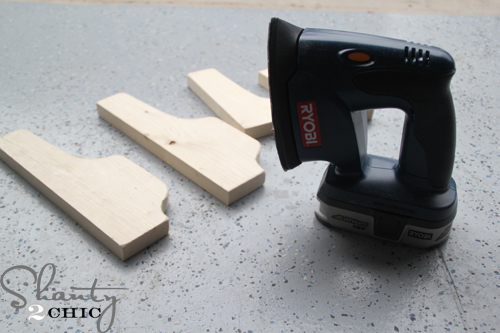 And, you don’t have to be exact on your Jigsaw because you can sand away the bad parts;) WE LOVE our Cordless Corner Cats! It is also an inexpensive tool and by far our favorite sanding tool. Notice it shares the Ryobi battery as well!
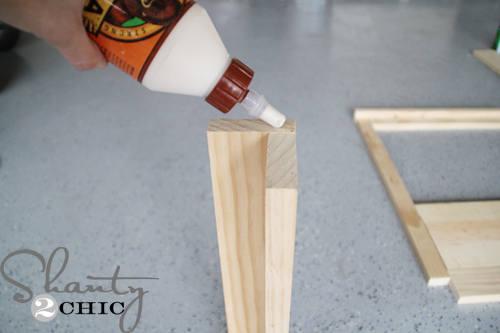 I used Gorilla Glue Wood Glue and nails for every joint! Attach the 2 – 1×3’s @ 17 3/4″. This will make the “shelf” part.
 Now, glue and nail the “shelf” to the “A” pieces! I love using my cordless Brad Nailer for projects like this! This is also an inexpensive tool that will share the same battery as the other Ryobi cordless tools;)
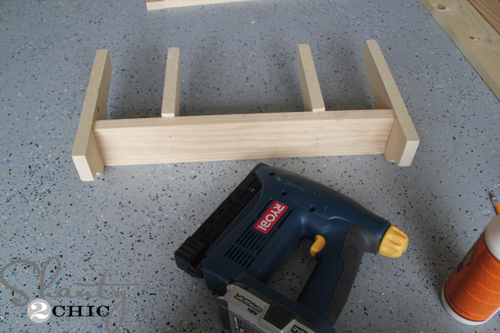 Now, nail and glue the “B” pieces. This will form the dividers. This is the backside of the shelf so the fronts of the “B” pieces will be covered by the 1×3 on the shelf.
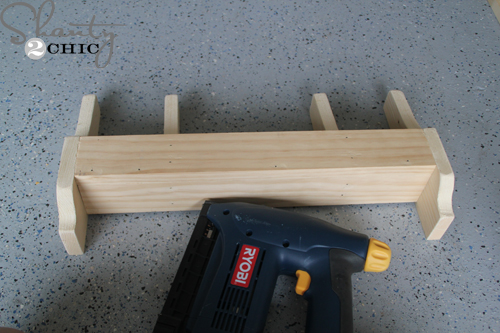
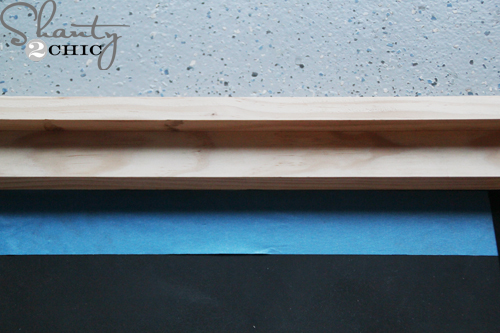
Front view of shelf. Now, set that aside.
Time to frame the chalkboard!
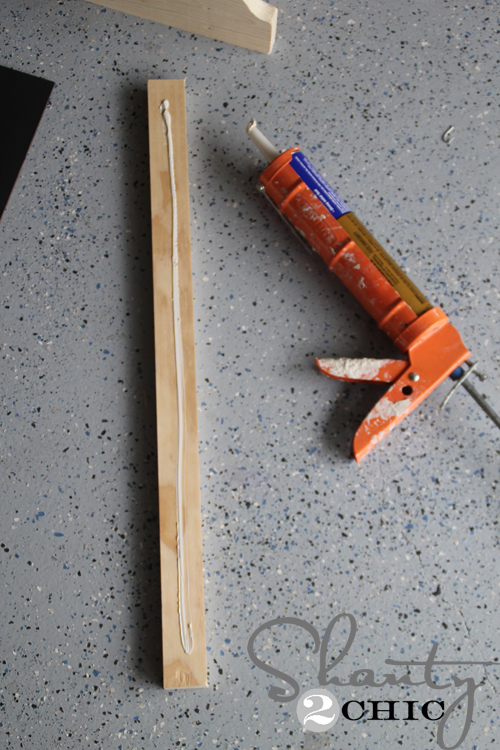 To frame the chalkboard, apply Liquid Nails to the back of the 1×2’s…
 and place them around the chalkboard (flush with the outer edges). The top 1×2 is 16″ and the outside 1×2’s are 24″.
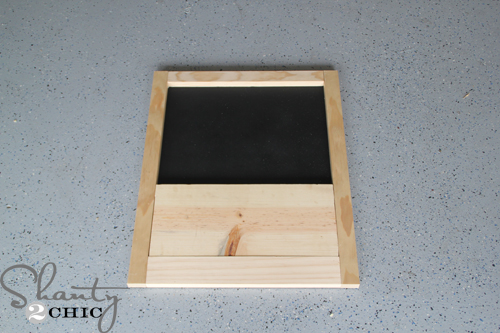 Now, attach the 16″ 1×3 to the bottom of the chalkboard (edges flush) with Liquid Nails. The 1×8 goes directly above that (also attach with Liquid Nails).
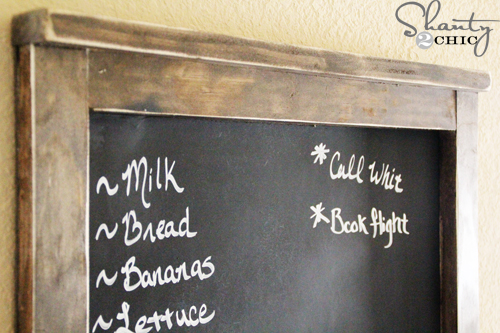
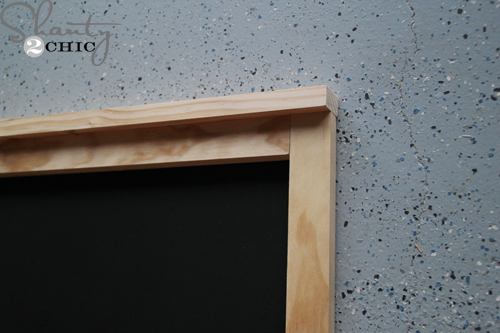 For the top trim, wood glue and nail the 19″ 1×2 to the top. The back edge will be flush with the back of the chalkboard leaving the front hanging over about 3/4″.
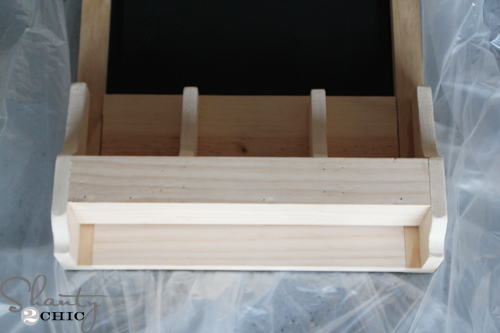 To attach the shelf, apply a thin amount of wood glue and nail from the back of the chalk board into the shelf and dividers. The bottom of the “A” pieces will be flush with the bottom of the 24″ 1×2’s.
Now for the finish!
 Tape off right under the frame of the chalkboard before you stain. I thought it was easier to stain the piece after assembling (wood glue will not adhere to treated wood). The tape will protect the chalkboard finish.
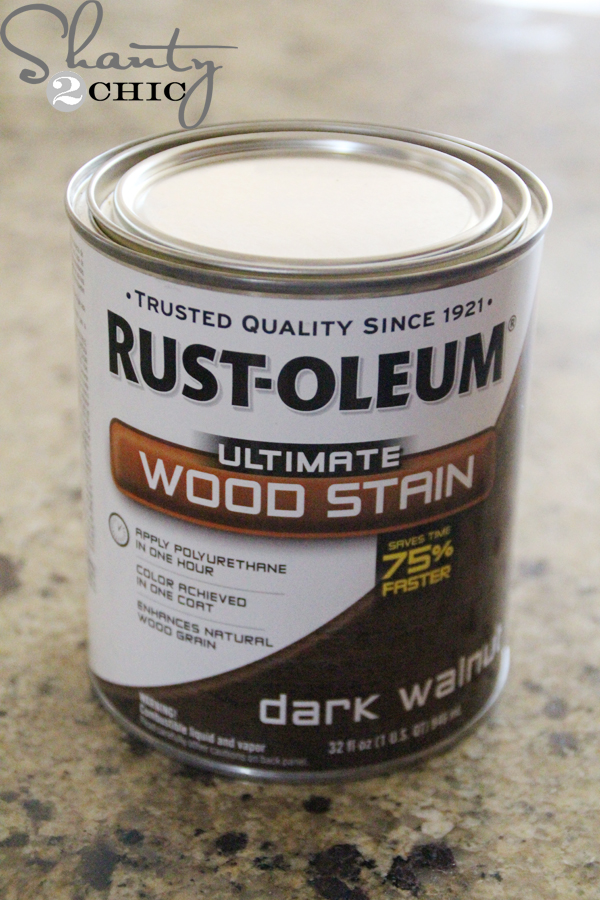 I chose a classic favorite, Dark Walnut Stain to finish this cutie! Just apply one coat with a foam brush and wipe with a clean cloth after 5-10 minutes. Do not wipe the stain completely off, the wiping just helps to make the stain even.
Now for the detail!

I purchased to galvanized brackets and hooks to give this piece some character! Just use small wood screws to attach the brackets! That’s it! To hang it, I used a large sawtooth hanger and anchored a screw into our wall!
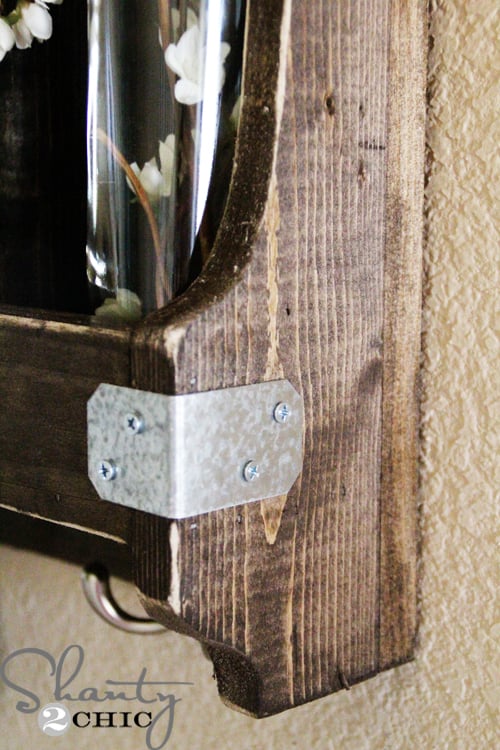 To get the distressed look on the stained wood, I sanded all of the edges with my Cordless Corner Cat!

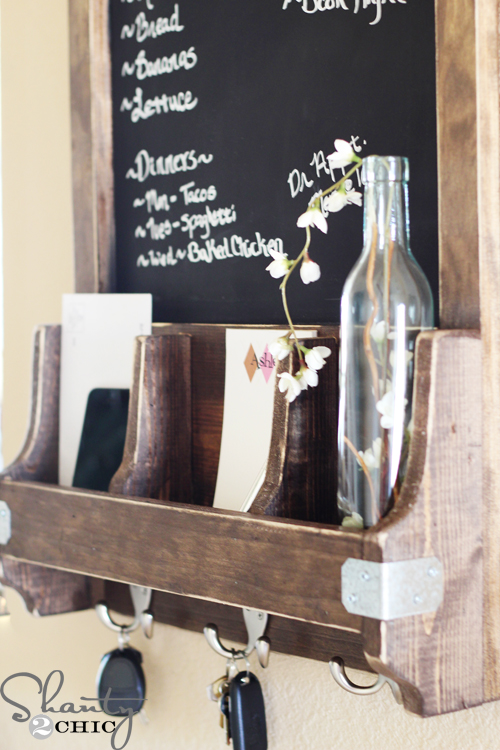

What a great excuse for a “Collect-All”:) Again, this is totally a beginner project and the tools needed are very inexpensive and they share batteries! Go for it;)
If you love my DIY Chalkboard and Key Hooks, I would LOVE your pins and shares!
Thanks so much for stopping by and happy DIY!
~Ashley
I used a chalk pen to write on the chalkboard. It wipes away with a damp cloth. You can purchase the one that we love on Amazon below!


When printing the templates for the fancy cuts do I print fit to paper or actual size? Very cute! can’t wait to make:) Thanks for sharing!
Thank you! Actual size:)
How did you hang it? And what would you think the weight limit would be? Thanks!
What a pain in the a$$ to try to print out for later use. Can’t you make it a little easier to save???
Not sure what you mean?
I think that Gary was saying that printing these plans is 24 pages long. Is there a way to print out the instructions without all the adds?
I’ve got all my wood cut and sanded but when going to put together it says you need 2 1×3 @ 17 3/4″. On the cut list it’s only 1 with 2 16″ 1×3. Am I reading wrong?
Oh no!!! I’m so sorry! You are right…. I can’t tell you how many times I double-checked the cut list and I still missed it!!! I’m so sorry, thank you for bringing it to my attention!
So for the 1x3s, you will need 2 at 17 3/4″ and only 1 16″? If so, you will need more than 4 ft of board…
Yep. I had to rip the extra wood with a table saw from the biggest piece (the leftovers). I measure twice and cut once always, but I forget that with the internet I should add first to make sure the numbers line up.
Love it! You’ve got me addicted to the dark walnut stain. Did you use just 1 sawtooth hanger on the back in the middle? How do you keep the whole thing from moving or sliding whenever you are using it? Thanks again for a really cool project and great tutorial.
This needs to be made soon. Great project.
This is beautiful! I have the perfect place in my home for this. Thanks for the awesome post and ideas! I LOVE your blog!
Love this project Ashley! And it’s giving me some ideas… Hmmmmm.
You guys come up with the best ideas. Can you do a post for a matching double or triple opening magazine holder? 🙂
What a fun project! Great design.
lovely creation! Now I just need to find a friend with all the cutting tools. 🙂
I don’t need one of these, but I want to make it just because it is so dang cute! Great job Ashley, one of my faves!
LOL Mindi! Thank you so much;)
Sent from my iPad
where do you get chalk pens?
On Amazon! Here’s a link! http://www.amazon.com/Chalk-Ink-Marker-6mm-White/dp/B005OS9J8W/ref=as_li_ss_mfw?&linkCode=wey&tag=sha2chi-20 I also added a link at the end of the post! Thanks:)
I love it but is there a way to make it with a white board instead? I am obsessed with white boards. =}
Sure! Just use whiteboard coated hardboard! I think you can purchase that at a craft store:)
Did you write on it with regular chalk or one of those chalk pens like y’all used on the labels from the pantry organization?
I used a chalk pen;) Obsessed! 🙂
And how does it erase? With a cleaner? Water?
I just use a damp paper towel:)