Hey friends! Happy Friday! To keep up with all of our projects from beginning to end, be sure to follow w us on Instagram!
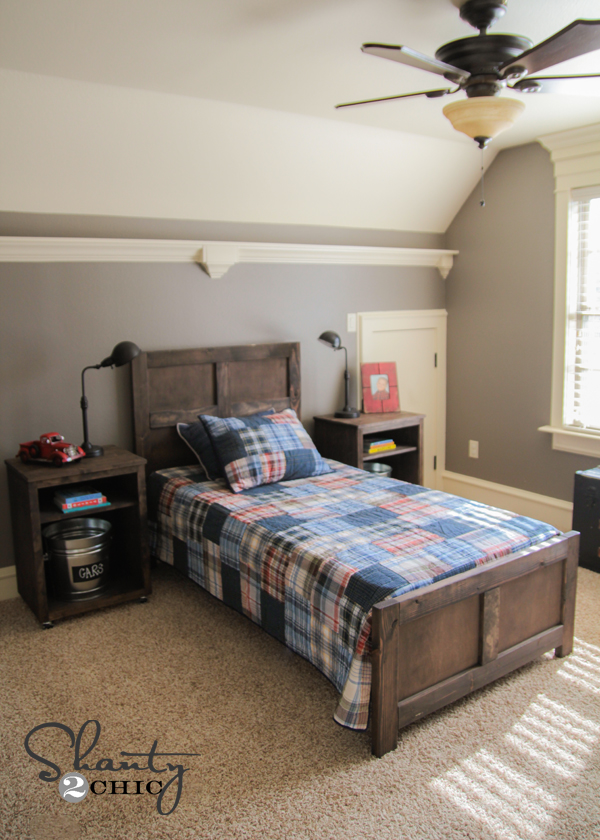
Many of you know that I have 5 kiddos. My youngest (and by far craziest) little guy turned two a few months ago. I have been avoiding putting him in a big boy bed because I knew that basically meant the end of my life. 😉 I did have to follow through when he recently mastered the crib escape.
I just built his older sister a new bed, and I knew her old Pottery Barn inspired bed I built her would go perfectly in his room. I set it all up and decided to design him some fun storage nightstands to go with it. Here is how they turned out!
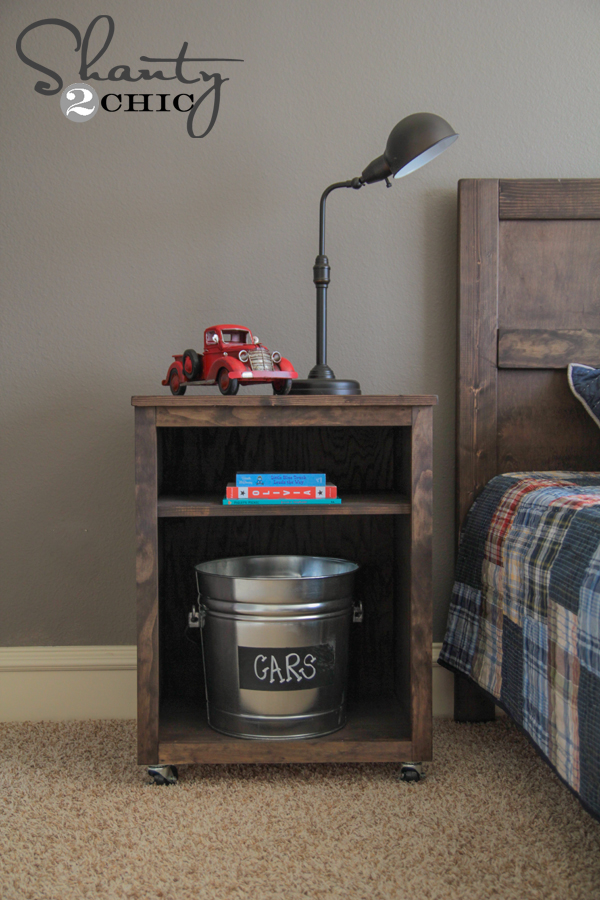
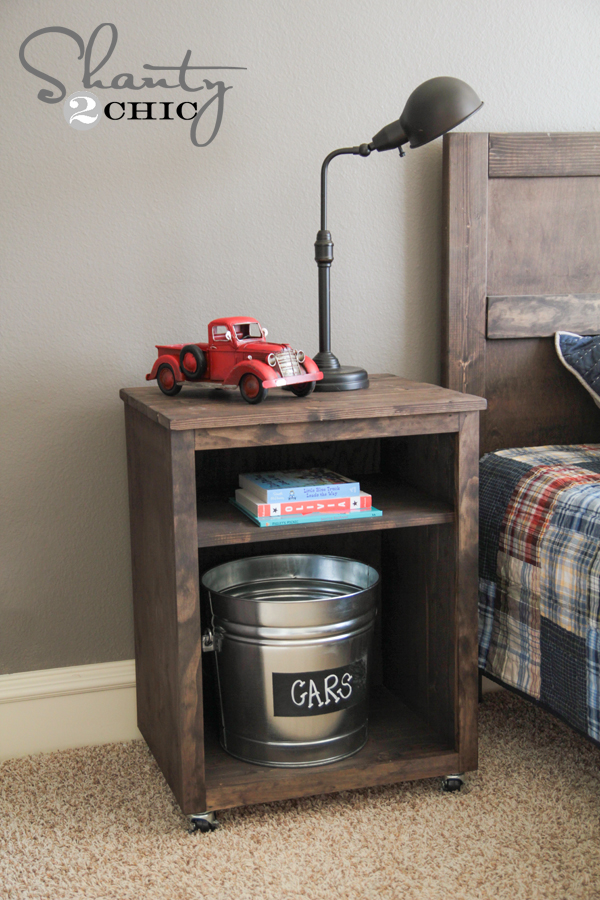
How cute are those? These are so simple and cheap to build!
Let’s get started!
DIY Nightstand Wood List
1 4×8 sheet of 3/4″ Purebond Hardwood Plywood ripped into 16″ boards (you can also use 16″ x 8′ pine project panels, but the cost will be higher
1 – 1 x 2 x 8 pine board
2 – 1 x 4 x 8 pine board
1/4″ hardwood plywood for the back (optional)
I opted to use project panels for these nightstands. I was in a huge hurry when I picked up my supplies, and I didn’t want to wait and have my wood ripped down. It made the cost higher, but I do like how they turned out. I do prefer using hardwood plywood when I can.
Start by making your cuts!
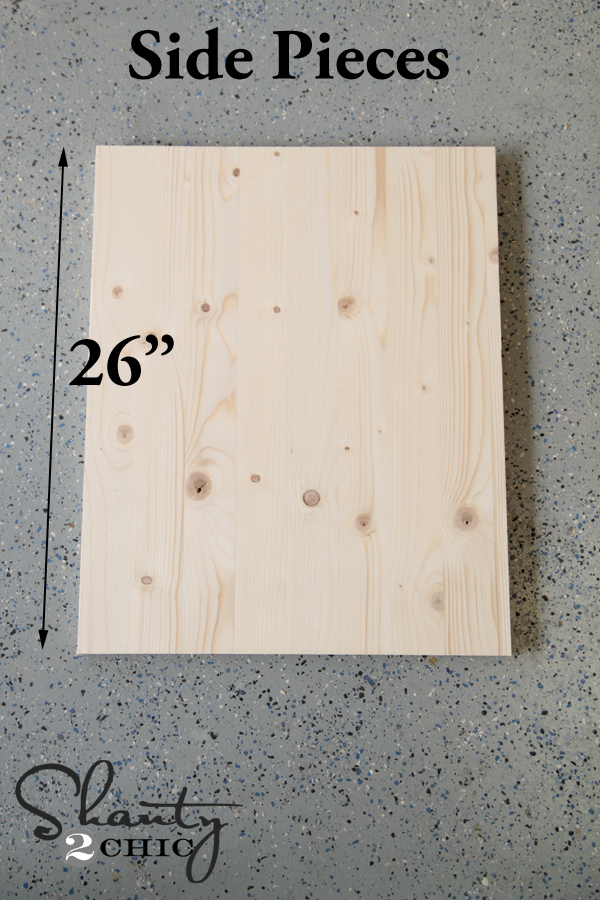
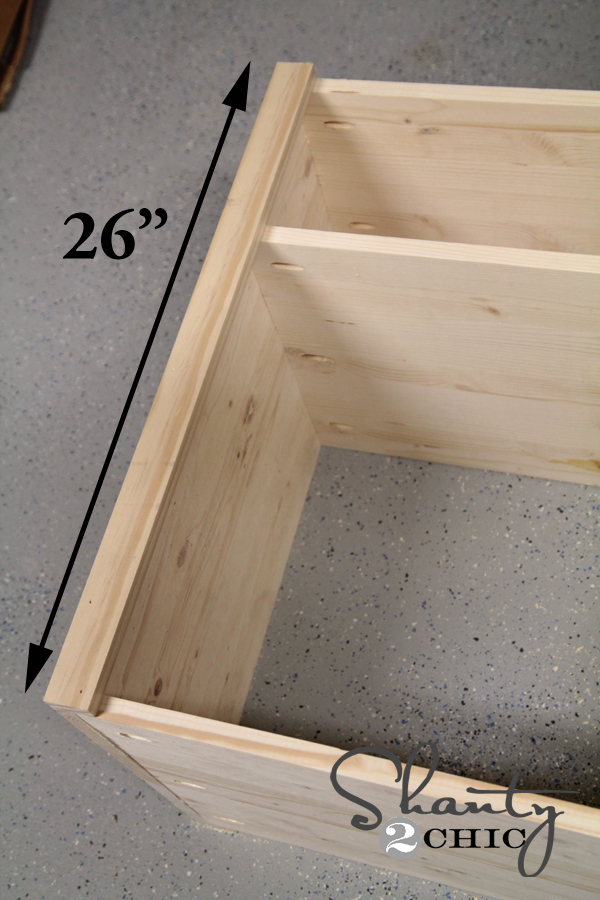
I used my Ridgid miter saw for this part. From the 16″ boards, you will have 2 sides at 26″ each.
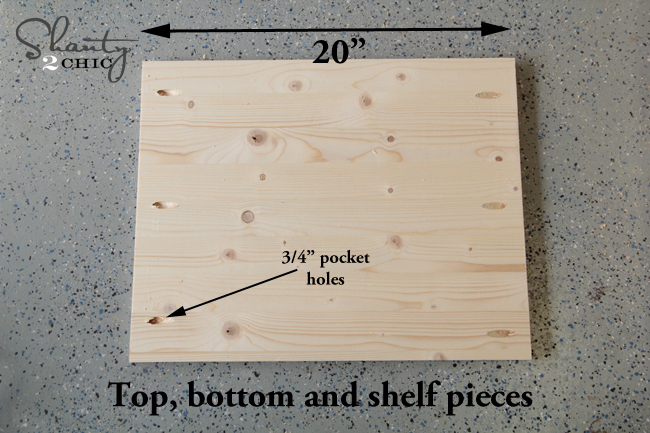
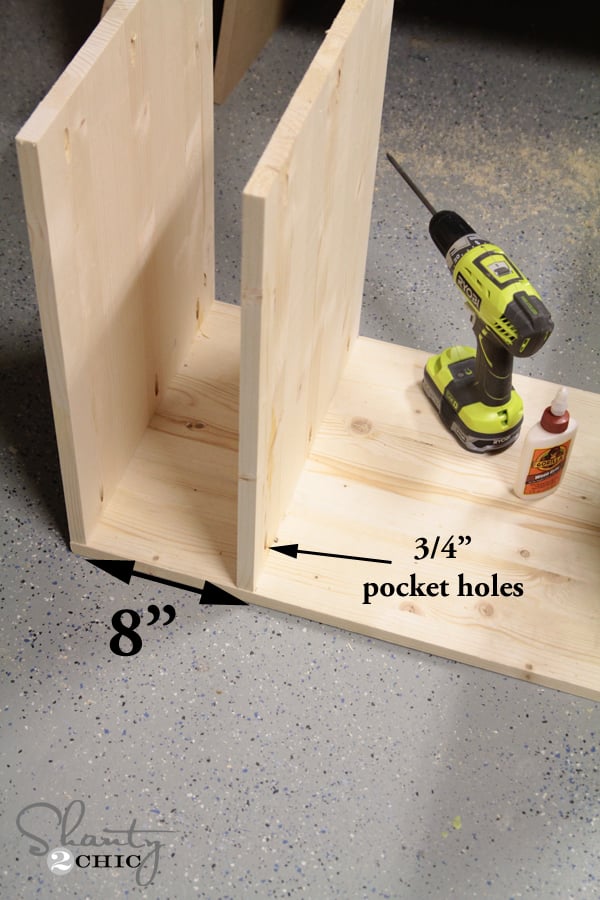
You will also have 3 pieces at 20″ each that will be your top, bottom and shelf pieces. I used my Kreg Jig to add 3/4″ pocket holes on one side of each of these pieces.

This is what those 3 pieces should look like now…
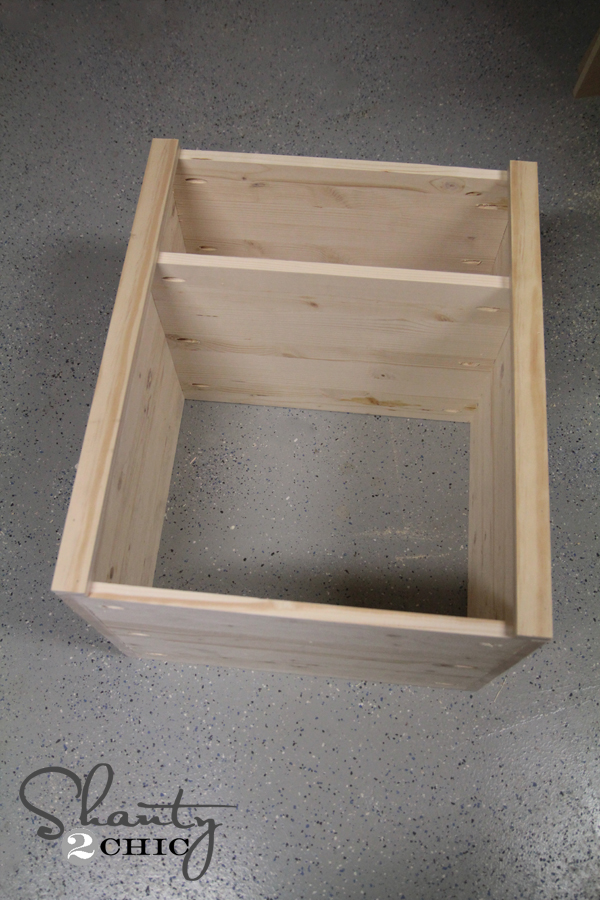
Now to assemble! I used a bit of Gorilla wood glue and 1 1/4″ pocket hole screws to attach my shelf pieces to my sides. Here is how I lined them up!
When you have all 3 pieces attached it should look like this.
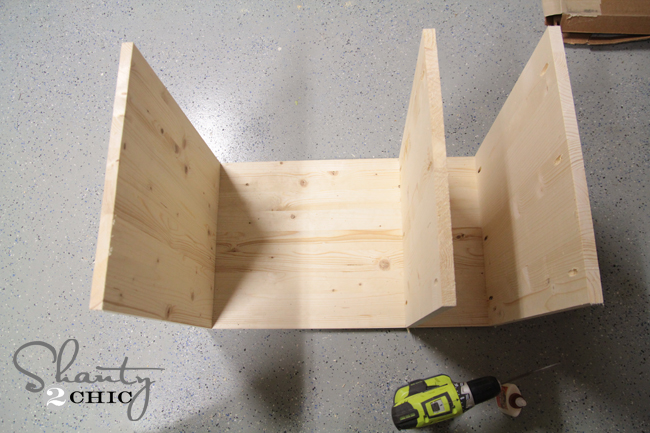
Next, I flipped the whole thing over and attached it to my other side piece the exact same way… Easy peasy! Here it is ready for trim!
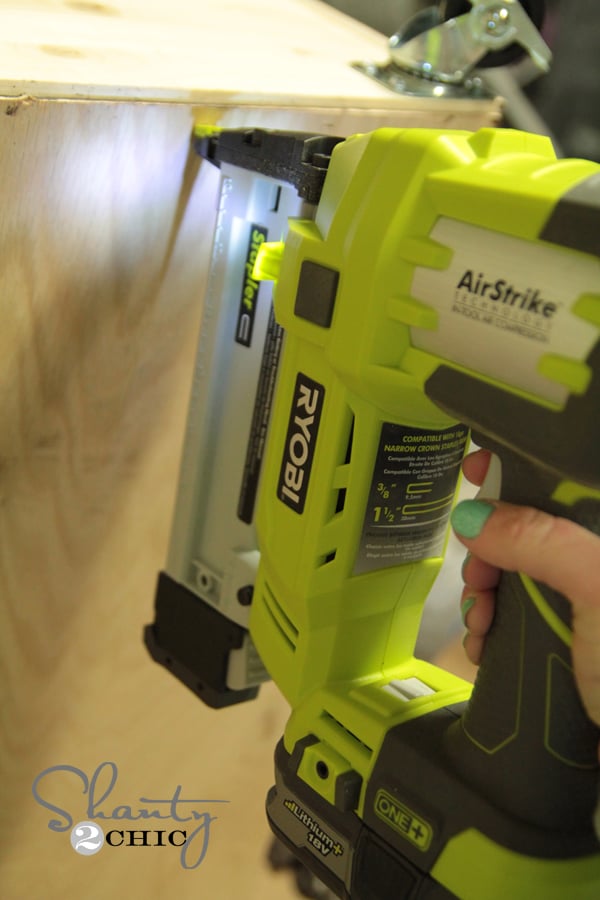
For the trim I used my Ryobi Airstrike Nail gun and wood glue to attach each piece. I can’t tell you enough just how easy and awesome this tool is. It’s easier than using a hot glue gun people! You just stick it where you want your nail and shoot a nail in… Bam. That easy. Get one. You will thank us 😉
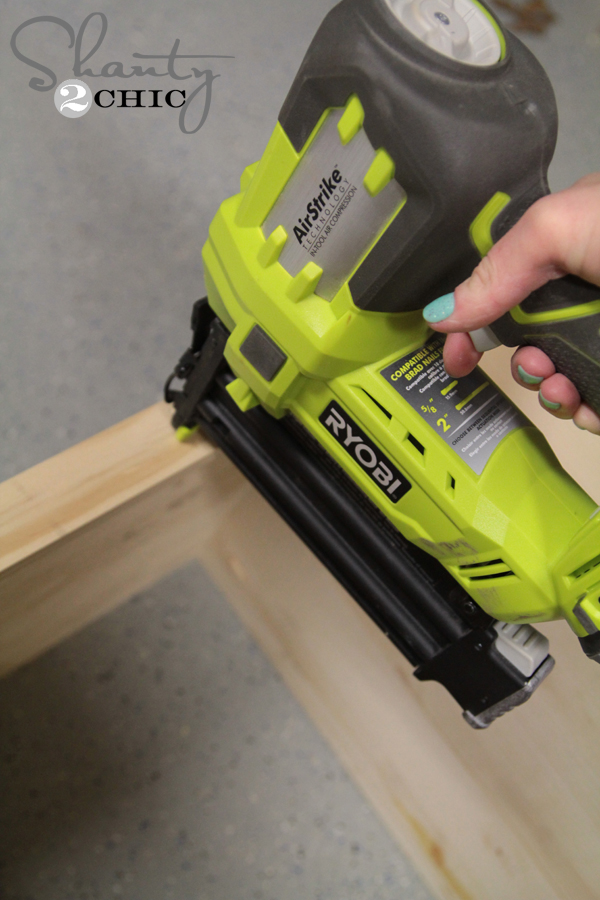
I did my side pieces first like this. I used the 1×2 board for this part.
Both sides attached…
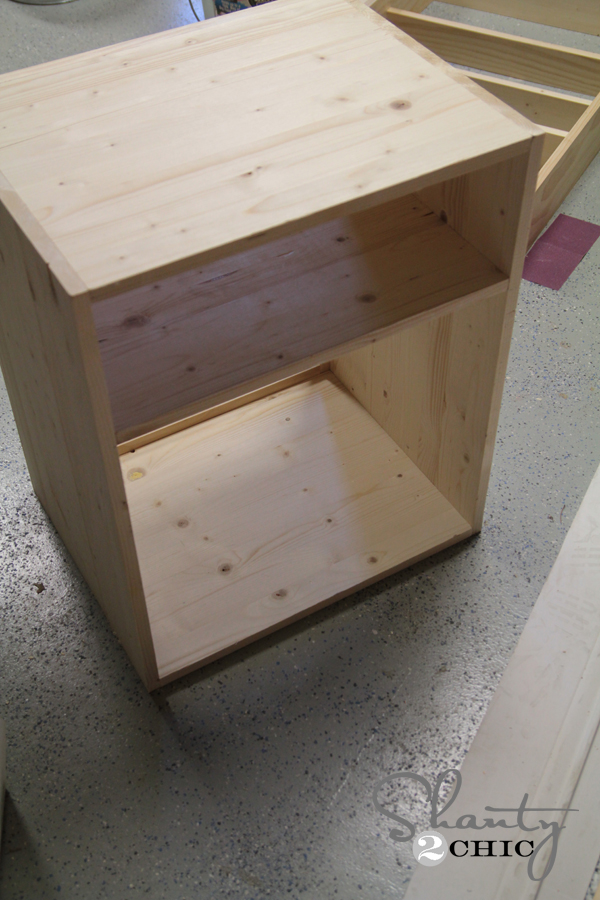
Now for the top and bottom pieces!
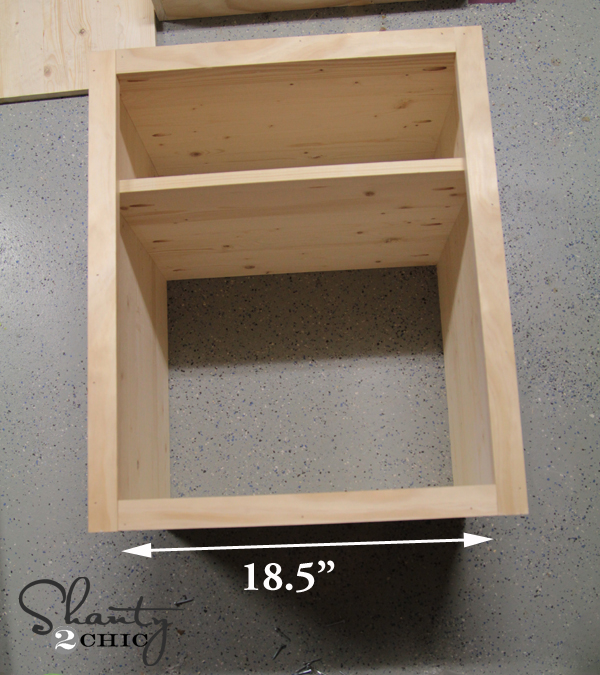

Almost done! Here it is ready for the planks on top!
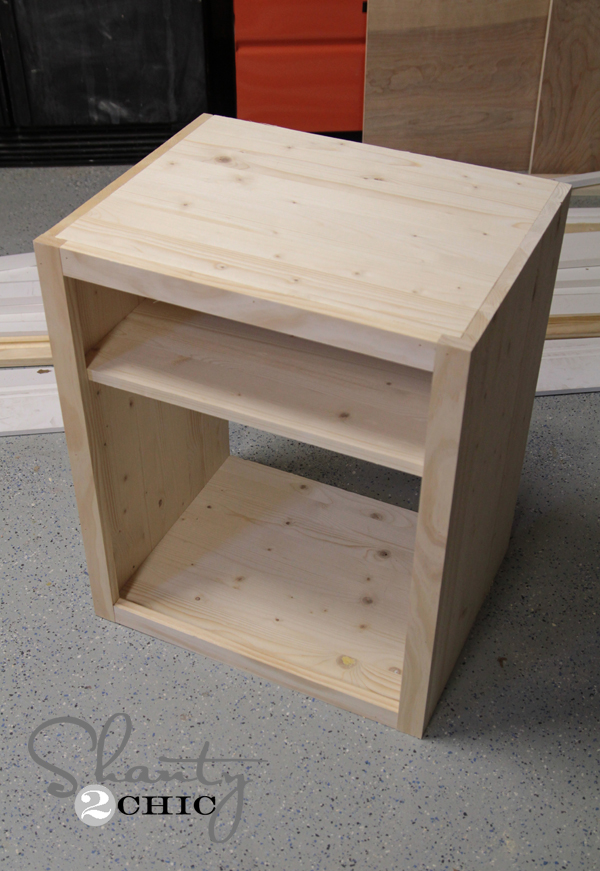
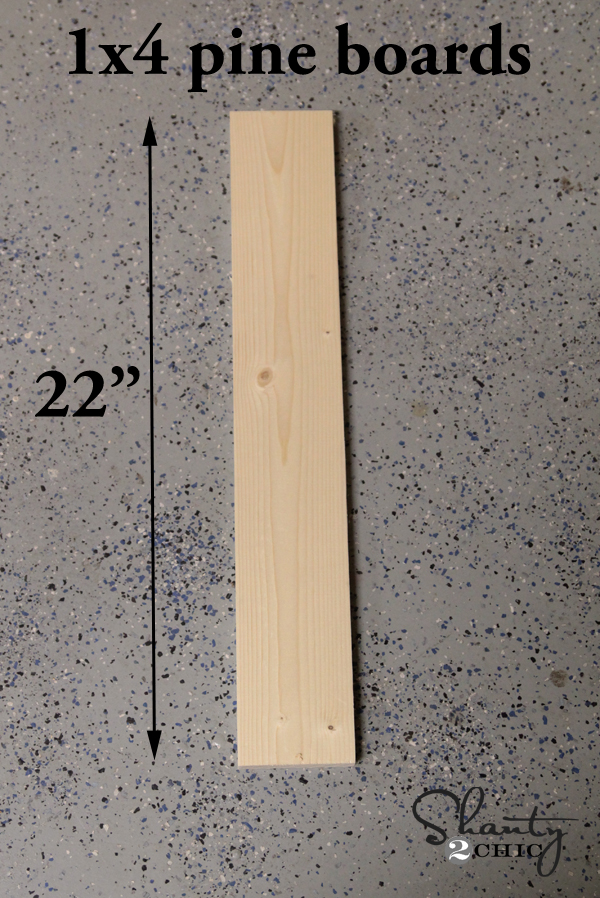
I decided to plank the top of these to dress them up a bit. I used the 1×4 board for this part. You can save more money and use furring strips too… I love how they look planked. For each table, I used 5 cuts at 22″ each.
Before attaching them, I used my Ryobi Corner Cat sander to round each of my edges on each board. I feel like it gives them a “I didn’t make this in my garage” look… Don’t you think?
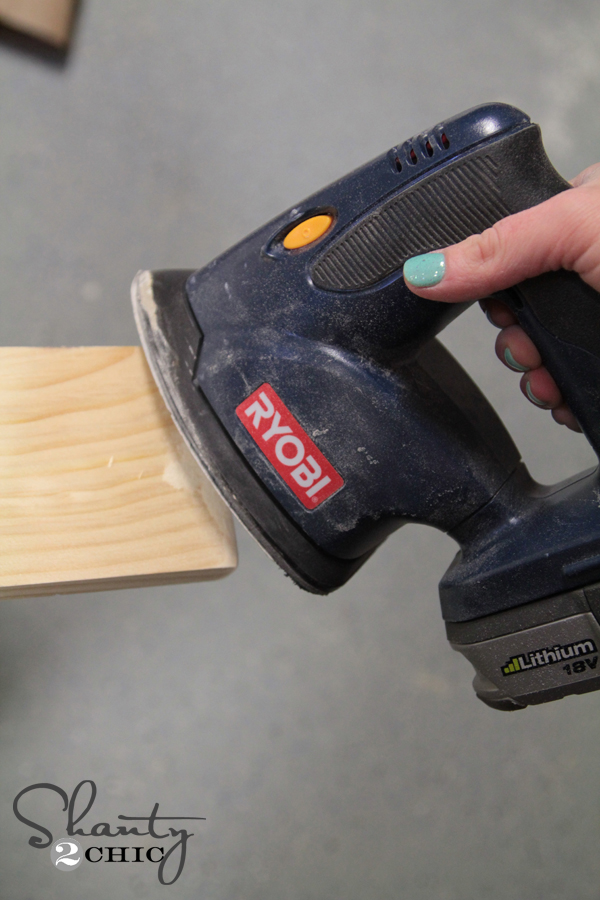
See how they are a bit rounded now?

Again, I used my nail gun and wood glue to attach each plank. These have about a 1/2″ hangover all the way around the table.

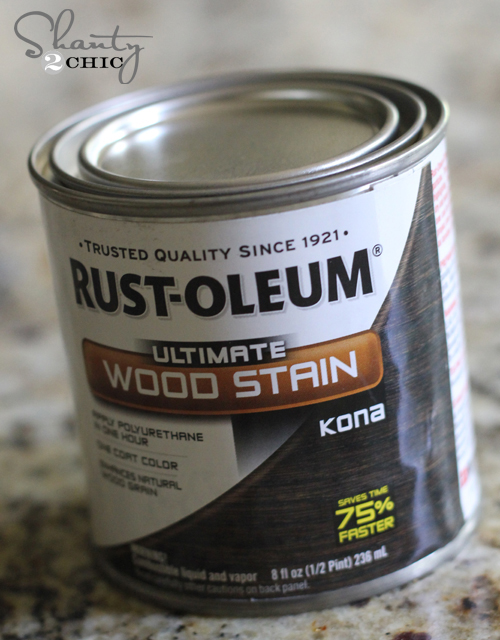
My next step was stain! I used the same color I used on the Pottery Barn knockoff bed for these. It’s Rust-Oleum Ultimate Wood Stain in Kona. Oh Kona… How I love you.
Staining is SIMPLE. It’s even easier than painting! All you do is use a brush to wipe on a little bit at a time. I do one side at a time and this is my favorite staining brush…
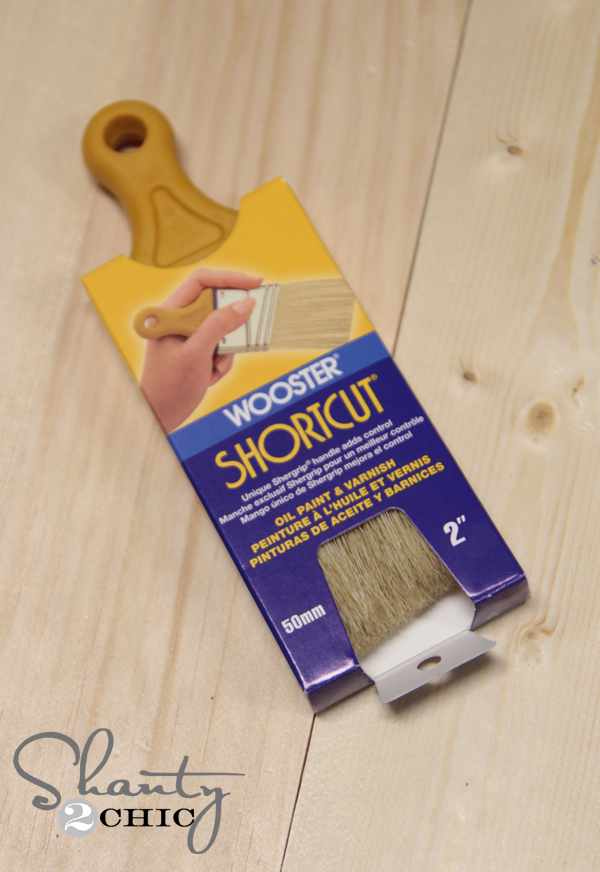
It’s a Wooster Shortcut brush and it fits into tight spaces, doesn’t drip and it fits my hands well. Once you have applied the stain to one side, just use a wiping cloth or old shirt to wipe all of the excess off. That’s it! That’s why I love this brand of stain too… It only takes one coat and it dries in under an hour… Woohoo!
After the stain dried, I added 2″ locking casters to the bottom of the tables. I love the look of wheels on furniture! You can find the super cheap at the hardware store.

I also used my new cordless staple gun to attach my 1/4″ wood to the back. This is optional! You can also leave it open for a different look!
That’s it! My final step was setting them up! What do you think??
Thanks so much for stopping by! You can make these for under $5o a piece which definitely fit my budget. Wish me luck on keeping him in his bed… I need it 😉
I would LOVE for you to share and pin these with your friends!
And for those of you that may ask…
Wall Color – Seine by Valspar
Bedding – Pottery Barn Teen
Metal Buckets – Lowe’s in the paint section
Hope that covers it!
~Whitney


My son and I have completed the assembly and sanding of the nightstand. It looks great; but, we can’t find the rustoleum stain (Kona) anywhere here in Harrisburg, PA. Where did you buy the stain? We have tried 6 different stores and everyone says the same thing: “I didn’t know Rustoleum made stain”??? (Just spray paint). Every one seems to carry Minwax and/or some no-name brand.
Hi Martin,
You can get Rust-oleum stain at Lowe’s but Home Depot carries Varathane stain which is also Rust-oleum and it offers the same colors. Hope this helps!
Great! Thanks for your quick reply.
Home Depot is where I get mine!
Would you tell me the wall paint color?
Love how simple this is to make (or at least you make it seem that way!). Thinking I might make a couple, but add a door to the bottom half (to keep my cat out), and maybe wire an electrical outlet into the top so there’s an easy place to plug in phones, etc.
Great idea! Send pics when you get them done!
Just what I need, kind of. My oldest needs one, but they are so expensive. Time is my enemy to completing but this is really what I need to make!
So easy! Why didn’t I ask for a krge jig for Christmas???
Do you mind sharing where your lamp is from?
These turned out amazing! I love them!
Do you apply any kind of sealer on top?
Looks great; nice work! I want to purchase a Kreg Jig so I can build things!
I recently purchased the Kreg Jig set and love how easy it is to make the holes. I am a little confused by the long piece used to screw in the nails as it has a round tip but the nail heads are square. Am I missing something?
I need to be brave and start trying out the power tools. I am in awe of all of your projects!
I was just admiring your crown molding shelf/brackets. My youngest big boy (who turned ten yesterday!) has the same ceiling situation going on in his small room. We just finished covering the ceiling in bead board and trimming it out. It looks amOZing! I couldn’t be more pleased. The next step is borrowing some real estate from the adjoining attic to sink two sets of 18″ kitchen drawer units flush with the wall. He asked for wide horizontal stripes in crimson and cream (University of Oklahoma) with a shelf for his trophies. No problemo! Love your stuff! 😀
So beautiful! How do you find the clean up of oil based stain vs water based? I want to try oil based but I typically stain in the house (basement) and I feel like it might be too much even with a window open for ventilation.
You can also use just a rag to stain or we use a foam brush like you would find at hobby stores, they also work great and are throw away for easy clean up.
Love, love, love! If I hadn’t just made my son a nightstand I would have used these instead! I love the look of his lamps, too, and the bucket and the vintage looking truck… Perfection.
do you have bed plans?
It’s at the top of the post and says “pottery barn inspired bed I built her”. That will take you to the same twin bed she built for her daughter.
Wow, so easy and quick! I recently got my Ryobi nailer, but didn’t realize it doesn’t come with a battery or charger… womp womp. Back to Home Depot I go. Thanks for sharing these cute nightstands!
Are the bed plans available? 🙂
It’s at the top of the post and says “pottery barn inspired bed I built her”. That will take you to the same twin bed she built for her daughter that she posted last week or so.
Thanks Whitney! 😉
How did you get away with $50 here in Canada plywood is twice the price