Shanty Photo Art
So with 7 days to go I finished my LAST Christmas gift today… WOOHOO:)! I am usually so last minute and find myself at Walgreen’s on Christmas Eve picking up at least 2 that I forgot but this year I finally had my act together. All of the siblings draw names for Christmas and I picked my youngest sister. Her request this year was framed pics of my kids… easy enough. But… I wanted to “shanty” it up a bit. Here is what I did…
I started by getting my supplies. I found some super shanty 4X6, 5X7, and 8X10 frames at the Dollar Tree.
And… a super cute but much in need of a makeover large frame.
I started by giving all of my pieces a few good coats of our favorite… Rust-Oleum Painter’s Touch in Canyon Black.
While that was drying I started on the next step. I originally planned on covering the cardboard with burlap but this frame had a plastic piece rather than glass so I just decided to cover it instead. I sprayed the plastic with spray adhesive.
I then cut the extras off and left a couple inches to work with.
My hot glue gun came to town at this point. I was done in almost no time! I started by gluing my extras to the opposite side of the plastic.
When I was done it looked like this…
I then put the covered plastic back into the now black frame and it looked a bit like this…
Awww… Already soooo much better don’t you think:)!
The next step was to arrange and glue all my frames and my applique. I eyeballed them and placed them where I wanted them and then used the hot glue again to attach each frame to the burlap.
And when I was finished it looked like this…
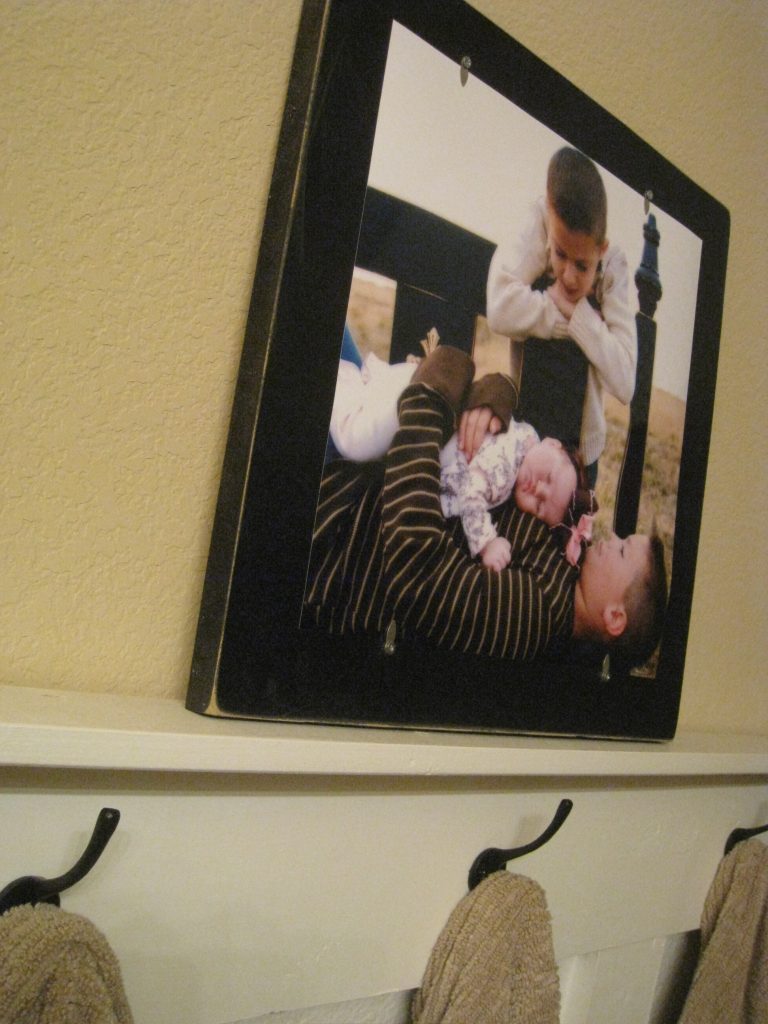
Almost finished… My final step was to add my little clippies. I found these at Walmart at around $1 for 2… woohoo again:)
I used my hot glue again to attach a clip to the center of each frame.
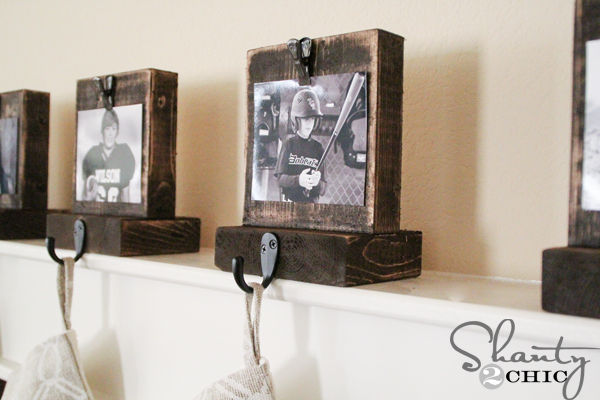
Now for my favorite part… the adding of the kiddos! I printed out some b&w’s at Walmart and clipped them up. I LOVE how it turned out! I wanted to give her something that she could easily change out and maybe someday put pics of her own kids… hint, hint Leash;) I also love the mix of the burlap, metal and fancy black. It just makes me smile. Now… I must make myself give it up:) That is the hardest part! So guys… What do you think??
~Whitney
Brilliant! I did this using a huge bulletin board that never really used as a bulletin board. I LOVE IT! Thanks for the wonderful idea!
I am almost finished with mine! It looks wonderful! Thanks for the great idea! My huge frame is perfect a whopping 38″ by 26″. Found it at Goodwill with an awful print inside for $7.99. It is going to look amazing over our bed.
An absolutely awesome project.
Makes me want to run right out to the dollar store.
I am so in love with your blogsite.
Keep the projects coming!!
Have a Blessed Day.
This is just adorable! What a GREAT gift idea! Your projects never cease to amaze.
Beautiful! You really did a great job.
~Michelle
This is so pretty! I love the black and burlap. Thanks so much, I'll be linking.
Has to be the BEST creative Idea for photo display that I've come across this year!! Thanks for all the details, step-by-step tutorial! I'm marking you a new favorite blog!
Creative genius! Now I can do something spectacular with the pile of frames I have in the basement!!!!!
(don't have a real blog yet….so I consider myself a "really creative follower")
Happy Holidays
Kolein – New York
Whitney-
I LOVE LOVE LOVE it! I have been looking around here for a great frame for awhile. I just found a great one a couple weeks ago, but wasn't sure what I wanted to do with it. It has a temporary fix for Christmas, but it isn't what I had hoped for. I can't wait for the Christmas decorations to come down and to set this up for our family room!
Does the hot glue gun hold the clips enough to change out the photos? I was kind of surprised you didn't use the Gorilla epoxy.
Have a GREAT CHRISTMAS!
Heidi
I really love this idea. I like the 3D feel, the black and burlap, the b&w photos – the whole thing looks so tailored and original. Great job – mind if I borrow 🙂
Great job!! What a great gift!
That is just FABULOUS!! I love love love it!! Thanks for the step-by-step. Merry Christmas!!
This was a FANTASTIC project. I'm sure your sister will *love* it 🙂
Shanty Sisters, I just came across your blog, there are so many out there. Wanted to comment on your shanty to chic projects. You do come up with some great items. Your philosophy is like mine, if it stays in the garage (attic, storage room, basement) long enough, an idea will bring it in and it will get used for a special project. Thanks for all the great ideas. Karen
Love how this turned out! My favorite part is how easy it is to change out the photos… it's nice to be able to keep it updated without a lot of hassle! I'll have to bookmark this one for sure!
I LOVE THIS AND WANT THIS!!!!!
if she doesn't love it, i know someone who will…{hint*hint ME!} let me know if you need my shipping address…HAHA! 😉
Do you have a rule "No blog peeking until after Christmas"?
I have not unloaded any gifts because I know the person I made it for will see it on my blog:)
I love the idea!
I am lovin' this great idea of yours….oh so cute! Thanks for sharing!
That is fabulous;such a great idea! I love it!!!
Holiday hugs, Erika
Awesome idea! And, just too cute!
Hey Girls! Thanks so much for your sweet comment…For those of you that asked… the large picture frame is 37" x 28". And… my sister has been told not to read the blog until after Christmas;)!
~Whitney
Like you need any more "Love It's" but add mine. I so love your "I don't need my hubby to do things for me attitude" My dad is a self employed Dairy farmer and my mom and I can fix or do almost any kind of home improvement that we set our mind too, just because we had to. My DH is constantly amazed by my just go get the screwdriver or hammer attitude. Love your blog and have been super inspired!!!!
I just love your frame!!! It is amazing. In fact, you do amazing work!! Love your blog. Don't stop. Wish your family a very
Merry Christmas!!
you girls rock! i just found you and I am so excited for all the projects that will be going on around my house – after christmas of course!
ULTRA clever!! Love all the smallest of details. The clips are a super cool idea.
Thanks for linking up to SNS!
FJ Donna
All your projects are awesome, but I think this one is my favorite so far! Love it and will definitely be making myself one or 2 or 3…
love this. Will have to try and do this. What size is your big frame that all the others are in? Merry Christmas.
I am soooo copying this!! I love it! I'm kicking myself now for not picking up the big old frame I saw at the thrift store today…wonder if it will still be there tomorrow…
holy toledo! I am sooo bookmarking this for a future project! LOVELY JUST LOVELY!!
beautiful!!!!
I didn't even notice the clips in the first photo, until I scrolled down through the tutorial. I think it looks good with our without the clips. I'm surprised you didn't sand a little around the edges though. But it looks super cute! The receiver will love it!
I am so going to do this! Absolutely love it – thanks so much for sharing!
Oh MY goodness! Your creativity never ceases to amaze me!! I LOVE this!! How gorgeous!
Here's my repeat of words….CUTE,CUTE,CUTE! I'm making one I have the perfect spot!
I love this! I am working on collecting frames to do a collage on my wall, but I might try something similar to this instead. You are filled with great ideas!!!
What a good idea! I'll have to save this so I can do it later! Thanks for sharing!
I love it. It looks absolutely gorgeous. What a wonderful idea. I can't wait to get started on one.
Ruth
This is great, Whitney! I love this! What a great project if you have some extra frames around, too.
I just came across your blog the other day and I LOVE all your unique ideas!! Thanks for such great tutorials!
I am totally in love with your blog!! What size is the big frame that all your frames are in?
Wow–wonderful! love the black and burlap.
This is so icredibly adorable! I love it!!! You come up with the BEST ideas!! AMAZING!
This is one of my favorites! I am SO going to do this. Love it!! Thanks.
I think you're a creative genius, that's what I think. Thanks for the idea.
I am IN LOVE! I will definitely make one of these…WOW! I just hope it comes out as good as yours did.
This is such a great idea! I have a large space to cover, but always have trouble hanging multiple frames together nicely… this fixes that!
I LOVE, LOVE, LOVE project this!!!
One word: Awesomeness!
I love-love this idea!! You girls are awesome. What are the dimensions of the big frame that you used?
Love it!
What a great idea,, and something you cant go out and buy in the store is always so much better. She'll love it.
I love this idea. I am going to do this in my bedroom. MERRY CHRISTMAS
This is incredibly cute and well done! Pottery Barn is going to copy you on this one!
Fantastic idea!!!
Love this! I would not have thought of the clips! I am always sticking pictures up -poking out of the china cabinet, fridge, other frames-so this way I can change them up! Thanks!
~Nancy
I am soooo in love with this project, I can't wait to try it out for myself! 🙂
What do I think ? I think you are brilliant and your kids are adorable !
That turned out great – I'm sure she'll love it. I just hope she doesn't read your blog.
Enjoy your weekend.
Love this idea…especially the "clips" so the photos can be changed out so easily. Happy Holidays
So cute!!! Hopefully she doesn't read the blog! 😉
This could be my favorite shanty to chic! I l-o-v-e it!! This is on my to-do list after the holidays!
Your creativity astounds me! She is going to love it! Gorgeous!
Perfect! Know I know what to do with a gorgeous, but in need of help, frame I just got…thank you for sharing this fabulous idea!
O.M.Gosh – it is beautiful! She is going to just l.o.v.e. it.
ok Whitney, this is going in my file now too!!! I.LOVE.LOVE.LOVE.THIS. 🙂 I wouldn't give it up either!
Well, consider this in my idea file now! I LOVE it. LOVE LOVE LOVE.
Love.
😉
Rachelle