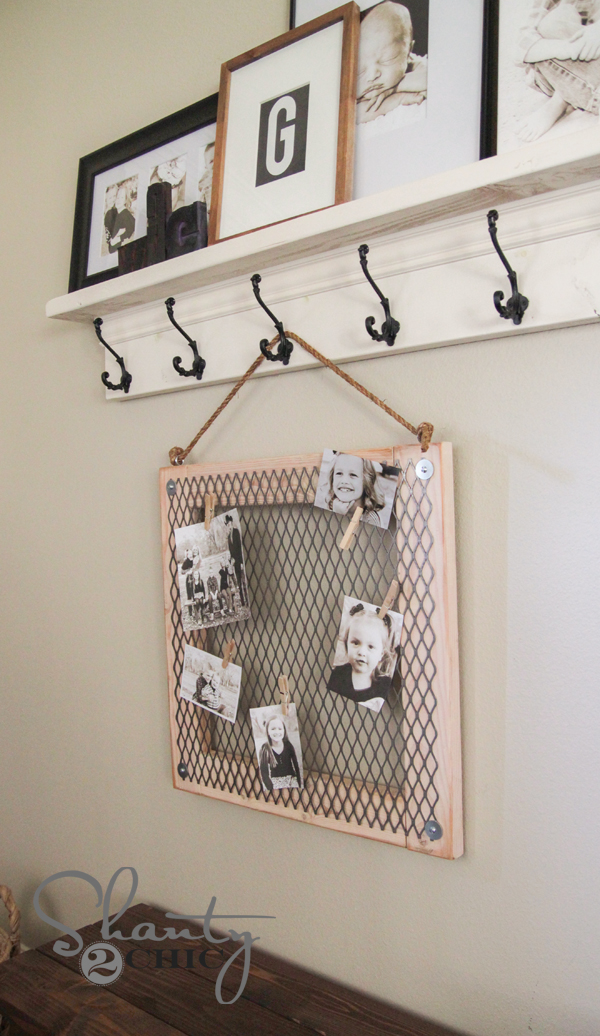
Hey friends! Hope you all had an awesome weekend! I’ve had lots of questions about the metal piece I used on my son’s shelf I shared last week. It’s called expanded metal, and I have a fun project to show you today with it! Here is a memo board I created with it…
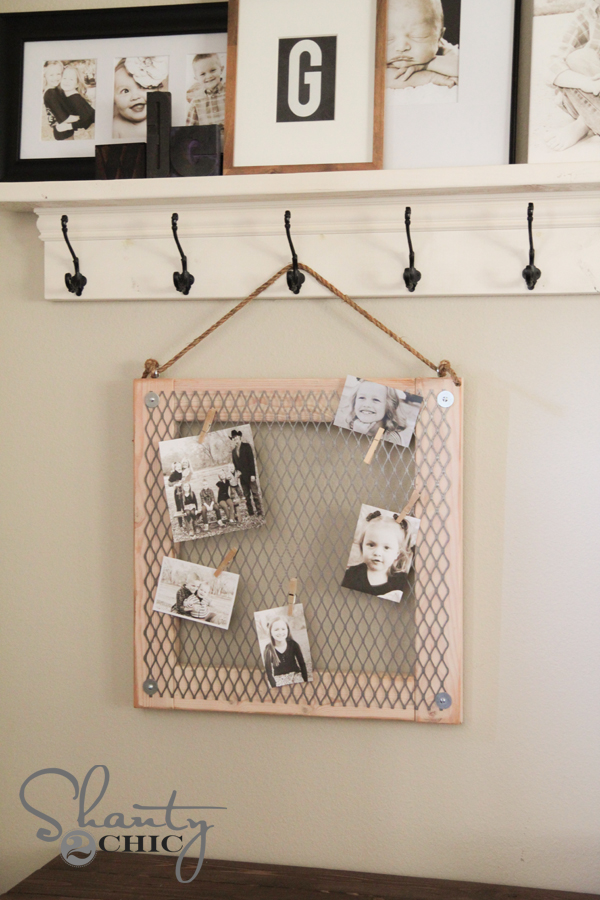
How cute is that?? I originally built it for my son, but may snag it and keep it for myself 😉
This is a super simple project you can finish in no time! Let’s get started…
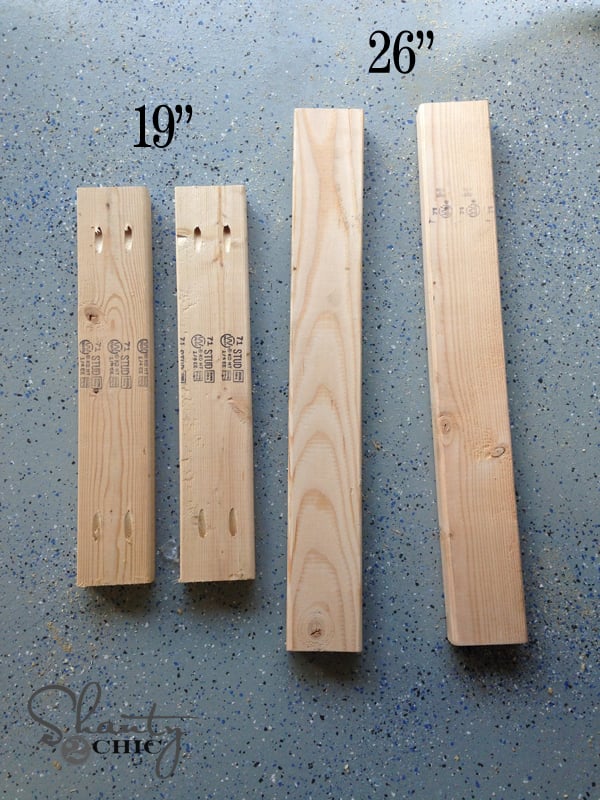
You will first need 2 2×4’s. I actually used all scraps for mine… Yippee!
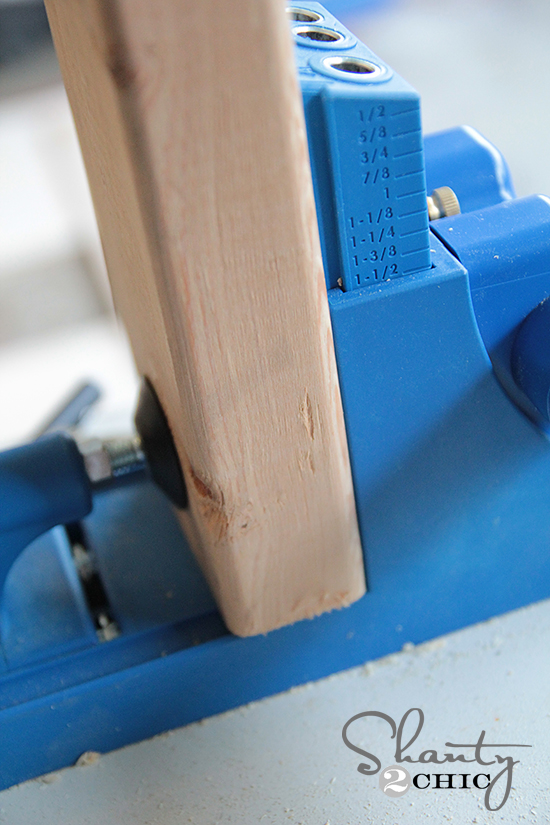
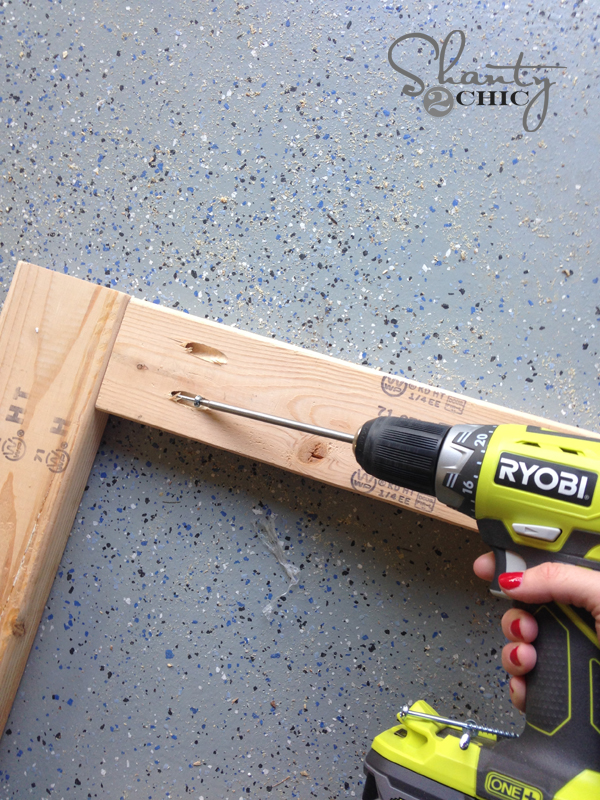
You will have 4 pieces. 2 cuts at 19″ and 2 at 26″. You can see below where I have added some pocket holes to each end of my 19″ pieces. I used my Kreg Jig for this part.
This is a PERFECT beginner Kreg Jig project. For those of you who have yours still in it’s box… Get it out! I added 1 1/2″ pocket holes to each end. This is an inexpensive and easy tool to use. It makes building SO much easier, and it makes your pieces look much more professional.
Now to attach them! I used 2 1/2″ pocket hole screws for this part.
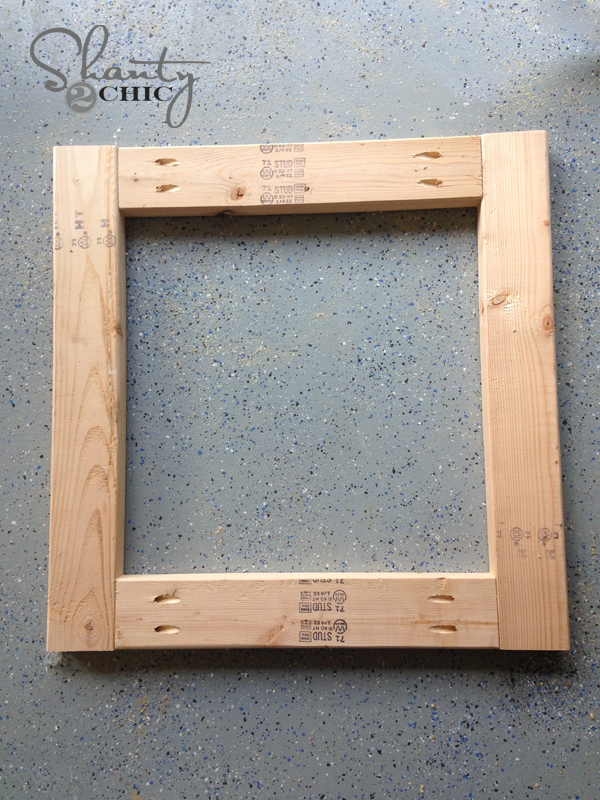
I did the same thing on all 4 corners and then it looked like this…
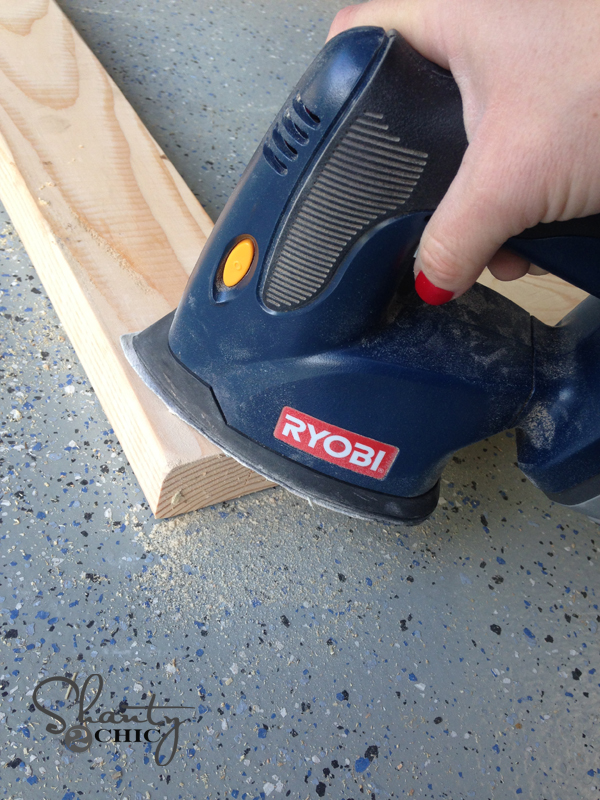
After I had it all together, I rounded out all my corners and smoothed the whole thing out using my Ryobi Corner Cat sander. This little guy uses the same 18V battery as my drill and is by FAR one of our very favorite tools.
At this point, I was ready for stain! Rust-Oleum carries a new stain that I LOVE and wanted to give it a try. It basically gives the wood a white washed, antiqued look. It’s called Willow. I first stained the whole thing. I love this stuff because it dries in under an hour.
After it dried, I used the sander again to remove some of the stain off the corners. I then added a small amount of dark walnut stain and wiped it off. It gave it a perfect aged finish!

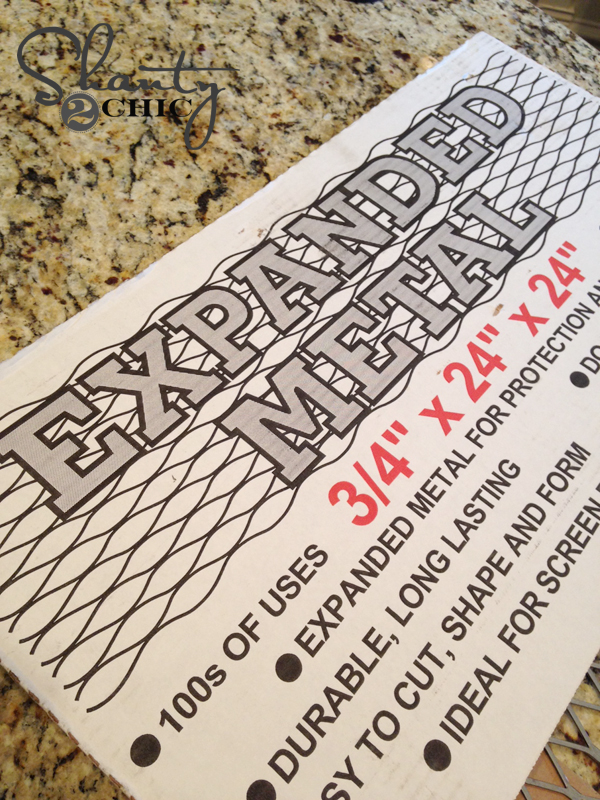
Now for the fun part! You can find Expanded Metal at Home Depot. I found my sheet for $20. Here is what the box looks like…
This stuff can have sharp sides, so be careful when you are handling it.
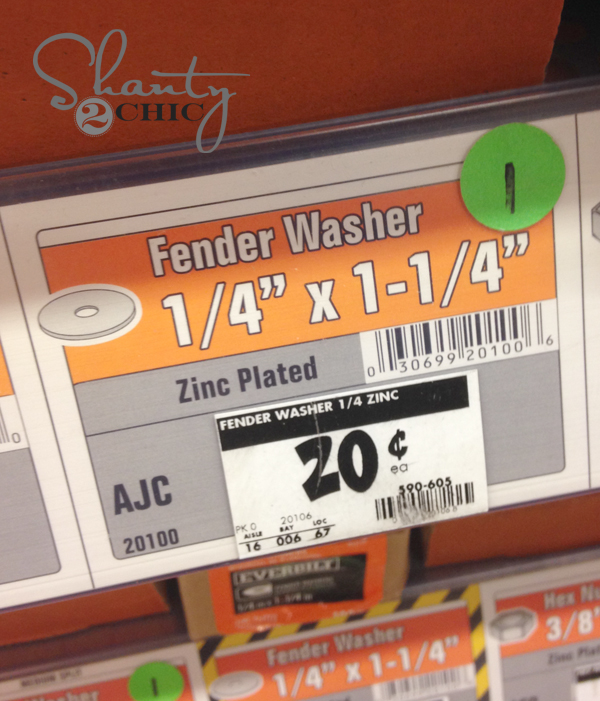
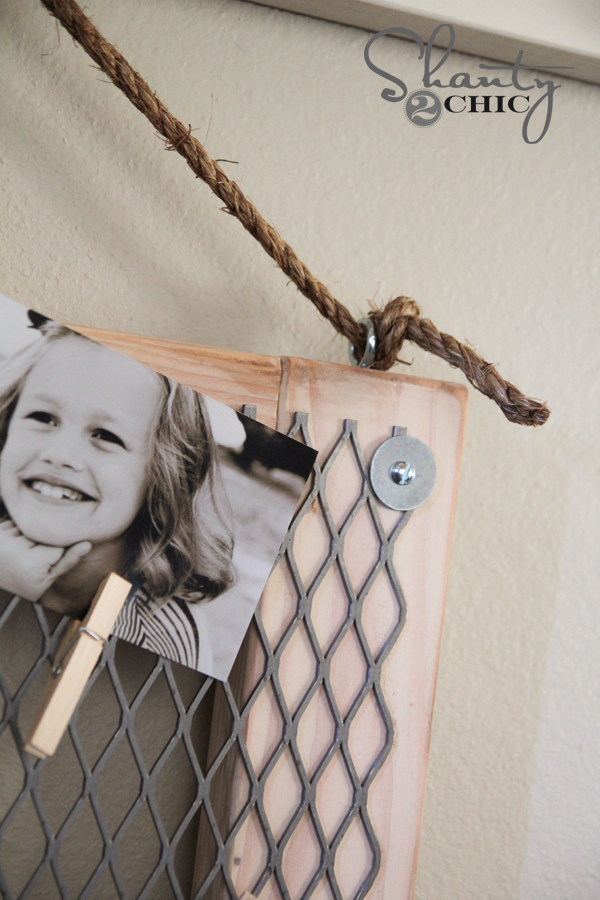
I also picked up 4 of these washers…
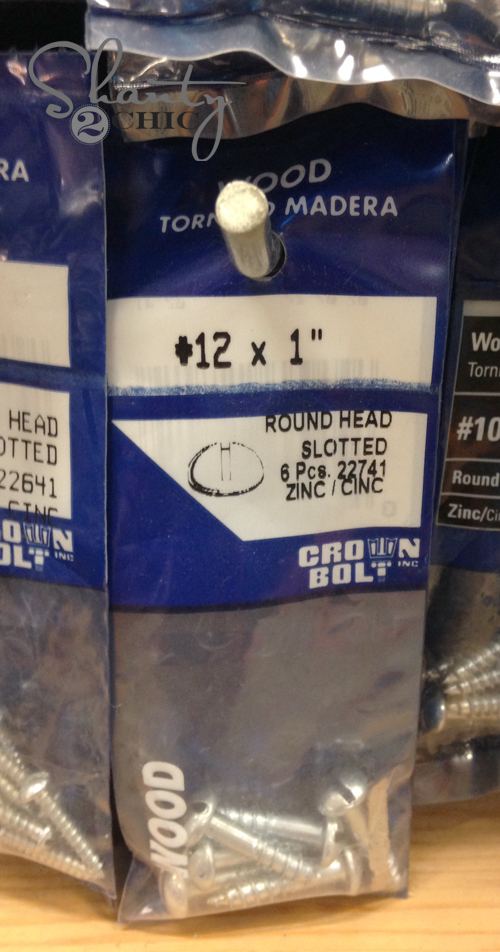
And a pack of these screws….
To attach the metal, I lined it up over my frame I built and used my drill to attach the screws through the washers and into each corner.
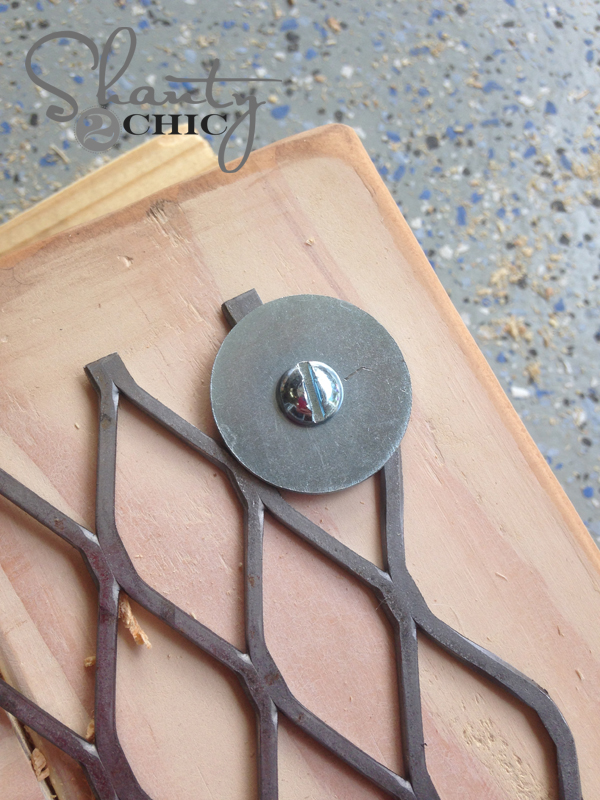
I did the same thing for all 4 corners.
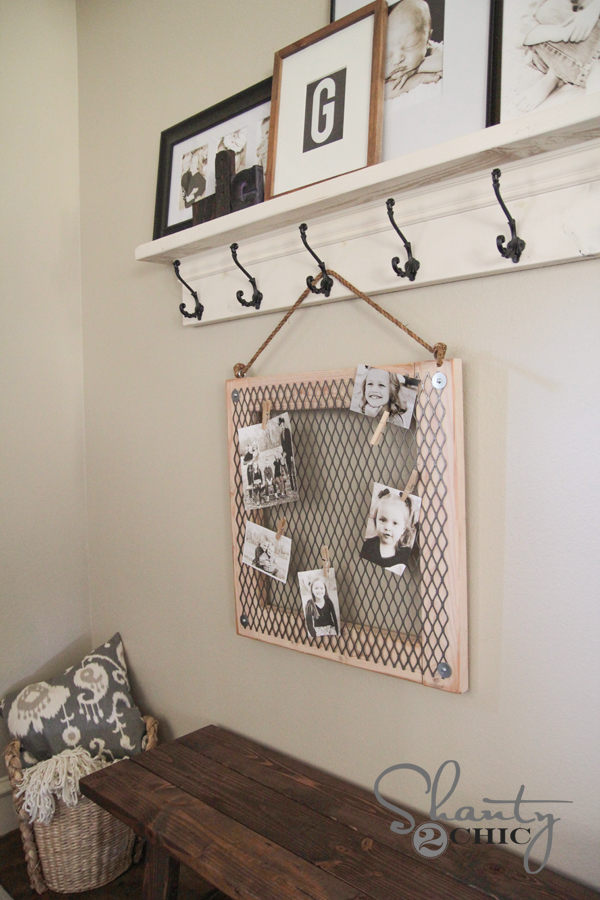
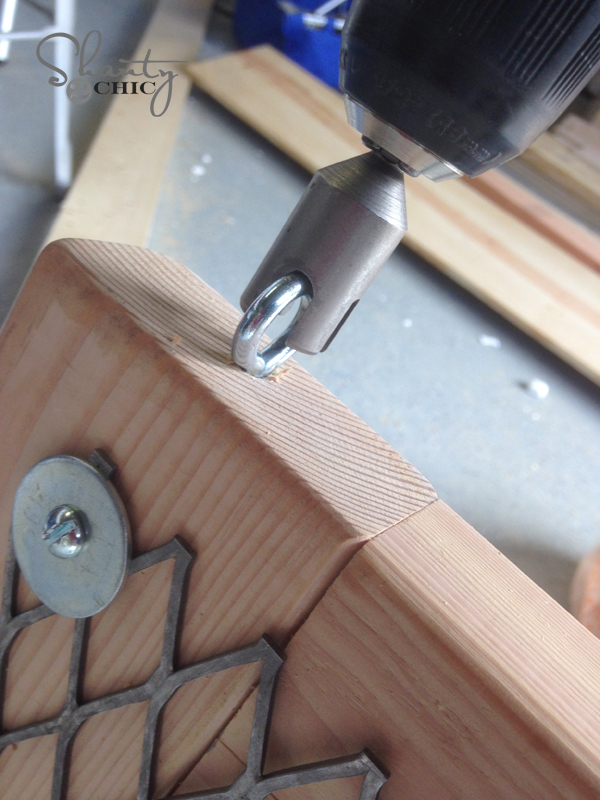
You can lean this on a ledge or shelf, but I decided to hang mine. I used 2 eye screws in my top corners. I was SO pumped to find this bit for my drill recently…
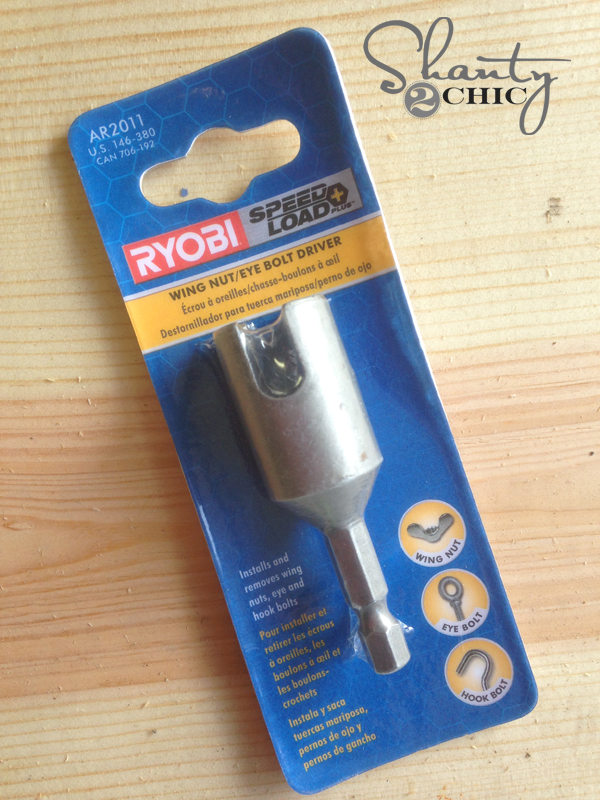
It hardly costs a thing and it made this part so easy. These things can be a booger to get in, and it saved me a ton of time.
Woohoo! I used some rope with knots on each end and I was done! I used some cheap clothespins to hold my photos. Here are a few more finished shots…
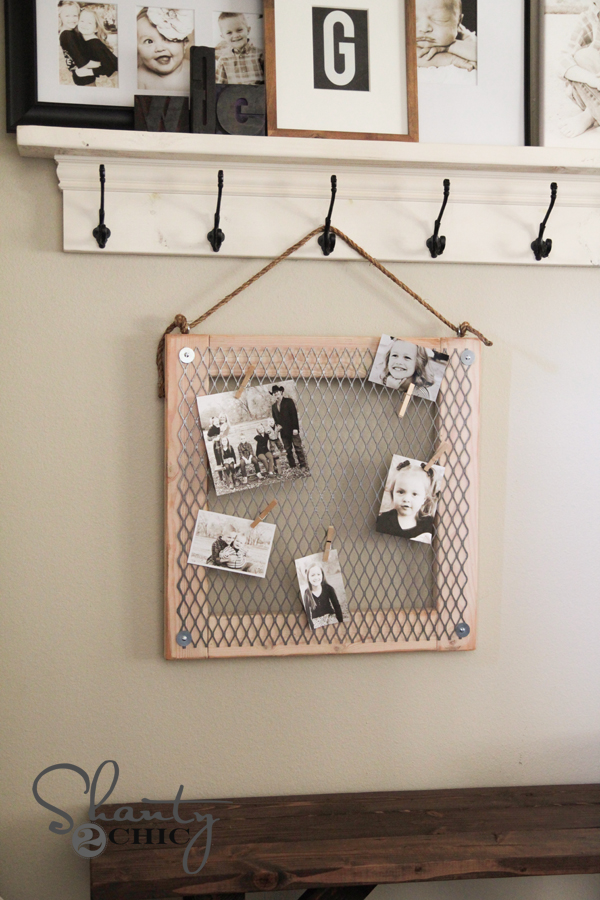
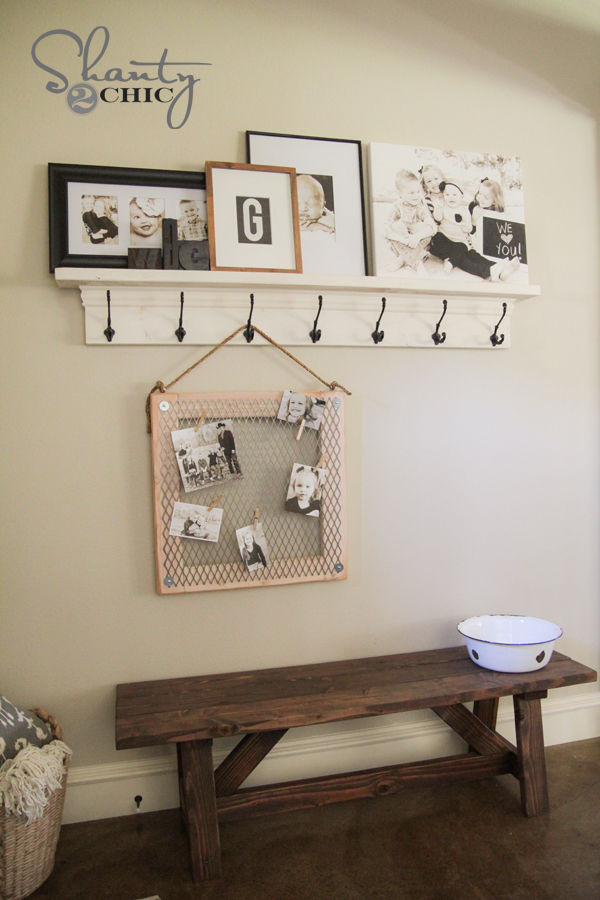
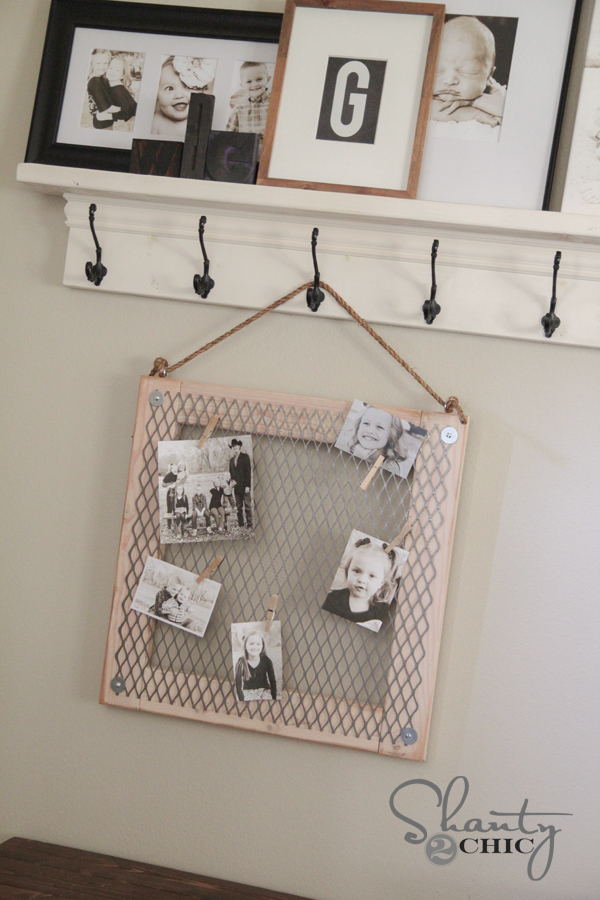
Hope you love it! Thanks so much for stopping by! Let me know if you have any questions at all!
I would LOVE for you to share this and PIN it with your peeps below!
Happy Monday!

I made something similar for my son, but I painted the sheet metal with chalkboard paint. So it was a magnet/ chalkboard 🙂
Recently I was really, really low on money and debts were eating me from all sides! That was UNTIL I decided to make money.. on the internet! I went to surveymoneymaker dot net, and started filling in surveys for cash, and surely I’ve been far more able to pay my bills!! I’m so glad, I did this! – afdu
Thats awesome! Its a great way to cycle through photos as well. You can easily add new ones take off the old ones. Saves having to open up your frames
Very cute!
Love!
Especially love the wing nut driver, what a great tip!
Thanks