Hi friends!
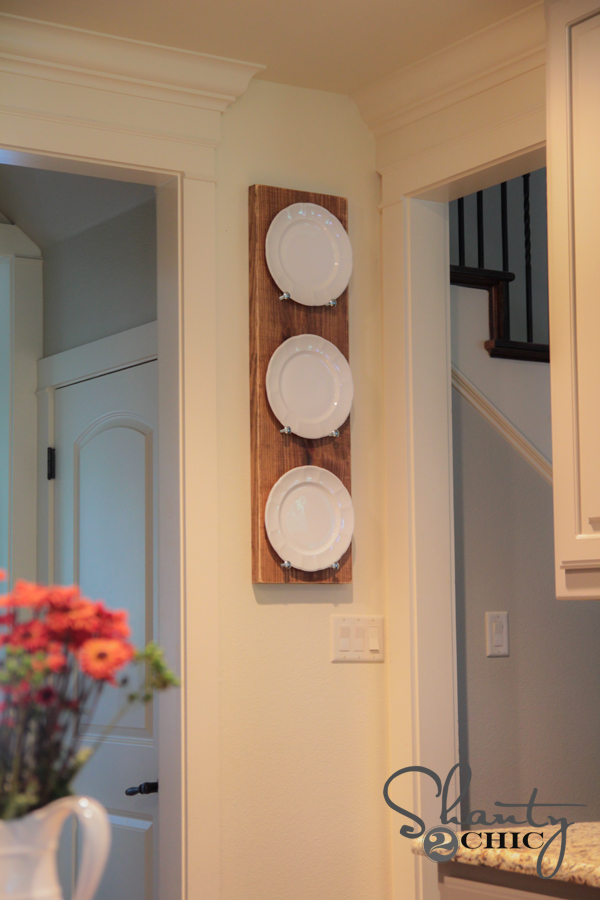
Happy Monday! Hope you all had a great weekend 🙂 Those of you that follow us on Instagram saw the little teaser I shared of this next project last night! Today I am sharing a super quick and oh so chic plate rack I made for my kitchen. I have this random wall that is always begging for something to hang on it, so I came up with this…
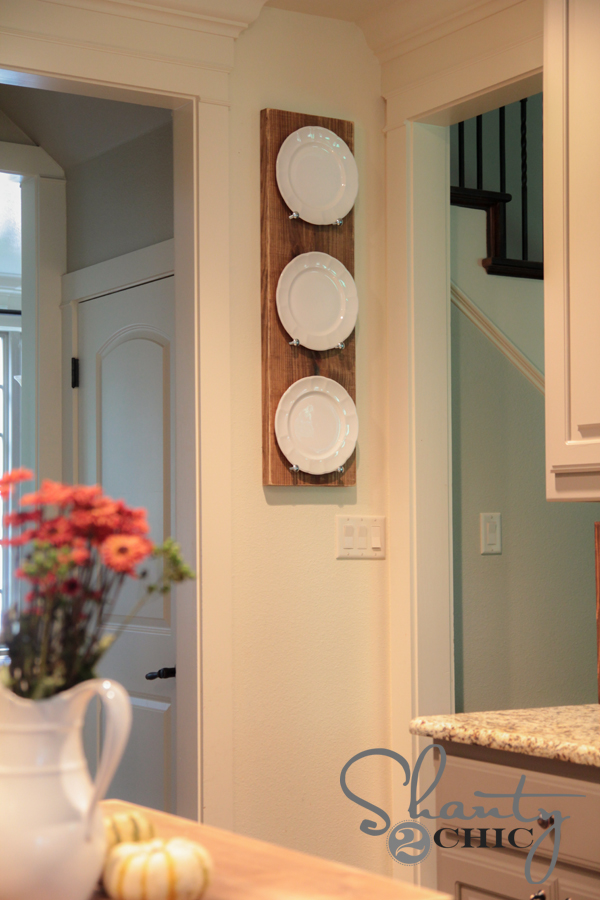
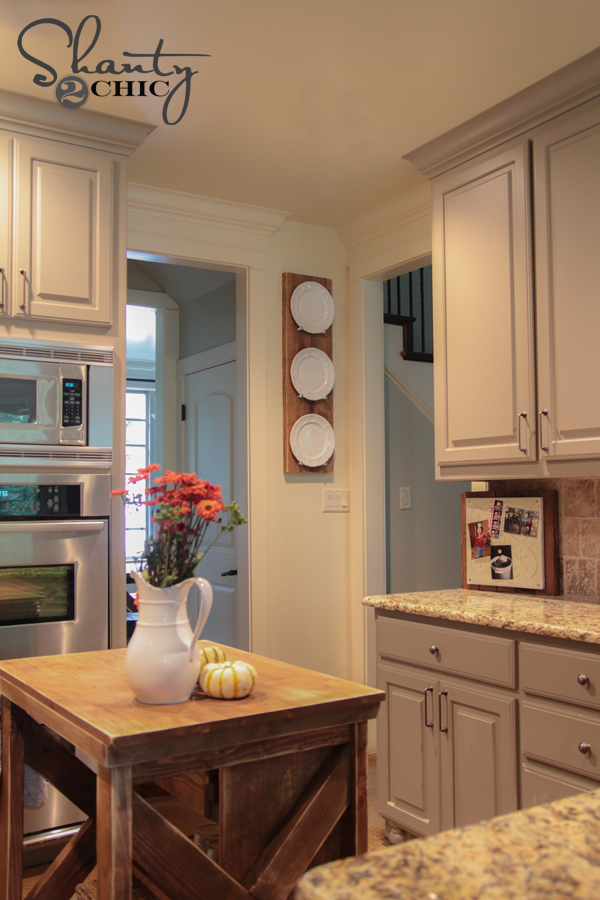
How cute is that? I love white dishes and I especially love the combination of them with some worn wood… Perfection.
So… Here is what you will need!
1 – 2x12x8′ board from Home Depot
6 small carriage bolts (Mine were $.39 a piece from Home Depot)
Gorilla Super Glue Gel
Let’s get started!
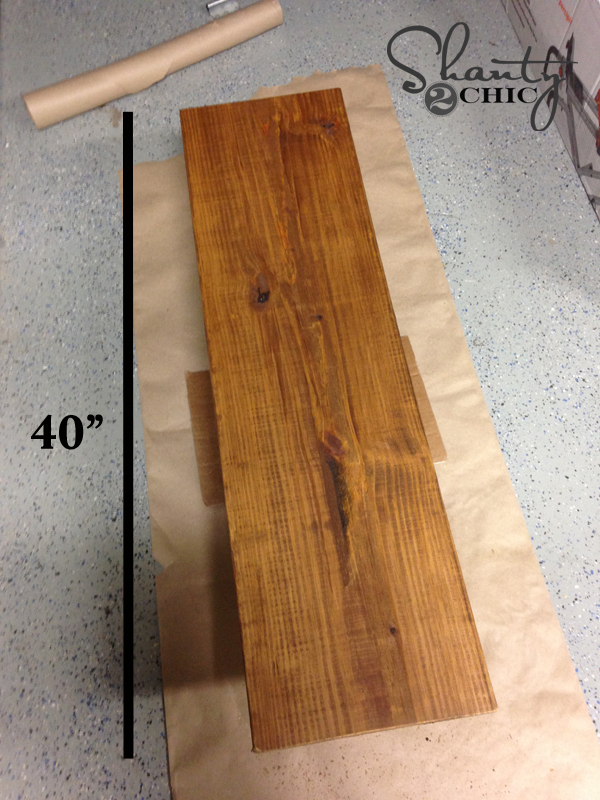
I cut my board to 40″. I am using standard 10″ dinner plates to give you an idea of what size to make yours. If you don’t have a saw that will cut this wood, you can have Home Depot cut it for free for you. One board will make 2 plate racks… (think Christmas gifts)
My total cost of wood and bolts was under $10 per rack. Whoop!
My first step was staining my board! I chose to use Varathane Stain in Early American for this one. This is a Rust-Oleum brand of stains sold at The Home Depot… One stop shopping baby. Woohoo!

Here is my wood drying…
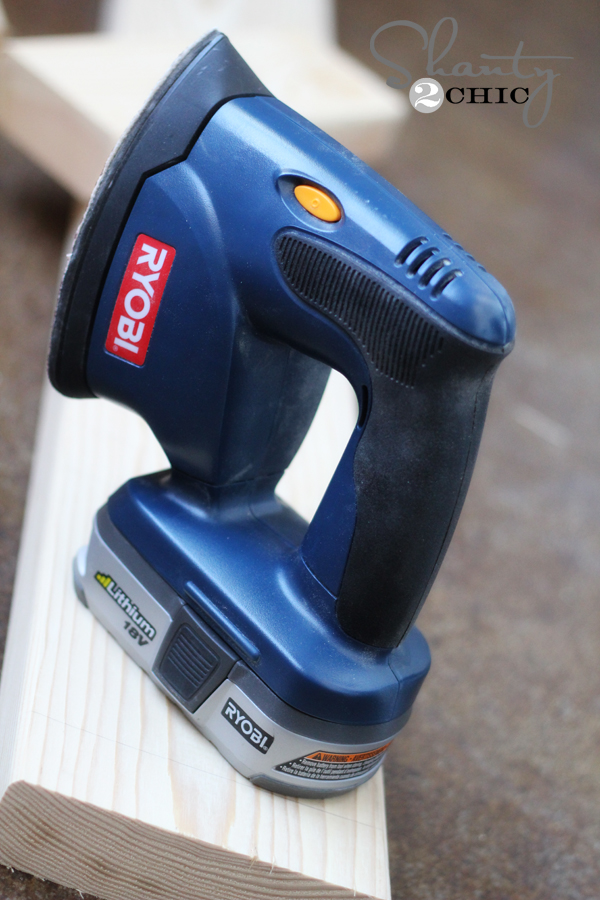
Next I used my Ryobi Corner Cat sander to distress my edges and corners… LOVE this tool. It is the BEST sander I have ever used. It’s small, lightweight, powerful and cheap! That, my friends is a good combo! 😉
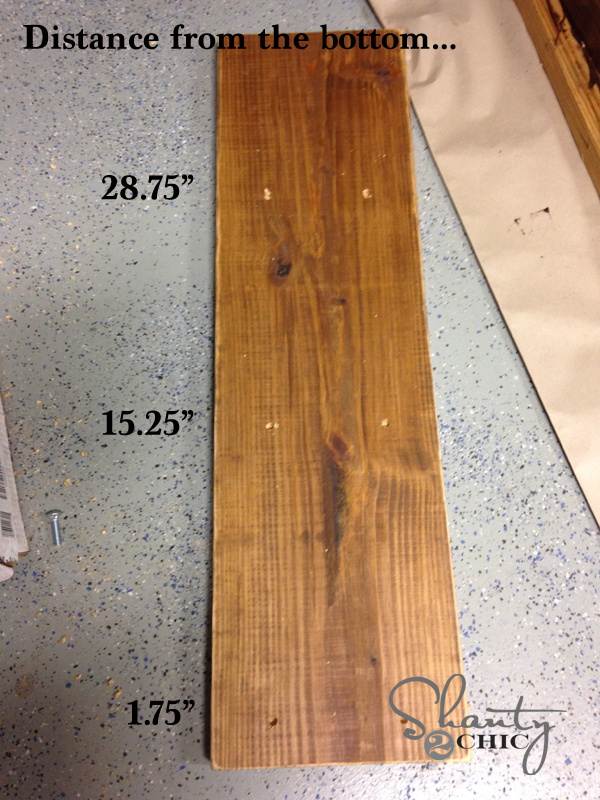
After sanding the edges a bit, I used my Ryobi 18V drill to make holes at the following measurements. These holes are each 5.5″ apart and the measurements shown are their distance from the bottom of the board. To make the holes the same length, I put a small piece of tape where I wanted the bit to stop. This acted as a guide to help me keep them all the same.

This is a 3/8″ drill bit, which is just slightly larger than the width of my carriage bolts I used.
Here you can see where I put all my holes…
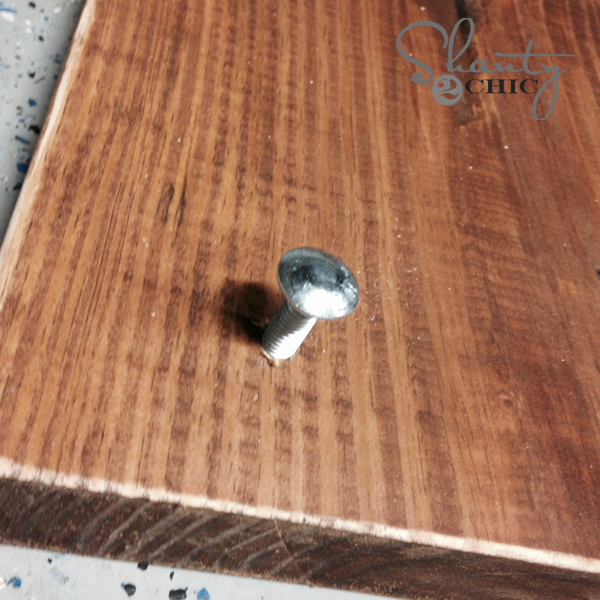
This is what my carriage bolts look like…

You can get yours as long or as short as you want. The longer they are, the more you will be able to tilt your plates.
Next, I squeezed some Gorilla Super Glue Gel into each hole…
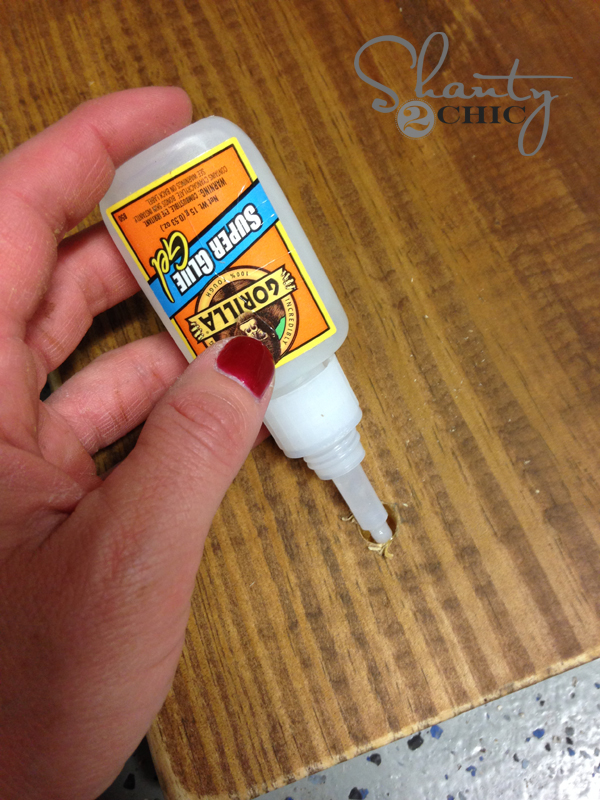
And then pushed the bolts in like this…
I let that dry for a few hours before hanging it up!
Now… This is a heavy board. I decided to drill wood screws through the board itself and into the studs of the wall. I didn’t bother covering the screws because I knew my plates would hide them… Shanty, I know. 😉
I would suggest you hang yours the same. I am sure heavy duty picture frame hardware and other things like that will work, but I felt this was the safest and easiest way to keep it in place. I used 4 screws to hang mine. Every wall is different, and you need to look into the best method for hanging yours safely.
That’s it peeps! Want to see a few more shots? Me too!


I hope you love it as much as I do! I would LOVE for you to pin and share this with all your peeps! You guys are awesome! Let me know if you have any questions at all.
Thanks so much!
~Whitney


I know you said 4screws, but how did you do it!! Thank you in advance!
Question: what did you use to hang it????
You plate rack is adorable and I love it with the all white plates, however, I have another question?? The island that you show in these pictures above, is that the island you show in your “projects” plans? If so, how did you get the crates in there? Do you have a tutorial for that too?? I love the island but am looking more for something like you have pictured above with the crates inside. Thank you so much! YOU DO AWESOME WORK!
Great Idea. I have 12 small plates from China that tells the story of a young Chinese girl that I’d love to hang in my bedroom and have been looking for a great idea. You have me thinking about using boards.
Thanks,.
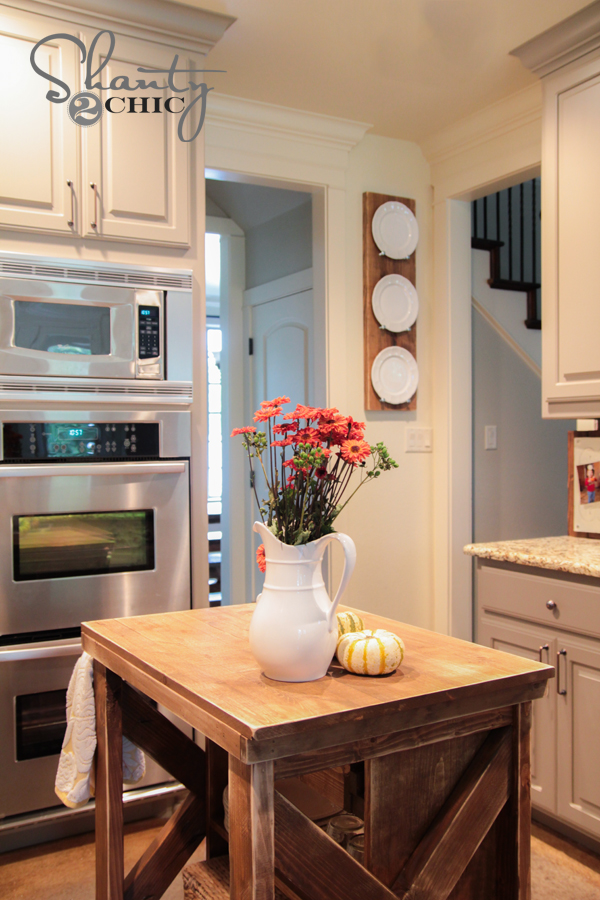
And here it is! Love it in my kitchen!
Made this last weekend and love it! Thank you so much!
Super cute!! I’m thinking of following this basic idea, but instead turning the board horizontal for an awkward space above a china hutch. I hope it works out in real life like it does in my head ; ) Thanks for the inspiration!
I need to do this – I love it!
Love this too! Are the 2 bolts the only thing holding up the plates? Is it sturdy?
What a clever idea! Y’all always come up with the best projects.
This is amazing and I can’t wait to try it! Can you share what kind of wood this is? I want to know exactly what to buy when I go to Home Depot. Thanks!
I like this a lot, especially better than many of those wire plate holders.
Love it! I would love a tour of your house, it looks beautiful!
Love this!!! Another idea to add to my Shanty List 😉
Question … what color is the wall under the stairs in the background?