Happy Monday guys!
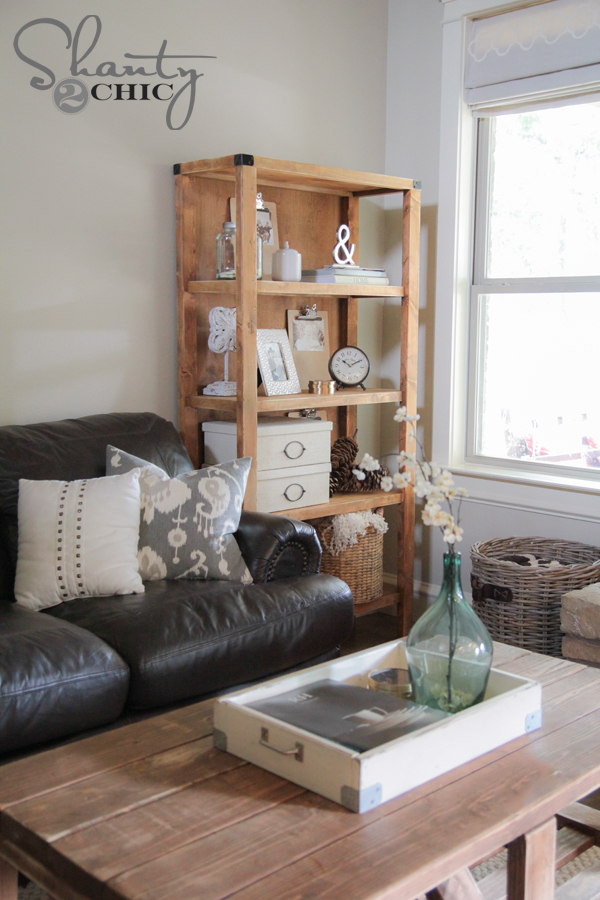
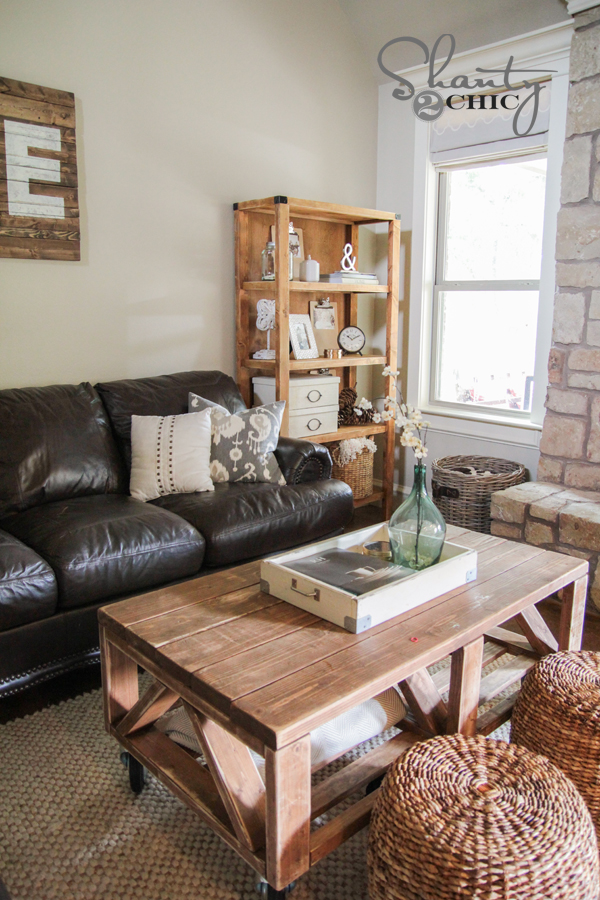
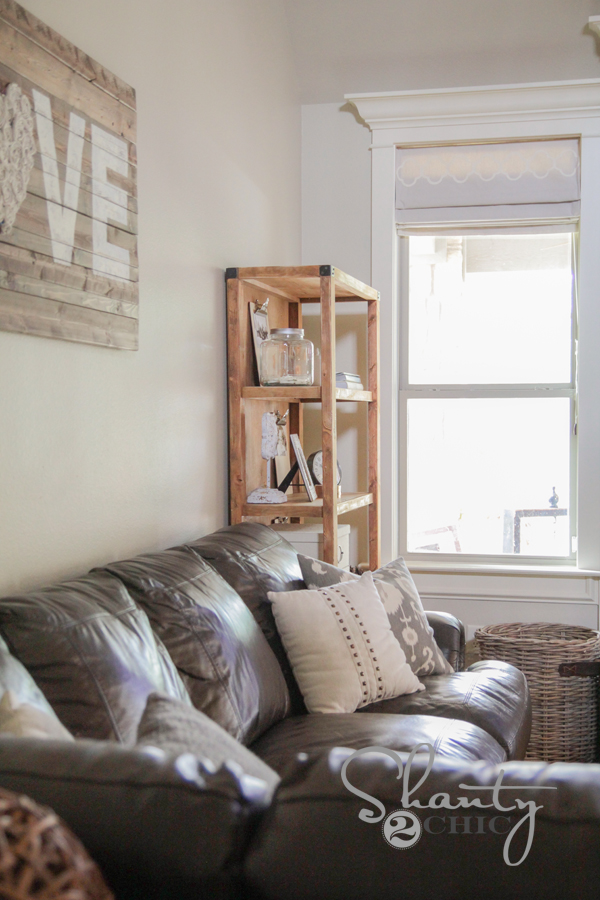
I am so excited to share my latest furniture build with you guys today. I have a blank space next to my couch in my living room that I am always trying to fill. It sits next to a window, so I always feel like I am covering the window when I put something in front of it. I decided an open bookcase was the perfect solution because it would let in the natural light and give me the height I was wanting as well. I teamed up with my good friend Ana White to bring you this Pottery Barn inspired bookcase….
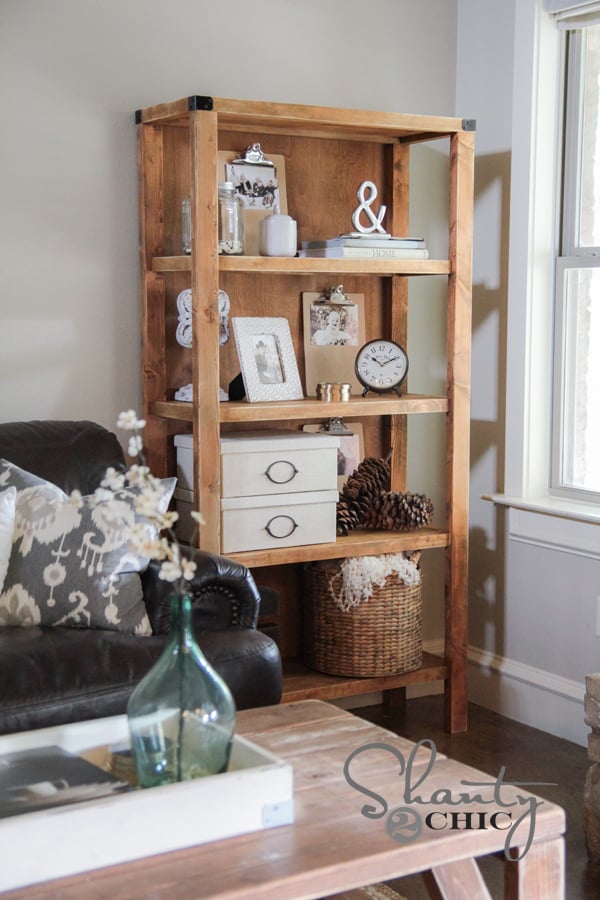
Isn’t it so cute? I think it fits the space perfectly! I will share some of my tips and tricks here, and you can check out the full set of free plans over on Ana’s website!
So… Here we go!
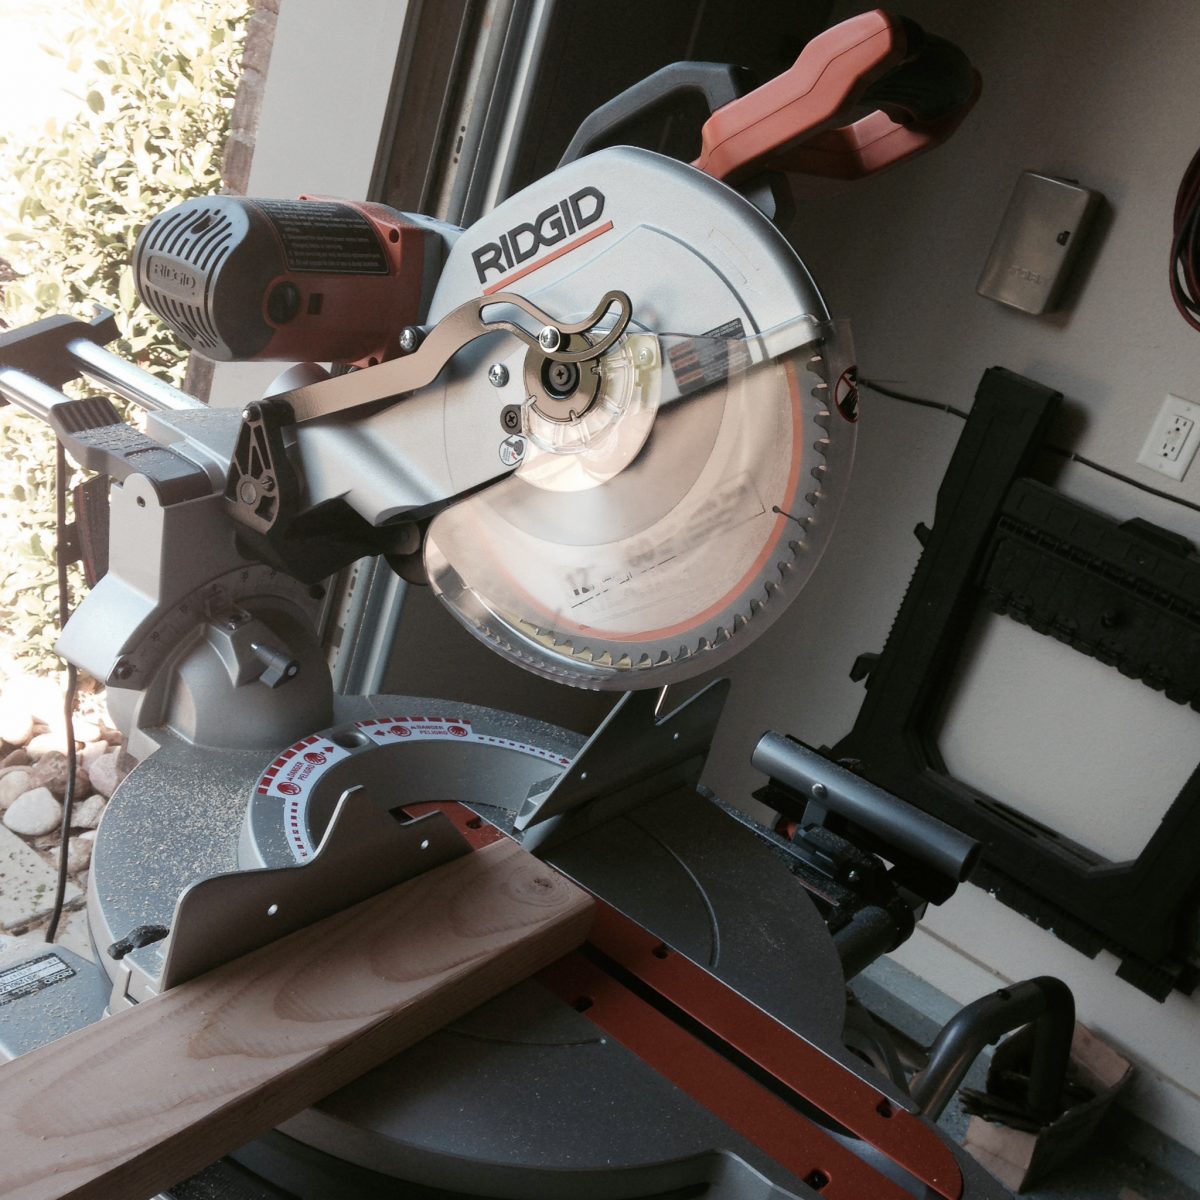
I made all my cuts using my Rigid 12″ Sliding Miter saw. I recently upgraded to this bad boy from my 10″ saw because it cuts through much thicker and larger wood. It is an investment, but it is the very best miter saw I have used. I love it to pieces.
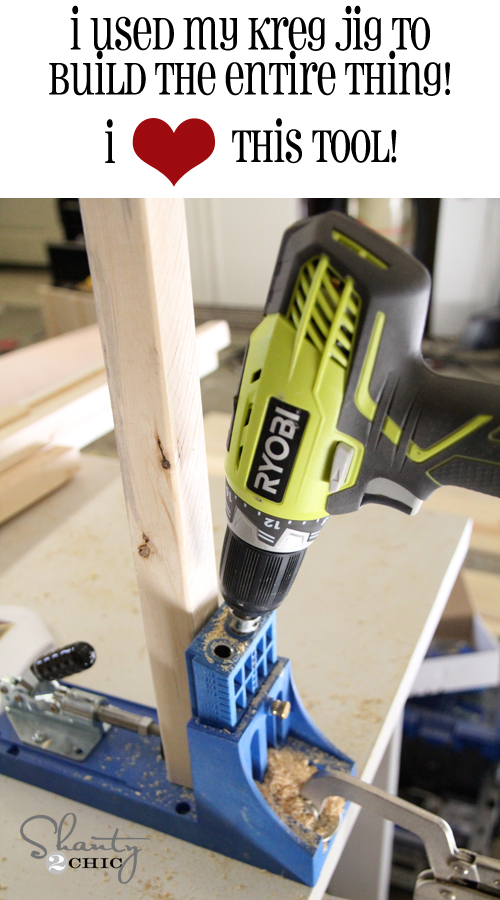
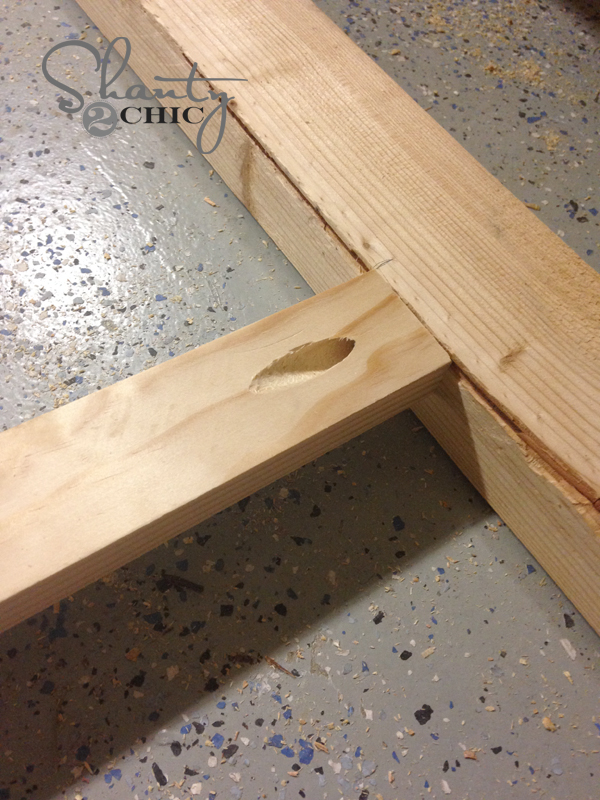
You guys know how much we love the Kreg Jig! Ash and I did a quick explanation video on it HERE for those of you who aren’t familiar with it.
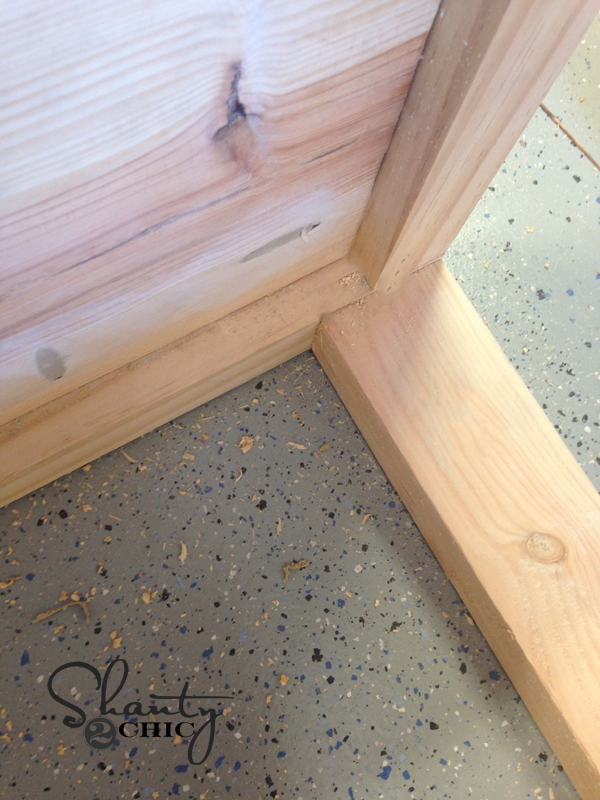
You can see here where I decided to put my pocket holes…

The frame uses 1.5″ pocket holes.

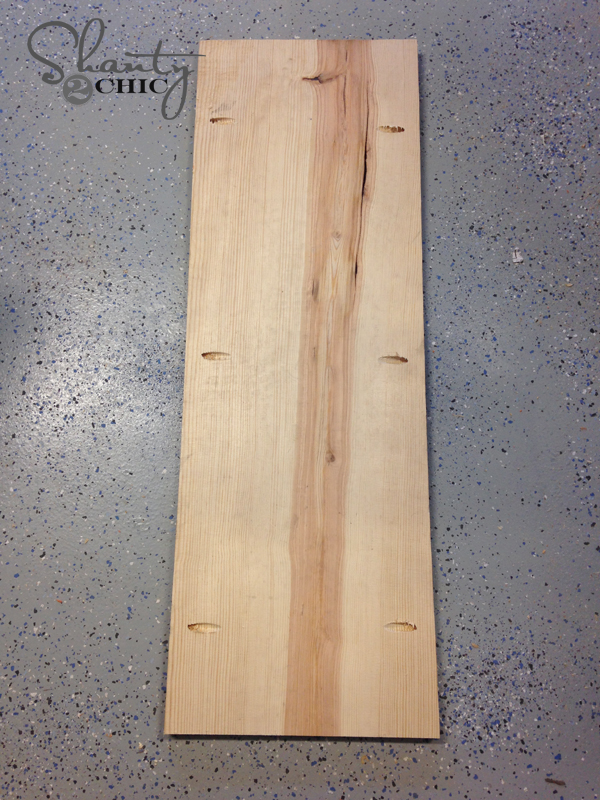
This is the bottom of my shelf pieces. I used 3/4″ pocket holes on this part.
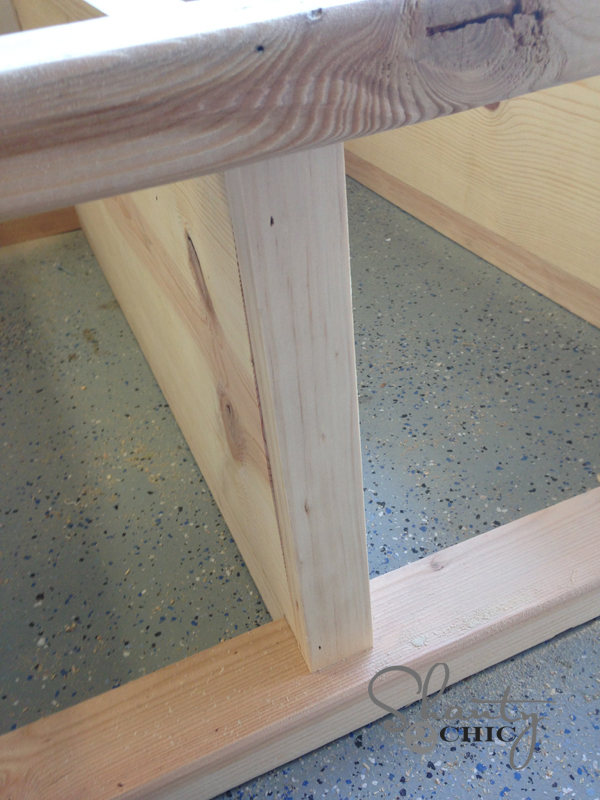
After building the frames, I attached my shelf pieces. I used 1.25″ pocket holes screws on this part.
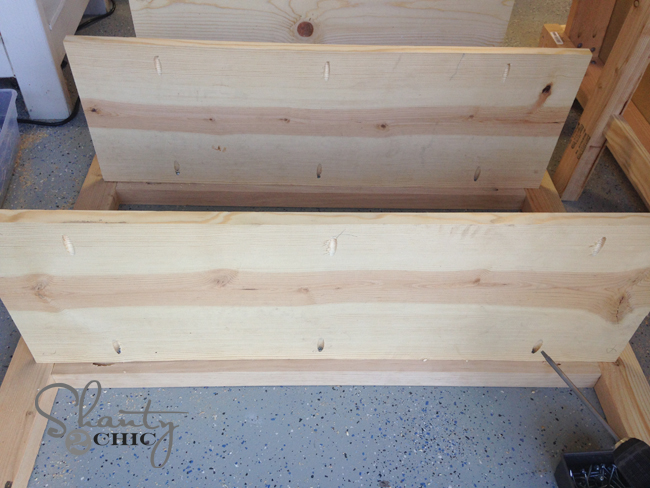
I built one whole side like this before attaching the other frame.
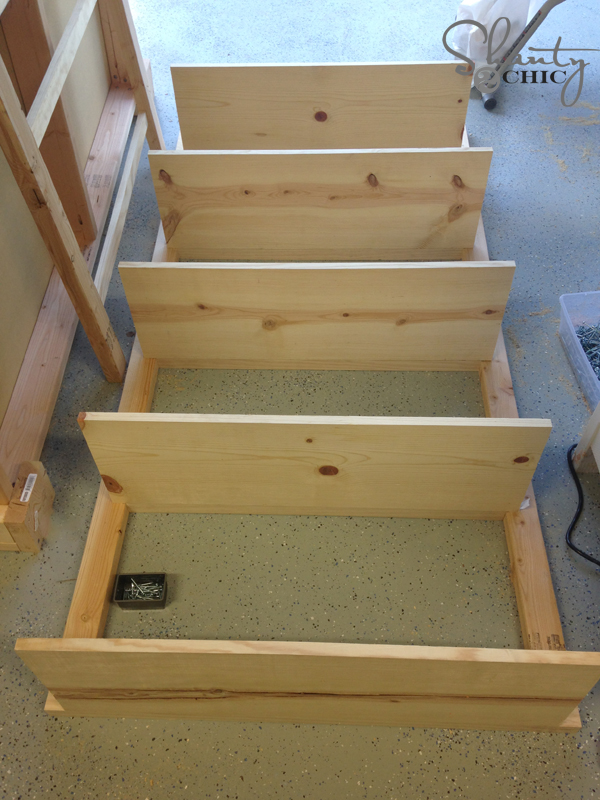
I faced my back frame to the back to hide the pocket holes. Here is a shot of the top of the bookcase. After building it, I filled all of the pocket holes with stainable wood putty.
And to attach my side trim pieces I used my Ryobi AirStrike Nailer. I LOVE this tool. You get all the function and awesomeness of a corded nailer without the cord. Can’t beat that! It also runs on the same battery as my drill.

This is what the trim pieces look like…
I used 1/4″ PureBond Plywood for the back of the bookcase. You can find it at the Home Depot. I had my Home Depot cut mine to size for me. Then, I just used my nailer to attach it to the back.
Time to finish!
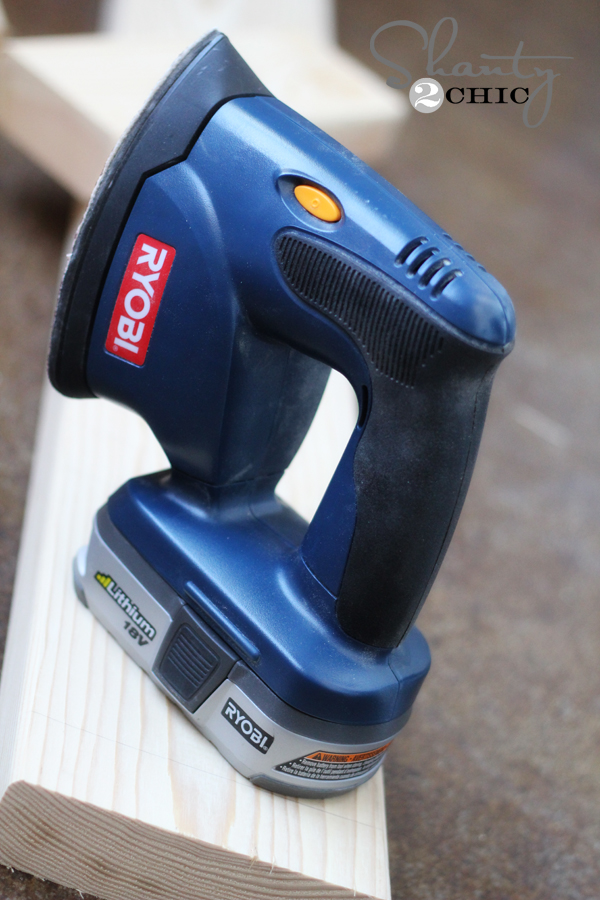
I used a new Rust-Oleum stain color called Wheat on this bookcase. It is very similar to the Early American that they discontinued. You just brush it on and then wipe off all of the excess stain. After giving it one coat and letting it dry, I used my Ryobi Corner Cat sander to sand my edges and corners. I love the look that it gives… Kind of worn and antique.
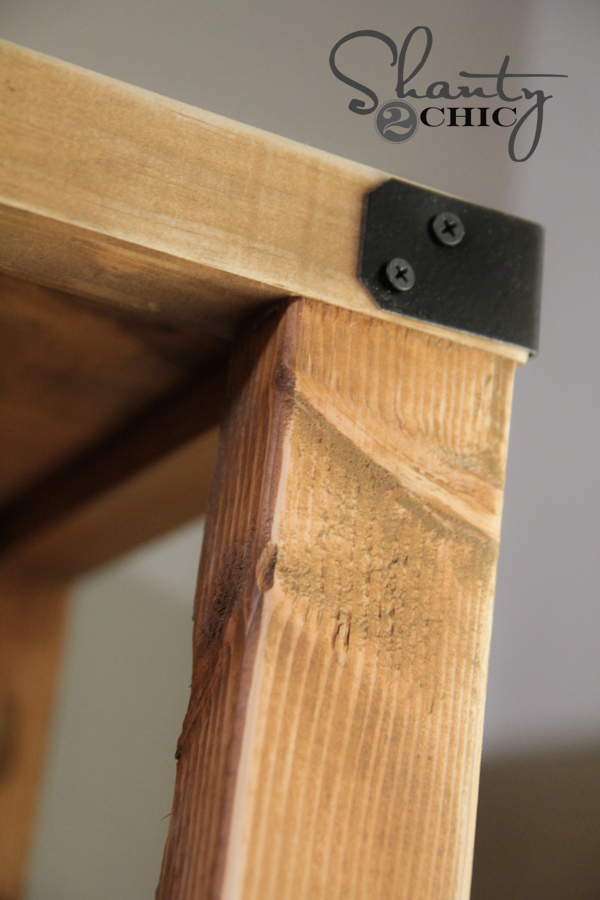
For the hardware, I found these brackets at Home Depot. You can get them in the roofing section. They are super cheap.
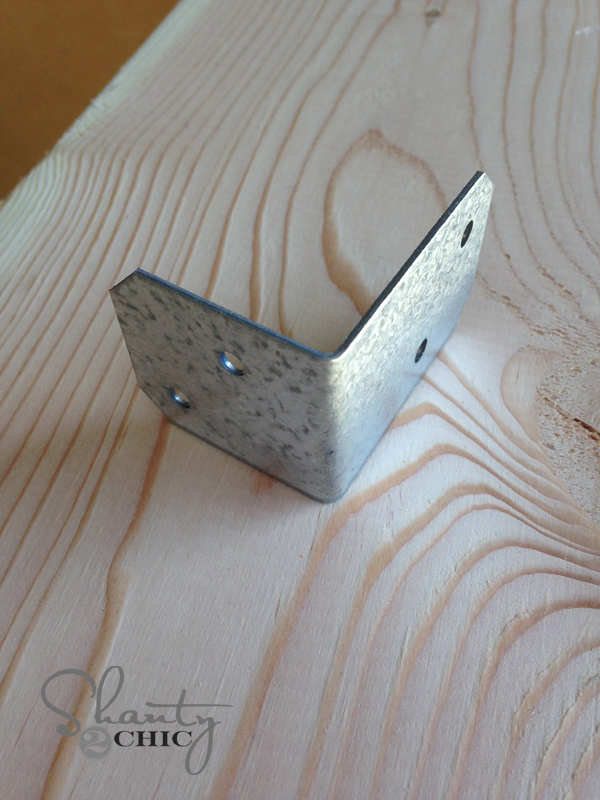
I painted mine with one coat of Rust-Oleum Painter’s Touch Canyon Black spray paint.
After letting it dry I attached them using some black drywall screws. Look how cute!
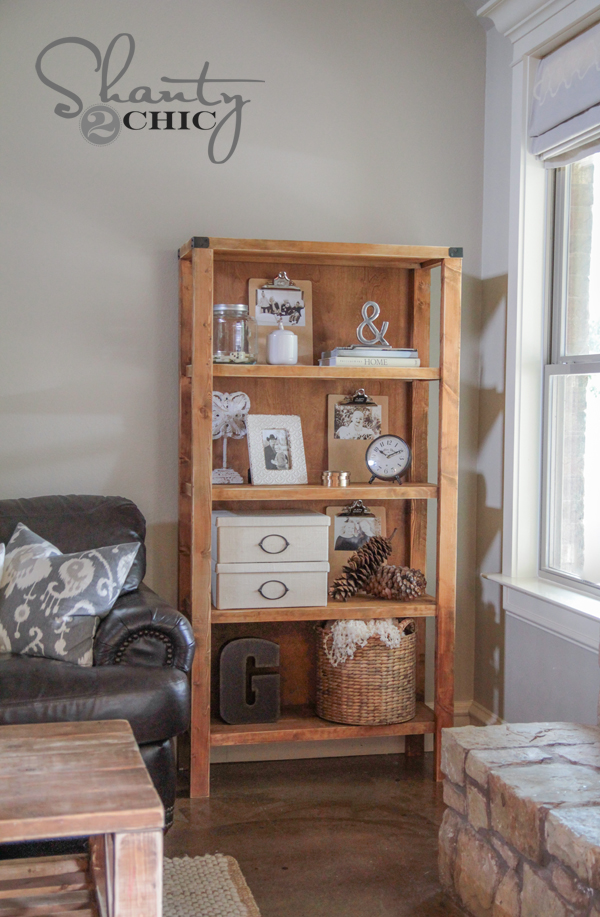
My final step was dressing it up and taking some pics! Here are a few more shots…
Hope you LOVE it as much as I do!
Remember to check out the full set of free plans over on Ana’s site!
I would love for you to share and PIN this with your peeps below!
Thanks so much for stopping by 🙂
~Whitney

I’m working on this now and struggling to align the front frame to the shelves and back. What steps did you take to align?
⭐?⭐?⭐?⭐?⭐?⭐?
⭐?⭐?⭐?⭐?⭐?⭐?
⭐?⭐?⭐?⭐?⭐??
⭐⭐ I built my own using the plans at www. WoodworkPlans.info – highly recommended you check those out too. They are detailed and super easy to read and understand unlike several others I found online. The amount of plans there is mind-boggling… there’s like 16,000 plans or something like that for tons of different projects. Definitely enough to keep me busy with projects for many more years to come haha
⭐ Head on over to www. WoodworkPlans.info if you want to learn more – click the pink link above for some more plans! Best of luck on your building adventures!
⭐?⭐?⭐?⭐?⭐?⭐?
⭐?⭐?⭐?⭐?⭐?⭐?
⭐?⭐?⭐?⭐?⭐?⭐?
Hey there!
I love this bookcase and I would like to build one sized to place behind my sofa…It’s actually an extremely visible and trafficked area of my house so it would look gorgeous there!!! Any suggestions on how to adapt from tall to wide?
Thanks!!!
Could you post a link to the saw you’re using here? Thanks!
Kim and I had to build this after seeing it on your site! Thanks for the inspiration.
Hi Whitney-
I love the bookcase and am hoping to make one. I just have a few questions on finishing it.. Did you sand the whole thing before using the Rust-Oleum Wheat stain or just stain it then stain? Also, did you use any wood conditioner or anything?
Thanks!
Hello –
I am new to your site and loving all of your great projects. I would love to know where you got the 2 white storage boxes shown on the bookcase.
Thanks !!
Where did you find your big pine cones?
Ziet er zeer mooi uit, en handig met de praktische uitleg erbij.
What a fantastic looking bookcase! 🙂
It looks like you bought it at a fancy shmancy store. Kuddos for using electric power tools 🙂
It is so beautiful! I love what you do.
Thank you sooo much! 🙂
It looks beautiful Whitney! You styling is perfect also!
Thank you Mindi! 🙂
Whitney, you are an inspiration! Love everything about this! Can you please tell me where you bought your sectional or what name brand it is? Thanks!
Thank you Janet! You are so sweet! I got it at a local store here in DFW. Are you local to the area?
We are up in the Texas Panhandle but I do have family in the DFW area.
Eeek! Love this! Every time I read one of your DIY furniture posts I add it to my list of ‘to-do’s when we finally move into our new home. Thanks for all the inspiration ladies! Love these projects!!
Oh yeah!! Happy to help that list grow 😉 you are sweet! Thanks so much!!
Once I saw the closeups — it gives me courage to build this and not worry too much about not being able to find the perfect boards to build. It adds to the charm of the piece. By the way, your tray on the coffee table, do you have the plans?
Thank you Grace! Here it is! https://www.shanty-2-chic.com/2012/04/diy-magazine-tray.html
Love! My to build list is getting longer and longer every time I visit your website! Hoping to create a beautiful, warm and welcoming home like yours. Thanks for the inspiration!
Thank you Kassie! You’re so sweet… That made me smile 🙂