Learn how to build a blanket ladder with 3 basic tools, $15 in lumber, free plans and a step-by-step tutorial. Perfect project for beginners.
I love making my home feel comfortable but chic 😉 for the holidays, whether it be for my own family or our guests! I’ve seen a lot of ladders for blanket storage in the past but, I wanted a specific “shanty” look! My favorite part of this ladder is the 2×6’s! They give it a solid, chunky look! I’m totally in love with it 🙂 It was so easy to build and only cost me about $10!!!
CLICK HERE TO JUMP TO THE FREE PRINTABLE Easy DIY Blanket Ladder plansHere’s how I did it!
Table of Contents
How to Build a DIY Blanket Ladder
Supplies:
- 2 – 2x4x8 pine boards or framing lumber
- 1 2x6x8 pine boards or framing lumber
- 2 1/2″ pocket hole screws
- Wood Glue
- Finish of your choice
Tools:
- Miter Saw (or hand saw or circular saw)
- Drill
- Kreg Jig
Step 1: Make the Cuts
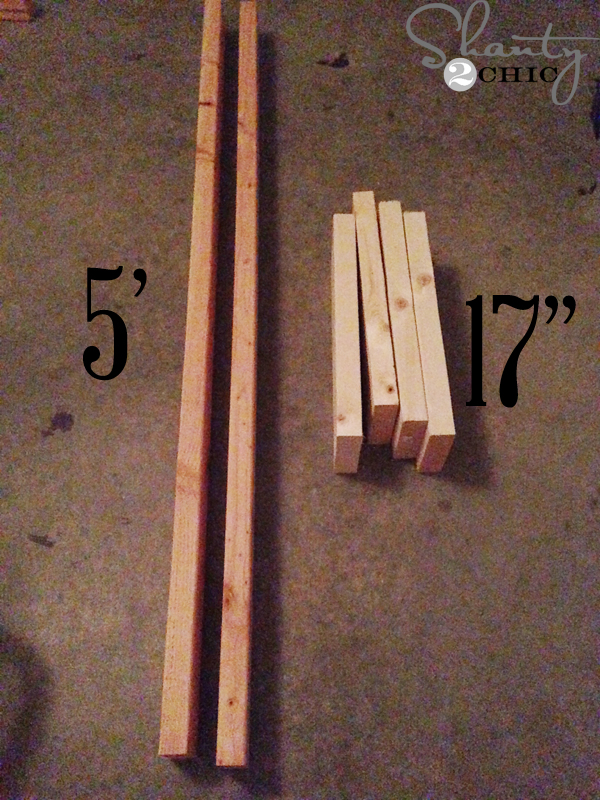
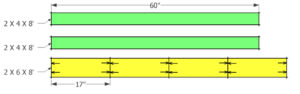
I cut two 2×4’s at 5′ long and 4 2×6 at 17″ long. I just made up my own measurements and I love how big and chunky the ladder is.
Step 2: Drill Pocket Holes in the Rungs
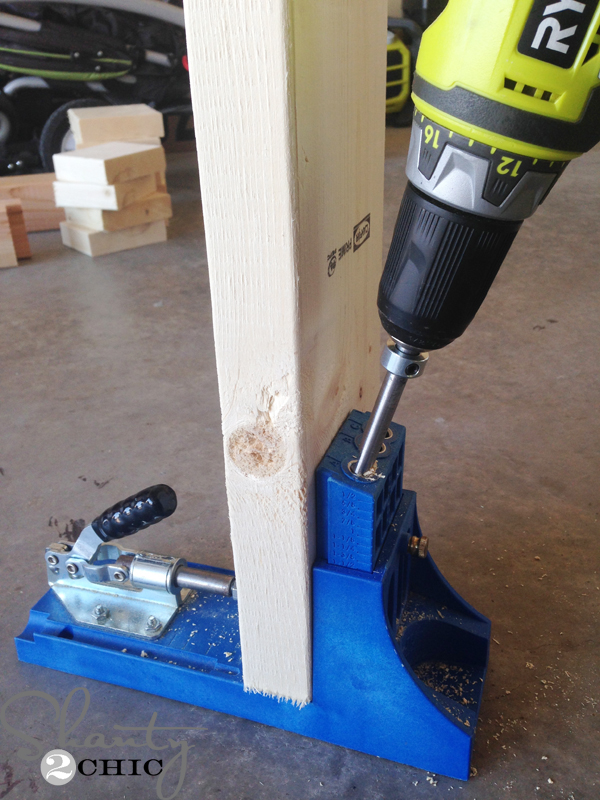
Next, I used my Kreg Jig to drill 1 1/2″ pocket holes into the ends of each 2×6. (You can find the Kreg Jig HERE on Amazon). If you do not own a Kreg Jig, you can pre drill from the sides of the 2×4’s into the 2×6’s and follow up with 2 1/2″ wood screws.
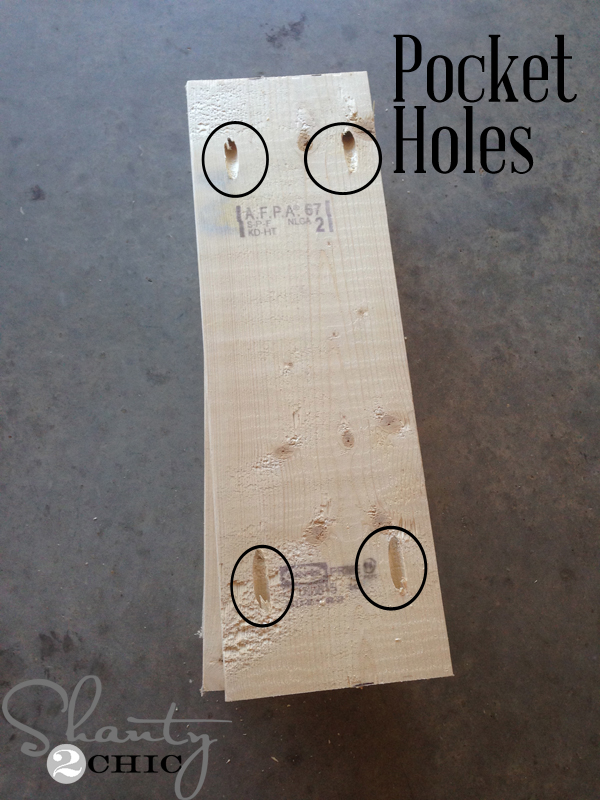
You can see that I circled where I drilled my Kreg pocket holes.
Step 3: Attach the Ladder Rungs

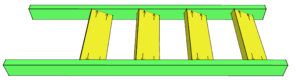
I set the 2×6 boards so that the front corner touched the front of the 2×4 and the back corner of the 2×6 touched the back of the 2×4. I placed the top rung 3″ from the top of the ladder and spaced the other rungs 12″ apart from each other. I measured from the front corner of each 2×6.
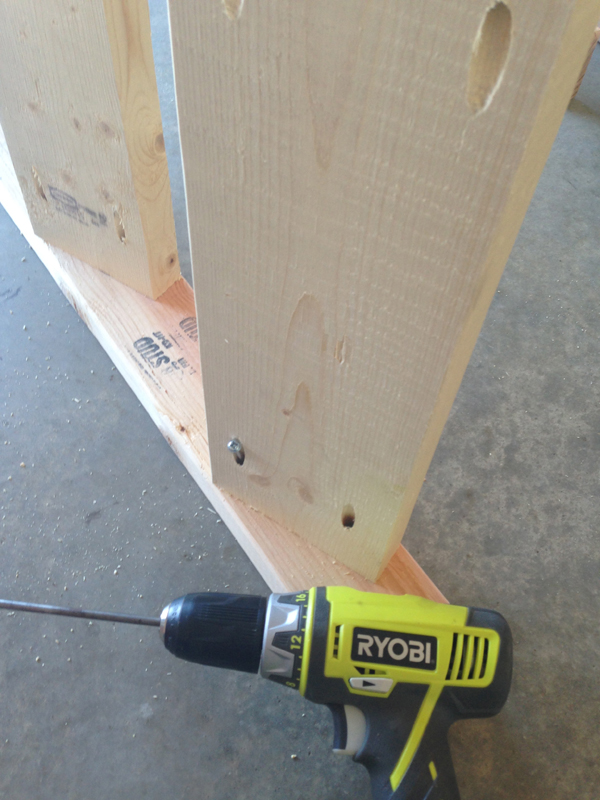
Make sure your Kreg pocket holes are facing the back. I used 2 1/2″ pocket hole screws to attach the 2×6 boards.
Next, just attach the other 2×4 to the other side of the 2×6’s the same way.
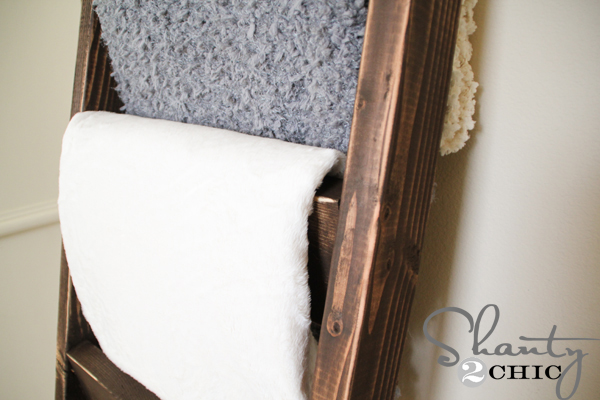
Step 4: Add a Finish
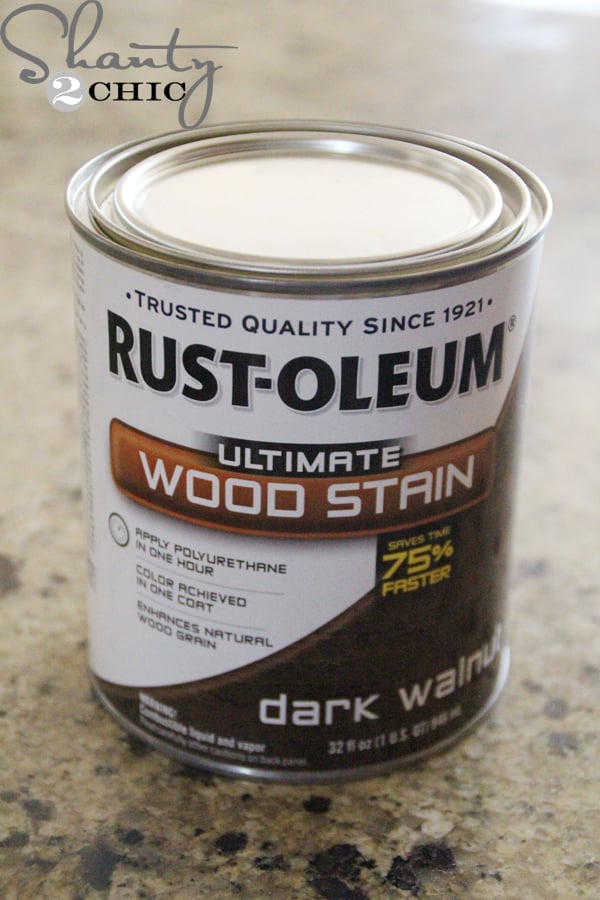
To finish this cutie off, I used applied one coat of my favorite stain, Rust-Oleum Dark Walnut, with a foam brush. Wait about 5 minutes and then blend the stain with a clean cloth.
- You can find the Dark Walnut stain HERE on Amazon
Step 5: Distressing the Finish
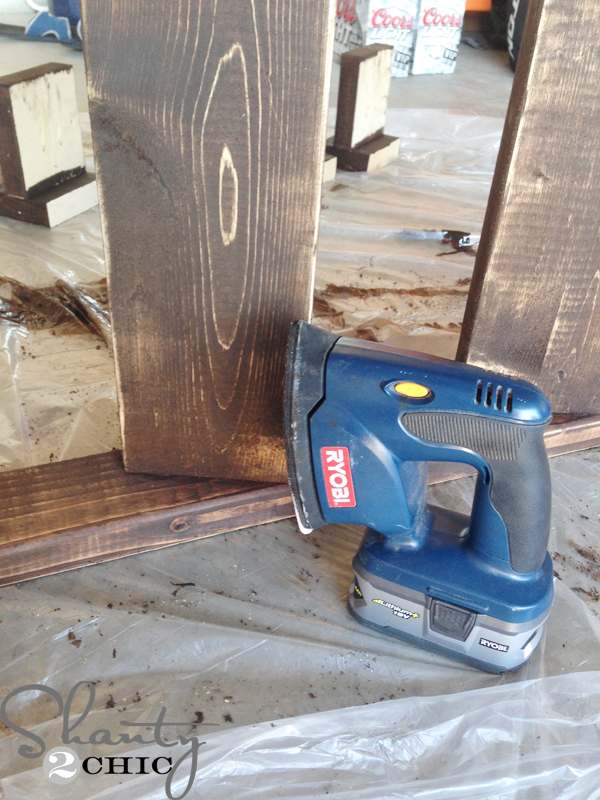
To give it the worn look that we love so much, I used my Ryobi Corner Cat Sander to distress the wood all over. This sander is perfect for sanding this piece because of all of the angles.
Once it was dry, I added a few cute and soft throw blankets!
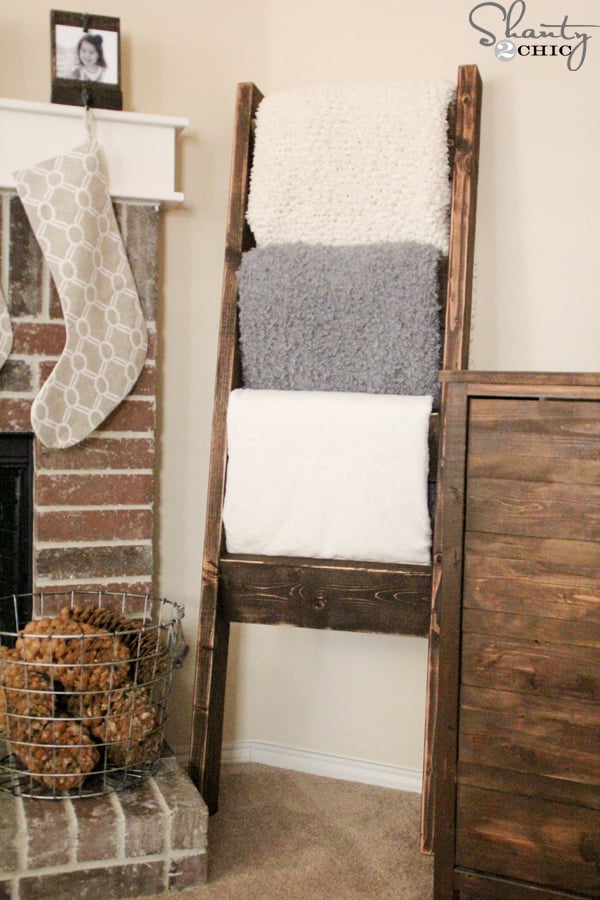
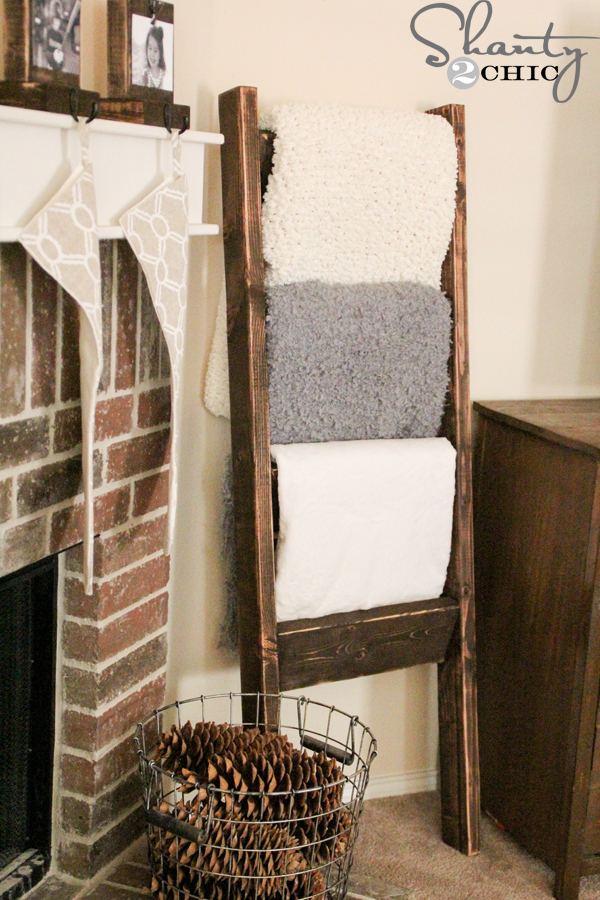
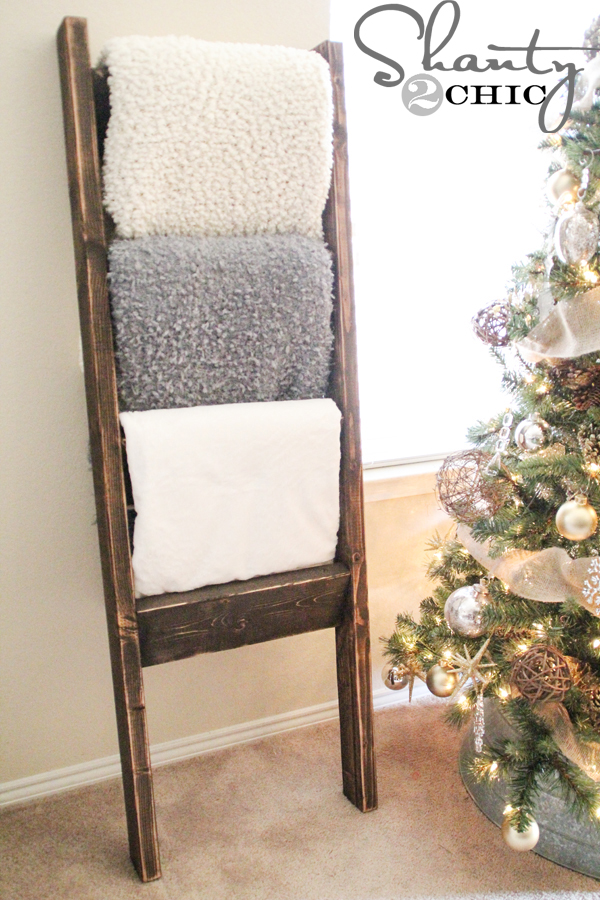
$15 Blanket Ladder
I can’t decide whereI love the form and function of this blanket ladder! It’s a beautiful way to store blankets and also serves as the perfect decor for any space! I think my next ladder might be for towel storage in the bathroom or outside by the pool.
I just love getting my home ready for Christmas! We have so much more to come over the next 11 days! This is just the beginning! We always appreciate your pins and shares 🙂
Check Out Our Other Free Blanket Ladder Plans!
- Barn Door Pull Blanket Ladder
- DIY Rustic Blanket Ladder for $7
- DIY Modern Blanket Ladder
- Blanket Ladder with Wood and Metal Pipe
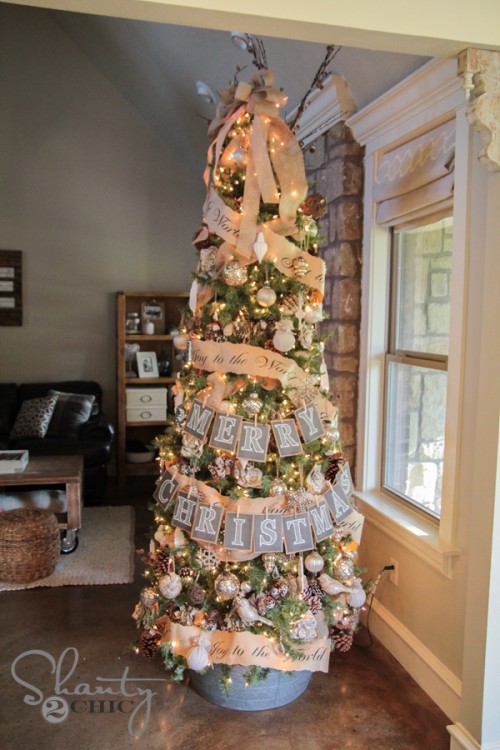
Here are a few projects that we have recently done to help you get your home holiday ready!

Free Printable Merry Christmas Banner
Thanks so much for stopping by!!!
Happy Building!
DIY Blanket Ladder
Supply List
- 2 2x4x8 Pine or Whitewood Boards
- 1 2x6x8 Pine or Whitewood Boards
- 2 1/2″ Pocket Hole Screws
- Finish of Choice
Instructions
- Cut List

- Dill 1 1/2″ pocket holes into the 2×6 boards. Attach the 2×6 pieces to one of the 2×4 pieces according to the diagram. The top 2×6 piece is 3″ away from the top of the 2×4. The rest of the pieces are spaced 12″ apart measuring from the front most corner of each 2×6. They are angled so that the opposite corners are flush with the opposite sides of the 2×4 as shown.

- Attach the other 2×4 side in the same way. Sand and finish as you wish! Make sure to share your builds with us on social media and use #shanty2chic so we can share them too!


I made one to hold all the bath towels that get used when we bathe our dogs. It was so simple and worked so well that I made a couple more. They’re in my daughters rooms. We could never get them to stop leaving their clothes on the floor, but these ladders work great for that too!
I love your projects and enthusiasm. Very infectious! Thanks!!
how do you make sure the ends of the ladders (rails) line up exactly before screwing the rungs in?
I measured on both rails where to put the rungs.
Is there a way to print out instructions for your projects without all of the other stuff that is on the page? I would love to try some of them, but I work better with something laid out in front of me to follow!!
Thanks
Hi Darlene! We are working to have PDF’s available for all of our plans:) this specific plan should be available this week:)
So so happy I found your blog! I will be busy this weekend!
My blanket ladder! Project #2 done! It took a few re-assembly efforts to get it straight. The first attempt was pretty crooked. It still isn’t perfect, but passable…
We love it:) thank you so much for sharing!!!!
I know this is a long shot but why was it crooked? I am having the same issue.
Make sure your getting your measurements right…each side has to be the same measurement…I build my first side..then measure and make the second “top” side to measure exactly…the top is 3″…but it might be slightly less or more depending how you placed it…measure then copy it for the second side. My first one was totally crooked too!
To make it as easy as possible clamp your 2x4s together and make your cut 1 time to assure they are the exact same size. Also, just for simple house keeping, make sure your 2×6 boards are not warped. That will make it very crooked very fast. Also make sure that they are screwed flush against the 2x4s. Hopefully this helps folks having the same issue in the future ????
Thanks, Zac!
I love all of the things you make.
would you suggest wood glue (with screws) if you do not have the jig? I am HOPING that the hubs got the many hits of that on my list 😉
It’s a beautiful project, and I am making 2. Perfect gifts!
Yes that is exactly how you would do it. You can use wood putty to fill the holes on the sides 🙂
I love these, just like everything else! My only question is: Do you know why my Rustoleum Dark Walnut stain looks so much lighter than what your projects look like? I love the color I see in your pictures but when I use the same exact stuff it’s super light! Thanks!
Thanks Tara! You need to make sure that you shake the can before you use it and I suggest using a paint stick to get the color mixed really well. Sometimes the color settled to the bottom of the can when it has sat on the shelf. Hope this helps!
What a fabulous project! I can think of SO many uses for this! Fabulous ladies!
xo Michael
I loooove the blanket ladder. I have been wanting one FOREVER!
Thank you:))
Have a question…do you find that the stain wears off onto the fabric of the quilts? My hubby made me a quilt hanging rack for the wall and I did not use stain on it for that reason. Has anyone had this problem or “fear” of it ruining their quilt?
You could put a satin poly over the stain after you sand it.
Yes!! Janet is right. Just put a coat of poly and you won’t have a problem!
Thank you! I had not thought of doing that. Have a great upcoming week!
Thank you ladies!! I had not thought of doing that! I wish you a great upcoming week! Thanks again!
Thank you so much angel!!
Love this, I have three antique quilts from the early 1900’s, I could just make it a bit wider, but still keep it a ladder. Thanks so,so much!! They’re in a drawer where no one can see them. Great idea!
Thank you Kim!!
Yes, quilt were the first thing I thought of when I saw the plain ladder.
Love this. Would be great to hold extra towels in the bath too. Is there any way to secure it to the wall to keep curious little ones safe?
Thank you Kim! To secure it, I would us some type of “L” bracket and anchors!
My blankets sure don’t look this beautiful in my home… I guess I need a ladder! 🙂 This project is gorgeous! And yeah… I need a kreg tool STAT.
LOL! Thank you Donna 🙂
Beautiful! Just one question….it looks like the side rails are cut at an angle on the bottom…if so, did you cut at 10 degrees or some other angle?
Love this, so simple but a gift anyone would love!
Thank you! They aren’t cut at an angle:) just a plain straight cut! I just lean it against the wall.
I just made finished my adorable ladder, and I went ahead and cut the bottom at 15 degree angles. It leans perfectly for what I was envisioning. 🙂
Oh, I love this. I have room in my home for more ladders. I’d better start and make me some!
Thank you Marianne :))