Happy Friday guys! So glad you are here! To keep up with all of our DIY projects, be sure to follow us on Instagram!
I want to start by saying a big CONGRATS to Miss Ana White on her new baby boy! We are so happy for her!
I am so excited to share her latest plan with you! When I spotted this baby on PB’s site, I knew it must be done. It’s so darn cute and works for any room in the house. Check out this DIY storage bench!
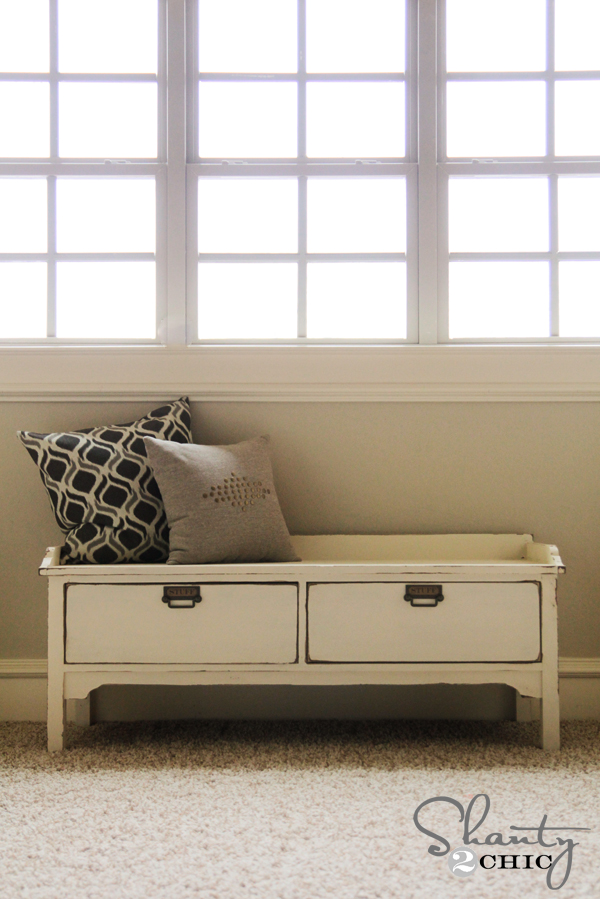
How cute is that? Now I must warn you… I took a lot of pics on this build! I tried to really break it down and take the intimidation out of it. It’s such a great project to try if you are new to drawers or a jig saw!
You know the drill… I will share my how-to tips and photos here, and you can download the full set of free plans over on Ana’s site!
Here we go!
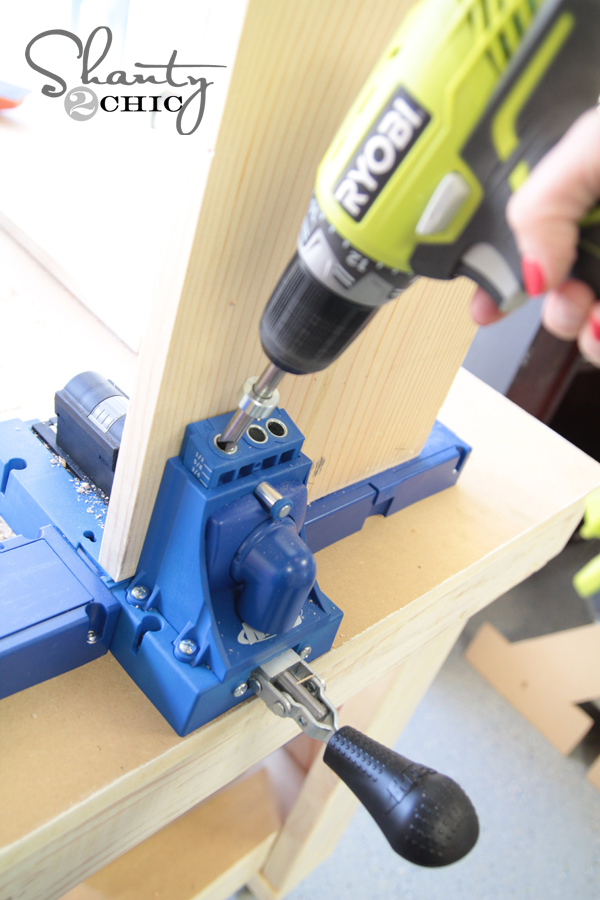
I would most definitely recommend a Kreg Jig for this build… Ok, for any build really! For those of you who have no clue what a Kreg Jig is, you can check out our video HERE. We really tried to break it down in our own words to help explain it to you! We get asked ALL the time which Kreg Jig we use. If you are considering purchasing one yourself, I would totally recommend the newest K5 model. Mine is my new best friend! It has lots of great new features making it even more user friendly and time saving.
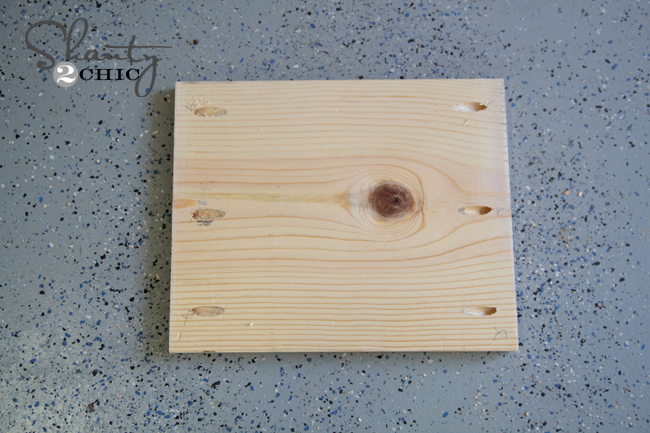
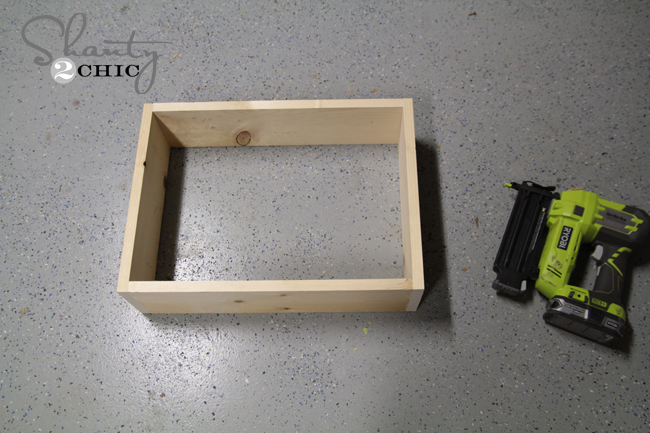
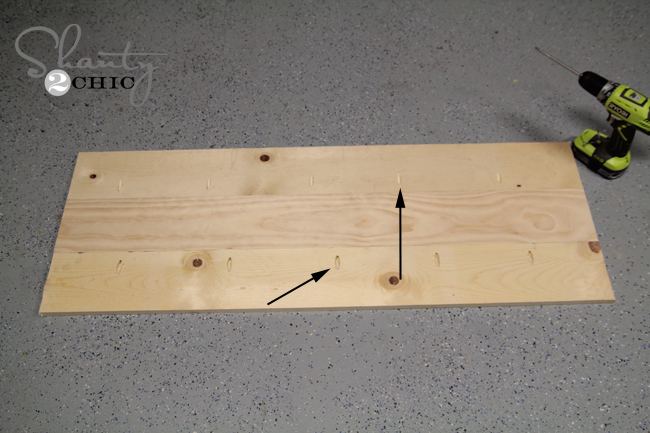
I assembled the sides of the bench first. I took lots of pics so you can see where I put the pocket holes. The entire bench used 3/4″ pocket holes. Here is my K5 in action…
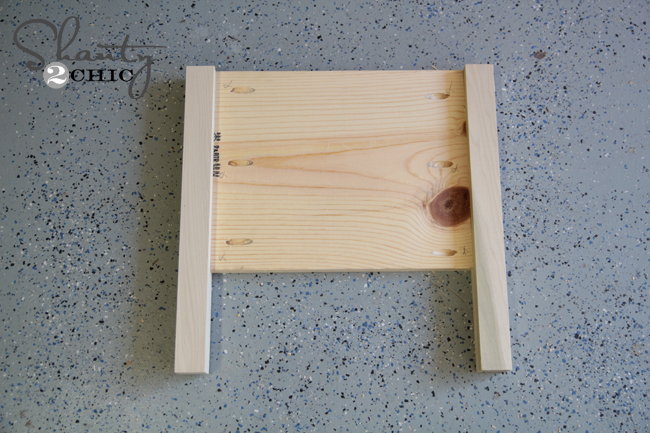
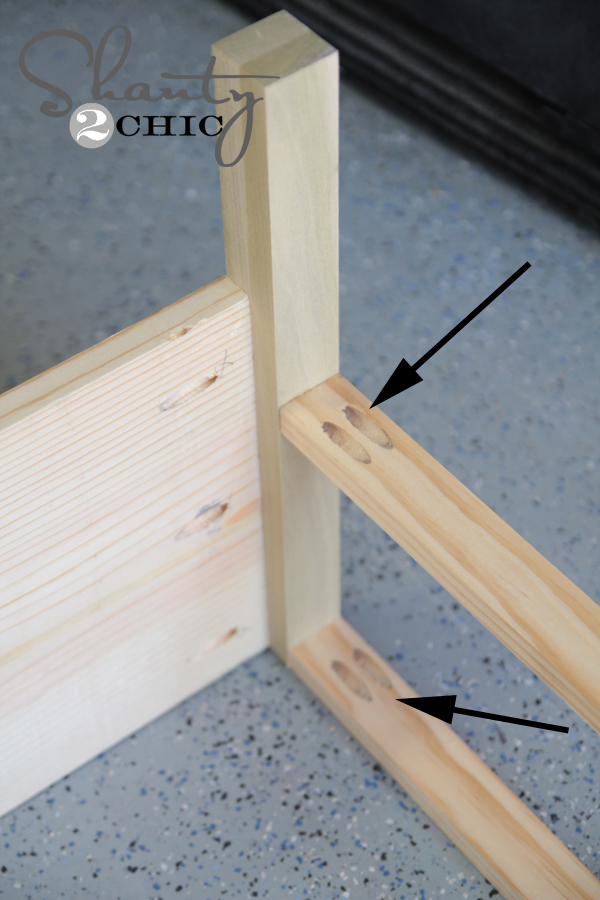
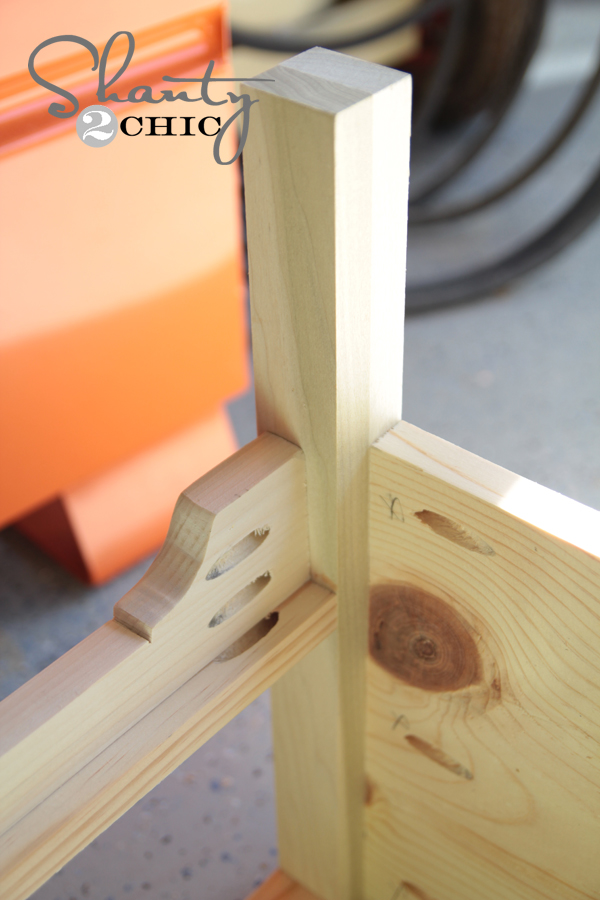
This is how I attached the sides to my bench legs. I used 1 1/4″ pocket hole screws and Gorilla Wood glue to attach all my pieces.


The back is done the same way! You can see it attached here…

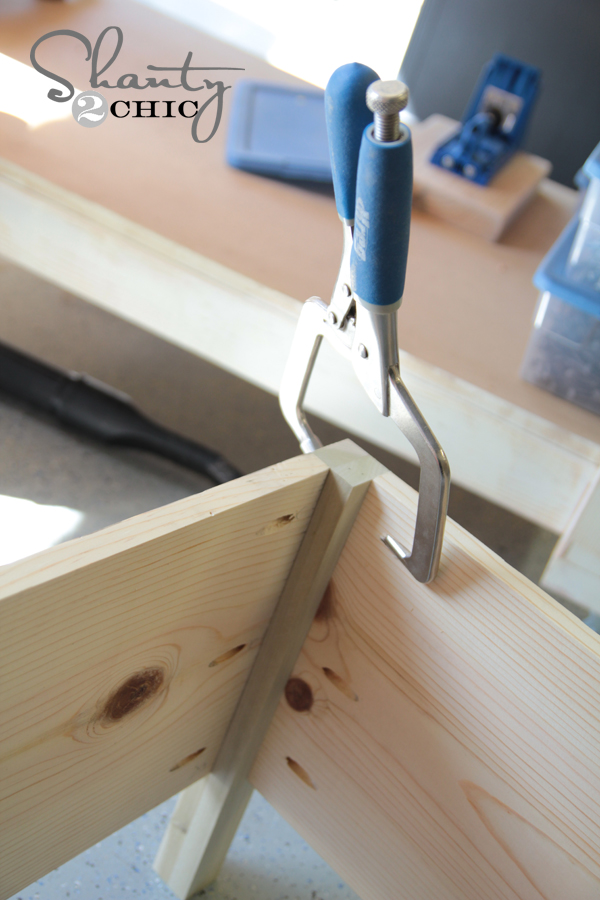
I used my Kreg Right Angle Clamp![]()
on this part. I LOVE it… It’s basically like having an extra set of hands. The end of it slides into your pocket hole and holds it all together while you place your other pocket holes.
Here is where I put my pocket holes on the front 1×2 pieces. These are on the bottom side of each so they are hidden.
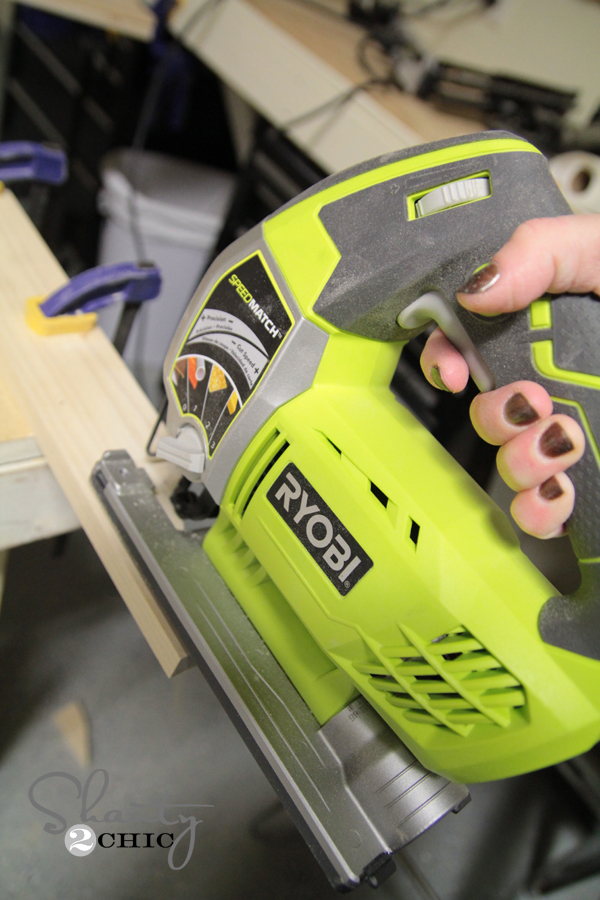
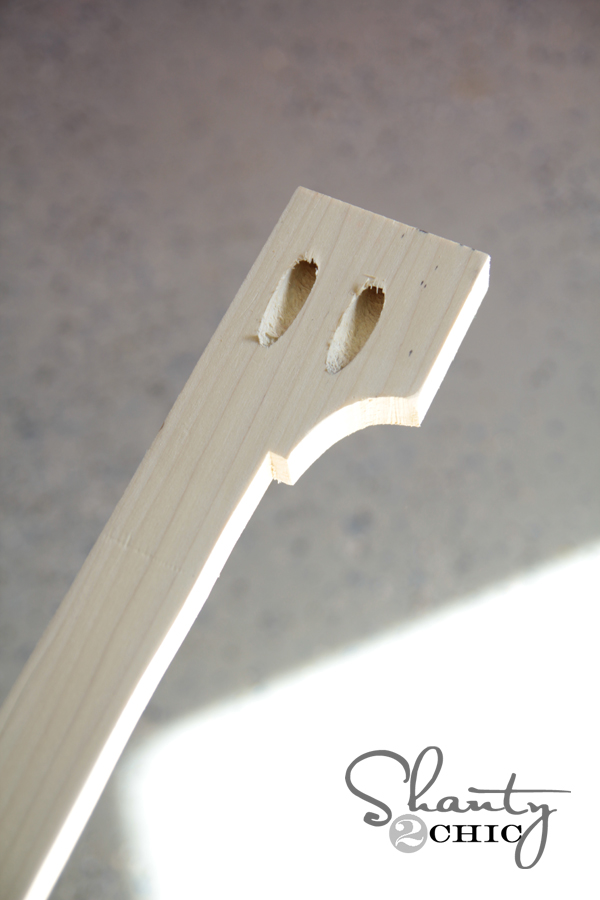
Next you add the decorative front piece. I used my Ryobi Jig Saw on this part. For those of you that have never used a jig saw, they are super simple to use! You basically just follow the lines. It allows you to make really decorative cuts like this one very simply!
Once I had it cut out, I added pocket holes to the back like this…
And here it is attached…
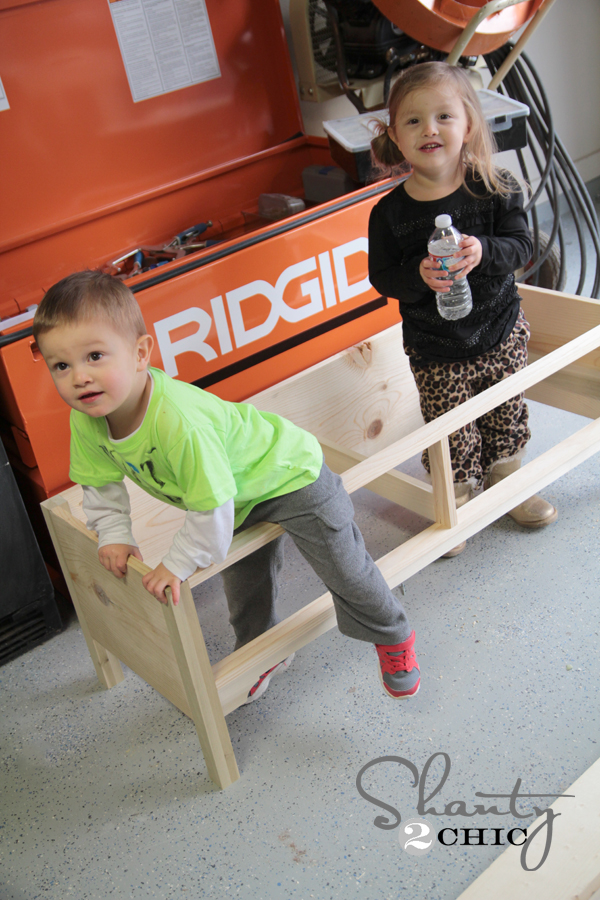
Now for the drawers! I had some ‘helpers’ on this part…
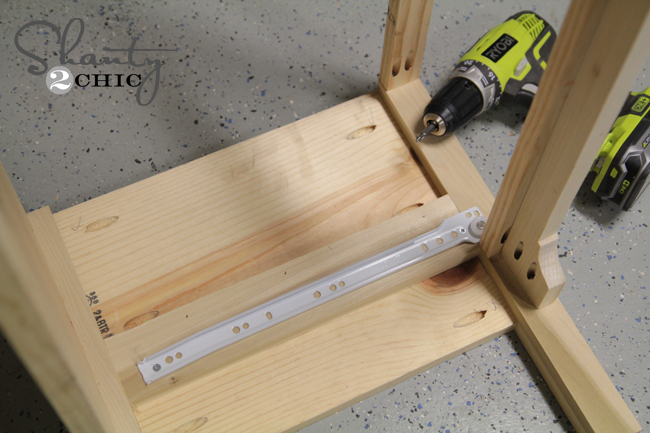
I will break the drawers down a bit here. You can also check out this post where I go into more detail about how I attach my drawer slides.
I like to attach my bench pieces first. You can see where I attached them here…

I lined each of these up 3/4″ from the front of the bench to save room for the drawer face.
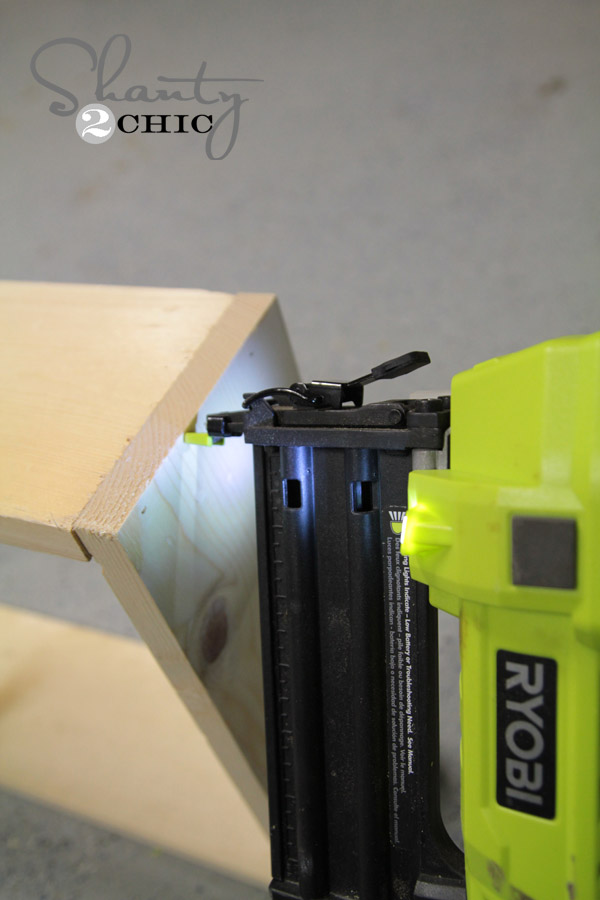
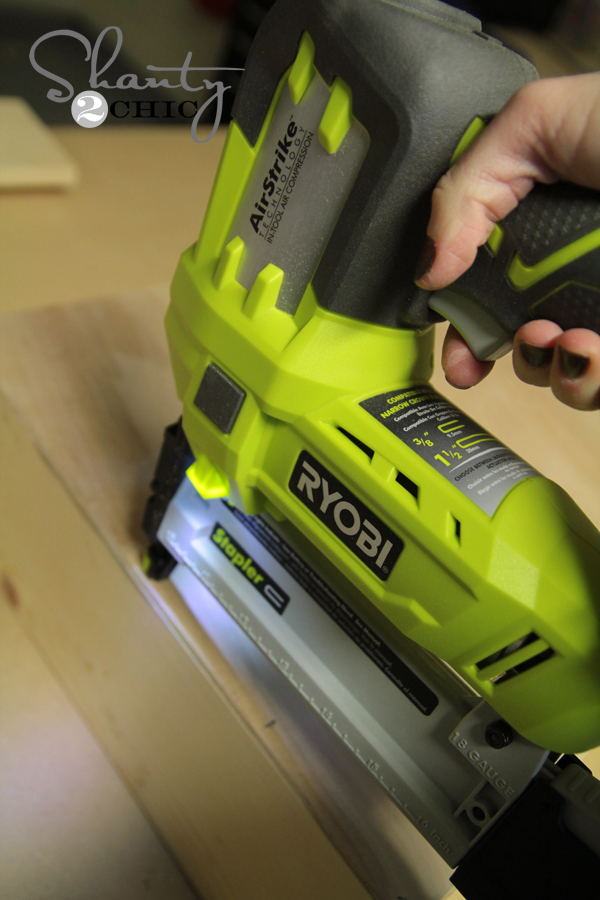
Next, I measured the distance between both drawer slides and built my drawers off of those measurements. I used wood glue and my cordless brad nailer on this part.
To attach the bottom 1/4″ piece, you can use your nail gun, but a stapler is even better at holding that material in place. Ryobi just came out with a cordless staple gun… Woohoo!! I am so pumped! It actually looks just like the nail gun and works about the same way, but shoots staples instead.
Once you have your boxes built, you can attach the slides to them.
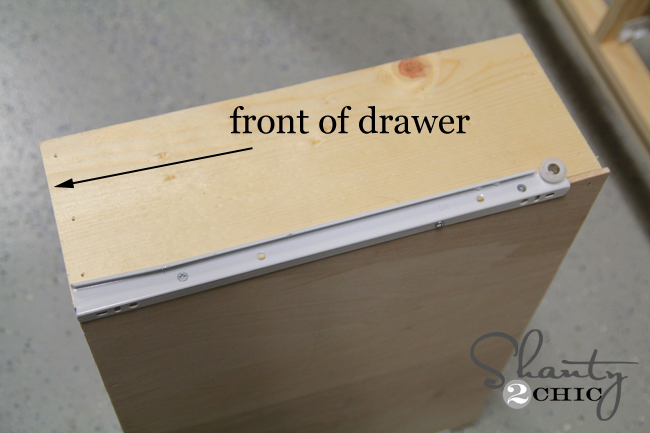
That’s it! They will slide into place now!
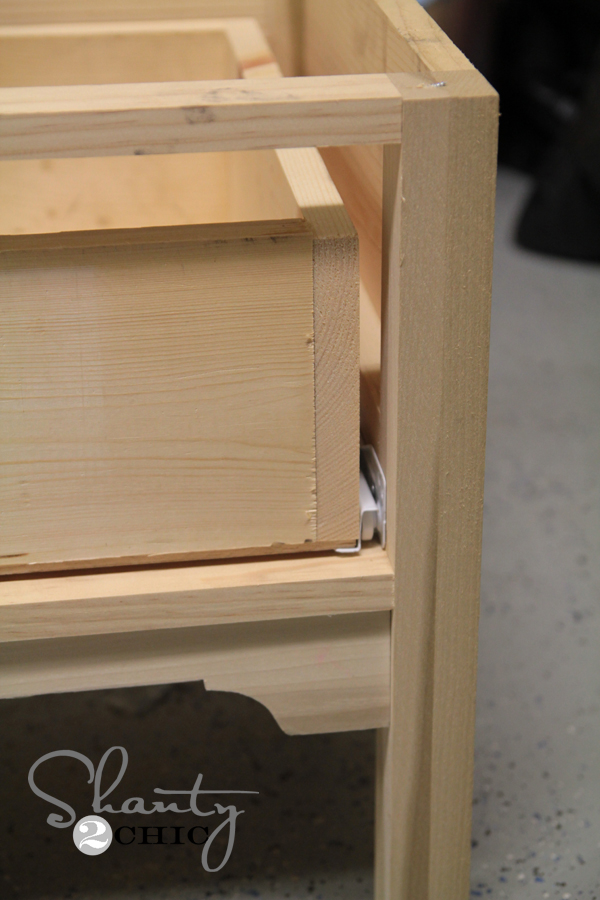
I added the drawer faces next. I used wood glue and my nailer for this part. I nailed from the inside of the drawers to keep the nails hidden. Here it is ready for the top!

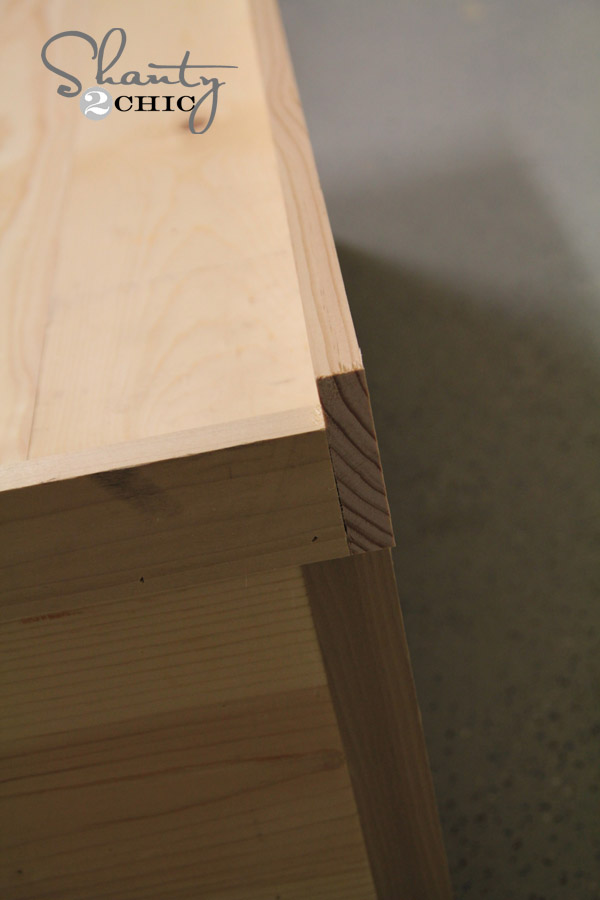
I chose to Kreg Jig my bench top together. I was concerned that middle board might bow down with time and this keeps everything nice and sturdy! Here is where I put all my pocket holes. Once it was all put together, I glued and nailed it in place.
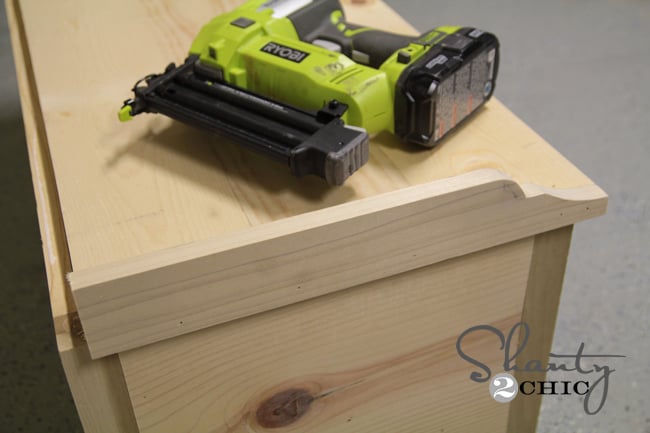
My final step was adding that top trim! I glued and nailed that part as well…
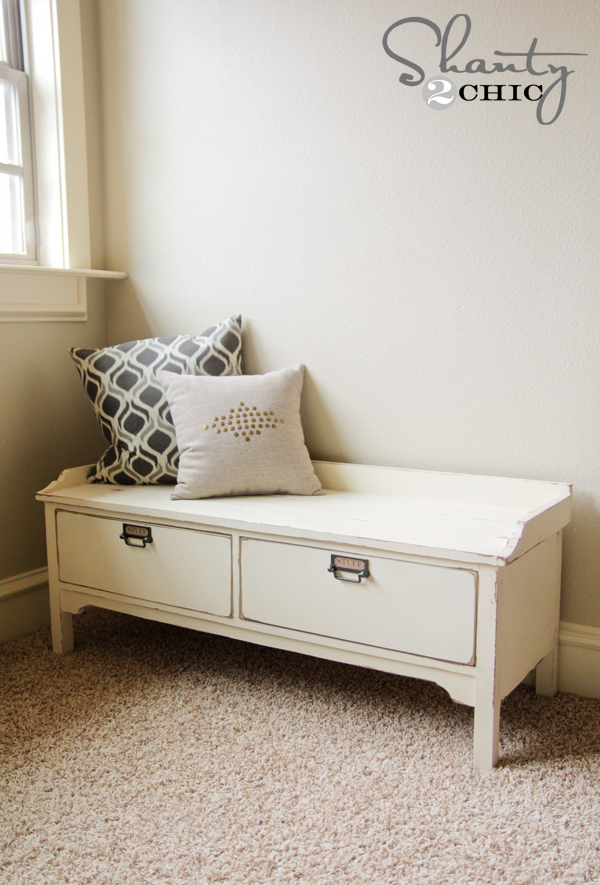
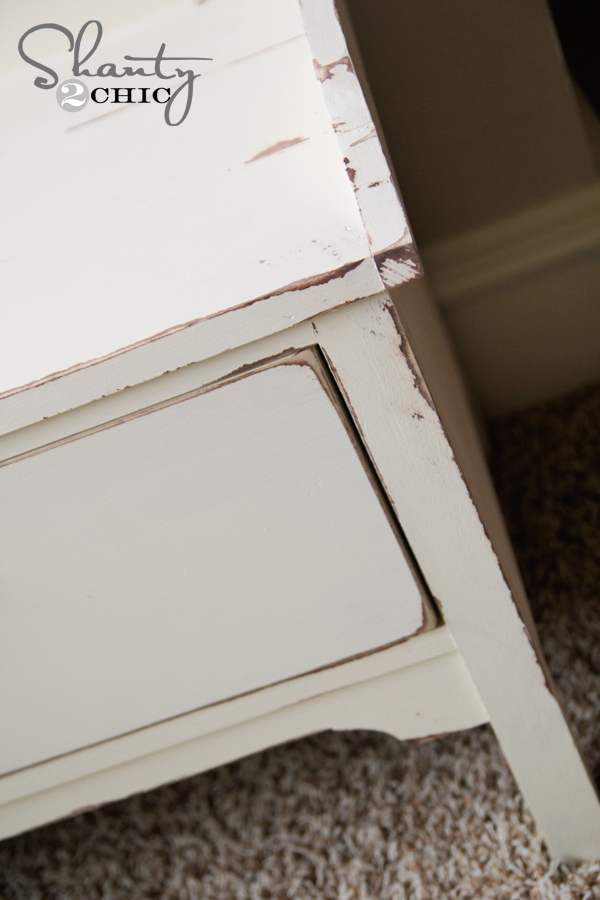
Finished! I painted my bench using one of my favorite painting methods. You can check it out HERE! My base coat is Rust-Oleum Carrington wood stain, and the top coat is Rust-Oleum Heirloom White spray paint.
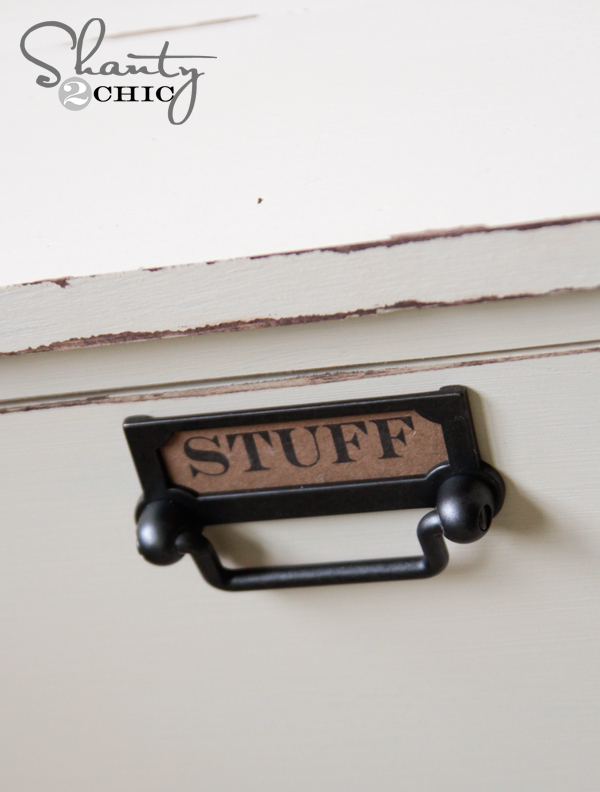
I set this upstairs for photos, but I haven’t quite decided where it will be staying. What do you think?? I found the super cute hardware at Target!
Thanks so much for stopping by guys!! Remember, you can get the full set of free plans over on Ana’s site! Let me know if you have any questions at all. I would LOVE for you to share and Pin this with your peeps below!
Have an awesome weekend!
~Whitney


You can buy *hardware* at your Target store????????????!!!!!!
Just finished my DIY bench! Big thanks to you girls at Shanty2chic and to Ana White for the plans! I had so much fun making this!!!
My husband just finished building this and now I just need to paint it! It looks amazing!! I’m wondering if you found the pulls in store or online at Target? I couldn’t find them and really like them.. thanks!!
I bought all the supplies for making this last night, but was confused on the drawer slides… The plan calls for 15″ Euro slides but the guy at Lowe’s said they only came in even numbers like 14″, 16″ and 18″. Do you know where I can find 15″ slides?
Good grief ~ You girls are keeping me so busy with all these great builds, my full time job is getting in the way!! lol Awesome job girls!!
You girls are just awesome! Such a great build and you make it look simple!
Amazing, as always! I’ve been intimidated by projects with drawers but I just need to get brave and do one! Thanks for the inspiration! 🙂
Love the bench!
The pillows are super cute too! Where did you get them?
Super cute–great job Whitney! Now I have another thing I want to build!
Yeah!! Happy to hear it!
Love!
Thank you!
If you are still wondering where it should go, I know exactly where you can put it. My house! !!!!
Hahaha yeah!;-)
It’s so cute! I love how you can make something look so professional.
Thank you!! That is always my goal… I appreciate your sweet comment!
I LOVE, LOVE, LOVE this!! How much do you think it cost to build??
I think they said $125. But if you buy Whitewood, instead of pine, probably cheaper…
Yes… $125, but I did use select pine on some which made the cost higher.
LOVE it!!!!!
Thanks Jill!