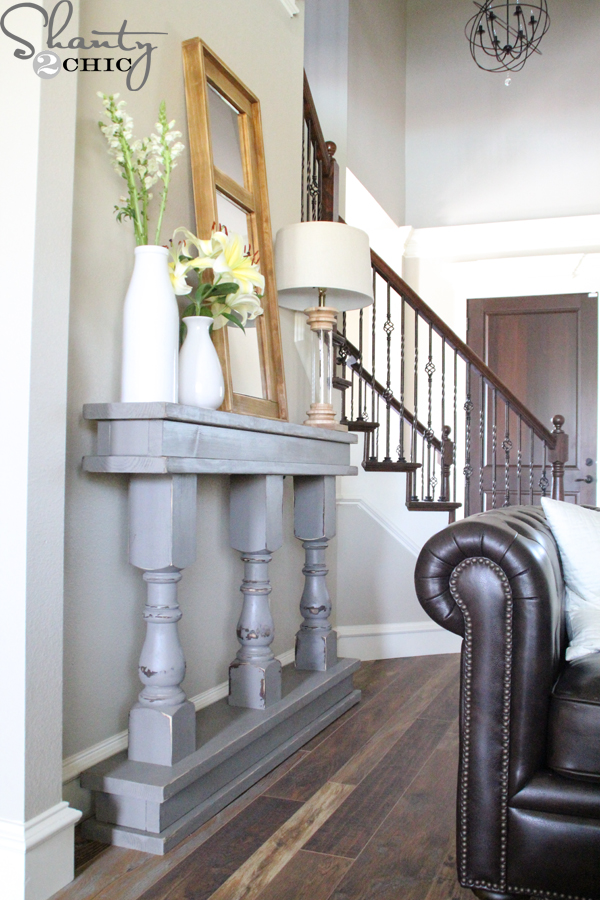
 Well holy moly I’m in love with it!! *If you like the mirror propped on top, click HERE to see how I made it!* This DIY Console Table is so easy!!
 I needed a narrow console table to fit a blank wall next to our stairs and came up with this SUPER EASY beauty! And of course we have the free plans for you as well! Just click the image below to print! Let’s get into this DIY Console Table.
 You can also click HERE for the Free Plans!
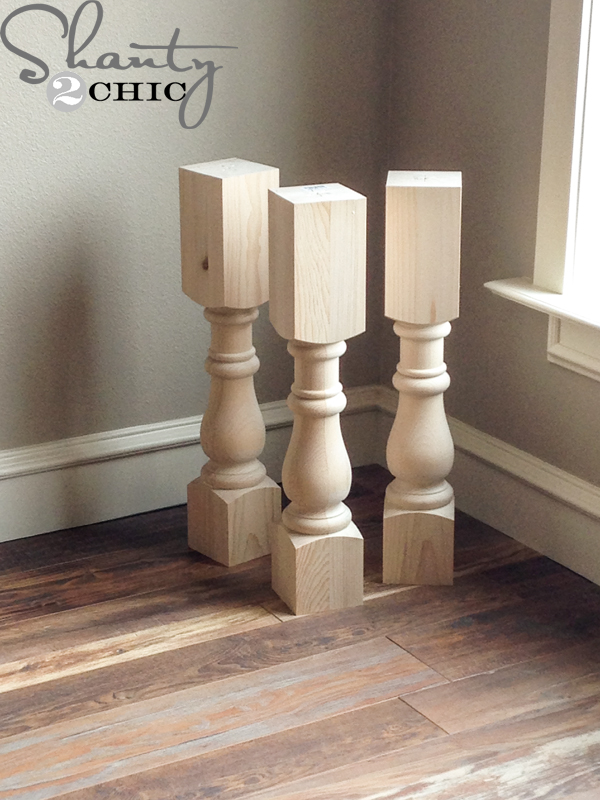 When I said this table was easy, I wasn’t kidding! It’s built with these awesome turned legs that I ordered from Osborne, 2×4’s and 2×10’s! That’s it friends! You can click HERE to order the turned legs. I ordered the knotty pine – they are about $60 each but that is the bulk of the cost with this table!
Here’s how I built the table!
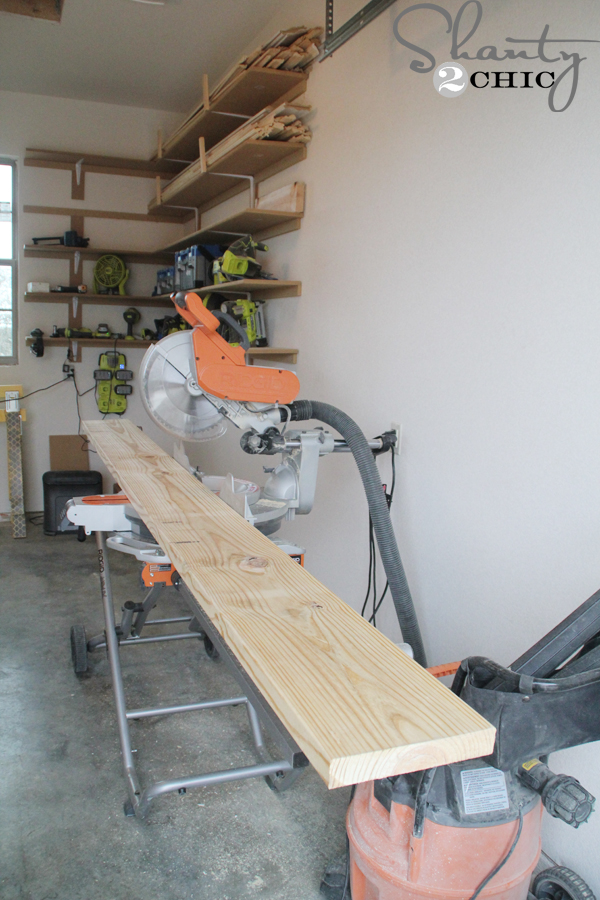 I started by cutting my 2×10 boards. These will be the main bases for the top and bottom of the table.
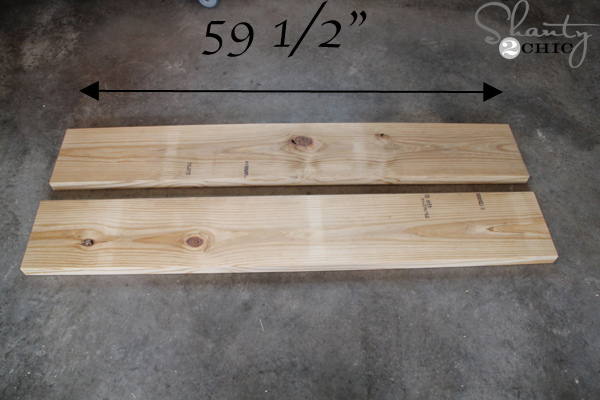 I cut 4 pieces at 59 1/2″.
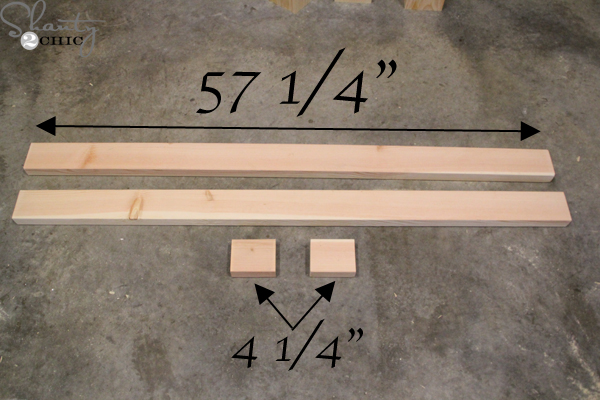 Next, I cut 4 2×4’s @ 57 1/4″ and 4 pieces at 4 1/4″. That’s it for cuts 🙂 We usually say measure and cut as you go but for this project, you can go ahead and make all of your cuts.
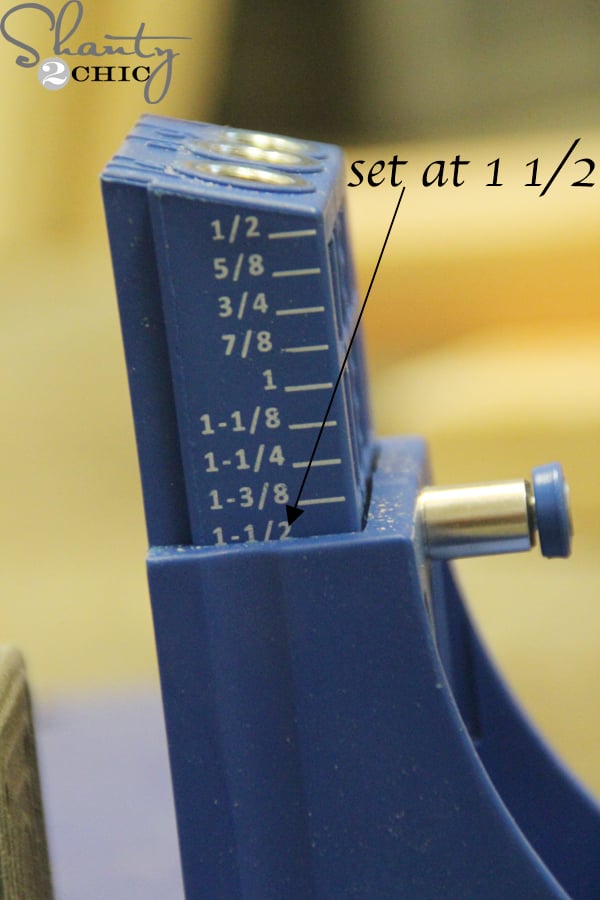 Next, I drilled all of my pocket holes. Set your Kreg Jig at 1 1/2″. If you don’t have a Kreg Jig, no worries, you can use 3″ wood screws and fill your holes.
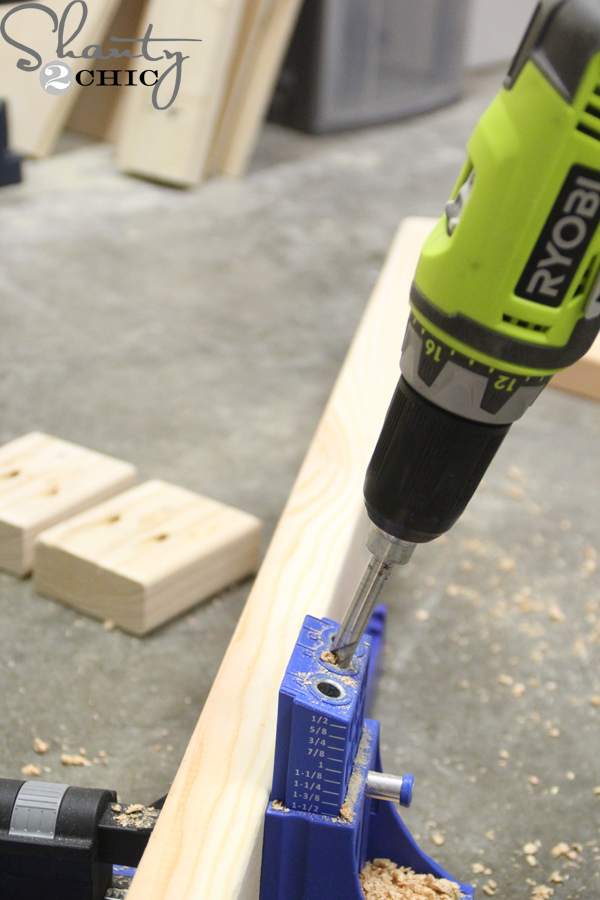 Follow the plans to see where to drill pocket holes. For this particular piece, you will only be able to use pocket holes in certain areas.
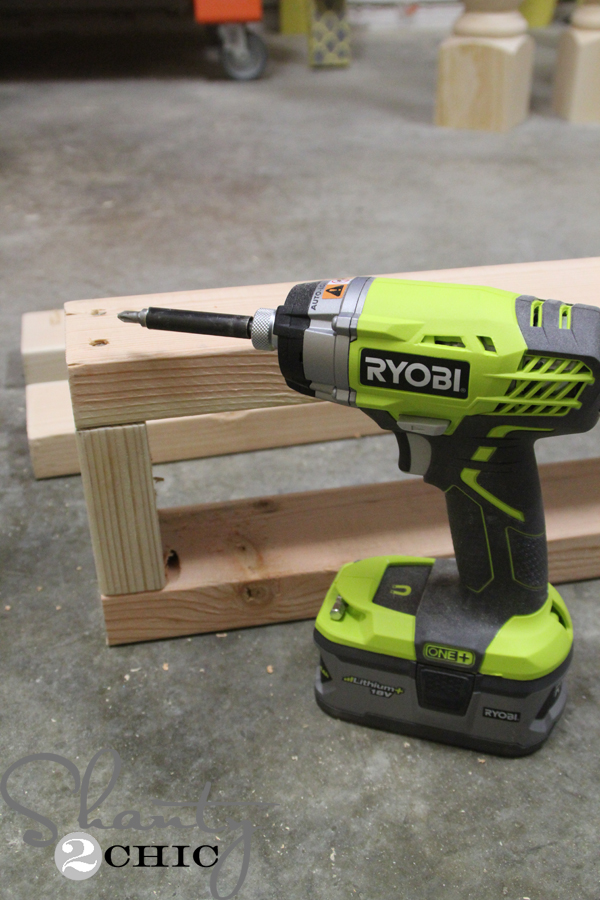 Start by connecting the 2×4’s. I used 3″ on the side that will face the wall and used 2 1/2″ pocket hole screws on the other side. I like to use my Ryobi Impact Driver when I’m attaching 2x’s! It’s one of my new favorite tools and It saves my arms 🙂 Build two of these and set them aside.
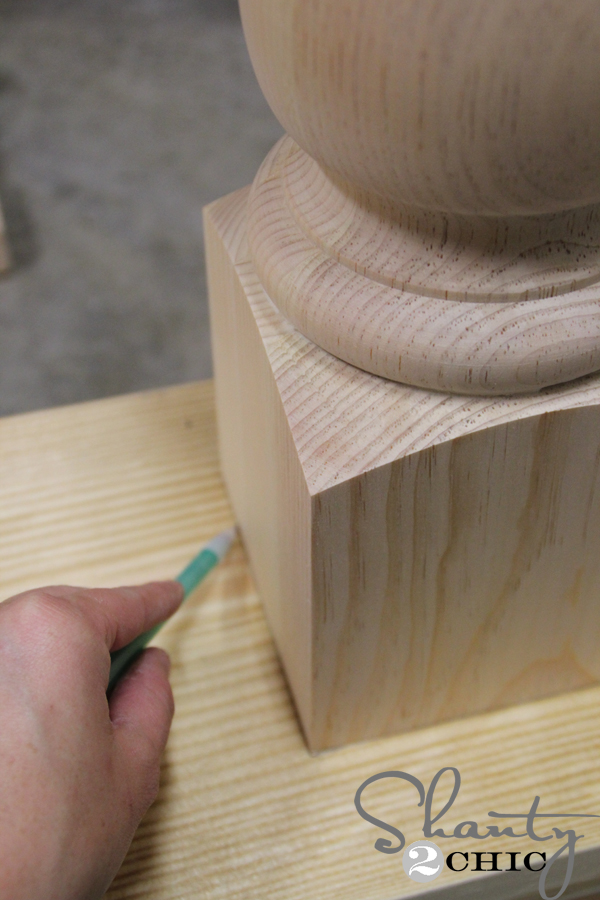 Now it’s time to attach the legs to the bottom 2×10. I traced around each leg before I flipped them over to attach.
 I used 3″ wood screws and my impact driver to attach the legs.
 Then I added one of the 2×4 assemblies and attached it with wood glue and 2 1/2″ pocket hole screws.
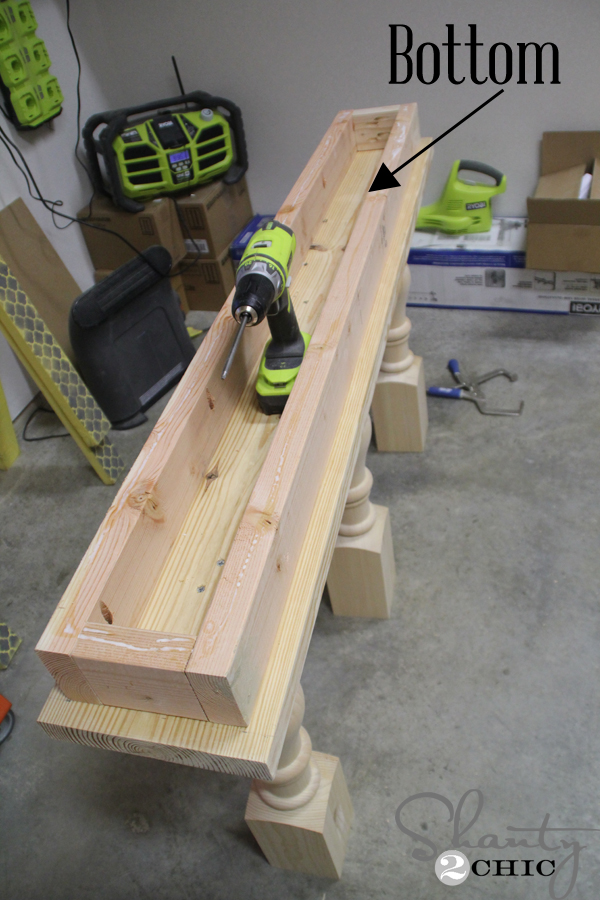
 Since this is the bottom of the piece, I used 3″ screws to attach the final 2×10 board. Don’t worry about filling your holes here!
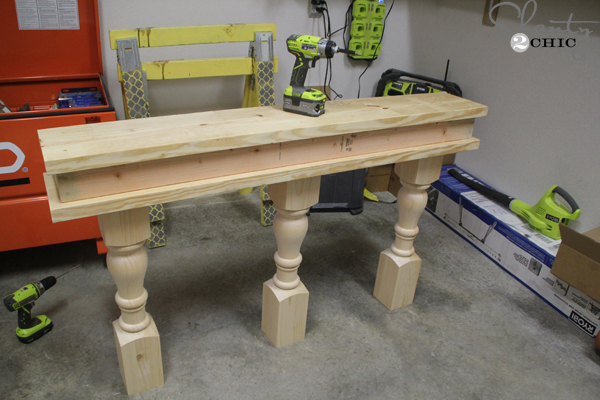
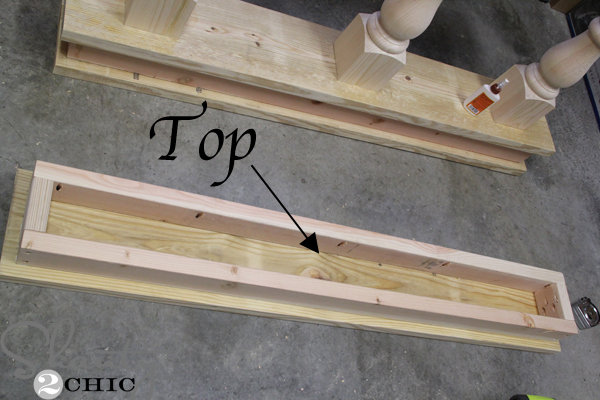 Now, flip the console over so the base is on the ground. Attach a 2×10″ to the top of the legs using 3″ wood screws and wood glue. Then, attach the other 2×4 assembly with 2 1/2″ pocket holes to the final 2×10 board. This 2×10 will be the very top of our console so we don’t want any screw holes.
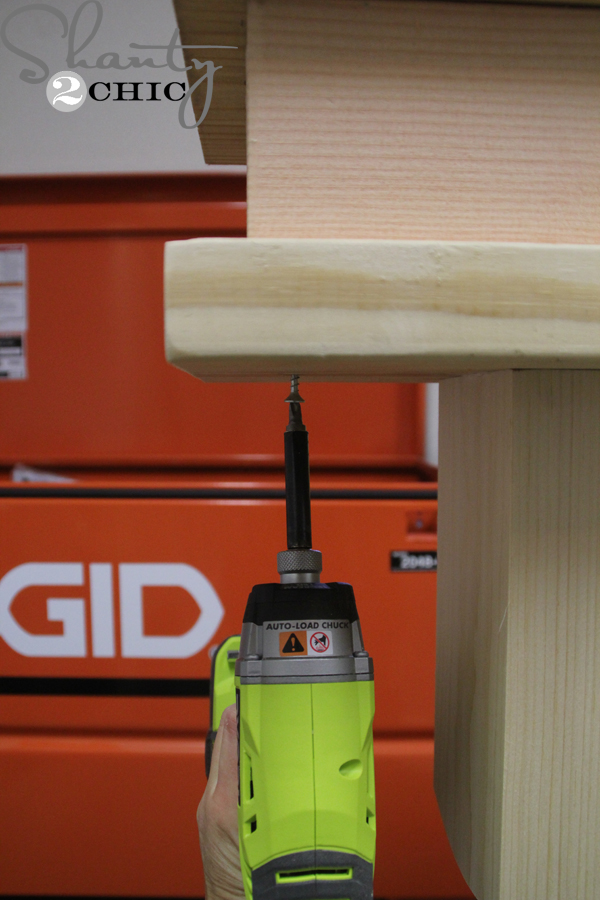 Set the 2×4 assembly on top of the console and attach it (from the bottom of the 2×10 into the 2×4 assembly using 3″ wood screws.
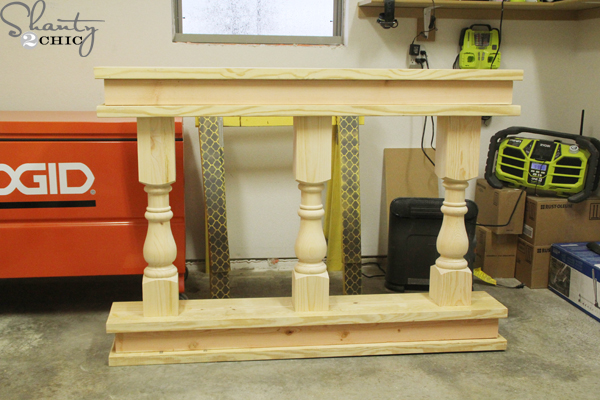 Here she is all ready for paint 🙂
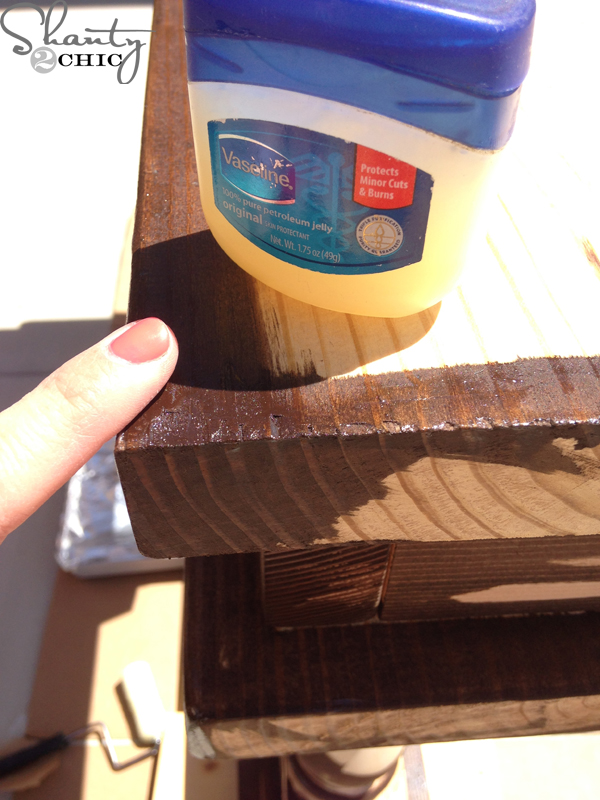 I used one of our favorite paint techniques to finish this off! I applied a bit of Rust-Oleum Dark Walnut stain around the edges of the piece. Once it was dry, I applied a little bit of vaseline on the edges and then painted two coats of Seine paint by Valspar,
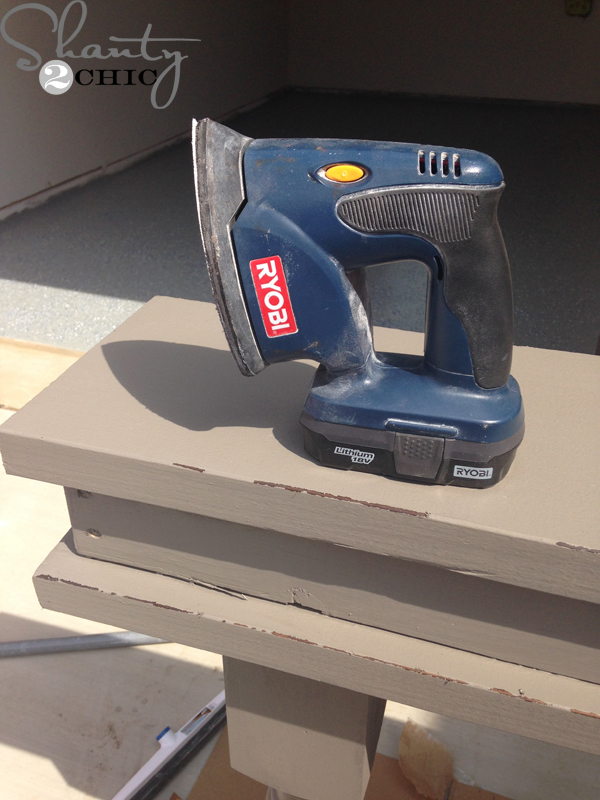 Once the paint dried, I used my Ryobi Corner Cat Sander to distress all of the edges. The vaseline creates a barrier between the paint and the stain allowing the stain to show when the paint is distressed.
 EEEEEEKKKKK!!!!! I LOVE, LOVE, LOVE this! It’s the perfect table for anyone that has a narrow spot that needs a little something 🙂 And, it’s super fun to decorate!
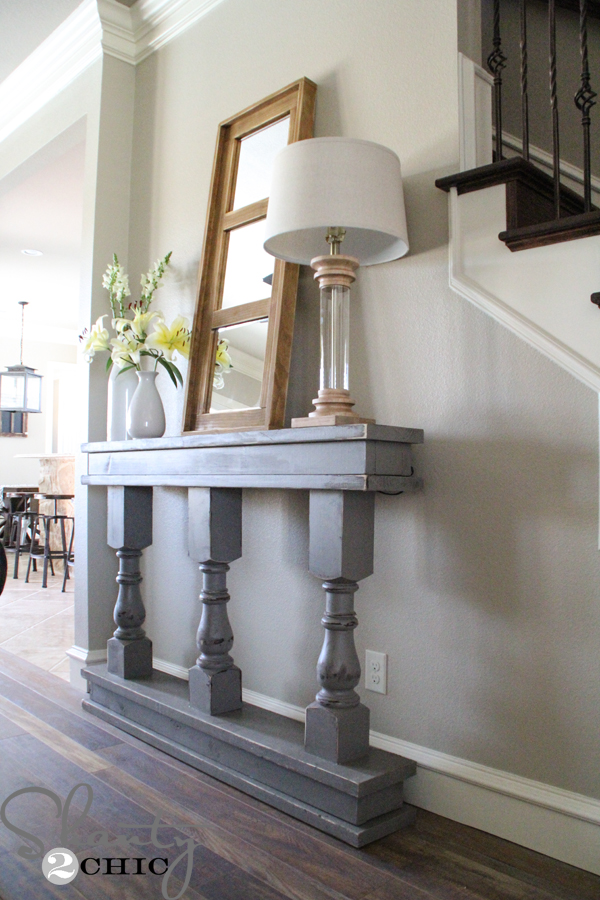
I hope you all love this console! Make sure to print your FREE Plans HERE! A huge thanks to Jay from Jay’s Custom Creations for taking our custom plans and converting them into PDF form for you guys! We always appreciate your shares and pins! Hope you enjoy this DIY Console Table 🙂
Do you love the wood floors in my living room? You can click HERE to find out all about them!
Thanks for stopping by!
Ashley


Can this be made with 18-20″ depth instead of 10″? Would modifications need to be made? Same question as below..did not see an answer. Also how tall does it end up being? Thanks
Can this be made with 18-20″ depth instead of 10″? Would modifications need to be made?
Can this be made with 18-20″ depth instead of 10″? Would adjustments need to be made?
I was wondering if your stain and paint are oil based or water based? Thanks 🙂
I love this idea and design!
Could you make the table with 2 legs or is the middle leg there for support?
You totally could 🙂 3 was just for looks!
Thank you so much!
I built mine on Friday in about an hour. Now the legs are not as big as the ones posted but they work. This was so easy to do. My wife asked me to do it and boom done.
Love this Curtis! Thank you for sharing your experience!
This was so easy, I also built a farm table and benches. Looking for Nightstands and dressers to do. And could use some plans for a barn door headboard style look. picture is of the benches and table. Another simple easy build
Love them!!! Have you seen our barn door headboard that we shared recently?
https://www.shanty-2-chic.com/2014/03/diy-barn-door-headboard.html
I’m in LOVE with this table! It’s perfect for our narrow entryway (and doesn’t get in the way of our 3 boys who race around the house like NASCAR.) I shared your ideas, photos, and printable plans on my blog this morning! Thank you, thank you!! ~ Andrea
http://www.curberry.com/fantastic-diy-console-table/#.U10c8_ldUxE
I absolutely love……….this piece!!!! Any chance you plans on the mirror? Thank you for your inspiration!!!!!!
Thank you Tammy! The plans are coming next week 🙂
Love this and so perfect for a narrow spot.
Thank you:)
Hi, I was given a pine kitchen table. I needed a slim console table for a narrow area, so we cut table in half longways added 2 small legs at the back for support and painted with annie sloane paint. sorry no pics folks not that offay with technology, but we gained 2 tables from this idea. cost pennies too.
Cool idea! Thanks for sharing Kristen!
I always use a candle stick for distressing. Have you ever tried that? I’ve never tried Vaseline. I’ll have to try it out next time and see if it works better. From the pictures of the finished piece though, it looks like the vaseline is working better. Looks great!
We have Jonathan! I think it’s about the same result but Vaseline is easier to apply in my opinion! Thanks 🙂
Love this and love the mirror too. Like how narrow it is so that it doesn’t take up too much space but adds a nice visual w/n the space.
Thank you Kristin!
Love this table! i have been eyeing one very similar at rh for my living room:) i really like that mirror, where did you get it?
Thank you Lorin! I actually made the mirror and I’m sharing a tutorial next week for it 🙂
So excited!! i have just started the whole building thing and am loving it:) Can’t wait to see the plans for the mirror. Thanks!
Thank you Lorin!!!