Hey hey guys! Happy FRIDAY!
I love the weekend. That’s all. Make sure to follow us on Instagram and Pinterest to keep up with all of our projects!
I am so please with how this last project turned out! I have been itching to build an upholstered ‘something’ in my house which led me to this!

How fun is that? This is such a simple build! You can download there free plans HERE, or by clicking on the button below. I will walk you through the whole build below like always! I had our good friend Jay of Jay’s Custom Creations put my design into a printable plan for you guys… He is awesome! Make sure to check his site out too!

So… let’s talk about this fabric! I sort of kind of love it. I found it on my very favorite fabric store…

You can check out the fabric HERE!
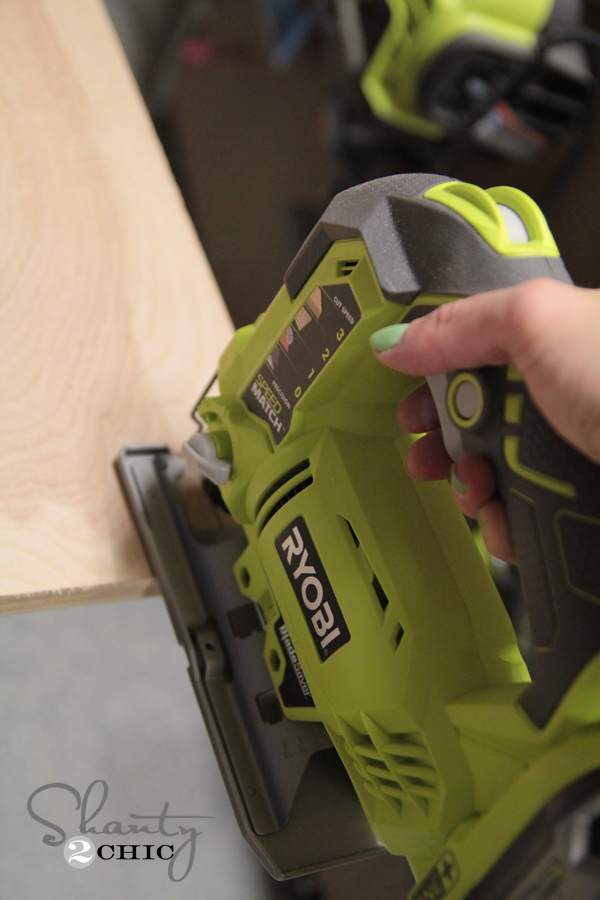
I started by cutting the plywood for this product. The bottom piece of plywood has squares cut out for the legs. I used my Ryobi Jig Saw for this part.
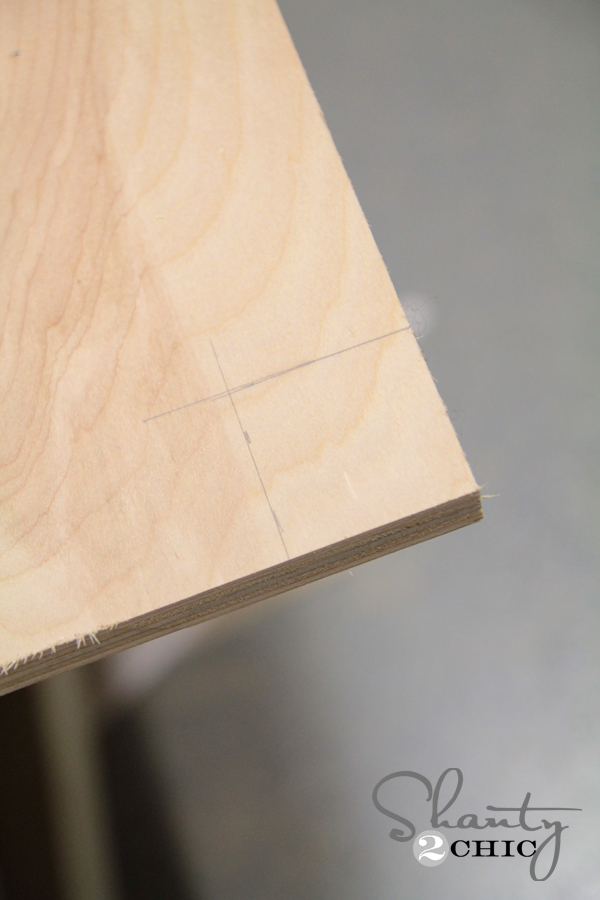
I started by tracing the squares on each corner.
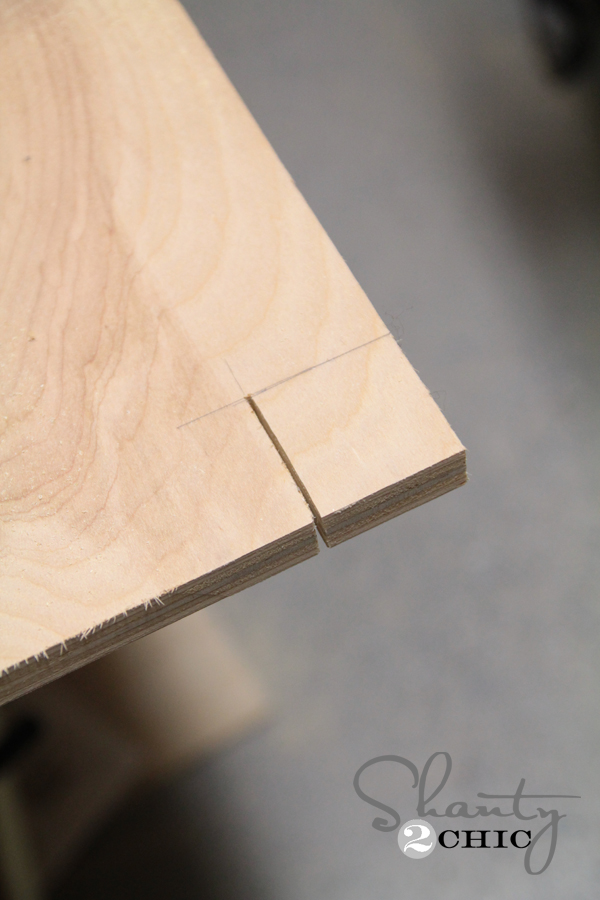
Then, I cut one line like this…
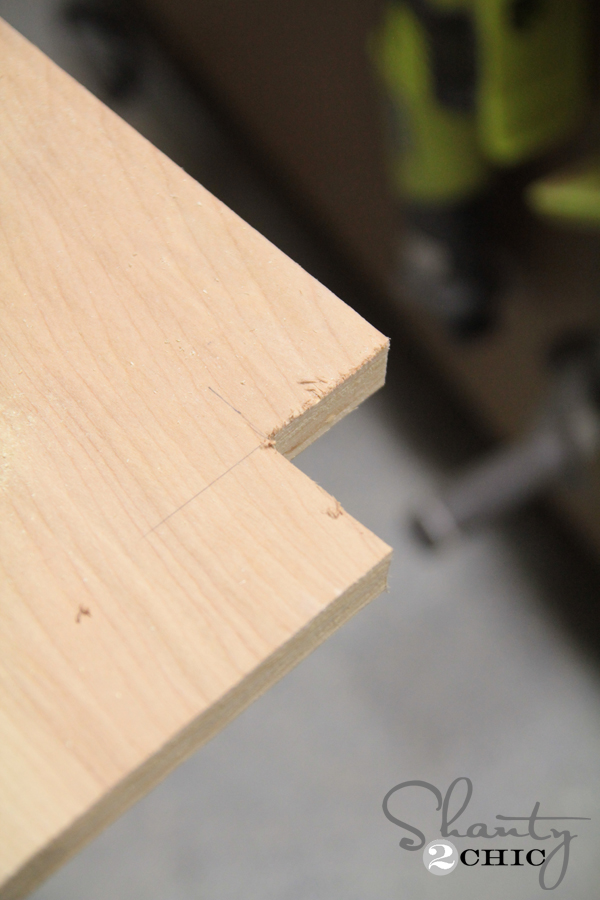
Next, I cut the second line and that’s your square!
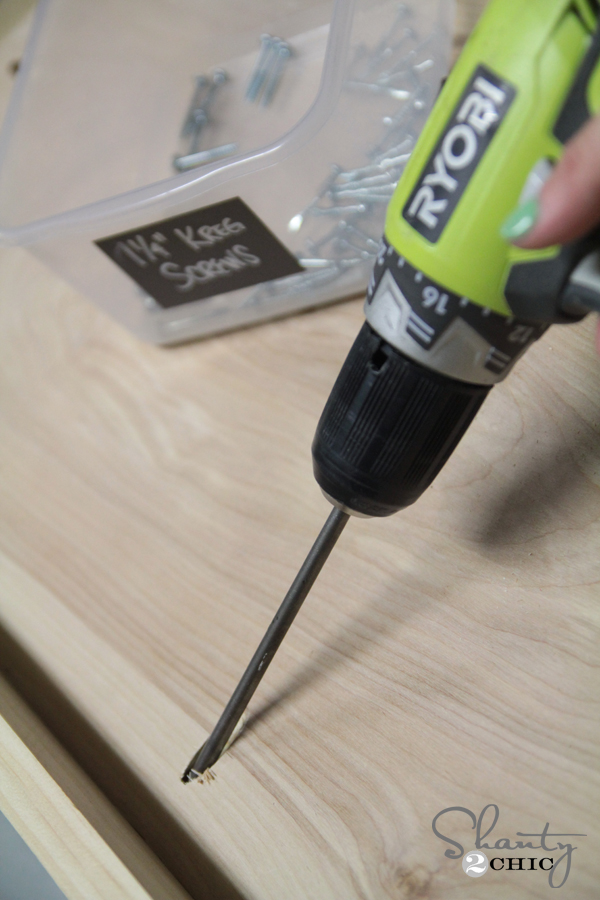
I did all four corners and moved on to the pocket holes. I used my K5 Kreg Jig for this part. We get asked all the time which Kreg Jig we use. Both of us used the K4 model for over two years before upgrading to the K5 model. They are both amazing, but the K5 has some new features making it even more user friendly and efficient. You can see that model HERE on Amazon!![]()
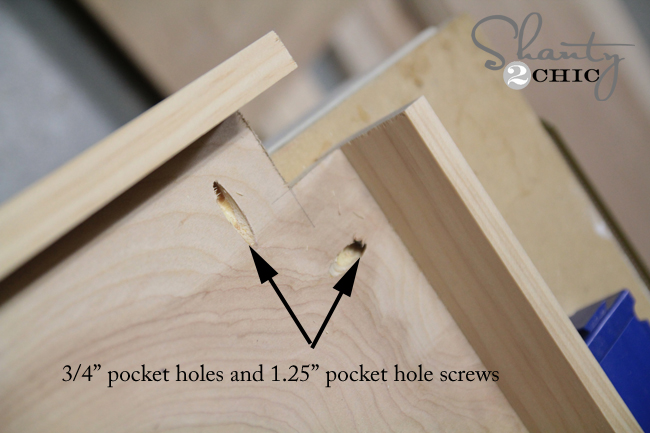
I used 3/4″ pocket holes for all of the holes on the bottom shelf.

You will put pocket holes on all 4 sides.

My next step was attaching the trim pieces. Our plans show the sizes of these, but I would remeasure on each side to get the exact length for this part. Measure twice… Cut once. 😉
You will attach the trim through the pocket holes. I also added a thin line of Gorilla Wood glue to all of my joints on this part.
Make sure to also add your pocket holes to the ends of the trim before attaching them. I speak from experience on this part…. Totally forgot. Oops! I had to go back with my Kreg R3 Jig to add the trim pocket holes on this part. I would have saved lots of time doing it the right way the first time! You will see in the photo below that my trim pieces are missing my pocket holes. Darnit.
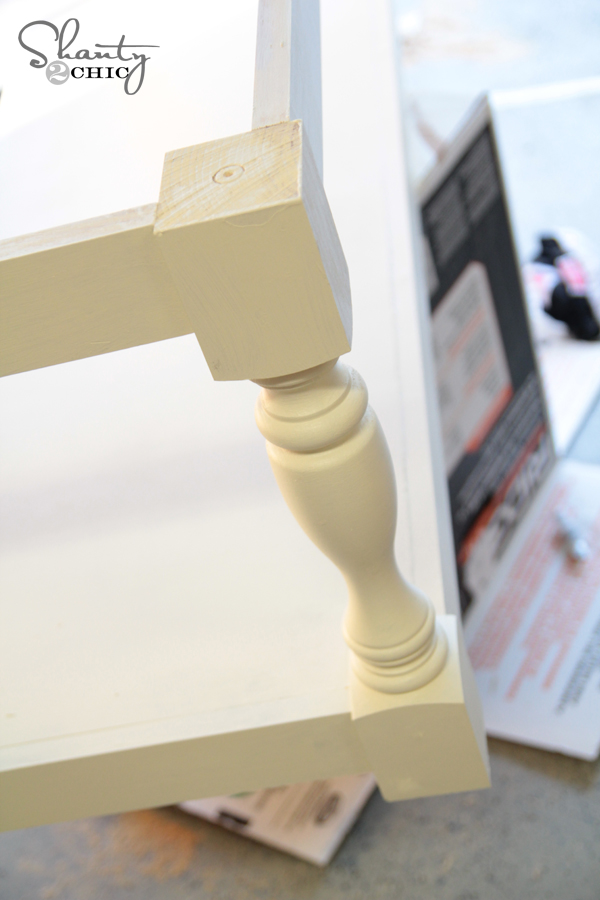
Once you have the trim pieces added, you will attach your legs! Those legs…. I LOVE them!
I worked with Osborne Wood to design the legs for this bench. I love how they turned out! You can buy the legs for your own bench HERE! I used knotty pine for mine making the legs under $17 a piece… Babam!
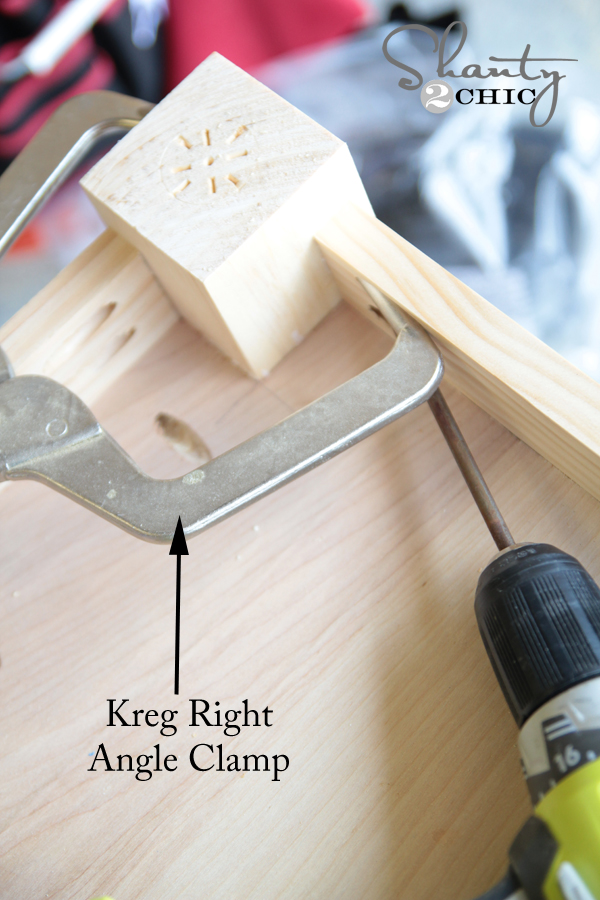
I attached mine with a little help from my Kreg Right Angle clamp. This thing is so great. It’s like having an extra set of hands. One end fits inside of a pocket hole and the other arm clamps to your other surface holding everything tight together.

I also added Gorilla Wood Glue to all of my joints.
My final step was adding my top runners. These will all get pocket holes that face up and on each end. You will use the pocket holes on the ends to attach to the legs, and you will later use those other pocket holes to attach the bench top.

Once I had all 4 legs attached, I gave the thing one coat of Varathane stain in Early American and let it dry!

I added some Vaseline to the stained bench using THIS method I shared here!
After doing that I painted the whole thing using a Sherwin Williams color called Antique White and let it dry really good!
Now for the top!
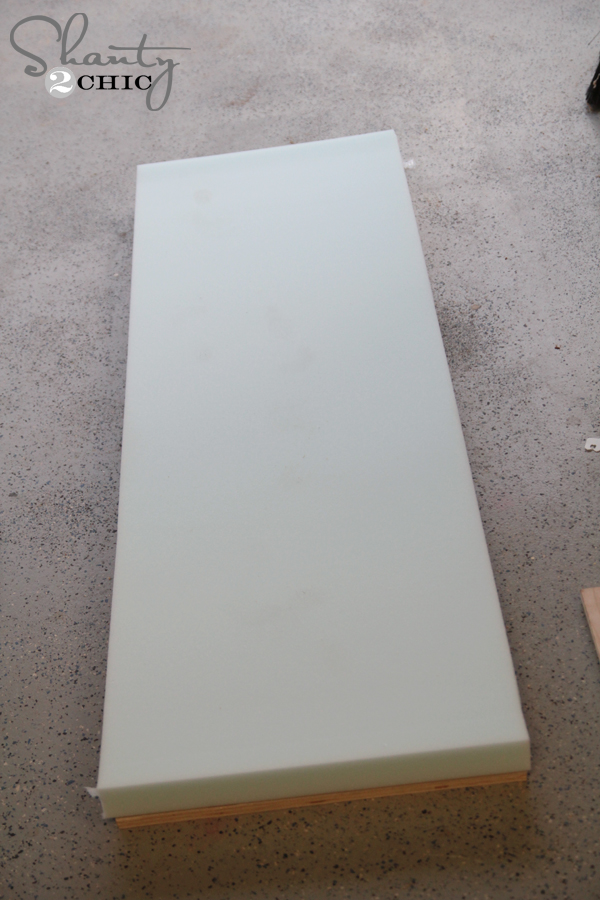
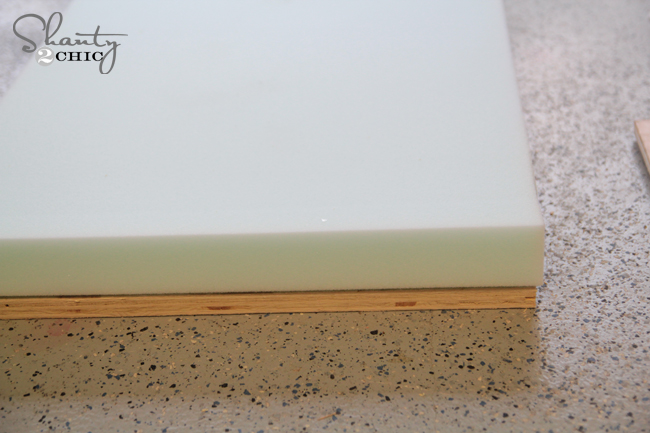
I started with my piece of plywood.

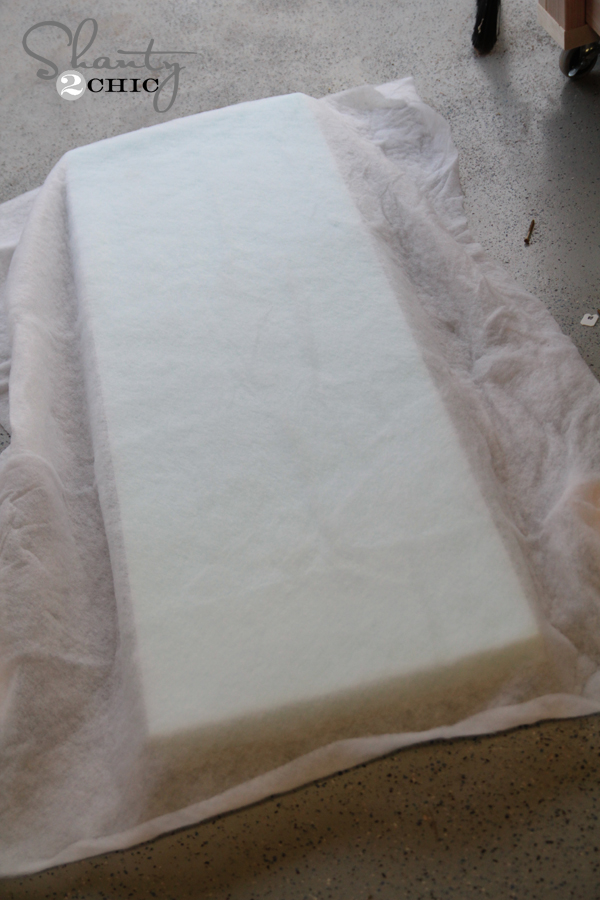
Next, I covered it with a piece of furniture foam from Online Fabric Store. THIS is the foam that I used. You don’t have to cut it at all… It comes the perfect size and ready to go.
It will lay right on top of the plywood like this…
Next, I covered this with a thin piece of batting. This will just soften the edges a bit when I cover it with fabric.
Next I laid my fabric on the ground good side down and turned the whole bench piece on top of it with the batting facing down.
I used my 18V Ryobi Airstrike Stapler to pull back the edge of the short side and attach it to the wood board. I used 1/2″ staples.

You want to pull snug but evenly as you are doing this part.
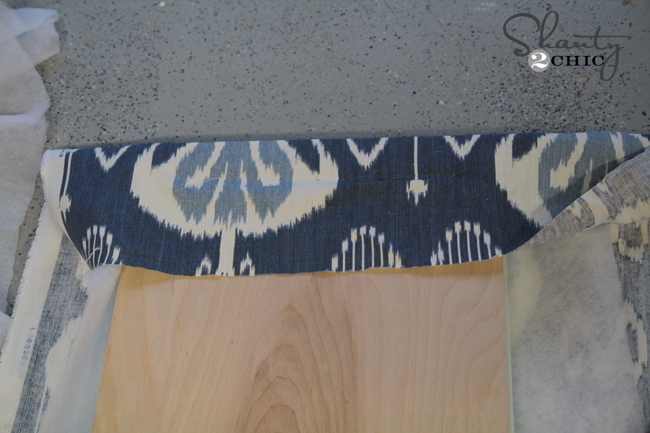
After doing the short sides I moved to my long sides and did the same thing. This will leave your corners loose and open!
I take my hands and fold them up a bit like an accordion and attach the corners down with staples like this…
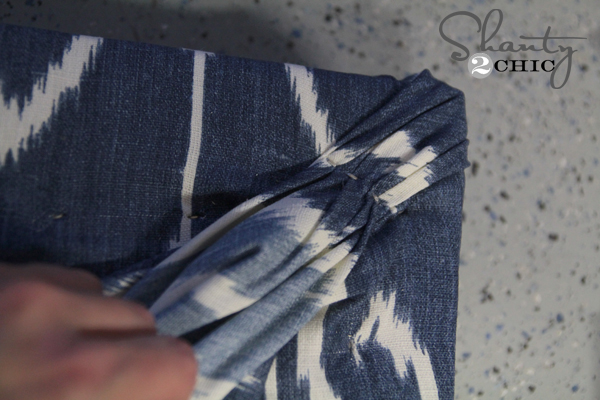
The extra fabric on your corners can be cut so it’s not thick!
The bottom will look a bit like this!
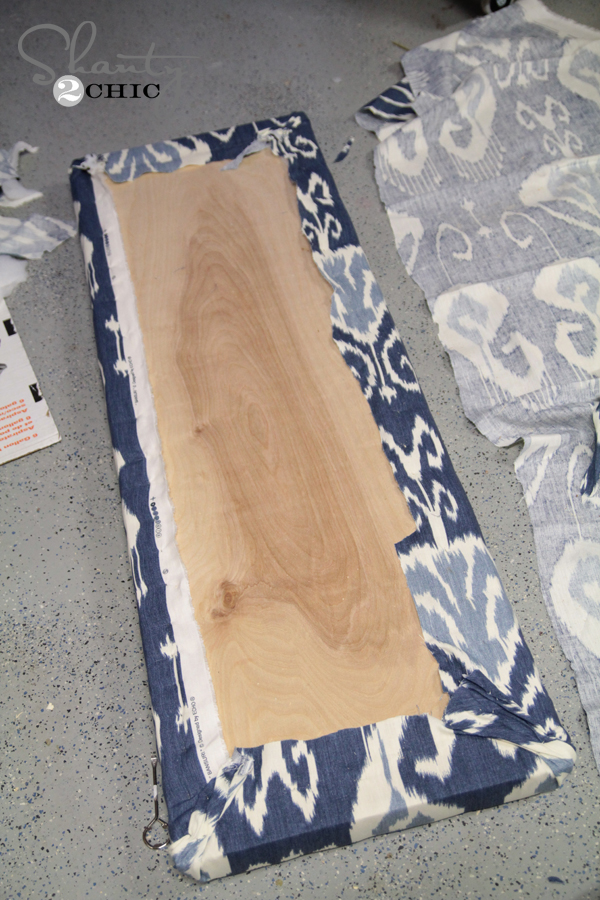
No perfection needed people! 🙂
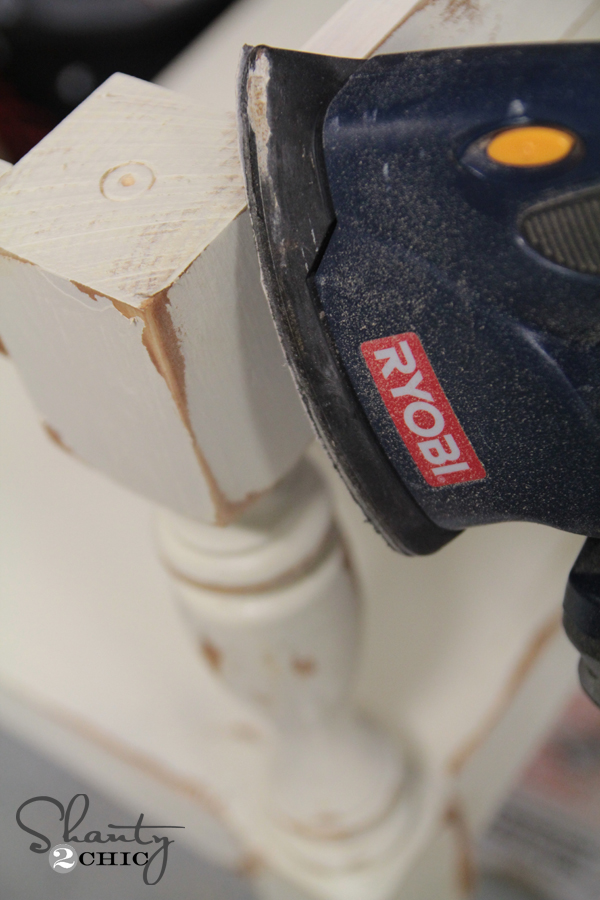
Before attaching it to the bench, I used my Ryobi Corner Cat sander to go over the edges of the bench. Wherever you put the Vaseline, the paint will just sand right off.
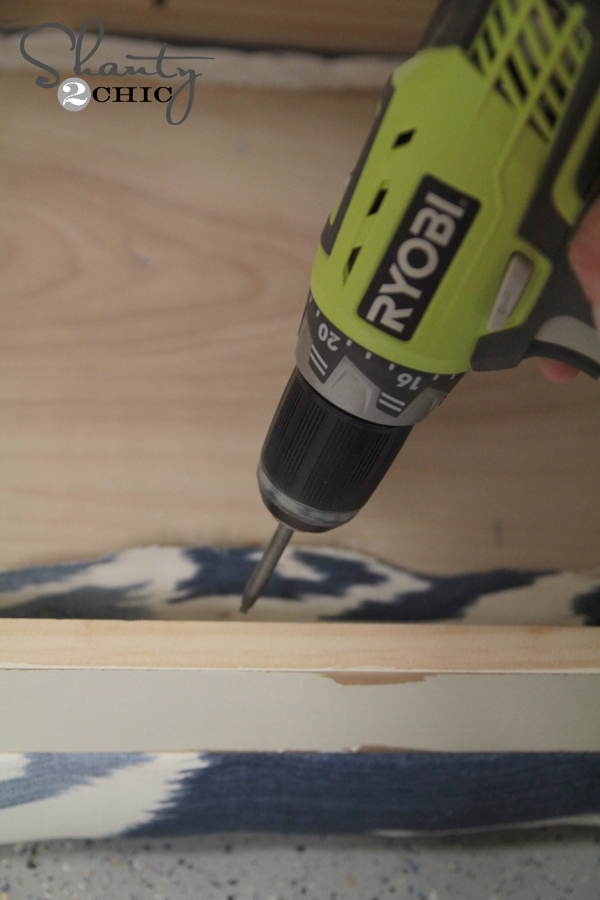
Now attach the bench top to the bench! I turned everything upside down for this part and used 1.25″ pocket hole screws through the bench pocket holes and into the cushion.
Once you have it all attached it’s time for nail heads! THESE are the nail heads that I used also found on Online Fabric Store!
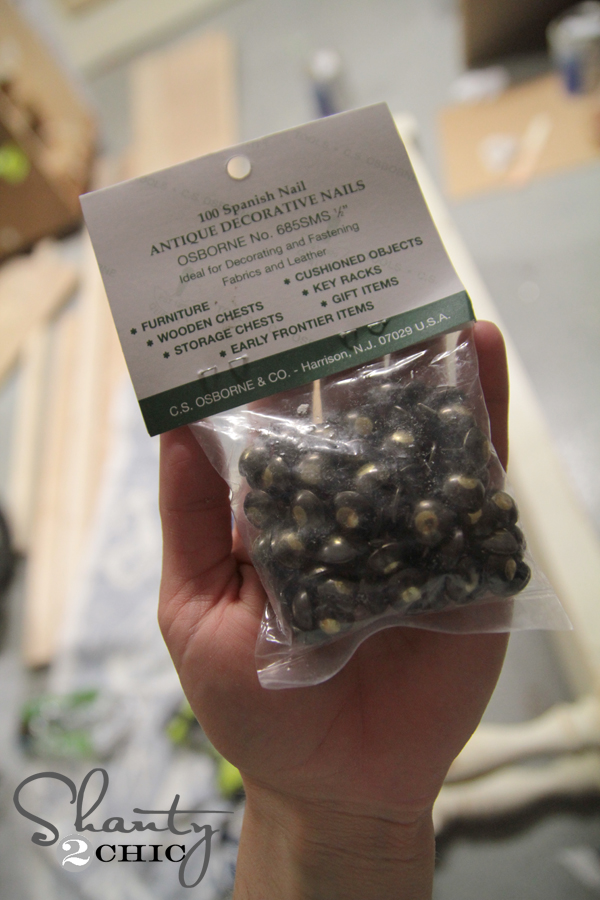
I used exactly 3 bags of nails for my bench. I started by pushing them into the wood bench top.
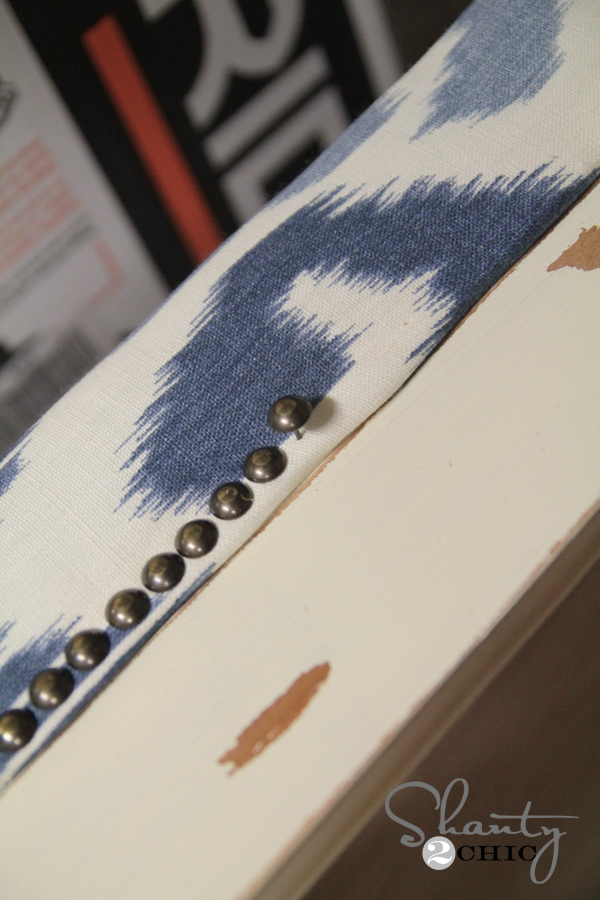
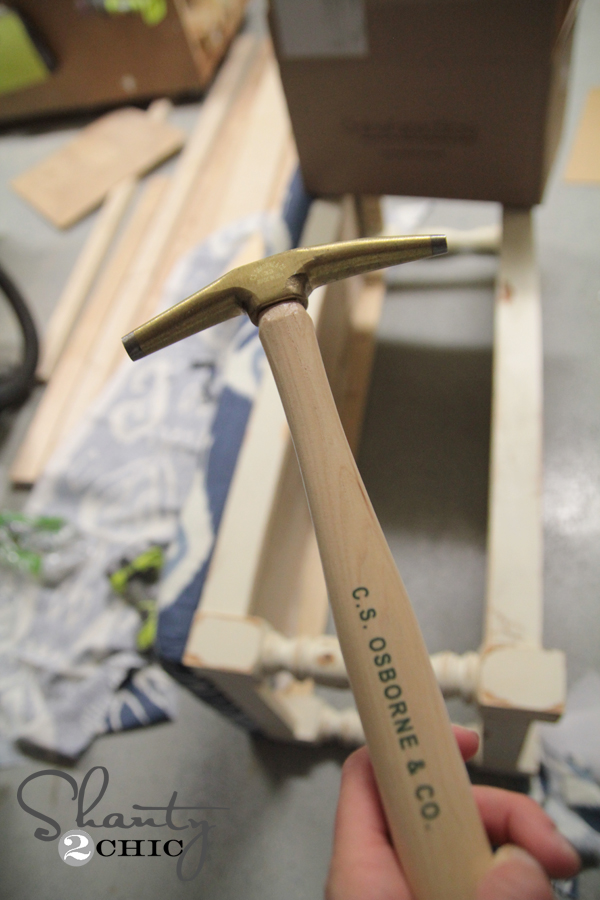
I used THIS upholstery hammer to tap them firmly into place.
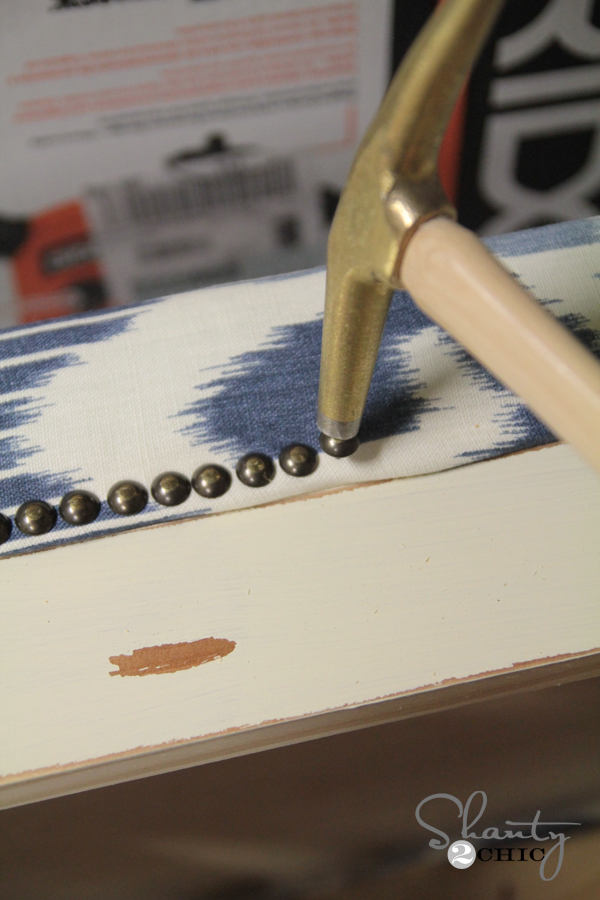
Once you have tapped them all into place, you are set!
Here she is all finished up!

How fun? I love how just a little fabric can add so much to a space!
Thanks so much for stopping by! Let me know if you have any questions at all!
~Whitney


I made this bench because I like the shoe storage underneath. I decided to go with a stained top instead of fabric. I love white paint and stain with each other. I did everything the same as the article except for the top which is nothing more than 2×4’s which I dimensioned on the jointer, planer and table saw. I love it.
How much Fabric did you order for this? Thanks!
Thanks for suggesting a place to find the upholstery foam! I was struggling to find an affordable place to order from! How much fabric did you need for this project?
This may be a silly question, but how do you know how big to cut the corner for the legs? I have a set of legs already (yeah!) but they are the kind that screw in the top. But I would still want to cut out the bottom piece so the shelf is flush. Any suggestions???
This is awesome! Looks great and your tutorial is is the best – so detailed and very well explained.
Carpet cleaners Fulham
This is so pretty! Do you have to do the decorative nail heads or can you finish it without them?
Wow! That is a DIY must do!! Can’t wait to get to the lumber store & order my fabric…
I must say (and have been wanting to say this for a while now) you two are the most inspirational “build like a girl” women around. Ever since I found your blog about a year or so ago, it has made me want to build & create like never before. I just treated myself to a sliding compound miter saw … nothing I’d ever “treat” myself to before Shanty-2-Chic. So thank you for the inspiration & filling my limited free time with great builds/projects.
Best message ever! Totally made our night!!! :-). Thanks Natalie!
Nice! I would like to upholster the top of my coffee table and put baskets or boxes below. It’s nice to see how it would look, thanks!
What did this project cost you?
I would love to know the cost of the project, minus the fabric. I did not see it posted and usually you state the cost of your projects. Thanks so much!
OMG!! This is hilarious, I saw a bench almost identical to this on PB.com and I thought to myself that would be so easy to make…have Osborne Wood make the legs, add some simple boards, upholstery, nail heads, viola!! LOL!!! And then I happened to check your website because I hadn’t in a few days (and yes I can only go a “few” days without checking out your website because I am addicted – there I admitted it…lol) and there she was… your bench, beautiful, sitting there so perfectly, begging me to build her!! 😉 Lucky for me, you did the dirty work and saved me some money since I didn’t have to get a custom quote on the leg!!! Whoop!!! Thanks ladies!!! O & I would just like to say great minds think alike…even if that is an insult to you girls!! HAHAHA!!!
I did see that osborne has it named after you guys though, so I found it:)
Here is the link! http://www.osbornewood.com/1337.cfm
I still don’t see that the link to the legs is working. Would love to do this project;)
This is awesome! I don’t think the link to the legs are on here though?
Here is the link sorry!
http://www.osbornewood.com/1337.cfm
I don’t see the link to the plans! Am I missing something? I love this project!
Whoops! Fixed it! Thanks for catching me!