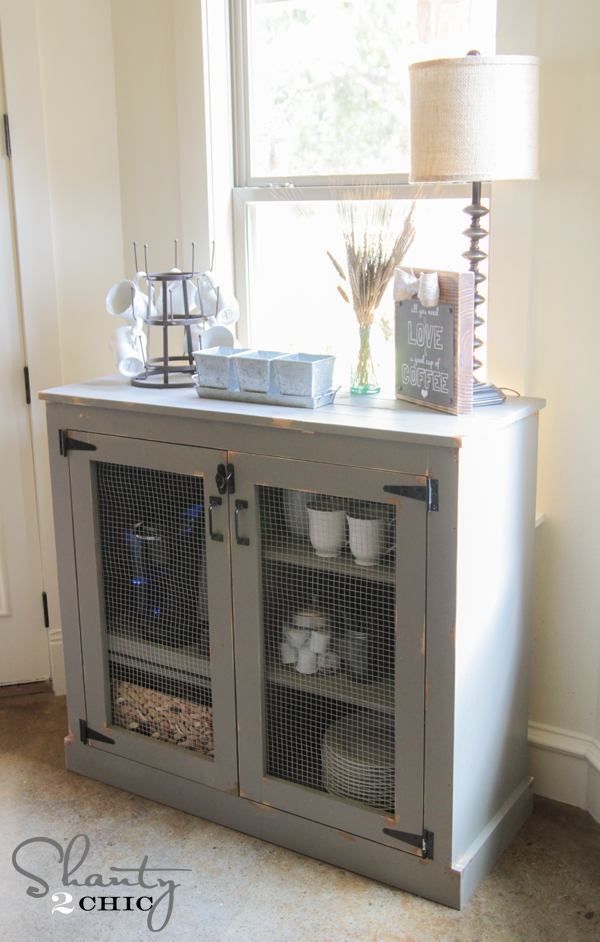
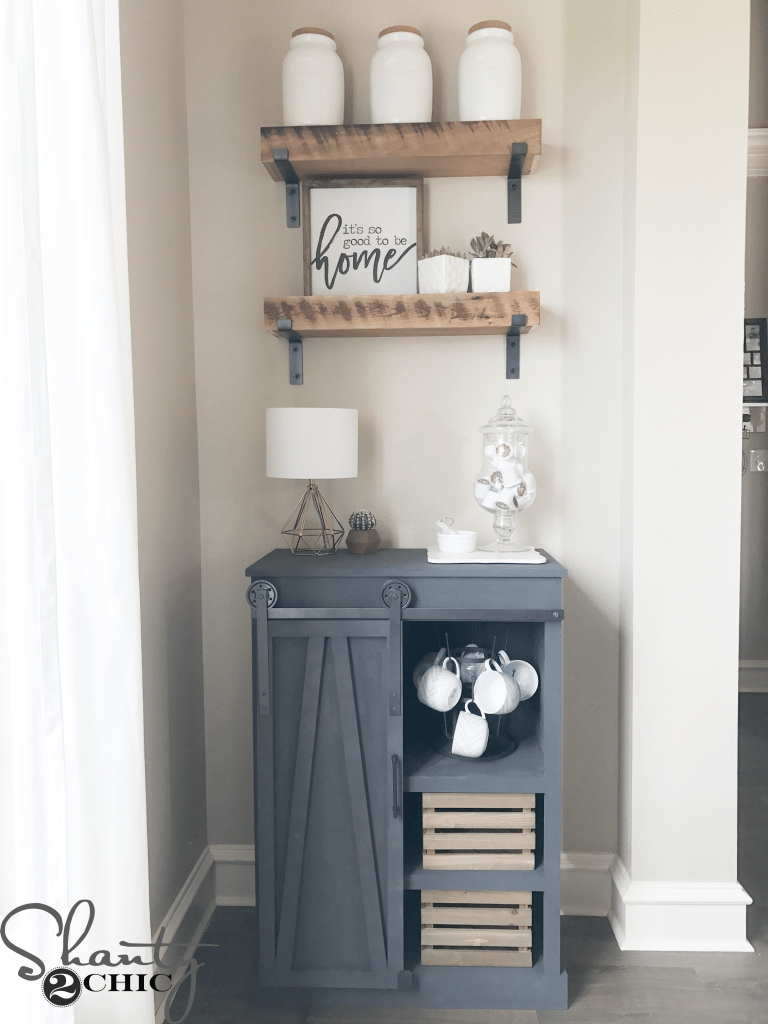
I am SO excited to share this piece with you today… It definitely has made my Top 5 builds yet!
I have a love for coffee. LOVE, it’s part of my every morning routine. I have been a Keurig owner for about a year now, which took my coffee love to an even bigger level, you hear me? The only thing I don’t love about my Keurig is the amount of space it takes up on my countertop. I decided it was time to give it a new home. This is what I came up with! Check out my new DIY Farmhouse Coffee Cabinet!
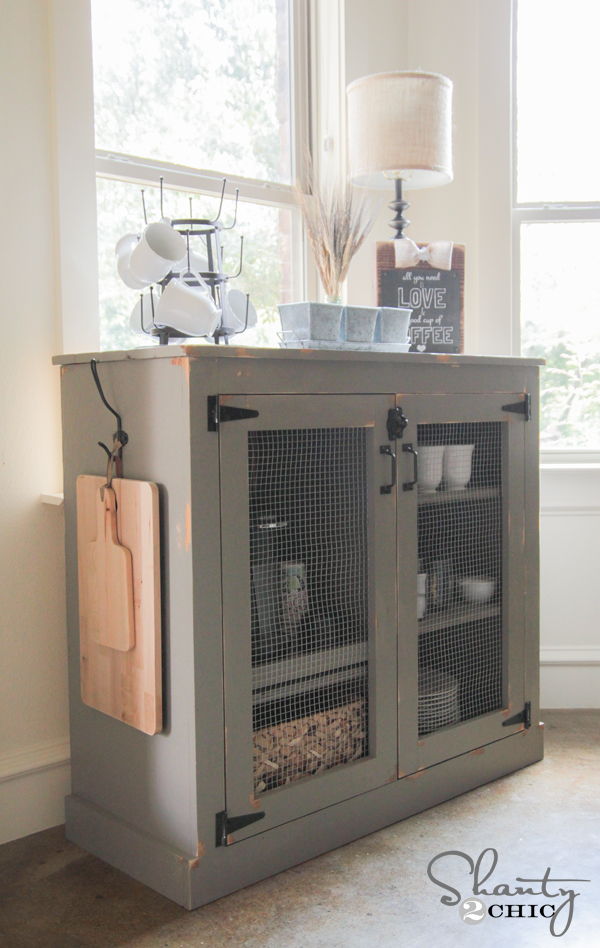
Ok, so although I am calling it a coffee cabinet, this baby can be used for just about anything! It’s a great piece of furniture for any space, it’s a good size and provides lots of storage. The entire piece is very simple to build using a few tools.
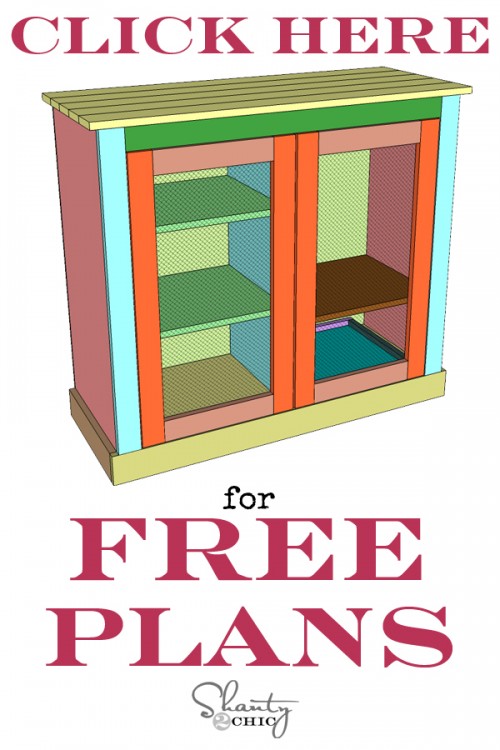
As always, you can download the FREE PRINTABLE PLANS with the supply list included, for this cabinet HERE, or by clicking the button below. I will walk you through the whole build tutorial below, as well!
So, lets get started! Just a head’s up… I did assemble mine slightly differently than our plan calls for. I added an extra piece of wood at the top to create a box. It’s not necessary to do that, so we left it off the plans. Either way will work! Just let me know any questions. 🙂
The cabinet box and shelves are made with 3/4″ Purebond Plywood. This can be found at Home Depot in 4′ x 8′ sheets. For me, it’s impossible to get it home in the Suburban with the 5 kiddos, so I have the nice guys at Home Depot rip it down for me. For this cabinet, I had them rip two cuts at 15 3/4″ and one cut at 15″. You can see the diagram below to see what I mean…

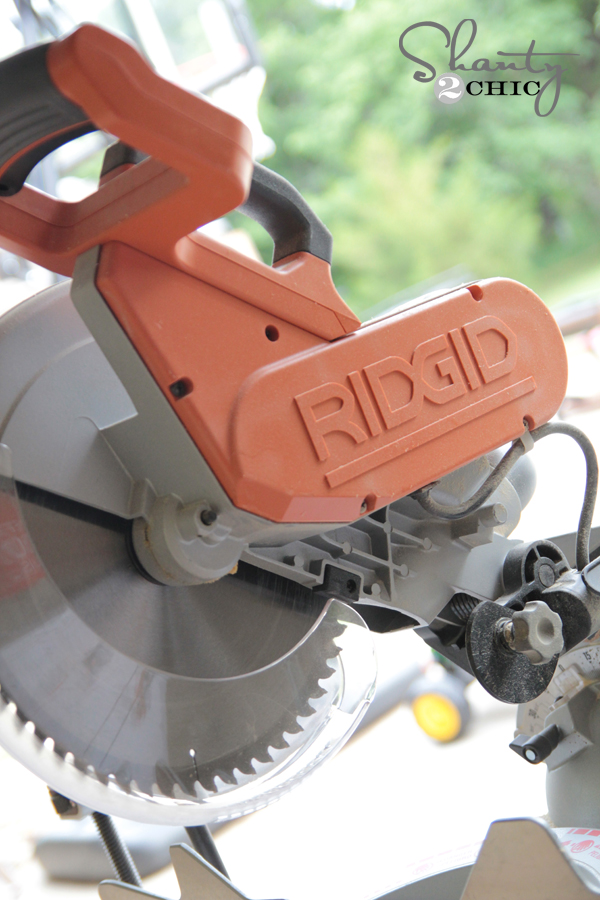
This gave me three boards that are MUCH easier to load in the car. When I got it home, I made all of the other cuts using my Ridgid Miter Saw, aka, my very best friend ever.
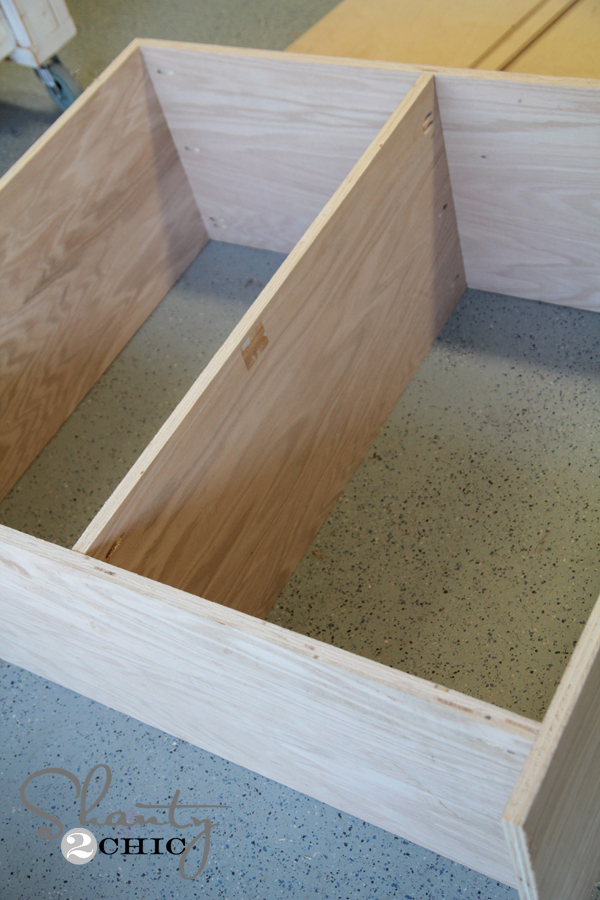
The first step is building the box of the cabinet. This part uses the 15 3/4″ plywood.
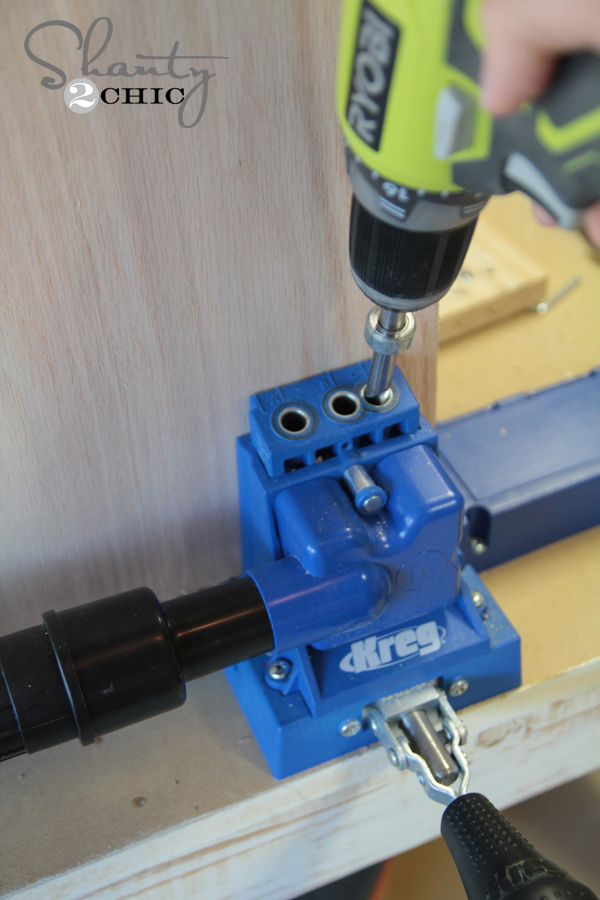
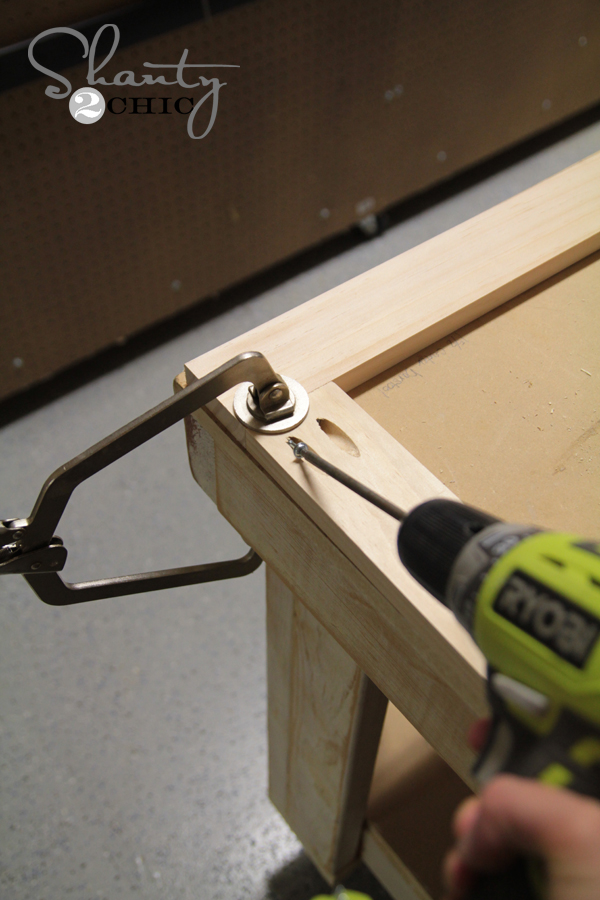
To connect all of my pieces, I used my K5 Kreg Jig! We get asked all the time which model of Kreg Jig we use. Ash and I both used the K4 model for years and love it. You can see that model HERE![]()
. We both recently upgraded to the awesome K5 model, which has some cool upgrades and features making it even faster and easier to use. You can check out the K5 model HERE![]() !
!
For this whole build, I used 3/4″ pocket holes and 1 1/4″ pocket hole screws.
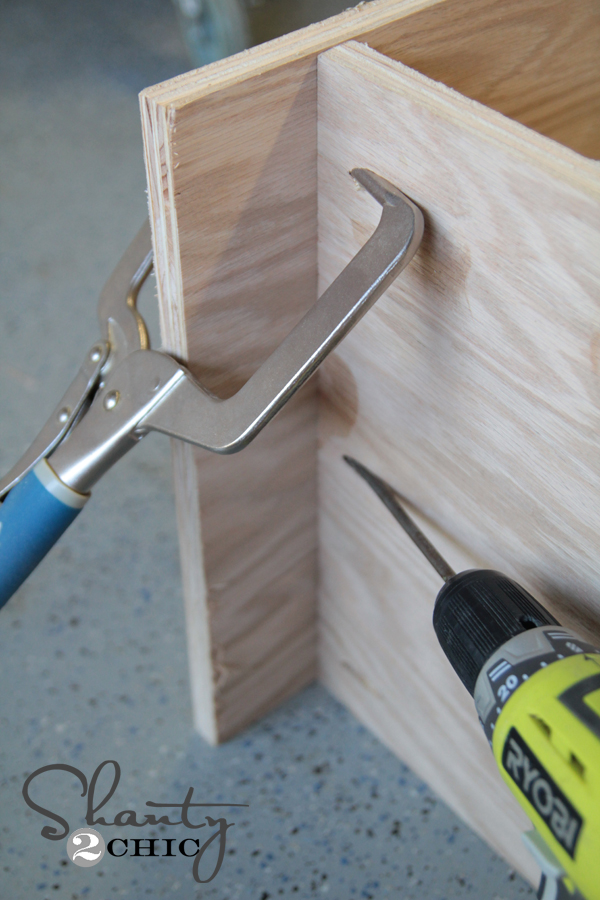
I put the box together like this below using 1 1/4″ pocket hole screws through all of the pocket holes I already made. On our cut lists in the printable plans, anywhere you see an arrow on a piece of wood, that indicates a pocket hole. Make sure to make all of your pocket holes before attaching anything!
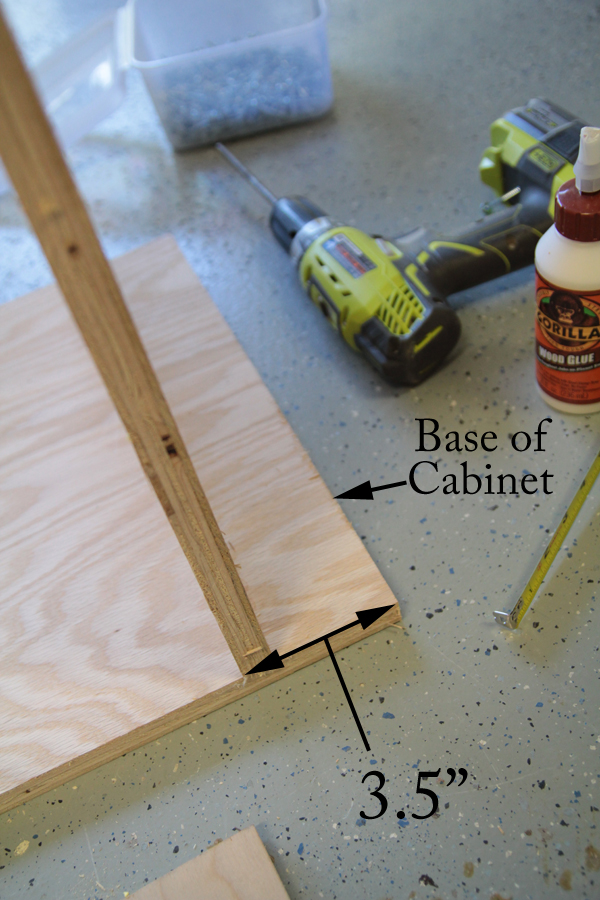
You can see I have lined up the bottom shelf of the piece at 3.5″ from the bottom of my side pieces.
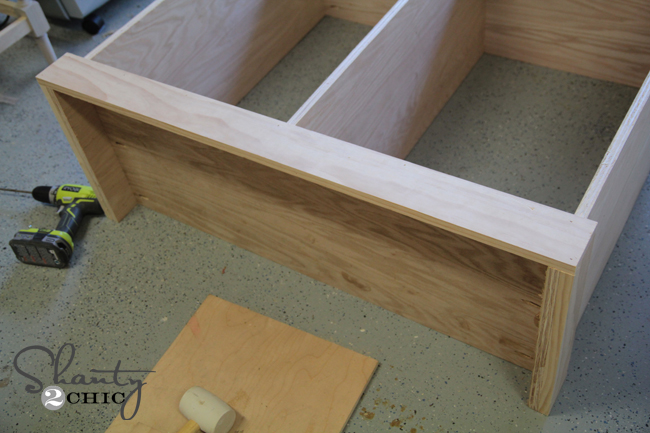
I used a line of Gorilla Wood Glue on each seem and held it all in place with my Kreg Right Angle Clamp. I used my Ryobi drill to drive the 1.25″ pocket hole screws through the pocket holes and into the side pieces.
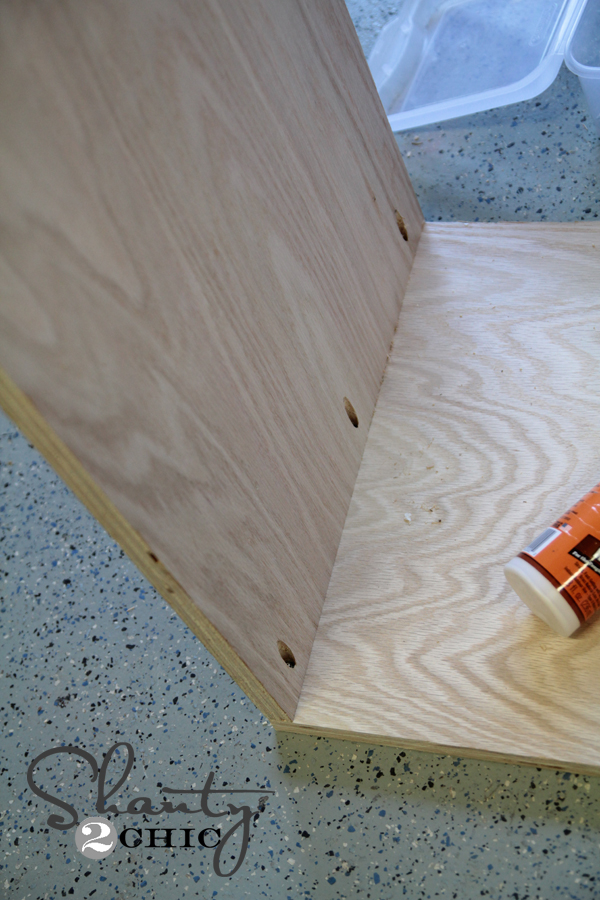
This is a picture of the top of the box. I have it turned upside-down on the ground. You can see the pocket holes I made here also attaching to the side pieces. The top of the cabinet will be flush with the top of the two side pieces.
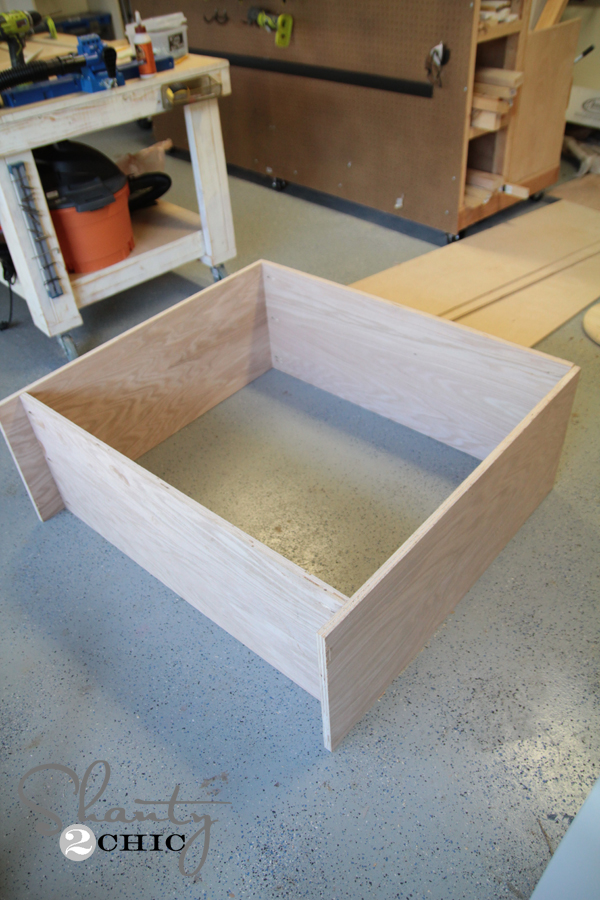
And bam… You have a box! 🙂
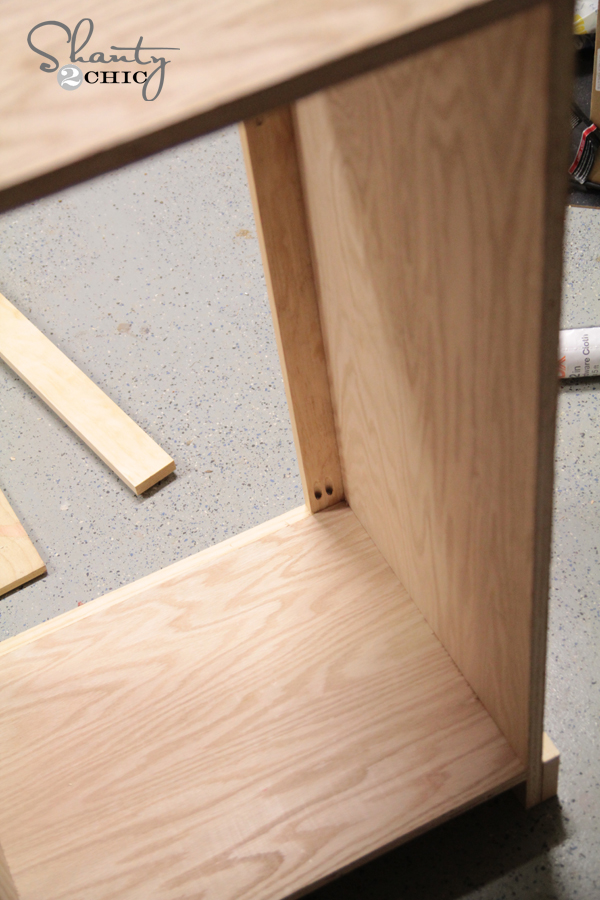
Now, add the middle shelf! Attach it with pocket hole screws through pocket holes and into the top and bottom of the box.
Next, I added my bottom trim pieces. I used a line of wood glue and my Ryobi AirStrike 18 gauge nail gun to attach the trim pieces.

I also added my bottom trim piece the same way on this part.
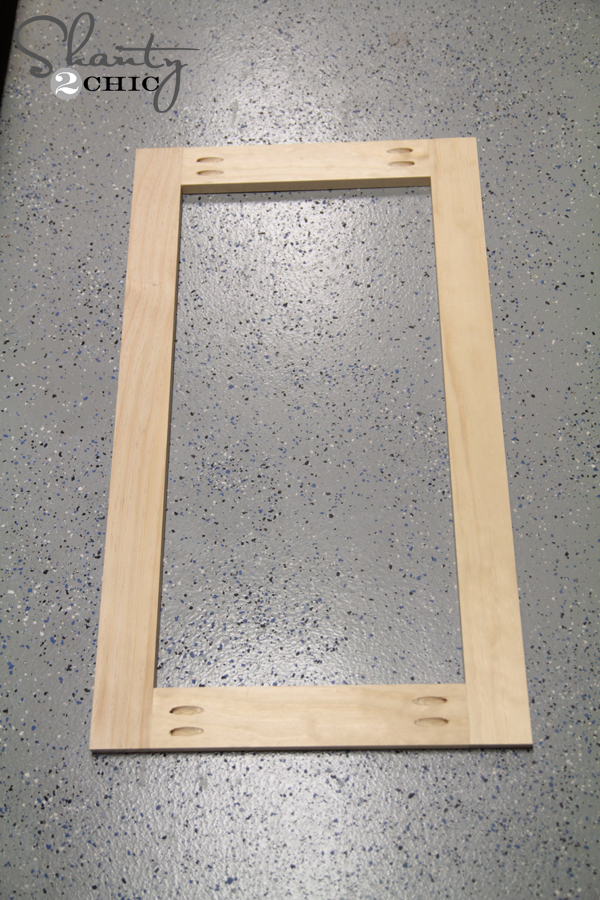
Now to build that face frame! This is simple! Just a few quick straight cuts and some pocket hole screws. I am looking from the back of the cabinet and into the front where you can see the pocket holes on the bottom where this part attaches to the bottom trim piece.
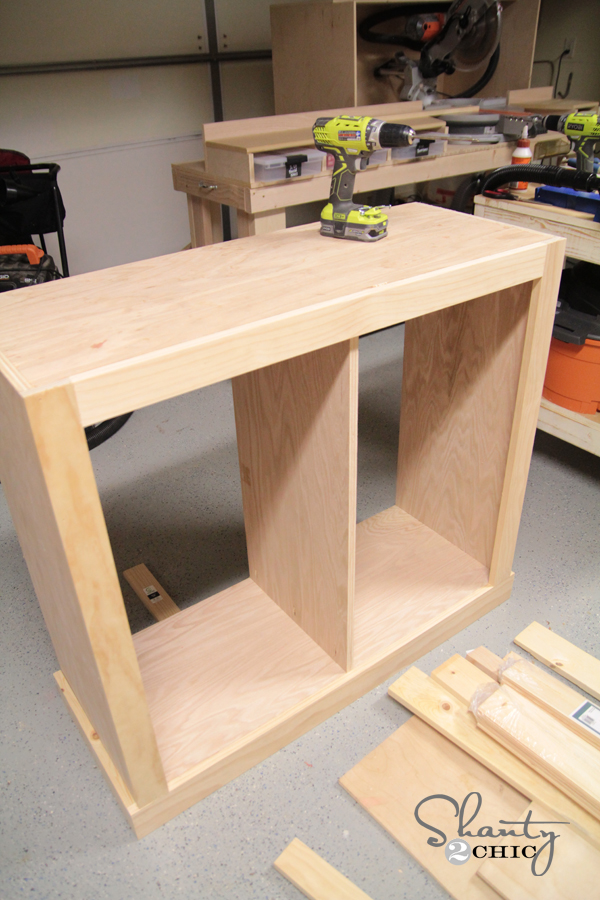
I added my shelves next! Each cabinet piece will be flush with the back of the cabinet and set back 3/4″ from the front.
You can set yours where you wish to fit your storage needs. On one side I chose to space two evenly, and on the other I set one a bit lower so I could have a space for the Keurig. Each shelf will need pocket holes on each 15″ long end to attach to the sides of the cabinet.

I built my cabinet doors next!
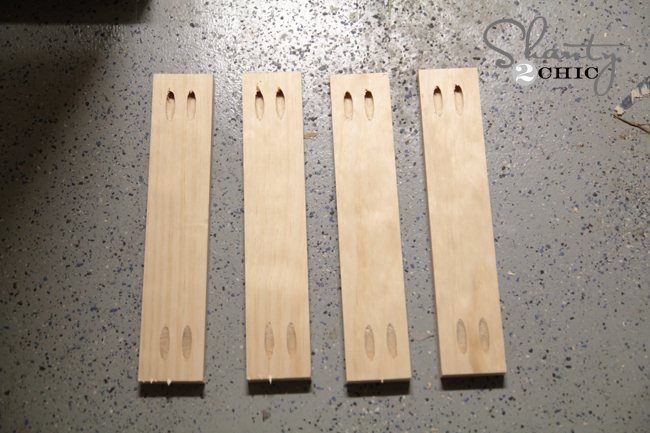
Although we give you guys the cuts for these doors, I always like to measure the opening before making the cuts to be sure on the size. I like to make the doors 1/8″ smaller all around, which would be 1/4″ smaller than the width and height of each opening. For the doors, you will have 4 longer pieces without pocket holes like this.

You will also have 4 smaller pieces each with pocket holes on both ends like this.
I attached these pieces using wood glue and 1.25″ pocket holes screws to create rectangles.
Each door looks like this!
Once the doors were finished I attached my back. You can have Home Depot cut this for you as well, and use staples to hold the back in place since the material is only 1/4″ thick.
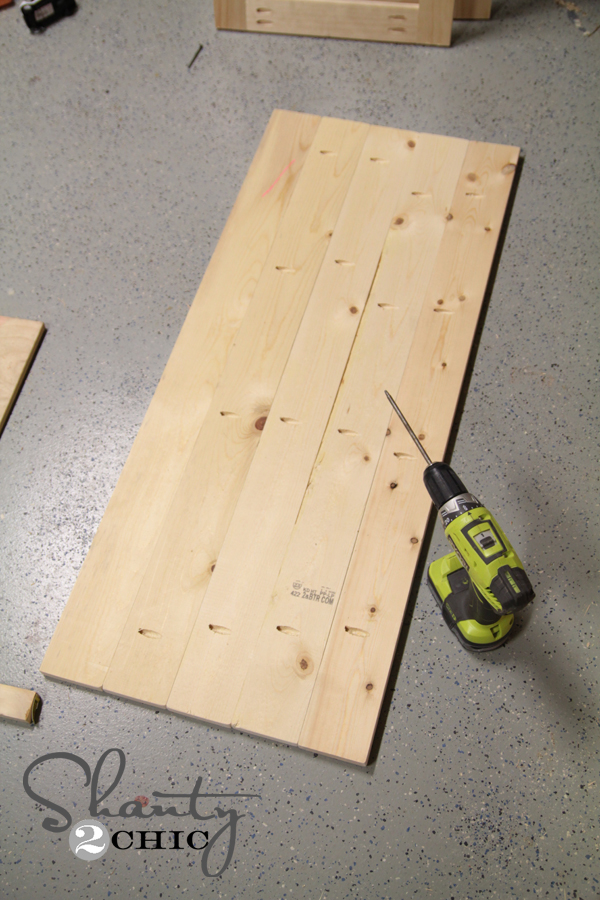
The top is planked boards. I used my Kreg Jig to attach those as well before nailing them down to the cabinet.
Now for the drawer… My fav part!
I decided to make a little pullout drawer for the coffee maker to sit on. I thought this would make the water easier to change out, and it was just plain cool. This is SO simple.
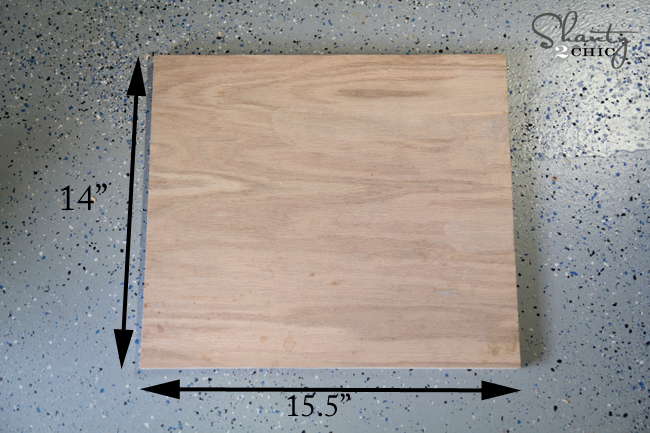
I started by cutting a piece of 3/4″ plywood at 14″ x 15.5″.
I trimmed this out with 1×2. Just cut two pieces at 14″ and attach them with your nail gun.
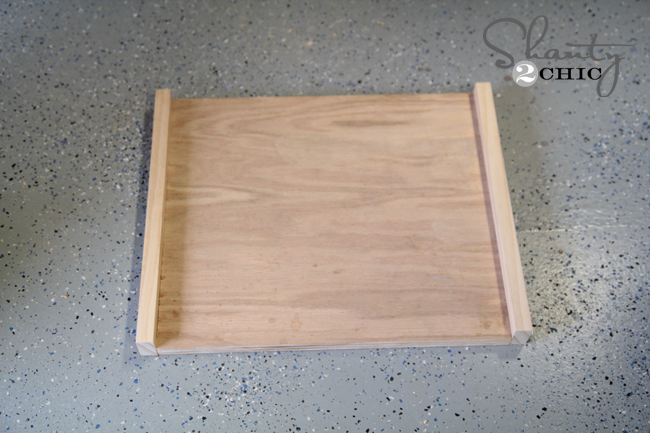
Your next two cuts will be 17″ and will be attached to the other sides. I used the nail gun and glue to attach these pieces as well.
Now for the slides! To make this easy I used some side mount slides but attached them to the bottom of the drawer. I started by pulling them open and attaching them first to the bottom of the drawer.
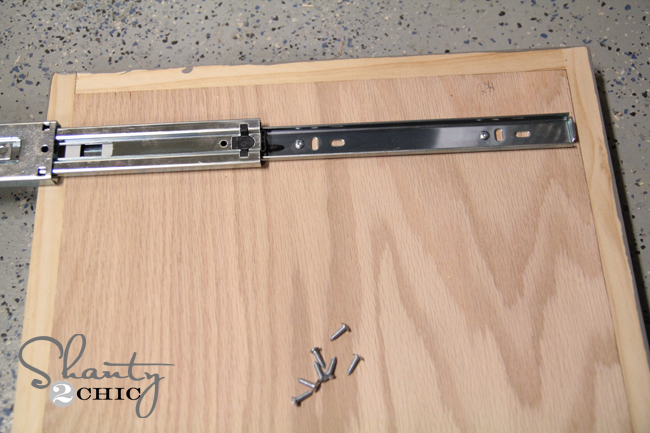
Then, I pushed the pull back into place and set it inside the cabinet on that one top shelf. I slowly pulled it out which opened up the slide again. Then, I just attached the pull to the inside of the shelf. Easy!!
Before adding all the hardware, I got it all painted up. I started by staining most of the piece with a new color that I love…
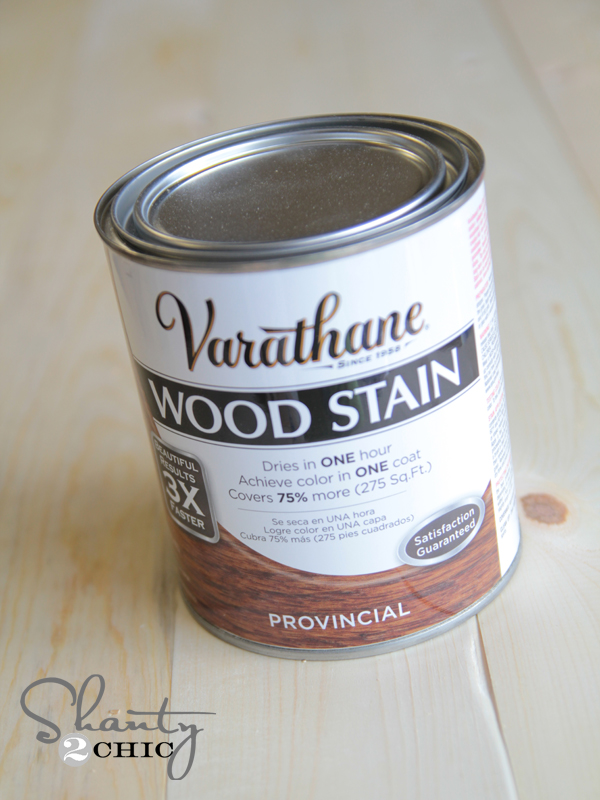
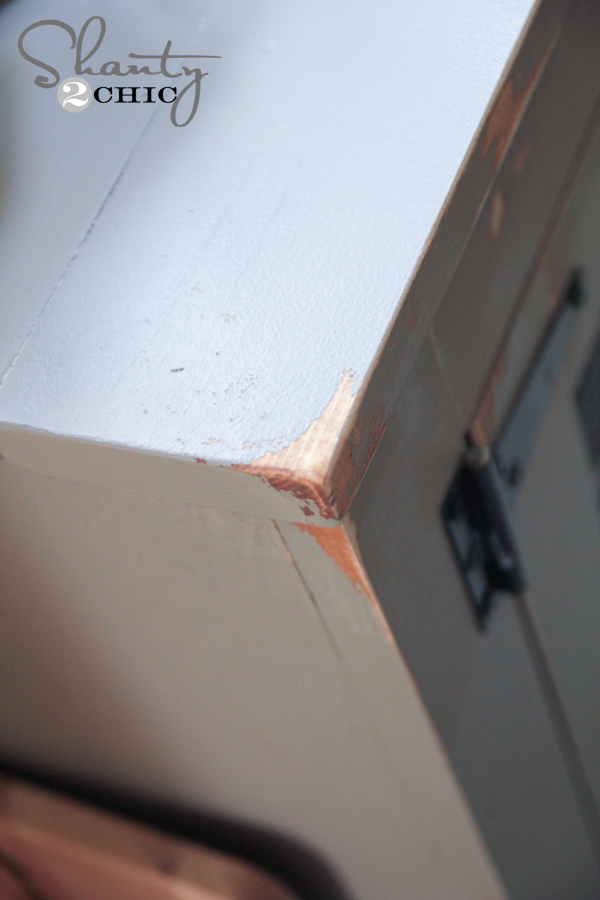
After that totally dried, I used a bit of Vaseline on my edges and corners. It doesn’t take much, just a thin dab! Next, I applied two coats of paint to the cabinet. I chose to use a Sherwin-Williams color called Anonymous. I LOVE IT! Once that totally dried, I used my corner cat sander to distress the edges a bit. Anywhere that I put the Vaseline just chipped right off… Woohoo!
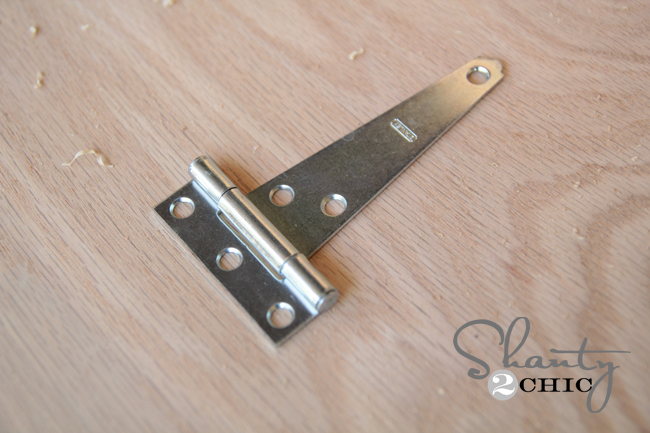
I found all of my hardware at Home Depot. The hinges are actually silver colored and I spray painted them black before attaching.
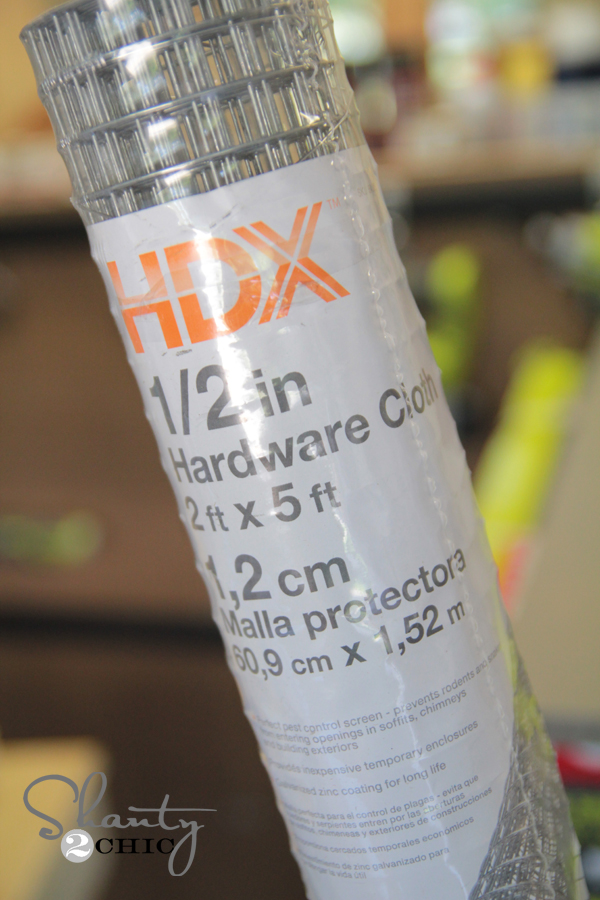
I used this hardware cloth on the inside cloth of the doors.
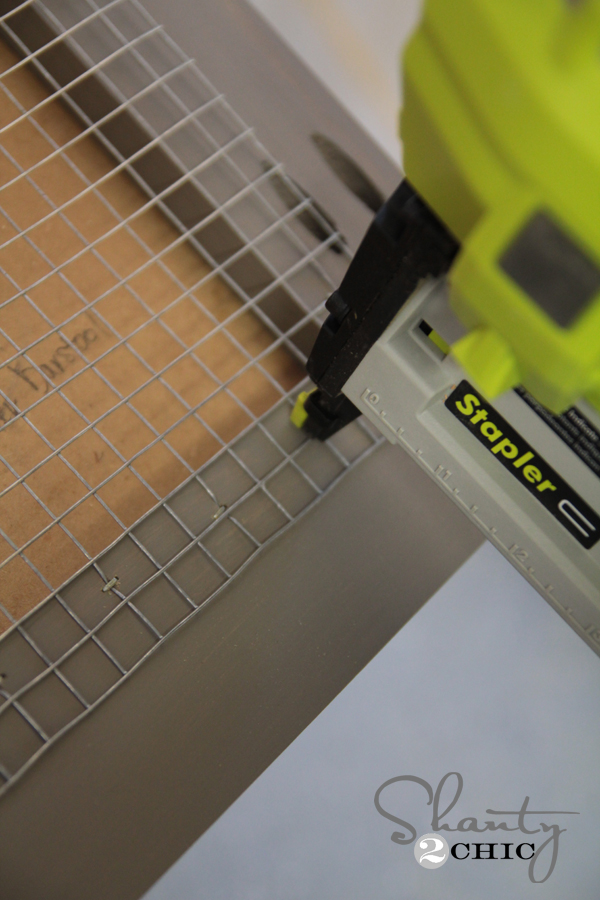
I used a small pair of pliers to cut it to size, and attached it using my Ryobi Airstrike Staple Gun.
Whew…. Please tell me I’m done. I think I covered it all 🙂
Oh, minus a few more shots of this baby and all the accessories!
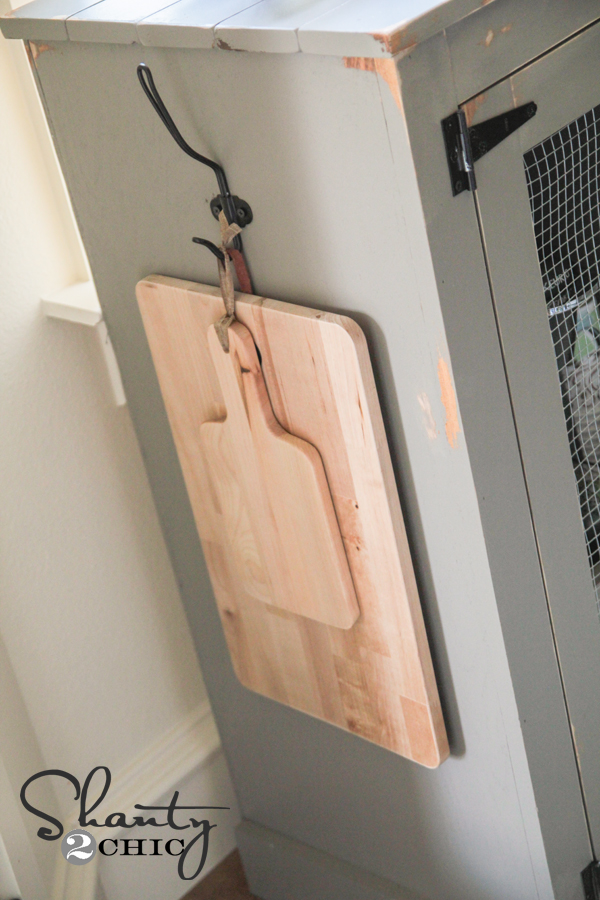
You can add a few hooks for a different purposes. I chose to install one on the side for my cute cutting board.
I found this cute mug tree at World Market.
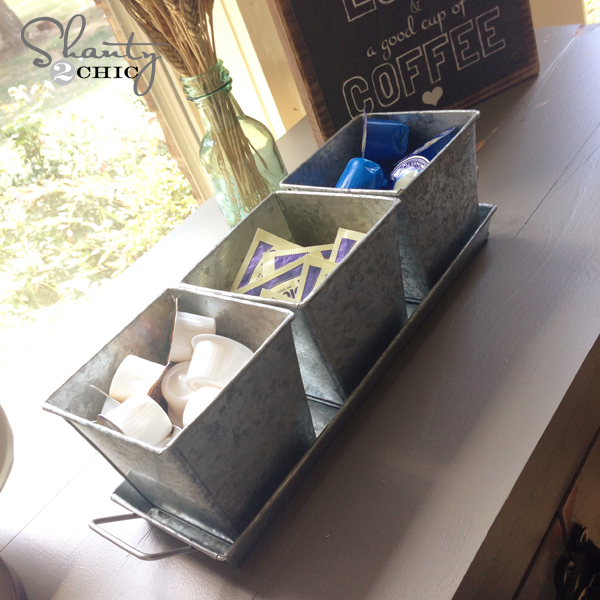
And how cute is this tray with baskets I found at one of my FAV sites ever?! It’s called www.save-on-crafts.com ! You guys… This site. They have the cutest home decor goodies, and it’s so affordable! HERE is the link to the galvanized tray I filled with creamer and sugar, it would be great for k-cups or coffee pods, as well. $8.99 people. And see the cute vintage green bottle in the background?? LOVE. You can find the link to that one HERE!
Hope you guys LOVE this cabinet as much as I do… And my Keurig and coffee mugs do too ;-)!! I love how it matches my kitchen cabinets and it’s a great piece for small spaces.
I would LOVE for you to pin and share this baby with all your friends!!
Thanks so much for stopping by!
Whitney
Check out our other DIY Farmhouse Coffee Bar ideas for great inspiration:

Could you tell me where you got the coffee sign?
HI!!!!! I just love ya’ll! I have made quite a few replicas of the projects you posted but I am having just one minor problem… I bought the small Kreg jig but am unsure how far down to drill.. If you could recommend a great guide or tutorial I would sure appreciate it 🙂 … Oh in here is a picture of the floating shelves you guys inspired me to do… Thanks again!!
Thank you for sharing! I need the counter space my espresso machine is taking up! I was trying to find something to repurpose but this would be much better! Do you have an estimated cost with lumber and hardware?
Thanks
Erin
Upsideofchaos.com
This is fantastic, and I love the finish!
Thanks so much Pauline :-)!
Sorry for all the posts but I LOVE this craft site and the prices. Thanks.
Yeah!! Me too! It’s a fav of mine!
Maybe I’m blind but what are the dimensions?
Yes, would love to make this but don’t see any quick ways to see the final dimensions. Thanks!
Love my Keurig too! This cabinet is great.
Thanks so much Carla!
Where did you get the hook that the cutting boards are hanging from? Love the look of it! Awesome cabinet.
Ikea!! They are a new hook they carry… Cheap and cute! Thanks!
Thanks for always having the most accessible plans and Tutorials! They give me confidence in completing projects!
LOVE hearing that Charlotte… I am so happy to hear it! Thanks for taking the time to leave a sweet message!
Great idea – I may need one as I totally agree – I love my Keurig, but it is a countertop nightmare. I love the coffee sign; can you tell me where you got it?
It’s a free printable on our site that I made! Here is the tutorial…https://www.shanty-2-chic.com/2014/04/diy-frame-and-free-coffee-printable.html
I LOVE this! Any idea what the total cost of it was? Thanks so much!
Thanks Jenny! For the lumber and hardware I spent around $125. Hope this helps!
totally helps. thank you so much!
Cute! Where did you find the mug holder?
World Market! $15!
Thanks!
I love this so much. Would it be easy to modify to make it a bit bigger (longer)? I’d love to use it as a buffet in the dining room.
Easily! And I love that idea… I may need a new buffet now ;-)!
Are the doors magnetic? How do they stay closed?
Is it closed in the back with another large piece of wood? Or is it open? All of the pictures show it being open in the back
My husband and I are currently in the process of doing this exact thing! We have essentially just made two cabinets (ease of transport) of course the top, backing and finishing pieces will be one piece. I will post a pic once it’s done 🙂
Another great project! Love it!
Leslie
House on the Way
Thanks Leslie!
What was the cost of the total project , or at least a guesstimate ? 🙂 thanks
Thanks Renee! For the lumber and hardware I spent around $125. Hope this helps!