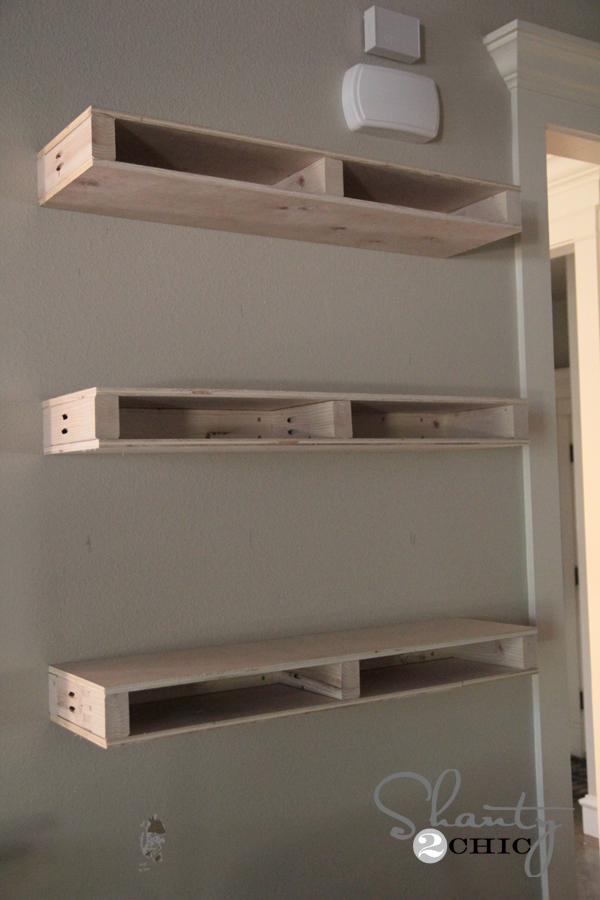
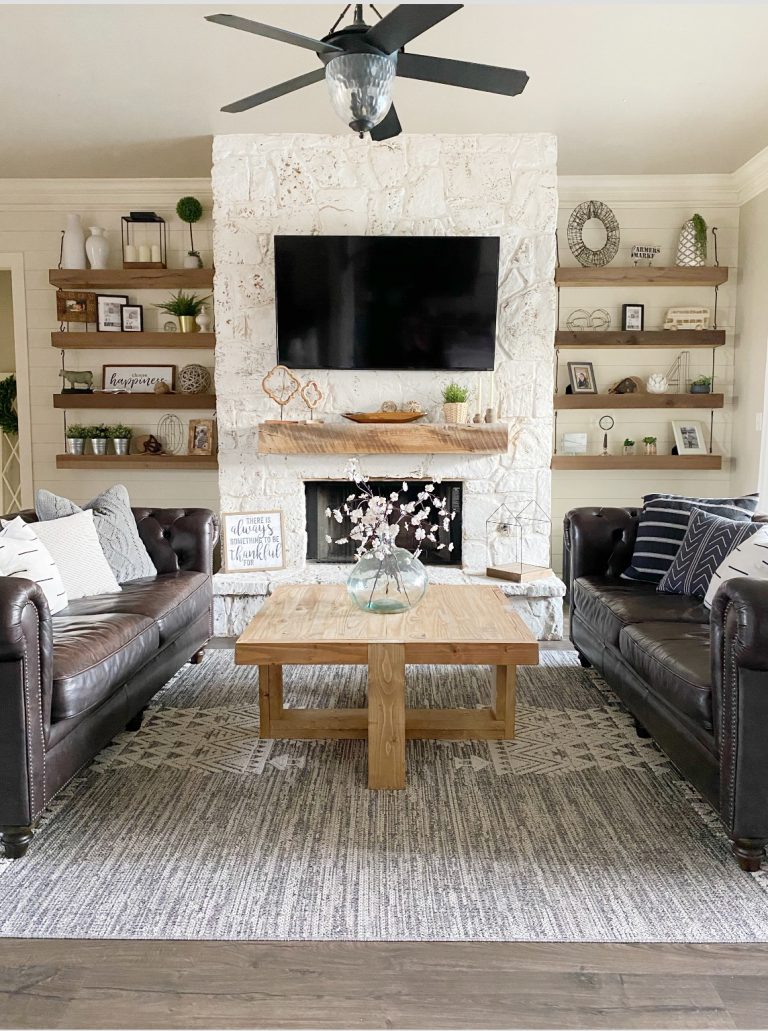
Now, we are no stranger to floating shelves around here. I shared my bathroom floating shelves at the beginning of this year, and Ashley recently shared her living room floating shelves as well. Be sure to click on those to find the tutorials!
I have a space in my own living room that has been begging for some, so I came up with these!
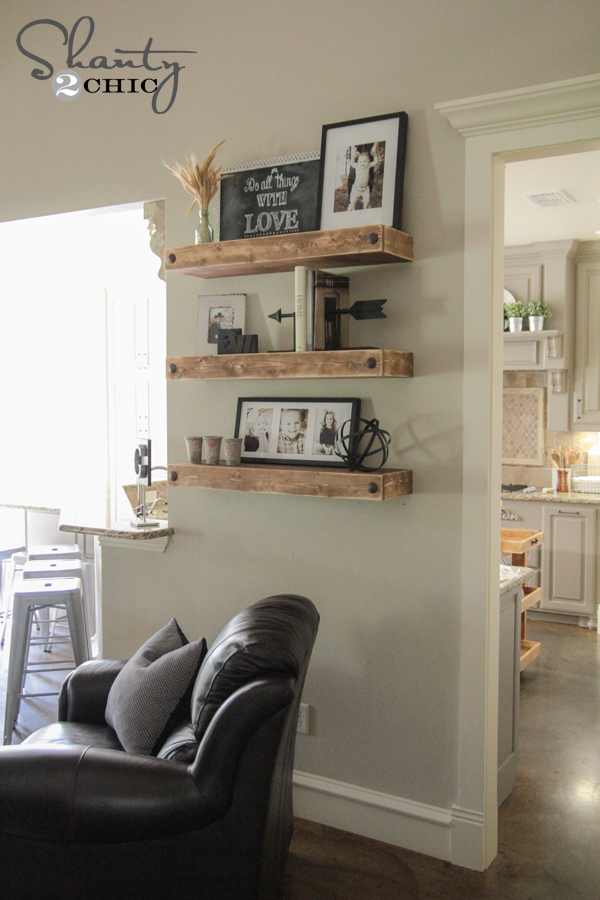

I LOVE them!! I love the height they add to the room! I did design these a bit different than my last floating shelves to simplify the build for you guys (and for me 😉 )!
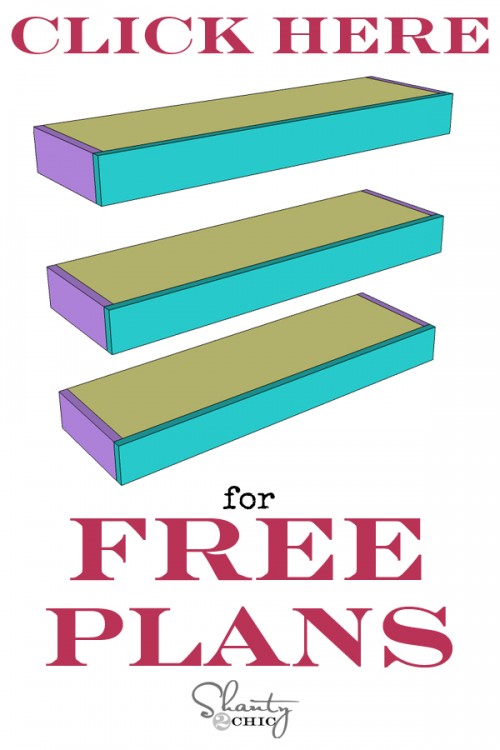
I will walk you through the entire build below, and you can also download the FREE set of printable plans by clicking HERE or the button below!
Check out our How to Build a Floating Shelf Video HERE!
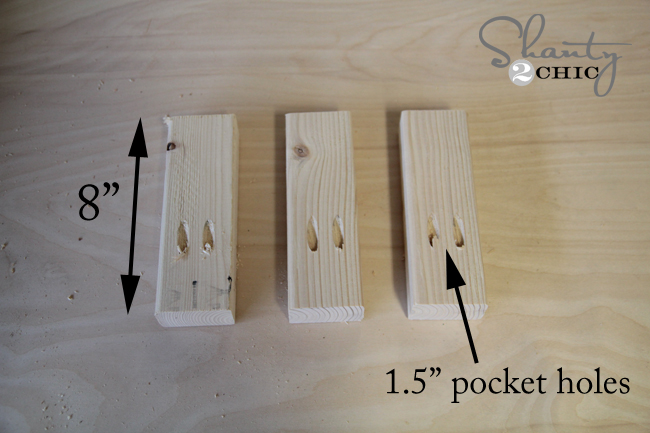
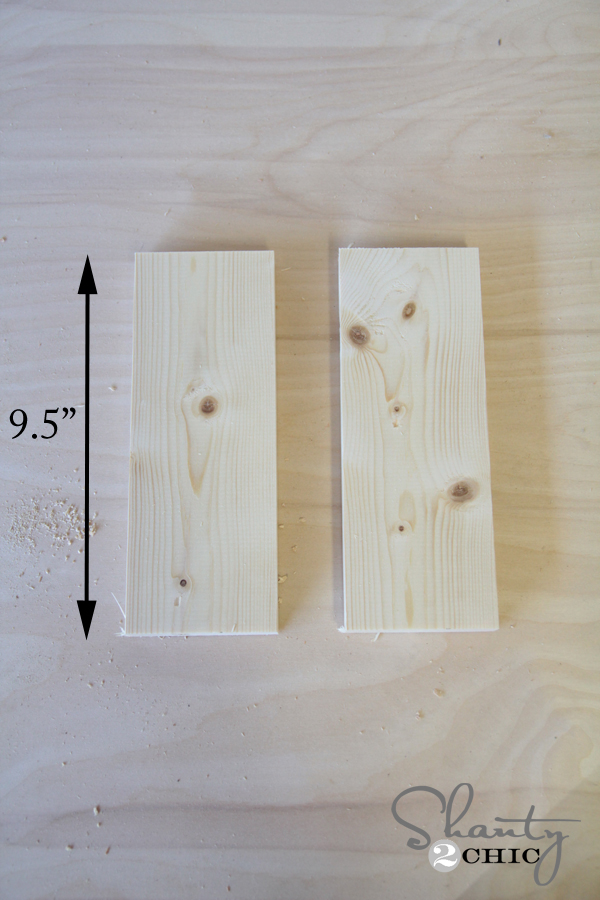
I started by cutting down my 2×3 boards. These are the bones of the shelves and it is what you will actually attach to the wall. I cut three pieces of 2×3 at 32.5″. I also cut 9 pieces of 2×3 at 8″ each. You can see my 8″ pieces below. Each shelf will use 3 of these smaller pieces.

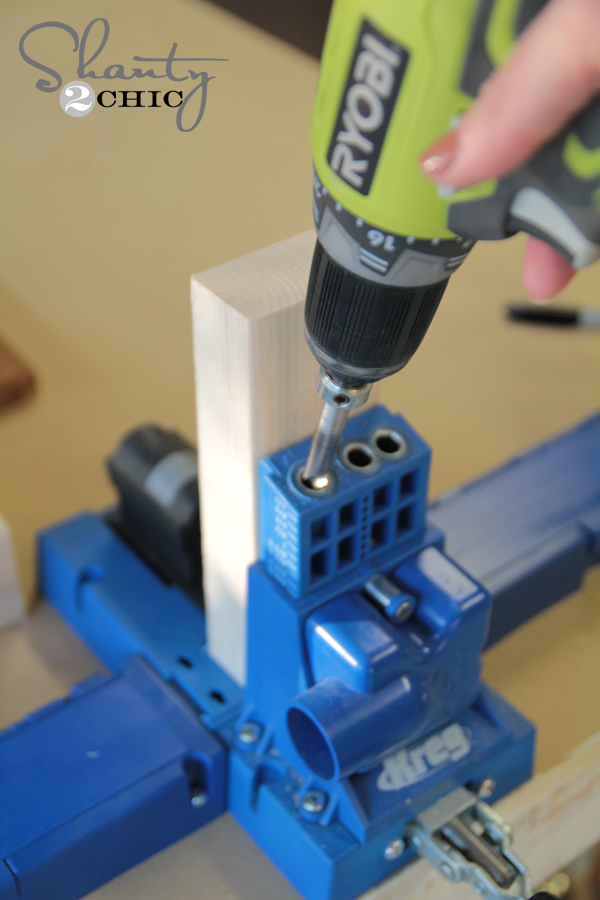
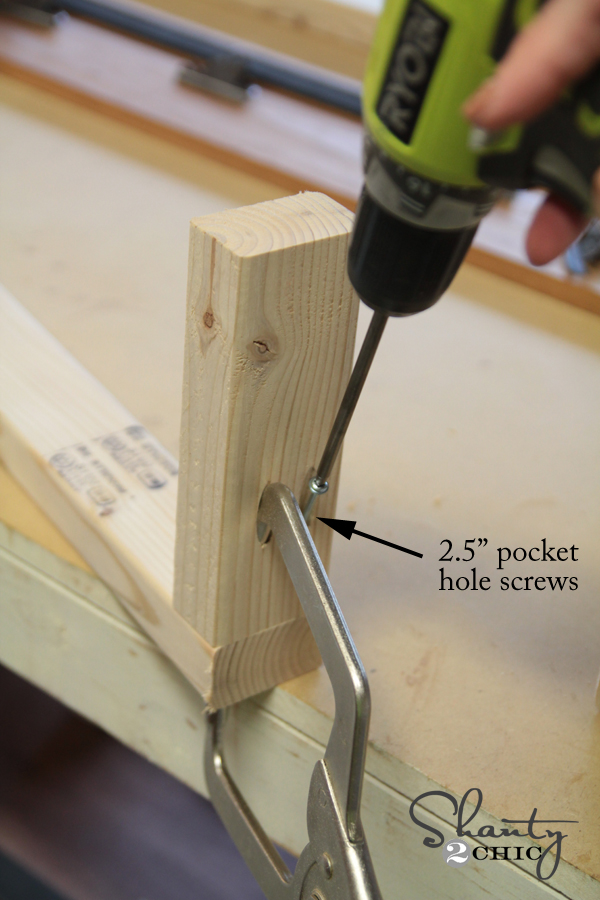
I used my Kreg Jig and my Ryobi drill to put 1.5″ pocket holes into one end of each of the smaller boards.
This is what each of the pieces looked like before attaching them to the longer boards.
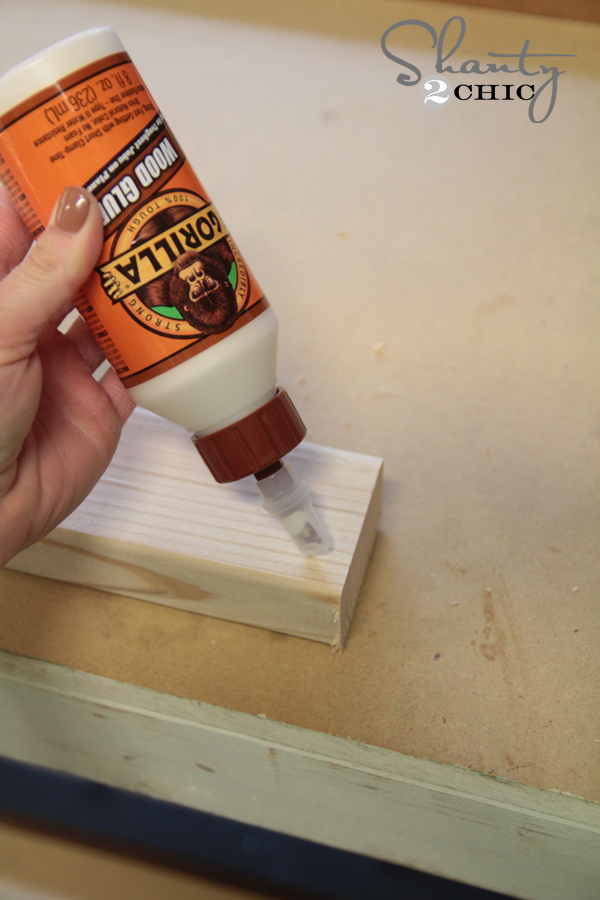
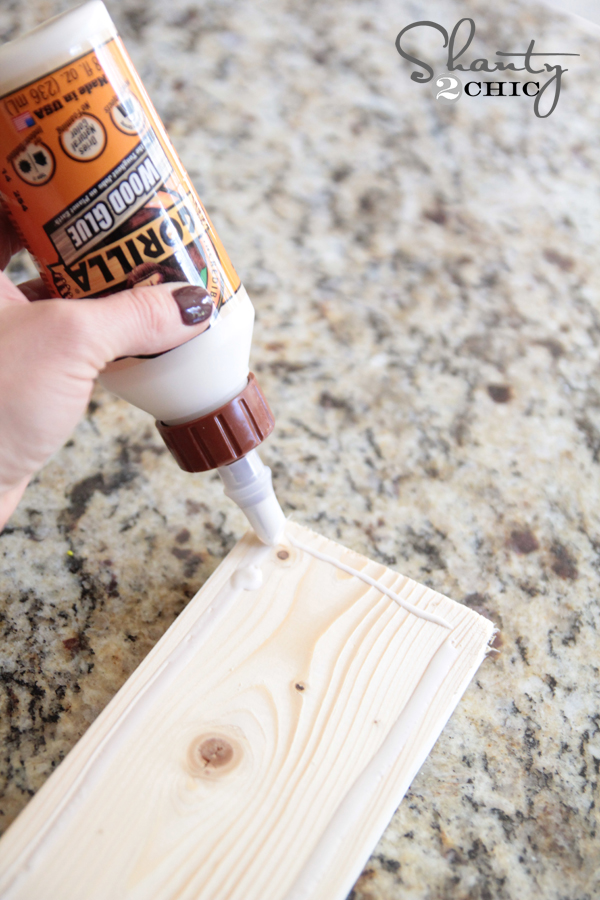
Next, I added a small amount of Gorilla Wood Glue onto my 32.5″ boards where the smaller pieces will attach.
I used my always awesome Kreg Right Angle clamp to hold mine the smaller pieces in place while driving the first 2.5″ pocket hole screw. You can see how this clamp easily fits into a pocket hole to hold everything all together. It’s AMAZING.
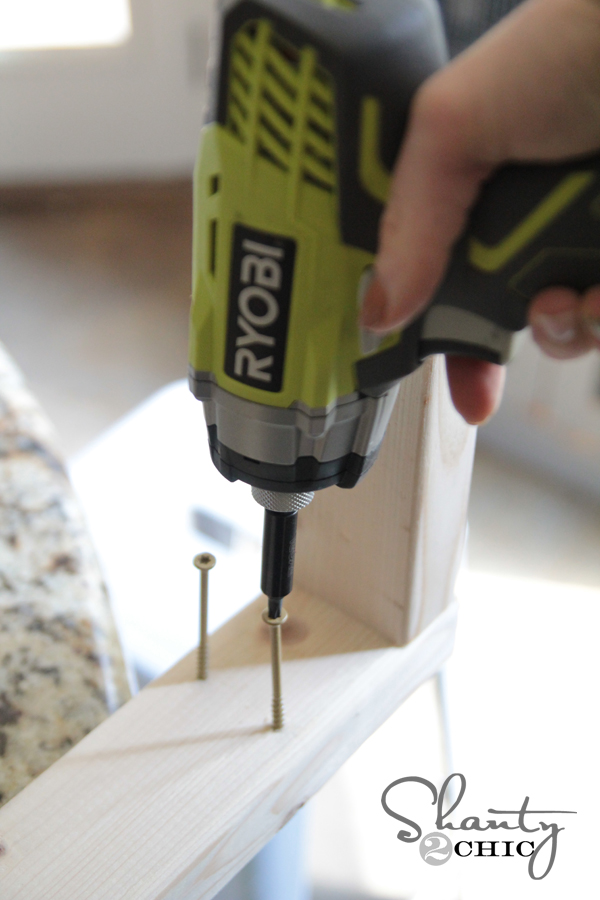
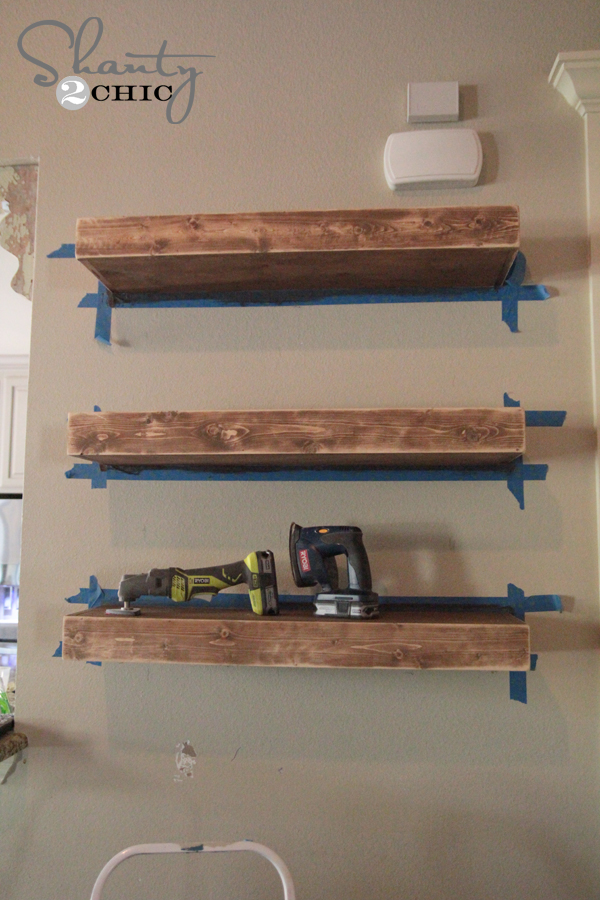
Once you have you ‘giant E’s’ built (that’s what my 4 year old called them 🙂 ) you are ready to attach them to the wall. I started by lining mine up where I wanted them and using a stud finder to find the studs in the wall. I marked on my boards where all of the studs lined up. Don’t have a stud finder?? You guys need to check out Ryobi’s new Phone Works Stud Sensor! This thing, and the whole line of Phone Work’s products are so cool and affordable! It actually hooks up to your smart phone… So awesome. You can see it HERE at Home Depot.
![Studs in wall]](https://www.shanty-2-chic.com/wp-content/uploads/2014/10/Studs-in-wall.jpg)
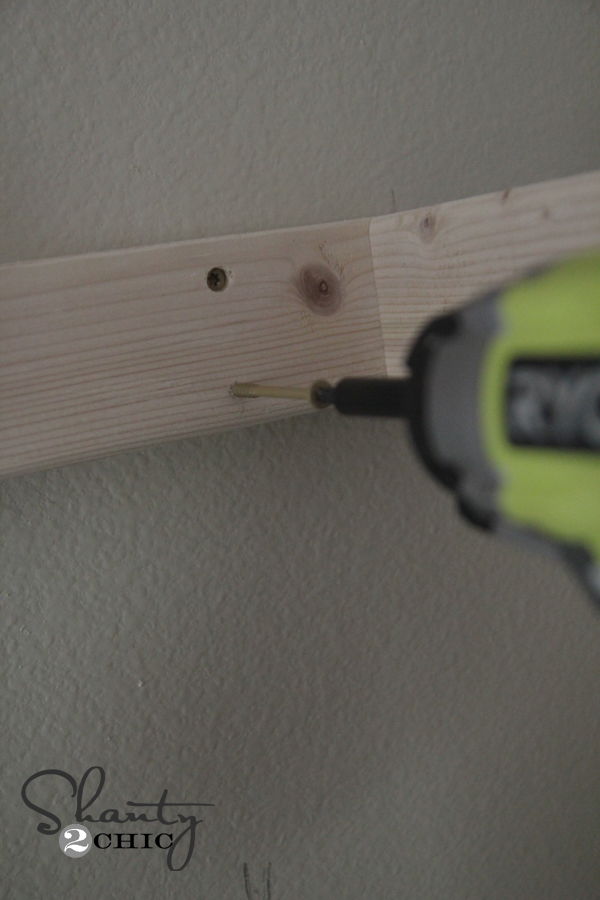
I used my Ryobi Drill and a small drill bit to pre drill holes into the board where I had made my marks. Pre-drilling will help keep the wood from splitting.

I chose to use my Impact Driver to attach mine to the wall. Why? Because I can hold the thing in one hand and push the button and it drives the screw with literally almost no work on my end. A drill will work too, but whenever I am driving screws into studs like this, I always use the impact driver. Before holding it up to the wall, I barely attached each screw into the holes to make it easier when I was holding it up.
I used 3″ torx screws to attach mine. Wood screws will work fine too. Make sure to also use a level on these boards so you know they sit straight on the wall.
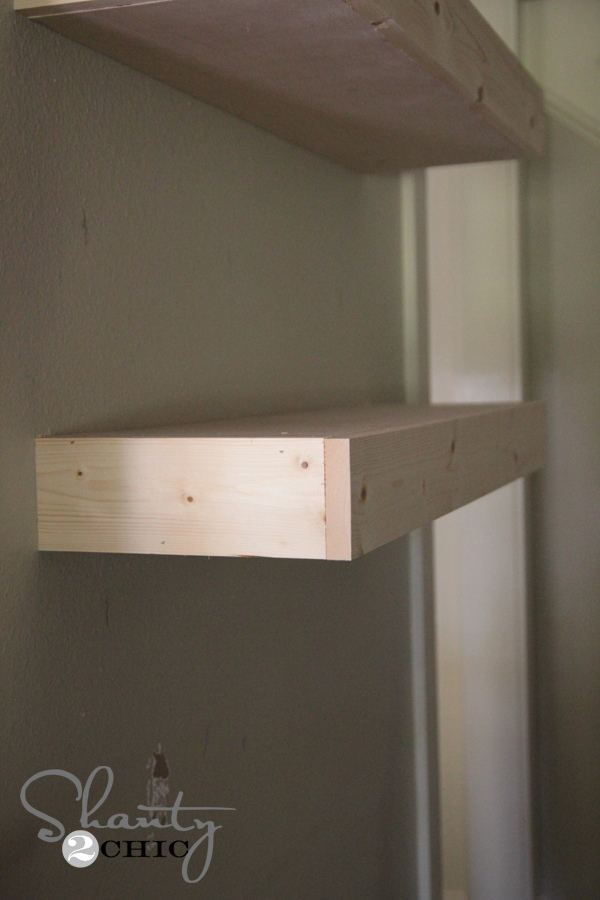
And there you have it… 3 Giant E’s on the wall 😉
Now to cover them up!
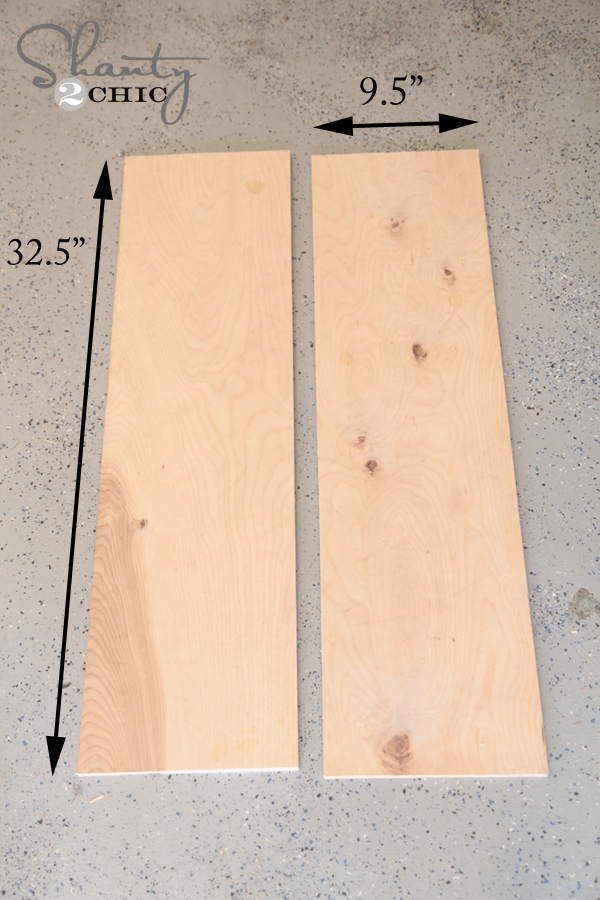
I chose to use PureBond Hardwood Plywood from Home Depot to create the tops and bottoms of these. I LOVE the way this product looks stained, which is why I chose it! I ripped my boards down to size with my Kreg Rip-Cut, but you can also have the guys at Home Depot cut these for you. It will make it easier to get it into the car and saves you a step! This is the board you will have cut and the cuts that you will need for this part…
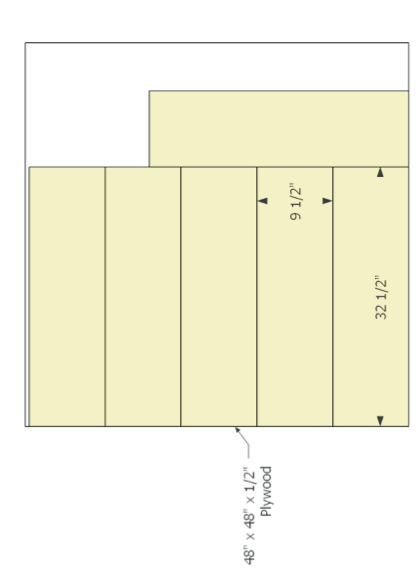
This is what my pieces looked like after I ripped them down.
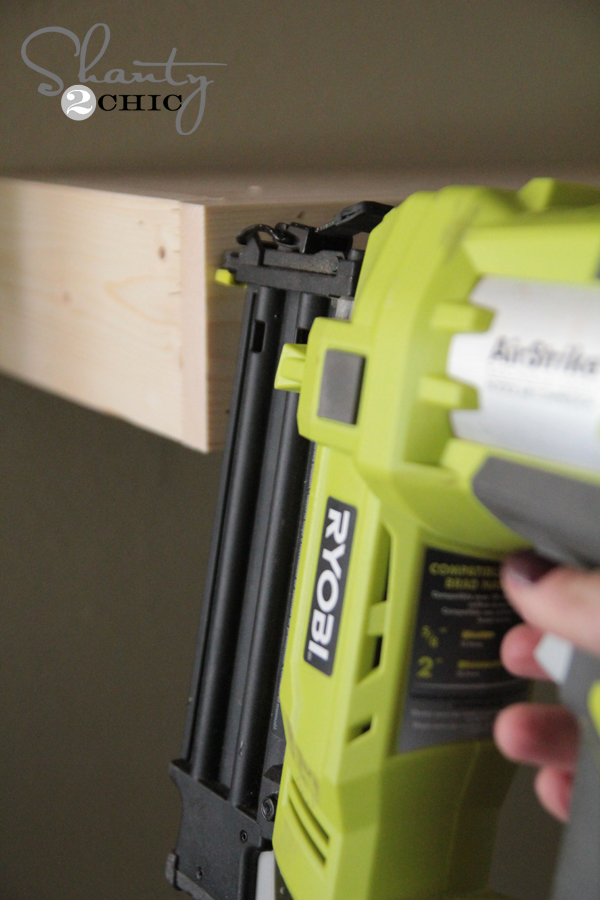
I used my Ryobi AirStrike brad nailer with 1.25″ brad nails to attach the bottom pieces first.
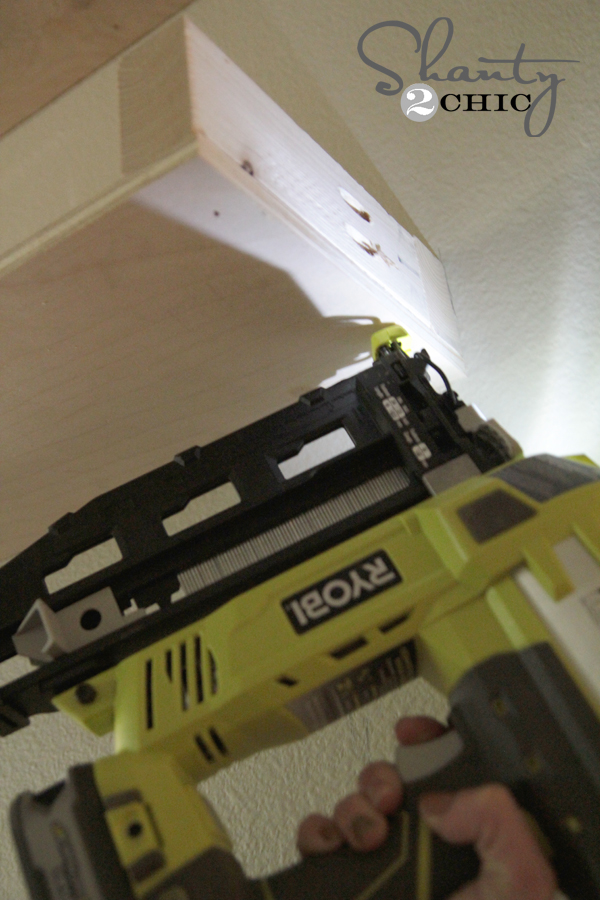
Next, I did the same thing with my top pieces!

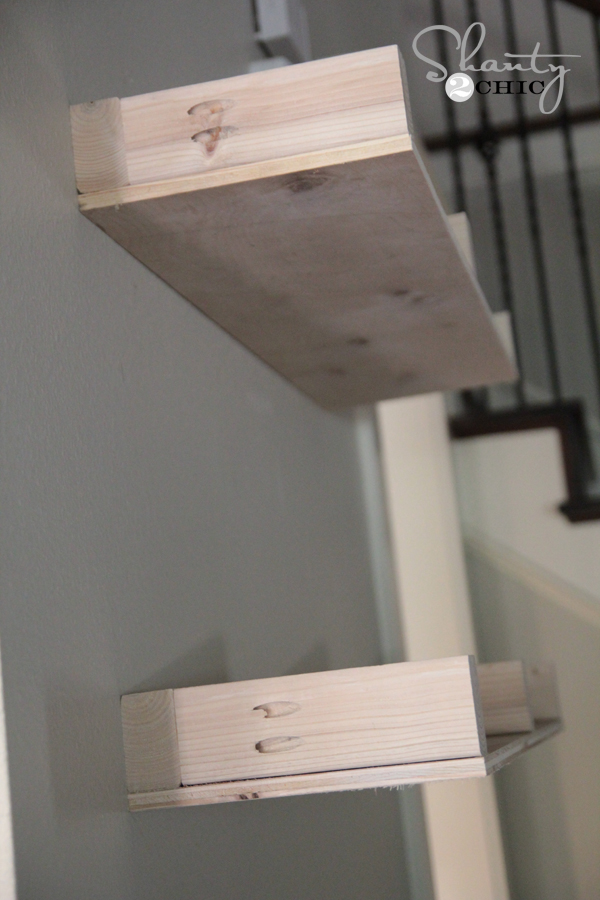
All three should look a bit like this once you have this part finished!

Now to trim them out! I used inexpensive whitewood for this part. I love the way it unevenly takes stain and the price makes me happy too! 🙂
I started by cutting my side pieces.
Before attaching them I added a line of wood glue to each one.

I used my brad nailer to attach those with 1.25″ brad nails and then cut the longer front pieces. I added wood glue along the outer edge of these pieces before attaching them to the front of the shelves.
I used the same nails on this part too.
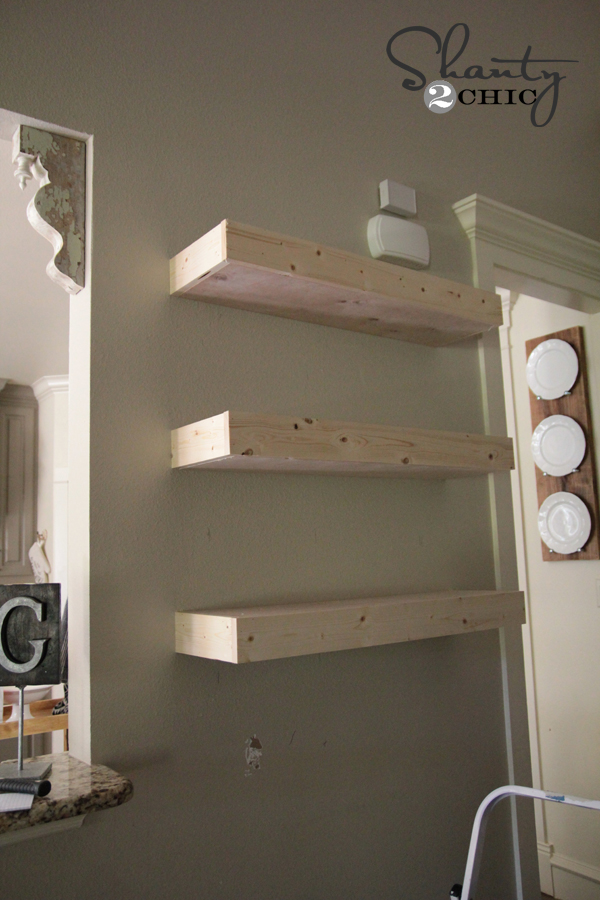
All finished!
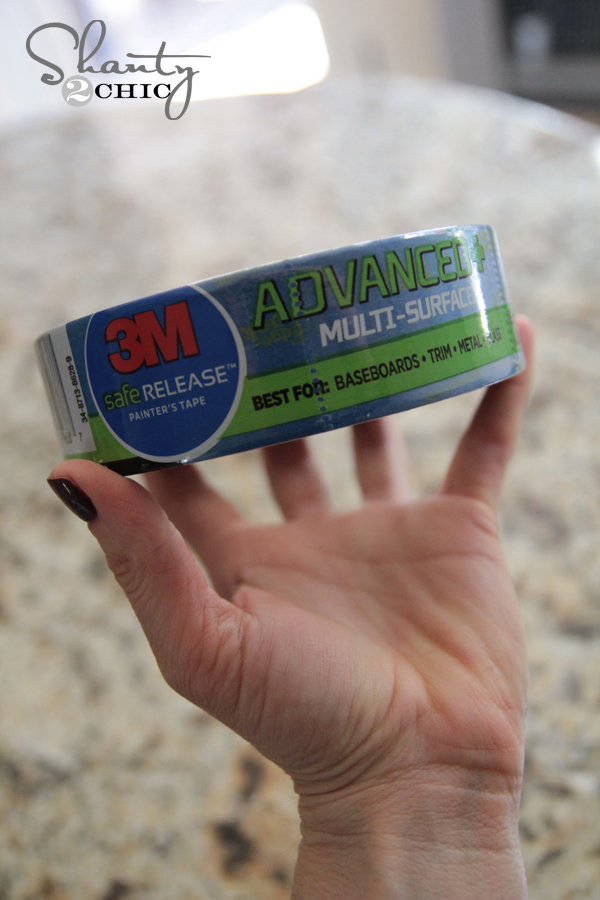
I used 3M painter’s tape to cover the wall around each shelf before adding the finish.
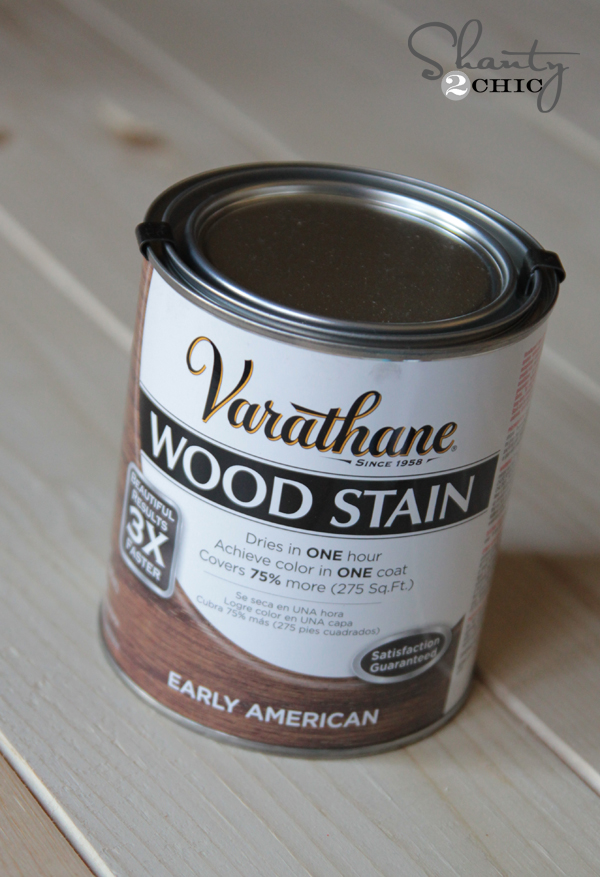
I chose to use Varathane wood stain from Home Depot in one of our FAV colors for mine…
After allowing that to dry an hour (yup! Only an hour) I used my Corner Cat sander and my JobPlus sander to distress the heck out of these. I wanted them to look old and rustic!
My final step was using a rubber mallet to attach these awesome clavos I found! You can find similar ones HERE on Amazon!![]()
! I love the added touch on that rough wood… So shanty! 😉

And here they are all dolled up! What do you think??
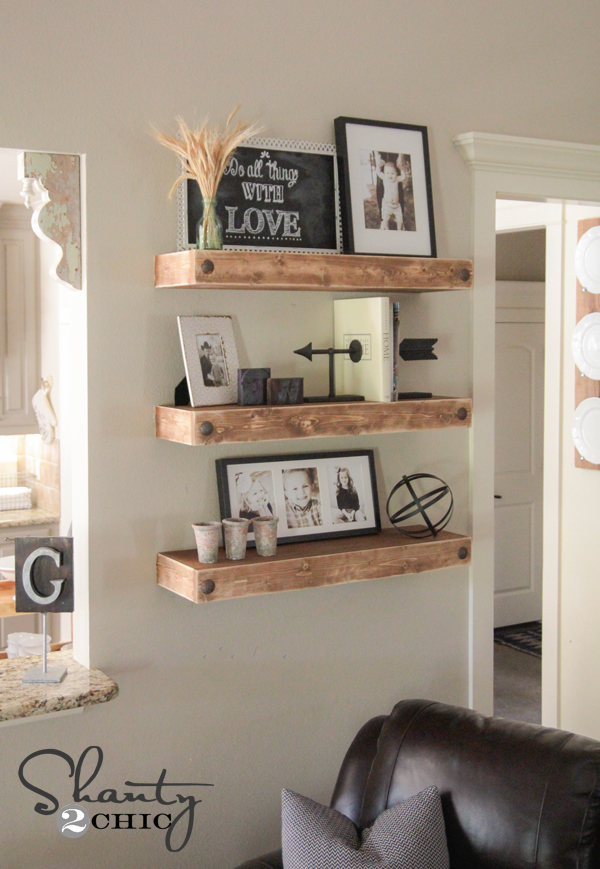

Hope you LOVE them as much as I do! It’s amazing to me what a project that costs under $50 can add to a room. YES! Under $50! Can’t beat it guys!
I would LOVE for you to share and PIN these! Thanks so much for stopping by and let me know if you have any questions at all!
~Whitney

Where did you find those arrow book ends? Cute!!
Pottery Barn! 🙂
You go girl! This is awesome! I love these! Everything about them, all the way down to the decor! I also appreciate the time that it took to stop in the middle – take pictures, edit, and describe everything. What a massive post! Thank you for sharing! I will be doing this project in the very near future.
Love these! And where did you get your barstools? I’ve been wanting some exactly like them!
Check out Target. I’m pretty sure ib just saw them there
Is this possible to make without a kreg? I don’t have many tools laying around the house.
I am new to your blog, so maybe I am missing it but is there a post where you share how you made those plates hanging in the background? I love the idea of something so simple like that but I never would have thought of it!
I love the idea of adding the clavo’s!! It really dresses them up! Would you mind sharing what color you painted your trim? I love the soft white color, but I have over 1001 different white samples and can’t choose one… too green, too blue, too red, etc! Thank you!
LOVE these shelves! what is the paint color on that wall?
How do you take them down though when you go to move? Without disassembling them.
I built floating shelves that looked just like these, but assembled the top, bottom, sides & front as a sleeve that slid over the “big ‘E'” that was anchored to the studs in the wall. I attached the “sleeve’ to the E using screws – either on top or bottom, along the wall, depending on from where the shelf would be viewed. They didn’t budge for 15 years, until we took them down before putting the house on the market. This technique also allows for finishing the shelves off the wall – always a plus.
I am a beginner DIYer and love all of your projects!!! Would this be a good one to try as my first big project? And what kind of tools do you think are necessary or most important when doing wood work? I have small hands and feel like my husbands DeWalt drill is soooo heavy! Just curious to see what you use…
I LOVE these!!! This will definitely be a weekend project soon! Can you tell me what type of floors those are in the top picture? It looks like concrete floors which we are considering putting in our house so I wanted to ask 🙂
I love the shelves….very nice!
Thank you!!
Can you please give me some guidance as to how do you figure out what size Kreig holes and screws to use. I have built some items but really knew if I was using right sizes. Thanks
This may help! http://www.kregtool.com/files/newsletters/kregplus/Images/february12/selecting-the-correct-screw.pdf
Just adding that if anyone WANTS a more even look to the stain, you can use wood conditioner first. It applies just like stain and only adds a few minutes more work to your project. LOVE the shelves.
Thanks Millie!
i like them a lot but i’ll make them to where the bracket part is stationary and the shelf slides over it so i can remove them if i need to (apartment dweller).. what about the G monogram on the counter? can we get instructions for that project too?
Great idea Andrea! I found that at Anthropologie! It would be an easy DIY though 🙂
any way i could get a few up close pics of it? i wouldn’t mind trying a DYI on that 🙂
This is amazing! I love the rustic feeling with the little clavo detail! Thanks for sharing the details 🙂
Thank you Kassandra!!!