Hey there!!! I am so excited to show you what I have been working on. It is GORGEOUS!!!
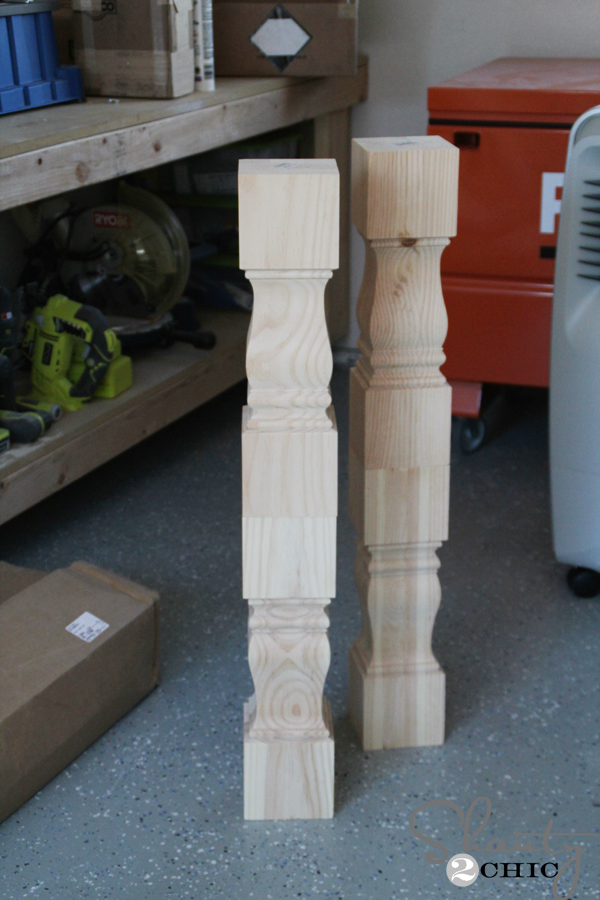
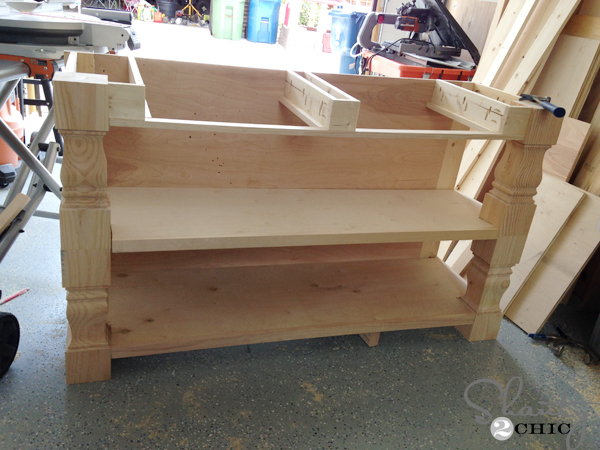
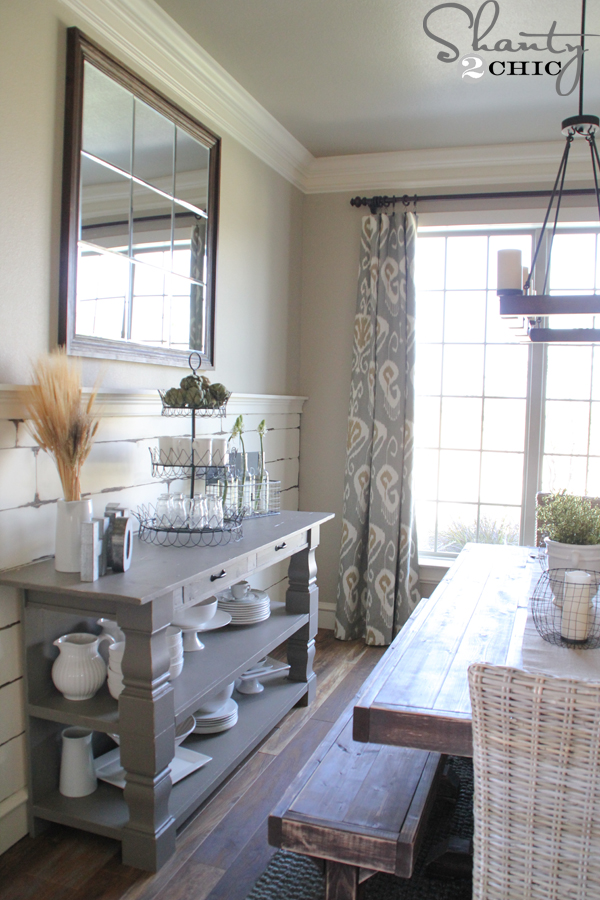
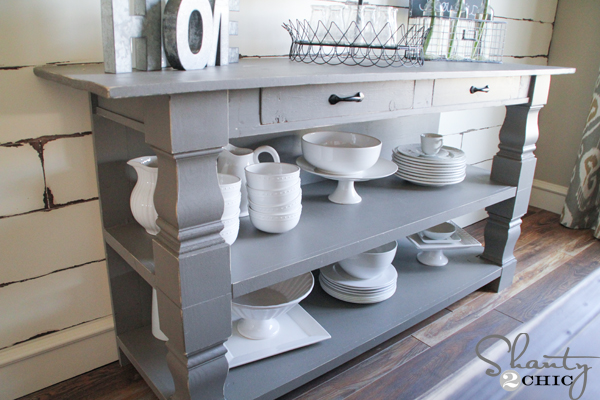
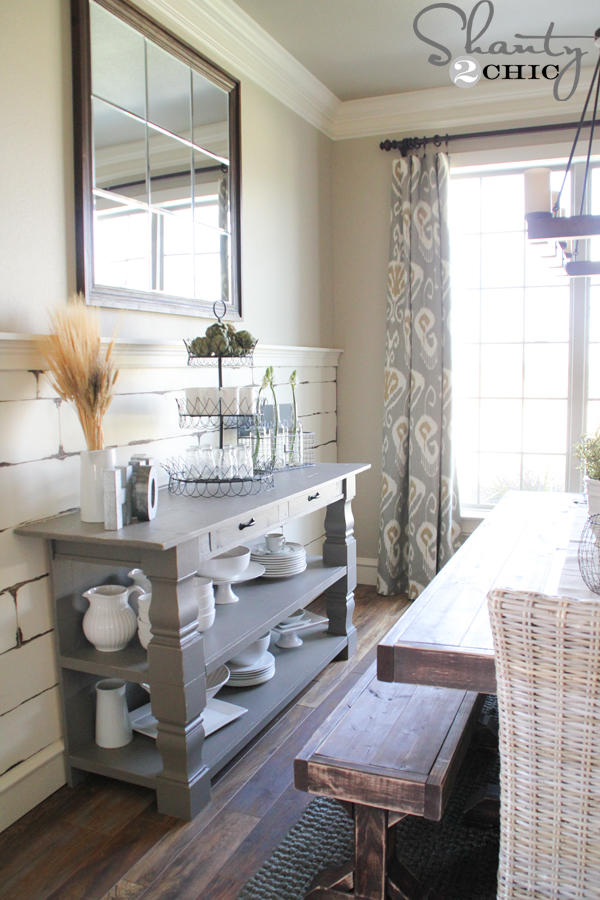
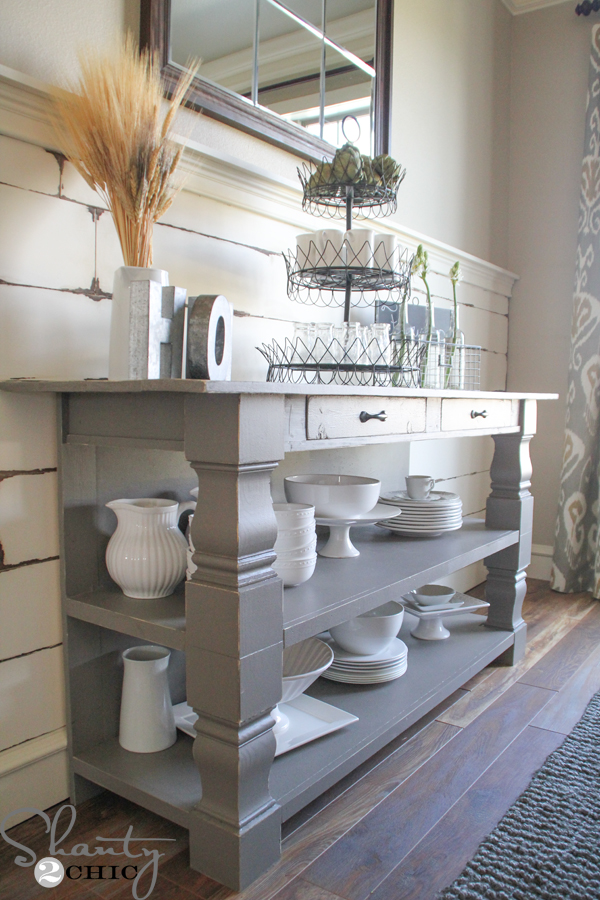 Meet the newest addition to my dining room – a DIY Turned Leg Buffet Table! I’m in LOVE! This is a 6 foot buffet table with a TON of storage space and although it is large, it was a very easy build! I got the legs from Osborne Wood Products and they are definitely the focal point of this piece! You can purchase the legs HERE (I used 4 knotty pine).
Total cost for this piece was about $350 – not bad for a 6 foot buffet table! I did have some scrap left over that I will be able to use on future projects too!
As always, we have the FREE Printable Plans and a step-by-step tutorial for you! Click HERE or the image below to print the plans.
 A special thanks to our friend Jay from Jay’s Custom Creations for creating the plans! Check his site out for more awesome plans!
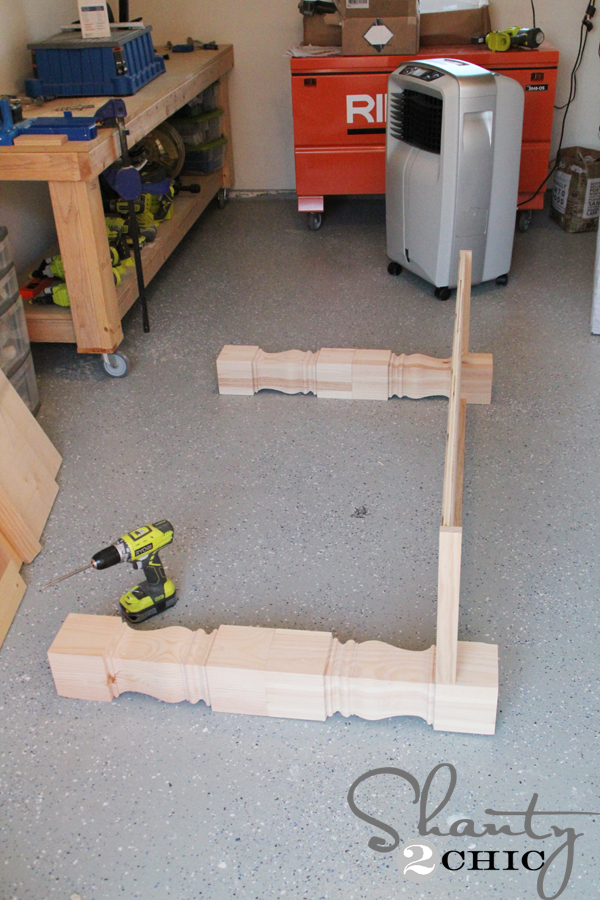
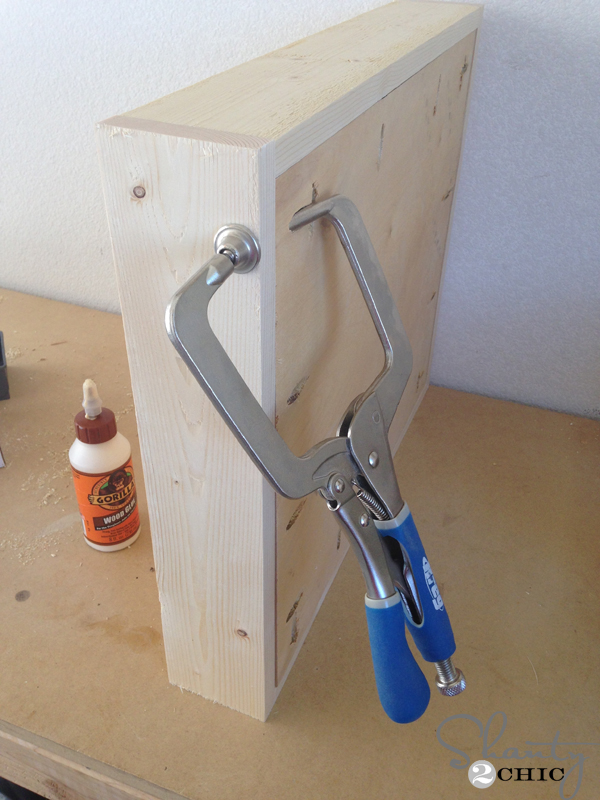
I started by gluing the 2 legs together with Gorilla Wood Glue. You can purchase the legs HERE!
While the glue was drying, I attached the back panel to the back legs. I used Purebond Plywood, in birch, for this project!

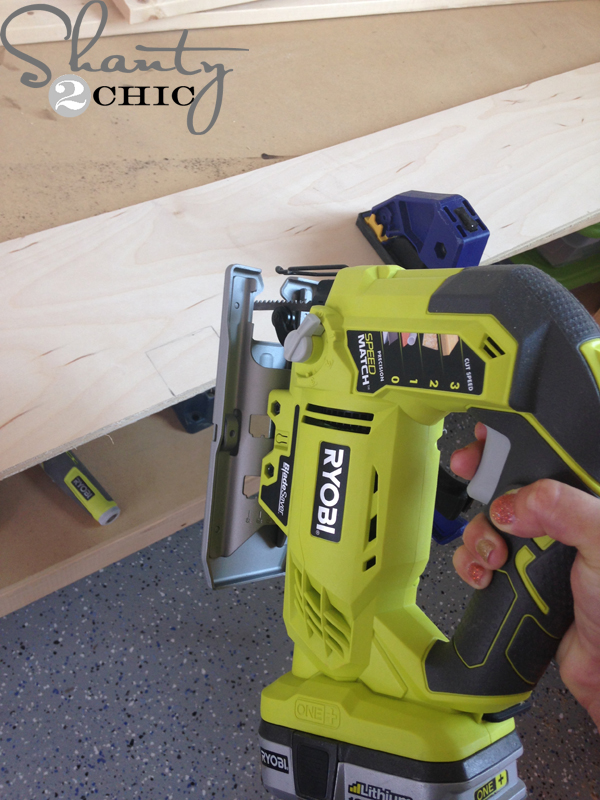
 Next, I used my Ryobi 18V Jig saw to cut notches in the shelves. (I purchased another sheet of 3/4″ Purebond for the shelves but you can also use a project panel if they have one at your hardware store).
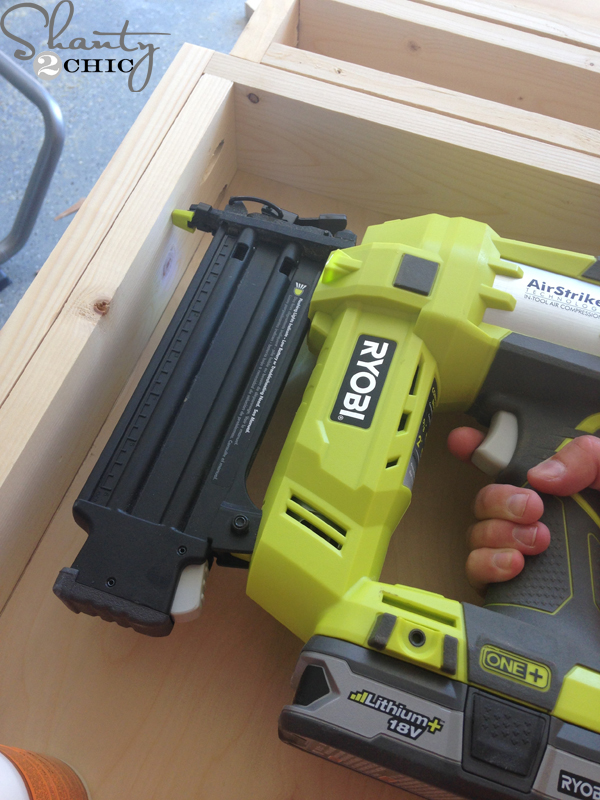
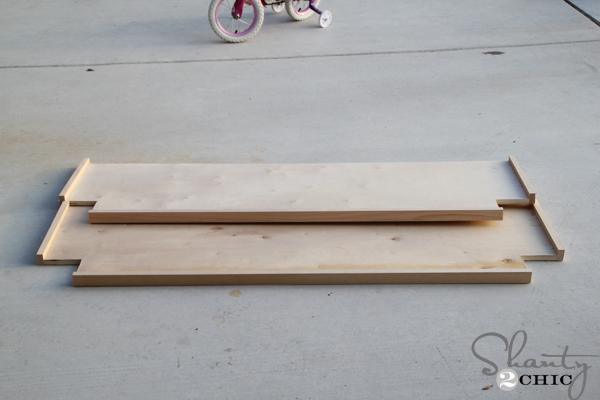 Once I cut the notches, I used my Airstrike Nailer and wood glue to attach the 1×2 trim.
 Next, I attached the bottom shelf to the legs and then the top shelf.
 I used my Kreg R3 to drill pocket holes on the back of the shelves. The R3 is a great option for your first Kreg Jig tool. I still use mine on large pieces like this!
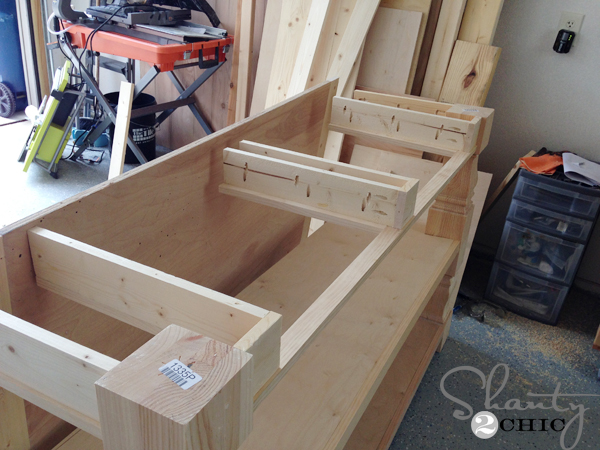
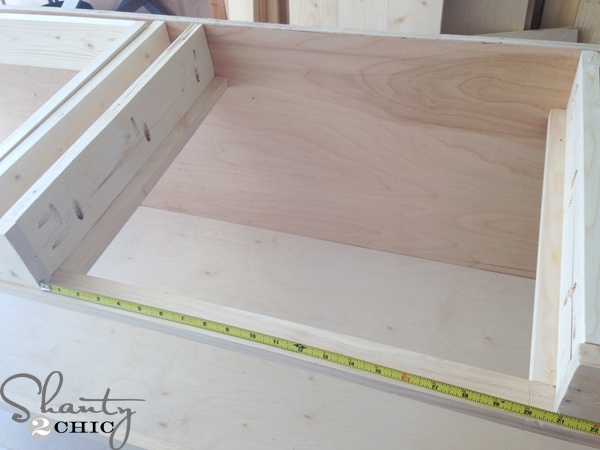
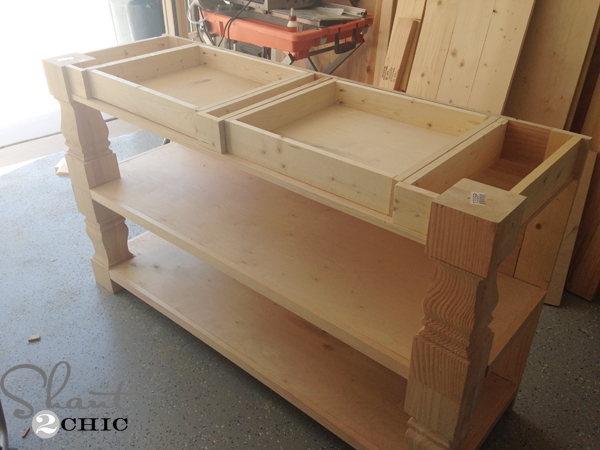
 Here is the frame for the drawers.
 And, here it is attached to the top of the legs.
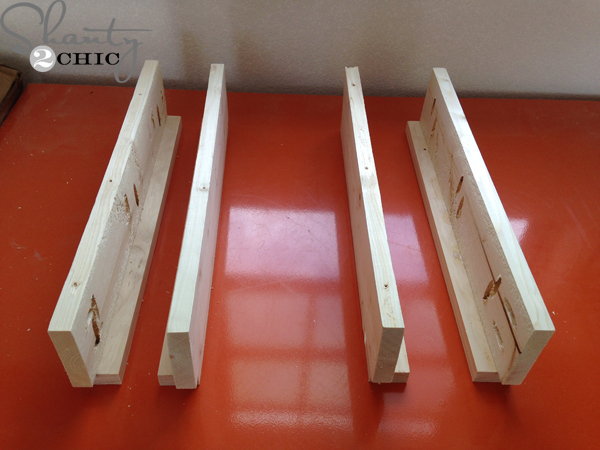 I assembled the 4 drawer slides
 And the sides with pocket holes and wood glue. This is seriously the easiest way to make drawers – EVER 🙂
 Here is a picture of the drawer slides attached to the drawer frame.
 This is a shot of the front of the buffet, so far.
 Next, I measured the width of my drawer slides
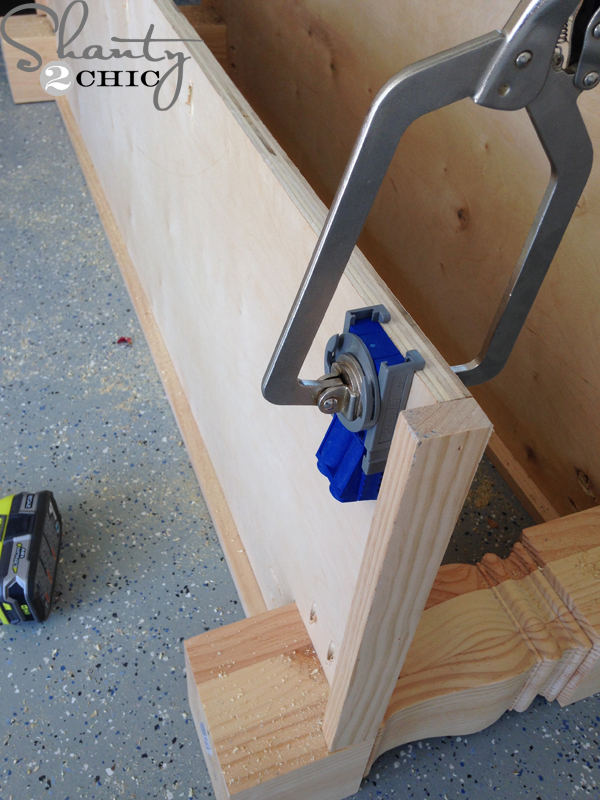
 And built the drawers to fit my measurements. I like to use my Kreg right angle clamp to hold pieces while I attach them!
 I used my Airstrike Nailer and wood glue to attach the face to the drawers – measure and cut to fit here, as well!
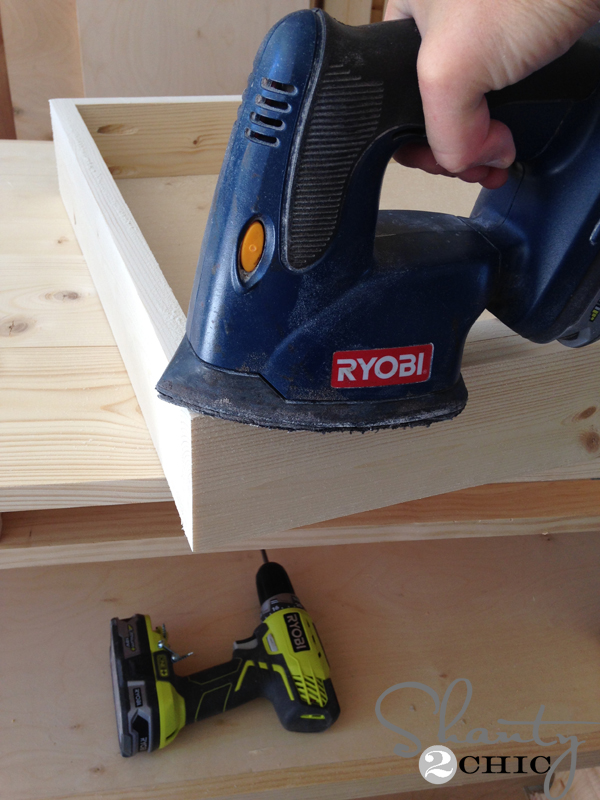
The final step on the drawers is to sand them down so that they slide easily. I used my Ryobi Corner Cat with 50-grit to sand the edges.
 Perfect fit 🙂
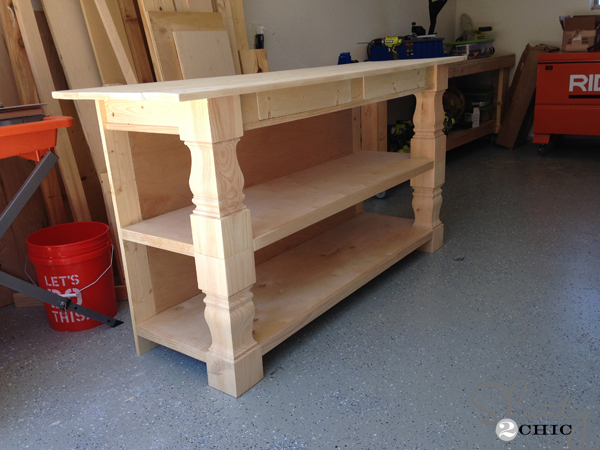 I attached the top planks and it’s ready for a finish!
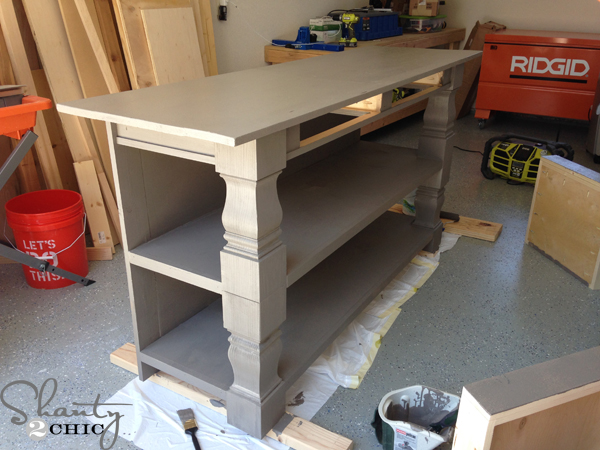 I gave it two coats of Sherwin Williams Anonymous and let it dry 🙂
That was it!!!!
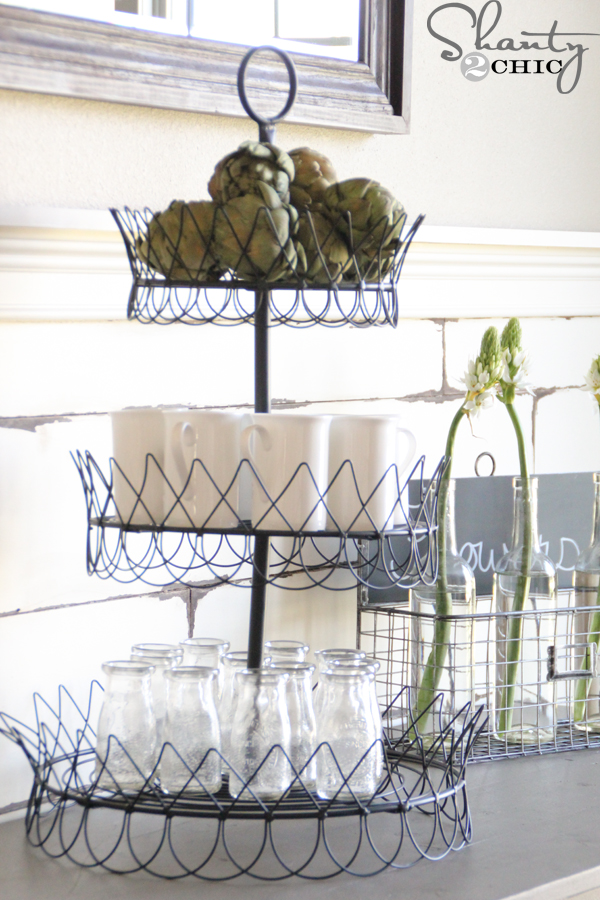 I added a few goodies from Save On Crafts! This is a great online store with so many inexpensive and cute accessories! I ordered this Tiered Serving Tray, the Glass Bottles and the cute Dried Artichokes and they arrived at my house in about a week!
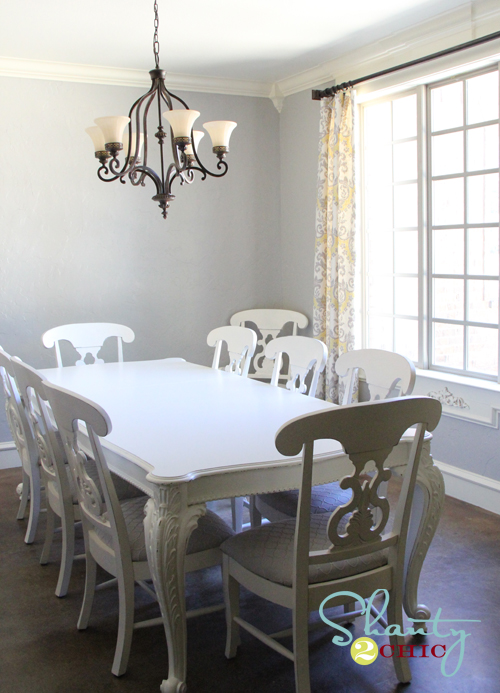
I am really LOVING how my dining room is shaping up! I DIY’ed EVERYTHING in this room so far (minus the Chandelier and the Rug)! Here is a list with links to everything you see in the room!
Thanks so much for stopping by!!!!
~Ashley


I LOVE everything you do and it is so nice of you to share your plans and ideas with us for free, thank you!
I don’t know if I am missing the info but what size legs did you use….they have so many to choose from when you click on the link.
Thank you
Not sure if you still have this buffet table.. but I was wondering how high the space is between the shelves. Wanting to fit an 18.5 inch microwave down on the middle shelf. Thanks!
Would it be possible to expand on the drawer building, please? Not very clear, not to me I should add.
Have you looked at the plans? They share more details too.
Thank you. Now I got it.
I have Sherwin Williams Anonymous on my BR walls, and it has taken on an Olive tone- not so on your beautiful buffet. Great work as always!
I’d love to know where your woven dining chairs came from. Thanks!
Pier 1!
what table?
I have to admit, I am not fond of the color choice (just not me) but the actual buffet is awesome!!!!!!! I love love love the style of this. AND what an easy build…I want to try this!
Thank you, Shirley! Send us pictures when you build yours 🙂
Awesome! Thank you so much! I will certainly send pics – going to order the legs now. Thank you for being such an inspiration ladies! Keep up the great work!
Thank you Rebecca 🙂
Hi Rebecca,
I think this would be just fine:) send us pics when you build it!!
Hi Ladies! Quick question, do think that this table can take an
18″x2.75″ leg or will that be too small to hold the weight? I found this
one on the Osborne site, but wanted to check with you first. THANK YOU!
http://www.osbornewood.com/1337.cfm
That is so gorgeous! Is it wrong to say that I want your dining room? The table, the benches, and this now…
LOL! Thank you Elena 🙂
Wow, I’m amazed that this was DIY. It looks fabulous! Makes me wonder what else I could make work around my house.
Thank you so much, Samantha!!
You’re welcome! What would you suggest for someone who doesn’t know how to do woodwork? Would you upcycle another piece of furniture?
Love it Ashley!
Thanks so much, Mindi!
Your buffet table is Gorgeous and love them legs and with your white dish pieces really is stunning. Love it and you have done a wonderful job
Thank you so much Colleen 🙂
Always stunning, Beautiful Work !
Thank you Paulene 😉