Welcome to Day 5 of our 12 Days of Christmas series!

Today I have a great gift idea for you. I made mine for my baby sister, but that’s just between you and me. 😉
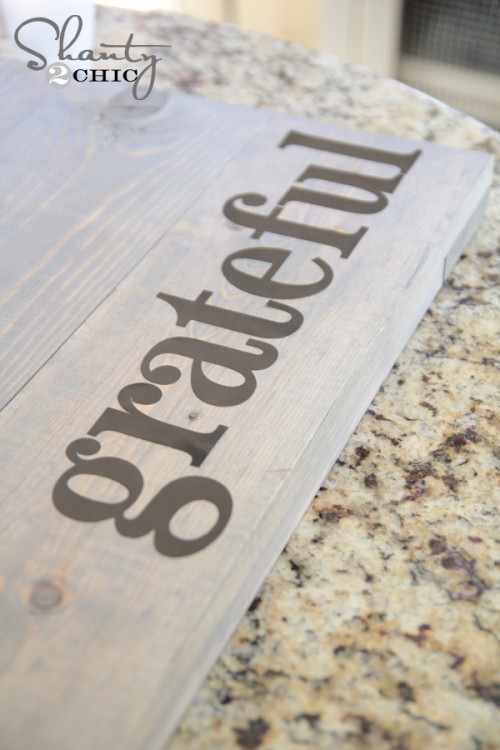
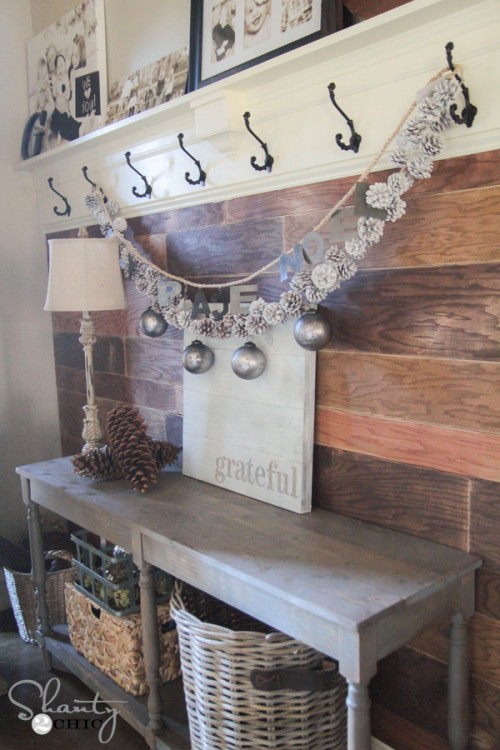
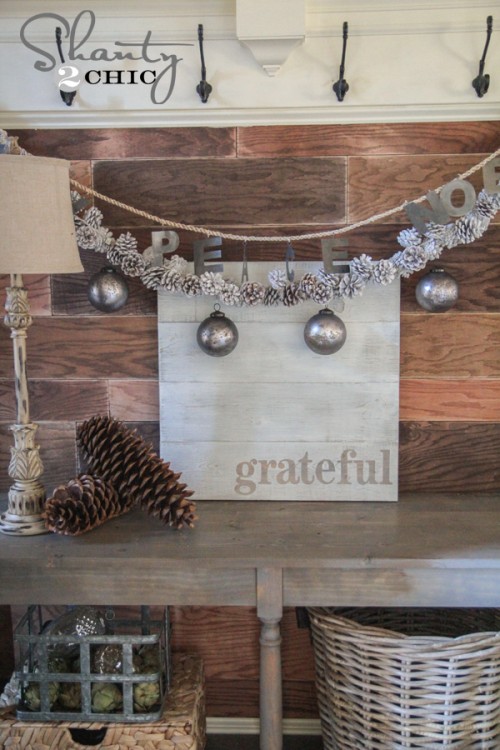
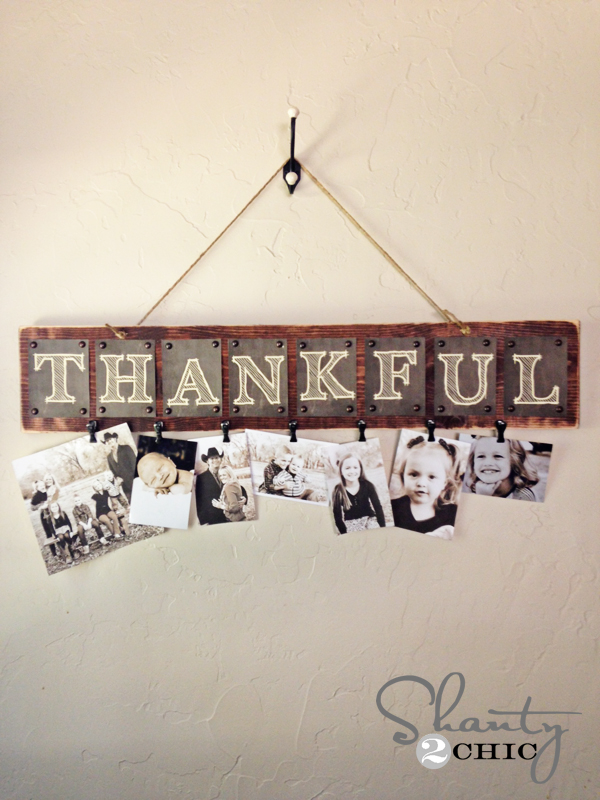
Check out my $8 DIY Wood Sign!


I chose to use the word Grateful for my sign. It’s a word I want to stamp on my brain and the brains of my kiddos all year long.
This is a super easy project, and only uses 2 boards making it cheap too!
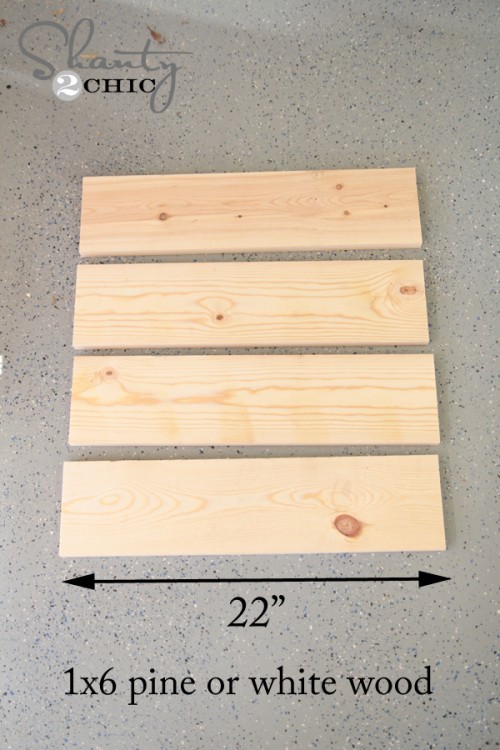
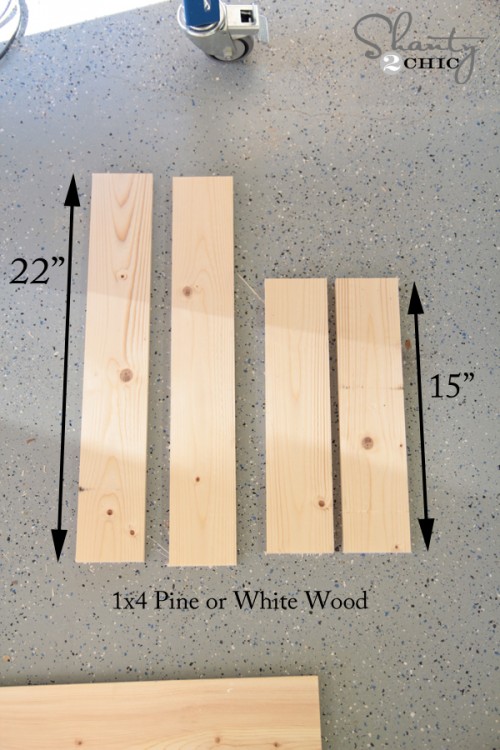
Supply List
1 – 1x6x8
1 – 1x4x8 (you can also use a 1×3 or 1×2 for this board)
Gorilla Wood Glue
1.25” brad nails or finish nails
Cuts
Start by making your cuts!
4 – 1×6 at 22”
2 – 1×4 at 22”
2 – 1×4 at 15”
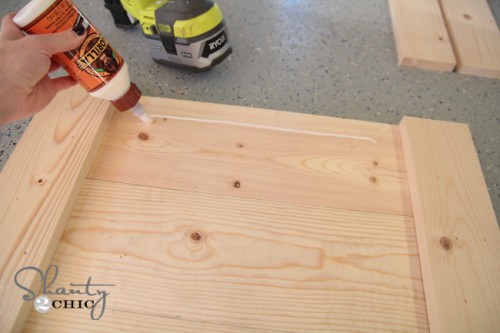
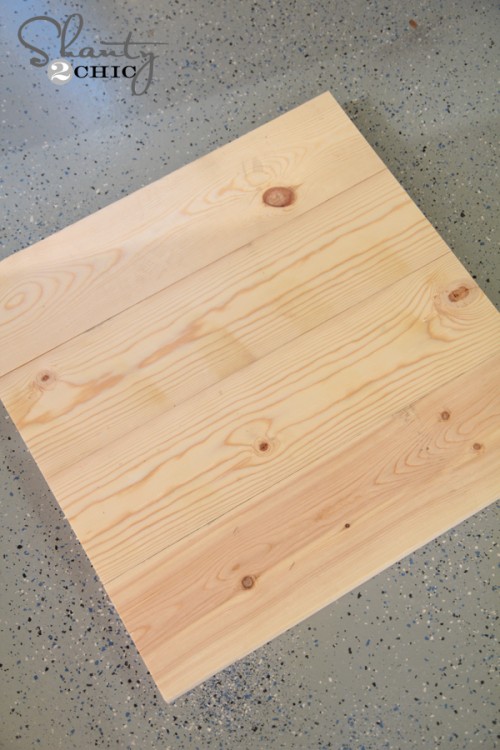
Start by lining up all of your boards side by side. Run a line of wood glue down one side like this.

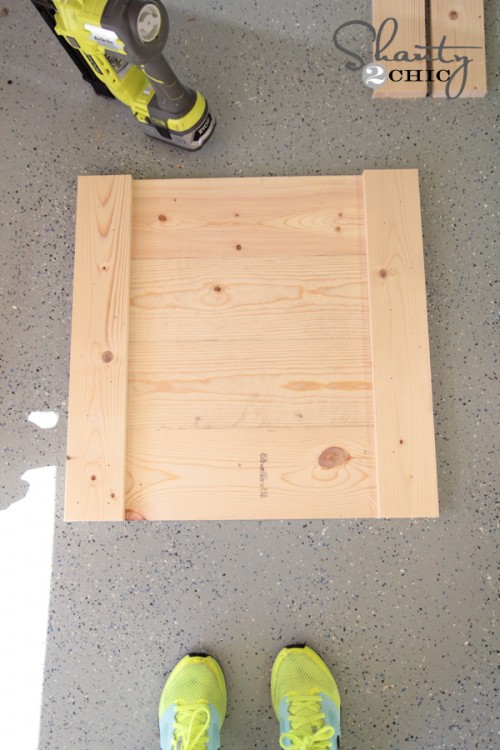
Next, lay one of the 22” 1×4 pieces on the edge of the sign and attach it to the boards using 1.25” brad or finish nails. I used my Ryobi AirStrike Brad Nailer for the whole thing. This is one of my favorite tools in my shop. It’s simple to use and you will be amazed at the projects it will do for you!

Once you have both your side pieces attached, it will look like this.
Next, run a line of wood glue on the other ends of the sign, and attach the 15” pieces the same way.
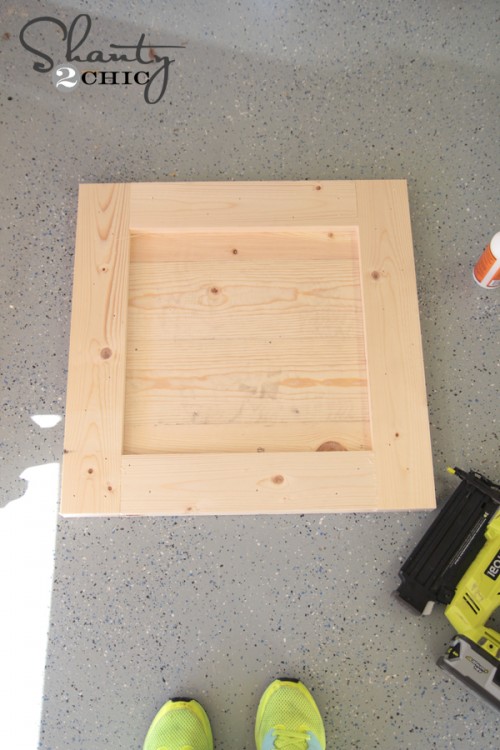
Flip it around and you have a sign!
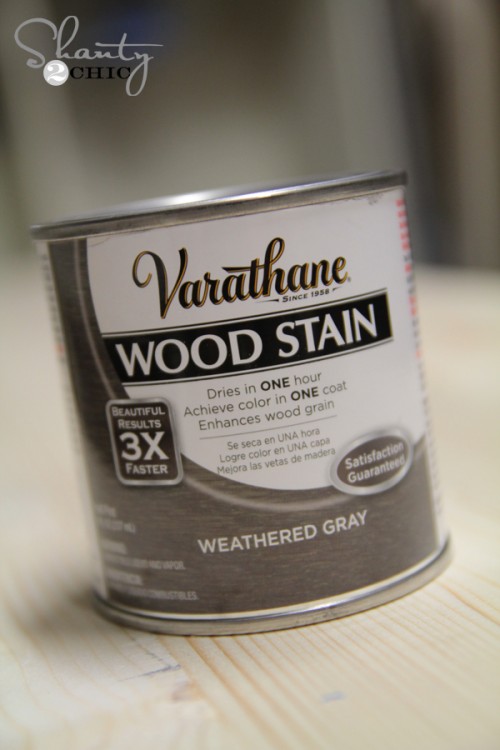
My next step was stain. You can use any stain color for your, but I chose to use Varathane Weathered Gray for mine. Love this color!
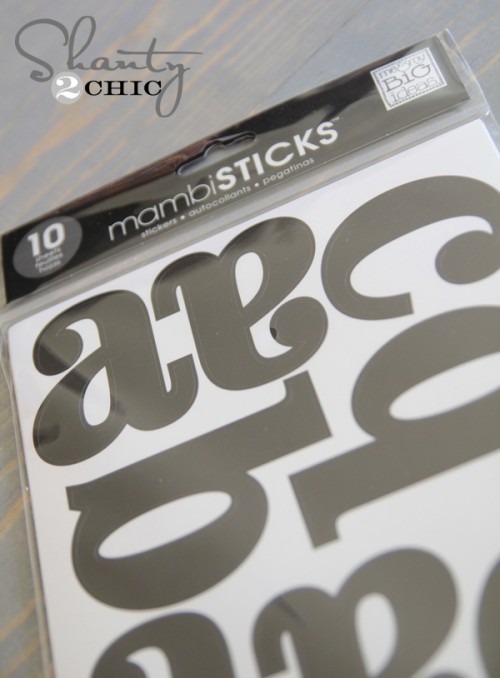
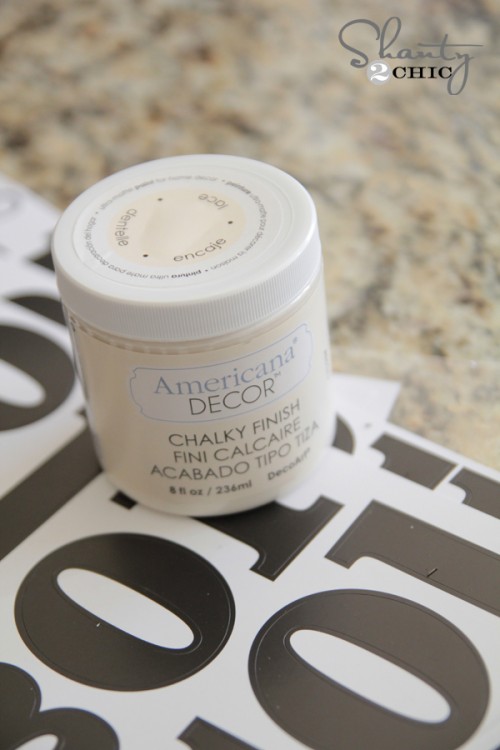
Once that dried I started on my letters. I found the best letters at Michael’s! The whole set was $5 before I used a 40% off coupon. I love the font and there are multiples of most letters. Plus, you can put the letters back on the sheet after using them and reuse them.
I peeled the letters I needed and put them on my sign.
Next, I used this paint from Michael’s to do a thin coat over the whole thing. You can also use an acrylic paint, but I like the way this looks and how thin the coverage is.
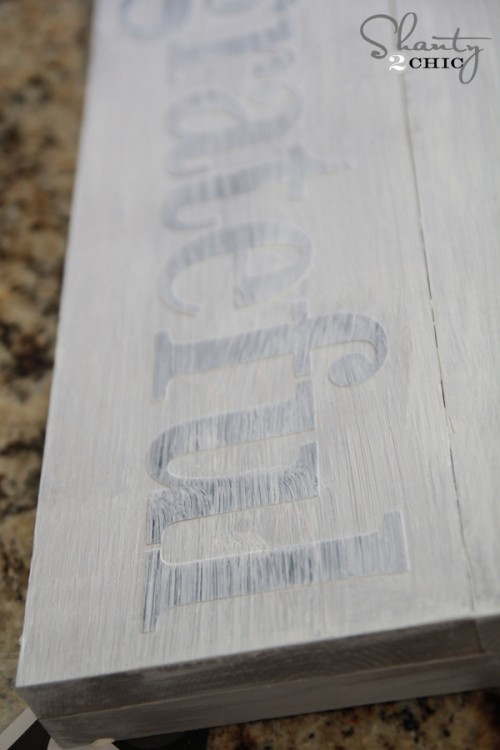
It dries really quickly. After it was all dry, I peeled the letters off. Simple!
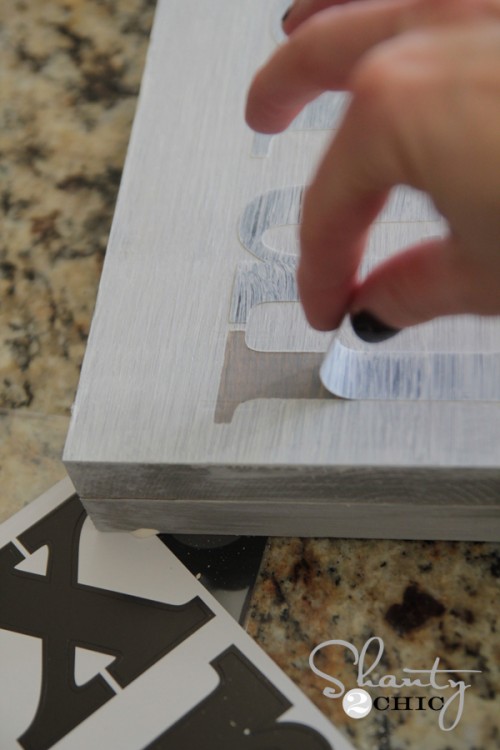
My last step was sanding the entire sign using 120 grit sand paper. I used my Ryobi Corner Cat for this part. I love how it takes some of the paint off and gives the entire sign a vintage look.

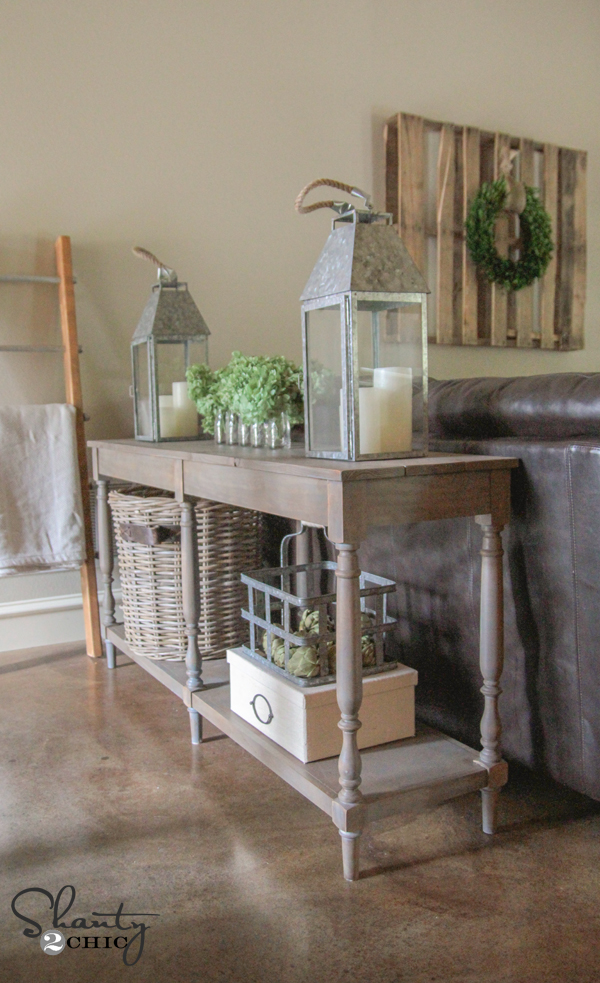
Here it is all set up on my entryway table!

What do you think?
I love that this can be customized with any word. I think it makes the best gift for friends, family, teachers… You name it.
The best part?? Under $8 for the wood… Bam. Hope you love it and let me know if you have any questions at all! Also, be sure to check out the other Day 5 projects from our friends! Just click on the buttons below to take you there!


these are great ideas i have never done this before
How different would the wood cuts and supports be if I want a larger sign, say instead of 22×22″ something around 5X3 ft???
Thanks!
Random question: Did you install the wood wall behind the sign? If so can you tell me where you go the supplies? Or how I go about getting the same? Thanks in advance!
Hi…in the above post you stated: Just click on the buttons below to take you there!
I have tried clicking the pics and otherwise do not see any buttons to click on to get to the other 5 day projects. Can you help?
Did you sand the wood any? If so, did you sand it before assembling it or after?
No sanding 🙂
I’m new to working with wood. If I wanted to sand it, would it be easier before assembling or after?
Sand after you assemble 🙂
I know this may be a dumb question, but how did you get the lettering so straight?
Love this! Is that the same stain you used on the table in the picture?
Clever! So beautiful and simple! I need to check out those letters!