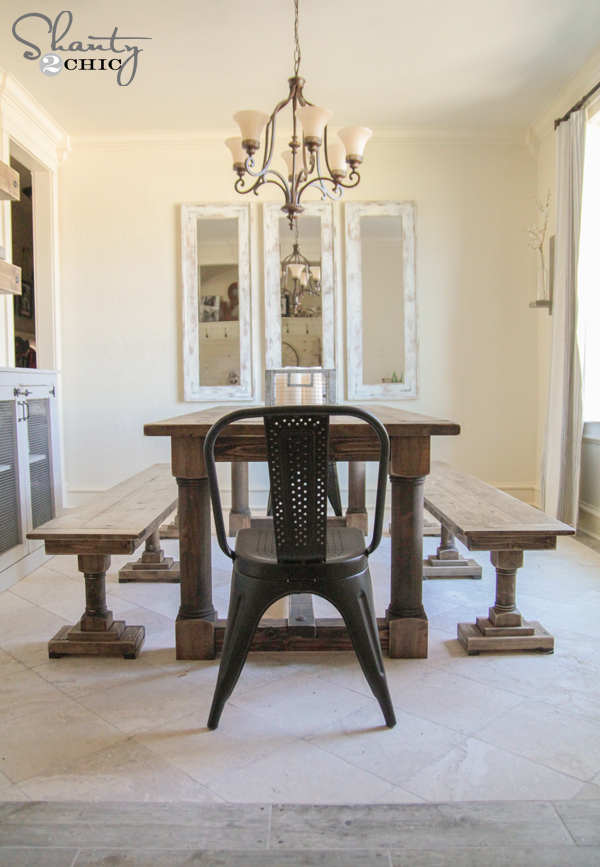
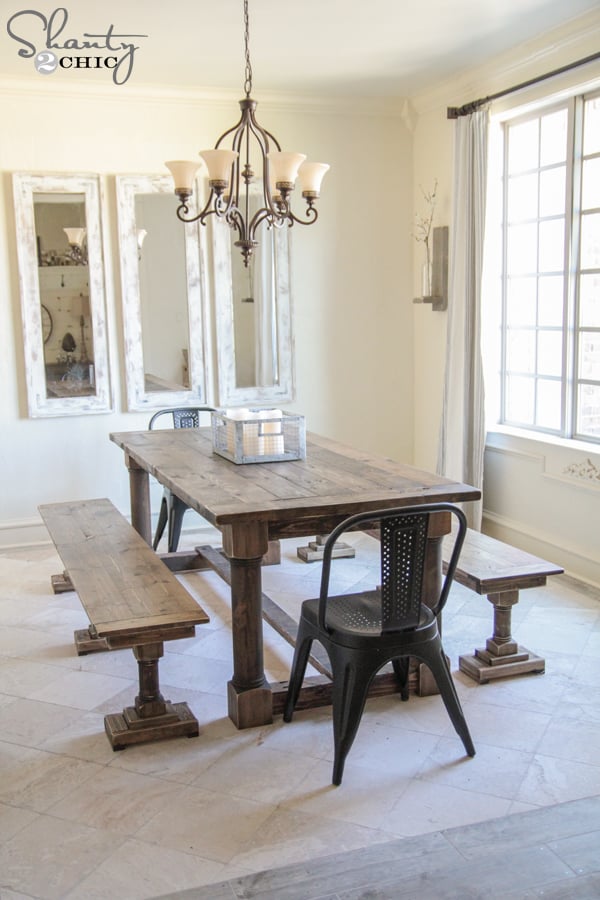
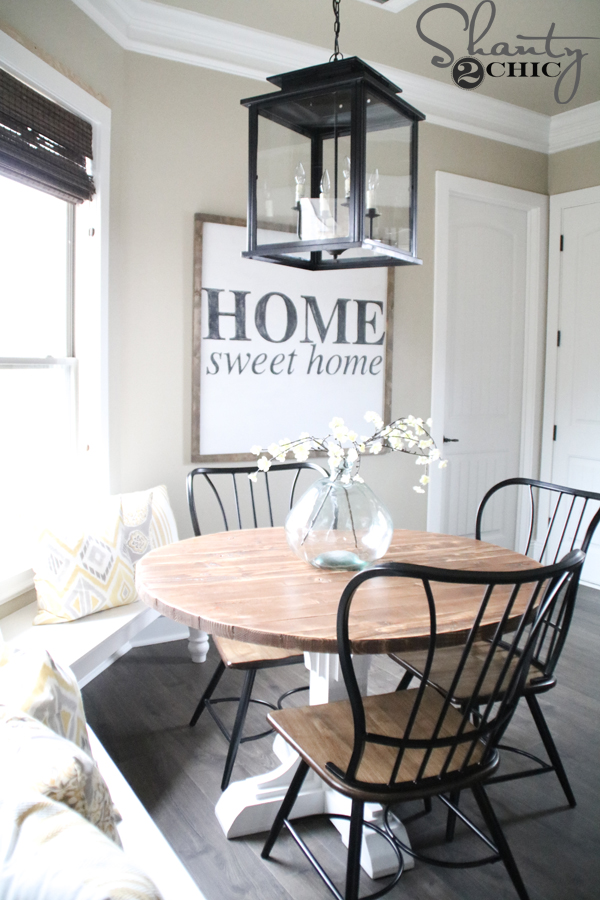
As many of you know, I have been revamping my dining room and sharing the progress and plans with you as I go. I shared my new dining table a few weeks back, and I am here today sharing my new DIY Dining Bench! Well… Make that benches. 😉 Check them out!

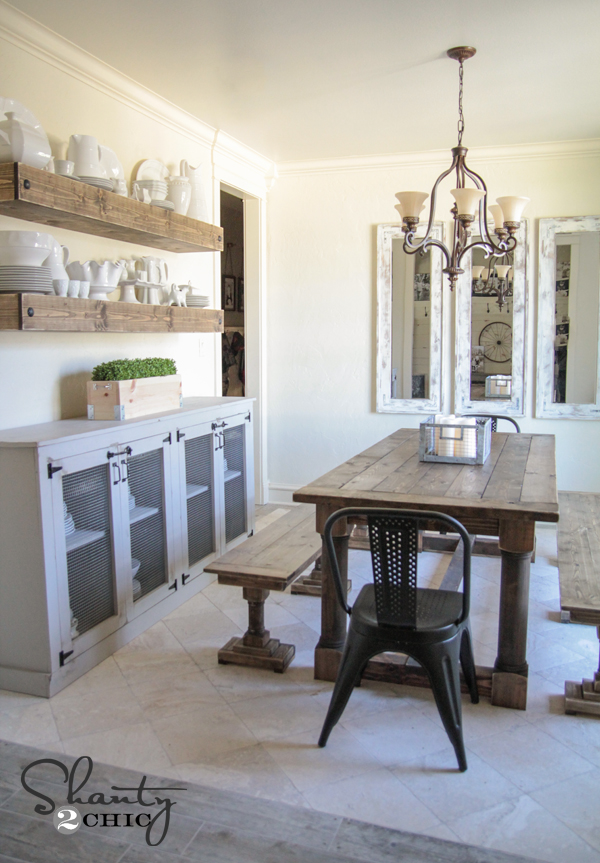
Aren’t they fun?? I think they compliment the legs of the table without fighting with the design. I debated originally about going with 10 chairs rather than benches, but with 5 kids under the age of 12, you just can’t beat a dining bench. As always, I will walk you through the entire build here, and you can also download the FREE printable plans by clicking HERE or the button below!

Here we go. I must warn you… I share lots of pics in this post. I went camera/photo happy on this one so there.
I worked with Osborne Wood Products to design the legs for these benches. I love how they turned out. You can find them on Osborne’s site HERE or on Amazon HERE!![]()
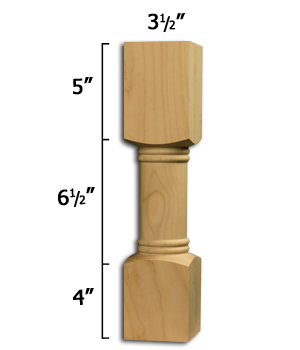
I used knotty pine for my legs. On Osborne’s site, these run $17.99 a piece, and shipping for 3 of them to my area is around $20. That would put the total cost of 3 legs to my house $75, which is GREAT.
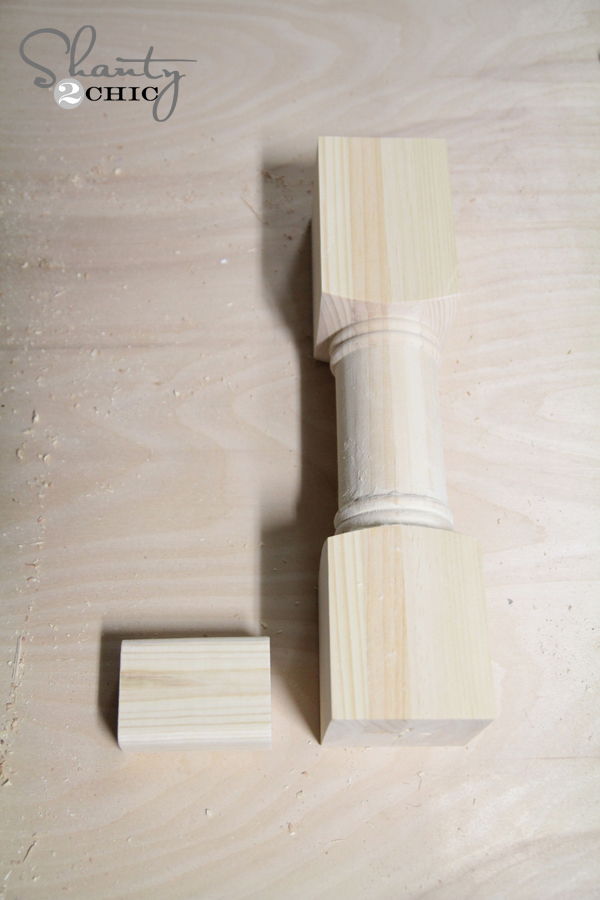
Your first step is building out the base of these legs. You will basically piece some boards together to create a solid feet for the legs. This gives the bench a ton of stability and I love the finished look as well.
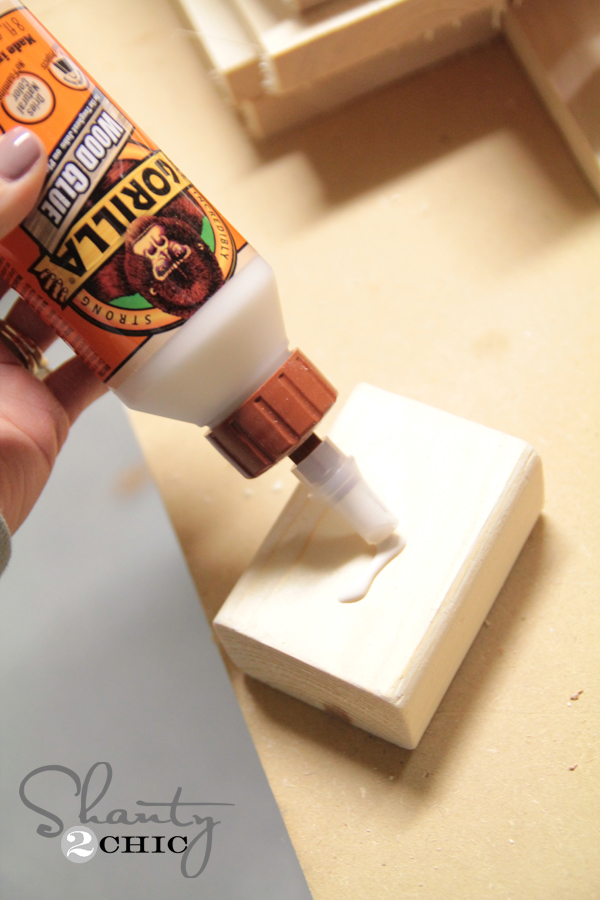
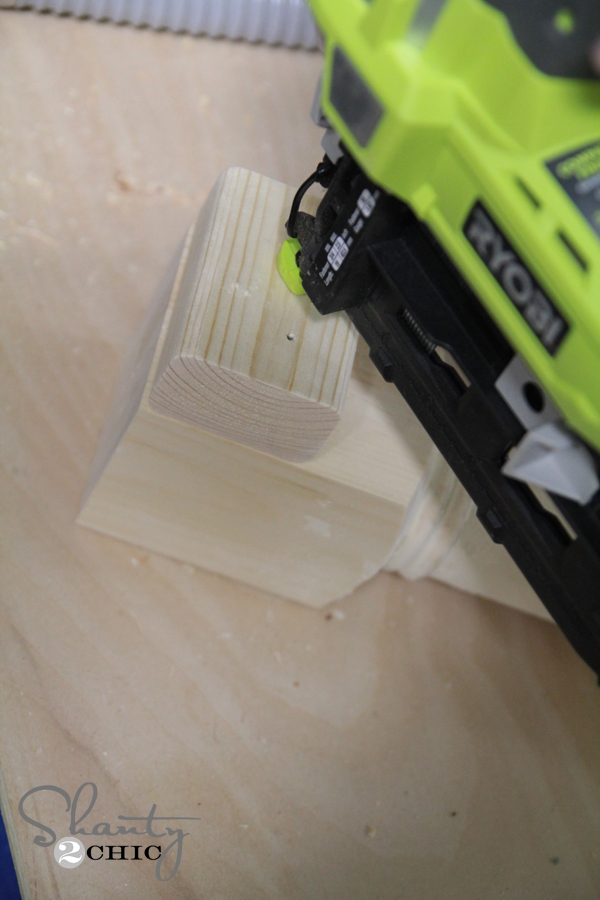
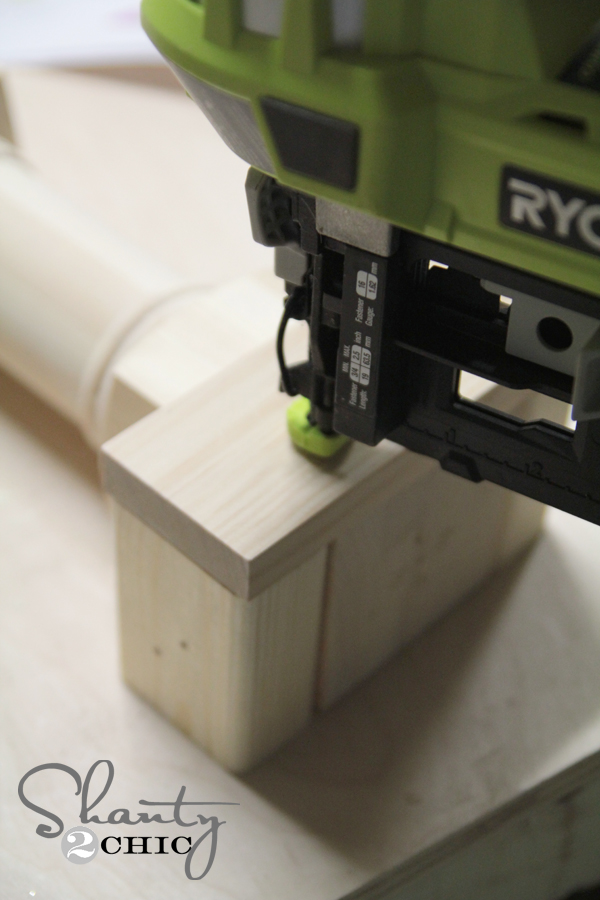
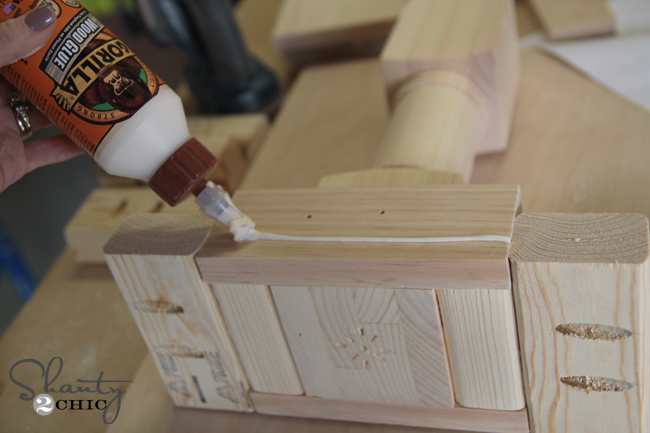
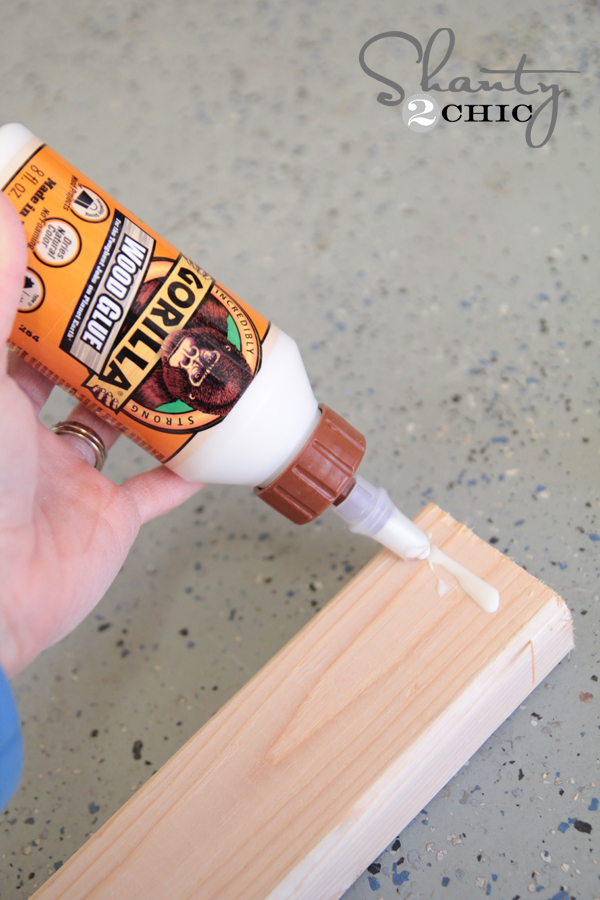
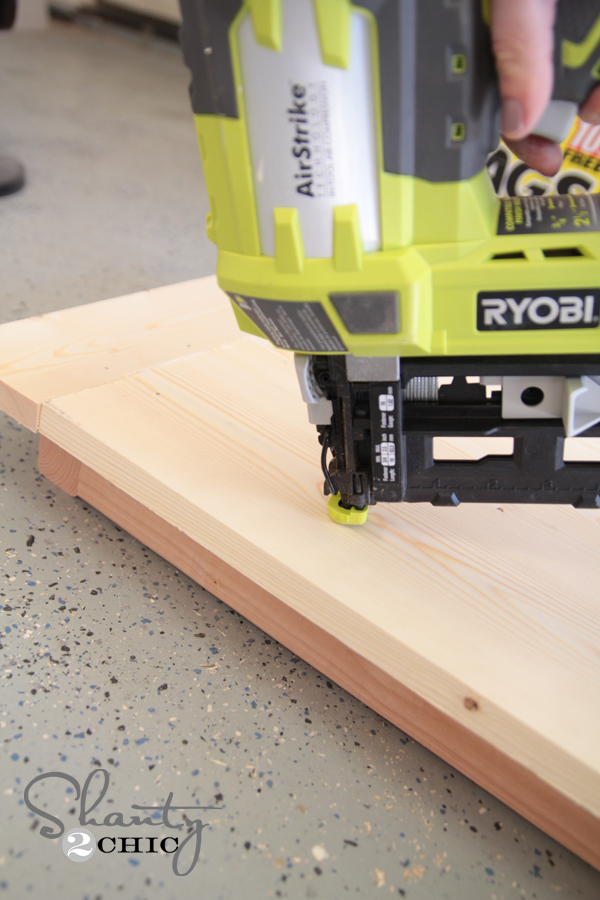
I used my Ryobi 16G AirStrike Finish Nailer for this project. I would recommend it over the brad nailer for this project as the nails are a bit beefier. Also, be sure to use wood glue on all of your joints. I used Gorilla Wood Glue for mine, like always. 😉
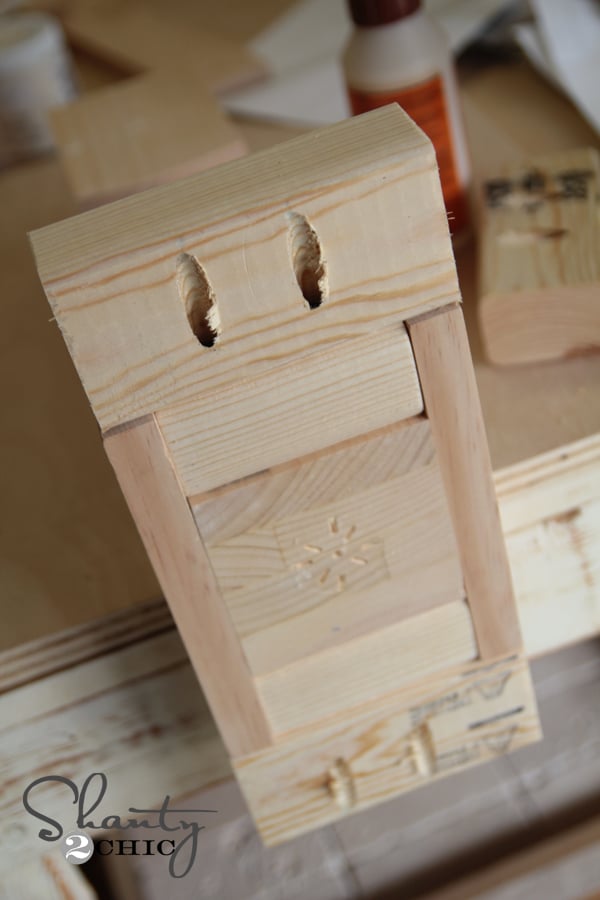
Start by making the 2×3 cuts that will be the same width as the leg. Each leg will have two of these cuts.
Next, glue and nail those pieces to the legs. I used 2″ finish nails on this part.
Each of the legs should look like this.
Before making the next cut, measure this length. We do list the length in our plans, but wood can run different widths, so it’s always good to measure before making your cuts.
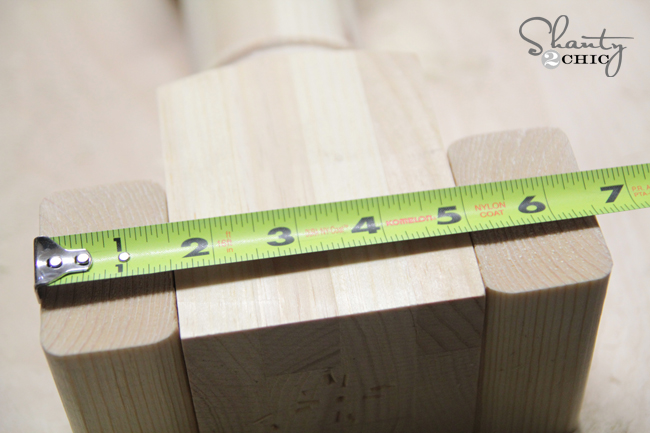
You will cut two 1×2 at this length, and attach them using wood glue and nails.

Once you have both nailed on, the leg should look like this.
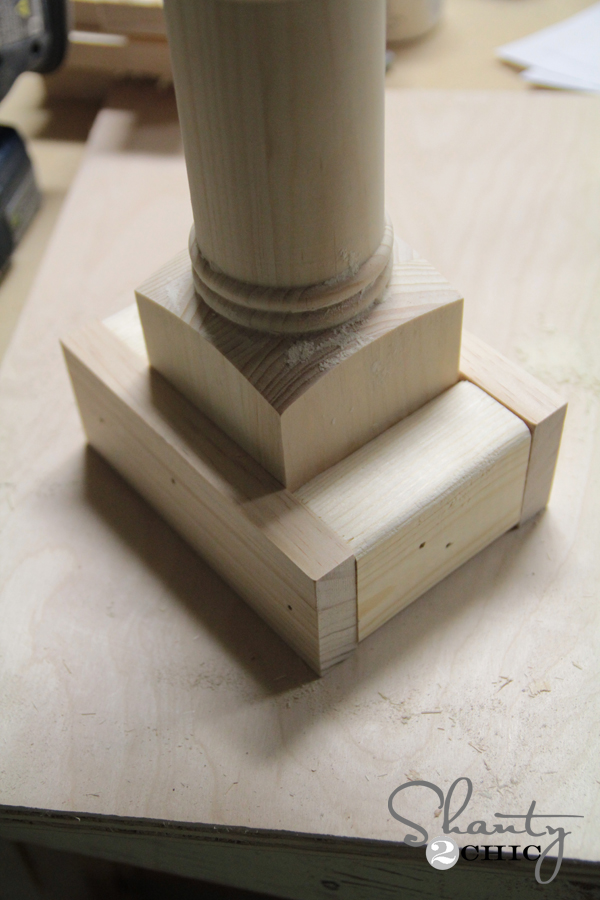
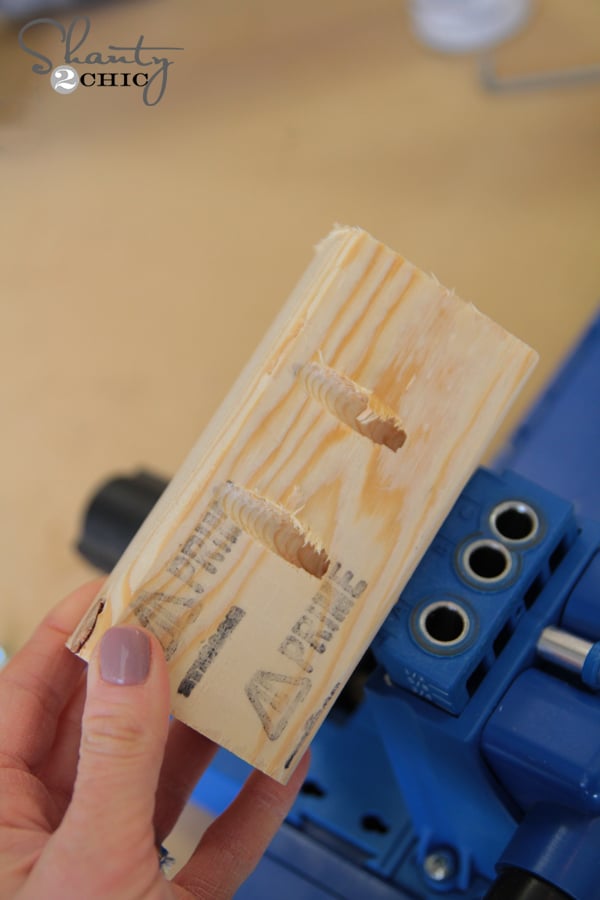
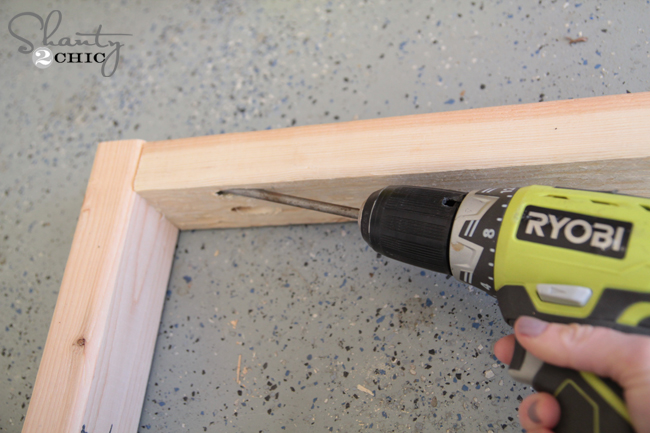
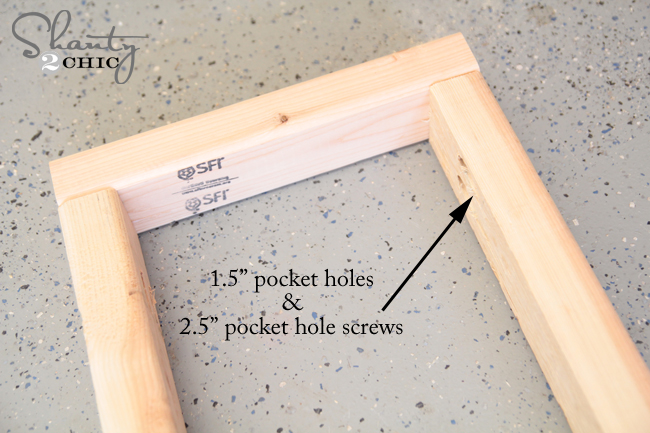
Next, you will cut two 2×3 for each foot. These will be attached using pocket holes and pocket hole screws. I used my Kreg Jig K5 for this part. I had to make adjustments to get the pocket holes in a good place. Not sure if it’s technically correct, but it worked like a charm. 🙂
I set the drill guide to 3/4″ rather than 1.5″, but adjusted the clamp of the jig to 1.5″.

That allowed me to make the pocket holes to stay on the wood and they looked like this.
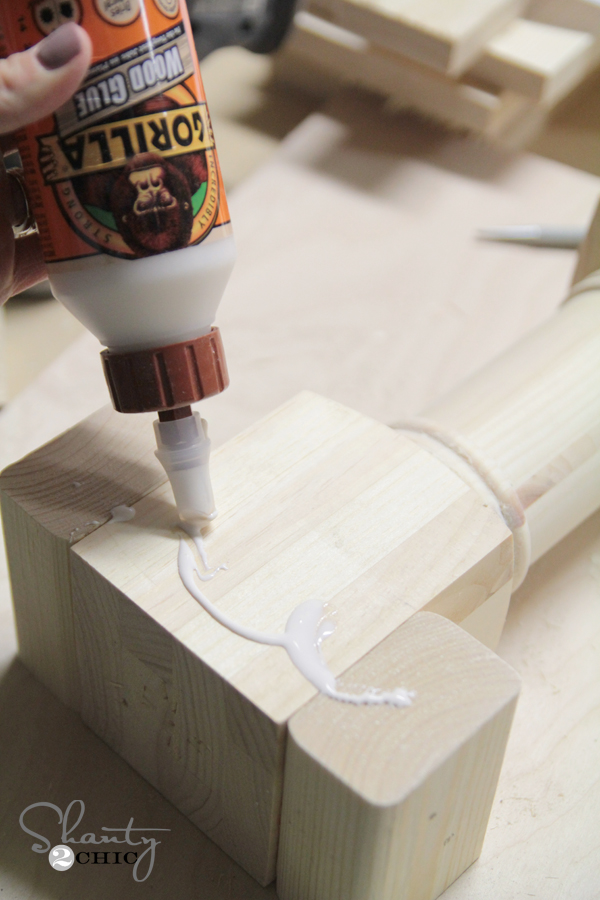
Next, I added wood glue to the end that attaches to the leg…

And, I used my new Kreg Bar Clamp (LOVE) to hold the piece in place.
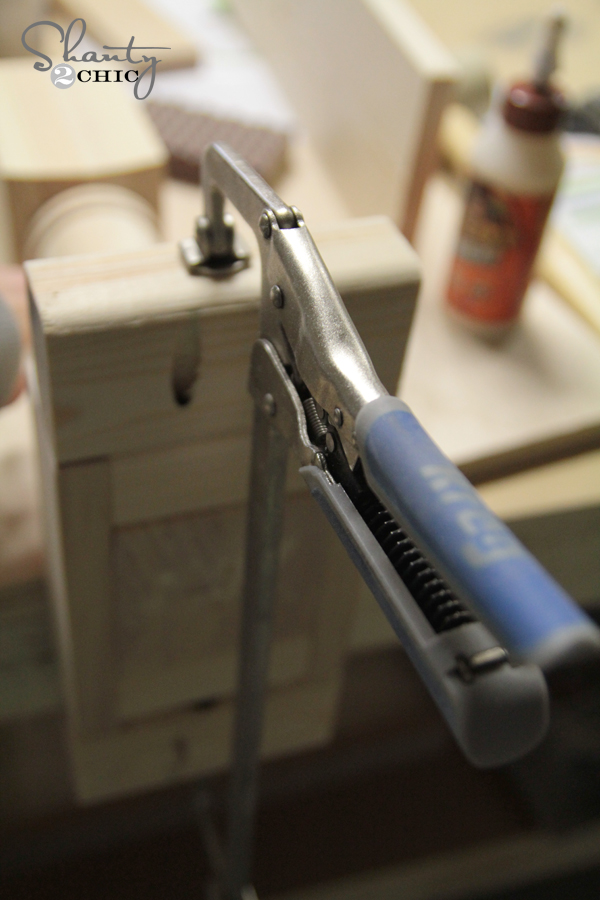
I used 2.5″ pocket hole screws to attach those pieces.

And the bottom looked a bit like this!
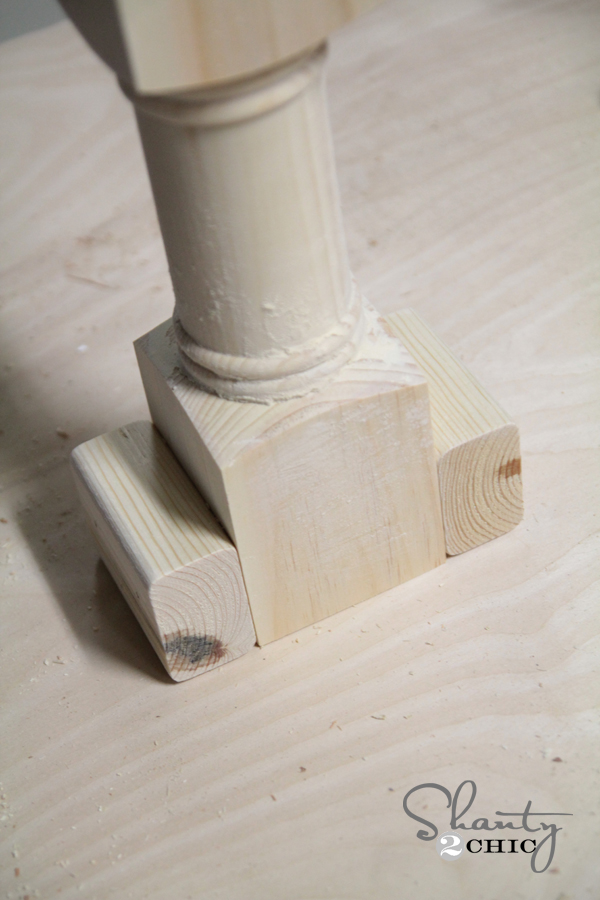
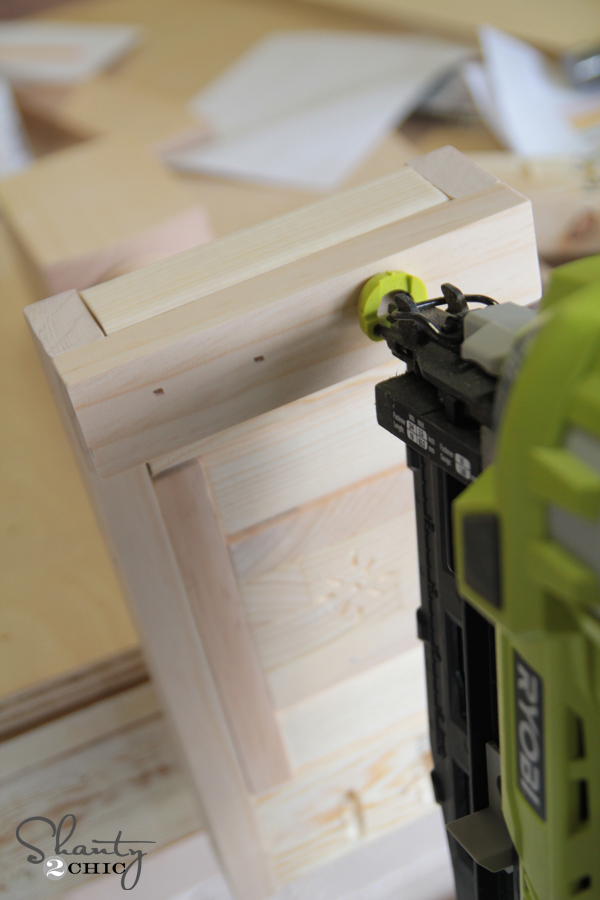
The next pieces you will add are the 1×2 side pieces. Again, measure before making the cuts. I used wood glue and finish nails on this part as well.
The final pieces you will add to these cute legs are the feet. These are just 1×2 cut to fit the bottom of the leg.

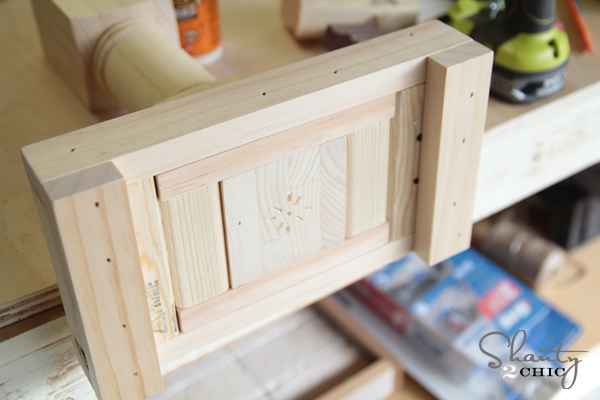
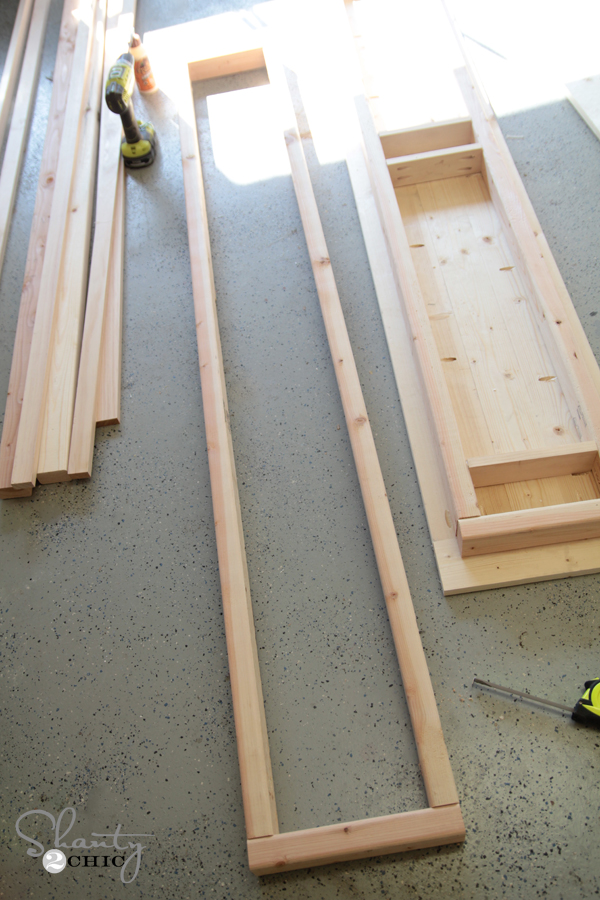
Bam. You got yourself a leg… Or 6.
Time for the tops! This part is easy too, with the Kreg Jig.
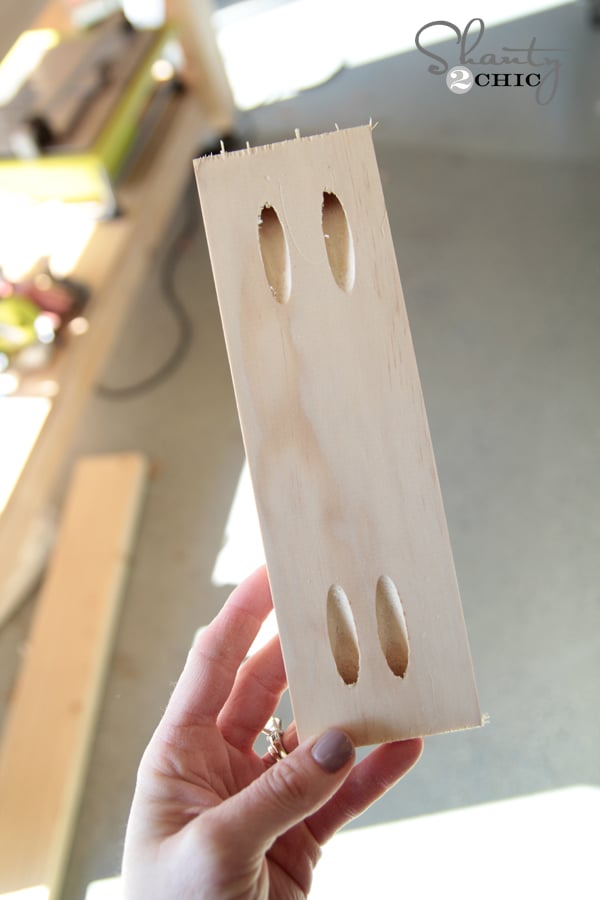
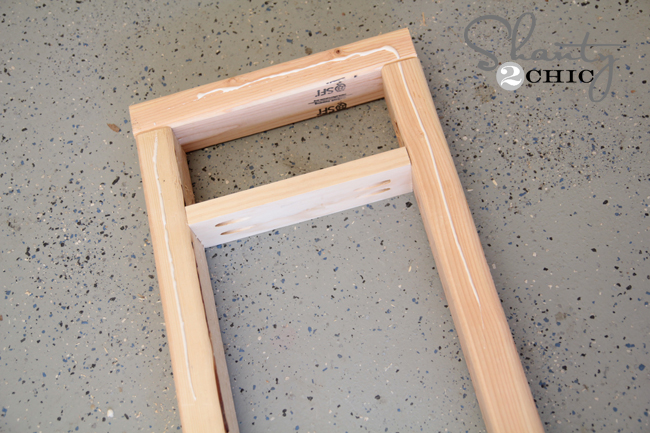
I started by creating the apron of the bench. This part will use 1.5″ pocket holes and 2.5″ pocket hole screws.
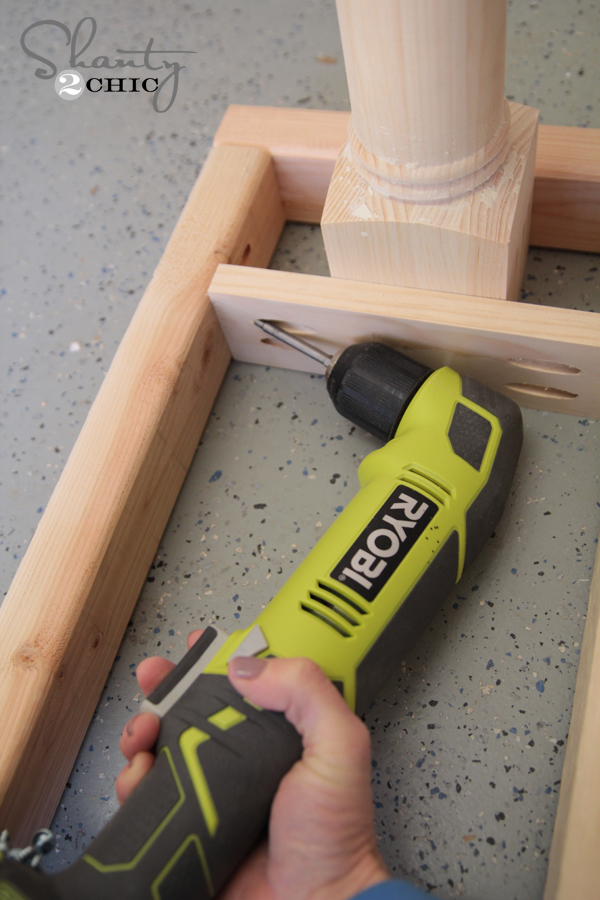
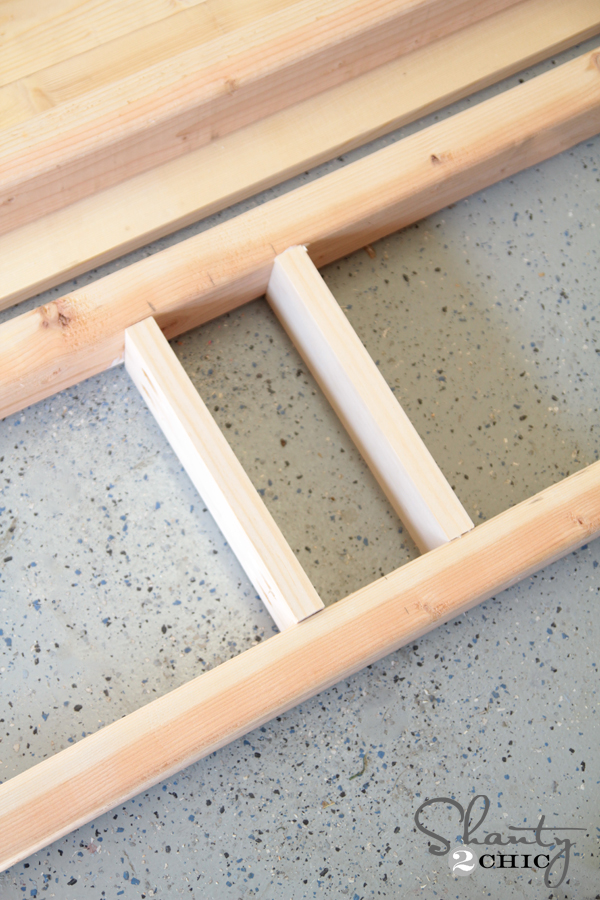
Once you have the outside of the apron looking like a big rectangle, you will add the smaller 1×2 to the inside. These will hold the legs in place.
Iused 3/4″ pocket holes and 1.25″ pocket hole screws for these smaller pieces.
It is a tight fit on this part, and I had the best luck using my Ryobi 18V right angle drill with the smaller 3″ Kreg driver bit. I don’t use either of these tools a ton, but when you need them, you need them. There are just some projects that will only allow for these, and I love having them handy when I need them!
The middle supports will look like this…
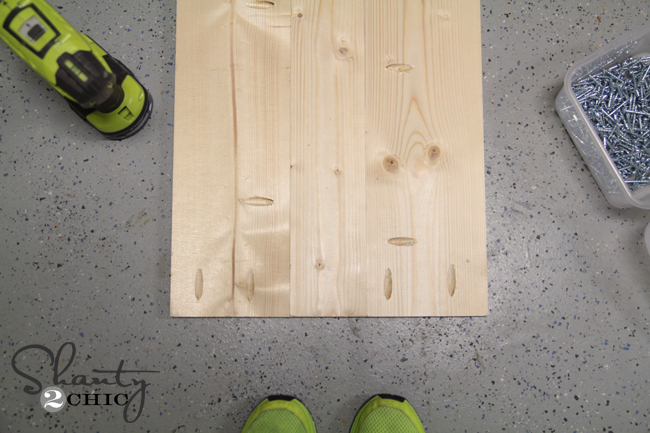
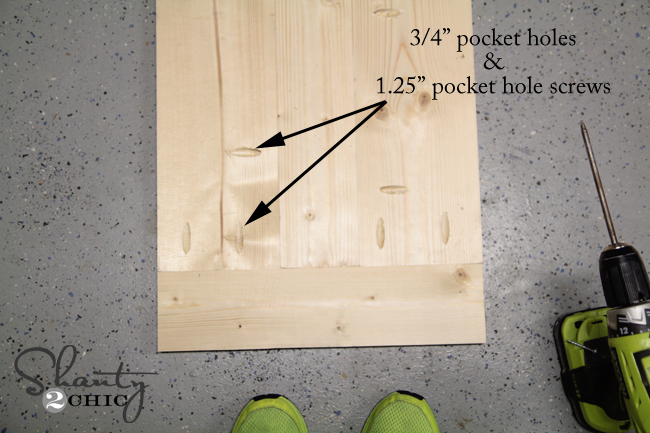
Next, I created the plank tops. I did this by using my Kreg Jig with 3/4″ pocket holes and 1.25″ pocket hole screws. I did not use glue between my planks on this part. It is strong enough with the pocket hole screws and it can get really messy making staining a booger.
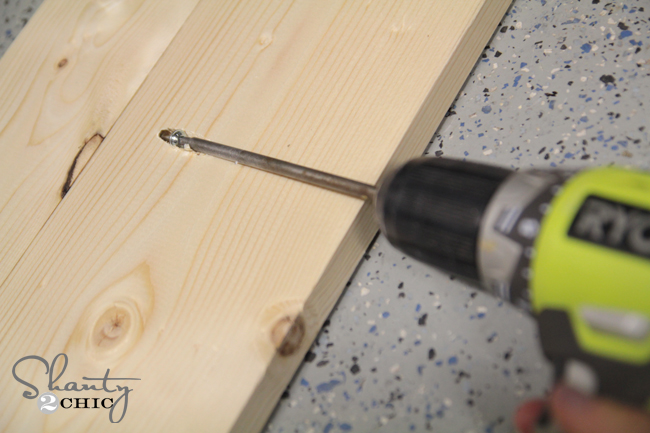
The first 3 long planks will be attached like this. You can see the pocket holes on one side of each of my outside pieces. Then, you will attach those to the wider middle piece using the screws.
Then, I attached my breadboards. I measured the exact width of those three boards to get the length of my breadboards. These are attached through the pocket holes on the ends of the three planks and into the breadboards.

Now I attached the planks to the apron using wood glue and finish nails. I went through the top of the planks and down into the apron.
The final step is setting those legs in place. I put wood glue on the top of each leg and set it into place. Then, I used 2″ finish nails through the supports and apron and into each leg. And naturally, I forget a pic of this part. #brainfart. It’s simple though! Just glue and nail and done.
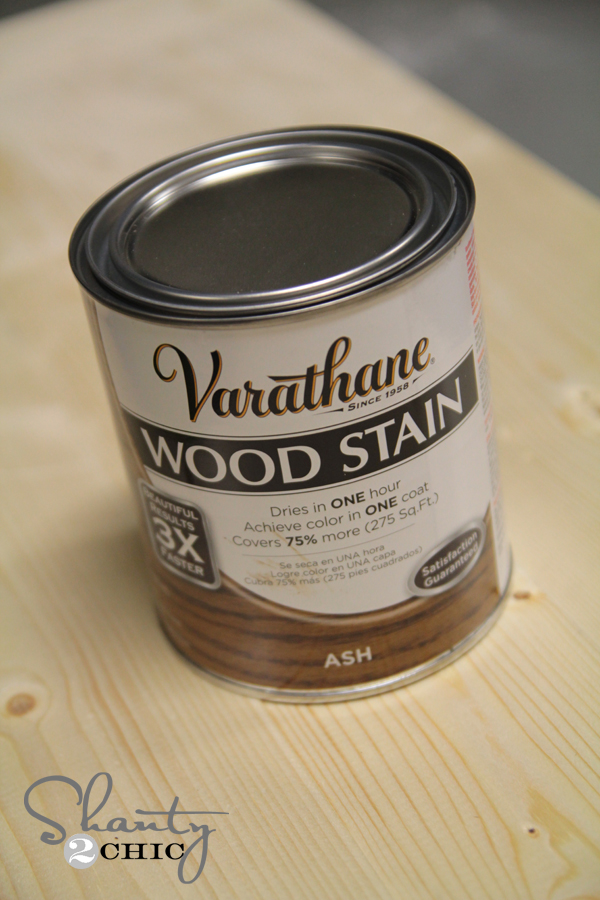
I used the same stain on the benches that I used on the DIY Dining Table. It can be found at the Home Depot. It’s called Varathane wood stain and the color is Ash. I love the deep almost black undertones of it, even though it is a brown stain. It only takes one coat and it dries in under an hour. Love it.
I used Varathane Triple Thick in Satin for the top coat. This has almost no sheen to it, but just enough to give it a smooth finish. I LOVE THIS STUFF. It dries in 2 hours and doesn’t show brush strokes. It has the thickness of 3 coats in one. I have used it a few times now and I love the outcome.
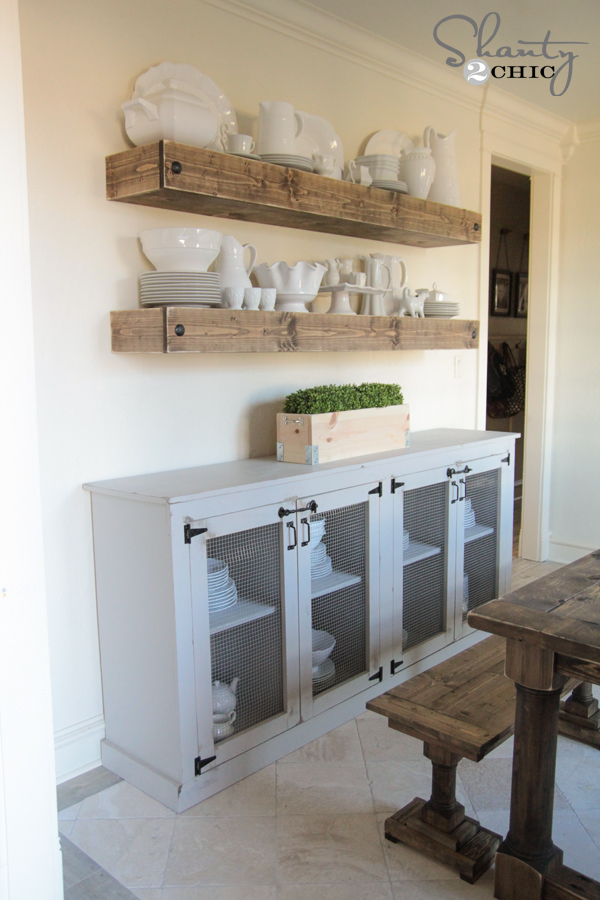
That’s it! You have a triple leg bench. I used white wood for all of my boards making the cost of lumber for each bench under $40. Teamed with the cost of the legs, you can build each bench for around $115. Not only does that beat the heck out of major brand’s benches, you can’t find one in this style yet. I am perfectly pleased! Check out the progress I am making in the room!
Here are the other projects to keep you busy!

did you sand the edges of your pieces you used in step 1? also curious, does it matter how far apart the pocket holes are for the bench top and matching dining table top?
I love this, and would love to replicate it. But I’m having the hardest time finding the plans for the table on the site. Any help?
There is a link, towards the bottom of this post, that’s says DIY Dining Table. That’s where the plans for the table can be found.
Forgive me if you’ve answered this a hundred times already, but are your walls still painted in Valspar’s Homestead Parlor Taupe? Trying to decide on that color or if I should go even more white. 😉 Thank you so much for your time.
Love the table but not sure about all the layers to the bench legs. I think one would have been enough so it looked more like the table.
Having three legs on the bench I believe gives it better balance.
I used to have benches years ago and the problem with them was that when someone sat at one end and another person sat at the other end disaster enfolded when a person decided to get up. The one person sitting on the bench disappeared rather noisily to the floor.