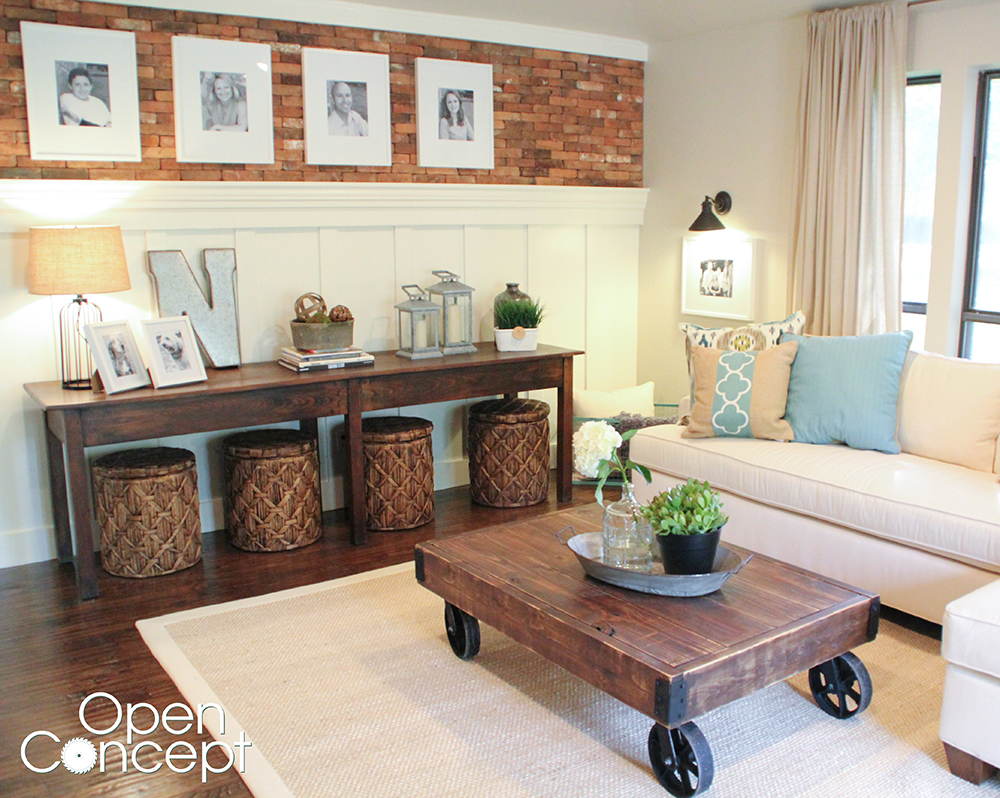
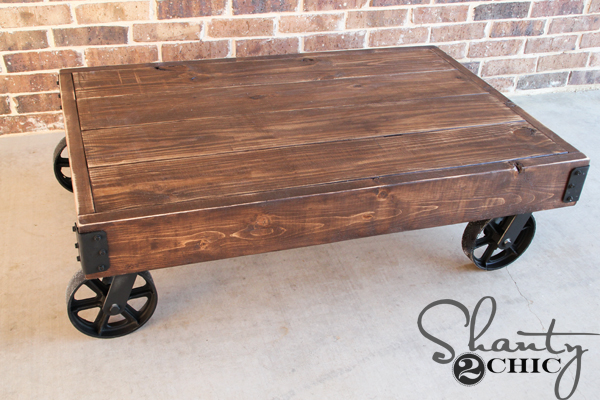
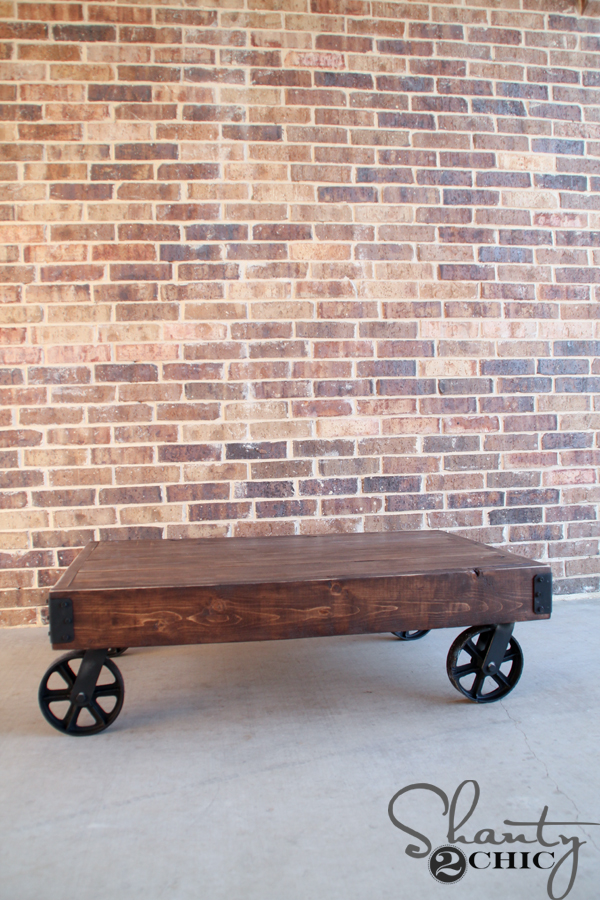
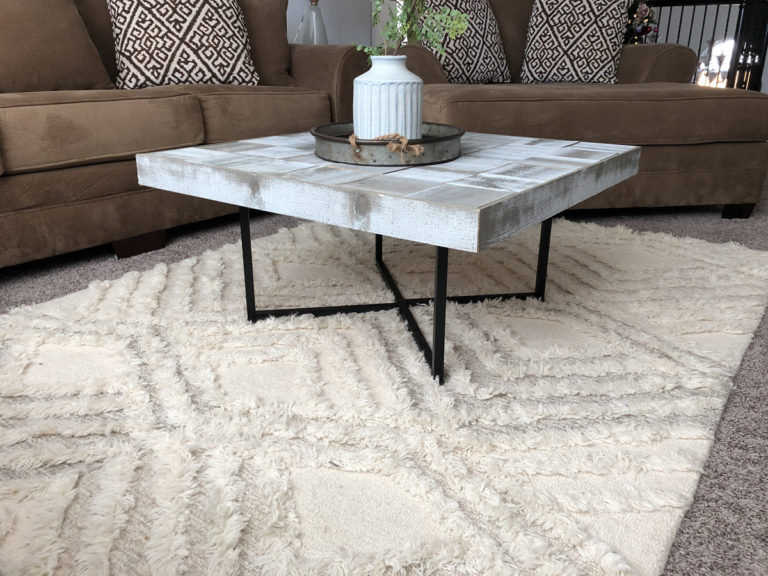
I’m so excited to share this coffee table with you guys today! I love, love, love factory cart coffee tables but they aren’t exactly budget friendly.

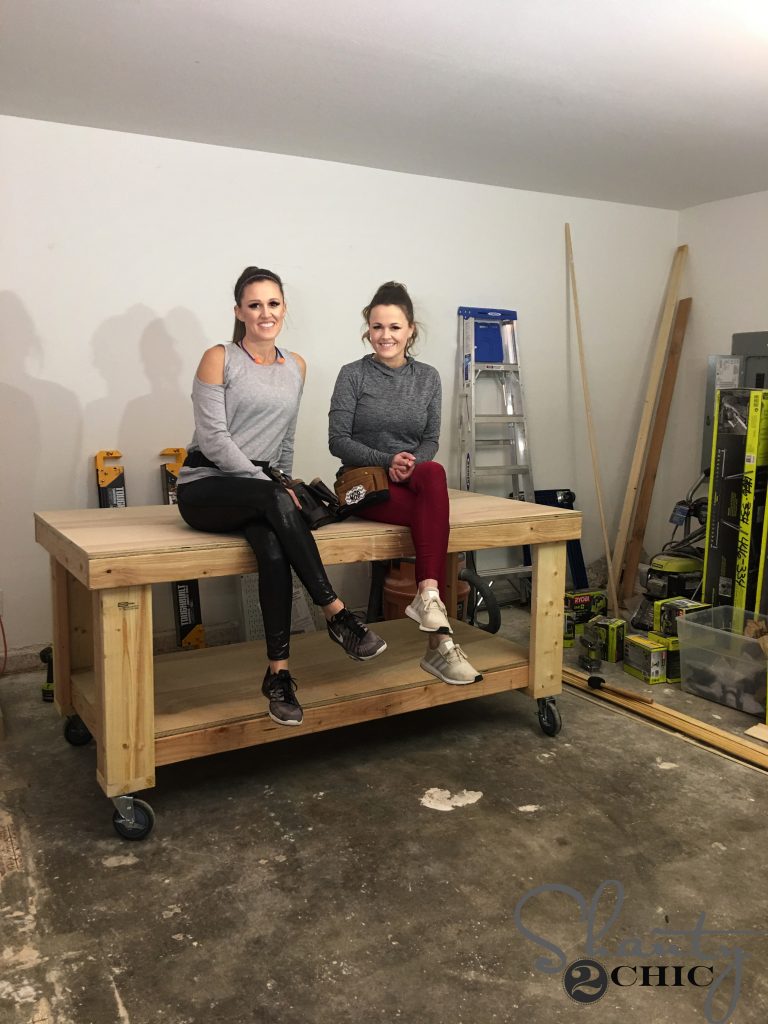
I had a specific design in mind for a special place so I hit-up our friend Jamison, a.k.a Rogue Engineer, to whip some printable plans up so we could share this easy and affordable build with you guys!
You can find the plans HERE and we’ve got the step-by-step tutorial for you to follow along with as well!
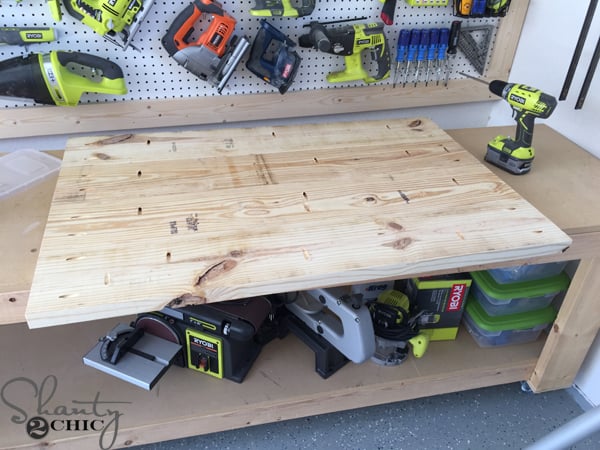
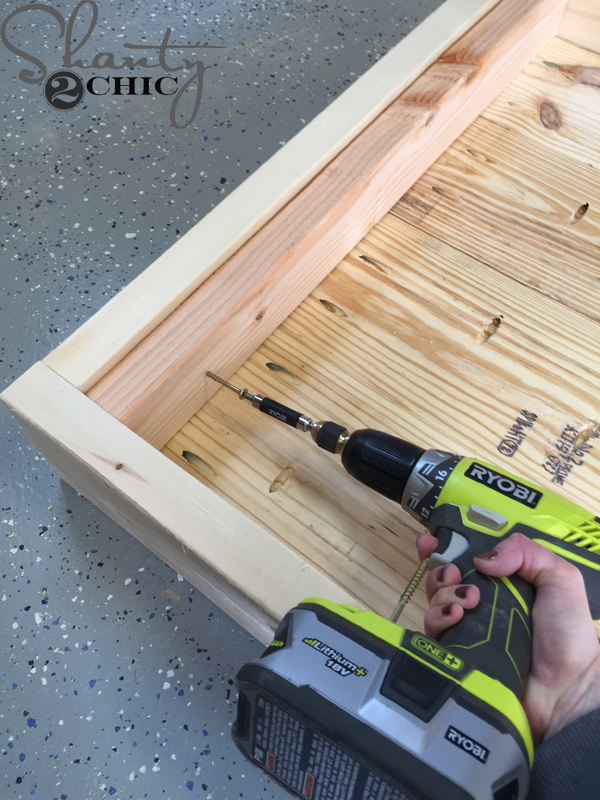
After I cut the boards for the planked top, I drilled 1 1/2″ pocket holes and attached them with 2 1/2″ pocket hole screws.
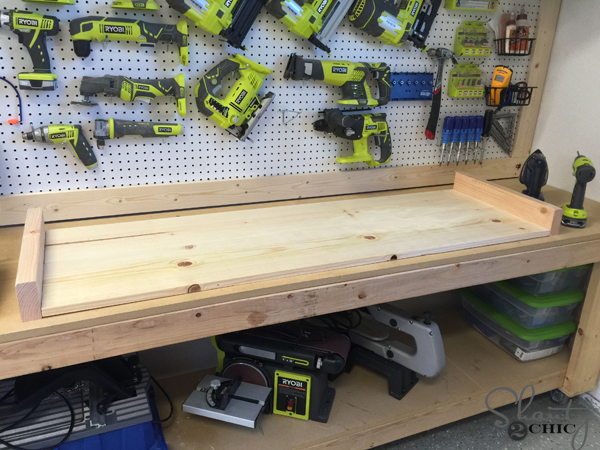
Then, I attached the short side pieces with pocket holes screws and wood glue. (I lost several of my tutorial pictures so this is not the exact table top but it is assembled the same way). Short sides first, then I attached the long pieces.
I flipped it over and attached the first 2×4 braces to each end with 2 1/2″ wood screws. I like to use the Spax multi-material star head screws. They are a bit pricey but oh.so.worth.it. They are self tapping, so you don’t have to predrill and the star head doesn’t strip as easily!
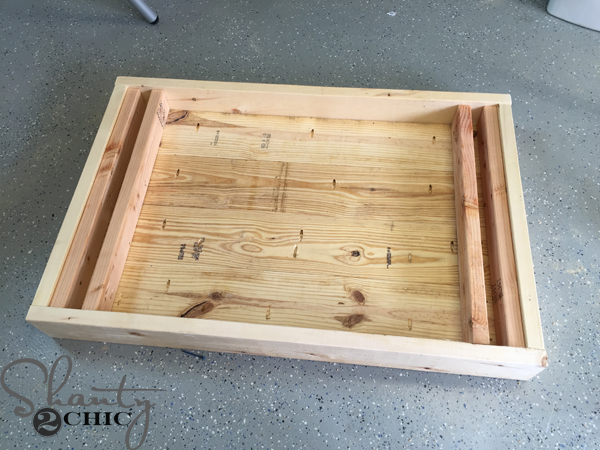
Next, I added the second set of 2×4 braces. You attach these with pocket hole screws.
That was IT for building 🙂 Now for the finish!
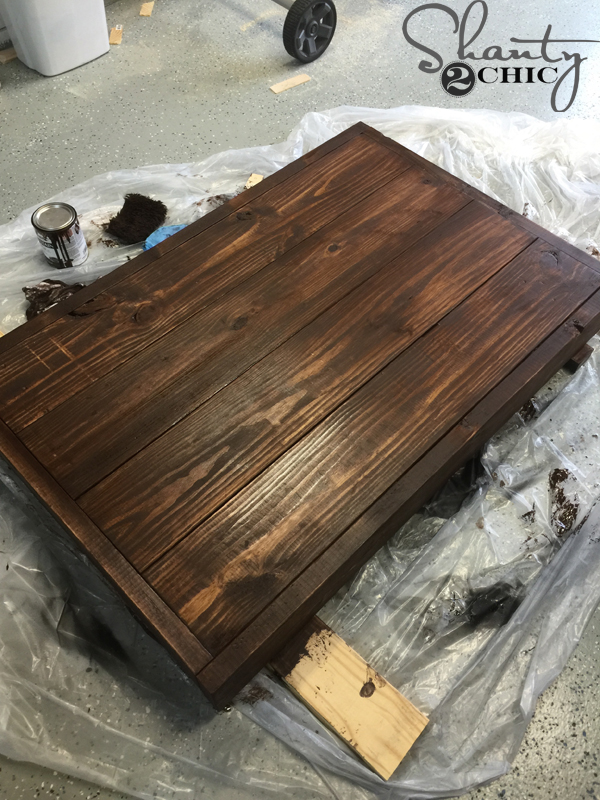
I applied one coat of Varathane Dark Walnut stain. Just wipe it on with a clean cloth, wait about 5 minutes, then wipe it with a new clean cloth. Don’t wipe the stain off, just blend it with the cloth so that the stain is even.
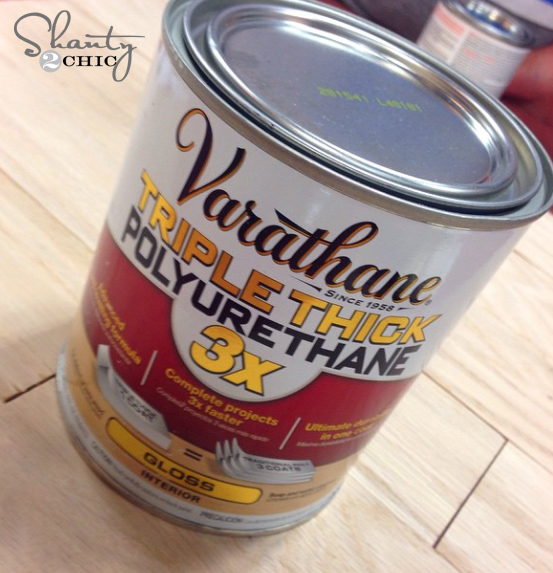
After the stain dried (about 1 hour later), I applied one coat of Varathane Triple Thick Polyurethane. Just apply it with a bristle brush. You can put it on thick, it is self leveling and will all spread out evenly. I use a bristle brush – it will look like glue until it dries.
Now for the fun part 🙂
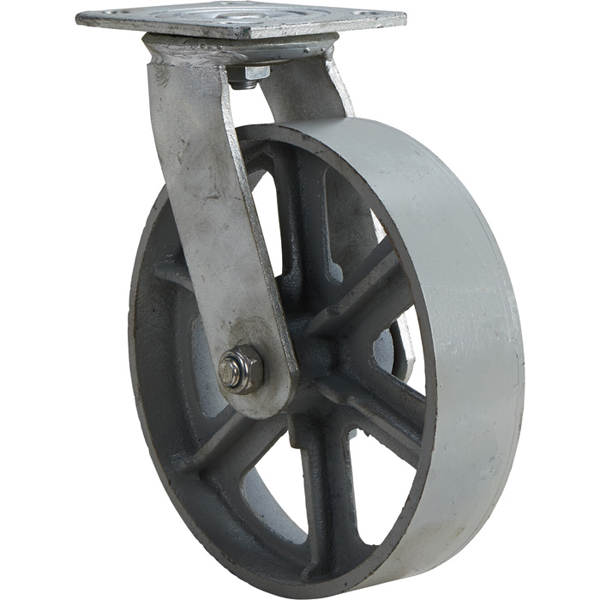
I purchased these 8″ casters from Northern Tool. You can see them HERE! These were the closest thing to budget-friendly, factory cart wheels that I could find and I think they are just perfect!
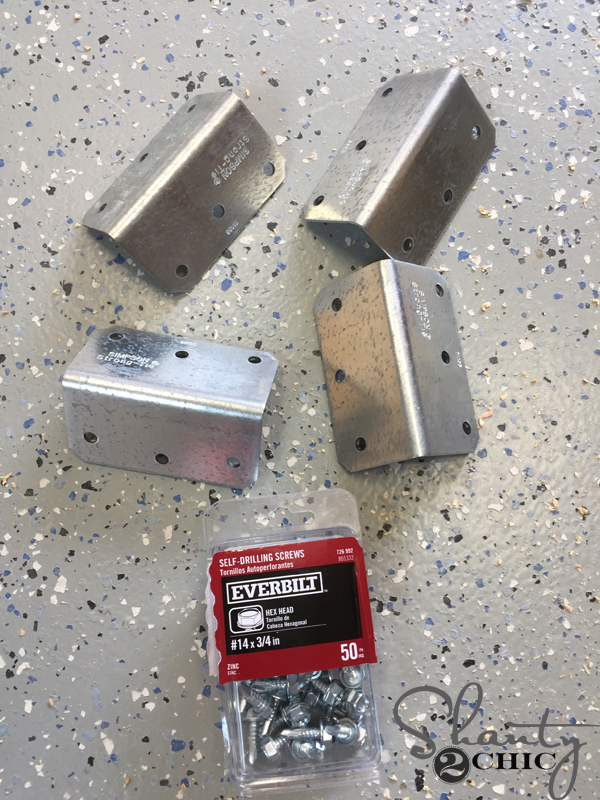
I also picked up these little hex screws and 6″ Simpson Strong Ties from Home Depot – super inexpensive! You can see the Strong Ties HERE. I spray painted the casters, screws and Strong Ties with Rust-oleum, satin black, spray paint and that was it!
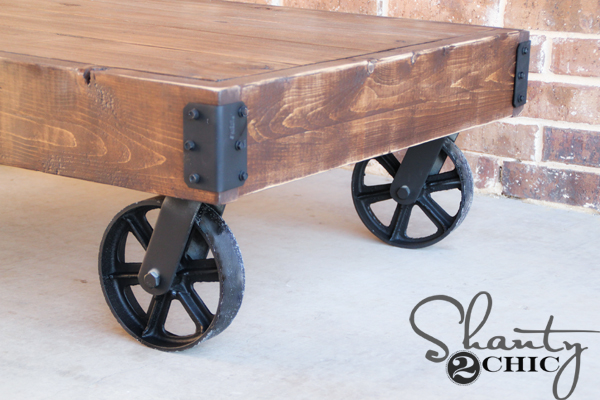
I attached the Strong Ties with the little hex screws.
Lumber, hardware and casters totaled about $100! Can’t beat that!!! I can’t wait to show you where this cutie is going – but that will have to wait for now 😉 Thanks again to Rogue Engineer for the FREE Printable Plans! Check him out! He has a ton of awesome DIY’s he’s been up to 🙂
Thanks so much for stopping by 🙂
~Ashley
Check out this video to build this DIY Rolling Storage Coffee Table!

Will you 2 be traveling to other states to do remodels/your show? We live in Arizona and would LOVE to have you come do our home! Diana
Just finished! Followed the instructions and it turned out great! Little trial and error for some, since I’ve never done something quite like this. Wheels were by far the most expensive part but compared to how much these tables usually cost, it’s totally worth it. Thanks Shanty 2 chic! Can’t wait to build something else!
Im sure there is a way you could make the top of this one continuous piece instead of having the planks… What kind of lumbar would you suggest for that? I currently have a planked top coffee table and its so hard to keep the edges clean! Wanting to build this but with a smooth surface of possible. Thanks!!
Hi Whitney! Yes, that’s easy, you can have a sheet of 3/4 Purebond plywood ripped down to put in its place. You will still need to trim the edges like this table but you won’t have the planks. Hope this helps!
Love the dark stain but would love to transfer a logo/lettering to the sides; any ideal how and have it show?
Thanks! You could use a stencil with a dry brush technique over the stain!
I just ordered my wheels and am so excited to make this piece!!! I do however, find it hard to believe that it only cost you $100 to make it. As I said, I just ordered my wheels and my total, just for the wheels was $117. That, of course, was with S&H and tax, but, I feel when you tell people how much it cost you to make it, you should count all those things in so it is an actual cost and we are prepared for how much it is ACTUALY going to cost us to make it. Just a little advice. Love all your ideas and am so excited to start my project!!!
Thanks! I did share how much it cost me to make it 🙂 as you said, there are many factors involved and each person has unique factors. It would be impossible to give a different scenario of cost for each individual. I shared the cost of mine, not to deceive anyone but as a way to gauge the cost. Lumber cost also varies by location. I purchased the casters for $19.99 (picked up at the store). The corner pieces were about $6 total and lumber was about $12. Total before tax was $98 and I said “about” $100. Sorry for the confusion and best of luck on your build!
Hello! I just found your blog and have already print out a bunch of your free plans, how AWESOME!! I’m totally stoked.
So here’s my question for you. My fiancee and I are totally NEW to all this wood work/DIY stuff and have a TON of projects on the list. We have a few projects we need to knock out for our wedding so we just invested in a Kobalt 15amp 10″ table saw. We must have been at the store for an hour and a half trying to decide between the 15amp 10″ Miter and this saw. We settled ont he table because it came WITH a table and it ended up saving us about $100. However, now that we’ve looked into a lot of these projects we’re wondering if we should have gone with the Miter? I was hoping you could shed a little light on what’s best for a newbie as well as which saw would be used more frequently. We wouldnt mind spending more knowing we’d get a better quality cut / more use out of it in the end.
Thanks for any tips! You’ve got me hooked and totally excited for our home upgrades!
Sarah
I just wanted to add my 2 cents worth of advice because I do a lot of woodworking myself. I use my miter saw more than any other saw I own, however, I use my table saw, scroll saw, hand saws, and small circular saw as well as a jig saw quite often as well. If you are going to be doing a lot of building just get them when you need them and eventually you will have everything you need. If you are going to be doing any amount of sanding, don’t buy the most expensive sanders. I go through them quickly. I do a lot of repurposing which usually means lots of sanding. Good luck with your projects!
I have a woodshop and the push guide on my Table Saw allows me to cut boards at an angle…and You can rotate to any angle 0 to 90 degrees .. ..also the saw tilts to… Netwen the two ..you should be able to cut what you want ..a miter saw us a lot easier to set up however .. But you should be able to make miter cuts with a table saw
Awesome!!! Thanks for sharing, Paula 🙂
Me encanta! Saludos desde México
I loved! Greetings from México
Thank you, Liliana! Happy to have you 🙂
Just found your site through Pinterest. The number of home improvement projects here are quite impressive. Cool coffee table, by the way.
Thank you!
I would love to know how you achieved the dark antique stain on your hardware/wheels…love this and thanks!
Thanks traci! I lost the picture of the process but I did mention that I used a spray paint!
Love this, but I have a toddler! How would you make this taller, and I assume HD or Lowes carries locking casters?
Such easy plans.. Even I could do this one!!
Hi Melanie,
They do carry locking casters and I agree, I wouldn’t have them not locking with a toddler. The table is very heavy and could roll. It doesn’t roll easily but better safe than sorry. I’m not sure on making it taller. These cadets are 8″ and the hardware stores don’t have wheels that tall. You could use wider boards – the side bards are 2×8. If you go 2×10 or 2×12 it will be even heavier so I do suggest using 1x boards. Hope this helps!
I love your projects! You always inspire me and help me add things to my to do list! 😉
Thank you, Lisa! Love it!
Can I know how u mount the wheels to the table?
The top of the wheel has four holes for screws.
Yes, four screws with washers 🙂 I lost so many tutorial pictures.
this is a great alternative to the pricey ones I find for purchase! I am totally going to make one for my Favorite 1st Son for his birthday! Thanks so much for the idea 🙂
Paula
www.redwineandpeonies.com
I love it! Thanks for sharing!
Thank you, Debbie 🙂