I’m back in my sons room this week and I’m tackling his windows with a DIY Corrugated Metal Awning!
I have been wanting something unique for his windows that would fit the style of his room. Well, inspiration is EVERYWHERE and that includes our hairstylists new salon – which is ADORABLE by the way 😉
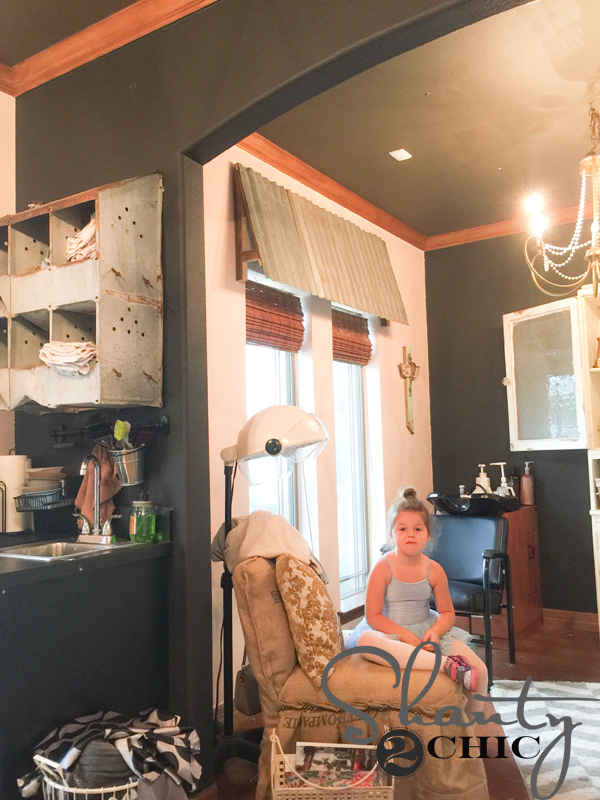
She has the cutest metal awnings in her room! She shares this room with a friend and her friends paw-paw built these for them with scrap metal and wood that he had laying around his home! She saw something similar in Canton and he whipped them up and installed them! What a sweet man and lucky for me that he is so talented 😉 They would be perfect for my sons room!
I took a pic of them, hurried home and got busy designing them! Bonus – this is two tutorials in one! I’m sharing how to build the awnings as well as how to make that shiny corrugated metal look like it’s been out in the elements for years! So, you do NOT have to have scrap metal and wood lying around your home. I purchased everything from my Home Depot and only spent about $10 on each awning!
Here’s how I did it!
DIY Corrugated Metal Awning
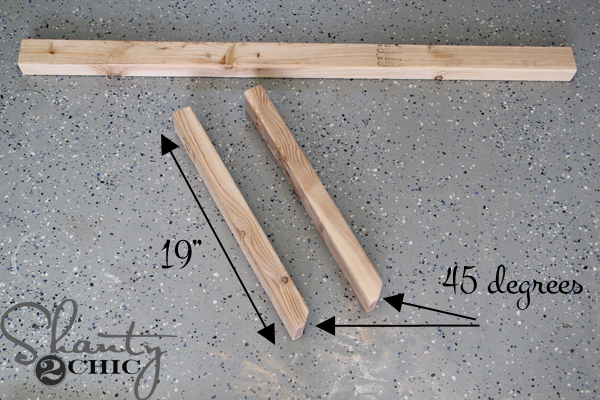
I built the awnings with 2×3 boards and a sheet of corrugated metal. I started by cutting my long back piece (that will attach to the wall over the window) and the two side pieces. The long piece needs to be about 6″ wider than your window. The side pieces are 19″ long with a 45 degree decorative cut at one end of each of the pieces (so you will only cut off one half of the end).
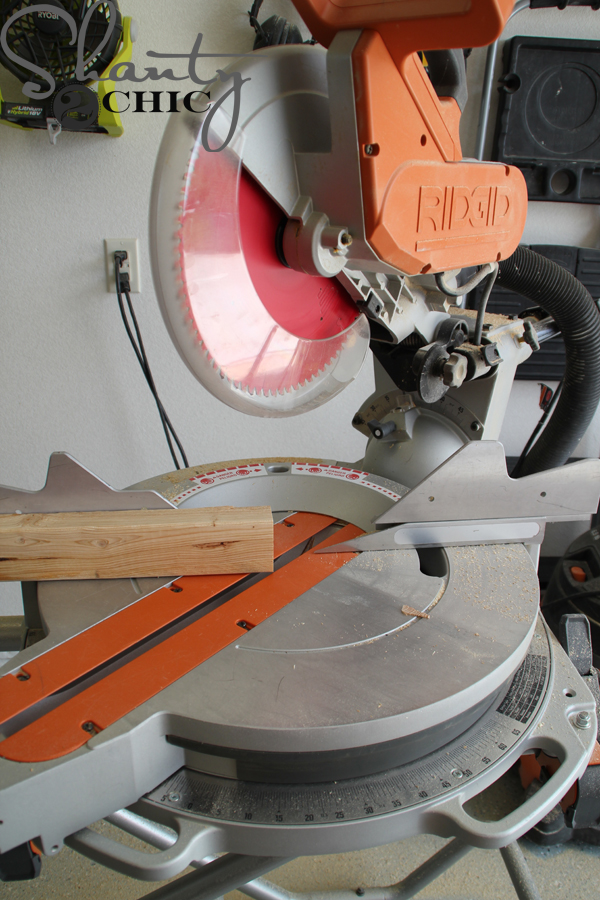
The 45 degree cut is easy. Just set the bottom part of your miter saw to 45 degrees. If you don’t have a miter saw, you can use a simple hand saw and miter box like the one in the box below.
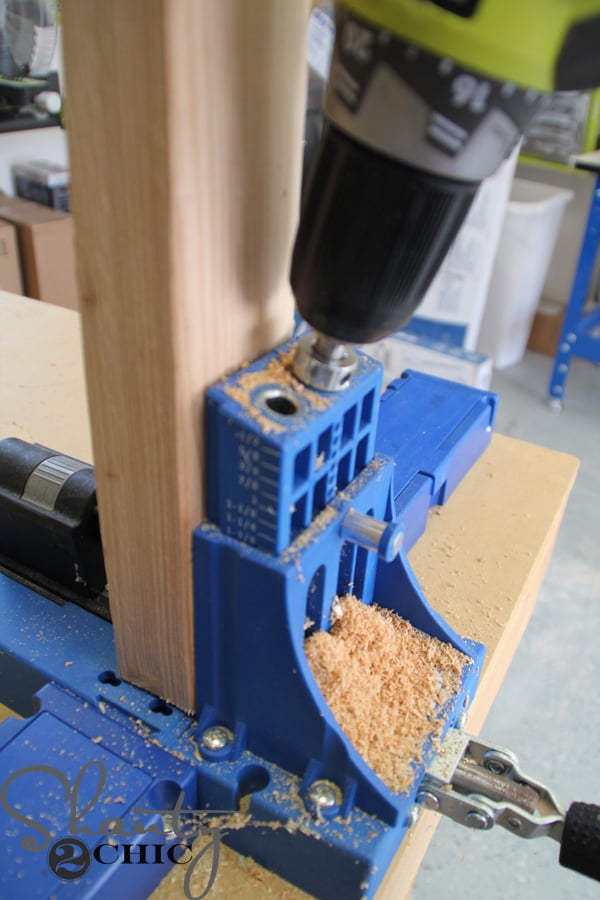
Next, I drilled 1 1/2″ pocket holes into one end of each of the short pieces. Drill them on the end without the decorative cut and the holes will be on the face of the board that does not have the decorative angle.
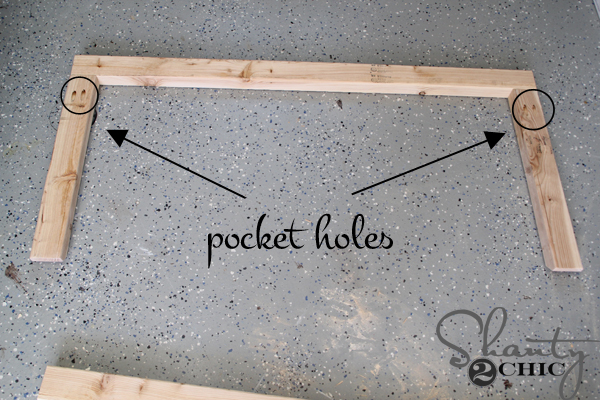
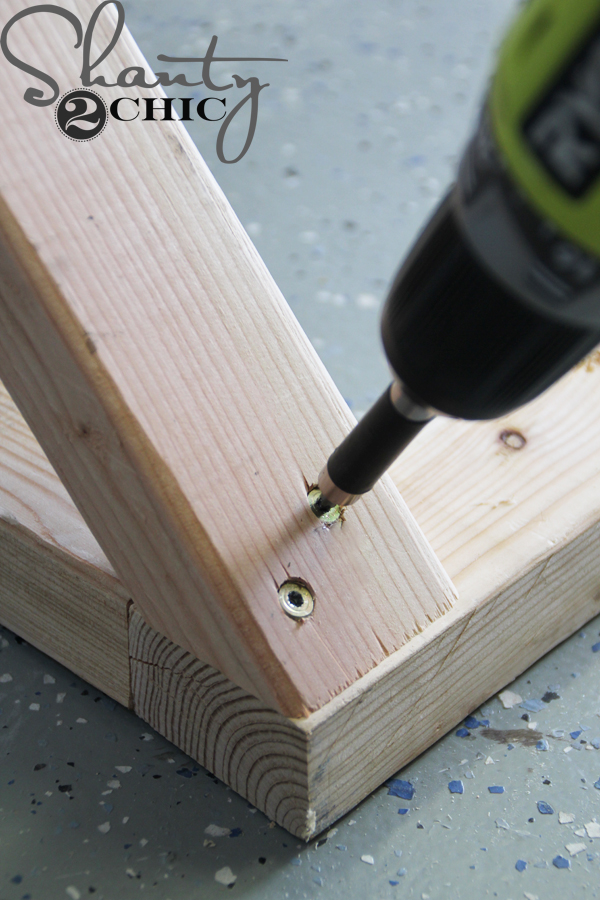
Then, I attached the side pieces to the ends of the long board with 2 1/2″ pocket hole screws and wood glue.

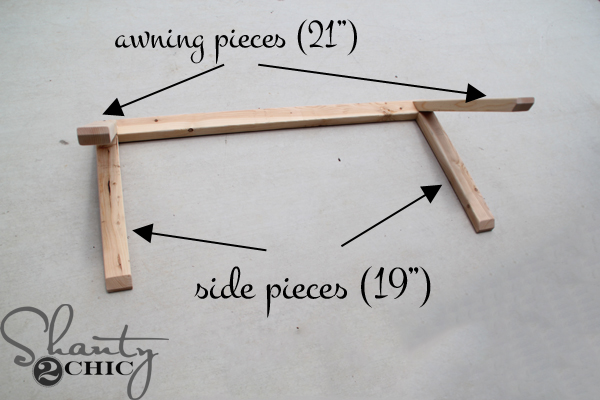
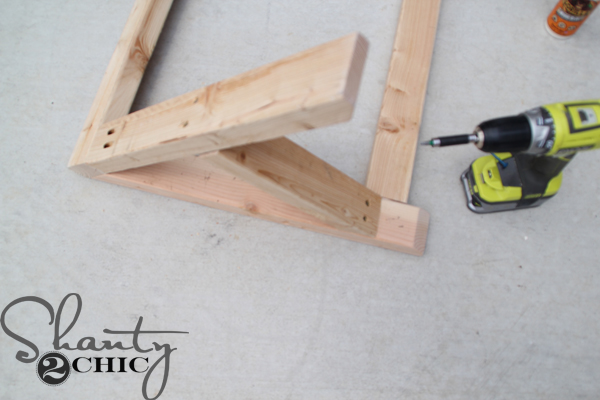
Next, I cut 2 2×3 pieces at 21″ long point to long point. One end will have a 45 degree angle and the other end will have a 45 degree decorative cut. Notice that they are not parallel. These are the pieces that stick out from the awning and hold the metal up.
Attach them to the top piece with wood glue and 2″ wood screws. I like to use Spax screws so that I don’t have to pre drill.
Here is the frame so far.
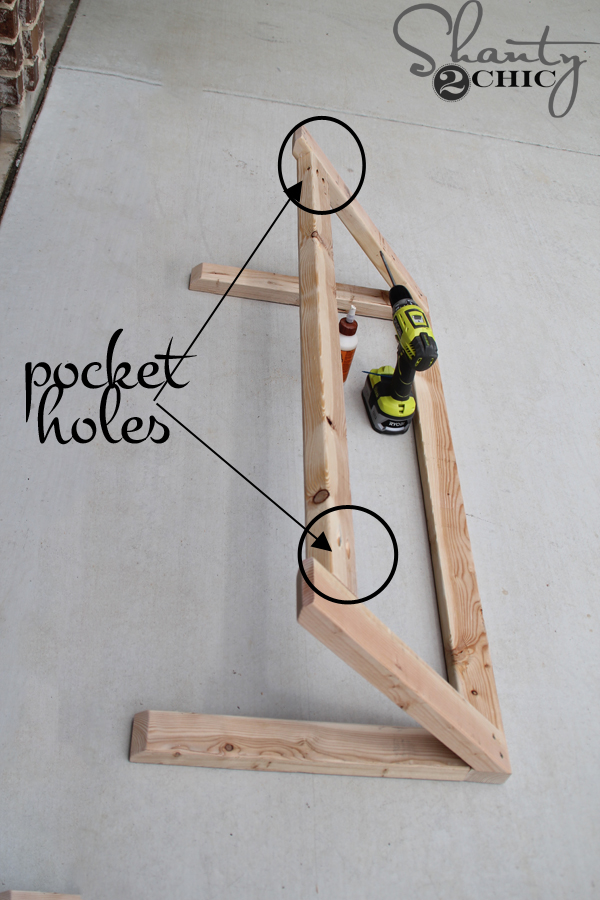
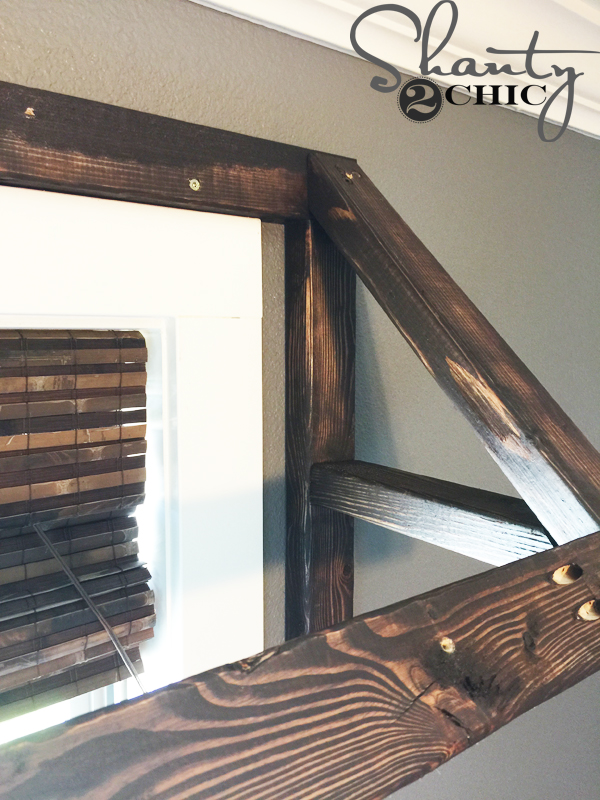
Measure between the front two pieces and cut another 2×3 to fit. Drill 1 1/2″ pocket holes into each end and attach it to the frame with 2 1/2″ pocket hole screws and wood glue. Have the pocket holes facing up (the metal will cover them). I placed the board about 2″ up.
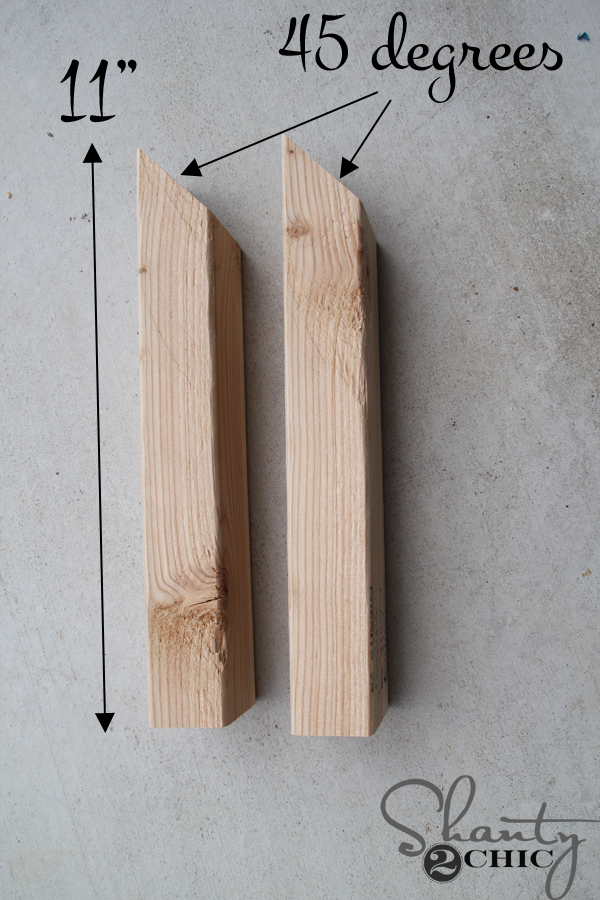
I cut 2 pieces at 11″ with a 45 degree angle on one end
and attached it on each side of the frame. I placed mine 7″ up from the back (19″) pieces with 2″ wood screws and wood glue. It should run level with the pieces that we added before this step.
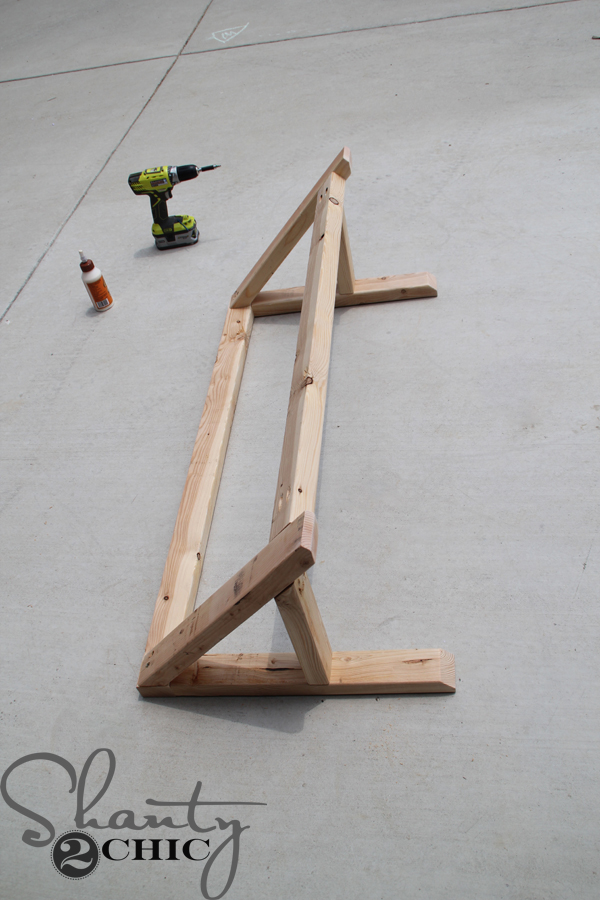
Here is the frame assembled and ready for the metal!
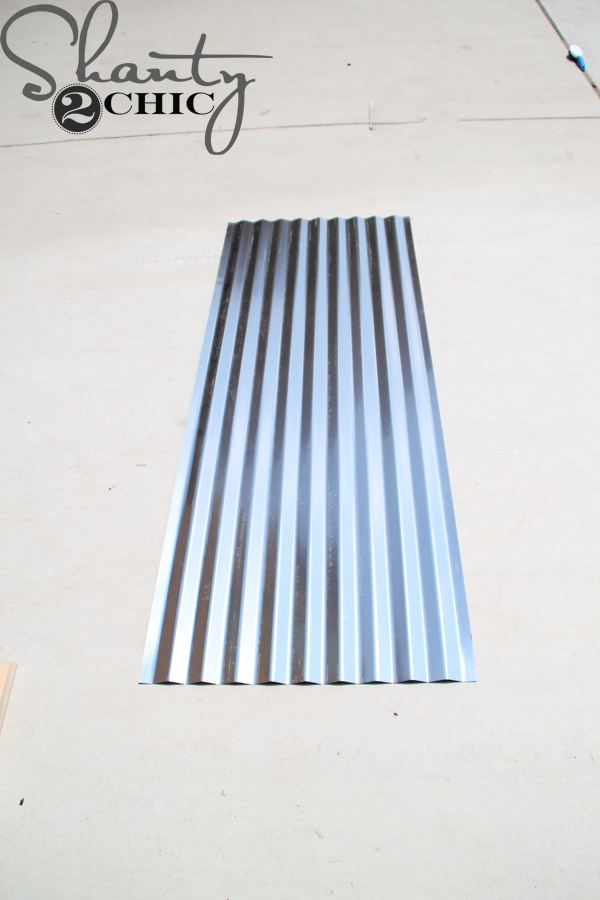
I picked up this piece of corrugated metal from Home Depot for about $10. I was able to make two awnings with it! It’s VERY easy to cut!!!
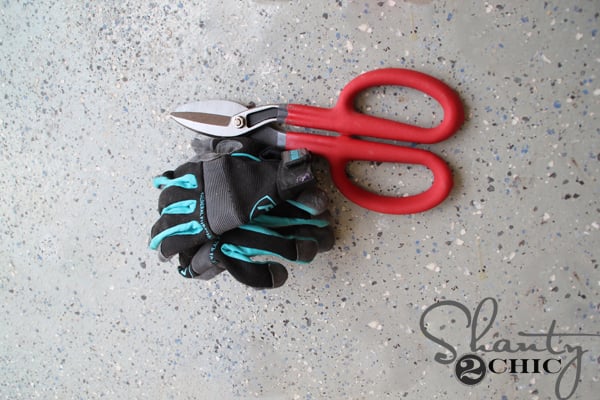
All you need is a pair of tin snips (I found these at Home Depot too – with the hand tools) and a pair of gloves. The metal can be sharp!
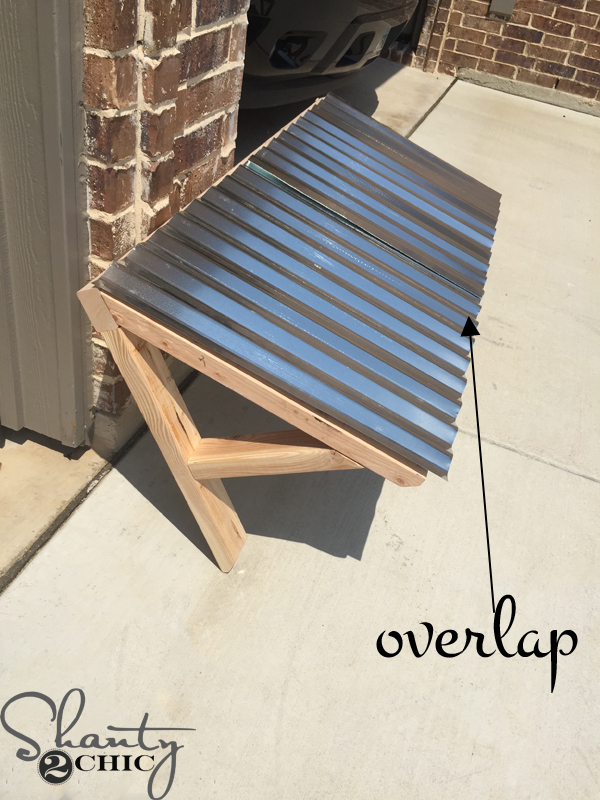
I don’t have any pictures of me cutting it because I needed both hands 😉 but i cut across the ripples. Just draw a line where you need to cut and cut slow. I went one ripple at a time. I cut my metal at 20″ wide. If your window is longer than the metal is wide, you will just overlap the pieces when you place them on the frame. That’s it! Easy enough 🙂
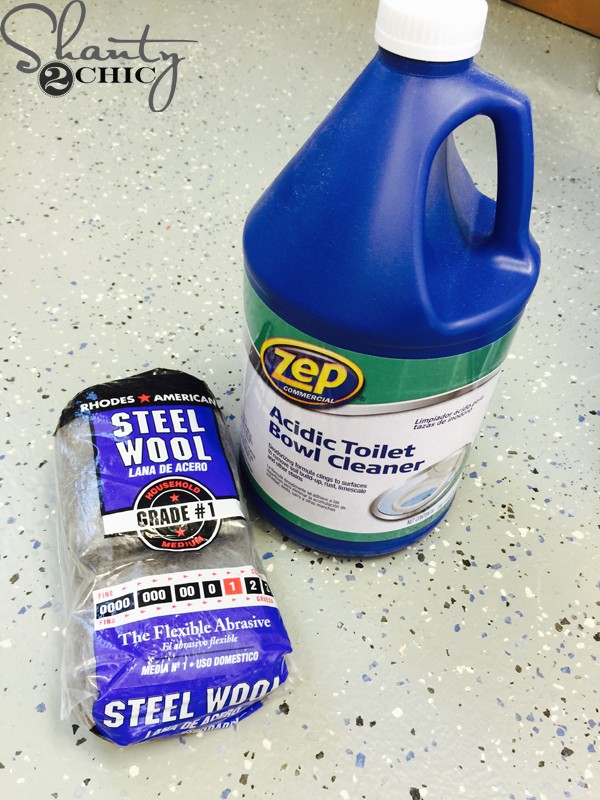
The metal will be very shiny when you buy it – which is fine if you want shiny but I wanted a more aged looking metal. I researched a bit and found that Acidic Toilet Bowl Cleaner will age metal! Whoop! I bought Zep brand from Home Depot.
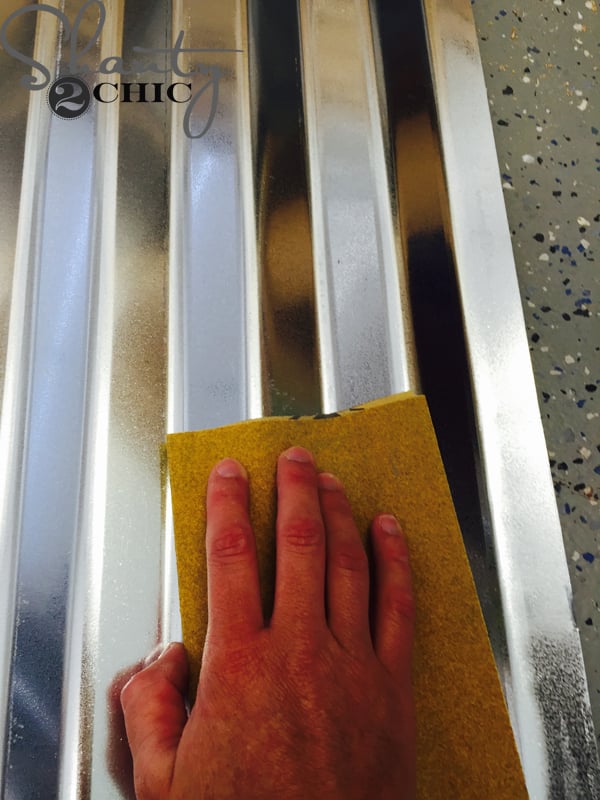
First, use an 80-grit sand paper to sand down the metal. This won’t take much elbow grease, just go over the whole sheet one time.

Then, pour the toilet bowl cleaner over the metal. Be generous with this part and make sure not to do this in the grass if you don’t want your grass to die 😉 Rub the cleaner all over the metal with steel wool and gloves! Gloves are a MUST! Let the cleaner sit on the metal for at least one hour, in the sun. I let mine sit all day.
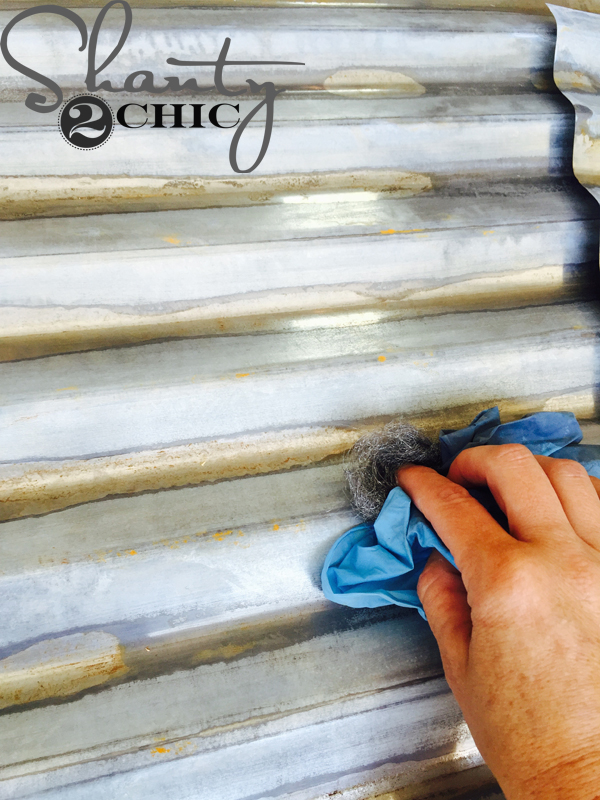
When it is aged to perfection, rinse it off with the water hose and scrub it with steel wool, again. Make sure you were gloves here too!
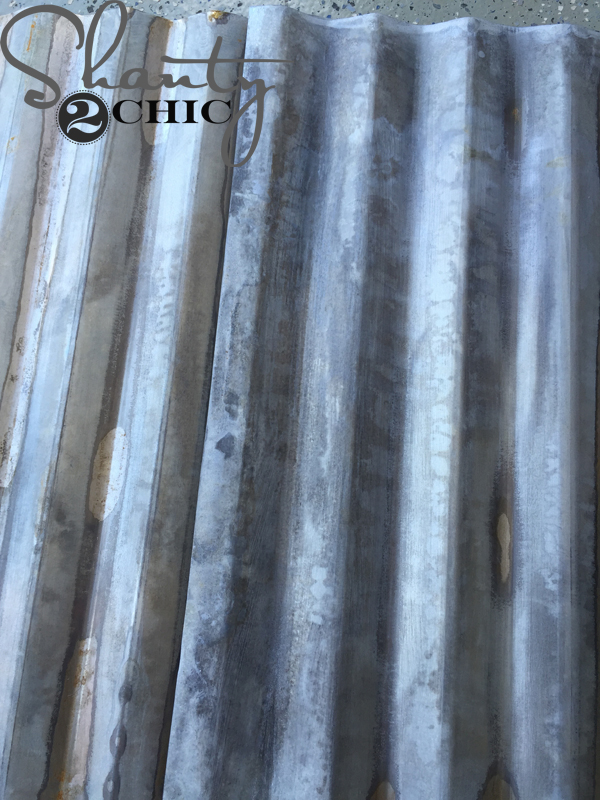
If you are satisfied with the way it looks, you are ready to attach it to the frame. If not, you can do the process over again 🙂
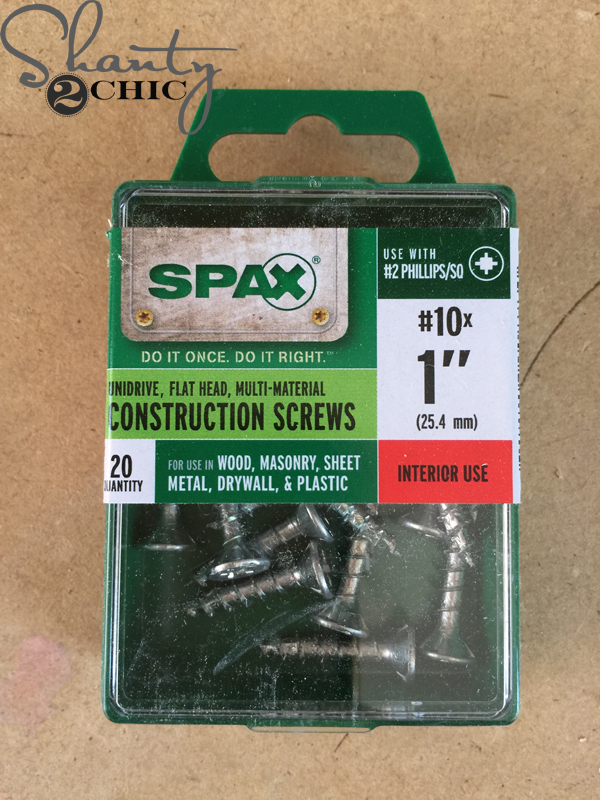
I attached the metal to the frame with 1″ multi-material construction screws.

I started at the corners and drove the screws straight into the metal and into the wood.
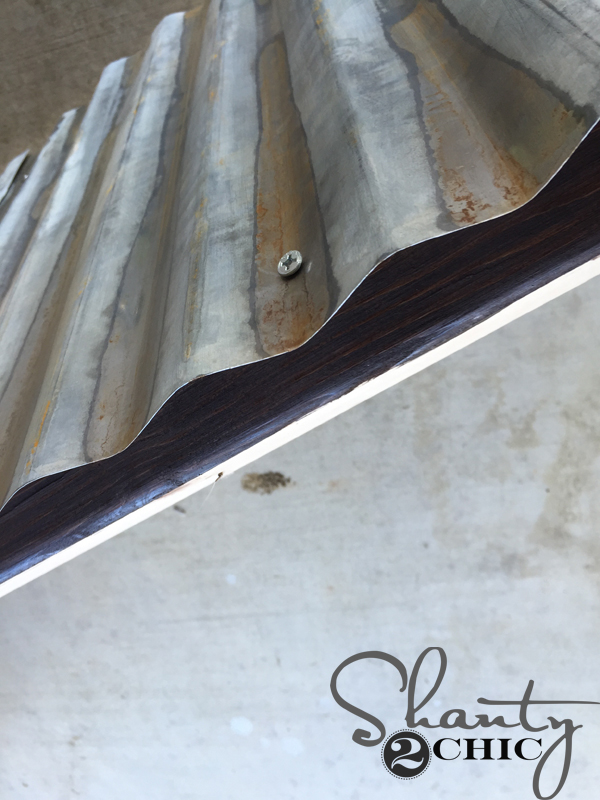
And placed another screw, every few ripples. Make sure to use a screw where the metal overlaps, as well. Do this on the top bottom and sides of the metal sheets.
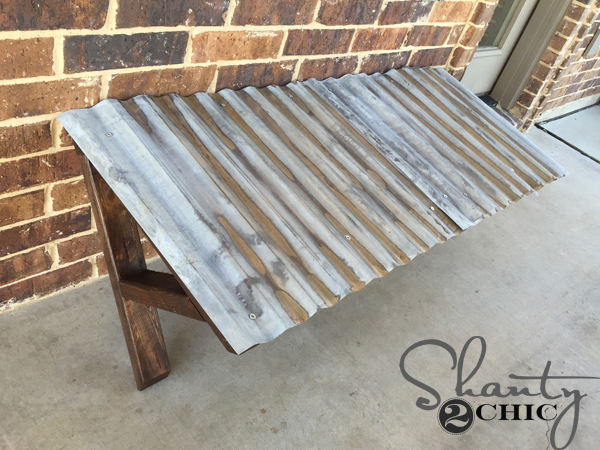
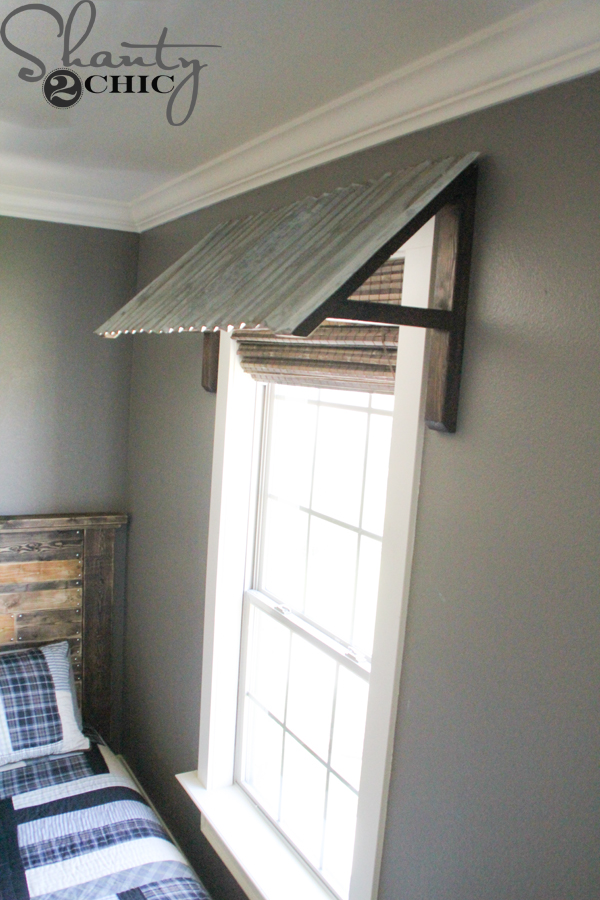
She’s ready to hang!
This is kind of annoying but I do suggest taking the metal pieces off to install the frame. You can wait and install the metal after you hang the frame but if you have a high window it’s just easier to reattach the metal when the holes are already there. It is hard to align the metal and get it straight after the frame is hanging. You should have a header running across the top of our window. Just drive wood screws into the frame and into the stud behind the wall. Do the same along the sides of the window (you should have studs here as well. If not, make sure the top is secure and leave the screws out of the side pieces. It will be secure.
That’s it! Just reattach the metal and you are DONE!
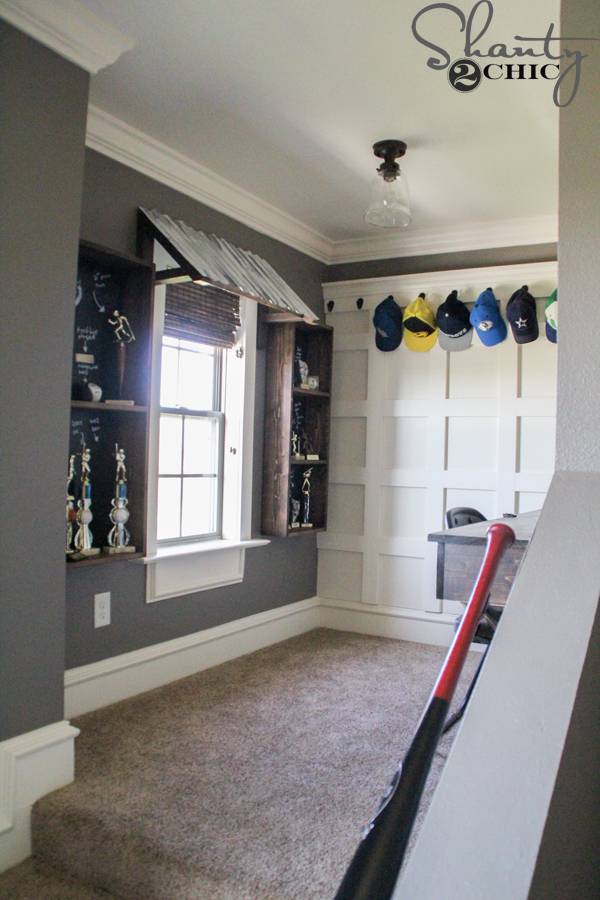
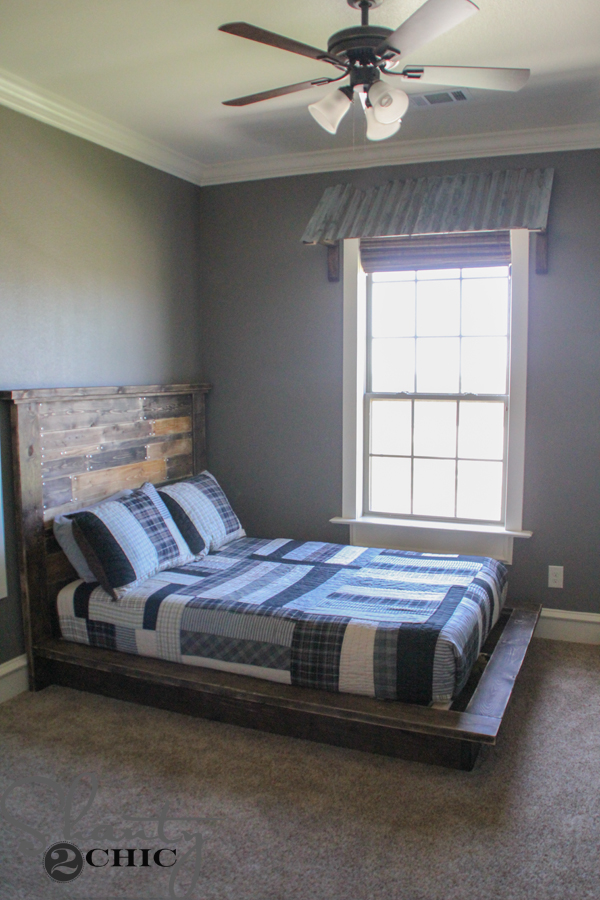
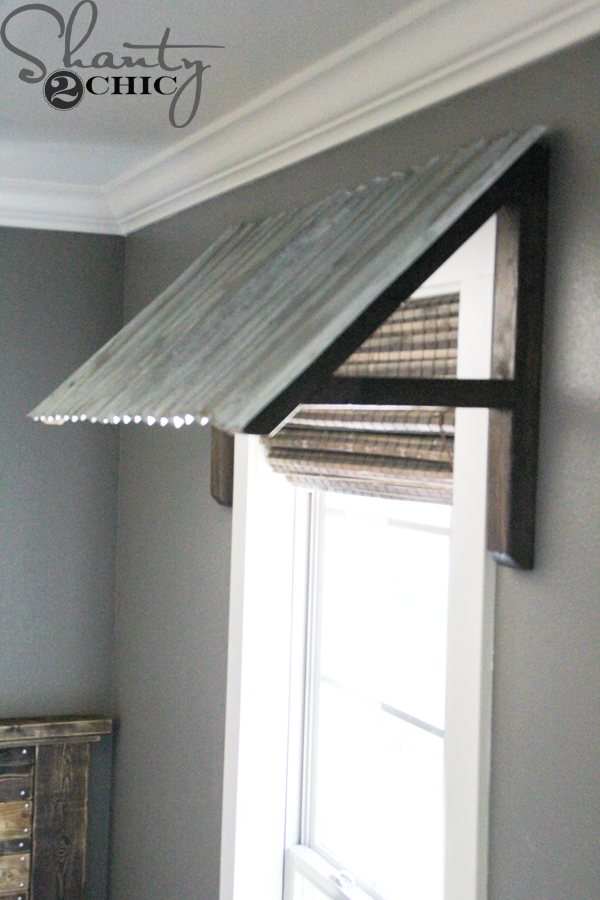
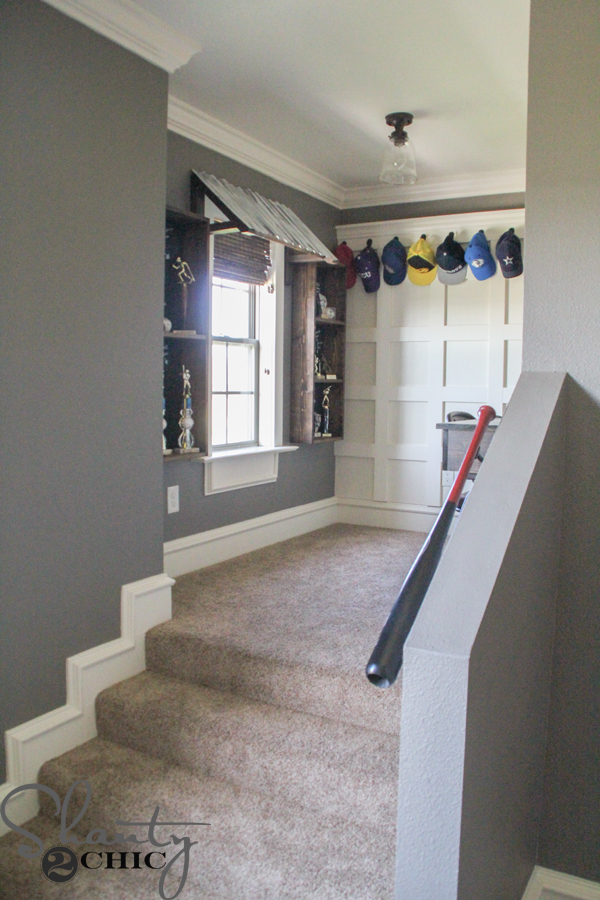
My son has two windows in his room and I LOVE the awnings over both of them! It’s such a great look for his little study area!


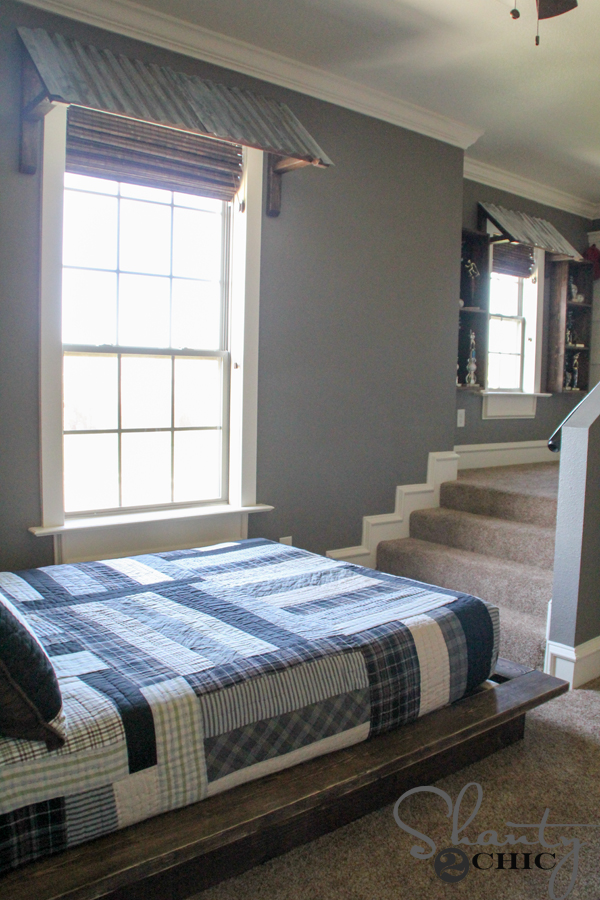
He ended up with a pretty cool room! It was one of the smaller rooms in the house when we started building it. Our step-dad built our home and noticed that the space where his study is now was walled up and wasted space. We left the wall to his room open and added steps (building codes…) and now he has a really awesome study that he wouldn’t have had originally!
Now I’m tempted to put metal awning all over my house…. I’m sure that will pass but all to say – I am LOVING them!
Everything you see in his room is DIY and I’ve shared the tutorial for all of the pieces! You can check them out below!
Still to come: Student Desk and Large Framed Photo
Thanks so much for stopping by!
~Ashley


We loved this awning and decided to make but had to make an adjustment because the side wood piece was 21 inches and the tin was 20 inches which made the wood show. We just flip flopped the dimensions and everything worked out.
Very cool. Do you know or remember if your sheet metal was galvanized?
Hi, I’m just wondering if you think this plan will work for outdoor awning as weel? I’m concerned about heavy wind and snow load.
For outdoor use be sure to screw the tin at the top of the ridges, not in the valleys or it will leak for sure.
I did these on the outside a couple of years ago. Have held up great and provide a great sun shade.
Can this be used outdoors as well?
I love this – never thought about installing it inside. And, the rustic look to his room is really cool. I really appreciate you sharing your designs and tips; I have learned so much!
Where did you get the quilt?
Hmm, awnings on the inside. So if it’s raining and your roof leaks, you’ll be able to smoke indoors next to the window?
I am so glad I found this! I am wanting to install this over the bathtub / shower in the main bathroom making it look similar to a barn. The shower curtain resembles “barn doors”. I have galvanized accessories and throw rug that looks like old floor planking! Can’t wait to get started on everything just waiting for it all to come together! This bathroom hardly ever gets used so basically it’s just for decoration! Thanks for the good instructions!
Love your son’s room and all the rustic touches…he is blessed to have you as his Mom.
Do you think muratic acid would work also?? I already have that so was hoping to use it!!
I have heard that it will but I haven’t tested it. Just be sure to follow on the safety warnings on the label 🙂
Hi! Where did you get the bamboo blinds for his windows? They look perfect!
Looks incredible!! What color paint did you use? I agree, you nailed it on this design.
Awesome and so cool! No “age limit” on that – it could carry him well into the teen years if you choose to! Nice work!
Plain and simple, I love it. It is fairly easy to decorate a girl’s room I find. But to decorate a boys room and to be unique is a bit more challenging. If you are going to invest time and money in a child’s room you want it to last for a good while. You nailed it perfectly.
Awesome! Love this!! Need to see more of this lovely salon! More pics please!!!
Looks great! Thanks for the tip on aging the corrugated tin.
How cool! I love these!