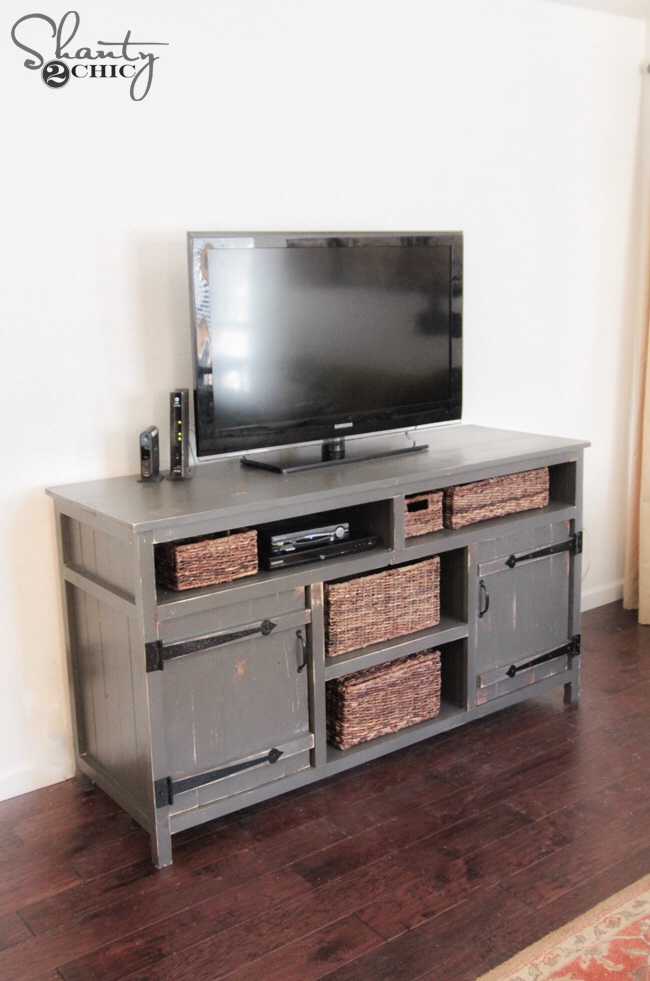
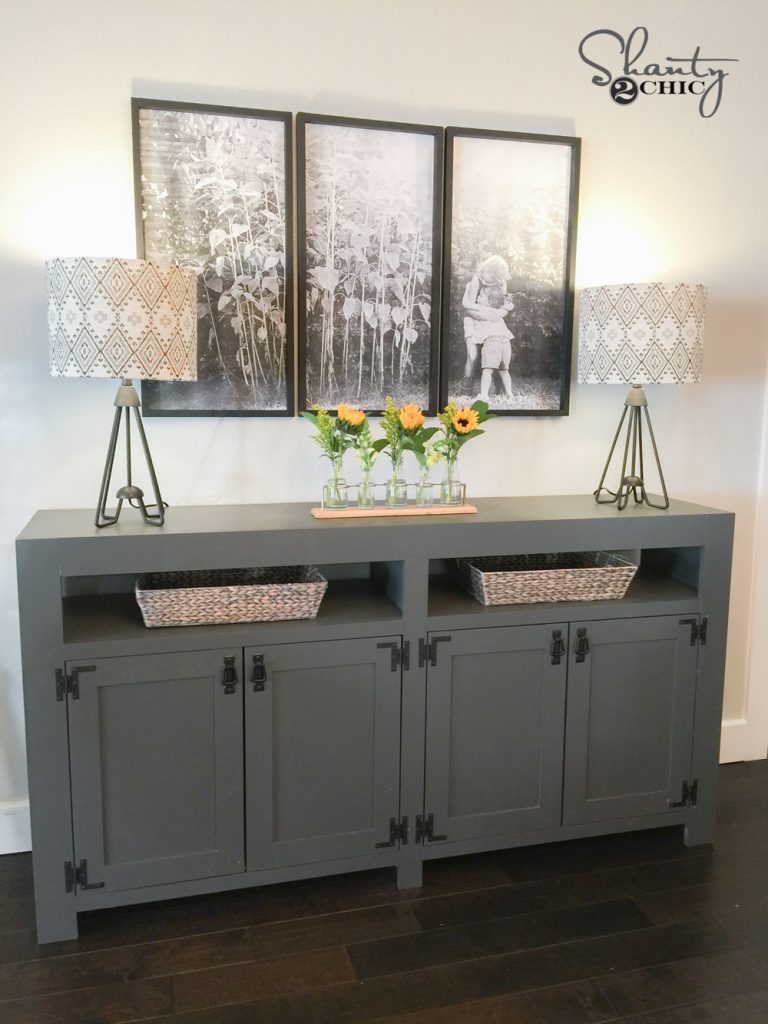
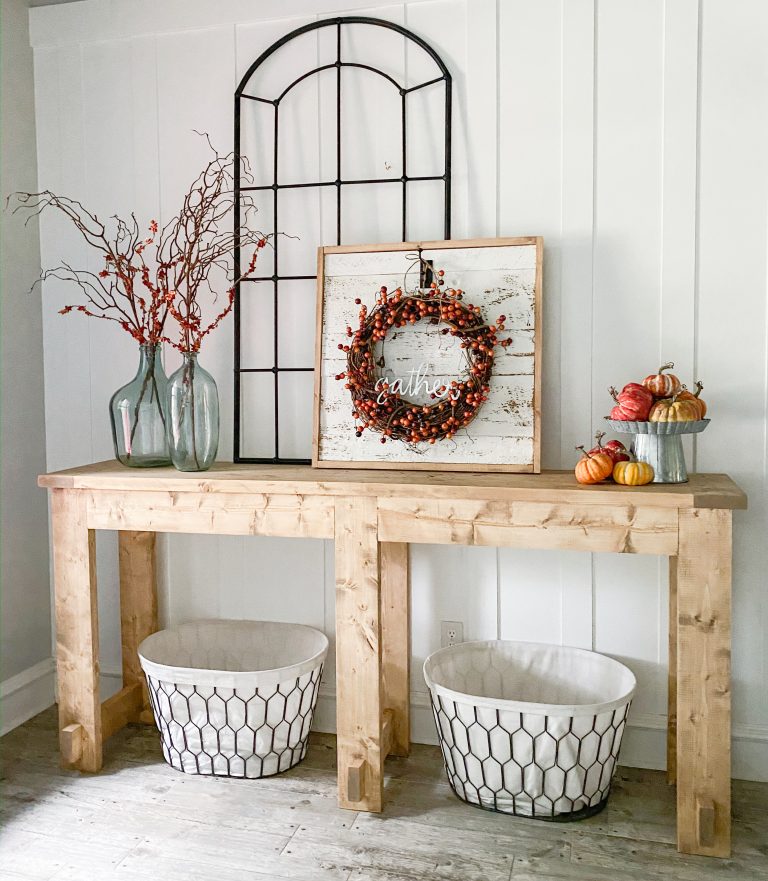
Hey friends! I’m so excited with how my latest build turned out! My in-laws recently moved here from Lubbock to be closer to us, and I thought they needed a good housewarming gift. So, furniture it is! 😉 Check out the new DIY Media Console I made them!
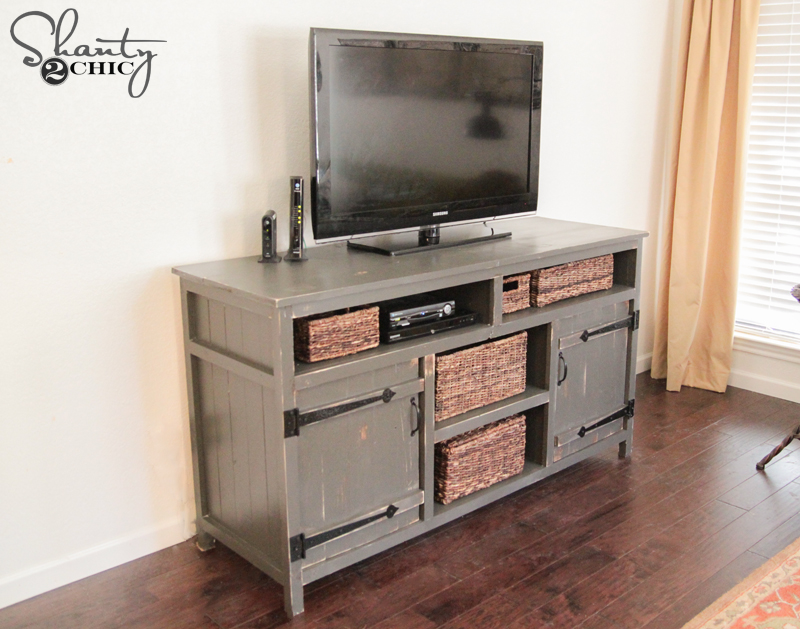
Isn’t she so cute! Perfectly functional too… Win win.
I worked with a good friend of ours to create the printable plans for my console for you guys. Jamison from Rogue Engineer made a great set of free printable plans over on his site for y’all. If you don’t follow him already, you should. He’s awesome!
I will walk you through this whole build here, and you can print the plans for this console HERE.
Here we go!
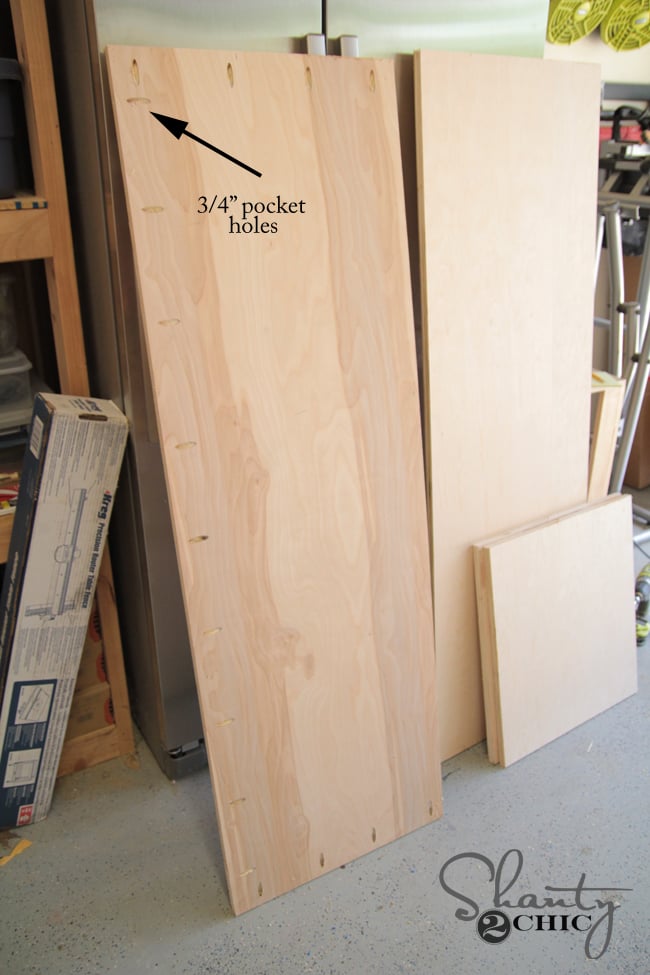
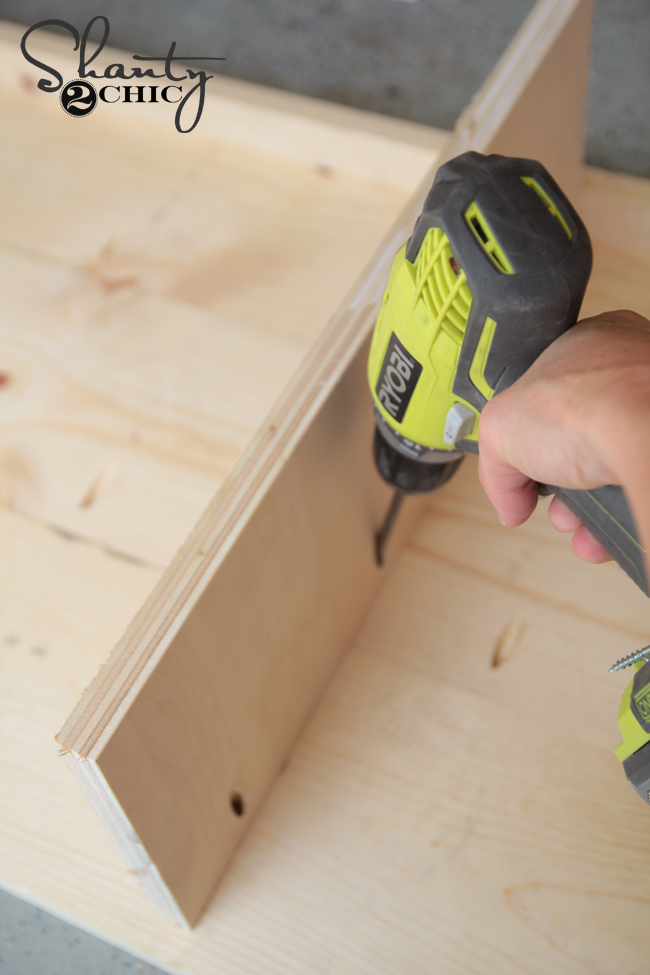
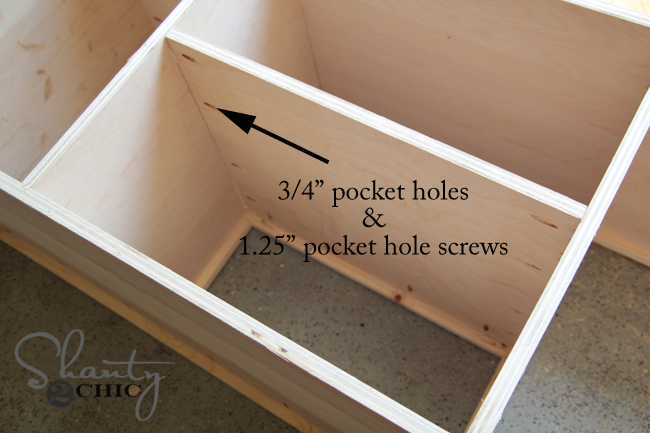
I started by building the side frames. I used my miter saw for all my cuts and used my Kreg Jig to create all the pocket holes for this project. I used the K5 model for this one. This is our very fav model of the Kreg Jig. I actually have two of them and I will show you why in a bit. Here are the side panels assembled.

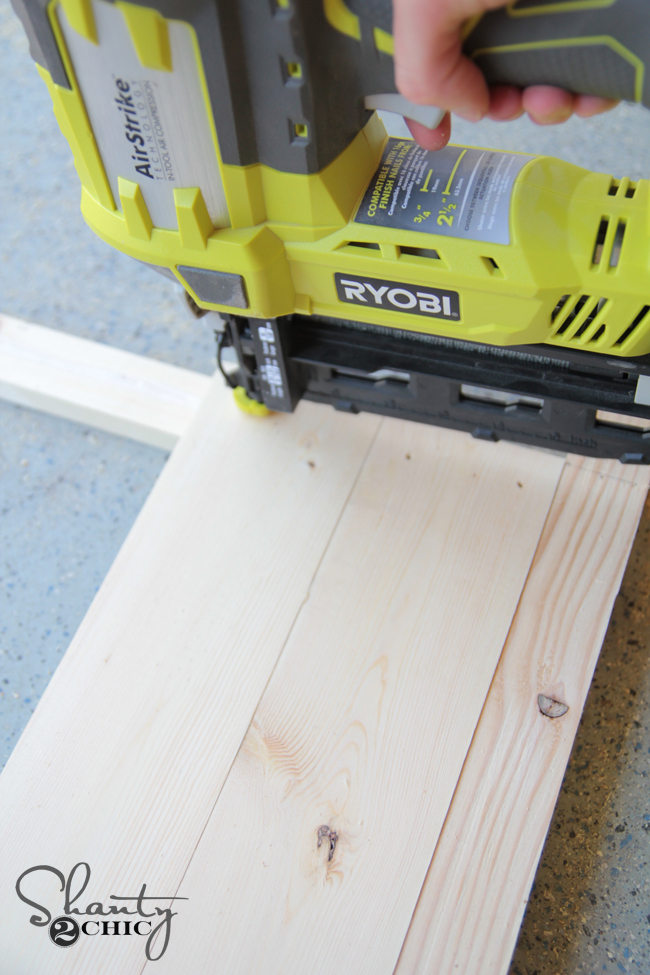
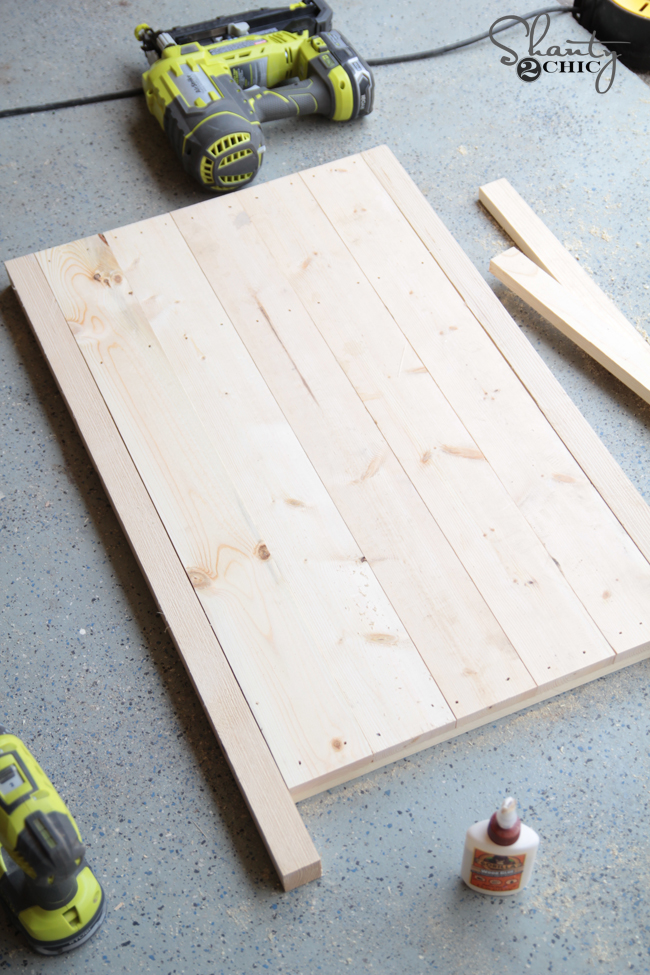
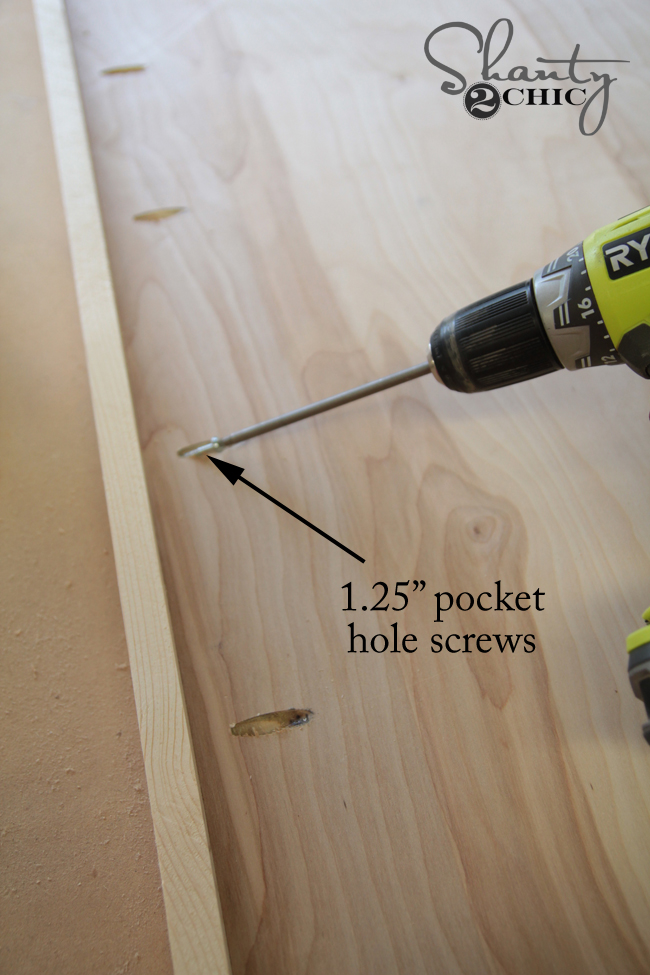
You can see I used 3/4″ pocket holes and 1.25″ pocket hole screws to join everything on this part. After building the frames, I added the planks to them. I used wood glue on the cross pieces, and used my Ryobi AirStrike Finish nailer with 1.25″ finish nails through the back of the planks and into the frame.

This is what the side frames looked like after adding the planks.
Next, I moved on to the shelves. The plan calls for hardwood plywood. I used PureBond from Home Depot, which is one of our very favorite products. It comes in 4’x8′ sheets and we have the guys at Depot rip it down for us to make it easier to get into the car. It stains beautifully and it’s super easy to work with. These are long panels, so I recently got a new Kreg Jig K5 model and mounted it to a board. I use this K5 to make pocket holes on longer boards that won’t fit on top of my workbench.
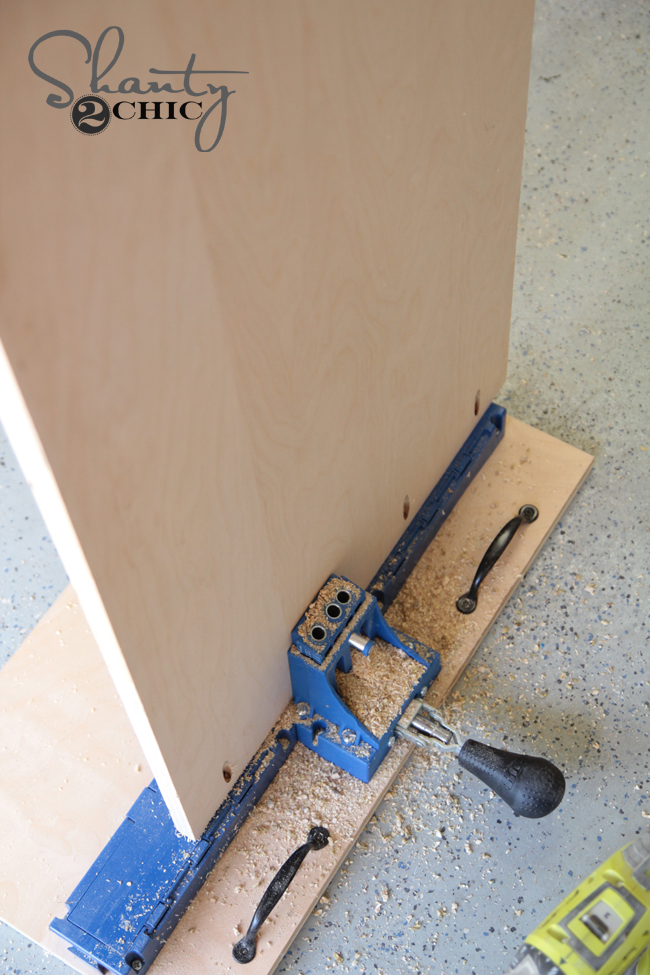
Anytime I am putting pocket holes into smaller panels and shorter boards I use the K5 mounted to my workbench. You can see plans for my workbench HERE. Ashley’s workbench plans can be found HERE.

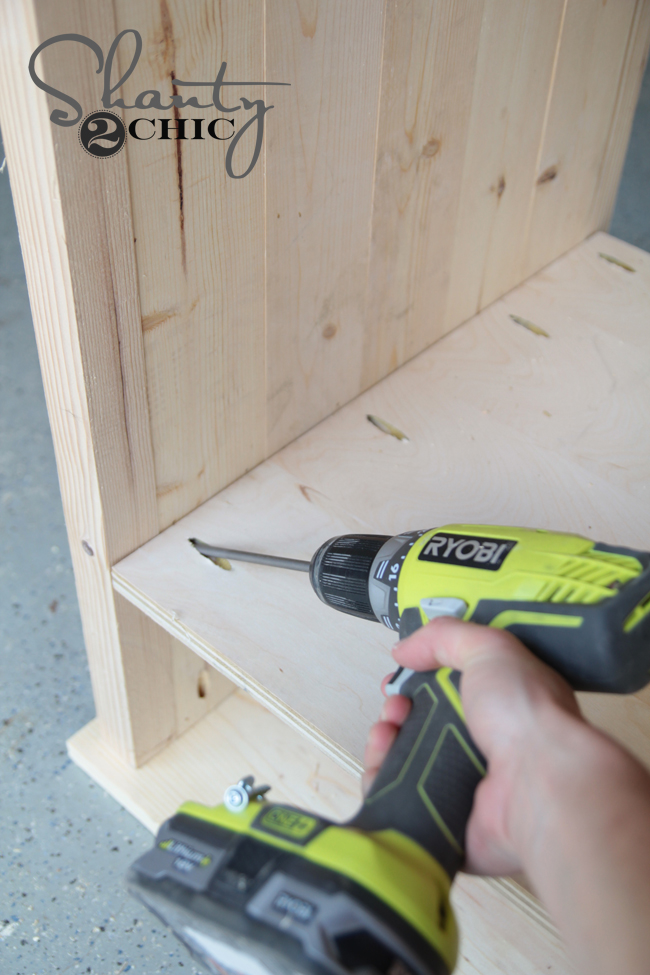
I used my Ryobi drill with the Kreg driver to attach the frames to the front of the plywood shelves.
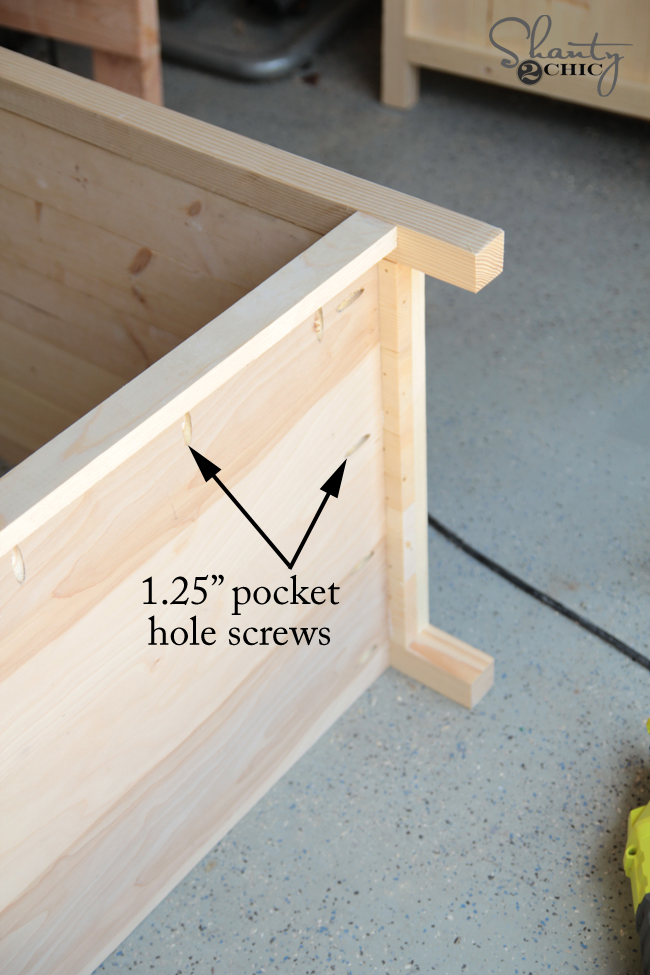
I then attached those to the side panels. A Kreg right angle clamp is super helpful on this part! It’s like having a 3rd, much stronger hand 🙂
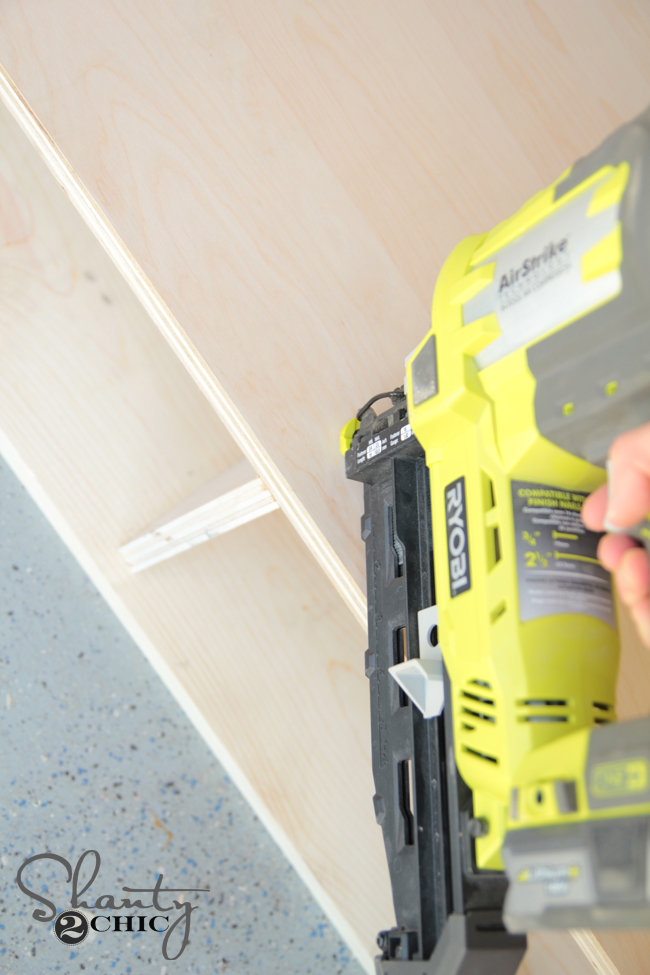
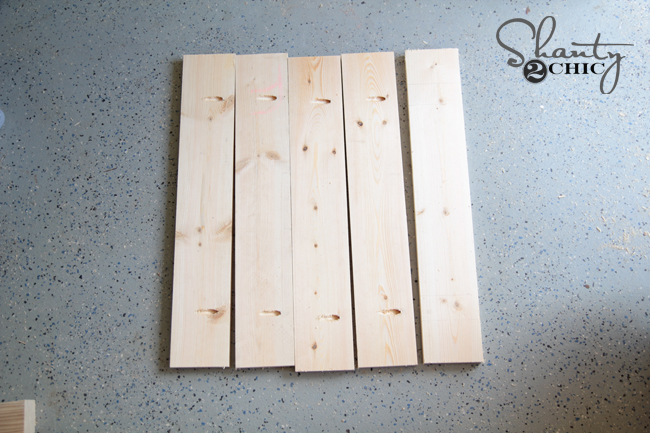
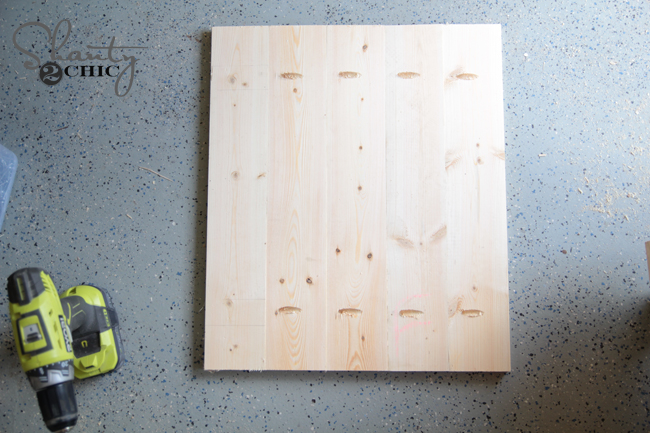
I planked the top of the console before attaching it to the base. You plank 3 boards together for this part. Pocket holes are the easiest and most accurate way to plank boards in my opinion.


I used pocket hole screws to attach the base to the top of the console table next.
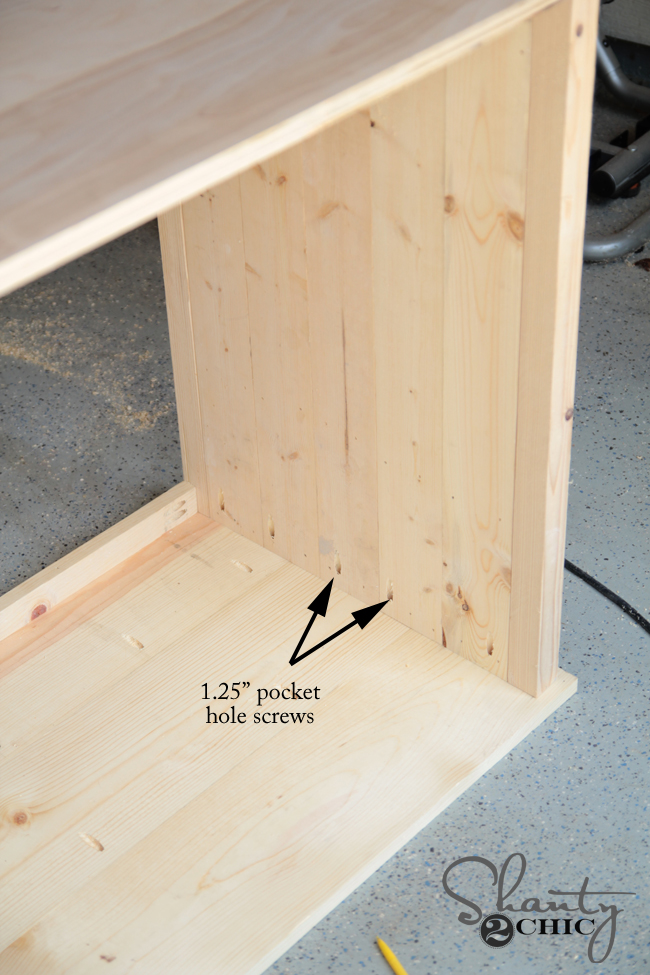
And to attach the middle divider…
And the shelf next…
I used my nailer to attach that shelf to the divider. I also used a line of wood glue on this joint.
Here is the face frame attached before adding the shelves.
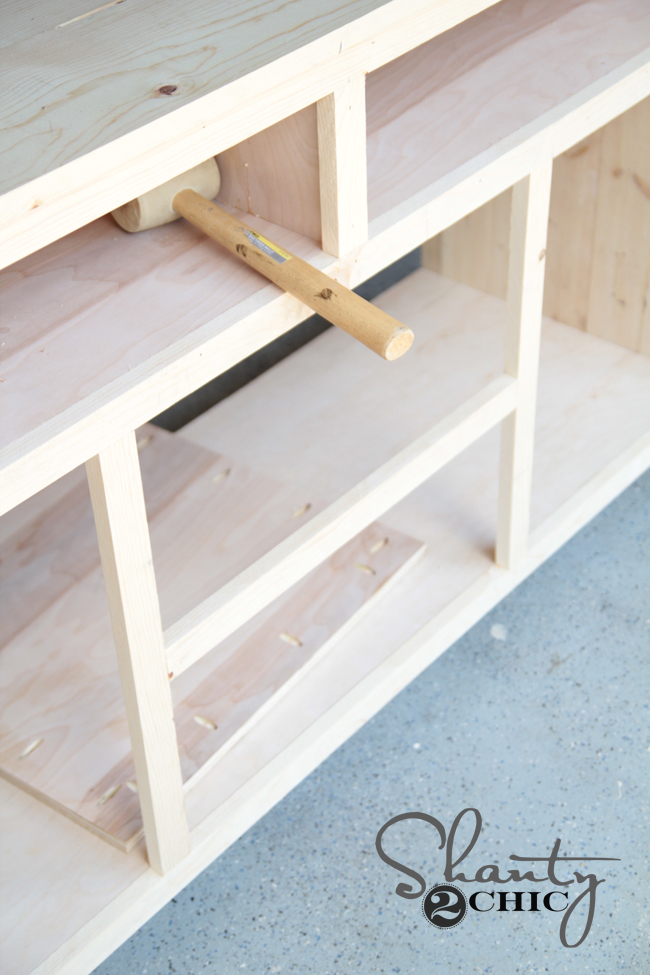
I added the shelves next using 1.25″ pocket hole screws again.
I used my Ryobi AirStrike stapler to attach the 1/4″ Purebond plywood to the back of the console. I had the guys at Depot cut this down for me as well.
My final step was the doors! These are simple and are also made my planking using pocket holes.
Now let’s talk paint and hardware… The important things right??
I used one of my VERY favorite greys for this console. It’s called Urbane Bronze by Sherwin-Williams SW 7048. It’s a deep, rich grey that I LOVE LOVE.

I did use my Vaseline distressing method on this piece. I used Varathane stain in Kona as my base coat. This is a SIMPLE method of distressing. You can see the whole tutorial HERE.
And that hardware…
I looked long for affordable, big hinges. I felt that they would add so much to this piece. I do know that some hardware stores sell similar hardware, but I found the best prices on eBay. HERE is a link to the seller’s item I bought this from.
And one more look at the piece… I hope they love it as much as I do! And I hope they feel the need to babysit lots for this. 😉

SO Ive got the first two shelves installed and i stood it up. It looks great but it seems a bit “Shaky”. Will the piece become more stable as I continue to add shelves and doors to it or will it always bee a little shaky?
(If you put your hand on the top and move it left to right it moves with it)
My dog and I are moving into our first apartment and Im going to modify this plan to integrate a crate for her to stay in while I’m at work. Im going to make it a little longer and wider and remove on door and the center shelves and put her space there. i love the look of this media console.
I started this project and I am feeling so defeated, already! 🙁 My wood doesn’t seem to be straight, my drill doesn’t seem to be strong enough, nothing is going right! But I have told myself I need to keep going, and just keep chugging along. Ha! Wish my luck!!
Thanks for the idea. I finished this on Christmas Eve just in time for my wife’s gift. She loved it!
Wow! That looks great 🙂
how do you get your planking to fit so flush together? None of the wood I see has perfect right angle corners like yours do in this tutorial
We use white wood (common board) not furring strips. The furring strips have rounded edges.
So… this is my first project with a kreg jig and I predrilled my holes because I’m borrowing a friends kreg jig. I just realized I set my drill bit to 1/2″ instead of 3/4″. My screw doesn’t go in deep enough to connect to the next board. Do I re-set the bit to 3/4 and drill deeper? Or buy longer screws? I am worried that if I re-drill it will be at too much of an angle. Help! This wood was expensive!
Thanks Shanty2Chic and Rogue Engineer for the plans and advice. My wife and I love how this turned out.
I see that you posted it six months ago, but I’d love to know how you got that paint look. It’s just my wife’s style.
Is there any way that you can share a picture with the doors open? I think I want to tweak it a bit, but need to see how it looks according to the plans. Either here or Istagram would work for a picture! Thanks much!
What was the total cost of this project? Love it and would like to build it but just wanted to see how much it was to build!
With hardware from the eBay link, it cost me around $150 for everything except paint…which was $17 for quart. So $170ish.
I did use some “select” pine boards in the project, so you might could shave off a few bucks by using all common board.
This might sound stupid, but what type of plywood did you use? Because so many plans just say “plywood” but you get to a lumber yard and there are TONS of varieties….
Not a dumb question! We should be more specific when we say plywood. It is hardwood plywood (we always use PureBond brand, sold at Home Depot only). We usually use Birch, as it is the most affordable! Hope this helps!
Perfect. Thanks!
Great project! I absolutely LOVE the color!!
What was the cost of this piece. I may have overlooked it ????
I am so excited, I am moving out of my parents house soon and I think I am either going to build this or the barn door console, can’t decide between the two! Also super excited about your new HGTV show! You guys have helped me find one of my most favorite hobbies yet, woodworking! My dad is a roofer and because of that he owns all the tools I need for these projects. #buildlikeagirl 🙂
Fabulous! This is going on my ever growing to do list. Very lovely! Thank you for sharing.
FYI, there’s a check next to the off-site links, and when I hover it says “Toggle link-love (currently “follow”). Only admins see this.” I’m pretty sure it lies, because I’m not an admin of your page. 😉
Oh heck. Thanks for the heads up!
So classy! I love it!