Hey friends! I am THRILLED with how this latest build turned out! Before I share it, I have to say… The whole thing cost me $100 to build. That includes hardware. Check out my new DIY Industrial Cart Bookcase!
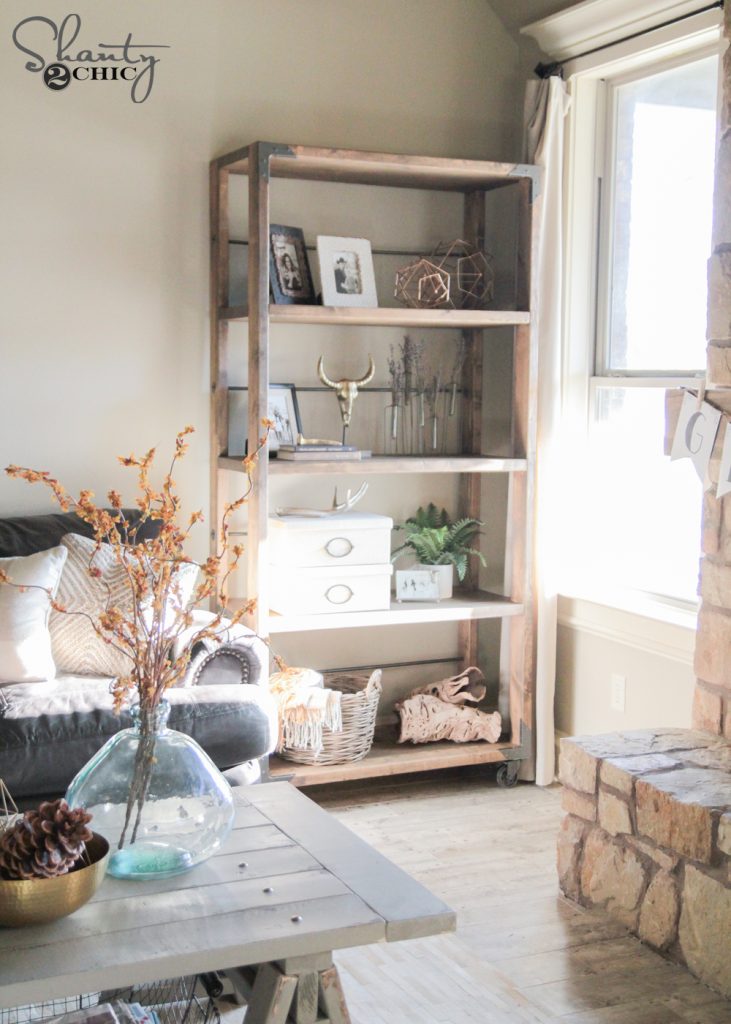
How pretty is she? This piece is all about the hardware. Really you are taking a very basic build and a few boards and turning them into a piece of art by adding some awesome hardware. These corner brackets are a new fav!

These are called Rigid Tie™ RTA12 connectors.
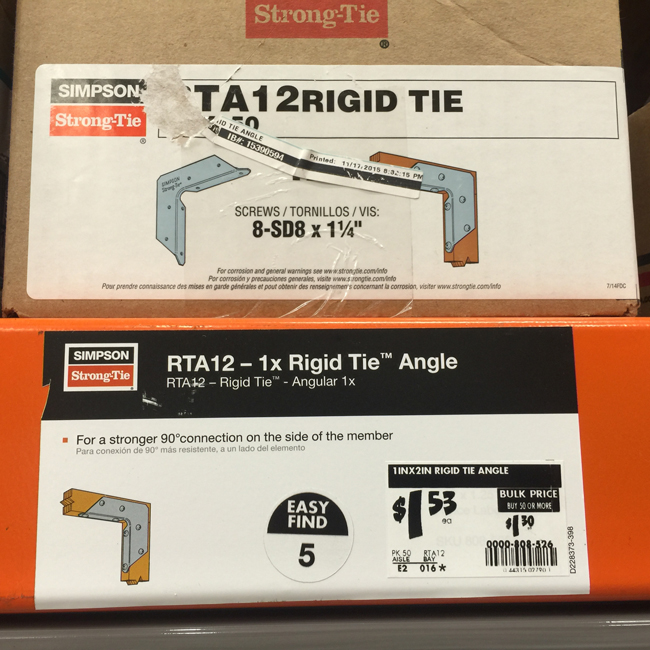
I found them at Home Depot. They are from Simpson Strong Tie.

They are only $1.53 piece! Yep… I love them even more! Add 4 of them to your shopping list! I’ll show you in a bit how to get them the color you want!
Let’s get started! I will share the whole build with you below, and I will add a link to the free printable plans at the bottom of this post.
Before making any cuts or assembly, I painted all of my hardware a cool dark grey metallic color. I used Rust-Oleum Universal Metallic Spray Paint in Flat Soft Iron.
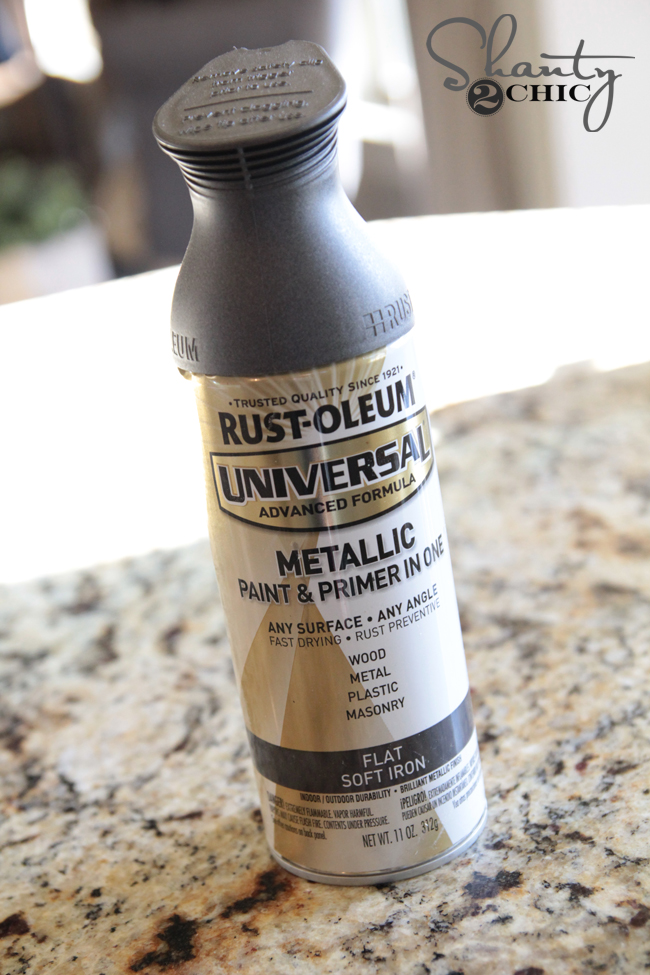
I put one coat on my Simpson Strong-Tie connectors, the dowels, washers and hex screws. While those were drying I started assembly on the bookshelf.
I made my cuts for the legs first. These are just 2×4 studs. Make sure to cut a very small piece off the end before making your measurements. This gets the board square.
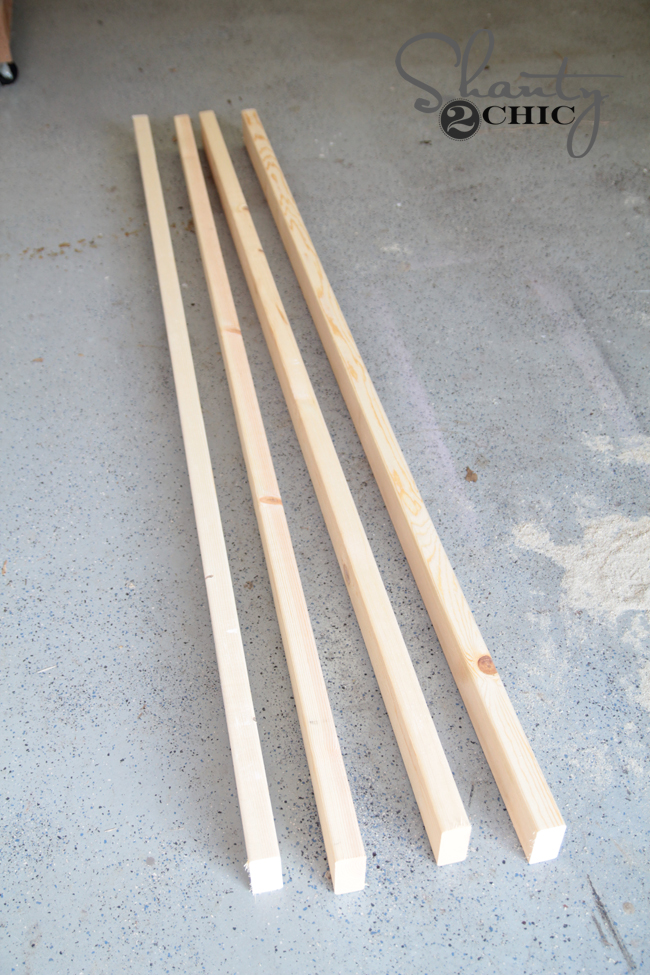
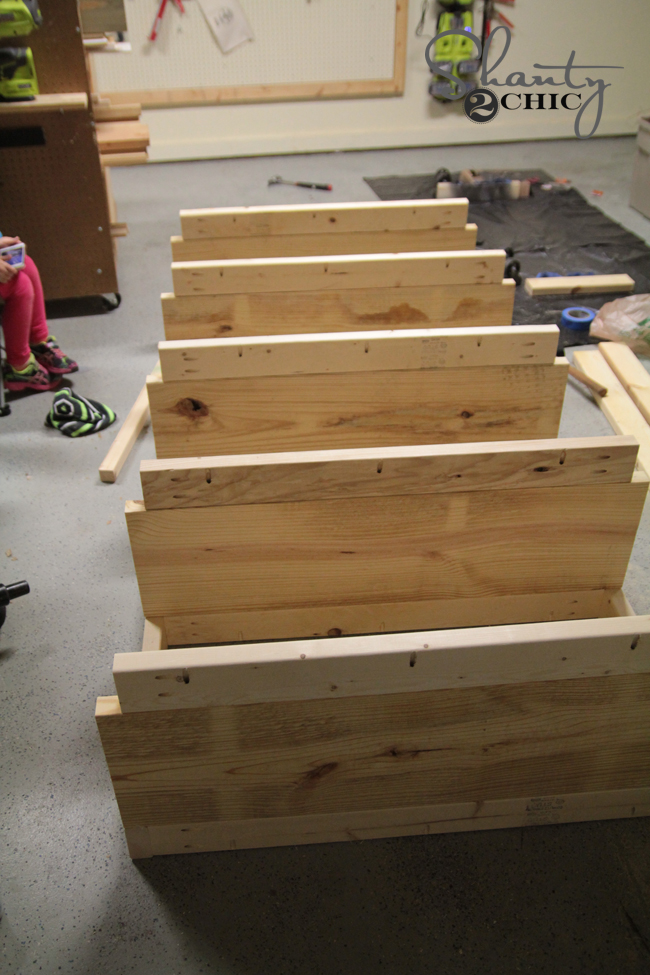
I made my cuts for those and all the cuts for each shelf. The shelves use 2×12. My saw will cut all the way through these with the slide, but yours may not. You may need to make one pass and then flip the board over to finish the cut.
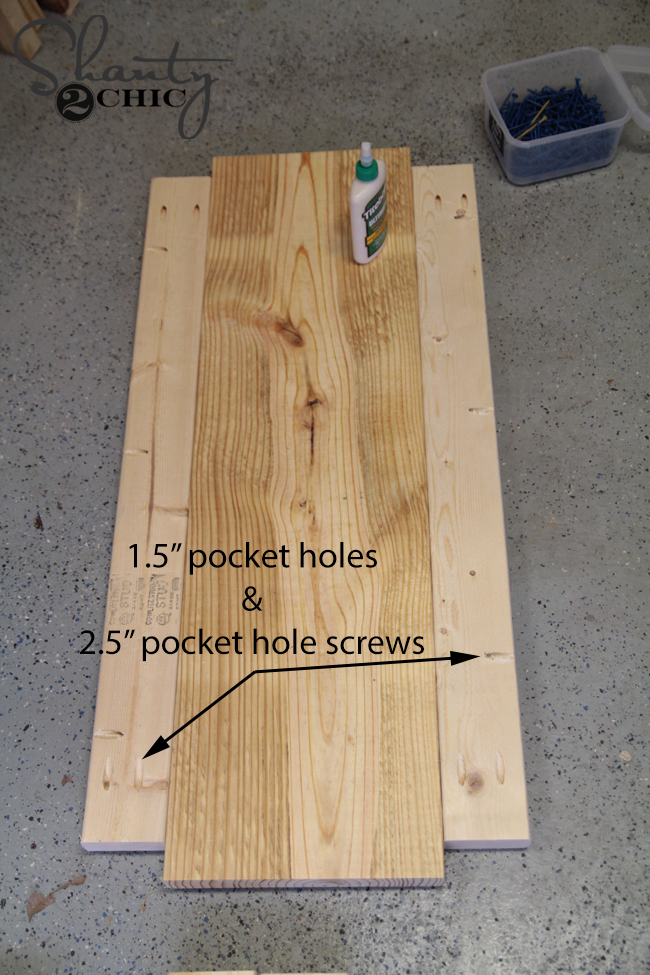
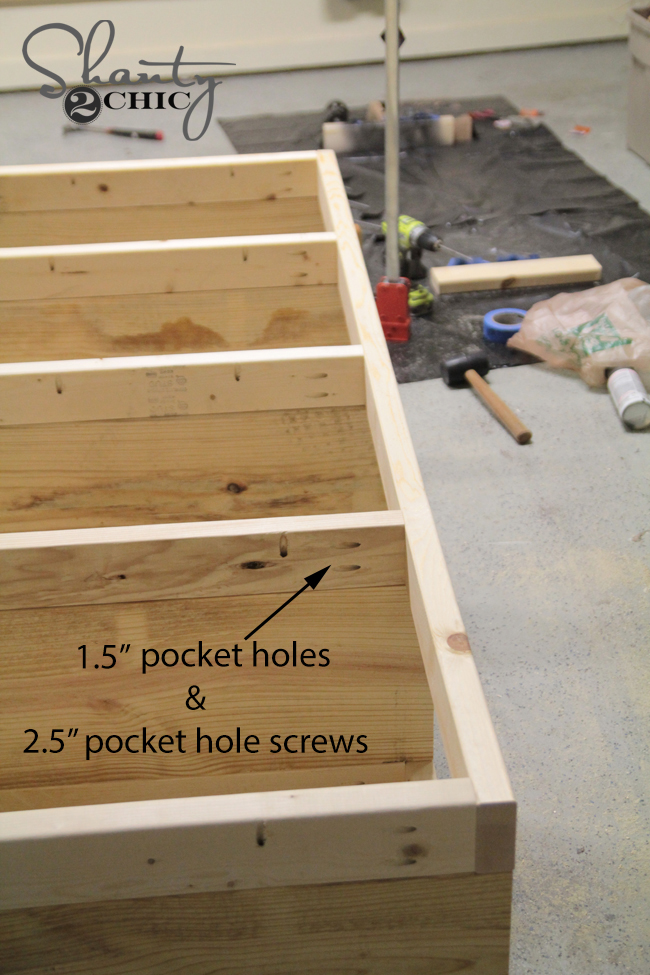
I assembled each shelf using wood glue and pocket holes with pocket hole screws. I used my Kreg Jig for this part. Each hole is 1.5″ and I used 2.5″ pocket hole screws to attach.
I built the 5 shelves and then attached the legs.
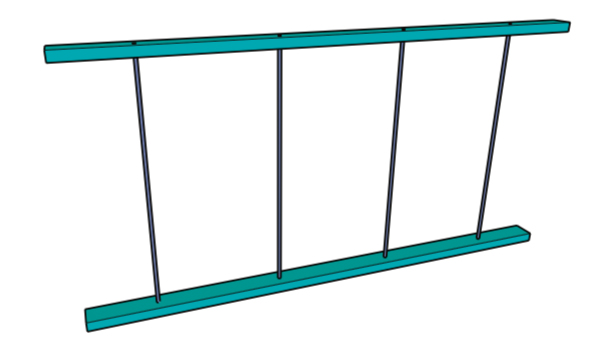
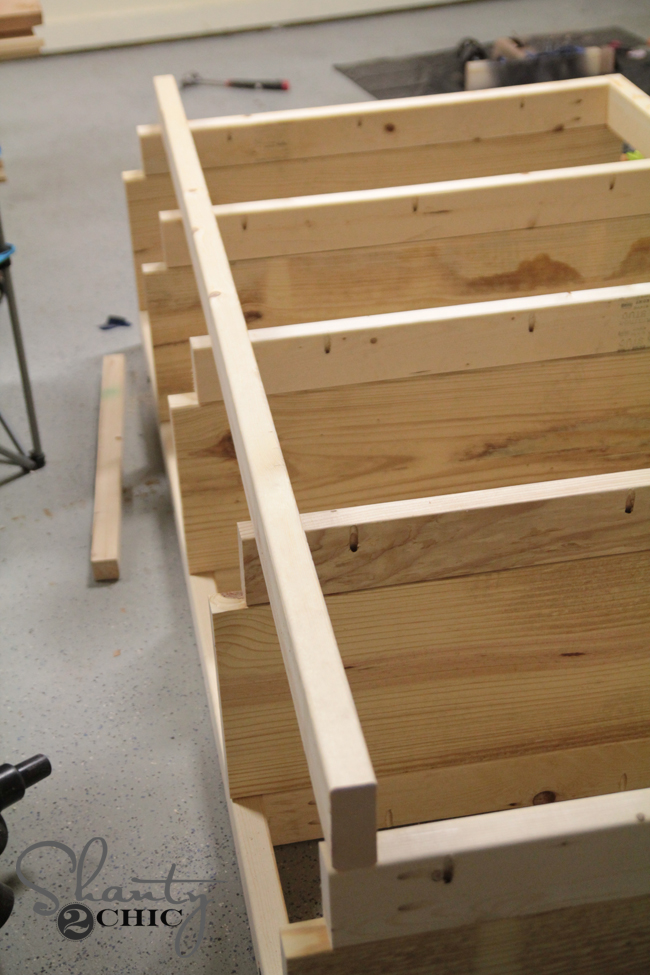
Before attaching the legs, you will need to make the cuts for your dowels. Yes people! Those are wood dowels! They look just like metal bars, even in person. It’s insane. And cheap. Woohoo. You will want to clamp the two boards together to make sure your holes are exactly the same.
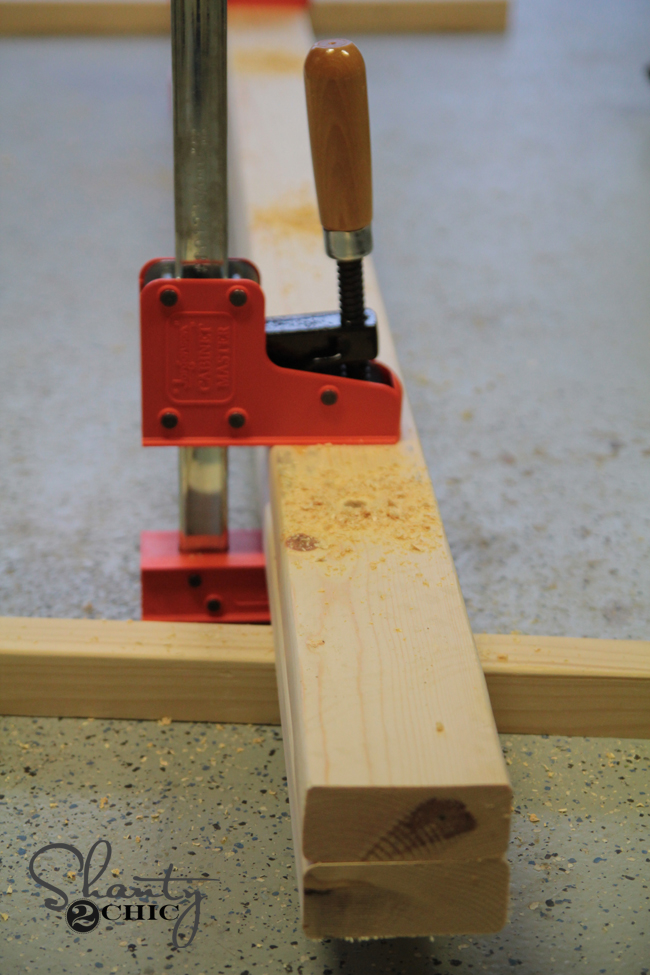
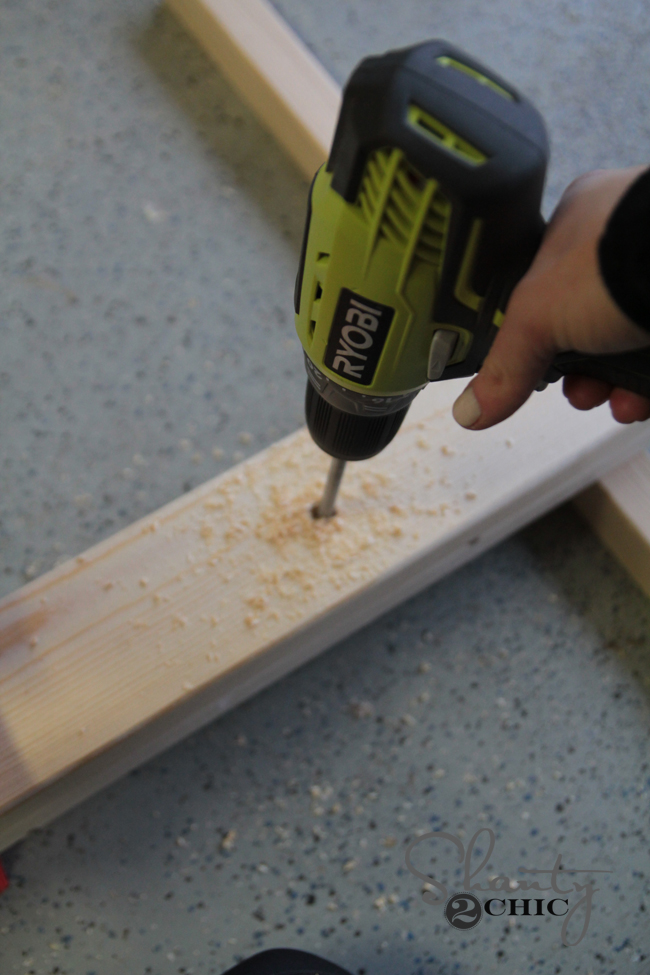
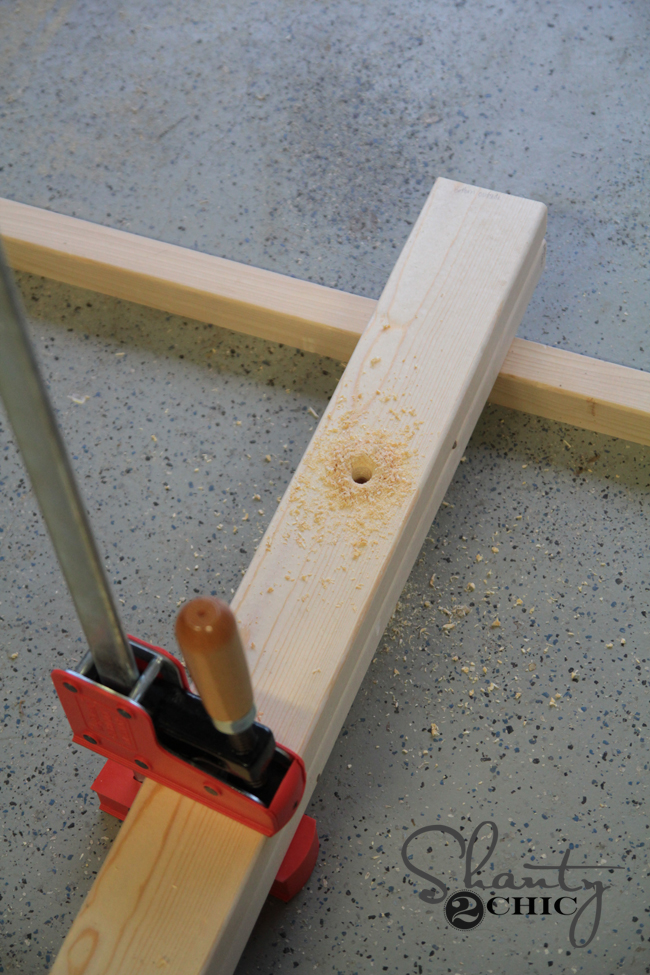
Once that was finished, I inserted the dowels and attached those boards first. You will almost make a ladder with your dowels like this…
These two will connect to the bookcase using wood glue and 2.5″ pocket hole screws.

Now for the front legs. These are attached the same way.
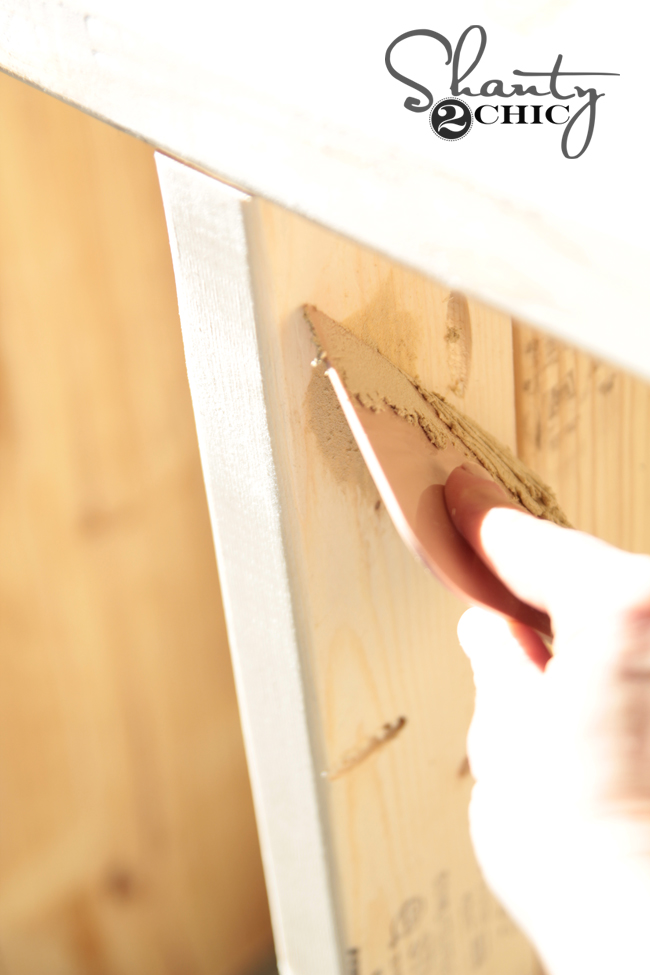
Now, this will leave some unsightly pocket holes on the bottom of the shelves. Because this is open shelving and visible, I filled these holes using stainable wood filler. Just push some into each hole and then smooth it out. You will want to lightly sand over each one after it dries before you stain. It sounds like a lot of trouble, but it only took a few minutes to fill all of them, and the filler dries really fast.

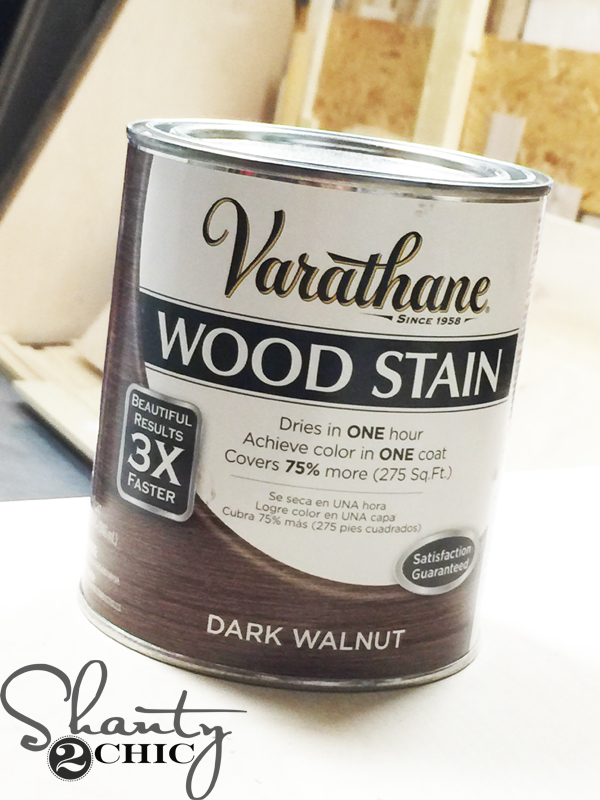
Time for stain! Oh I had fun on this one. I actually combined three stains to create a very worn brown color. It matches the pallet I have hanging on the wall almost exactly. Here are the three I mixed.

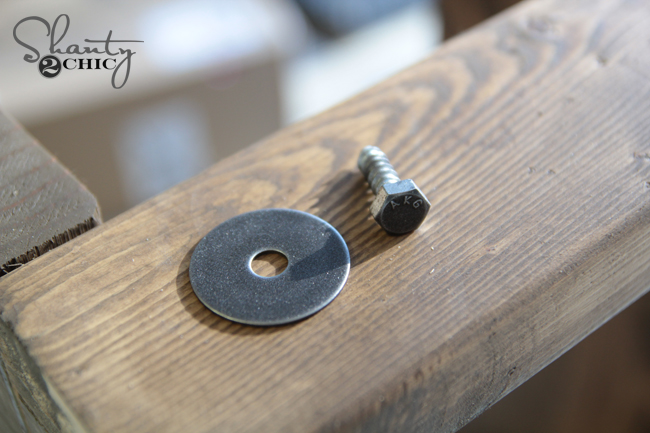
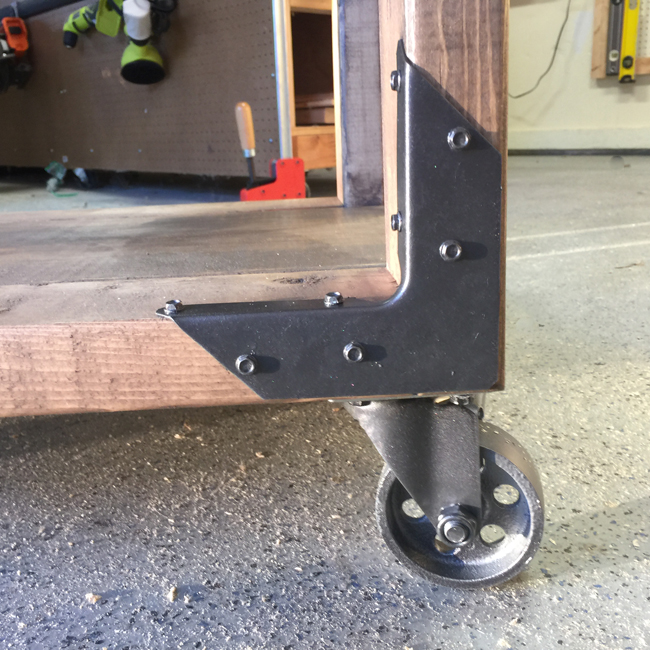
Once the stain dried, I added the rest of the hardware. I started with the washers and hex screws.
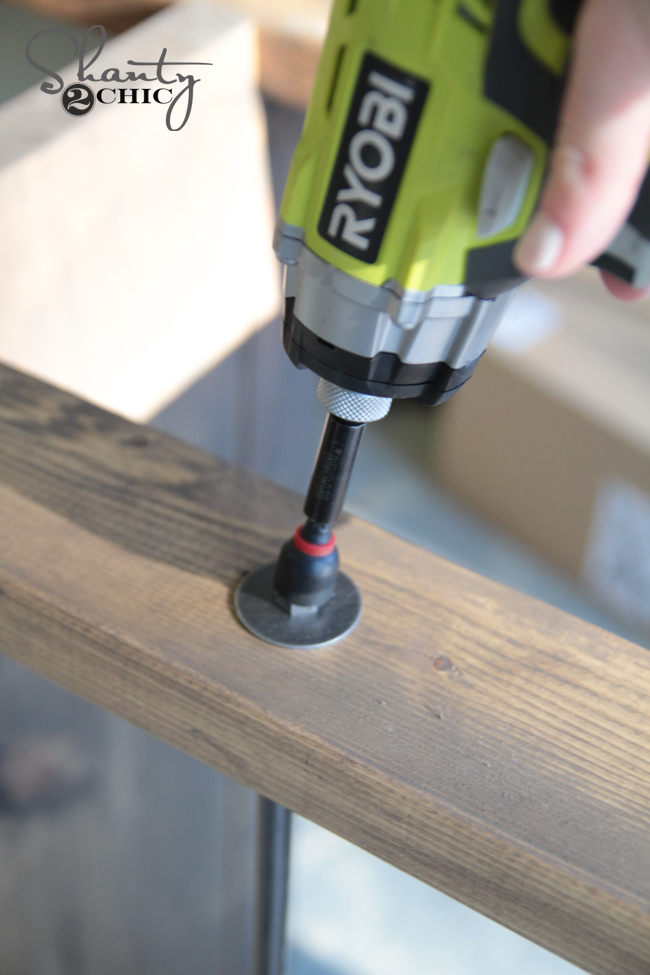

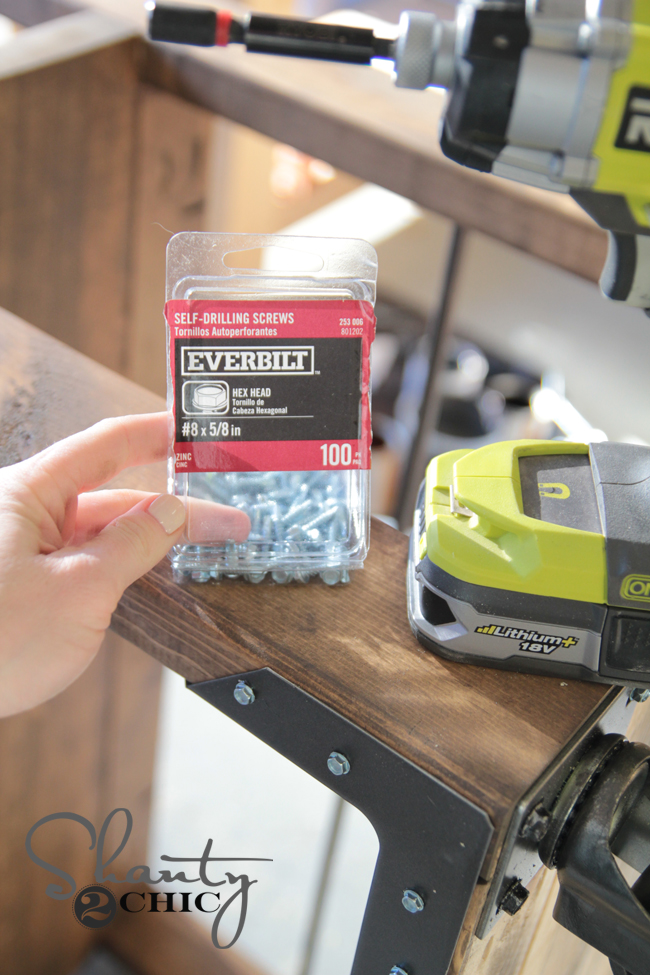
Then, I used these small screws to attach the Simpson Strong-Tie connectors.
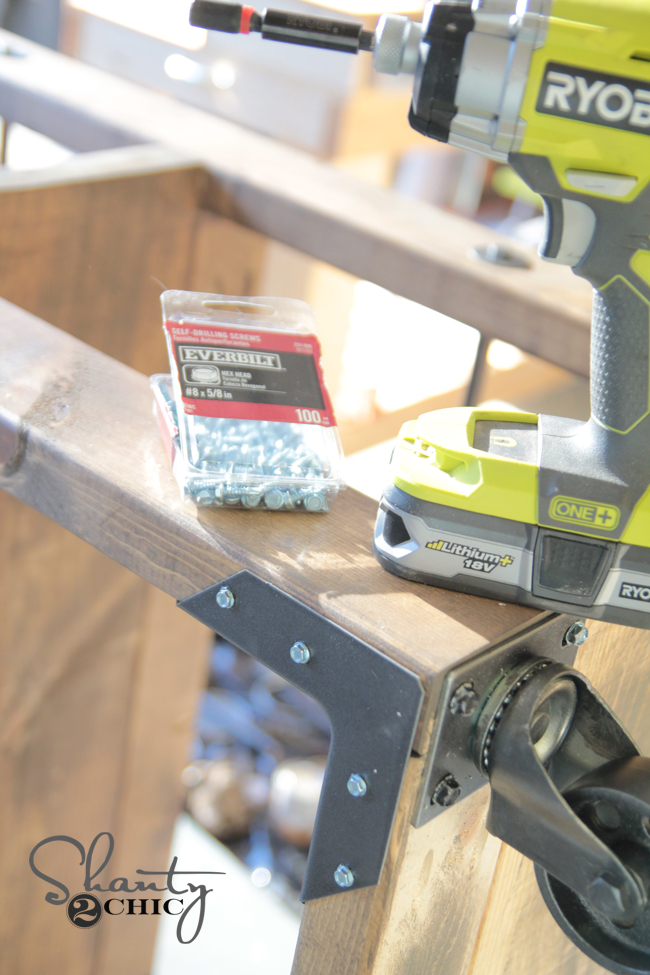
You will see those are still silver. I found this great paint at Michael’s. It matches the spray paint almost exactly. I dabbed some on each of the screws and I also used it touch up anywhere else that needed it.

The casters are metal casters that I also found at Home Depot.
That’s it! Here she is all prettied up in my living room!
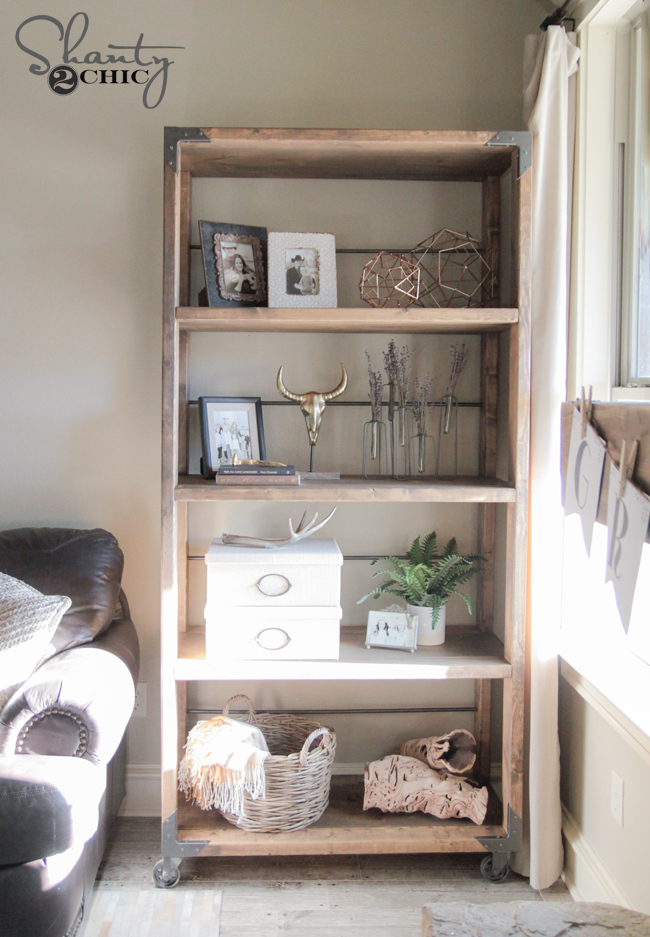
Ahhhh I love. Hope you do too!
You can also download and print the FREE plans by clicking HERE!
Let us know if you have any questions at all! Happy Building!


Did you screw the hex screws and washers into the outside of the dowels to cover the drilled out holes they lie in? Or how did you cover those drilled holes once the dowels are in?
So I’m attempting to make this within the next 2 weeks and so far I’ve purchasedone all the materials except for the lumber. The materials I got from the local home depot in maryland and it’s already about $75. Neither home depot nor lowes carry pine board. They had anot her type but it was almost $30 per board! Today I’m checking at a local lumber yard but when calling they said they had 1 by’s and not 2’s. I’m having a really hard time finding pine board. Does anyone know where I can find it? @shanty2chic do you have a video for this tutorial by any chance?
Where did you find the driftwood looking pieces of wood shown of the bottom shelf? I love those!!
Can anyone tell me how much weight these shelves can hold? I want to build something to hold a vinyl record collection with a lot of weight. I know the 2x’s are strong enough, but I’m worried about the weight stressing the screws in the corners.
Thanks!
I tried! I thought the bottom shelf’s grain came out nice
How much did it cost you?
Eh I think it was just under $100, but I did not use casters.
What is the point of 3 separate pieces per shelf with pocket holes? Why not go simple and stronger with single piece shelves?
Sounds like you have a great design idea… Go for it! That’s the great thing about DIY 🙂
Three single boards are more dimensionally stable than using a single board (providing they are flipped alternately). They will not warp or twist like a single board. They also provide more strength.
That’s what creates the shape that goes around the legs. No notching! You also end up with a shelf that is deeper than just the 12″ of the main piece. That’s as large as standard lumber stores will typically carry.
I know you asked a while ago, but I see that the other answers didn’t hit upon what came to me – thought I would add my $0.02!
Looks great. Perhaps you should note these metal casters are NOT sutable for wood floors.
what color is the martha stewart metallic paint? Thanks!
I can’t wait to build this!!!!! As always inspiring great work!!! Much appreciated!!!!
Amazing, I LOVE it!! Did you mix all 3 stains together in another container or did you apply them to the wood one at a time?
Yes Kaiti, I mixed all three in a plastic tub and kept adding small amounts of each until I was happy with the tone. Then apply it just like you would regular stain… Hope that helps!
Love this build! Do you have an approximation of what it costs to build?
Yes Patti… I mentioned in the post that the whole thing cost around $100… Woohoo!
Gorgeous!
Thank you Kate!
It looks beautiful and I love the price tag!
Thank you Whitney!!
This is beautiful! I love the metallic touches and the wheels. Thanks for the inspiration!
Thank you so much Pam!
Love it! Did you spray paint the casters too? What attachment piece did you put on your drill to screw in the Simpson Strong-Ties.
I did paint the casters… And I used a nut driver attachment (cheap at Home Depot) to add the screws… Hope that helps!
Did you worry about the spray paint getting into the bearings on the casters? I’m building mine this weekend and I’m worried the spray paint may ruin the caster by getting into the bearings.