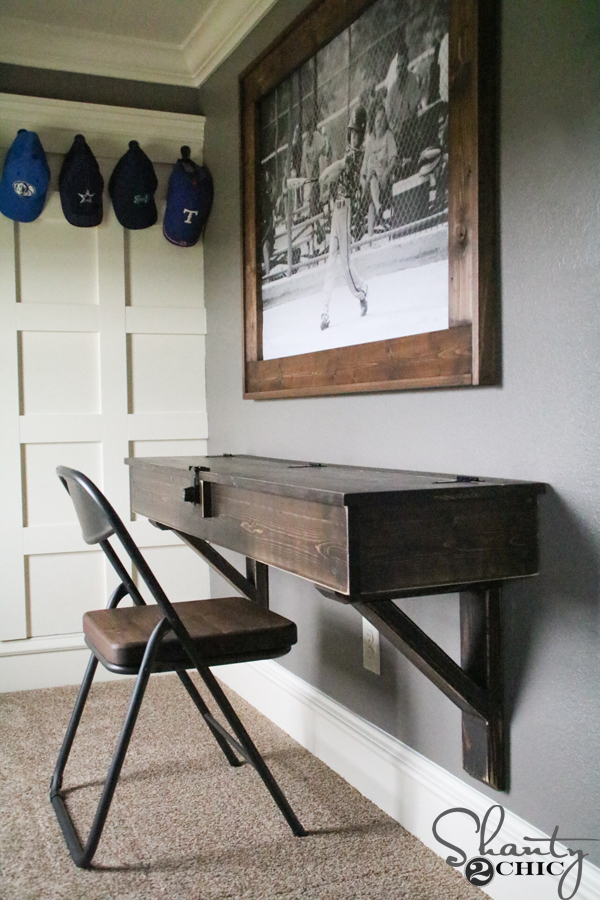
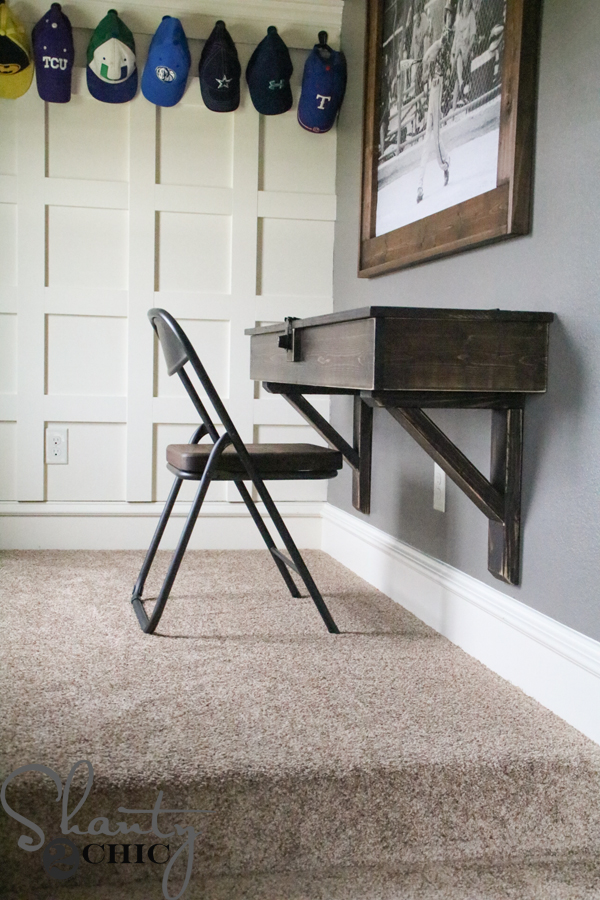
Hey guys! I’m back to share one of the latest pieces that I have built for my sons room! Check out this DIY Floating Desk with Storage we built for him.
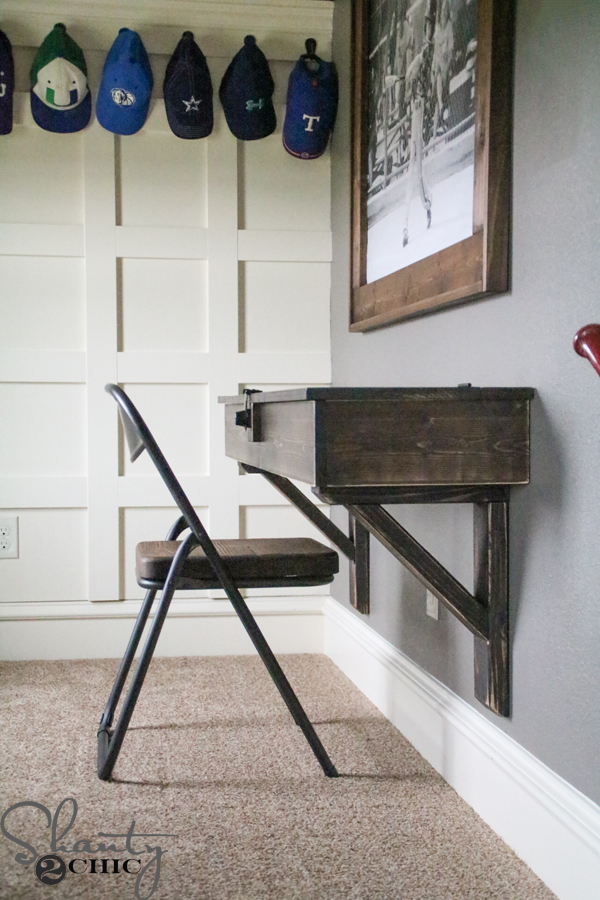
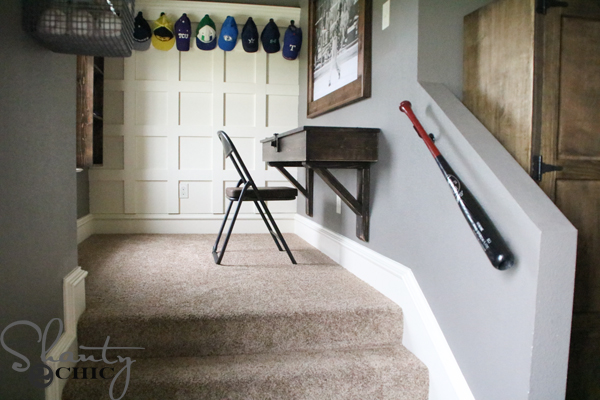
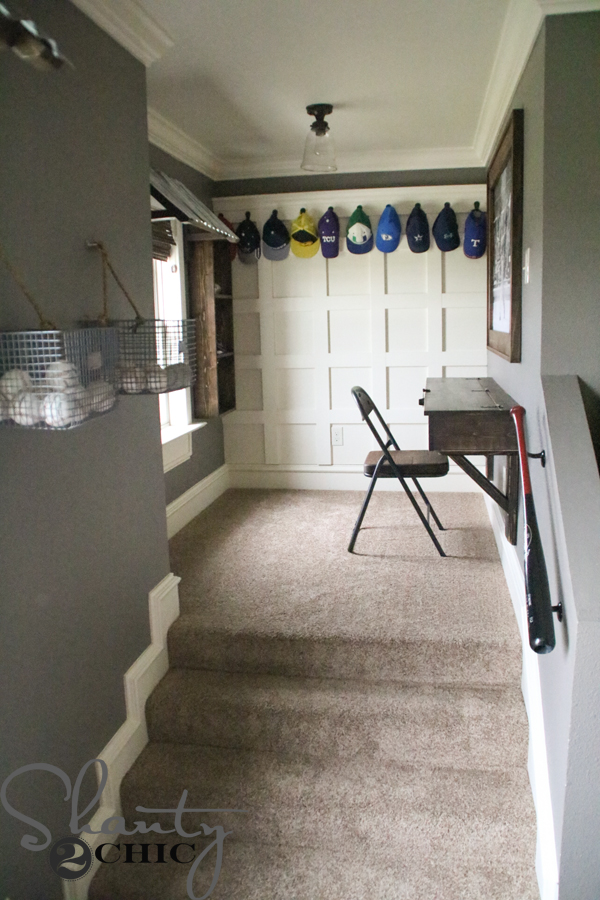
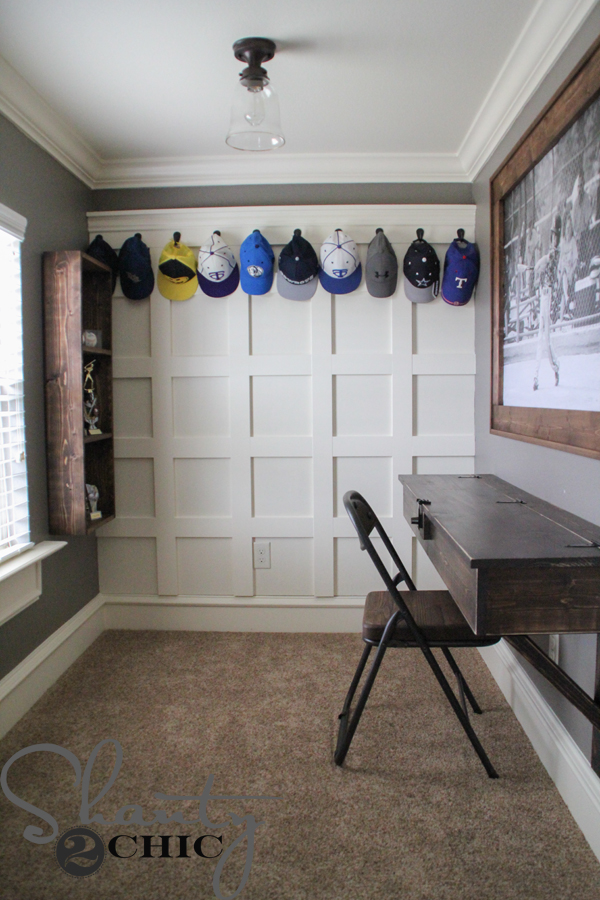
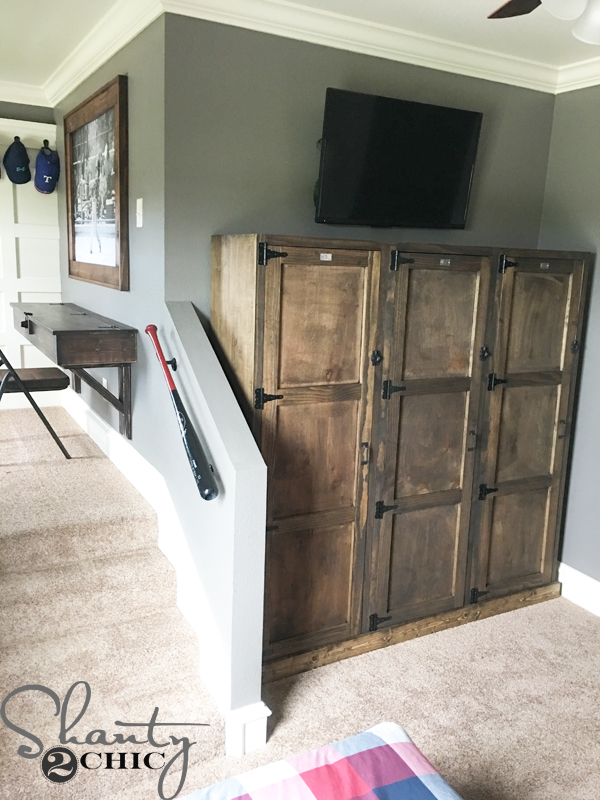
He has this really cool space in his room that was not part of the plans. It was a closed off area over our front porch and it would have been completely wasted and valuable space! So, we created a few steps up and left the wall open there. It’s the perfect spot for a little study area! I wanted to maximize the space so I decided to build him a floating desk with a flip top for storage.
It’s super easy to build, it’s 5 ft. long and I was able to build it for under $30! Here’s how!
Supplies:
2 – 2×4@8ft.
1 – 1×12@6ft.
1 – 1×4@6ft.
1 – 1×6@8ft.
1 – 13 1/2″ x 57″ 3/4″ sheet of scrap plywood
1 lock set
3 hinges
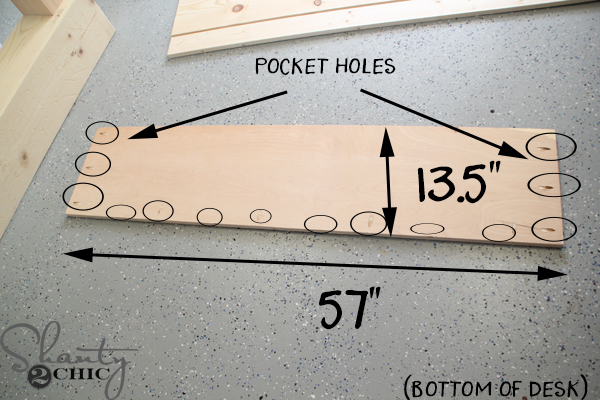
I started with a scrap piece of 3/4″ plywood. This is where I was really able to save money. Check your scrap pile. I had enough scrap to cut a 57″x13.5″ piece. This will be the bottom of the desk.

I drilled 3/4″ pocket holes into the both sides and the front edge of the plywood piece.
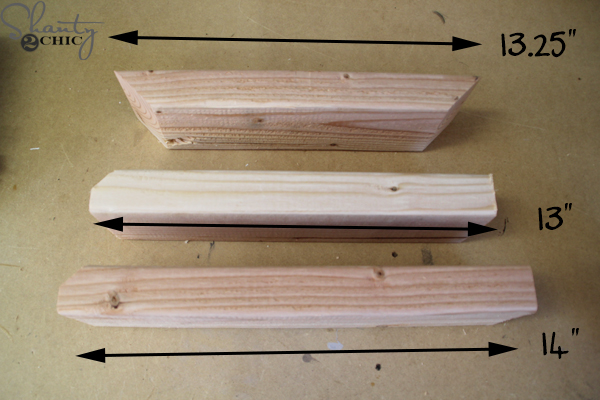
Next, I 2×4 pieces for the corbels. These measurements are long point to long point. Notice that the two bottom pieces have a 45 degree cut on one corner.
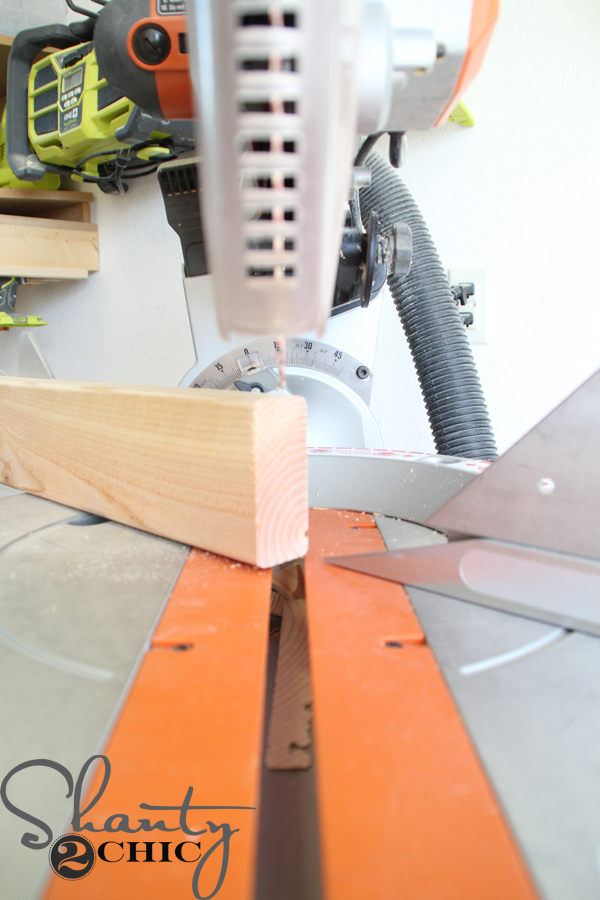
To make that angle cut, first cut the 2×4 down to side, then line up the edge of the 2×4 so that the blade of the saw will only cut half of the end. Set your miter handle to the 45 degree stop and make your cut.
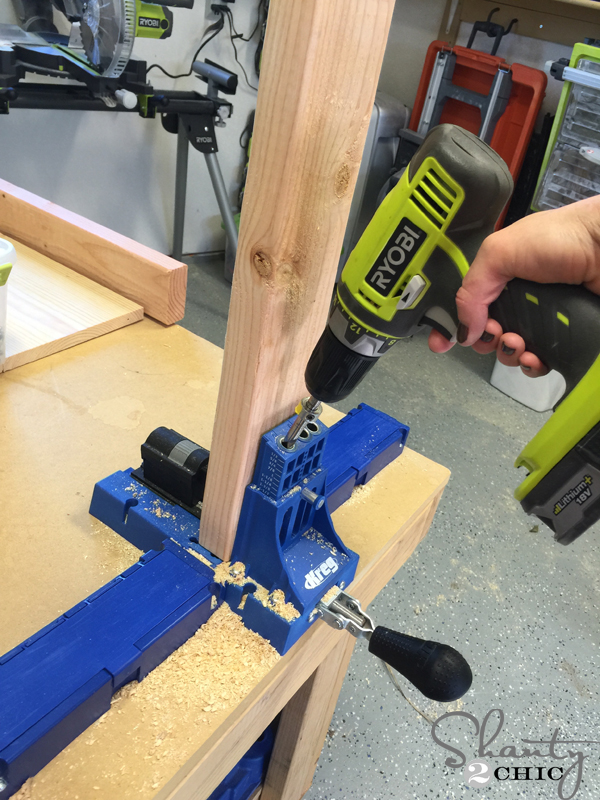
Next, I drilled 1 1/2″ pocket holes in one end of each of the 14″ 2×4 pieces. Click here to watch our How to use a Kreg Jig Video! Click here to buy the K5 Kreg Jig on Amazon.
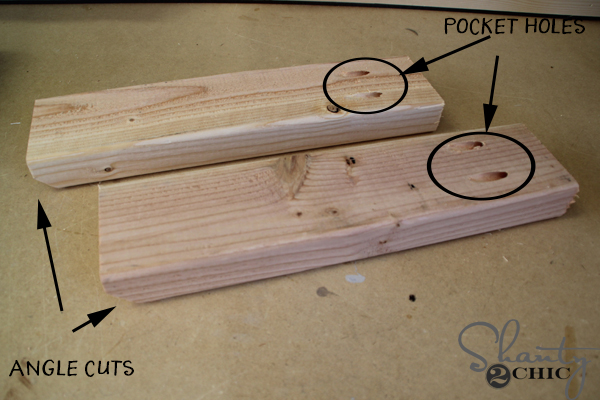
Notice where the angle cuts are in relation to the pocket holes.
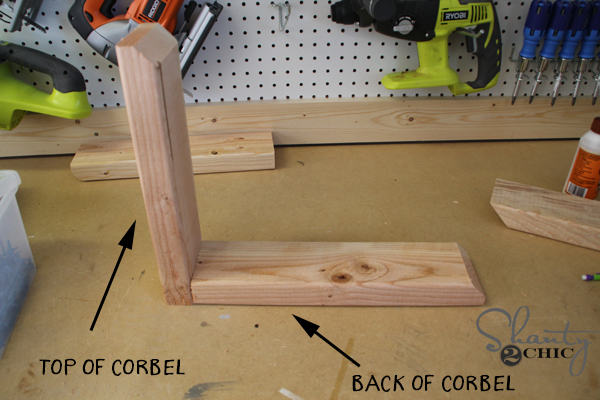
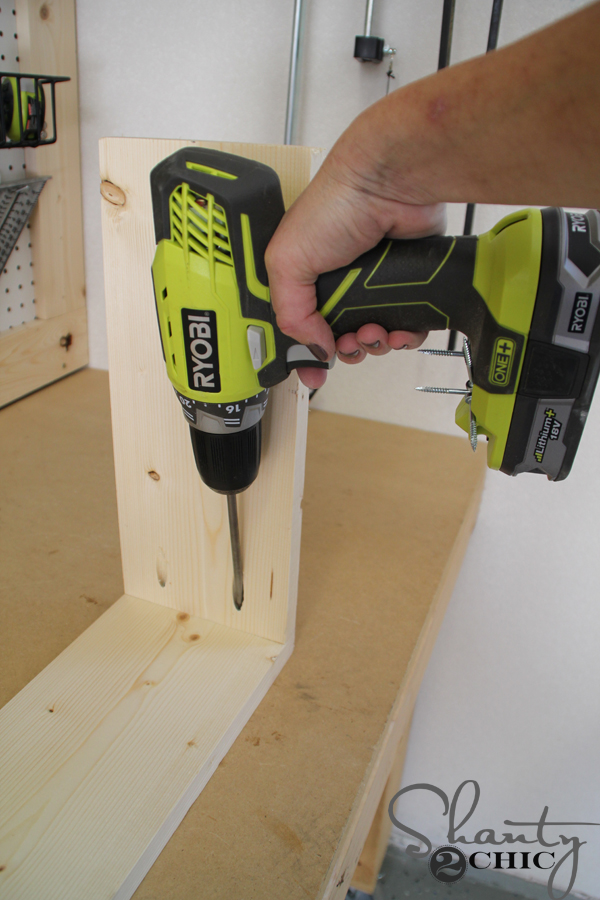
Next, I attached the 14″ piece to the 13″ piece with 2″ pocket hole screws and wood glue.
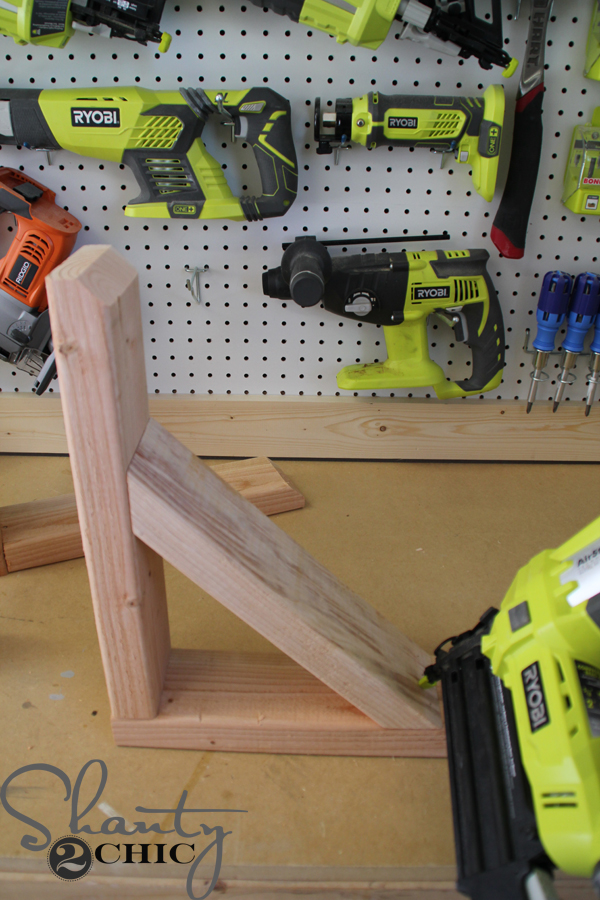
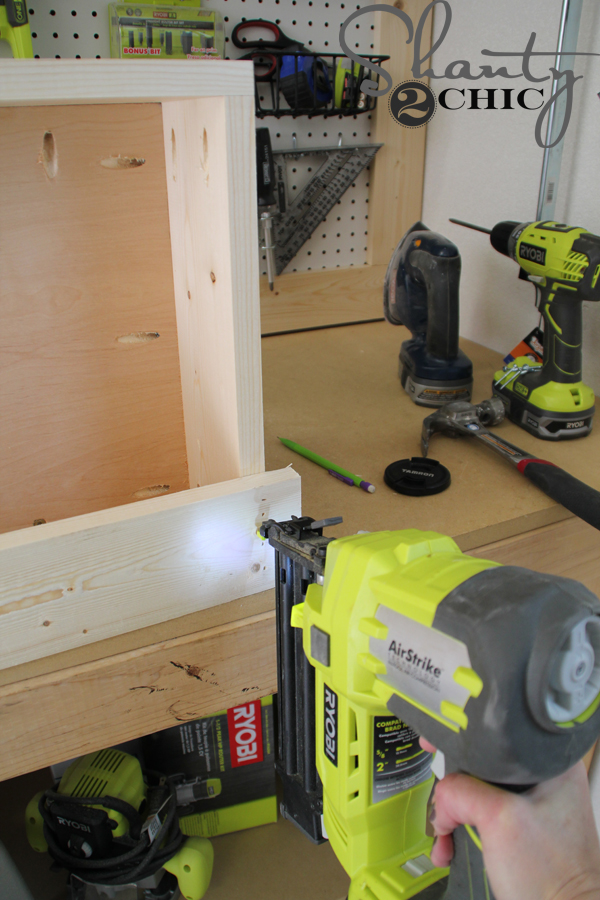
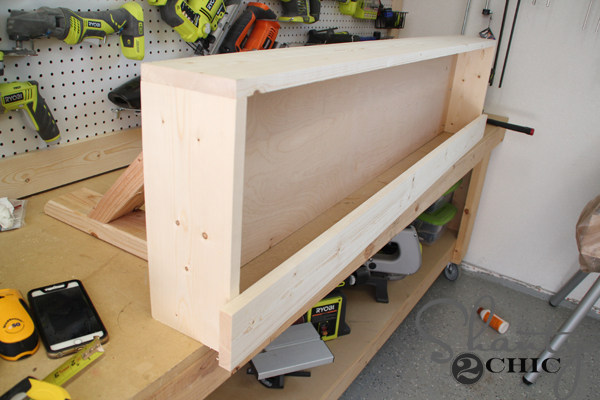
Finally, attach the cross brace to the corbel with wood glue and 2″ brad nails.
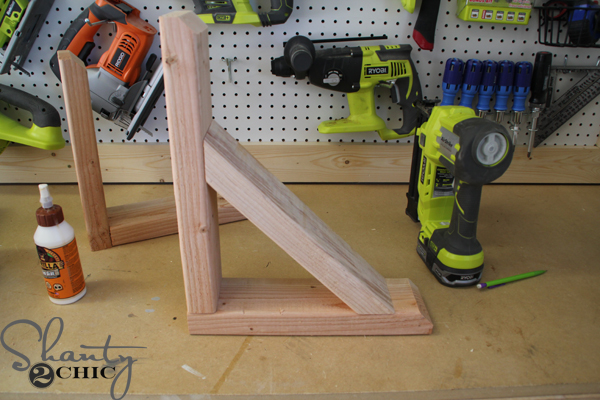
This is the corbel upside down.
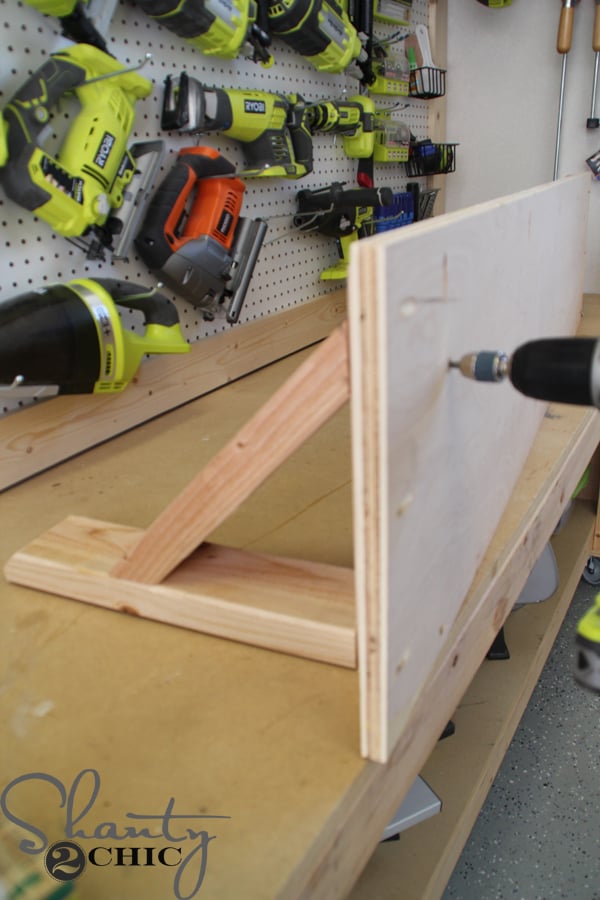
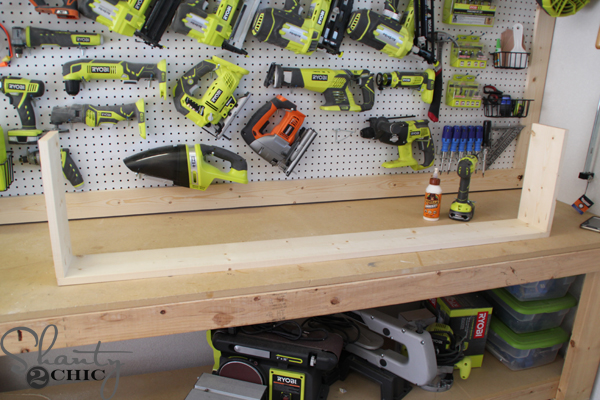
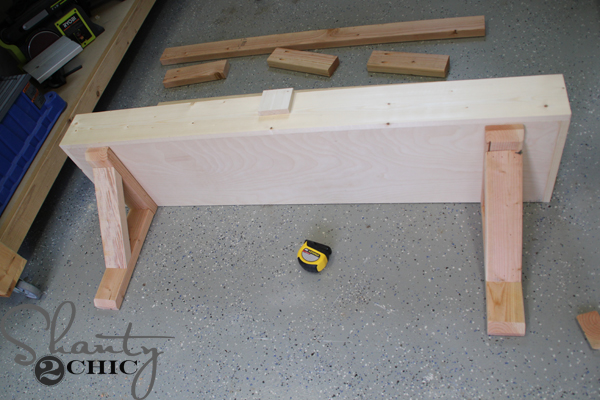
Now, attach the corbels to the scrap piece of plywood. Make sure the pocket holes are on the opposite side of the corbels. This will be important when you are attaching the front of the desk. I attached the corbels 4″ from the ends of the plywood.
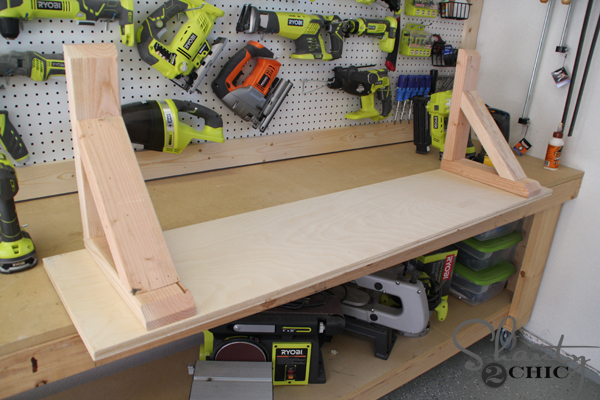
Here is the desk bottom with the corbels.
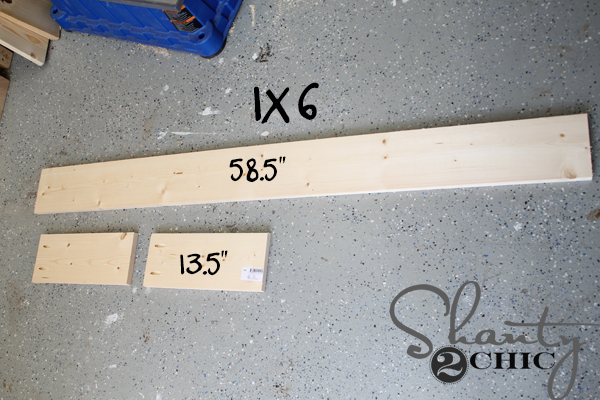
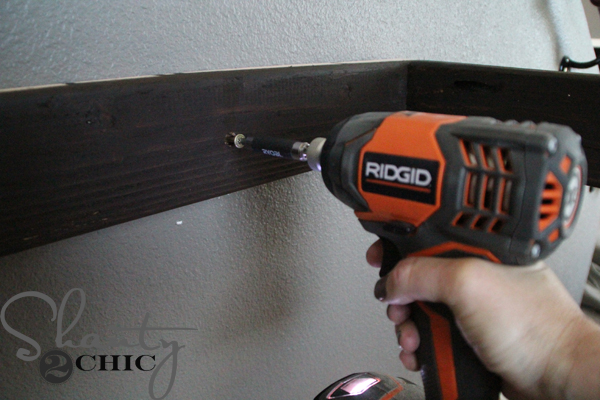
Now, you can cut the 1×6 pieces for the front of the desk. I cut one long piece at 58 1/2″ and two pieces at 13 1/2″.

Drill 3/4″ pocket holes into one end of each of the short 1×6 pieces.
Now, attach the short pieces to the long 1×6 piece with 1 1/4″ pocket hole screws and wood glue.
Here is the front of the desk.
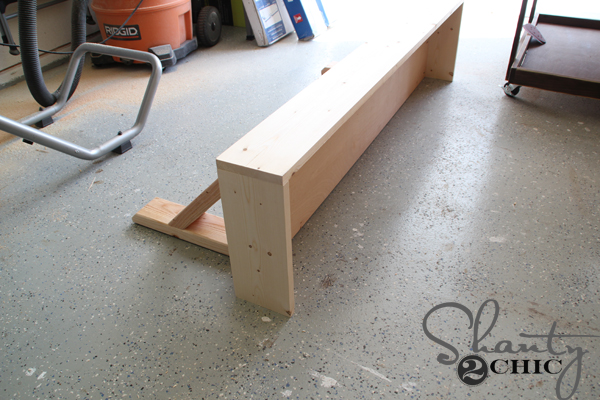
Next, you can attach the front of the desk to the bottom of the desk. Use 1 1/4″ pocket hole screws and wood glue. The bottom of the desk sit inside the bottom of the front frame of the desk.
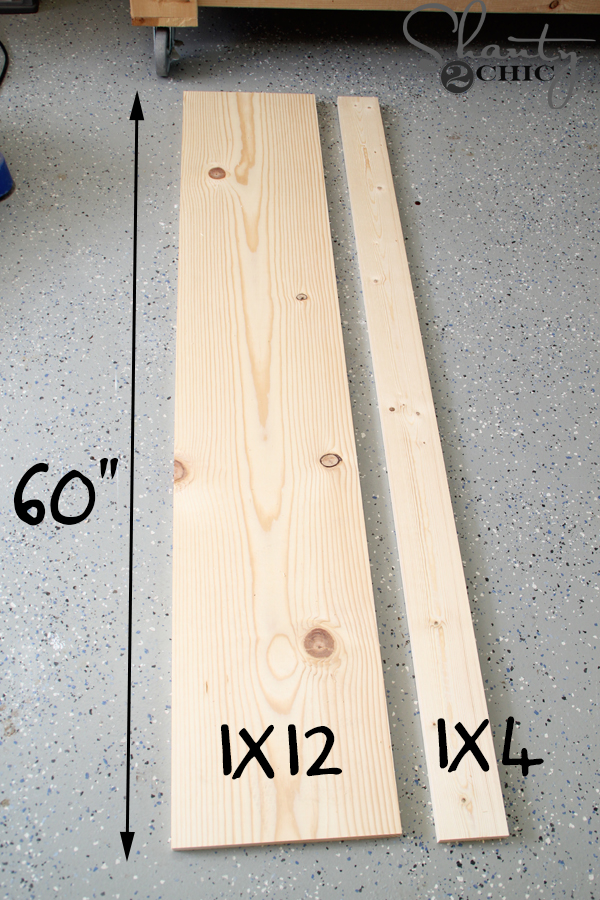
The final cuts will be for the top of the desk. There will be a 3/4″ overhang on the front and sides of the desk. Cut the 1×12 and the 1×4 at 60″.
Now, attach the 1×4 to the top of the desk with 1 1/4″ brad nails and wood glue. The 1×4 will be flush with the back of the desk (where it will attach to the wall) and the sides will overhang 3/4″.
Almost done!
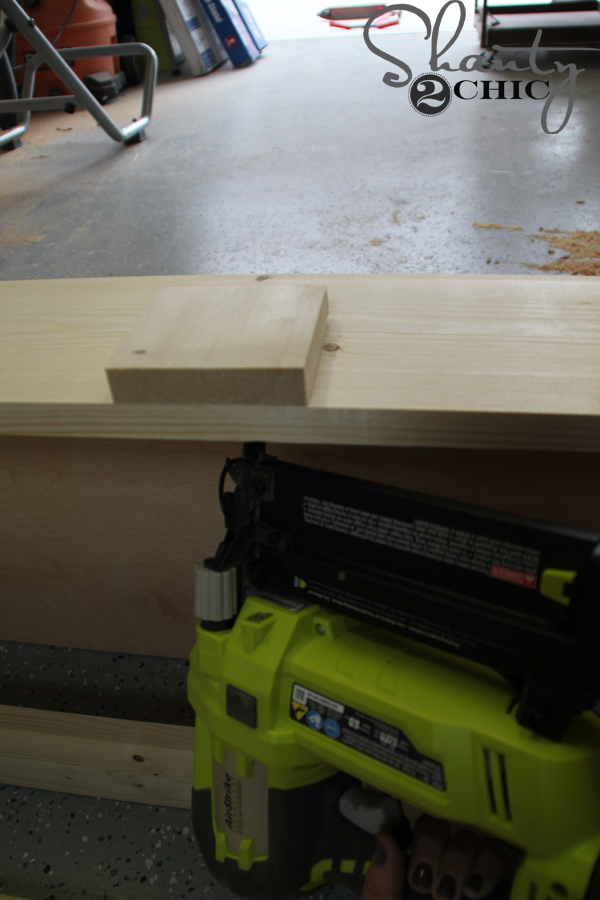
If you plan to use a lock for your desk, just cut a scrap piece of 1×4 at 3 1/2″ and attach it to the center of the front of the desk with wood glue and brad nails, from the inside of the desk.
The spacer block will be flush with the top of the front of the desk. Stop here and move on to building the cleat for the wall. We will stain everything before hanging it on the wall, adding the hardware and the 1×12 top.

Cut the cleat pieces from a 2×4. I cut one piece at 58 1/2″ and three pieces at 11 3/4″. Drill 1 1/2″ pocket holes into one end of each of the short pieces.
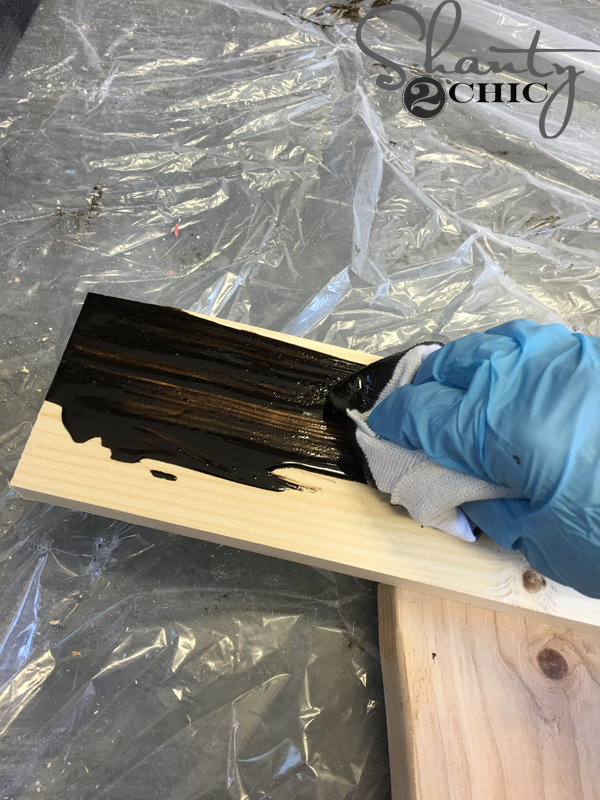
I applied one coat of Dark Walnut stain by Rust-Oleum (you can find it HERE on Amazon) all over the desk and cleat pieces. I just wiped the stain on with a clean cloth, let it site for about five minutes then wiped it down with a new clean cloth.
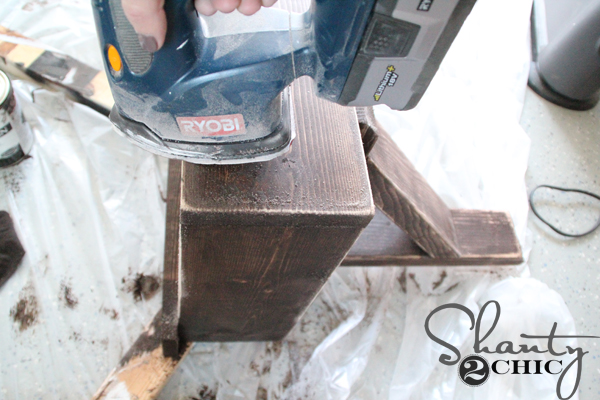
The Varathane stain dries in about an hour. Once it’s dry, I took my Ryobi corner cat sander to it with an 80-grit sanding pad. I did this to give the desk a more rustic/distressed look to match the rest of my sons room.
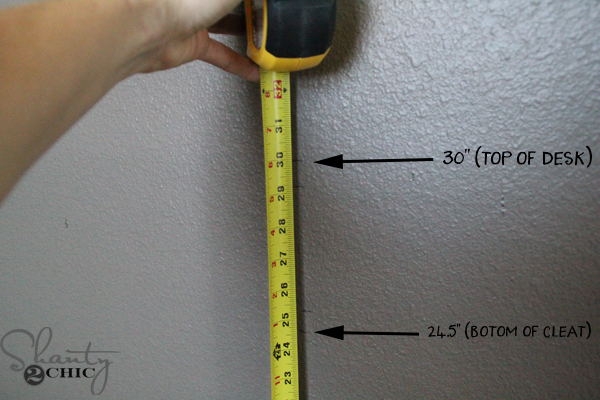
Now to hang it on the wall. I like my desks to be 30″ high so I marked 30″ and then subtracted the height of the desk from that. The bottom of my cleat needs to be at 24 1/2″ so I marked that spot on the wall to attach my cleat.
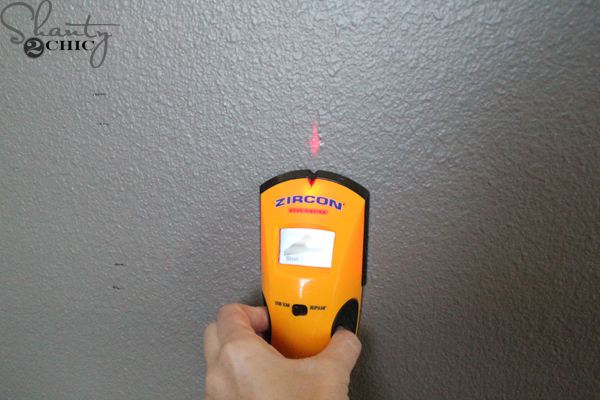
Now you can find the studs. This is my favorite stud finder. You can find it HERE on Amazon.
Once you locale the studs, you can attach the cleat to the wall with 3 1/2″ drywall screws. Make sure to use a level on top of the cleat to make sure your desk will sit level.
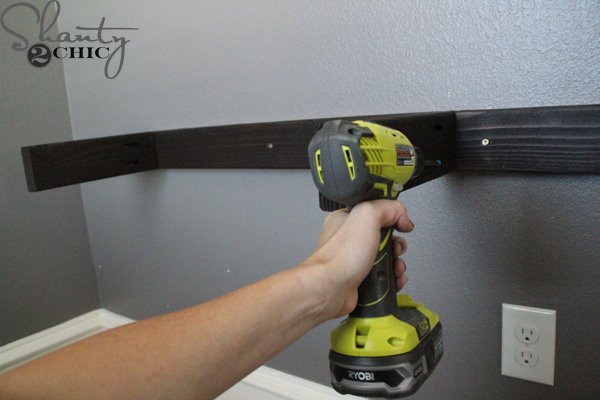
I added the middle support on the cleat after I attached it to the wall. I do this so that it doesn’t get in the way if there happens to be a stud in the middle.
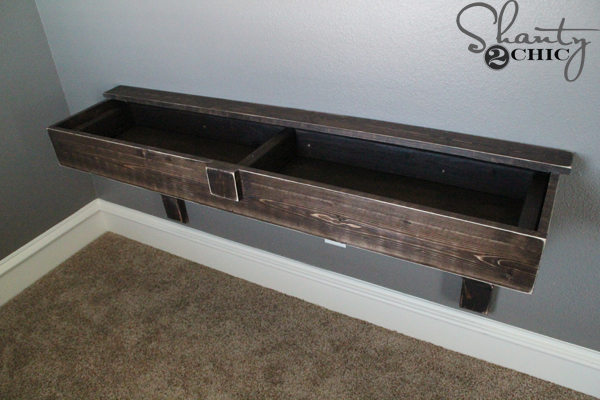
Now, just slide the desk over the cleat. The cleat will sit flush on the bottom of the desk. Attach the desk to the cleat from underneath the desk, with 1 1/4″ screws and add a few from the sides into the cleats. You can fill your screw holes, on the sides, with wood filler and touch them up with a little dab of stain.
Now, you can attach the 1×12 piece to the 1×4 piece with three hinges.
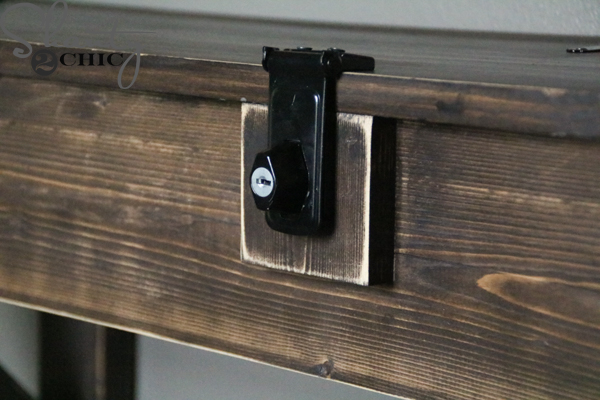
I added a lock to the desk because my son likes to keep his little sis out of his things 🙂 Mom has a spare though 😉
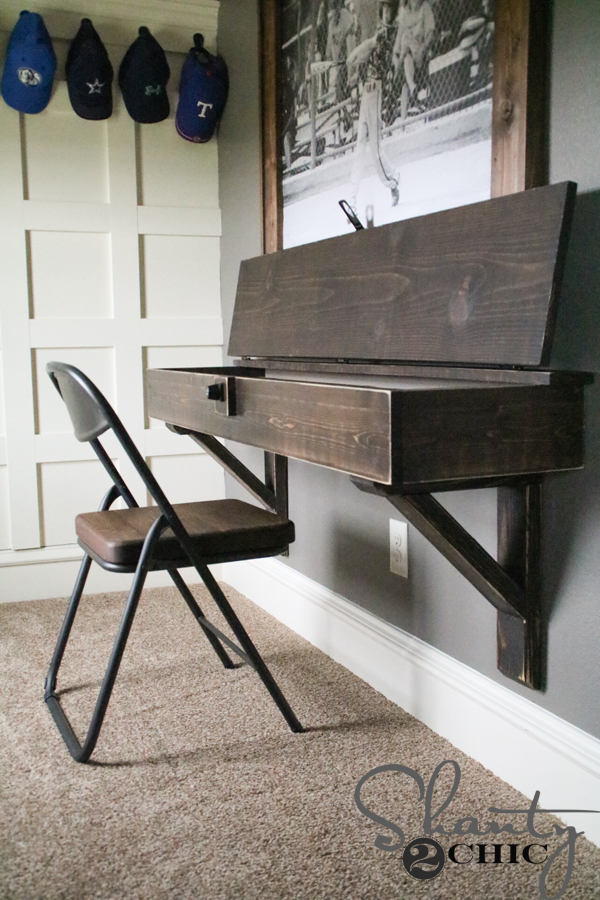
I love all of the storage that he has inside the desk!
Thanks so much for stopping by!
~Ashley
P.S. You can click the links below to check out all of the other how-to’s that I’ve shared for his room!
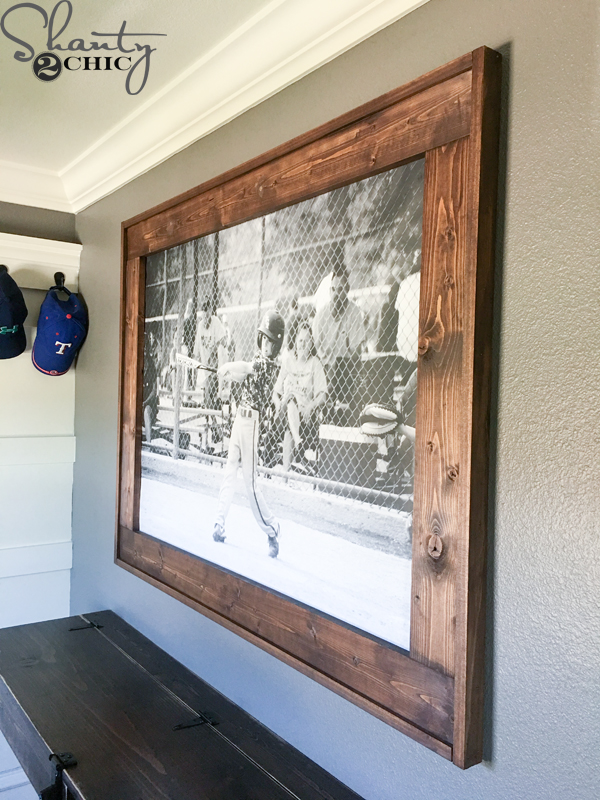


Did you buy chance also make the picture frame above the desk?? I love the frame and would love to make something similar..
I didn’t notice the link anywhere to the printable plans for the desk, are they available?
Thank you so much both of you girls. I have already built dining table and desk with your plans. Planning to build this one. I pretty much learned everything from you girls.
Hey there! I can’t find the printable plans for this. Are they somewhere and I am missing them?
Thanks!
I’ve been searching for something like this and this looks great! I have a question though. Are these measurements good for any person to sit there? Meaning, does it leave too little room for legs or too high a reach for writing if the leg room is sufficient? I’m worried building a desk that is so thick would cause problems. Does that make sense? I’ll be starting this project in the next week or two and want to get it right before I waste material. Thanks!
You could probably just change the height that you mount it to the wall to suit your height.
I knew I wasn’t going to explain that correctly. I was concerned about the thickness of the desk. Meaning, I was afraid it would be too thick to sit at where having it low enough to write on would make the bottom of the desk too low for legs to fit under. I made one though, and it works just fine.
What is the length of the middle corbel piece? The Pinterest logo covers it in the photo. Thank you in advance.
It’s 13.25”
I am going to build this desk for my son’s room. Do you have a bookshelf that matches?
Hey:) I didn’t notice the link anywhere to the printable plans for the desk, are they available or should i just print this page online? Thank you!
I’m trying to figure to out why the cleat is cut at 58.5 while my play wood is 57 and it has to slide over the cleat 😕
Cleat should also be 57″. That is a typo. Sorry about that.
where did you get the desk?
This was driving my husband crazy..thanks for clarifying….
I used these plans as a guide for one I built for my son, I redid his room while he was away over the summer, excuse the mess in the room, I was so excited I took the pictures befor it was finished, lol. Mine is a little different because I’m a newbie, but he loves it! Thank you so much for the tutorial, you made it so easy, and if I can do it anyone can!
My dad and I are going to make this for my son but my dad is concerned that of be top is wood when he writes on paper it will leave indents on the wood. Any thoughts?
You could go with a harder wood if you’re concerned… The cost would be greater, but it would work. I have built all of my kids’ desks and have never had the issue. I use a coat of triple thick poly by Varathane over the top. I think he would have to write pretty hard to leave marks though. Hope that helps!
Thank you very much! It does help! Hoping to post pictures soon! LOve ya guys! Love your show and love your new Youtube videos!
Do you use any kind of wax after you stain to protect the finish of the desk?
No wax just a poly!
What kind of poly to you use to look so natural? thanks
Thanks for the tutorial. Beautiful desk.
Thank you!
What a beautiful desk!! You did a wonderful job. <3
Thank you 🙂