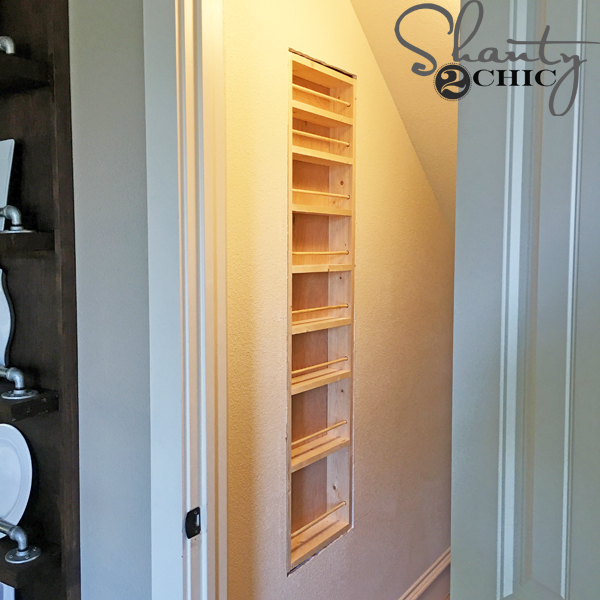
Hey guys! Well, I have to say that this Built-in DIY Spice Rack is something that I have been dying to do, for my pantry, since we moved into our home. It was pushed aside because I had so much furniture that needed to be built but I finally got around to it and I LOVE IT SO MUCH!
I have a large pantry but it’s very narrow. I thought that building the DIY spice rack inside the wall was the best use of space. It might seem intimidating to cut a big hole in your wall and build something to fit inside the hole but it is actually VERY easy and the trim on the front gives you a little room for error.
Here’s how I did it! (I’m going to give you my measurements but this is just an example. I built this between the studs and the width between studs varies so make sure to measure and cut your own to fit)!
***When you cut in to a wall, you want to make sure of what is behind the wall first. I knew that there was no plumbing pipes or electrical wiring behind the wall (because I built the house). If you aren’t sure, you can use a MultiScanner that will detect metal, studs and AC electrical wires. You can find one of those HERE on Amazon.
DIY Spice Rack – Supplies:
3 – 1×4@ 10ft
1 – 1×4@ 6ft
1 – scrap 1/4″ plywood to fit (mine was 57″x14 3/4″
3 – 3/8″ dowel rods @4ft
Wood Glue
Tools:
Miter Saw
Drill
Rotary Saw
Nailer (can use hammer and finish nails)
Stapler (can use hammer and finish nails)
Sander
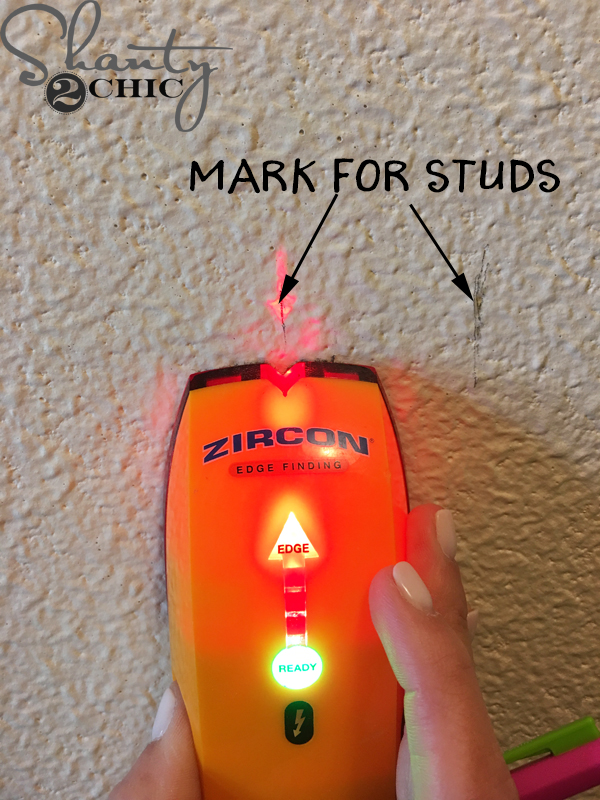
I started by using my stud finder to locate the two studs that I would put the diy spice rack between. I use this stud finder that you can find HERE on Amazon.
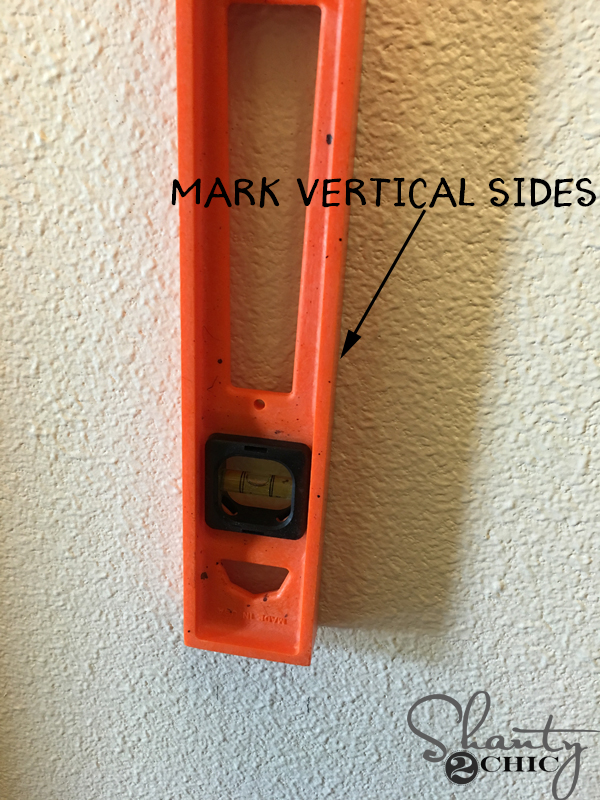
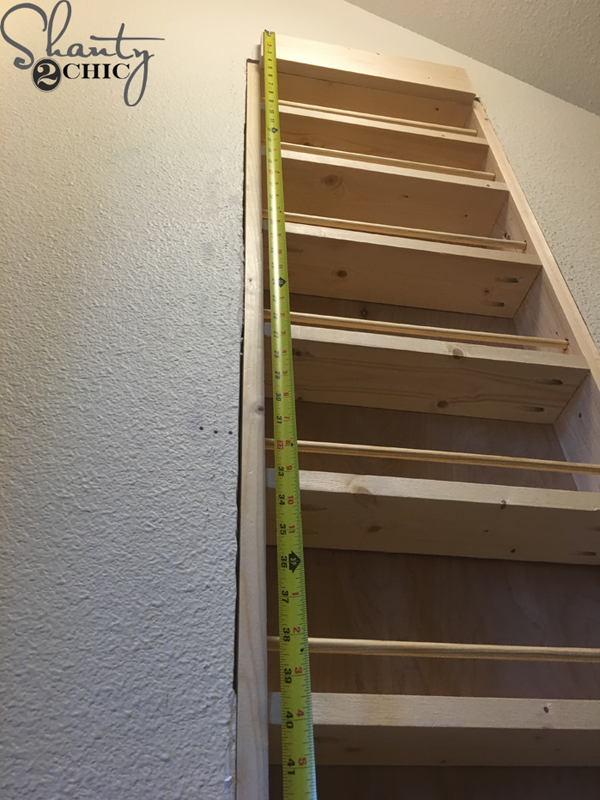
Next, I used my level to mark a vertical line (along the inside of both studs) the length that I wanted the spice rack to be. I decided to make the length of mine 57″.
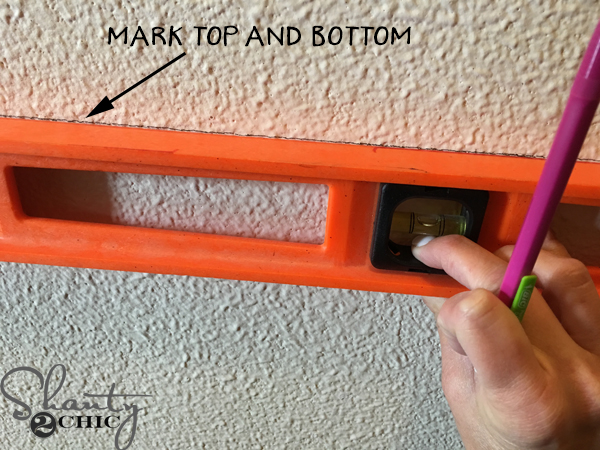
Then, I marked the horizontal top and bottom lines between the studs. I had exactly 14 3/4″ between studs.
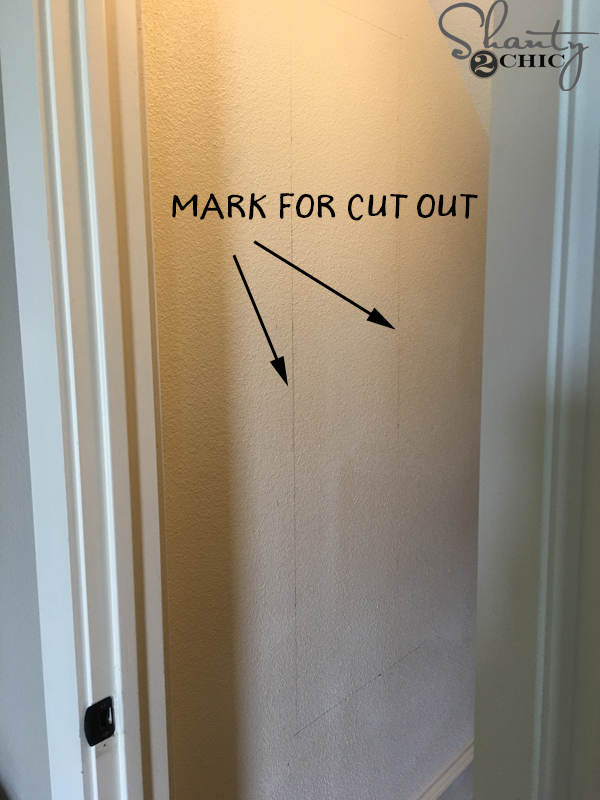
Now, you should have a box drawn on your wall. The overall opening that I was going to cut was 57″x14 3/4″.
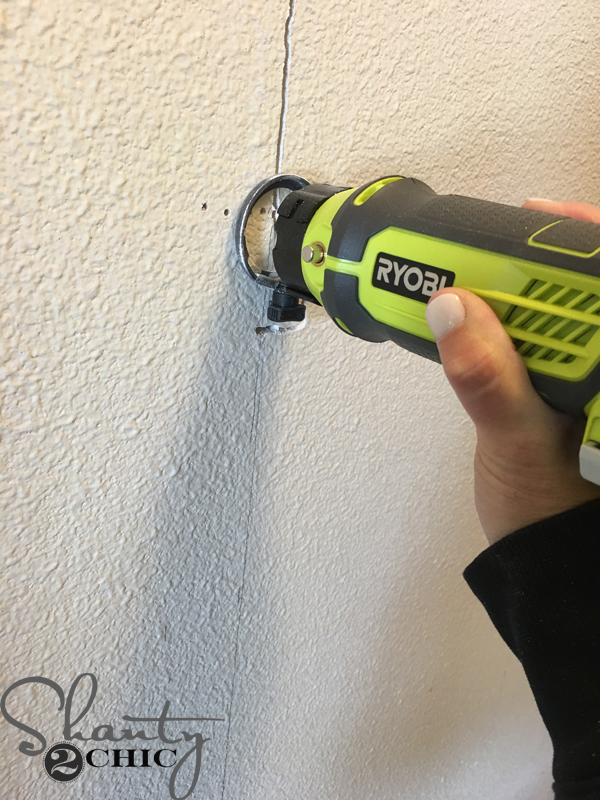
To cut the opening in the drywall, I used my Ryobi Rotary Cutter and started by cutting the vertical sides first. The blade should be running along the inside of the stud. You can buy this as a bare tool and it’s only about $40. You can find it HERE at Home Depot.
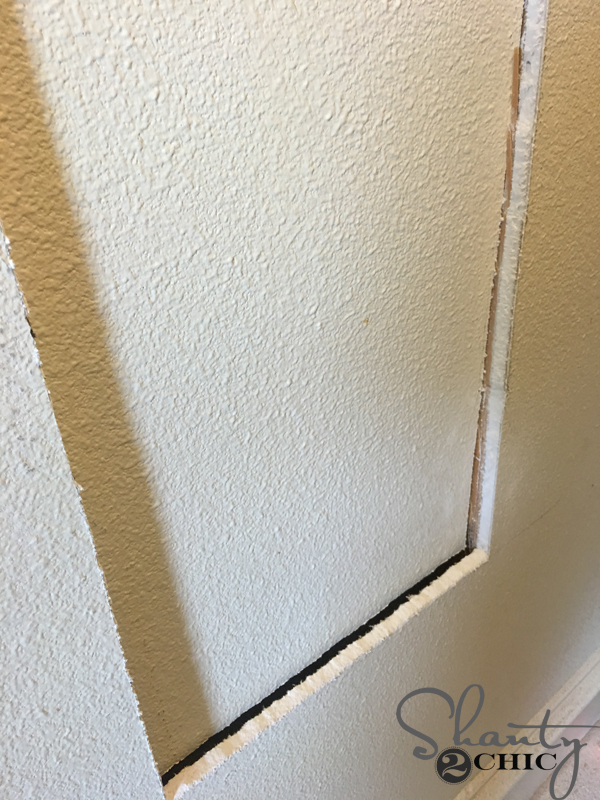
I followed with the horizontal cuts. The cut doesn’t have to be completely smooth, you have room for a jagged edge but make it as level as possible.
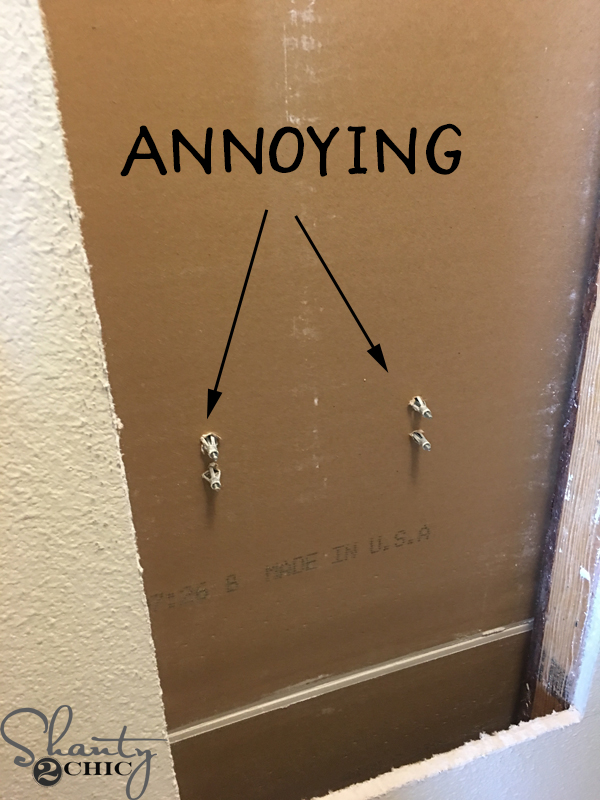
DIY Spice Rack – Toilet Paper Holder Fail
I pulled the sheet of drywall out of the wall and realized that I had installed a toilet paper roll holder on the other side of the wall. Those are the anchors for it….annoying! So, I had to stop what I was doing and move the toilet paper roll holder to the other wall in our half bath 🙂
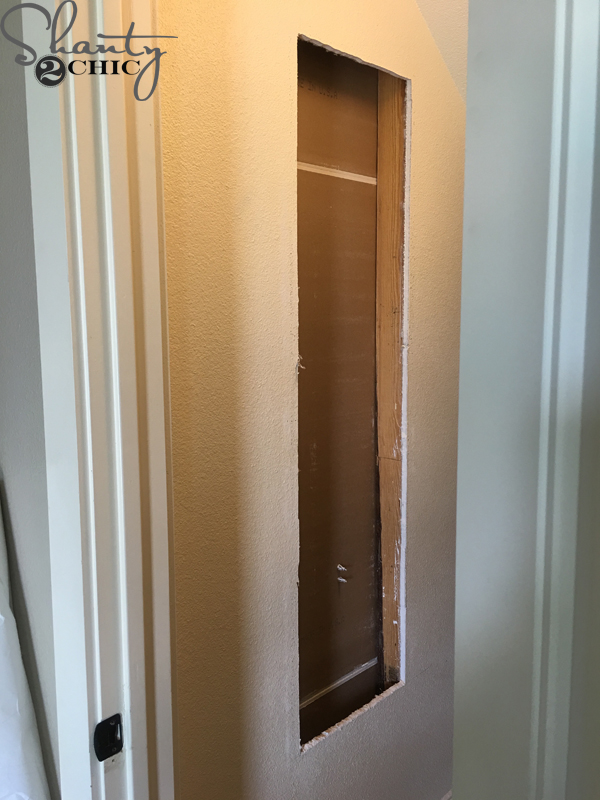
Now that the hold is cut in the wall, it’s time to measure so that you can know exactly what size to make your spice rack.
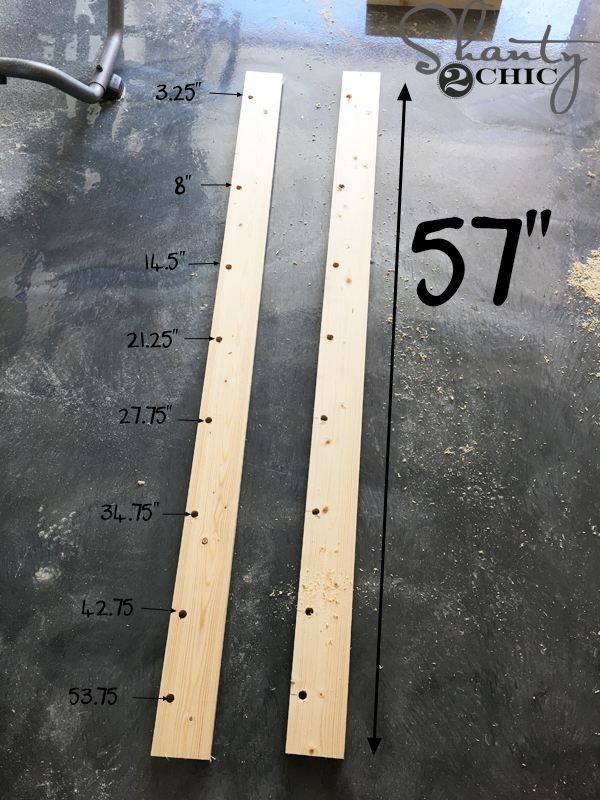
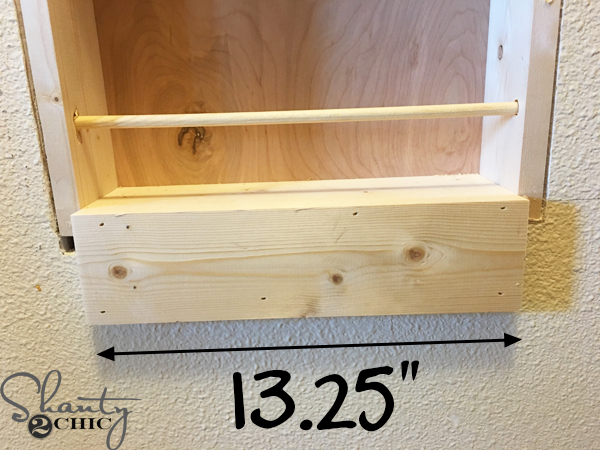
I started by cutting 2 1×4 pine boards at 57″ long. These will be the sides of the spice rack.

I used a Forstner bit to drill holes on each board. I put the holes about 3/4″ from one side and I marked the exact spot, on the picture above, that I drilled each hole. The measurements are from the top of each board.
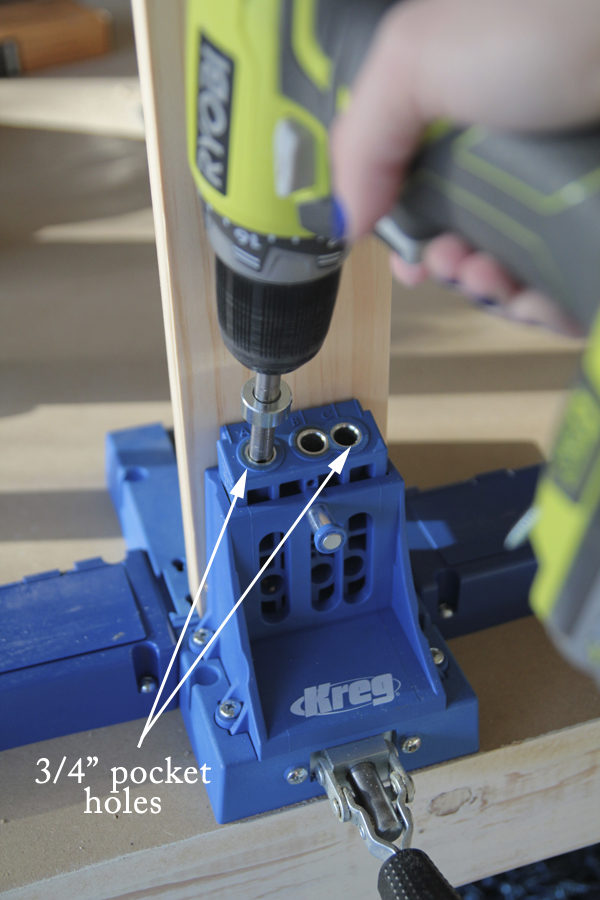
Next, I cut 9 1×4 boards at 13 1/4″ (these are the shelf pieces of the spice rack). This is the width of the space between the studs minutes 1 1/2″. The 1 1/2″ comes from the two 3/4″ sides of the spice rack. I used my Kreg Jig K5 to drill 3/4″ pocket holes into each end of the 13 1/4″ boards. You can find the Kreg Jig K5 model HERE on Amazon. You can watch our How to use a Kreg Jig video tutorial HERE.
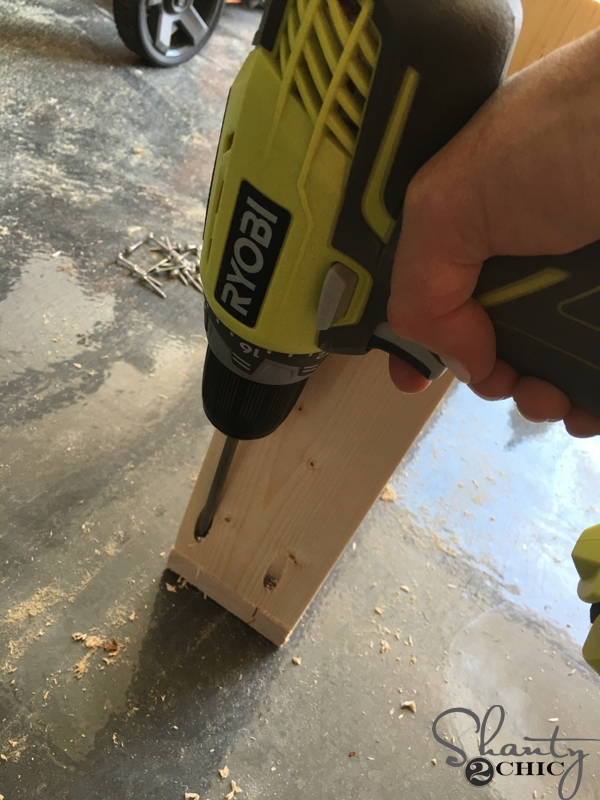
Then, I attached each short board to one of the long side boards with 1 1/4″ pocket hole screws. Start at the top and work your way down. *** Tip – before drilling pocket holes and attaching the short boards, I would run in the house and do a dry fit on the pieces. This way, you can cut the short boards down to get a perfect fit. You don’t want to assemble this guy and then realize it is too tight of a fit.***
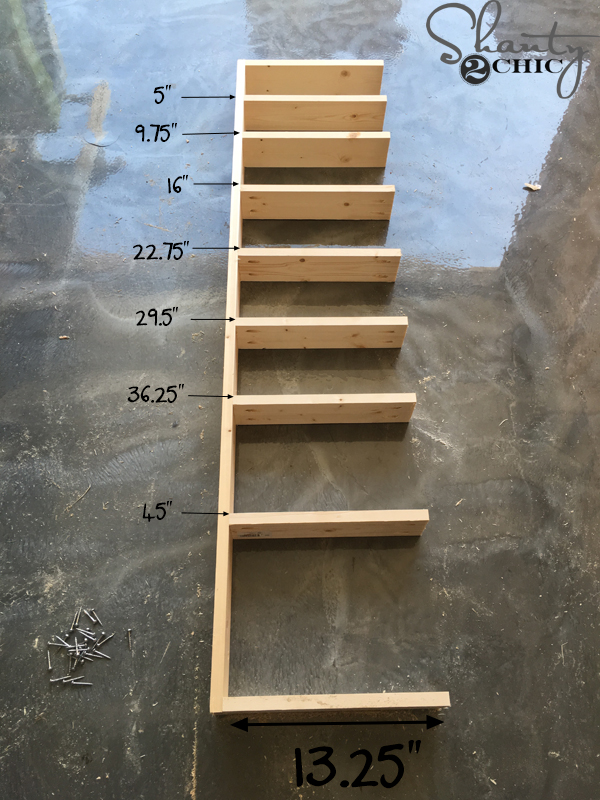
I marked, in the pic above, where I placed each board. I measured from the top down on every measurement. The top and bottom boards will be flush with the side piece.
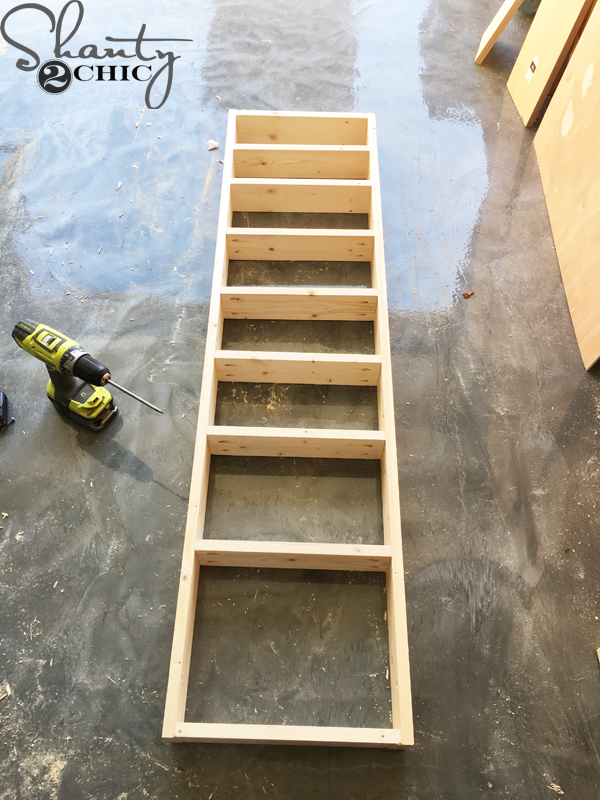
Now, attach the other side piece the same way. ***Make sure the second side piece is flipped the right way, so that the holes will match up – trust 🙂 ***
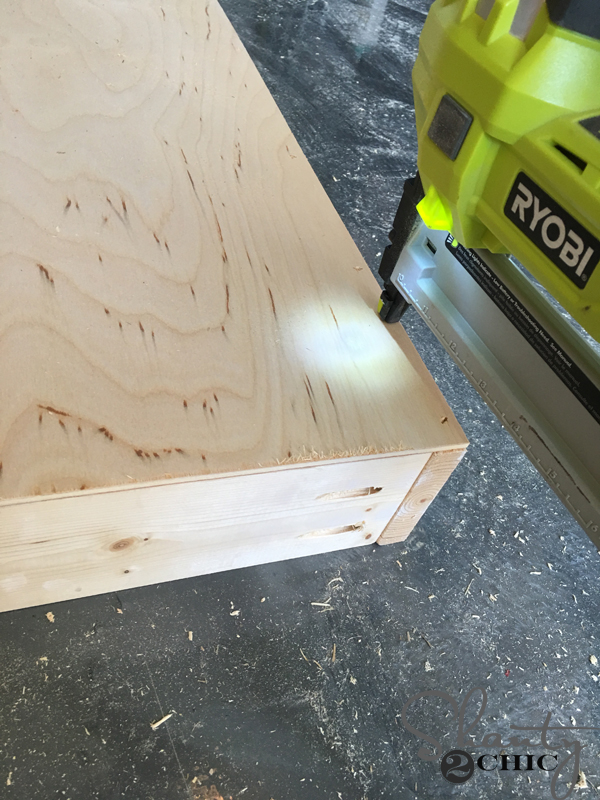
Now, flip the spice rack over so that the holes on the side pieces are closest to the ground. Measure and cut to fit a 1/4″ sheet of plywood. Then, attach it to the back of the spice rack with wood glue and 3/4″ staples. I used my Ryobi 18V stapler. You can also use hammer and finishing nails here.
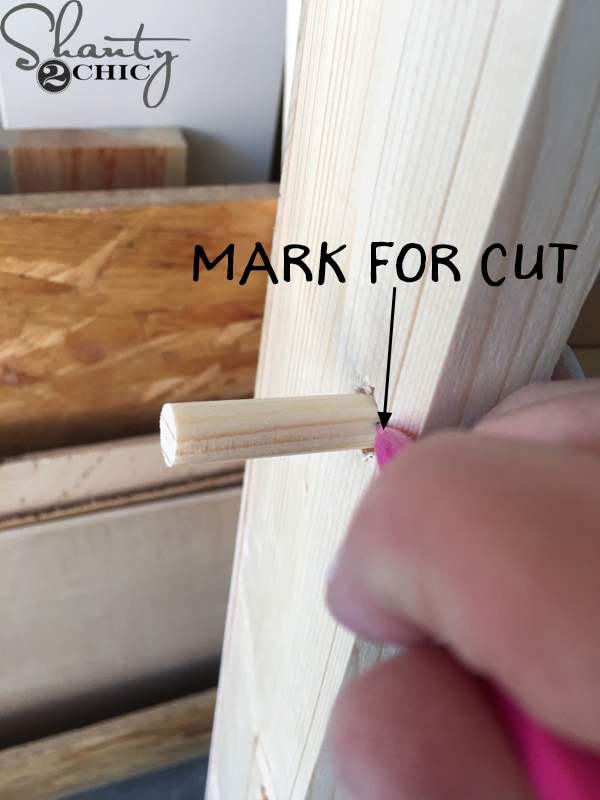
Flip the spice rack back around and fit a dowel into each hole. Flush one end up and then mark where to cut the other end. Do this for every set of holes.
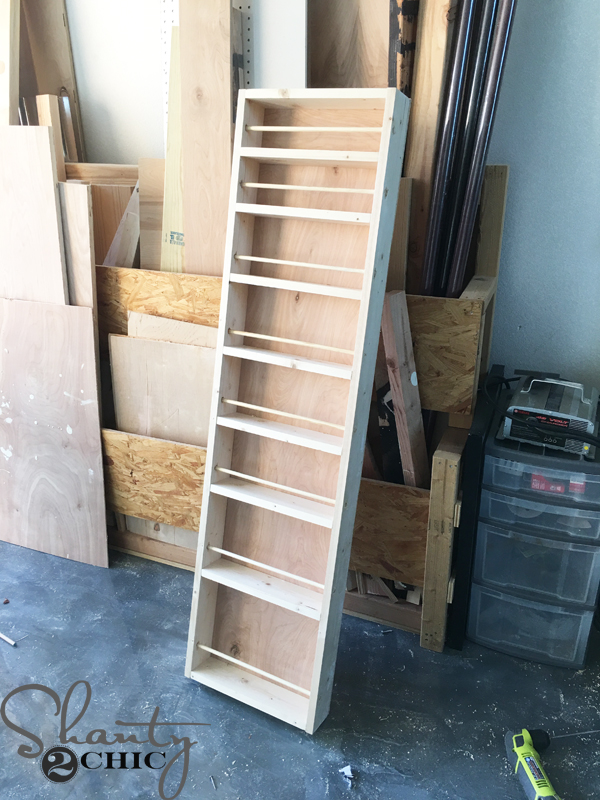
Ready for the wall 😉
Place the spice rack into the wall opening. If it’s a tight fit, that’s ok, use a rubber mallet. These are so handy to have around your shop when you are building. We use them all of the time! You can find one HERE on Amazon!
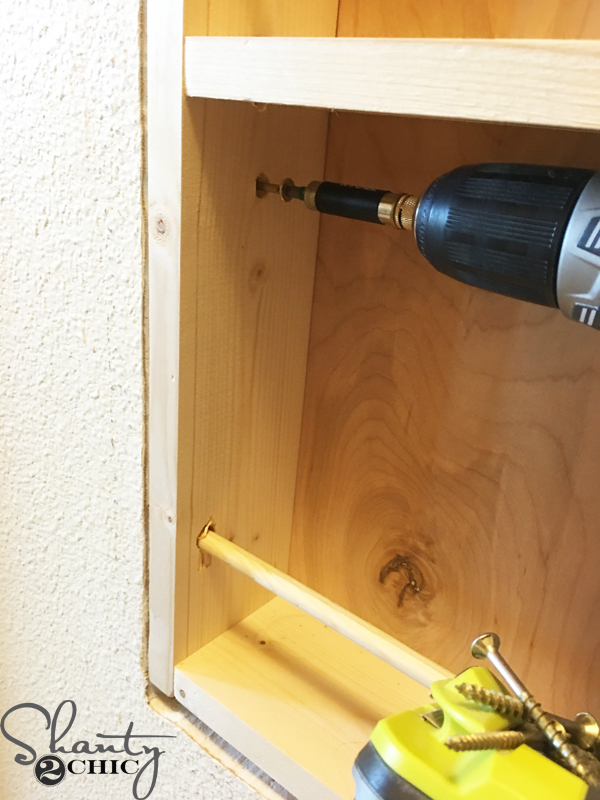
Secure the spice rack to the studs with 2″ wood screws. I put 3 screws on each side of the spice rack.
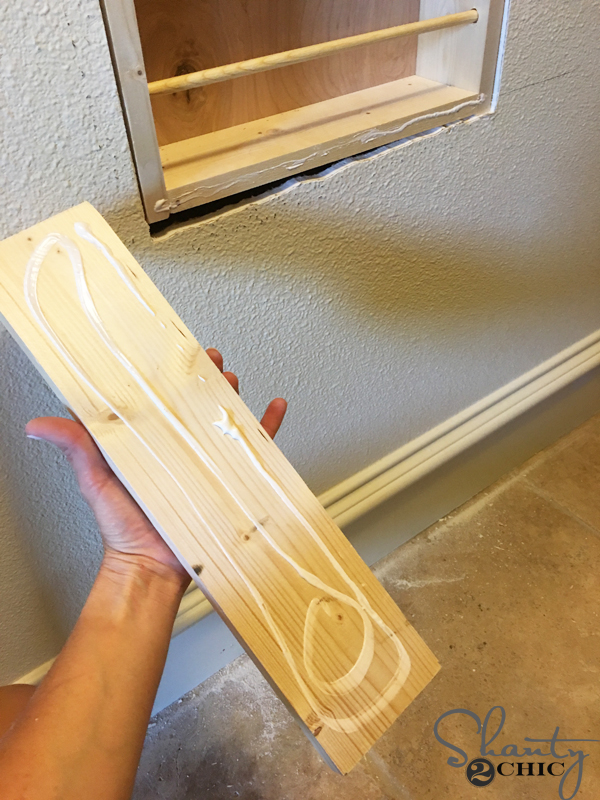
Now for the trim. Cut 2 1×4 boards the same length as the 9 shelf pieces. Apply wood glue to the back of the boards
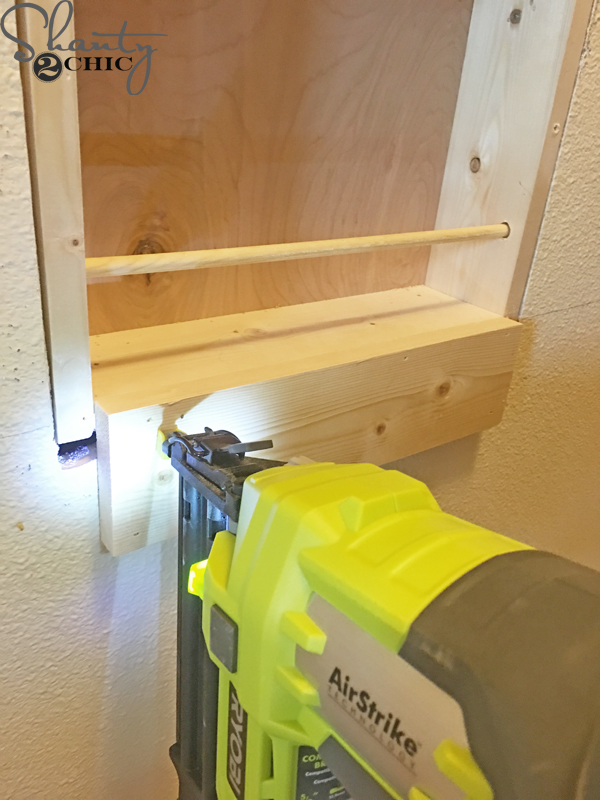
and attach it to the top and bottom of the spice rack. I attached it with 1 1/4″ brad nails and my Ryobi 18 gauge nailer. Make sure to put the nails into the trim so that they also go into the bottom shelf piece. You can add a few on the bottom corners, as well.
Do the same for the top piece, as well. The top edge of the trim piece will be flush with the top of the bottom shelf of the spice rack so that you do not see the 3/4″ edge of the spice rack.
Now, measure from the top of the trim to the bottom of the bottom piece of trim and cut 2 1×4 boards to fit.
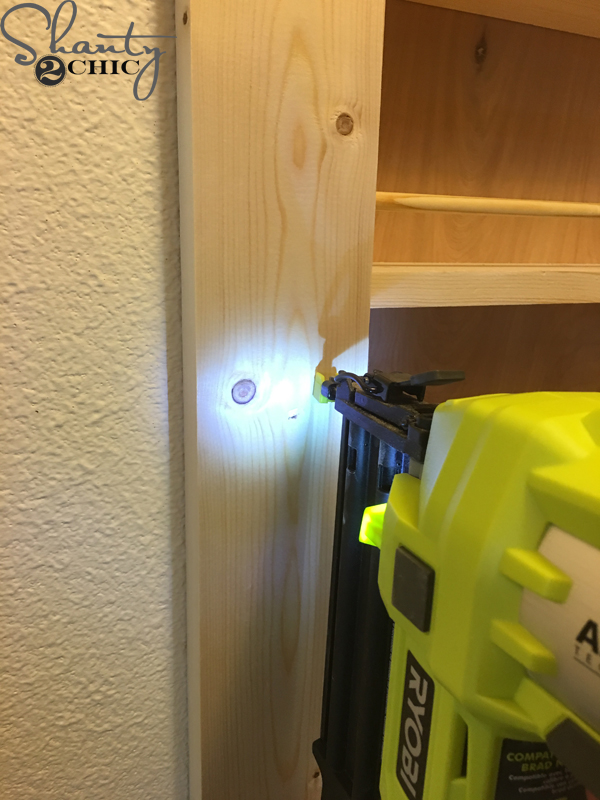
Attach the side trim pieces with wood glue and 1 1/4″ brad nails. There will be a stud behind the side pieces, so you can just nail along the corners and edges.

Fill all of your nail holes and wood screw holes with wood filler. If you can see any of the pocket holes, under the shelves, fill those too. You can find the wood filler on Amazon HERE.
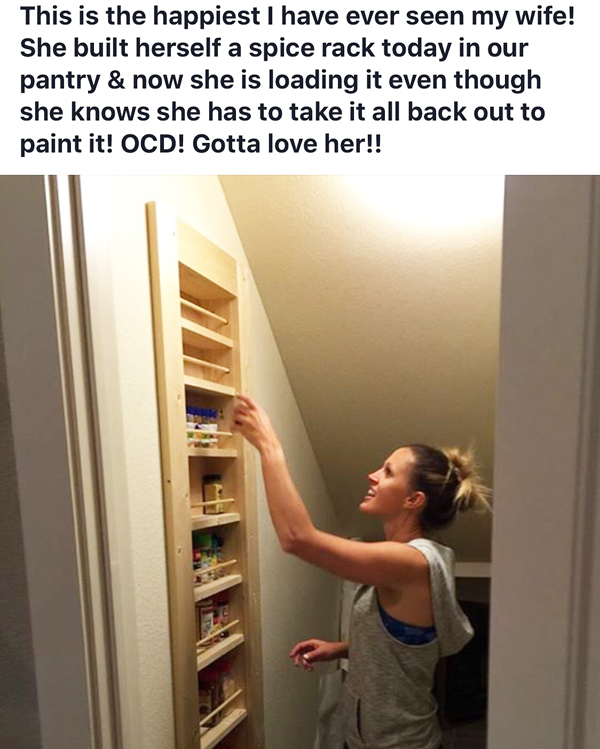
I was so excited about my new diy spice rack that I had to give it a test drive while I waited for the wood filler to dry. My hubby snapped this pic of me and shared it on his social media page – he knows me well 🙂 #myhappyplace
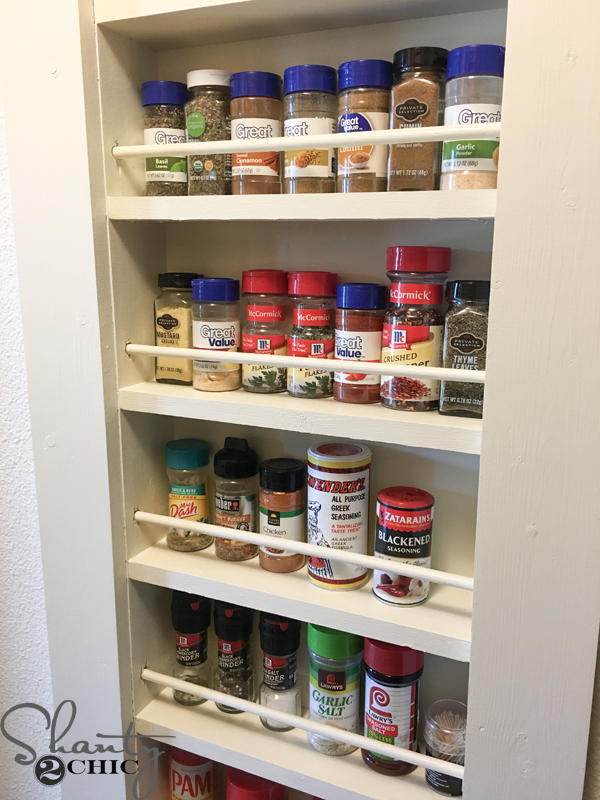
Once the wood filler dried, I applied two coats of paint (to match my trim). The color is Ivory Lace by Valspar. Then, I put my spices back in and my pantry has never been the same since 😉
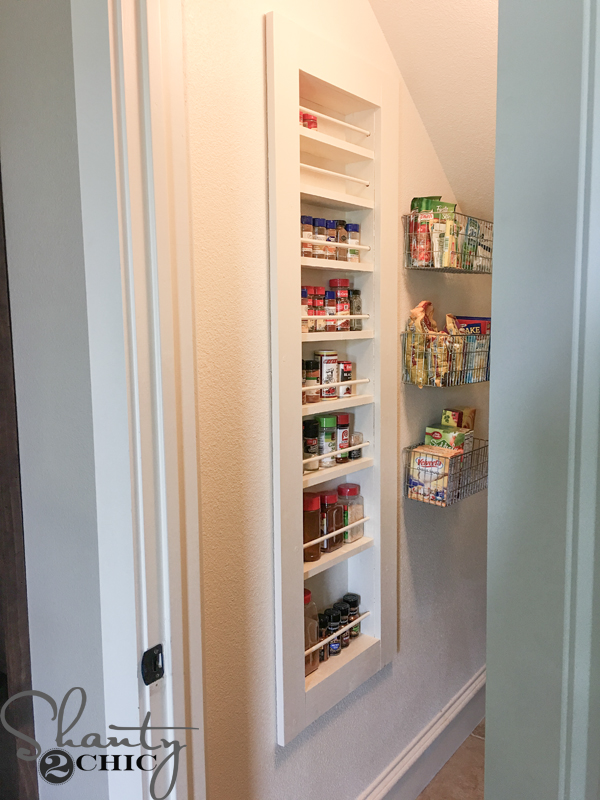
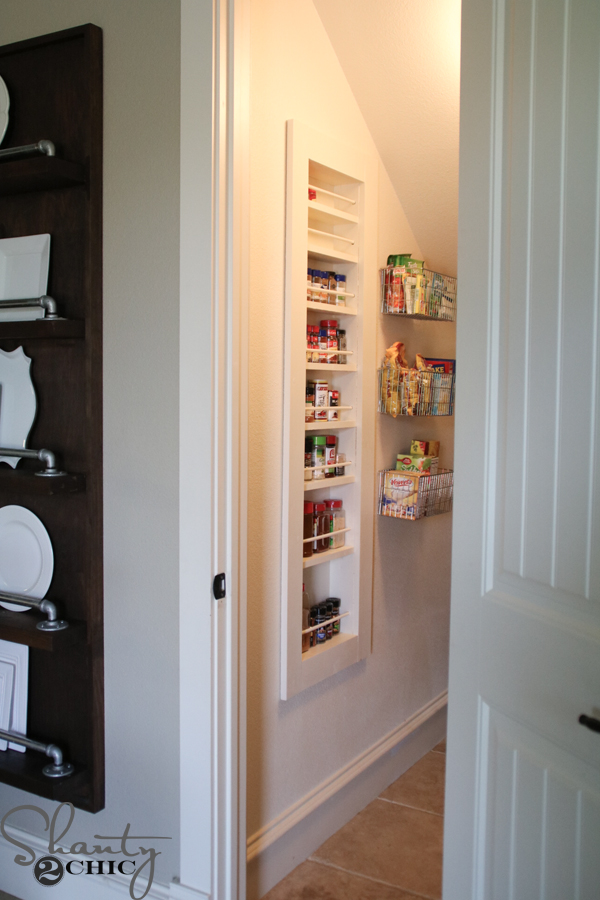
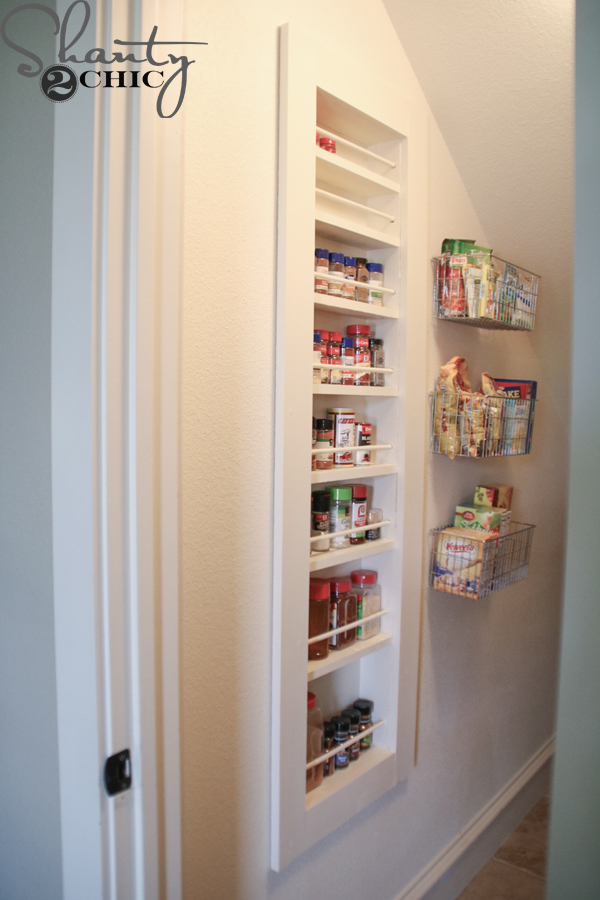
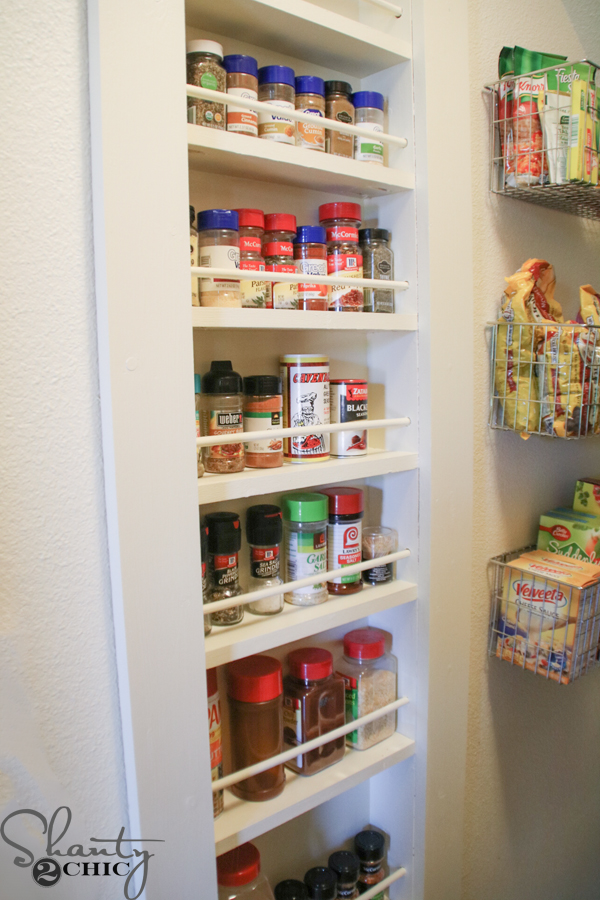
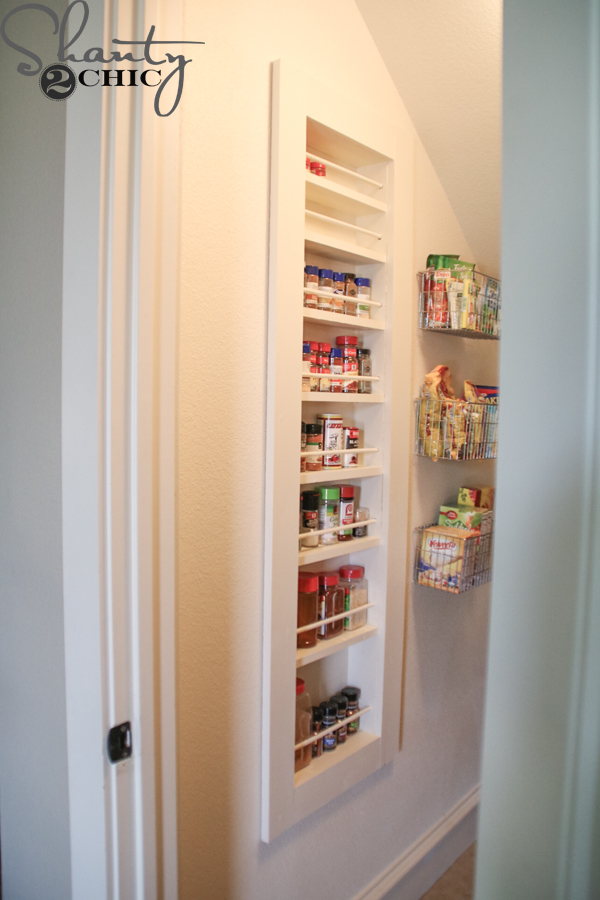
This built-in diy spice rack is totally customizable! You could add a sliding door over it, maybe with a chalk board front for a grocery list, add a hinged door, build it out deeper for extra storage…the possibilities are endless! I wanted to add a sliding door but I didn’t want to waste the usable space next to the spice rack. I found the hanging pantry baskets HERE and they are so great for extra storage! I think I could actually use a few more 🙂
I hope you were all inspired and maybe got a few new ideas for things to do around your home!
Thanks so much for stopping by and Happy Building, friends!
~Ashley


What do you do if the stud is right where you would want to put it?! How do you know if a wall is load bearing?!
It goes between the studs. It wouldn’t matter if the wall is load bearing. Just cut out the Sheetrock between the studs.
This is nice an simple. Like the design.
Love the idea. but sad family hate the idea
I love these shelves! You have inspired me to try my hand at building! I would like to use the same concept for these shelves to build shelves in my dd’s wall at the end of her closet for books and what not’s. What do you think? Any advice?