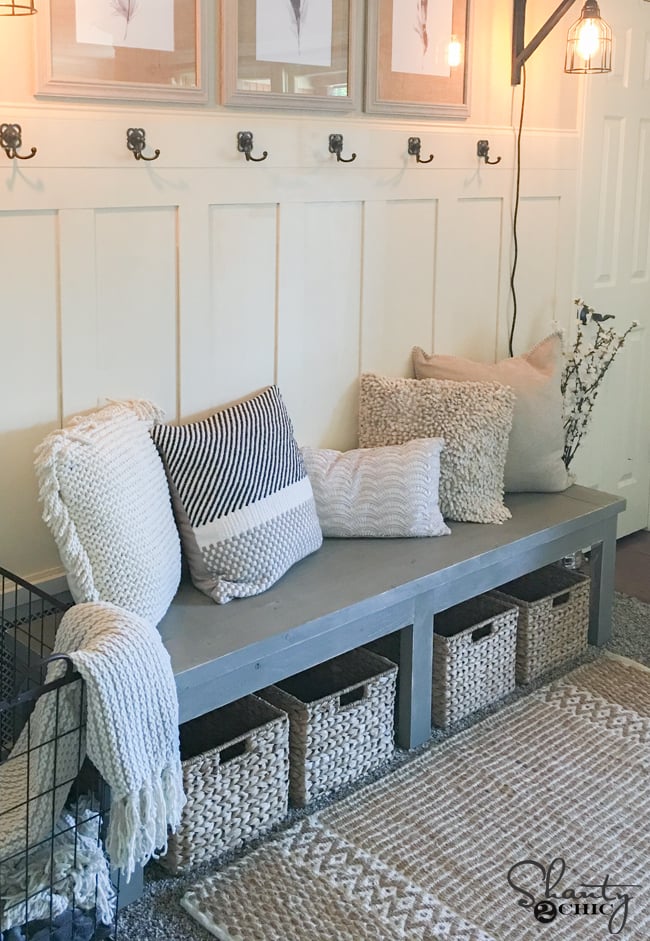
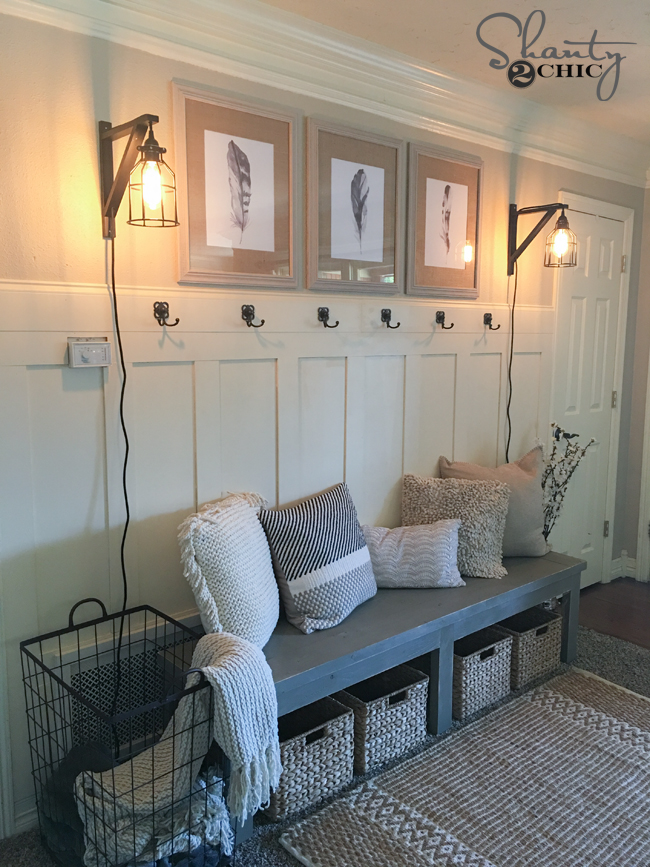
Hey guys! So excited to share these plans today! This is about as simple as they come! We think just about every room can use a good bench. Ash and I designed this DIY Farmhouse Bench for under $25 for our little sister’s home, and check out how it turned out!
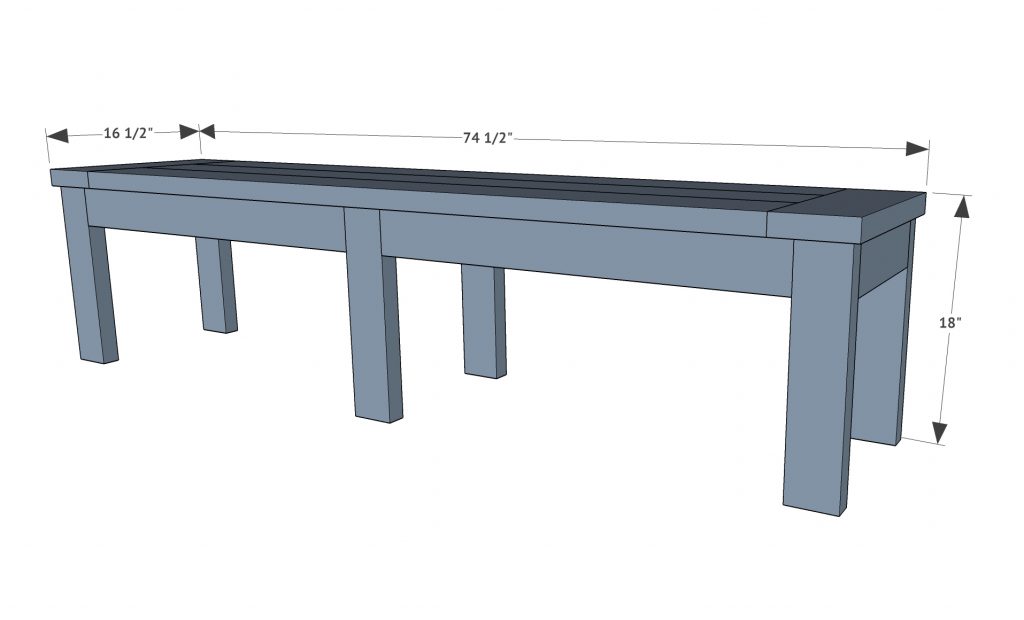
DIY Farmhouse Bench

Before we get started, make sure to check out our YouTube video tutorial on building this bench HERE or by clicking below!
You can download our FREE plans to build your own bench HERE!
We started by making our cuts! For this bench we used our Ridgid 12″ sliding compound miter saw, but any miter saw will get the job done!
Once your cuts are made, it’s time for pocket holes. We used a Kreg Jig K5 for this step! Kind of, sort of, totally love this tool. You can find it on Amazon HERE! We use ours on just about every project.
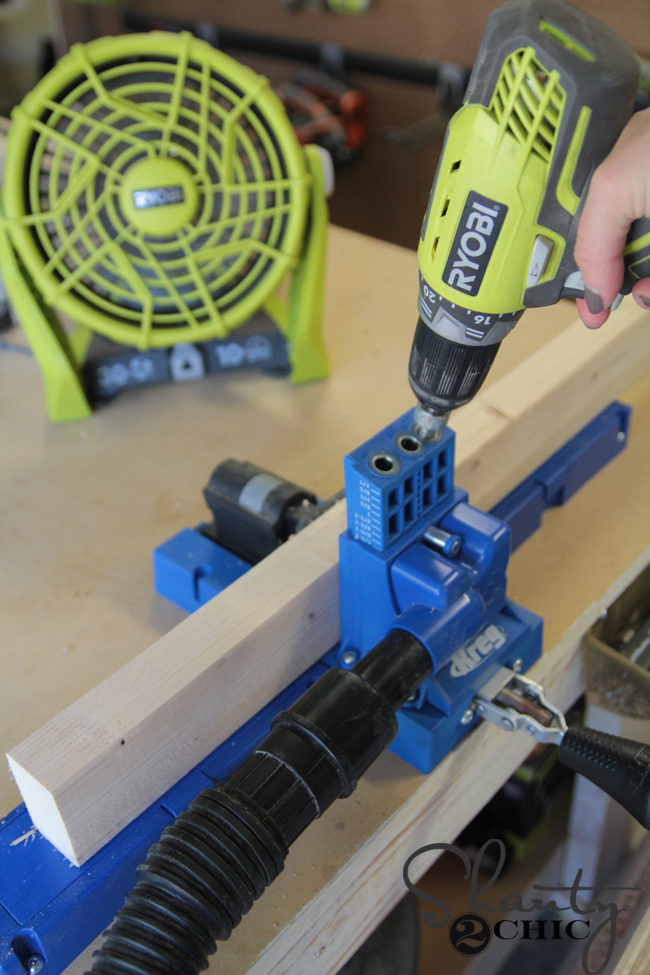
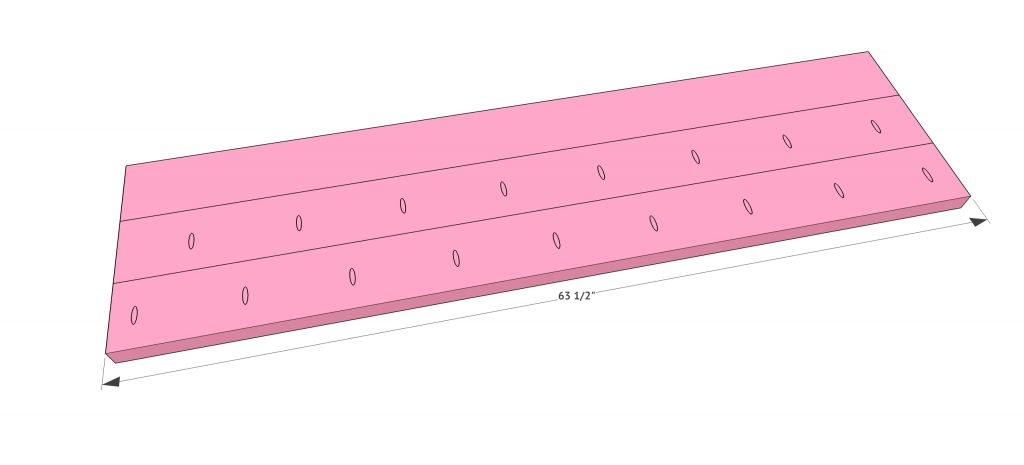
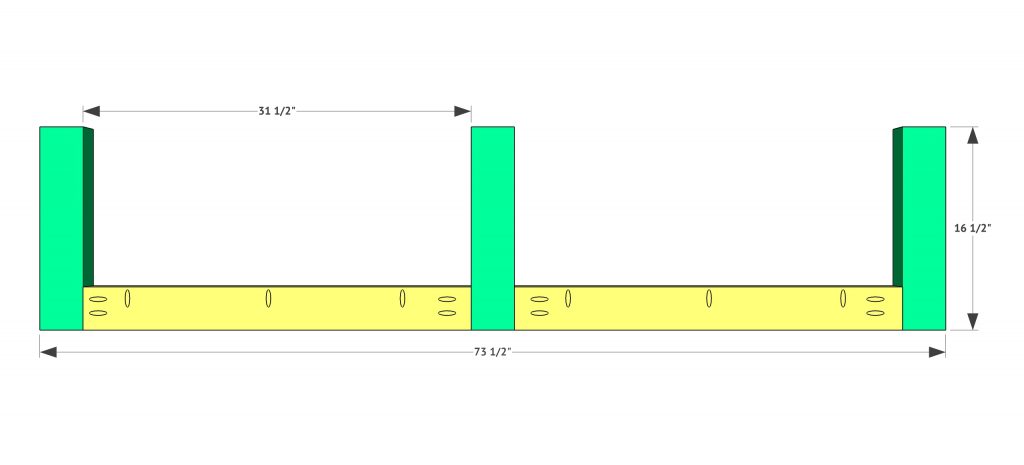
You will line your bench top planks up first. You can see on the photo where we placed the 1.5″ pocket holes.
We attached all of the boards with 2.5″ pocket hole screws through those pocket holes and into the adjoining boards.
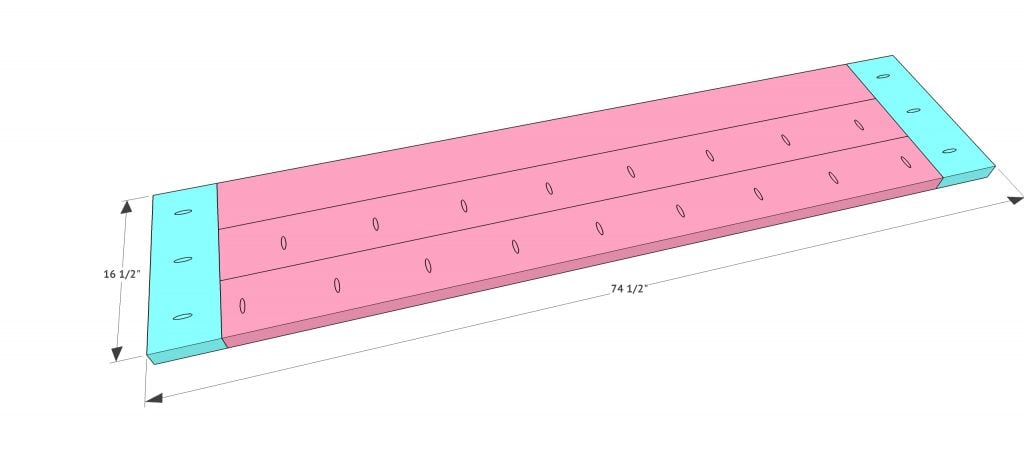
Next, we added the breadboards. These are the small pieces on each end of the top. They give a more polished finish on each end. We also attached these with 2.5″ pocket holes.
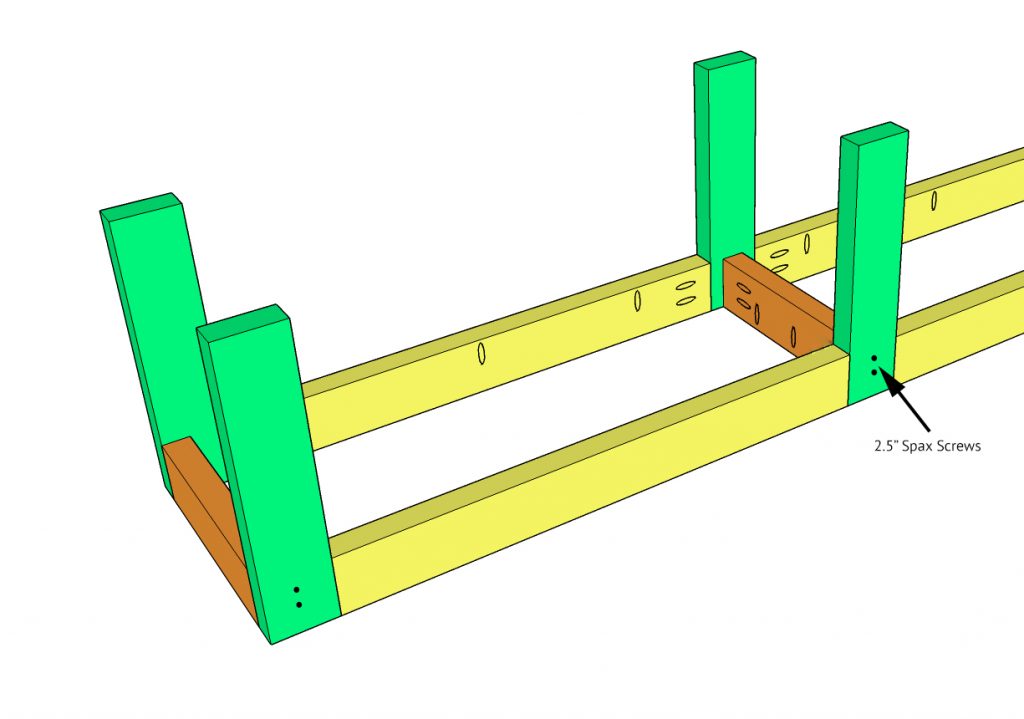
Now to build the base! We are building two of these and then we will attach them together with small runners. We used our Kreg Jig to make 1.5″ pocket holes on each of our long runners. There will be two on each of the ends, and we also placed them running down each one. We will use those holes to attach the base to the top in a later step. We attached each runner to a leg piece using wood glue and 2.5″ pocket hole screws.
After building two of these, we attached them using small runners. The plans call for you to attach all the small runners with 2.5″ pocket hole screws into the legs, but if you can’t fit your driver in the narrow space, you can also attach the small runners to the front leg assembly first using pocket hole screws, and then attach the back leg assembly to the runners using 2.5″ spax screws through the back leg assembly and into the runners like the photo below.
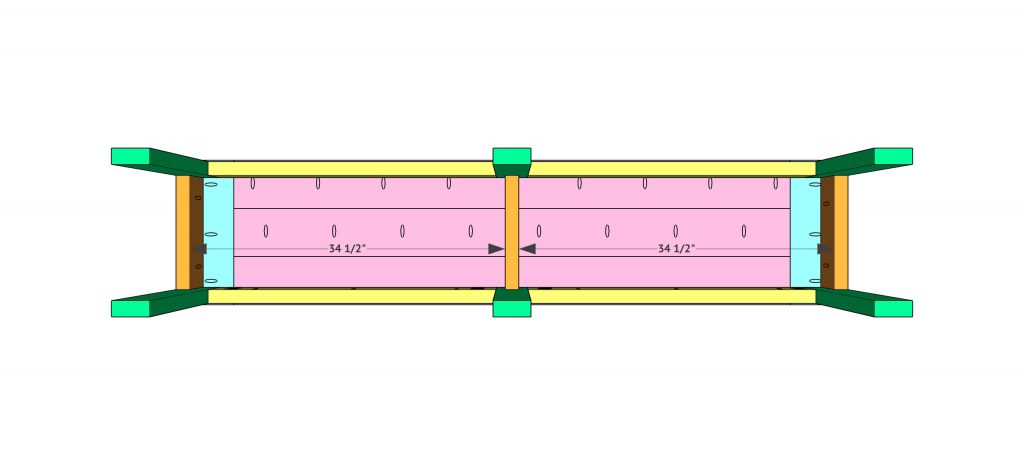
Finally, we are attaching the base to the top. We did this by laying the base upside down on the bottom of our bench top, and attaching with wood glue and 2.5″ pocket hole screws through the pocket holes on the aprons and into the bench top.
Flip it right side up, give it a coat of paint or stain and you’re done!
Hope you love it as much as we do (and our sister does)! This is a super simple, $25 bench that would be so cute in any room! Make sure to send us pics or tag us on social if you build one!
And, don’t forget to check out the video again HERE and SUBSCRIBE! We have a new video coming each week and we don’t want y’all to miss out!

I just used these plans to build two 48” benches with a shoe rack underneath. I absolutely love them! ?
can you please share your bench picture .
I love watching all your videos! I’ve pretty much have watched them all as I feeding my baby her bottle! I finally finished this mudroom bench and it looks awesome! I added farmhouse style X’s in the middle amd shelves on the bottom to make it my own but am so glad to have the shanty2chic plans available! So glad I found shanty2chic and got my kreg jig now. I will be building lots more to come so plz keep the videos coming!!
PLEASE share where those hooks can’t be found!!! ?
Could you tell me where these hooks are from?
Love this bench!! Had to scale mine down some for the space I wanted to put it in but it turned out beautiful!!! I’m onto the barn door console next! Love you two!
Wish I could add the picture!
Where are the hooks from?
Anyone know where these baskets are from??
Following! I need those baskets! ?
Could you please tell us what color you used for the paint/stain? I love it but can’t seem to find anything similar.
Thank you! It’s Seine by Valspar!
Beautiful!
Where are the lights from?
What stain/paint did you use for your bench? I love the color!
Check your plans, should the wood be 2″ x 4″ x 8′ (the plans show 8″).
And 2″ x 6″ x 8′
Is this stained or painted??
Bought the wood and making this bench over the weekend. Hopefully I’ll get it finished and be able to share pictures. I’m painting it turquoise with valspar flat and your DIY plaster of Paris recipe then antiquing with dark wax. Can’t wait!
Ok, after reading and rereading and printing out the instructions; where does the
1 – 2x3x8 come into play at??
Watched the video a couple of times but no mention of using the 2x3x8
I am not sure if it was in the plans and they edited it, but I do NOT see a 2x3x8 anywhere in the plans I downloaded. Try downloading the plans again.
Did you guys cut the rounded edges off your 2xs?
sure looks that way. i was wondering the same thing. Maybe that is where the 2×3 comes into play that they refrenced?
We did! But this isn’t a necessary step!
What color paint/stain did you use on the bench?
I believe the 2×3 is the bread board in the plans… Not the video though