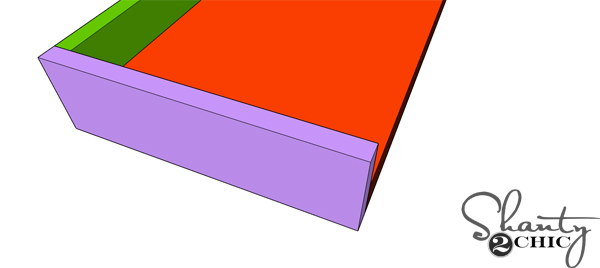
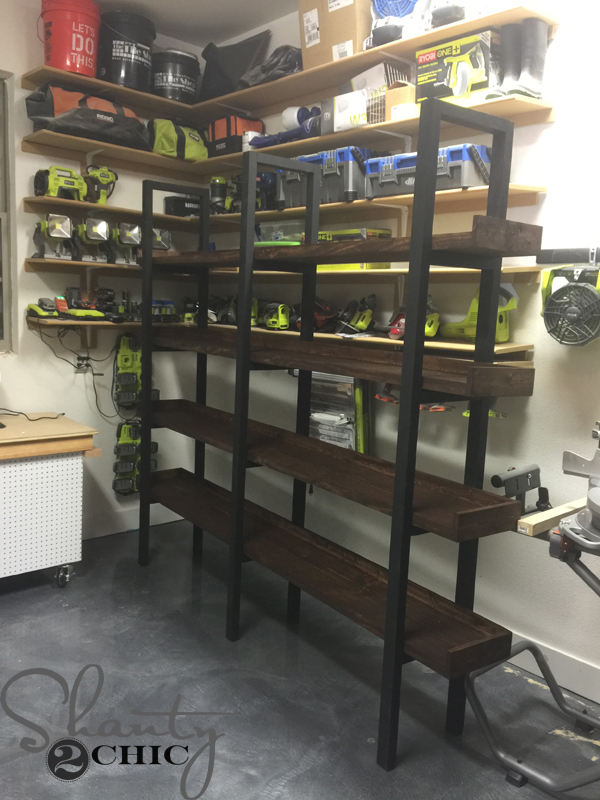
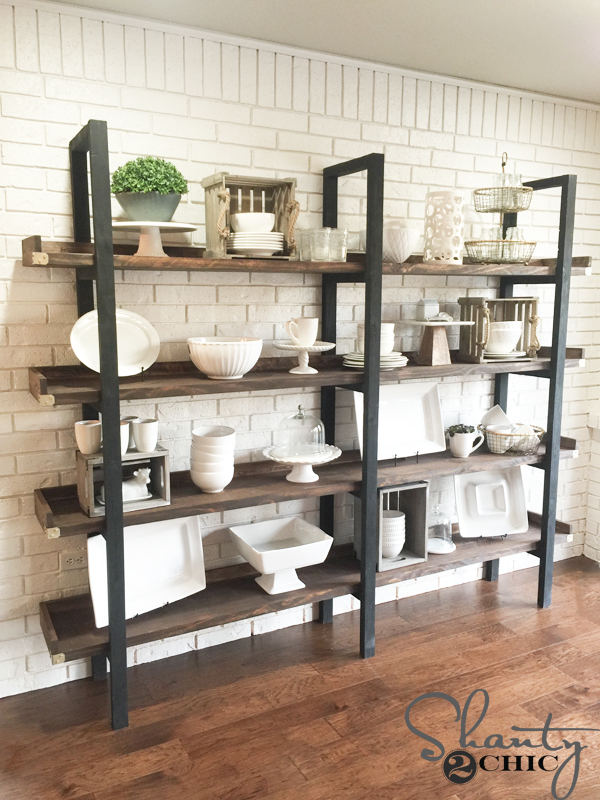
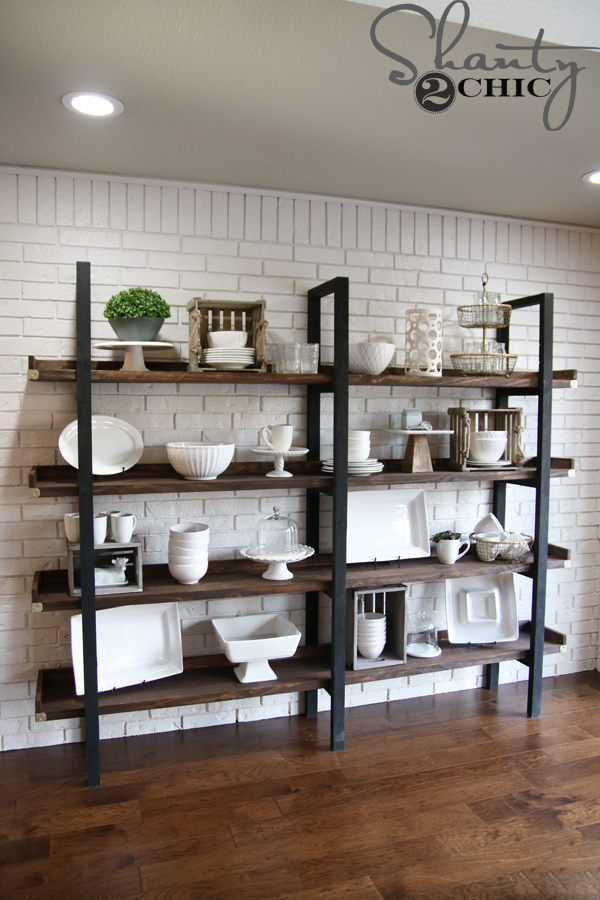
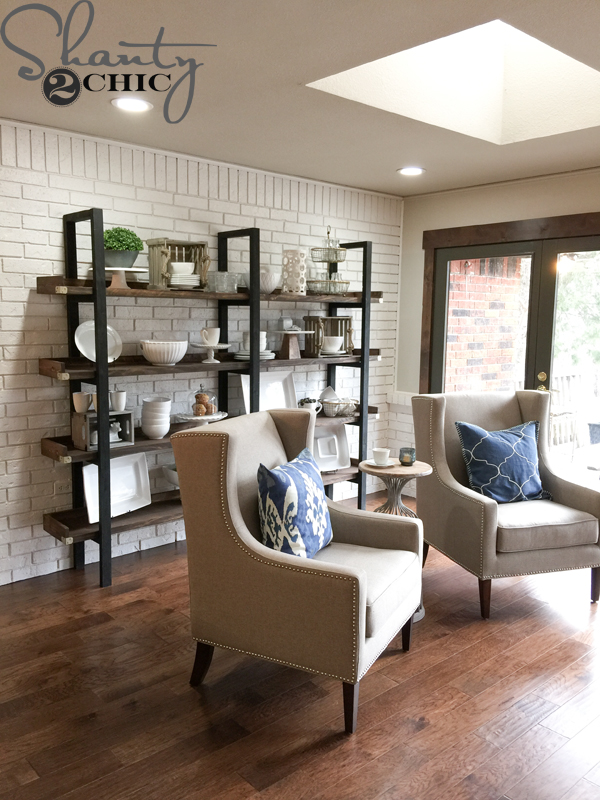
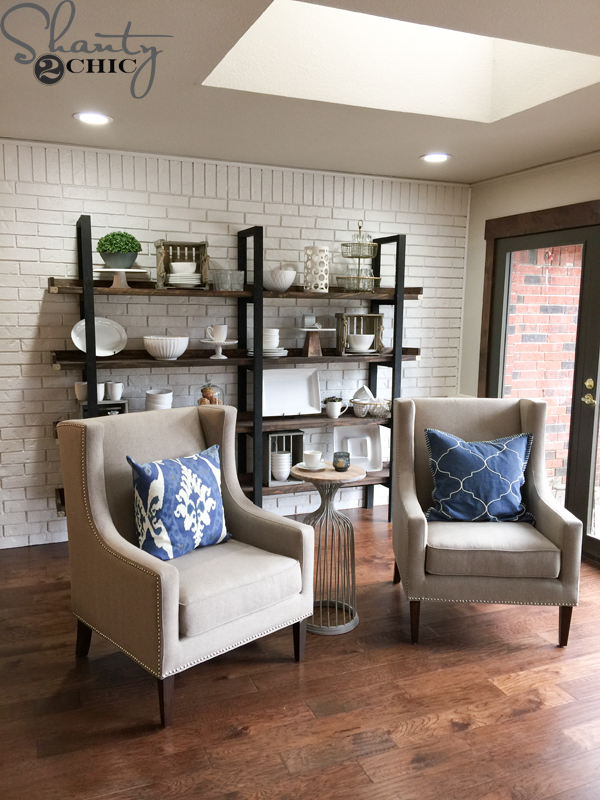
That’s right! This is a 7 ft. long by 8 ft. tall DIY Plate Rack that was built with only $95 in lumber!
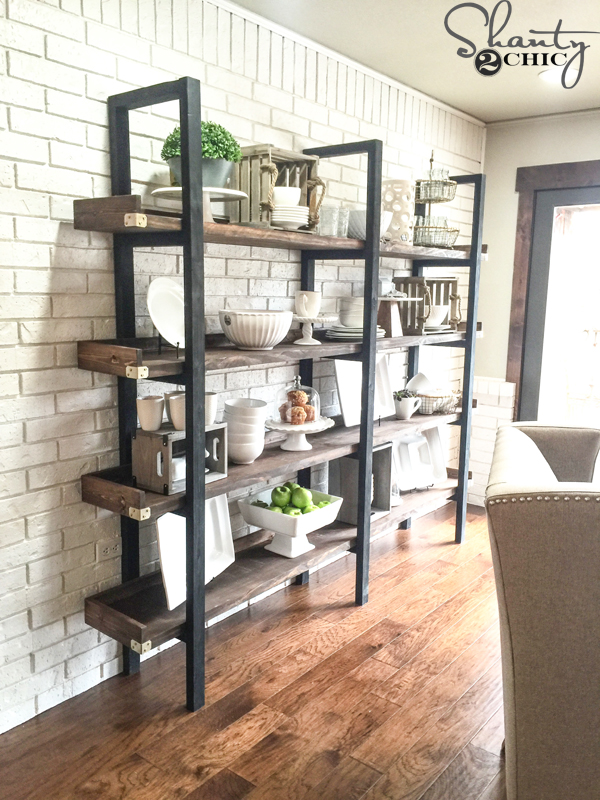
If you saw our second episode of Open Concept on HGTV you know that we built this piece with the purpose of making a use of this space that was across from the new dining area. It was a wasted space before and we wanted to tie this spot in with the dining area. Not only did Mary get four glorious 8 ft. long shelves of storage, it gave this spot in her home a purpose and it adds such a great contrast to the painted brick wall and makes it stand out!
This is a VERY easy piece to build! You can download the FREE printable plans HERE and follow along the step-by-step tutorial below
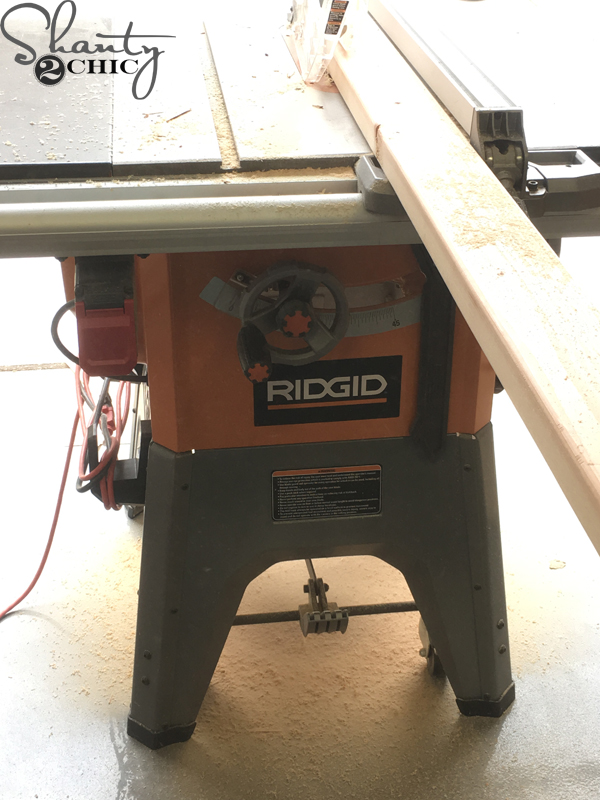
This is not a necessary step but I prefer the overall look of the piece. If you don’t have a table saw or don’t feel “ready” to do this, you can skip this step. I started by ripping the rounded edges off of the 2×12 boards and creating 2×2 boards from 2×3 boards (if you can’t find 2×3 boards, you can use 2×4 boards). I ripped about 1/8″ off of each side of the 2×12 and then ripped 1/2″ off of each side of the 2×3’s to create 2×2’s.
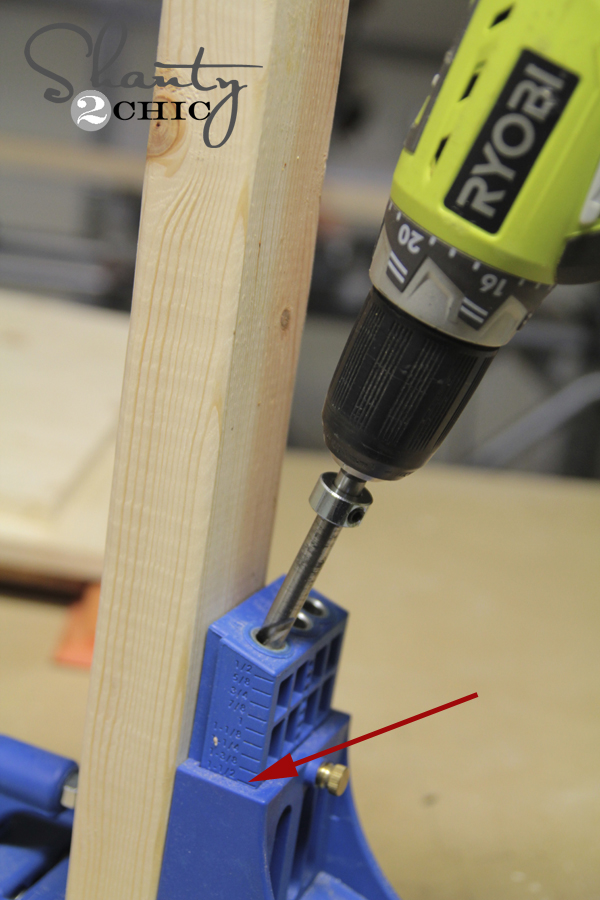
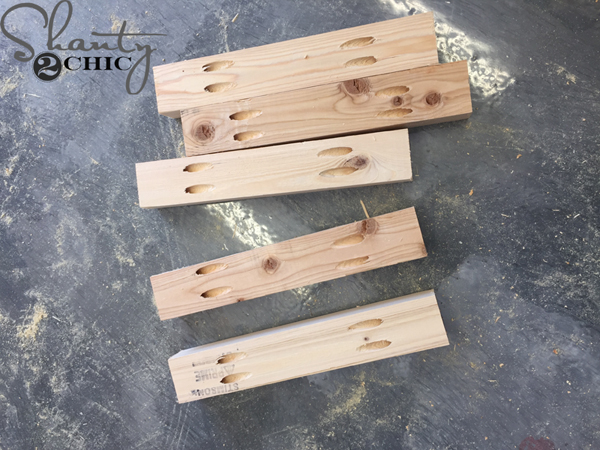
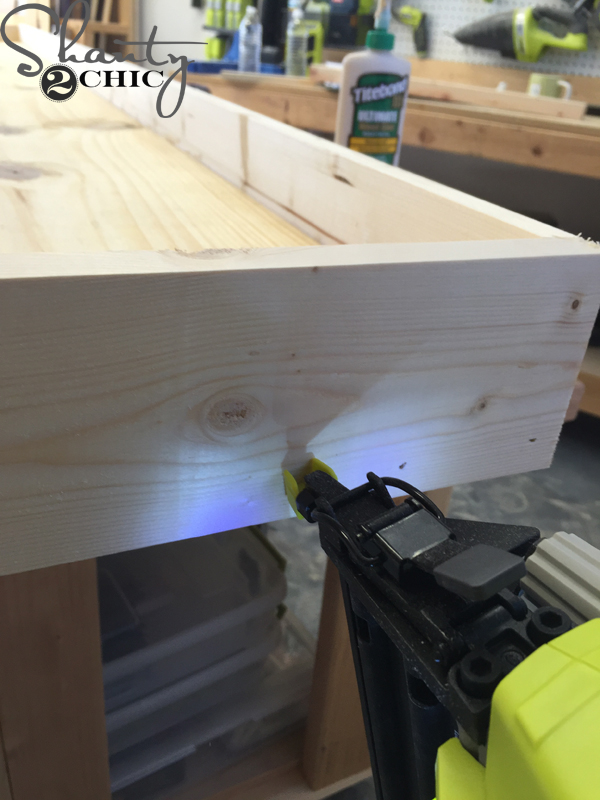
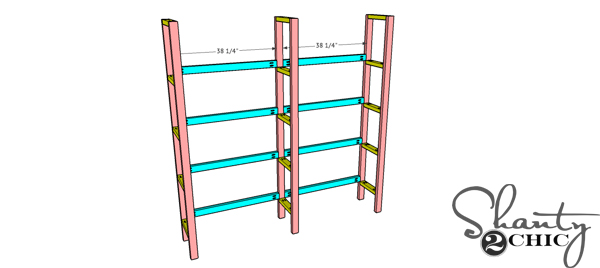
Next, I cut all of the pieces for my 3 “ladders” and drilled 2 1/2″ pocket holes into both ends of each “rung”. You an find the Kreg Jig K5 that we use HERE on Amazon.
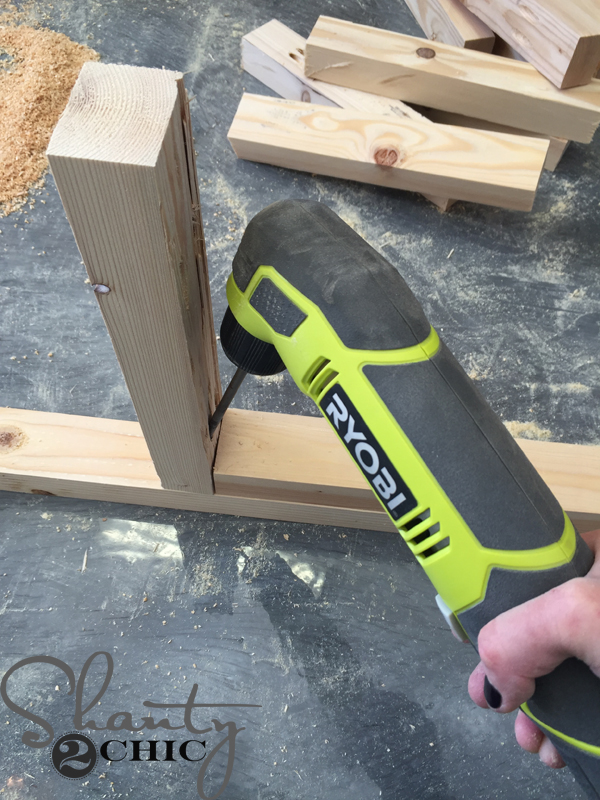
Then, I attached the rungs to each ladder piece. I used my Ryobi 18V Right Angle Drill to attach the rungs because the ladders are narrow. You can also use a 3″ long Kreg Jig Driver on a standard drill. You can find the short driver HERE on Amazon.
Tip: Cut a scrap piece to use as a guide when you are attaching the rungs. This keeps you from having to measure and mark for each piece.
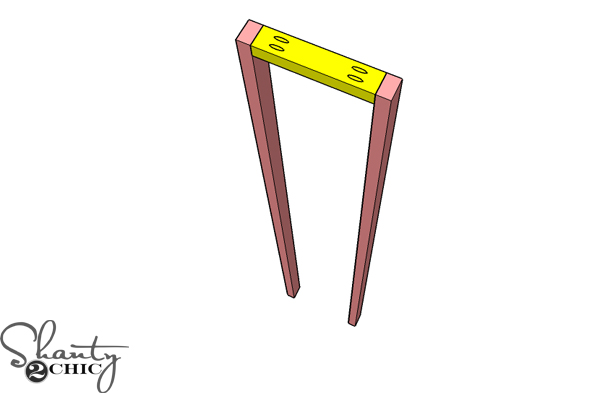
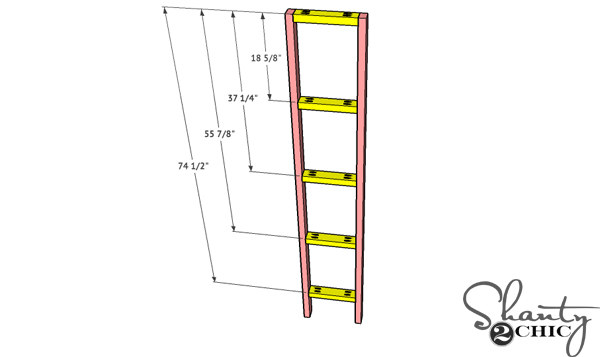
Begin at the top, keeping the top rung flush with the top of the ladder pieces and work your way down. Make sure all of your pocket holes are facing up towards the top of the ladder. This way all of the pocket holes will be covered by the shelves and the pocket holes on the top will face the ceiling and not be seen.
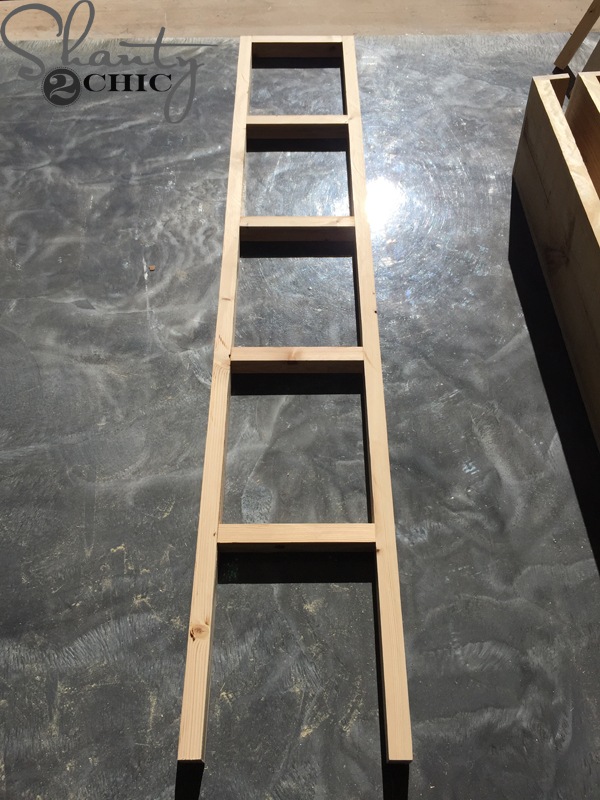
Do this to make 3 ladders. They should all look like this.
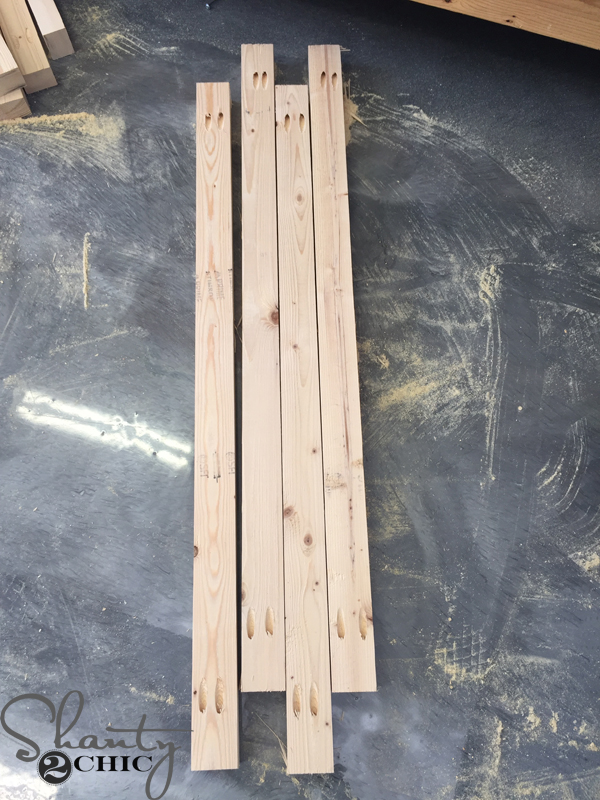
Next, cut the pieces for the supports that will connect the ladders together and drill 2 1/2″ pocket holes on each end.
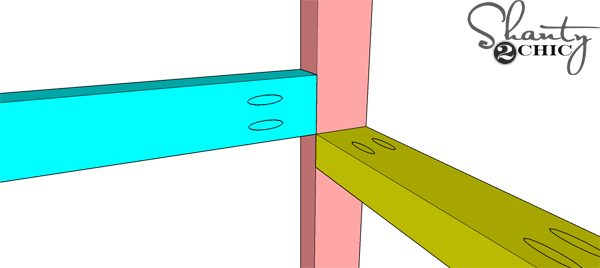
The supports should attach just above the rungs. This way they will be hidden by the shelves. The pocket holes should face towards the front of the piece.
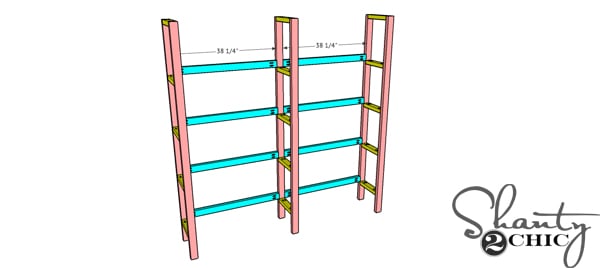
The piece should look like this, once all of the supports are attached.
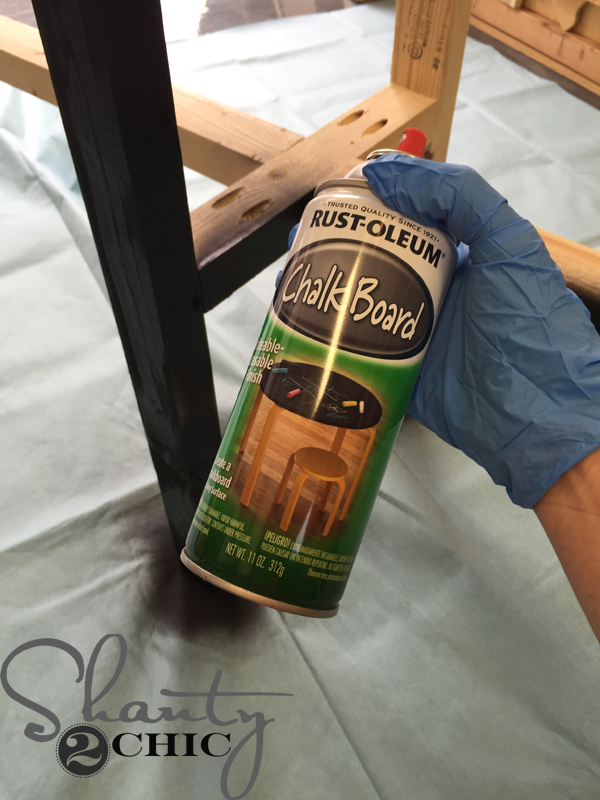
I decided that I wanted to have the ladder piece look like metal so I chose Rust-Oleum Chalk Board spray paint for the finish. It is the perfect matte black spray paint finish. I sprayed two coats over the entire ladder structure. You can find the spray paint HERE on Amazon.
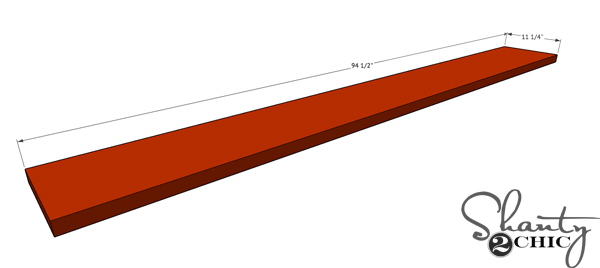
While the spray paint was drying, I started building the shelves. First, I cut all of my shelf pieces to size.
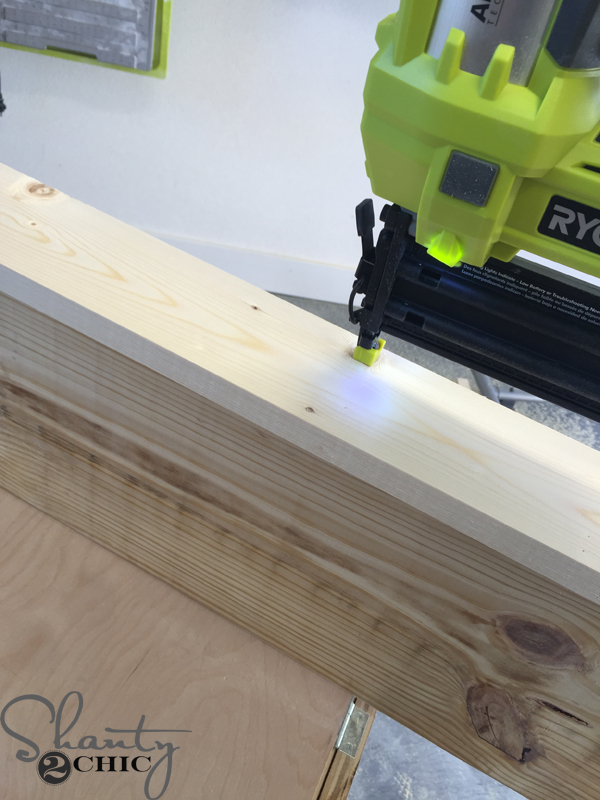
Then, I attached the long 1×4 pieces to one side of each 2×12 shelf with wood glue and 1 1/4″ brad nails.
The ends and the bottom edge of the 1×4’s should be flush with the 2×12 shelf pieces.
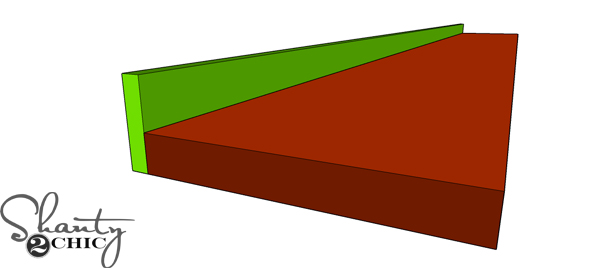
Now, measure from the back of the 1×4 to the front edge of the 2×12 and cut another 1×4 piece to fit. This will be the side of the shelf. Do this on both ends.
Attach the side pieces with 1 1/4″ brad nails and wood glue.
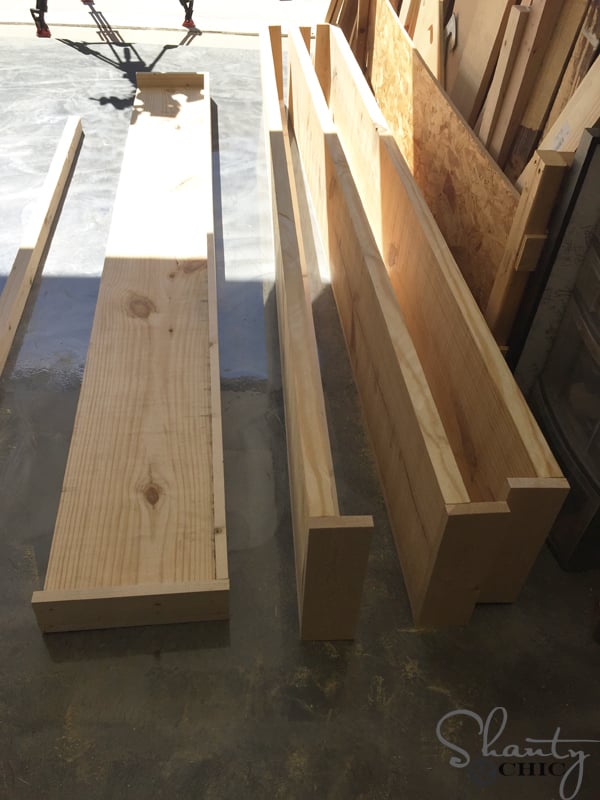
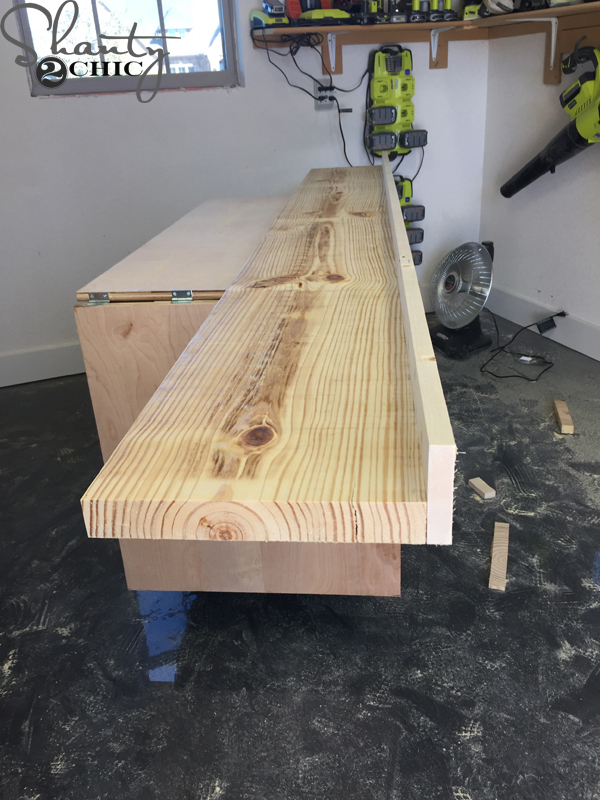
Do this to all four shelves. The should look like this now.
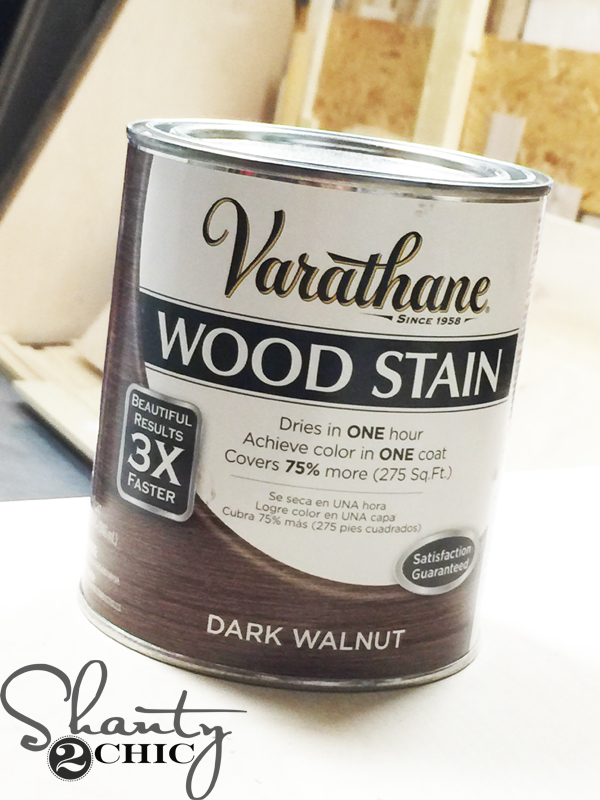
Once all four shelves were built, I applied one coat of Dark Walnut stain by Varathane to each shelf. You can find the stain HERE on Amazon.
Here she is all finished! Don’t attach the shelves to the ladders just yet. This piece is heavy and needs to be mounted on a wall for safety!
Bring the ladder structure in the house and attach the piece to the wall. To do this, locate the studs behind the wall with a stud finder (you can find our fav stud finder HERE on Amazon).
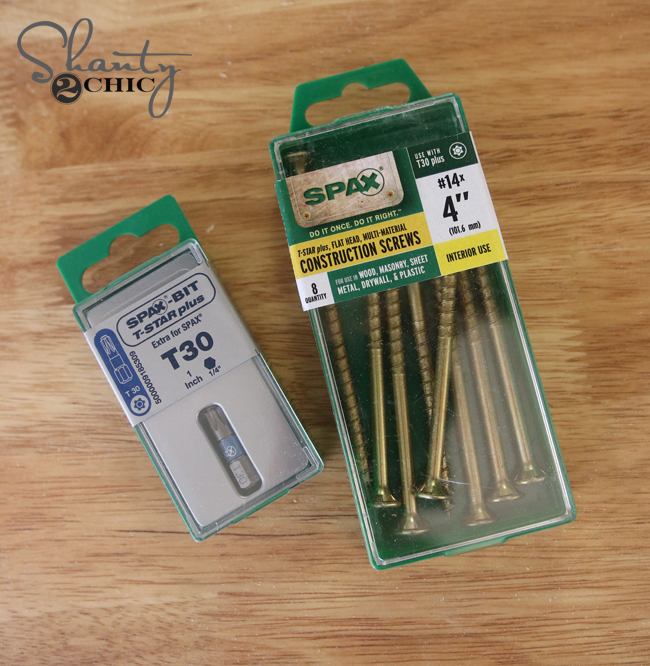
Then, drive 4″ Spax screws into the supports and into the studs in the wall. I would do at least 2 screws per support. If a stud falls on a ladder piece just drive the screw so that it will be hidden by the shelf. We find the Spax screws at Home Depot but you can also find there HERE on Amazon. (Note: we attached this piece to a brick wall so we used masonry screws instead).

Now you can attach the shelves.
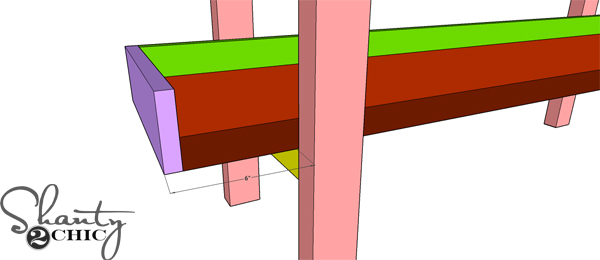
Make sure that there is the same amount of over hang on each end of the ladders. My shelves had a 6″ over hang. I attached the shelves from the bottom of the rungs into the shelves with 2 1/2″ Spax screws (find HERE on Amazon). You can drive screws from the top of the shelf into the rung on the bottom shelf (because it may be hard to get a drill and screw under the piece), just make sure to either use wood filler and stain or cover it with a pretty piece on the shelf.
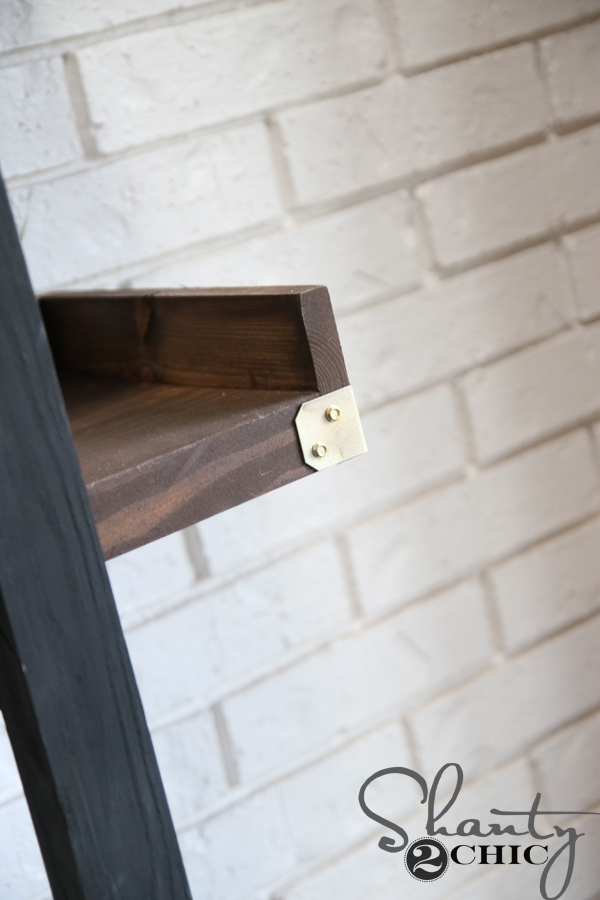
Finally, I added a metal angle piece to the front corner of each shelf. You can find the angle pieces HERE from Home Depot. They are silver but I painted them with gold acrylic paint to fancy them up.
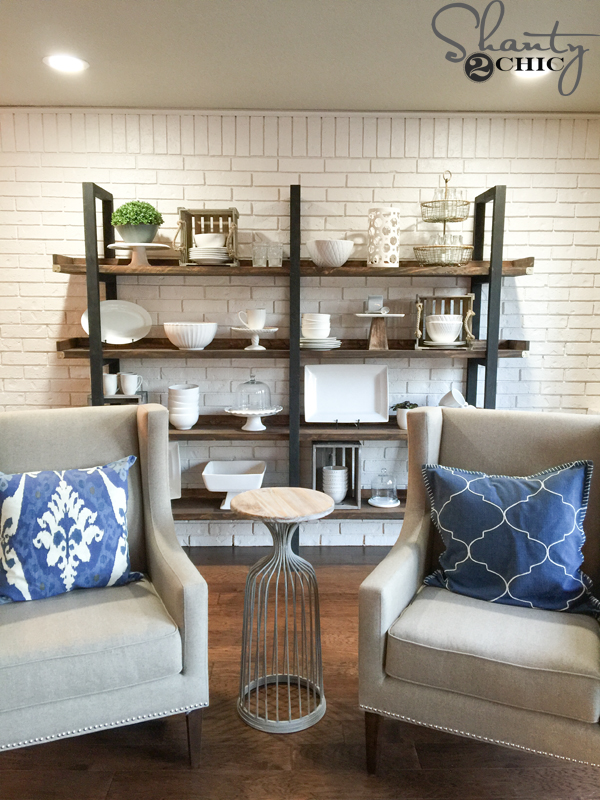
That was it! We added some pretty white platters, dinner ware and cake stands and called named it a Modern Plate Rack. Not bad for $95 in lumber 😉

You can get info for the other items in the space below:
Pillow on right: HERE
Pillow on left: HERE
Chairs: HERE
Accent Table: AtHome
Dishes: A mix of AtHome, HomeGoods, World Market and Target
Paint on wall: Agreeable Grey by Sherwin Williams
Paint on Brick: Extra White by Sherwin Williams
Doors: Urbane Bronze by Sherwin Williams


Do you remember what type of acrylic gold paint you used? Was it a spray or brush on? Did you have to prime the metal first?
did you rip the edges off the 2×12 or leave them as is?
Just discovered you! How awesome to share your sketches, thank you so much.
***8’ long, 7’ tall
I want this piece but I don’t want to build it. Do you have people who do that? I’m in Tampa.
What type of wood do you use to give it a rustic look?
What type of wood are you using or recc using for a nice look but affordable cost?
Why did you end up ripping 2×3 into 2×2 instead of just buying 2×2?
A 2×2 is about $7-$8 per board. I can make two from a 2×4 for about $1.50 each.
Well that makes sense 🙂 if I don’t have a table saw, will HD rip them in half for me?
Do you happen to know the name of the chairs? When i click on the link it just takes me to the wayfair website!
On your cut list are the remaning two 2x3x8’s cut to 12.25″?
Yes, all of those yellow pieces are the same measurement. Should match the ones above 🙂
Love all of your builds but I have a question. When I rip a piece of lumber it is not always width on each end is not always consistent. Should I try and clamp the fence on my table saw or is this just my fault not keeping same pressure on pushing the board through? Thanks