We are back with another 3-tool project and another DIY video! Come build this DIY Sawhorse Bookcase with us! Just click HERE or the image below to watch our how-to video.
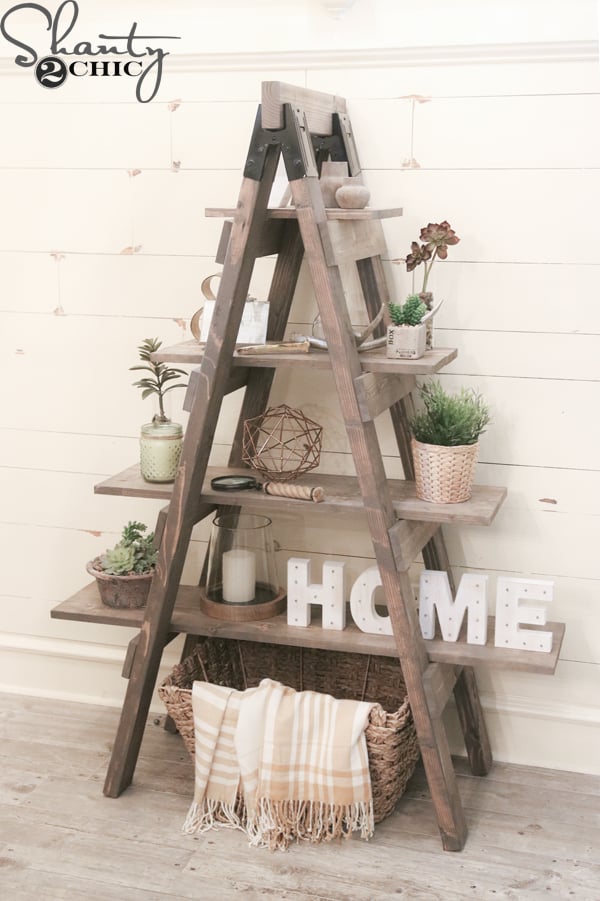
I’ve always love the look and function of ladder shelves so I decided to design and build my own! With only 3 tools and less than $50 in materials, we built this super unique bookcase that’s perfect for any room!
DIY Sawhorse Bookcase
You can download the free, printable instructions by clicking HERE and follow along with us while we build, below!
We have designed 5 projects using only these three tools:
Tool #1: 18-Volt Miter Saw
Tool #2: 18-Volt Brad Nailer
Tool #3: 18-Volt Drill
This DIY Ladder Shelf is the second build of the five! If you missed the first one, you can find it HERE or you can get all five of the project plans now in our new e-book! It’s only $4.99 and you will get ALL FIVE, 3 tool project plans that you can download directly to your device! Click HERE to for the e-book! And as a thank you for your purchase, we’ve also included a bonus printable as a thank you 🙂
Now for the build!
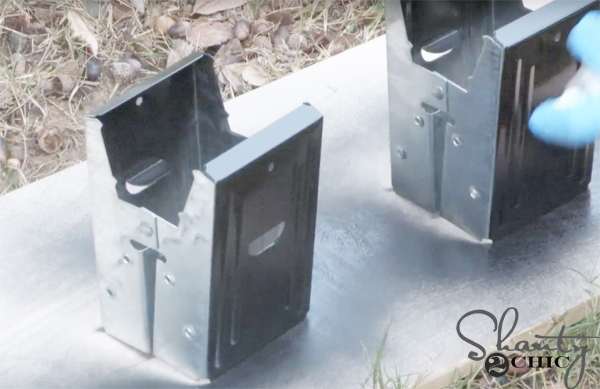
We started by spray painting the sawhorse brackets. This is not a necessary step, unless you don’t want them to be silver. This was our first step because this bookcase is such a quick build and we didn’t want to wait for the paint to dry. We found these brackets at our local hardware store for about $7 for the set.
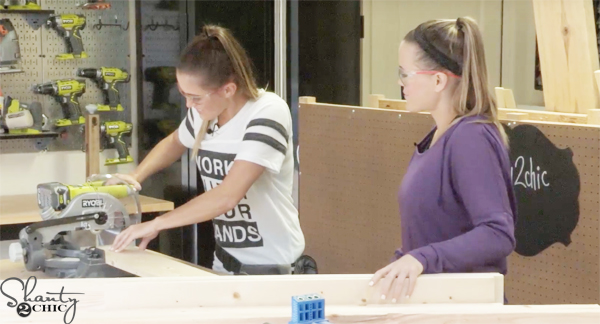
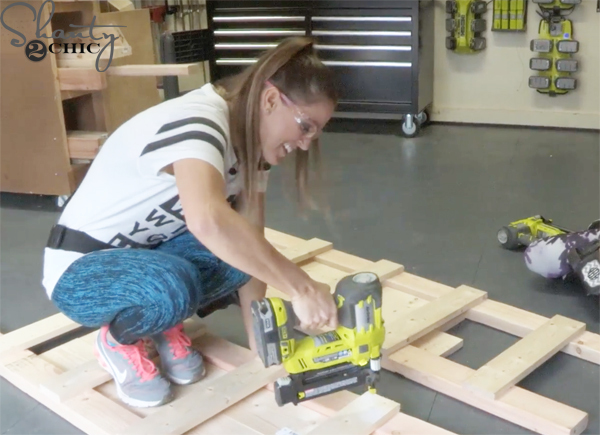
Next, we used our 18V Ryobi Miter saw to cut all of our pieces. You can refer to our cut list for the dimensions. This miter saw will cut up to a 1×4, but if you flip the board after your first cut, you can cut up to a 1×8! If you don’t have a miter saw, you could also use a circular saw for this entire build.

Once the cuts were made, we spaced the side rails for the ladder. Here’s a tip: Put two pine boards next to each other, between two side rails. This will guarantee that your shelf pieces will fit between the rails 😉
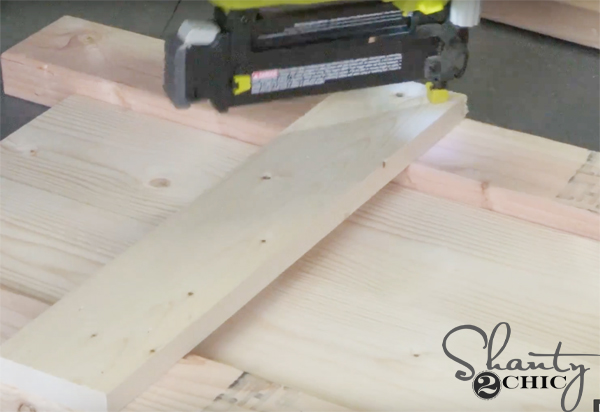
To attach the rungs, we started with the bottom piece and worked our way up. Refer to the plans for the proper placement. We used a dab of wood glue on each rail and attached the rungs with 1 1/4″ brad nails, in our 18-volt nailer. The edges of the rungs should be flush with the outside edges of the side rails.
We worked our way up the ladders, attaching the rungs the same way.
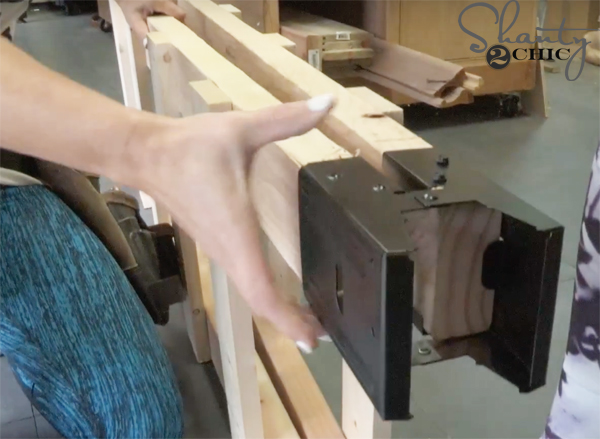
Once we built both ladders, we held them together, rungs facing out, and slipped a sawhorse bracket over the top ends of each ladder.
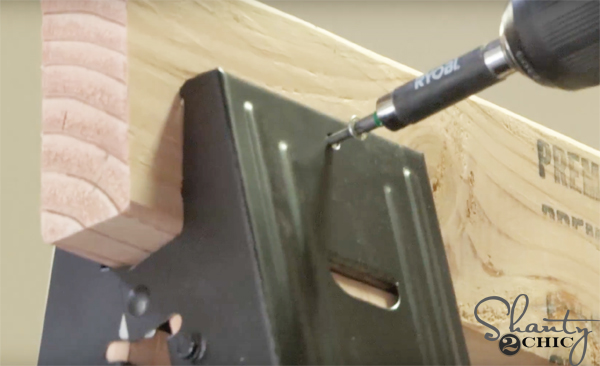
Next, we used out 18-volt drill and small hex screws to secure the brackets in place.
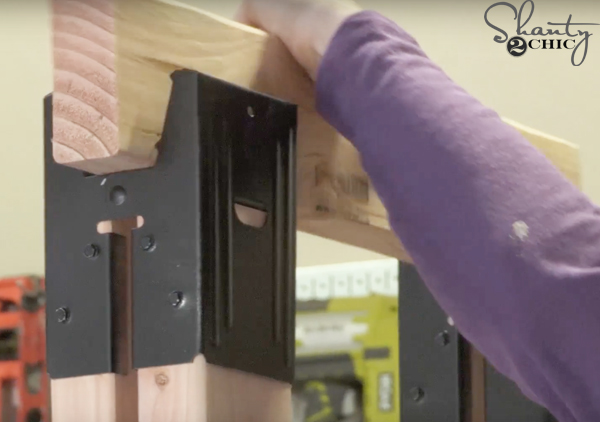
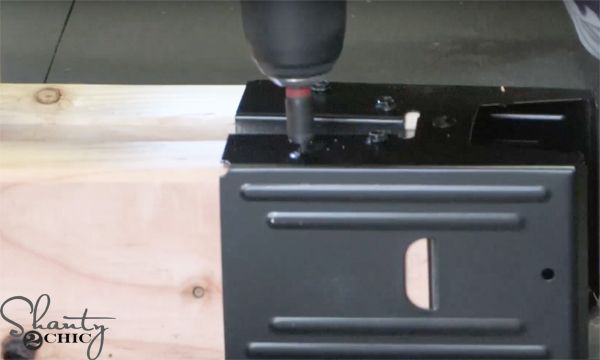
Then, we stood the ladder upright, with the ladders still together, and placed the top board in the opening end of the sawhorse brackets.
We pulled the bottom of the ladders apart, so that the teeth at the top of the brackets sunk into the top board. Then, we used a 1 1/4″ Spax screw to secure the top board in place. You can find lots of these screws on Amazon HERE if you have trouble finding them locally.
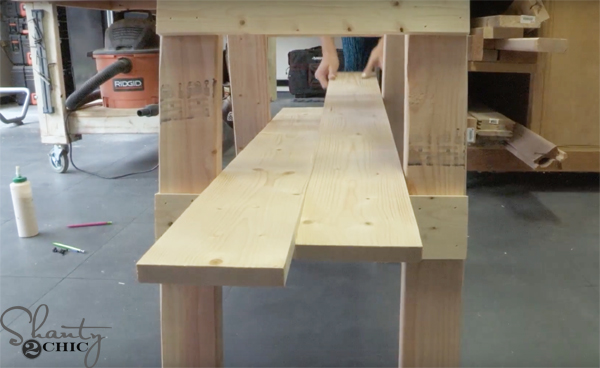
With the brackets and shelf frame in place, we slid the shelf pieces over the rungs. Refer to the plans for proper placement.
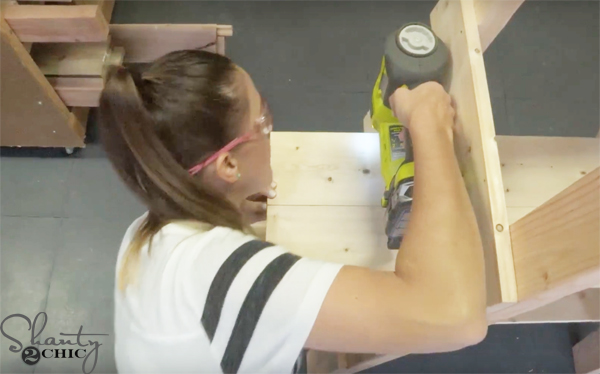
We attached shelf pieces to the rungs with 1 1/4″ brad nails. Make sure the nailer is lined up so that the nails will shoot directly into the rungs. We started with the bottom shelf first.
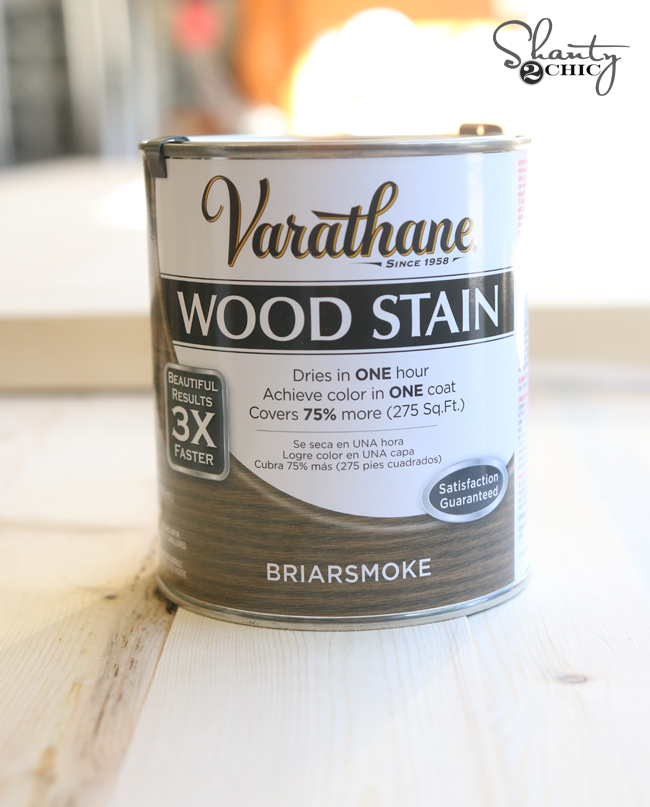
Our final step was to add a finish! We sanded the entire piece with a 120-grit sanding block. Then, we chose our current fave, Briarsmoke stain by Varathane. We wiped on one coat of stain with a clean cloth, let the stain sit for about 5 minutes, then we wiped the stain, to blend it, with a fresh, clean cloth.
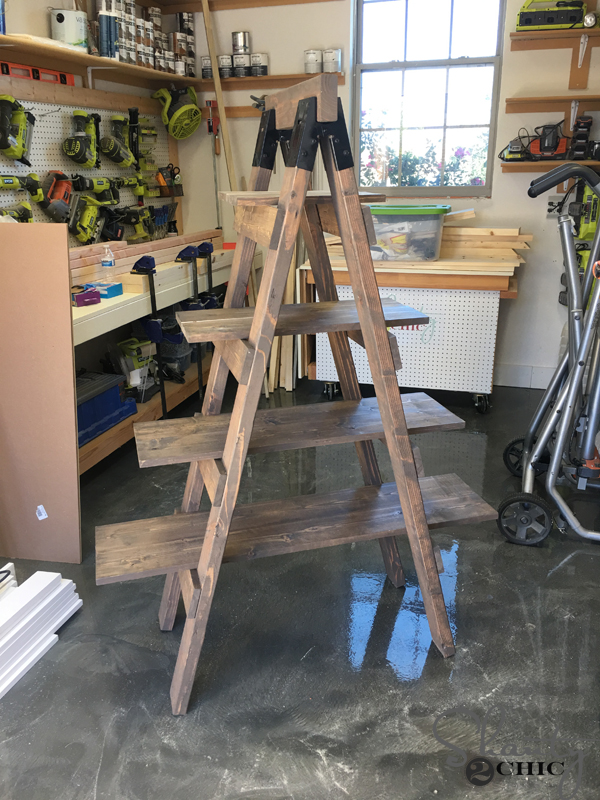
Now the Ladder Shelving Unit is done! That was IT! How easy is that?!
Now, you can dress your wooden ladder shelf however you like! I love that it looks like an old wooden ladder. It makes great storage space and it would be a pretty easy modification to build a second ladder bookshelf and run one long second shelf between the two to create a desk! It would be perfect in a bathroom to store towels, a living room to store books or a bookcase in an office. Whatever you choose to do with yours, share a picture with us on our social media accounts so that we can see it and share with our readers!

Don’t forget to check out the how-to video for this DIY Ladder Bookcase, HERE!
And, if you are too impatient to wait for the remaining three plans, in our 3-tool DIY project series, you can download our e-book HERE for only $4.99 to get this DIY Ladder Shelf Plans and ALL of 3-tool project plans, plus the bonus printable today!
Thanks so much for stopping by!
Ashley and Whitney


I love the stain. What color was used for this project?
Ive been searching for a bookcase to fill in the space in my living room and found your beautiful bookcase ladder. thankful for the the clear plan u guys made I was able to build one myself ( my first diy furniture project )So pleased with the result?
Hello,
What’s the total height of that ladder shelf?
Thank you
i was looking at the cur measurements and it looks like the second shelf down is same length but different sizes of wood. is that correct?
nevermind, i was reading it wrong
Heads up Diy’ers, you can’t build this for $50. Just priced this out and its cost a lot more than 50$
I built this for $49. For some reason wood is a lot cheaper here in Texas. So, if you are building this elsewhere take the price with a grain of salt.
What are the made from, what size wood? What are the length of the shelves?
How much did it cost to make it
What are the dimensions of the cuts?
What angles are legs cut at?
There are no angles
I made two shorter ones and love them. They were so easy but I definitely stained all of the wood in advance then just went back through and rubbed stain on any new cuts. Super easy project. Thanks for sharing!
Hi! Is there any way to make this into a portable one? Would love to be able to offer this to clients (I style parties and rent decor locally!) 🙂
Just attempted to make it…. was looking great until time to stain it. Was taking forever to stain because no way to stain the whole thing under 5min or at least not for me so in between staining having to wipe of wood already stained. Then the metal pieces at the top ended up horrible. Spray painted them black and looked great but to to try to stain next to them and the piece of wood in the front that shows and the wood behind the metal ended up getting stain on the metal. So I kept looking at the metal thinking it looked bad and some wood was darker than others. Ended up scrapping the whole thing. Thinking IF I decide to attempt this again I need to stain beforehand so when out together it’s finished. I’ll keep trying! Love it tho!
I love this design! I made it 8′ tall, skipped a shelf, and added a chair as a little computer desk option.
Do you have a photo?
What are the dimensions of all your cuts?
I did not see and dimensions.
Really nice!
Question though – when someone tries to move it, if they lift on the shelves, won’t the brad nails pull out?
I wouldn’t lift by the shelves. You can lift u see the rungs.