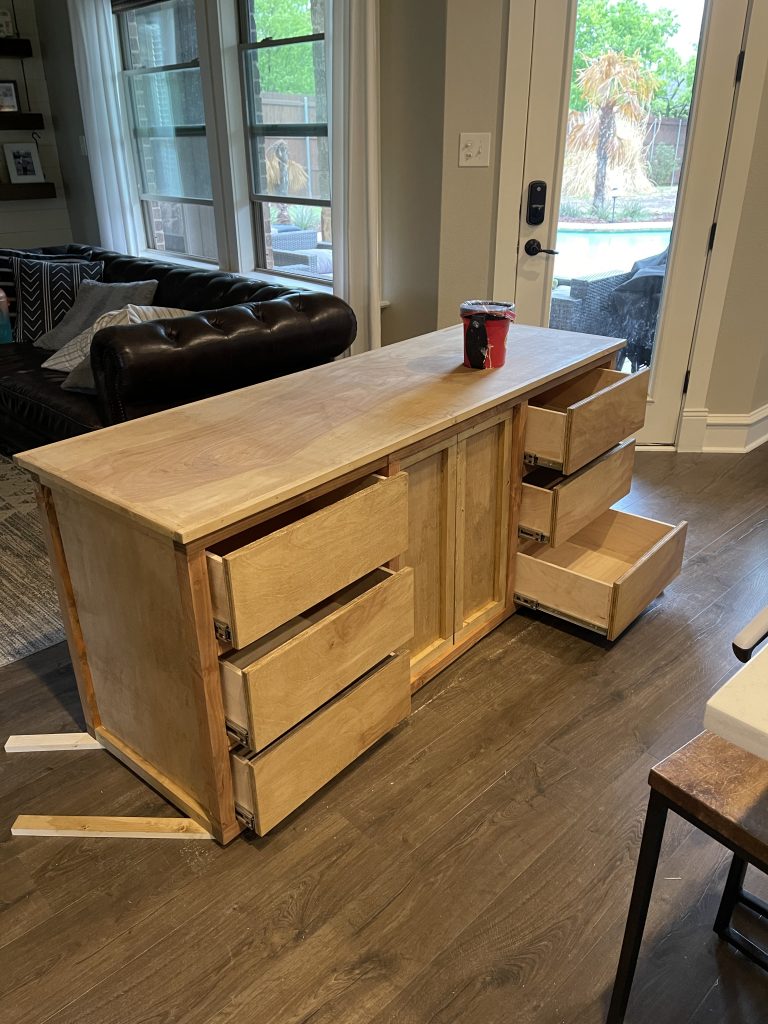
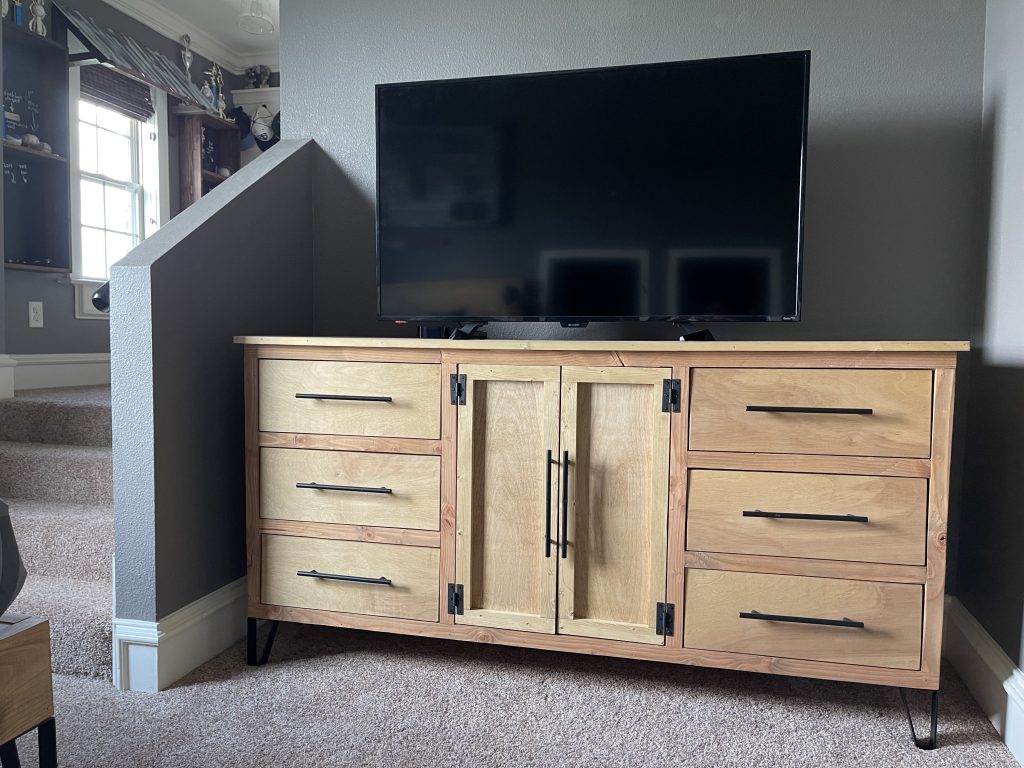
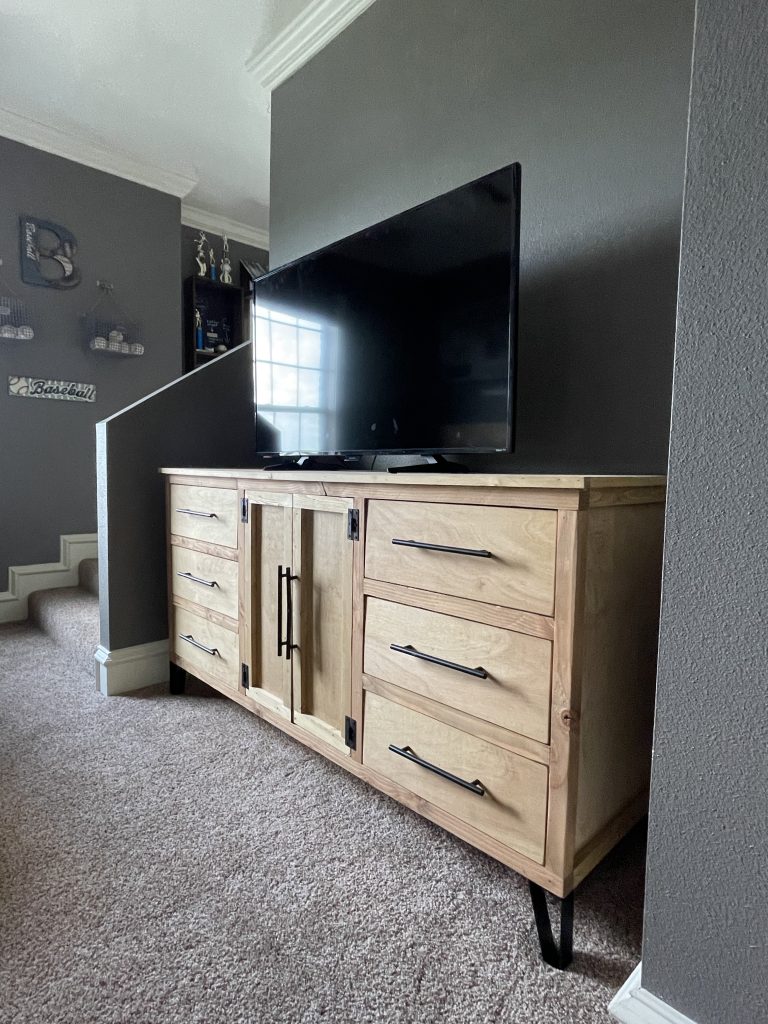
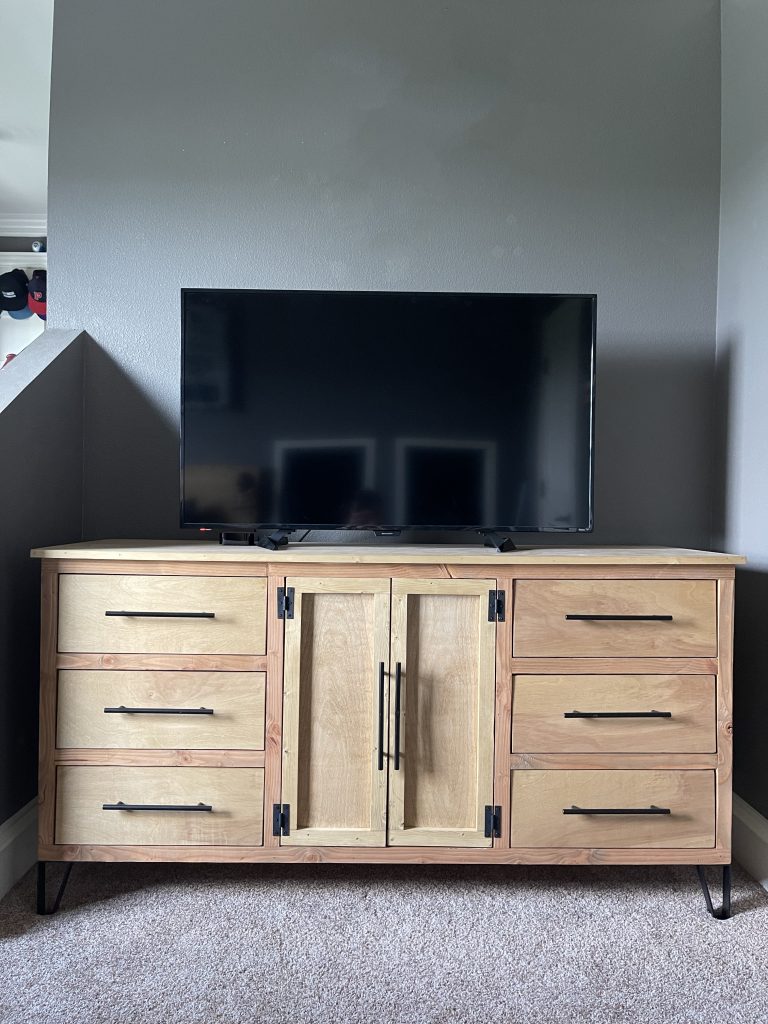
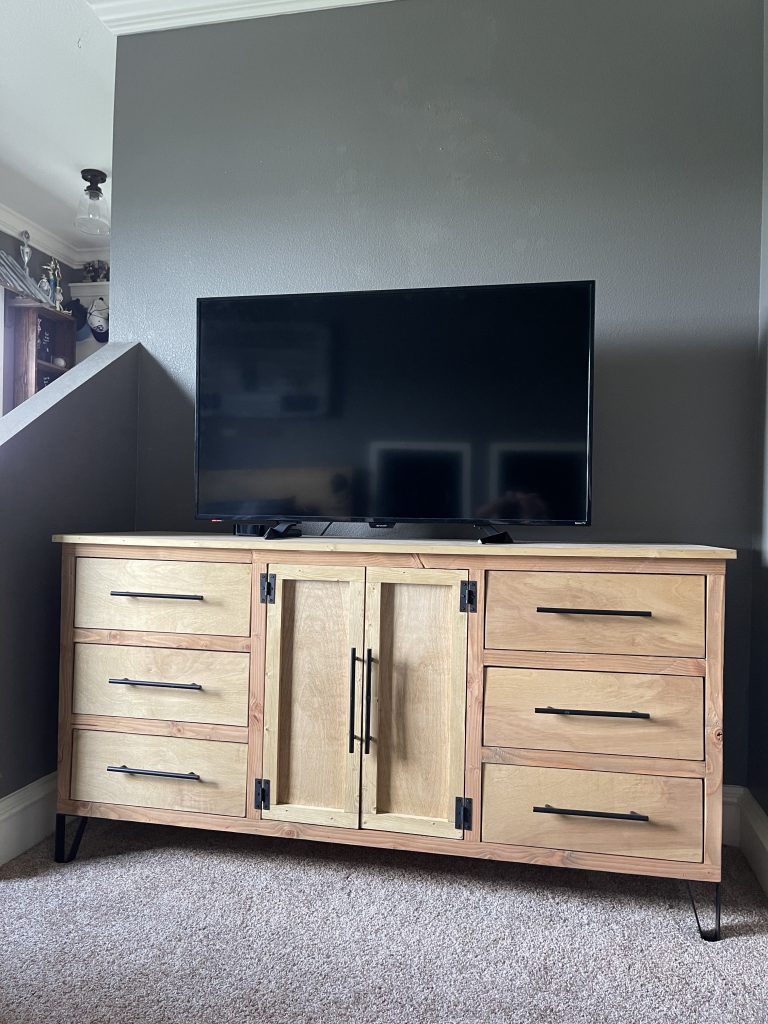
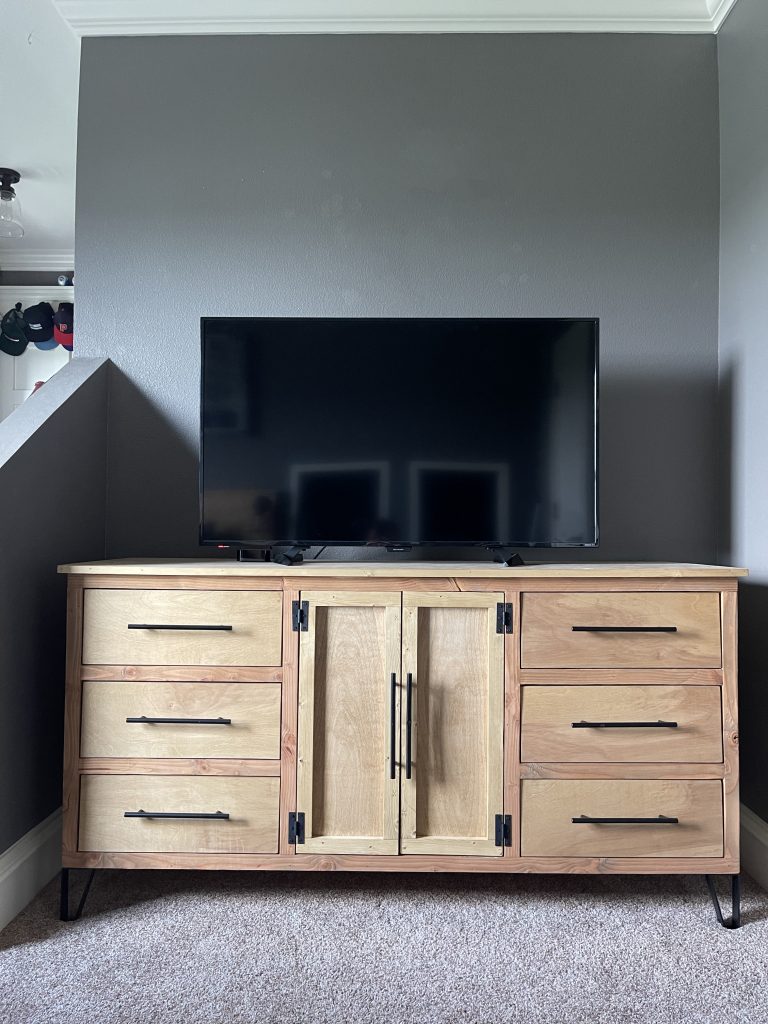
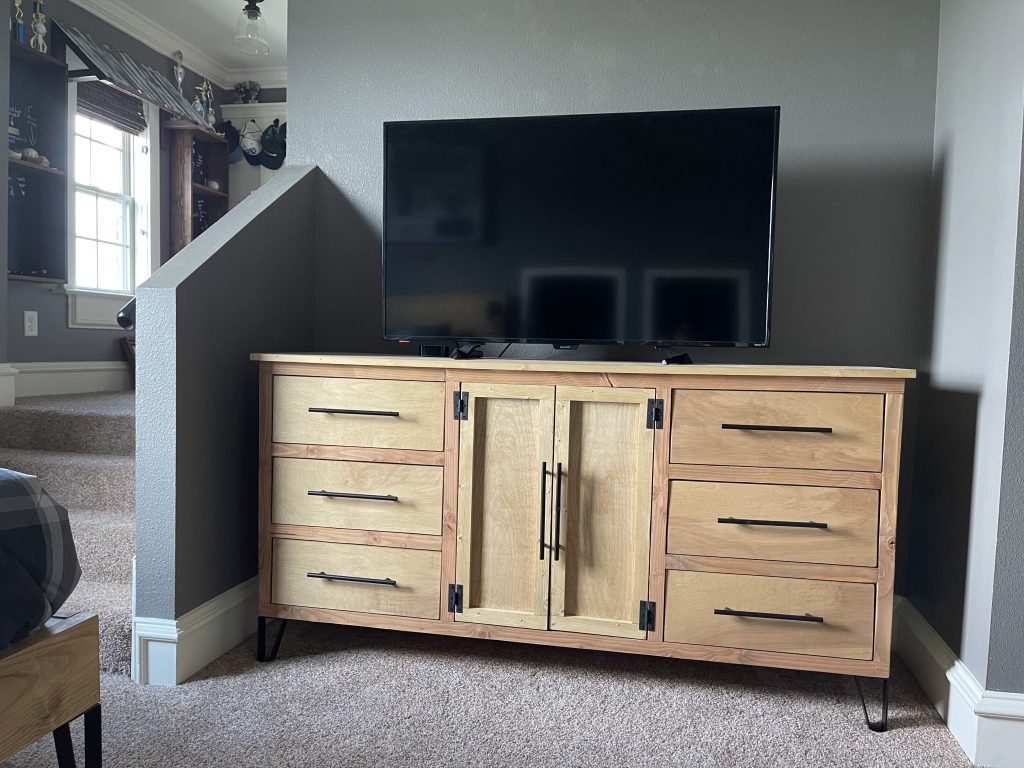
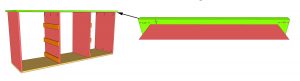
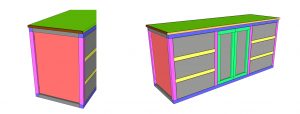
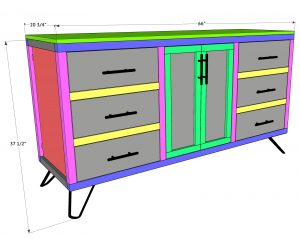
Learn how to build this DIY Modern Dresser with free plans and a how-to video by Shanty2Chic! This is an easy build, makes the perfect TV stand and doubles as a dresser with tons of storage space!
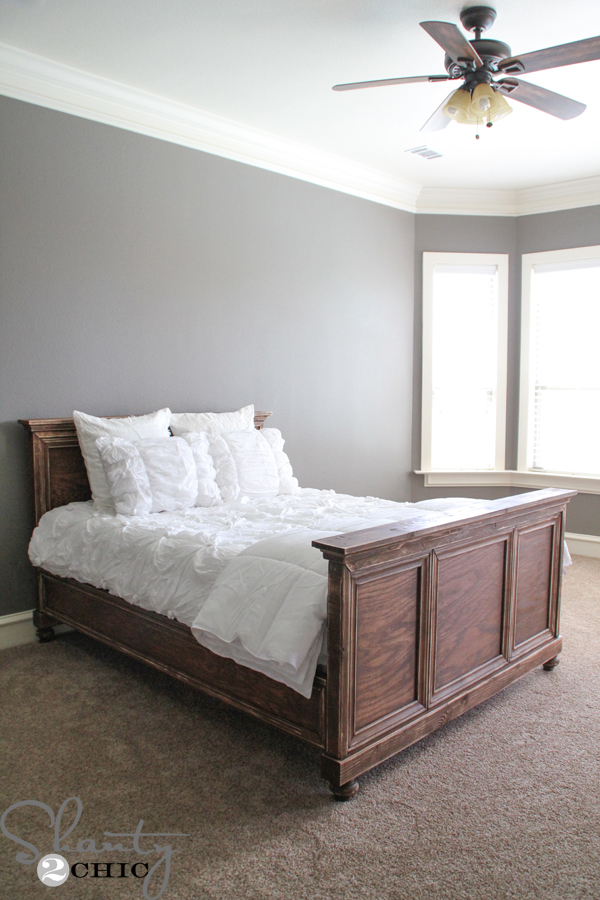
This DIY Modern Dresser has been a long time coming! My son had a set of DIY Lockers that I built him for his “dresser” but the organization was out of control! He told me he would rather have a dresser with drawers and a spot for his game consoles, so that’s exactly what he got! I recently built him this DIY Modern Full Size Bed so I used that as my guide for the style of this dresser!
Check out the how-to video below to watch!
Make sure to download the free pritnable plans!
Click here to jump to the free printable plans!Table of Contents
Tools:
- Miter Saw
- Drill
- Kreg Jig
- Brad Nailer
- Sander
- Stapler (optional)
- Table Saw (optional)
Supplies:
- 8 – 2x2x8 Common Board (I ripped from 2×4 studs)
- 3 – 1x4x8 Common Board
- 2 – 3/4″x48″x96″ Hardwood Plywood
- 1 – 1/2″x48″x96″ Hardwood Plywood
- 1 – 1/4″x48″x96″ Hardwood Plywood
- 1 1/4″ Pocket Hole Screws
- 2 1/2″ Pocket Hole Screws
- 1 1/4″ Brad Nails
- 2 1/2″ Finish Nails
- 5/8″ Staples (optional)
- Wood Glue
- 8 Pulls
- 4 Legs
- 4 Hinges
How to Build a DIY Modern Dresser
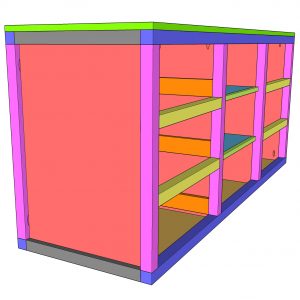
Building the Cabinet Frame
Step 1:
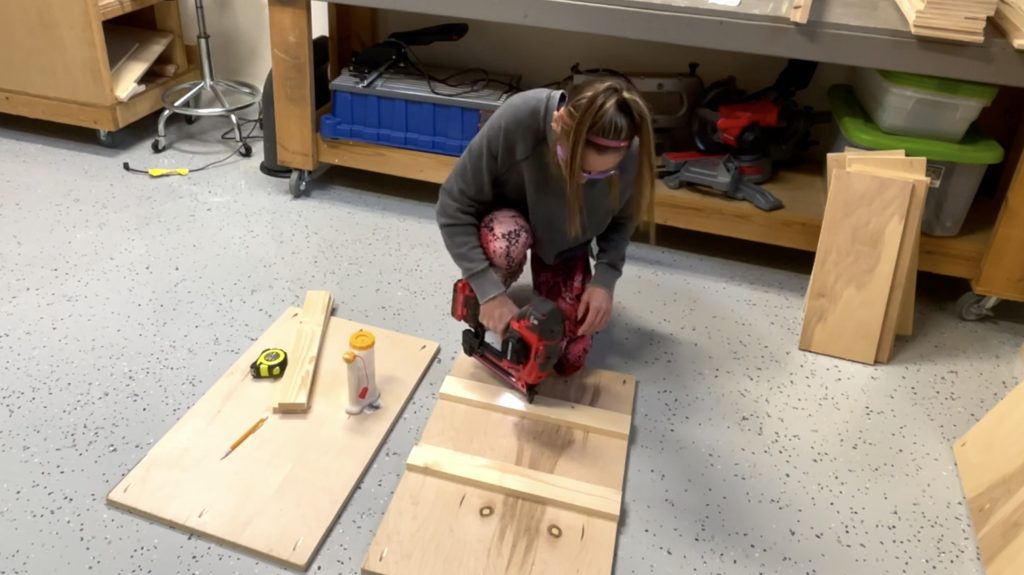
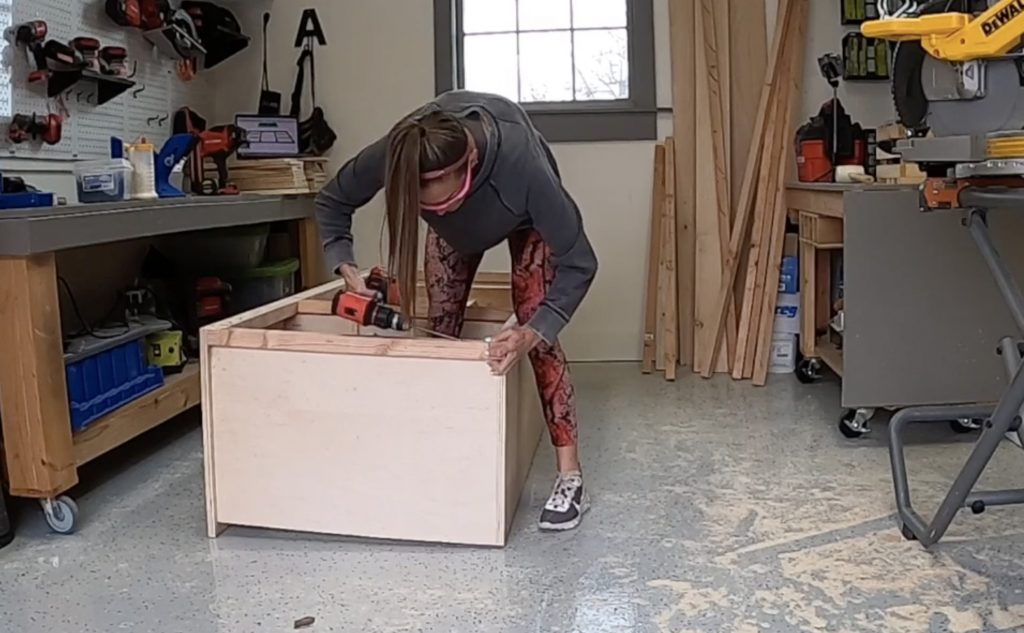
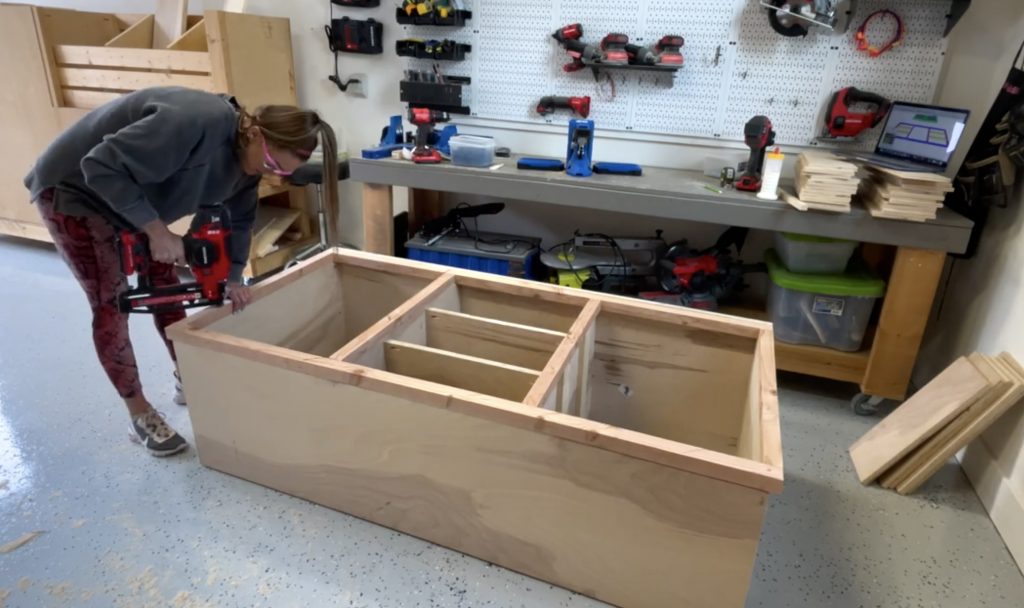
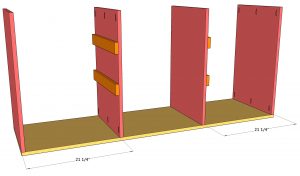
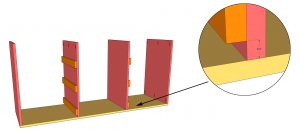
Cut the vertical dividers and cleats to size. Drill 3/4″ pocket holes at both ends of each divider. Attach the top two cleats to two of the dividers with 1 1/4″ brad nails and wood glue.
Step 2:
Cut the bottom cabinet board to size. Attach the vertical dividers to the bottom board with 1 1/4″ pocket hole screws and wood glue.
Step 3:
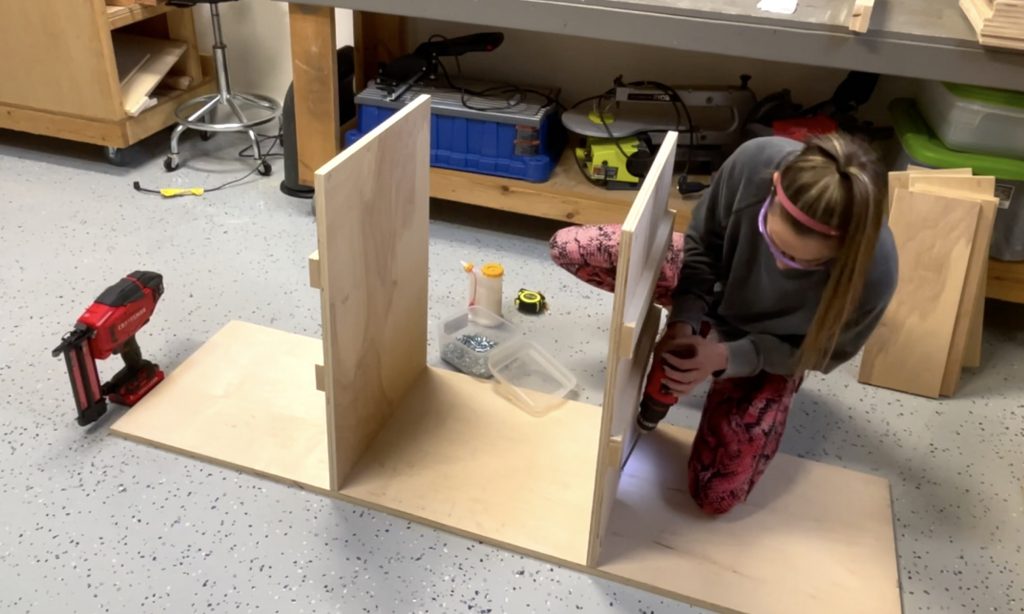
Attach the bottom cleats to the middle dividers with 1 1/4″ brad nails and wood glue.
Step 4:
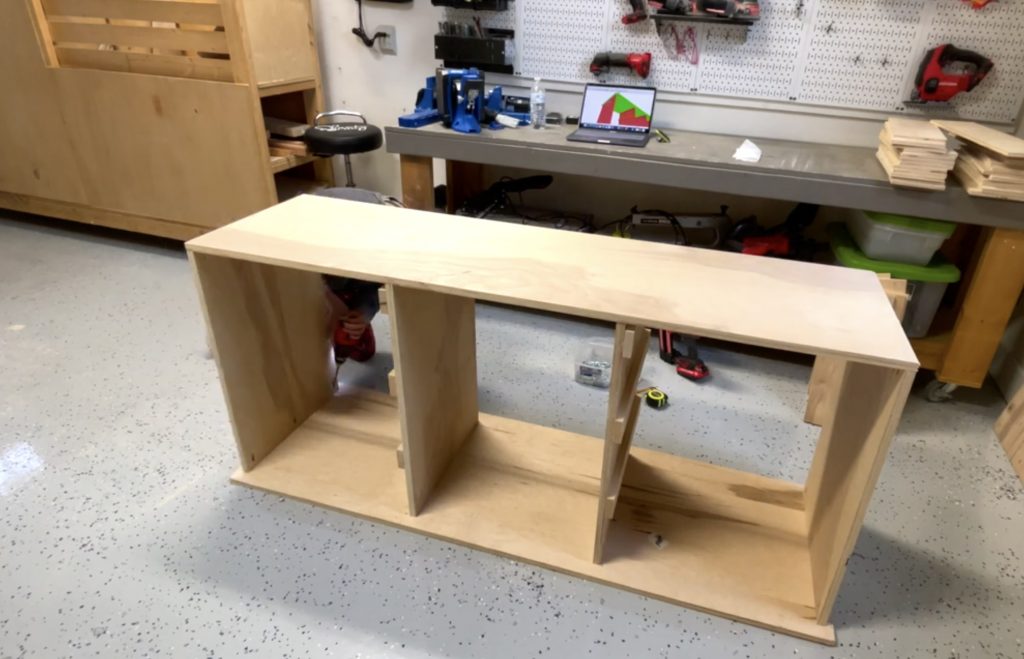
Cut the cabinet top piece to size and attach it to the cabinet dividers with 1 1/4″ pocket hole screws and wood glue.
Step 5:
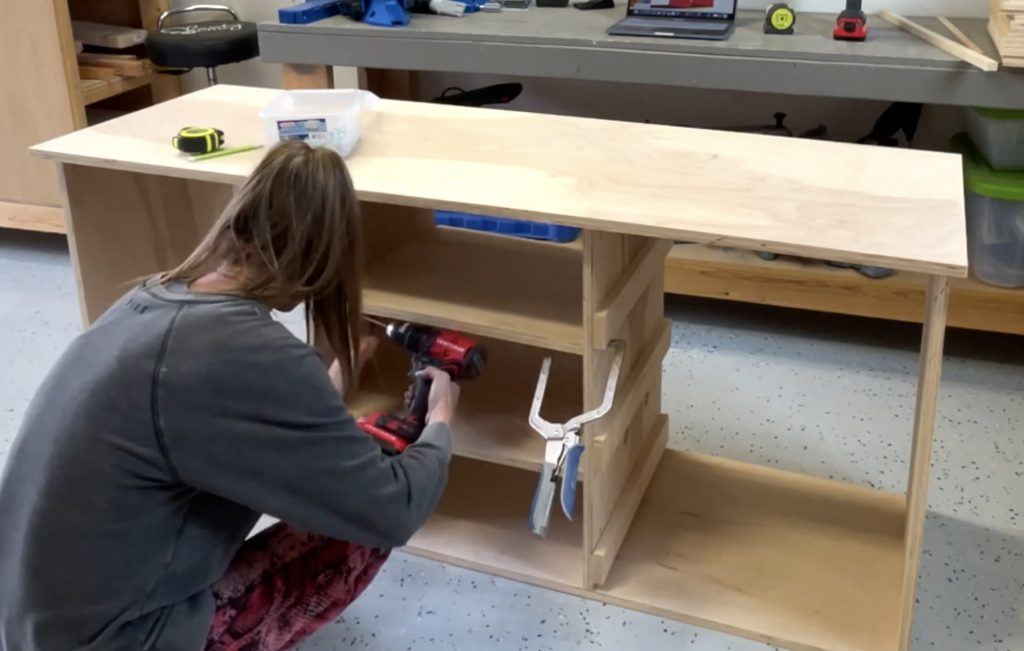
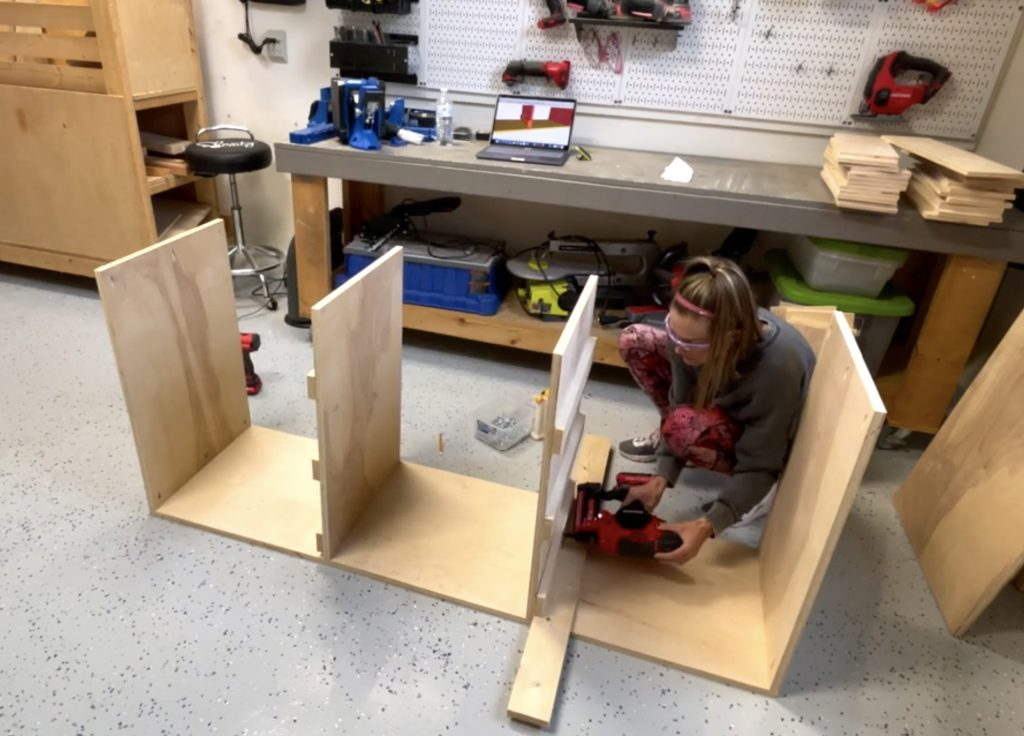
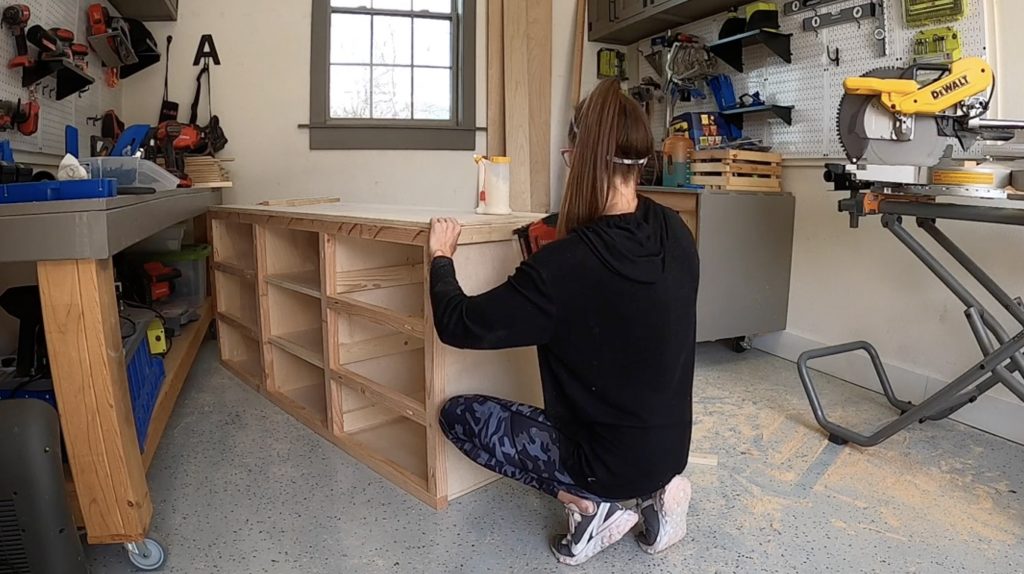
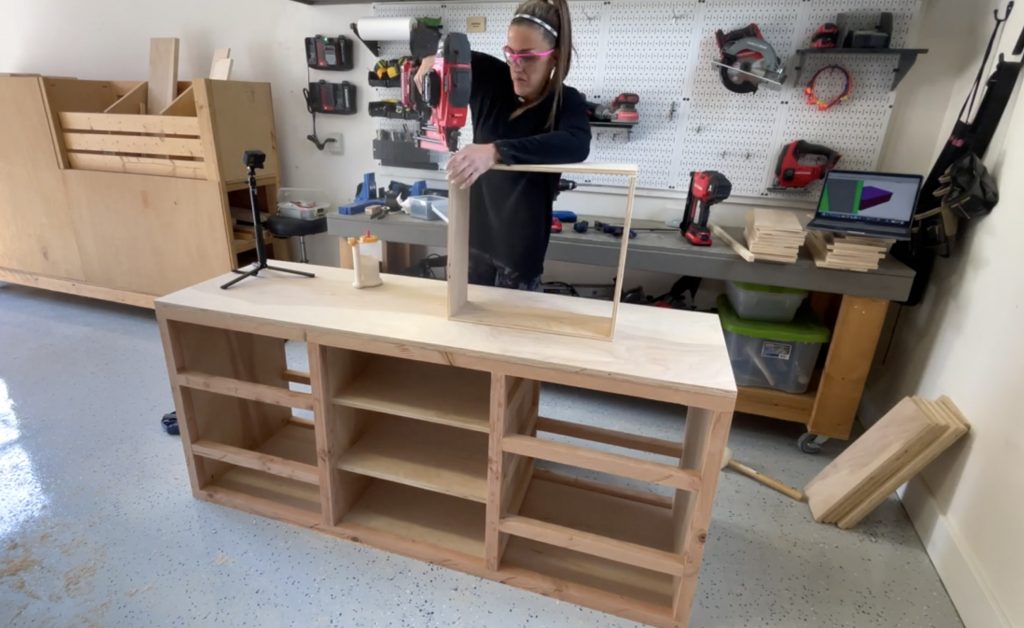
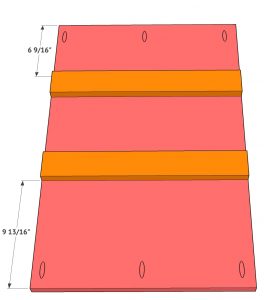
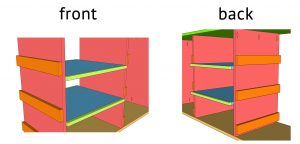
Cut the shelf pieces to size and drill 3/4″ pocket holes on the ends. Attach them to the inside of the cabinet with 1 1/4″ pocket hole screws and wood glue. Note the inset and overhang on the front and back.
Step 6:
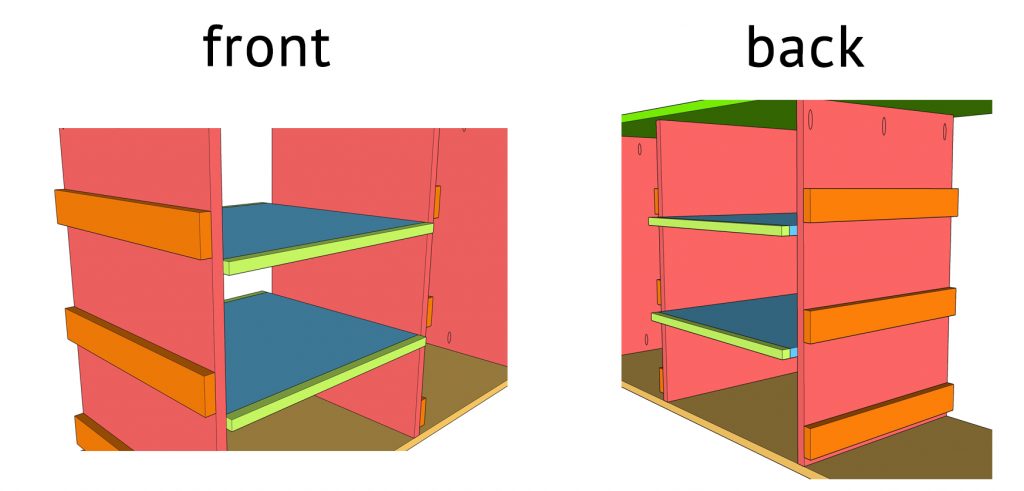
Cut the shelf trim to size and attach it to the front and back of the shelves with 1″ finish nails and wood glue.
Step 7:
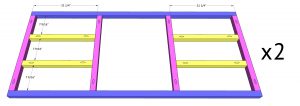
Cut the face frame pieces to size and drill 1 1/2″ pocket holes according to the cut list.
Attach the pieces together with 2 1/2″ pocket hole screws and wood glue. Build two face frames.
Step 8:
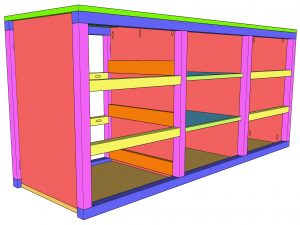
Attach a face frame to the front and back of the cabinet. They should line up flush with the top of the cabinet and the pocket holes should face inside.
Step 9:
Cut the side trim pieces to size and attach them to the sides of the cabinet with 2 1/2″ finish nails and wood glue. They should line up flush with the top and bottom face frames.
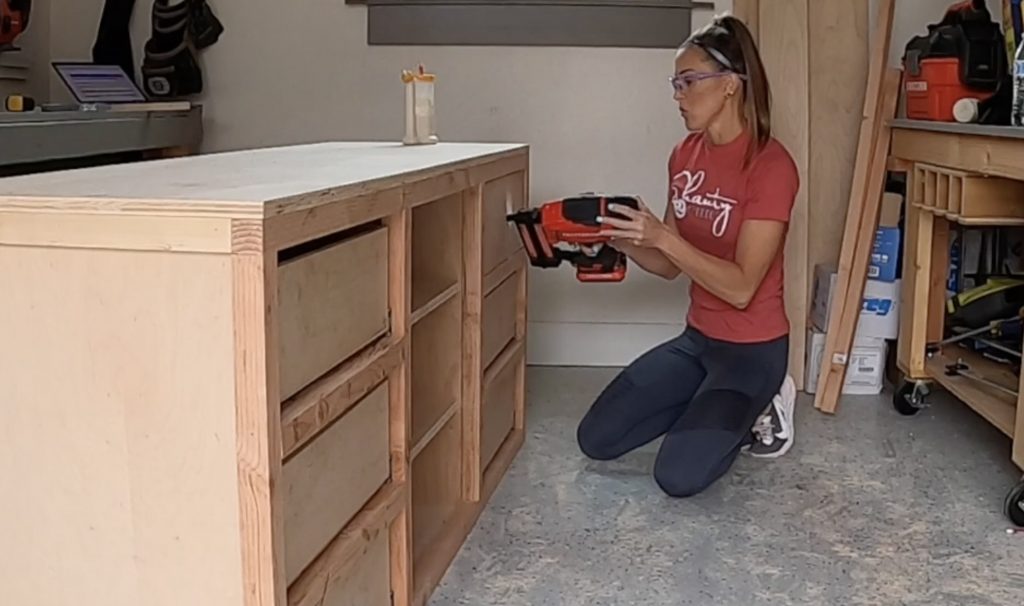
Building the Drawers:
Step 1:
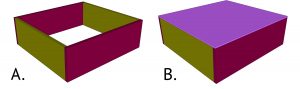
A. Cut the drawer front and side pieces to size. Attach them together with 1 1/4″ brad nails and wood glue.
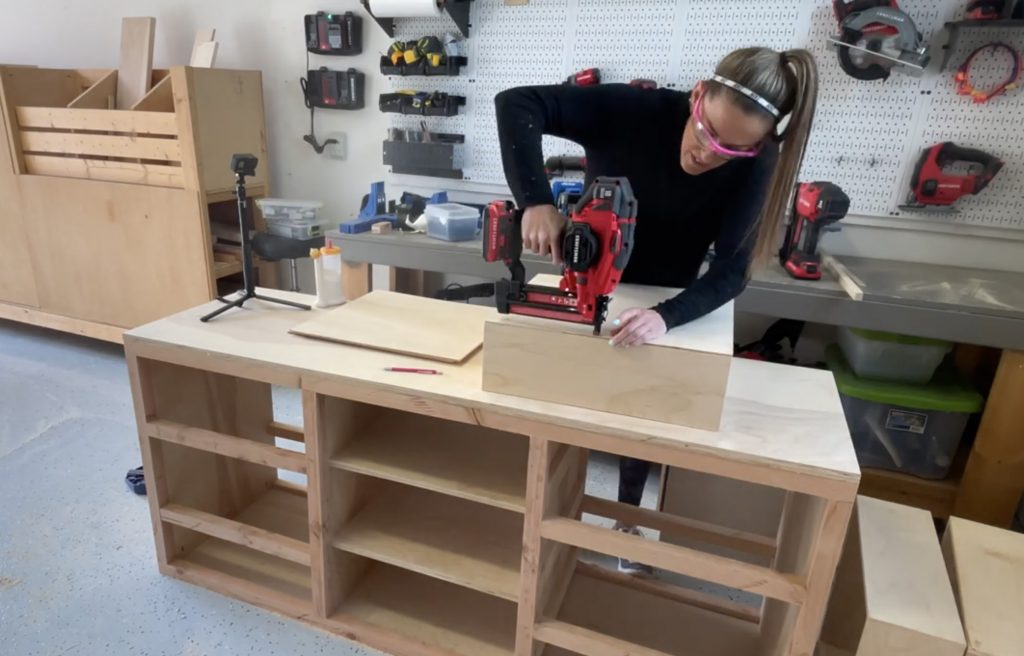
B. Cut the drawer bottoms to size and attach them to the bottom of the drawers with 1 1/4″ brad nails and wood glue.
Step 2:
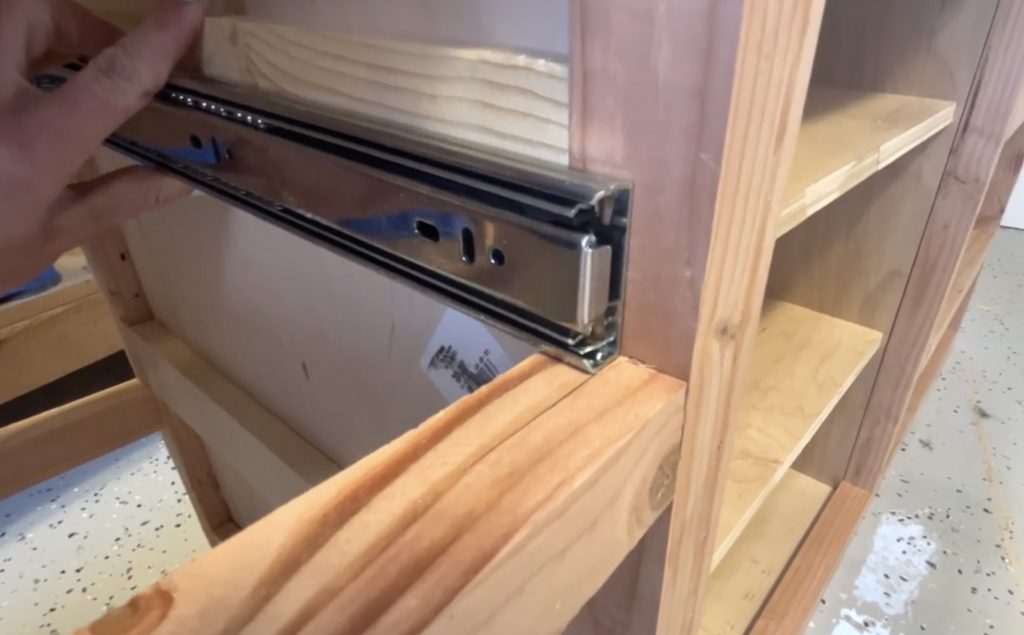
Install the drawers with drawer slides. You can get the detailed instructions for the install in our video!
Step 3:
Cut the drawer faces to size and attach them to the front of each drawer with 1 1/4″ brad nails, from the back of the drawer and into the back of the drawer face. There should be a 1/8″ gap around all sides
Building the Doors
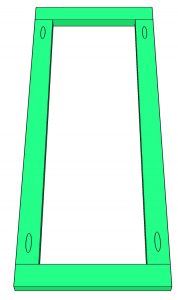
Step 1:

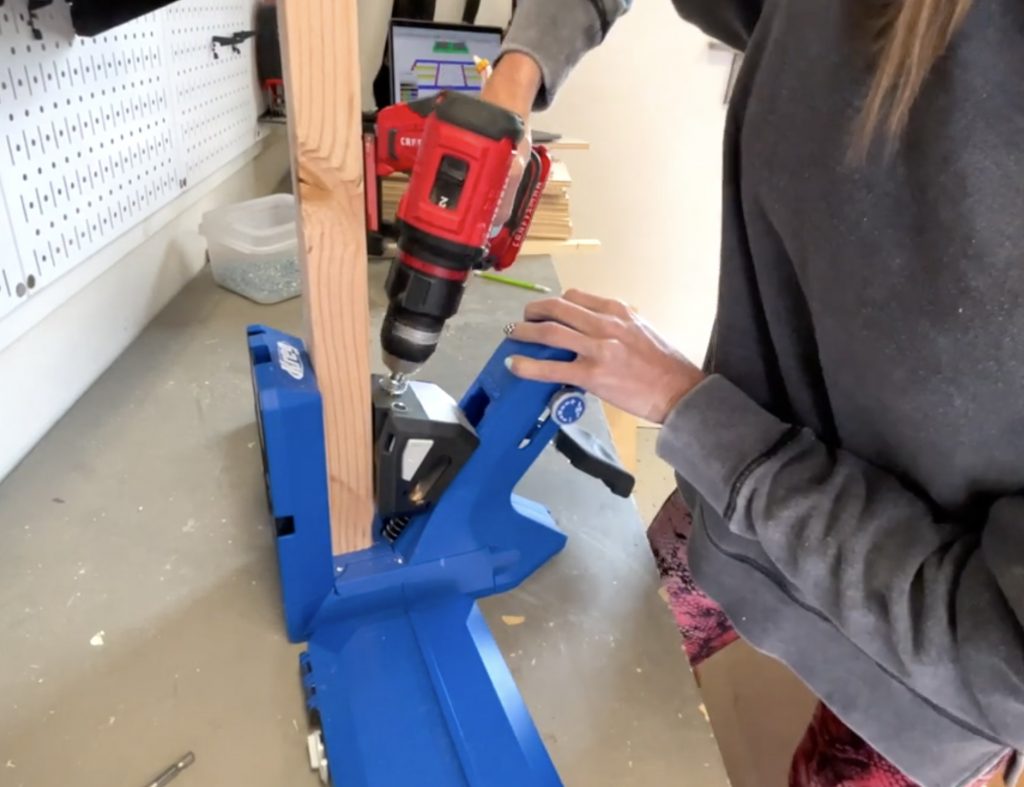
Cut the door frame pieces to size. Drill 3/4″ pocket holes on both ends of the long boards. Attach them to the short boards with 1 1/4″ pocket hole screws and wood glue.
Step 2:
Cut the plywood for the back of the doors to size. Attach them to the back of the door frames with 5/8″ staples and wood glue.
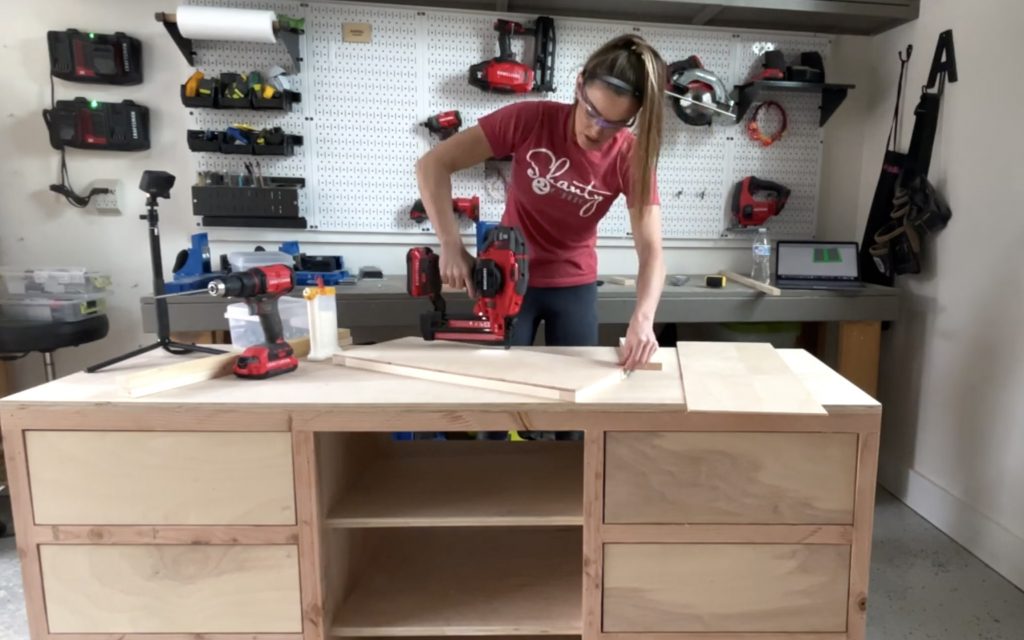
The Finish!
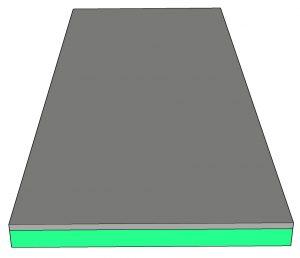
Step 1:
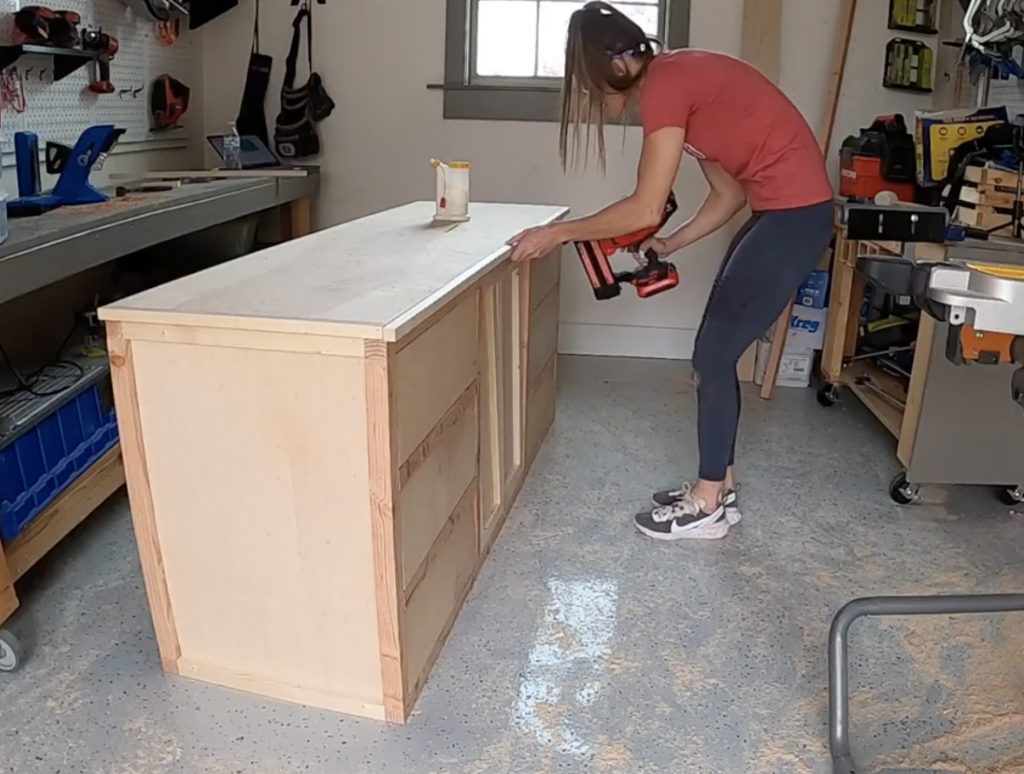
Cut the side top trim pieces to size and attach them to the sides of the top plywood sheet with 1 1/4″ brad nails and wood glue. Measure and cut the fron and back trim pieces to size and attach them the same way.
Step 2:
Fill all your nail holes, sand it down and add a finish!
Step 3:
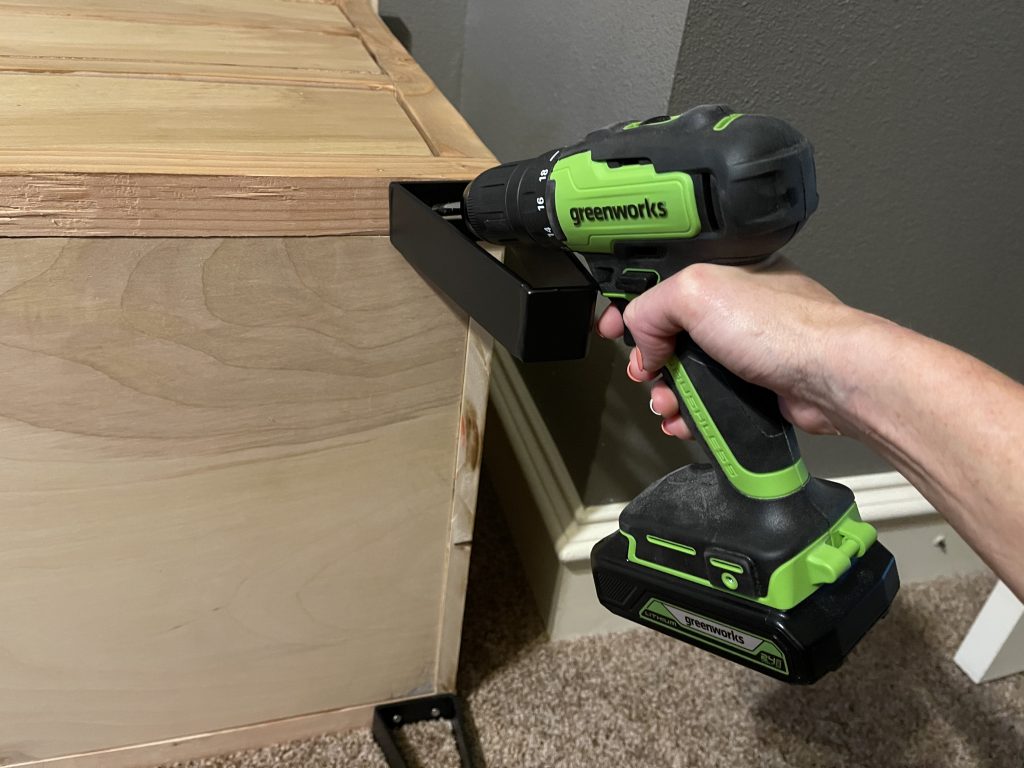
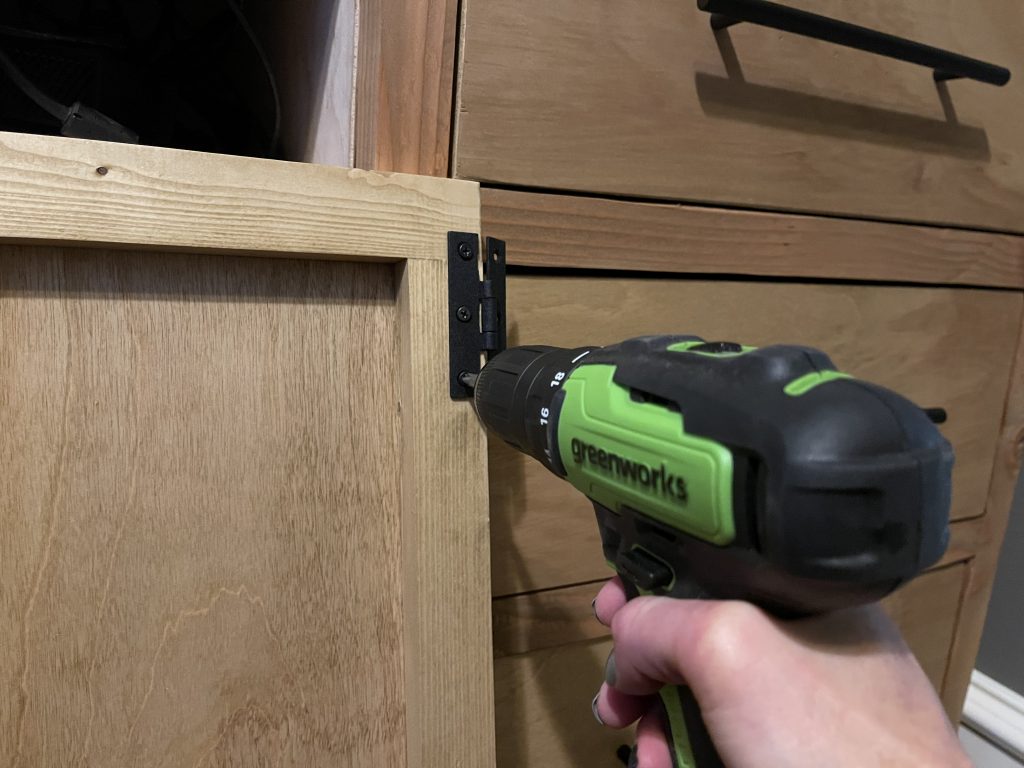
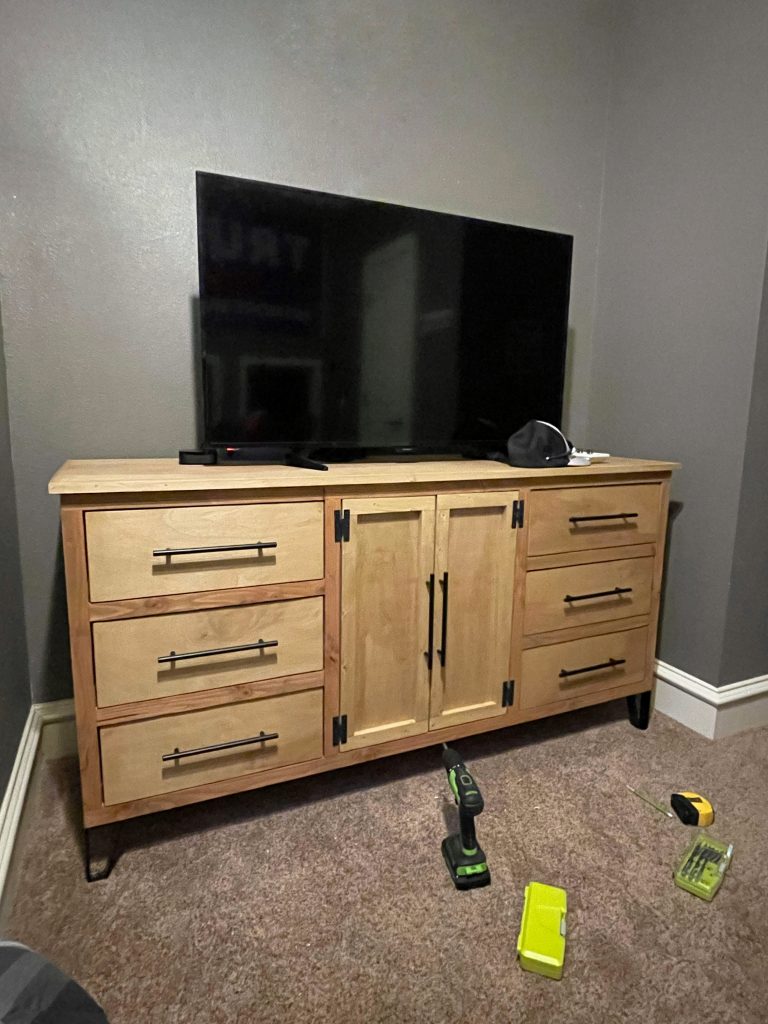
I added modern hairpin legs, bar pulls and exposed hinges for the doors.

Make sure to share your builds with us on social media and use #shanty2chic so we can share them too! Happy Building!

DIY Modern Dresser
Tools
- Miter Saw
- Drill
- Kreg Jig
- Brad Nailer
- Sander
- Stapler (optional)
- Table Saw (optional)
Supply List
- 8 2x2x8 Framing Lumber Ripped from 2×4
- 3 1x4x8 Common Board
- 2 3/4"x48"x96" Hardwood Plywood
- 1 1/2"x48"x96" Hardwood Plywood
- 1 1/4"x48"x96" Hardwood Plywood
- 1 1/4" Pocket Hole Screws
- 2 1/2" Pocket Hole Screws
- 1 1/4" Brad Nails
- 2 1/2" Finish Nails
- 5/8" Staples
- Wood Glue
- 8 Pulls
- 4 Legs
- 4 Hinges
Instructions
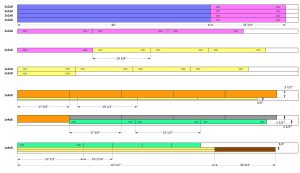
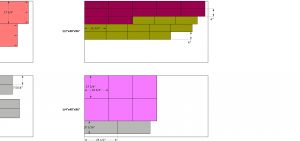
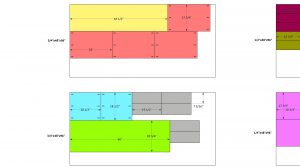
Cut List
- Cut List 1

- Cut List 2

- Cut List 3

Building the Cabinet Frame
- Cut the vertical dividers and cleats to size. Drill 3/4" pocket holes at both ends of each divider. Attach the top two cleats to two of the dividers with 1 1/4" brad nails and wood glue.

- Cut the bottom cabinet board to size. Attach the vertical dividers to the bottom board with 1 1/4" pocket hole screws and wood glue.

- Attach the bottom cleats to the middle dividers with 1 1/4" brad nails and wood glue.

- Cut the cabinet top piece to size and attach it to the cabinet dividers with 1 1/4" pocket hole screws and wood glue.

- Cut the shelf pieces to size and drill 3/4" pocket holes on the ends. Attach them to the inside of the cabinet with 1 1/4" pocket hole screws and wood glue. Note the inset and overhang on the front and back.

- Cut the shelf trim to size and attach it to the front and back of the shelves with 1" finish nails and wood glue.

- Cut the face frame pieces to size and drill 1 1/2" pocket holes according to the cut list. Attach the pieces together with 2 1/2" pocket hole screws and wood glue. Build two face frames.

- Attach a face frame to the front and back of the cabinet. They should line up flush with the top of the cabinet and the pocket holes should face inside.

- Cut the side trim pieces to size and attach them to the sides of the cabinet with 2 1/2" finish nails and wood glue. They should line up flush with the top and bottom face frames.


Building the Drawers
- A. Cut the drawer front and side pieces to size. Attach them together with 1 1/4" brad nails and wood glue.B. Cut the drawer bottoms to size and attach them to the bottom of the drawers with 1 1/4" brad nails and wood glue.

- Install the drawers with drawer slides. You can get the detailed instructions and a link to the slides I used on our website.

- Cut the drawer faces to size and attach them to the front of each drawer with 1 1/4" brad nails, from the back of the drawer and into the back of the drawer face. There should be a 1/8" gap around all sides.


Building the Doors
- Cut the door frame pieces to size. Drill 3/4" pocket holes on both ends of the long boards. Attach them to the short boards with 1 1/4" pocket hole screws and wood glue.

- Cut the plywood for the back of the doors to size. Attach them to the back of the door frames with 5/8" staples and wood glue.

The Finish!
- Cut the side top trim pieces to size and attach them to the sides of the top plywood sheet with 1 1/4" brad nails and wood glue. Measure and cut the fron and back trim pieces to size and attach them the same way.

- Fill all your nail holes, sand it down and add a finish! Get creative with it and make it your own! I added modern hairpin legs and pulls!Make sure to share your builds with us on social media and use #shanty2chic so we can share them too!Happy Building!


I really like the decoration and the options it brings us are very educational
I’ve read a lot of articles regarding bloggers, but this one is really well written. Please keep it up.
I can’t read the drawer size in the maroon color
How can start? I’m new and this is my first time seeing you. Looking forward to reading your comments
I have read so many articles about the blogger lovers but this piece of writing is truly a nice post, keep it up.
Awesome! Its genuinely awesome paragraph, I have got much clear idea on the
topic of from this paragraph.
I can’t read the magenta cut on cut list #2
Did you ever find this out?
I am looking to make this but, the dimensions for the cut list (specifically the trim pieces attached to the fronts) aren’t fully listed in the plans. The length is there but, the width is not. Can you add those to the plans?
I am having the same issue. Any luck on getting this information?
The drawer slides are not listed on the supplies, where do i find them?
Also you said youd leave a link for the levels you used and i dont see those either.
Beautiful dresser, cant wait to make it.
Beautiful design! I love the contrast of the modern hardware to the light wood. The dresser would look great with your two-drawer DIY nightstand! 🙂
Love, love, love it!!!! What color stain, finish did you use?
Do you have the plans for a diy locker?!?! I’ve been dying to build one!! Thank you!!