Learn how to build this DIY Farmhouse Coffee Table with only 8 boards with free plans and a how-to video by Shanty-2-Chic.
Hey guys! Happy Wednesday! Happy day before Thanksgiving day! I can’t wait for #allthefood! Today we are sharing a super cute solid wood table you can make for under $40 in lumber and only 8 boards… Heck yes. Sign me up! Before we get started, be sure to check out the video by clicking the play button below!
I have added a link at the bottom of this post to print the free plans for this table!
How to Build an 8 Board Farmhouse Coffee Table
Table of Contents
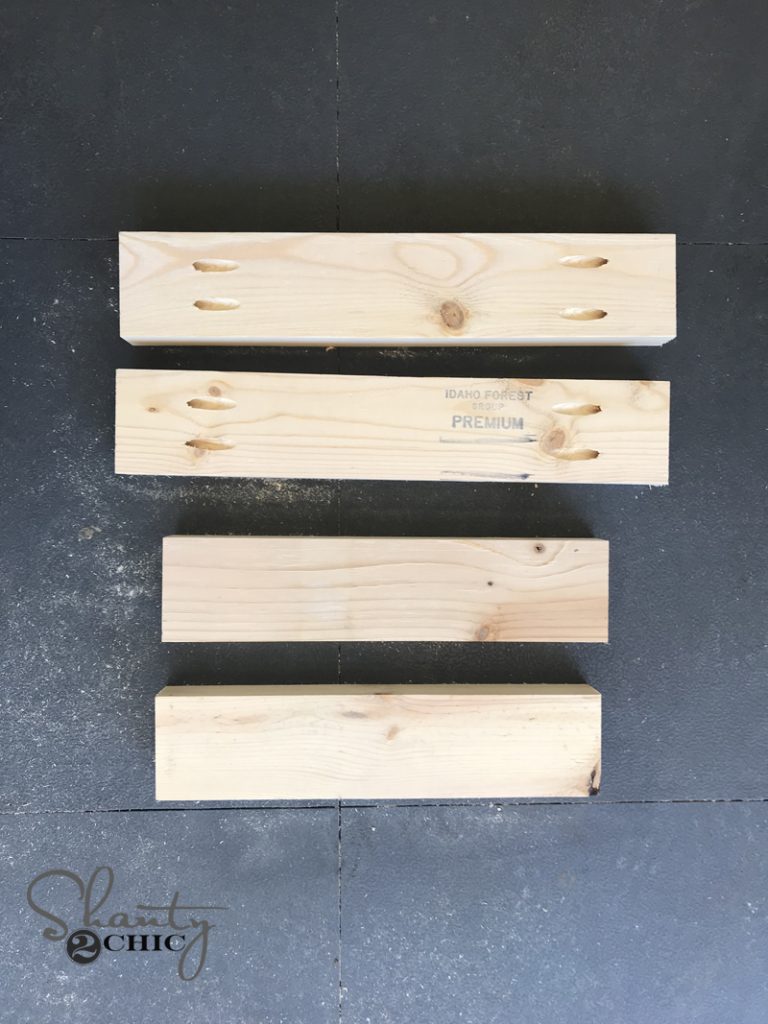
Step 1: Building the Leg Assemblies
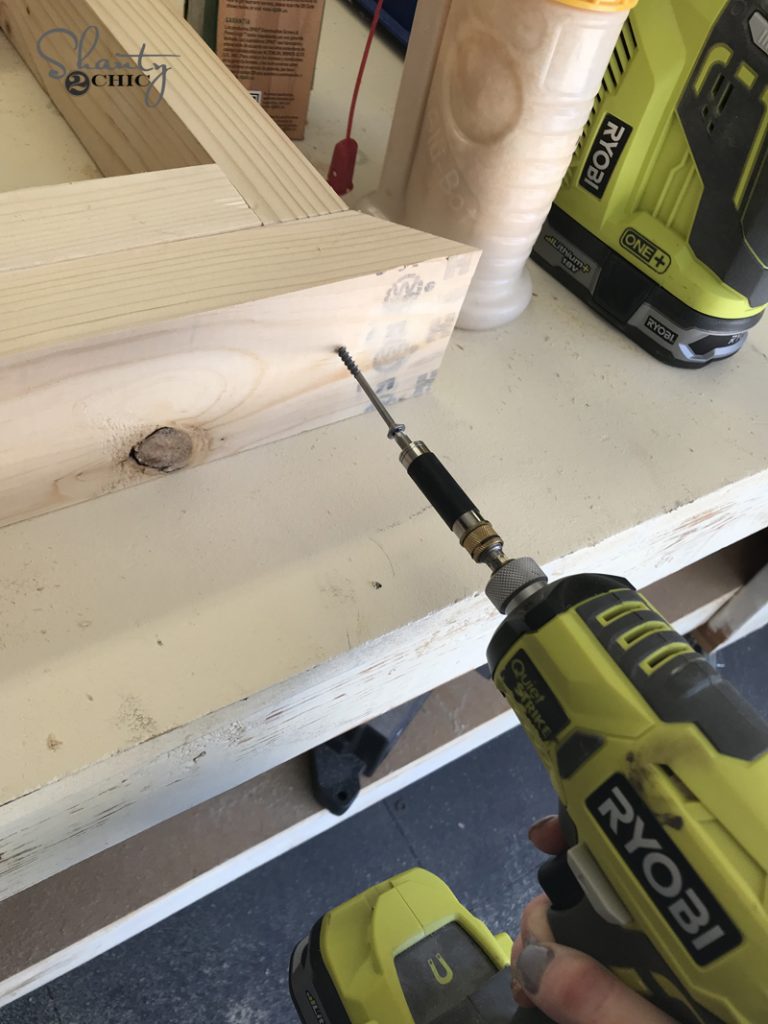
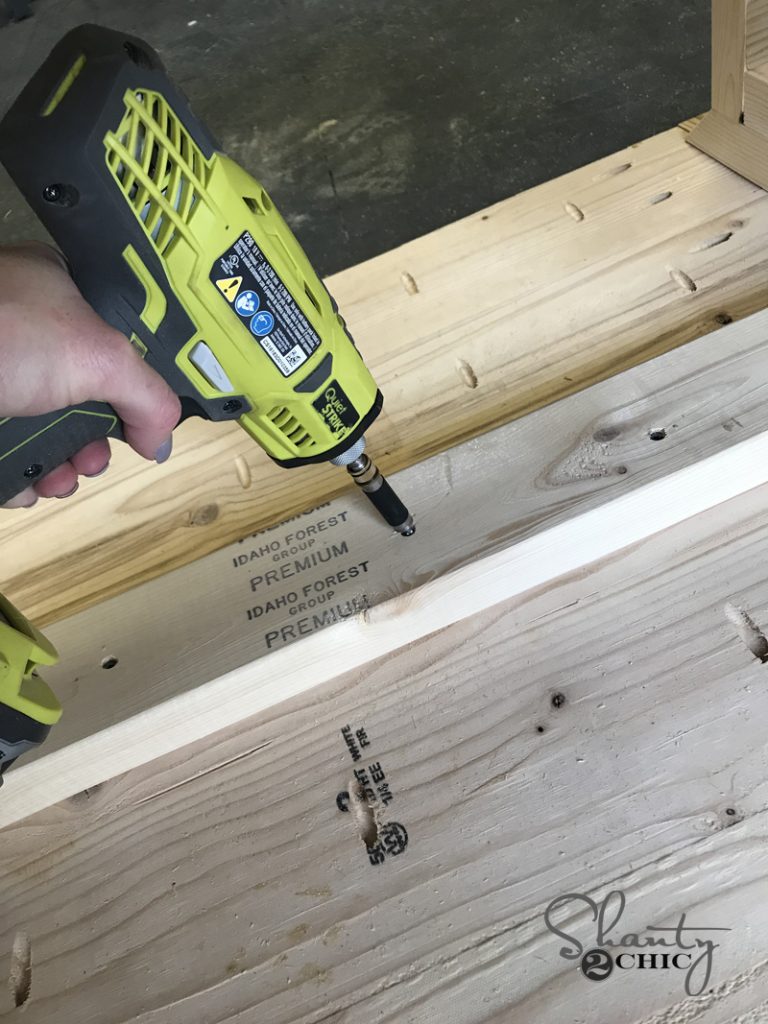
First, build two boxes for each leg assembly. These are attached using wood glue and 2.5” pocket hole screws through the horizontal boards and into the vertical boards. You want your pocket holes facing the outside of the box on this part because we will cover them with another board on the next part. We used our K5 Kreg Jig for this part. We get asked ALL the time which Kreg Jig to start with. We always suggest the K5. We use it on almost every build. You can find it HERE on Amazon!
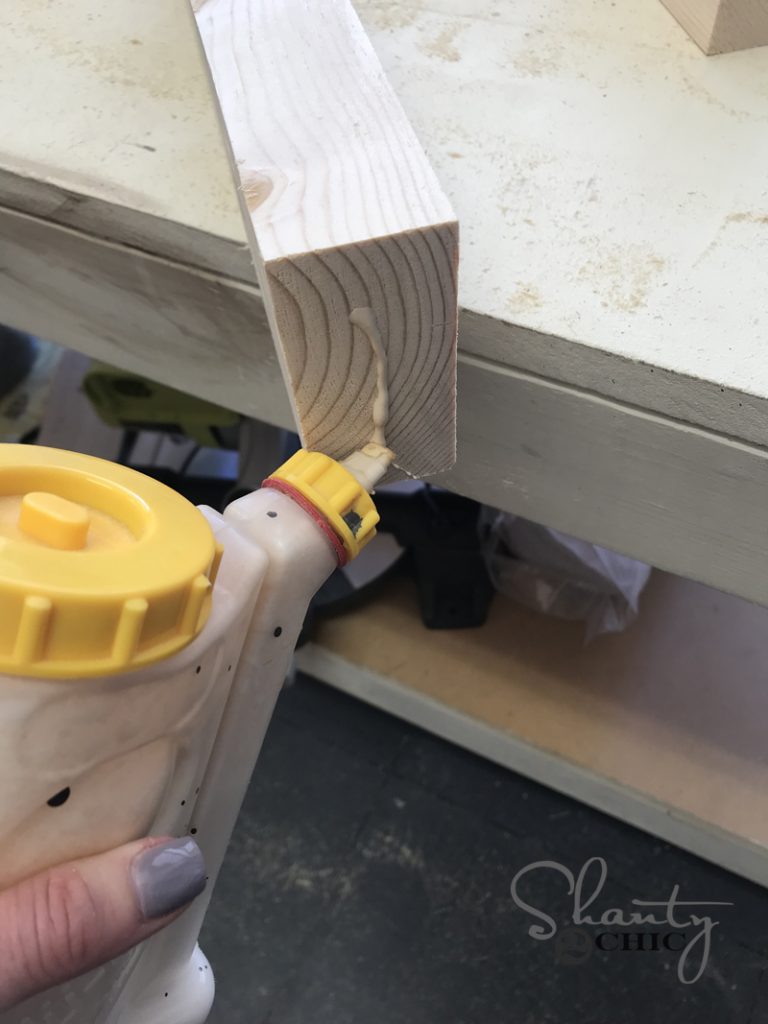
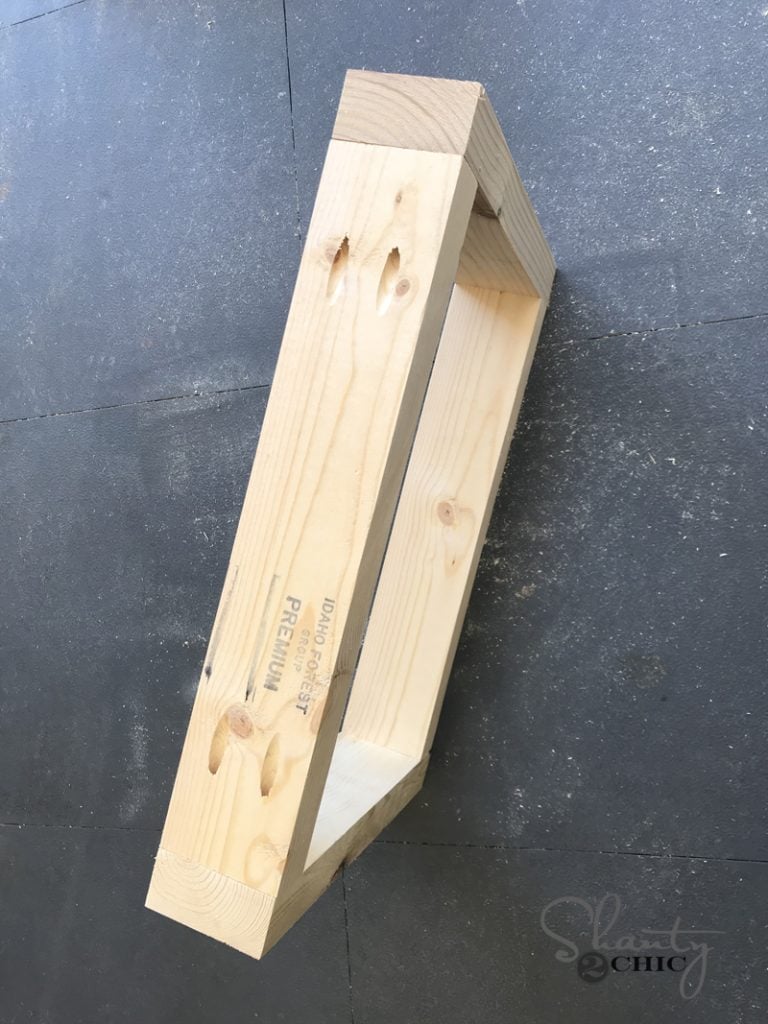
Now add the decorative pieces to the top and bottom. These edges are cut at a 45˚ angle and are attached to each assebly with wood glue and 2.5” wood screws through each decorative piece and into the leg assembly.
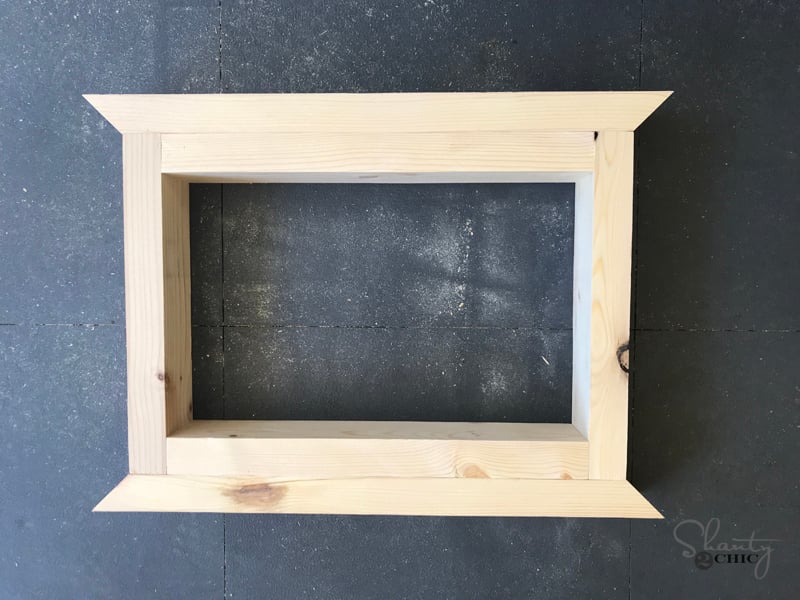
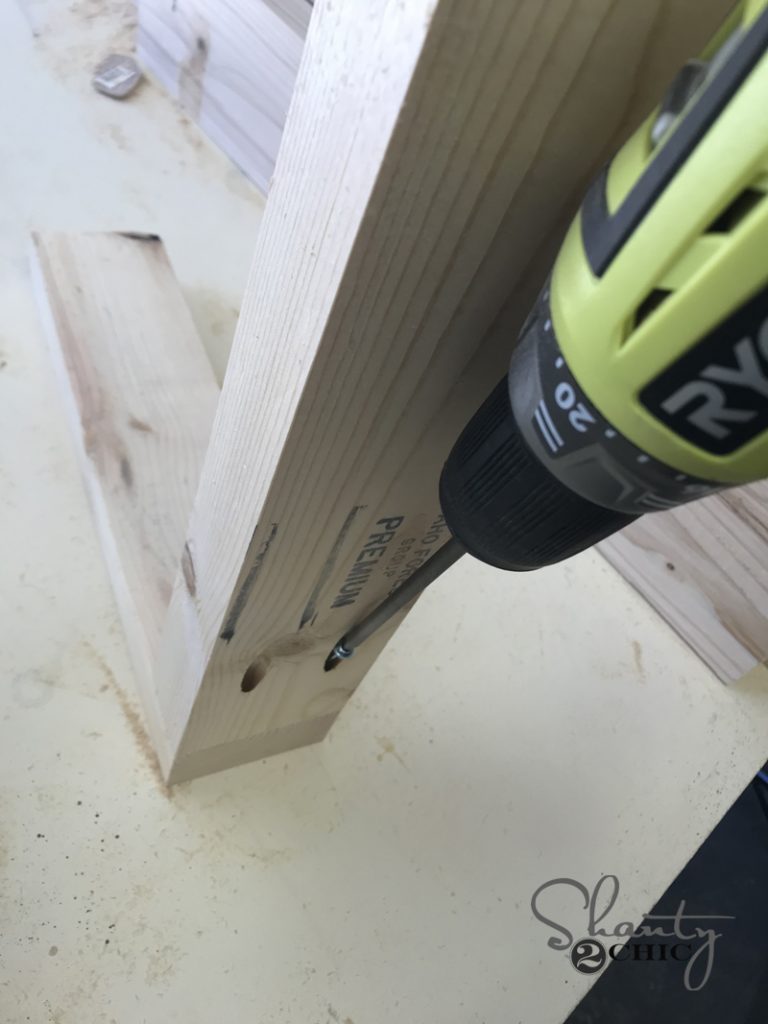
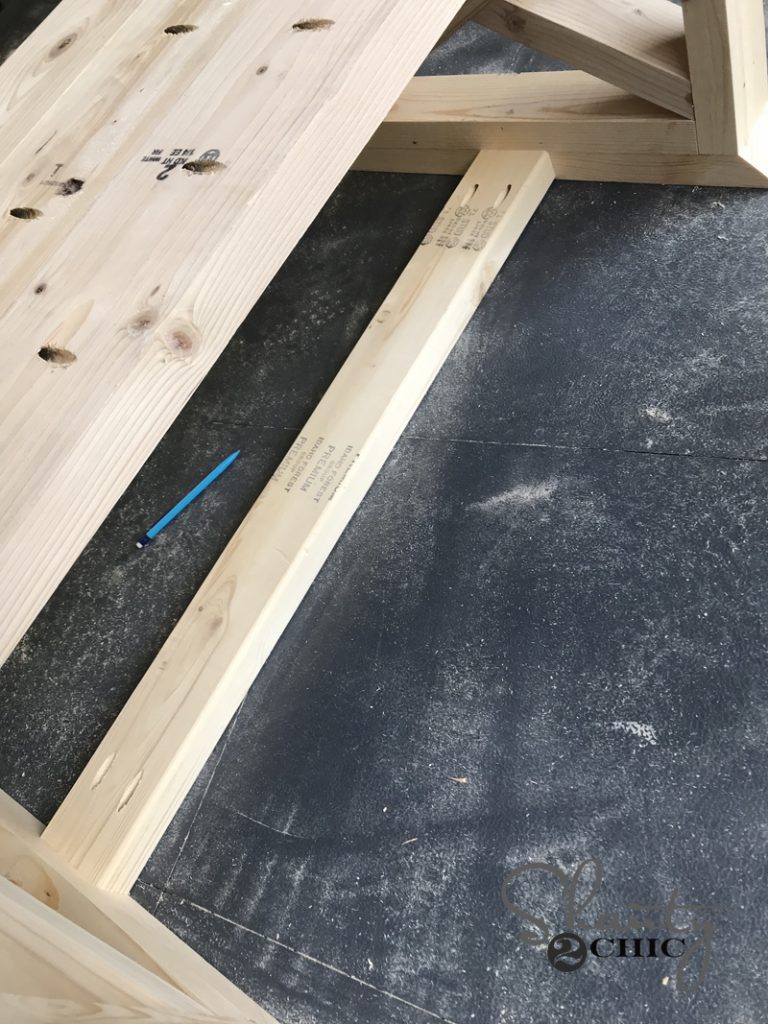
We cut the decorative x boards to fit on this part. Mark each board with your pencil and cut them to fit exact. You can check out the video if you have questions about this part! We walk you through it. Cut the diagonal pieces to fit first, then mark and attach them to each other using wood glue and nails. Then, fit them in the box and attach them with wood glue and nails through the box and into each end of the X piece.

Step 2: Building the Table Top
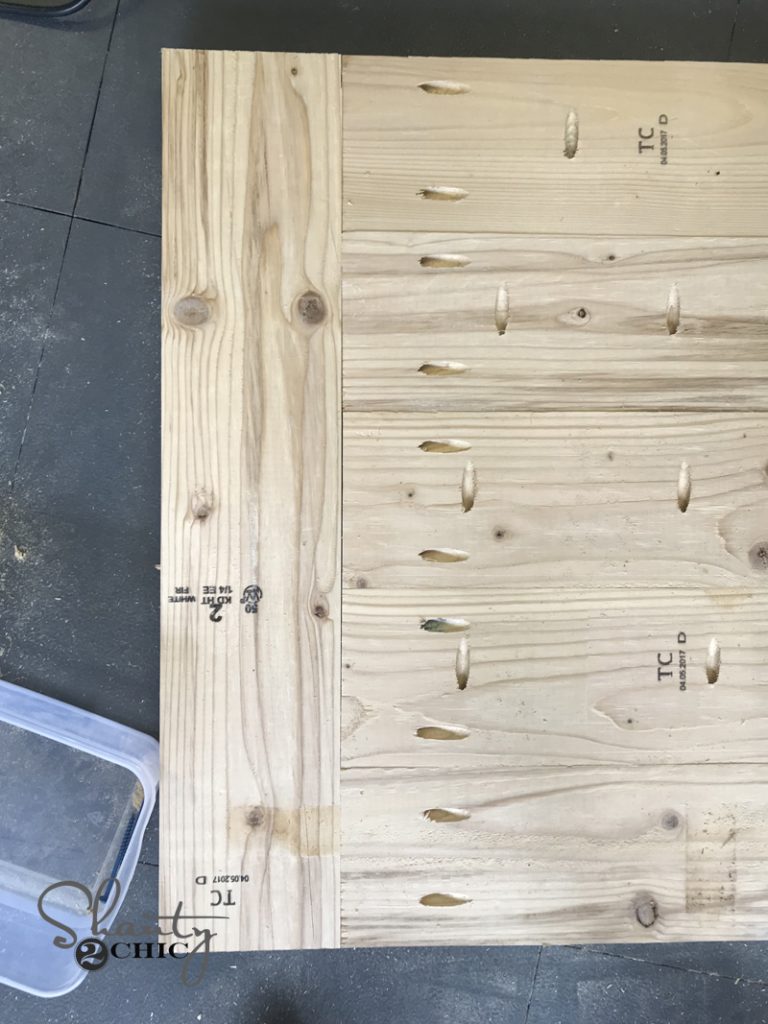
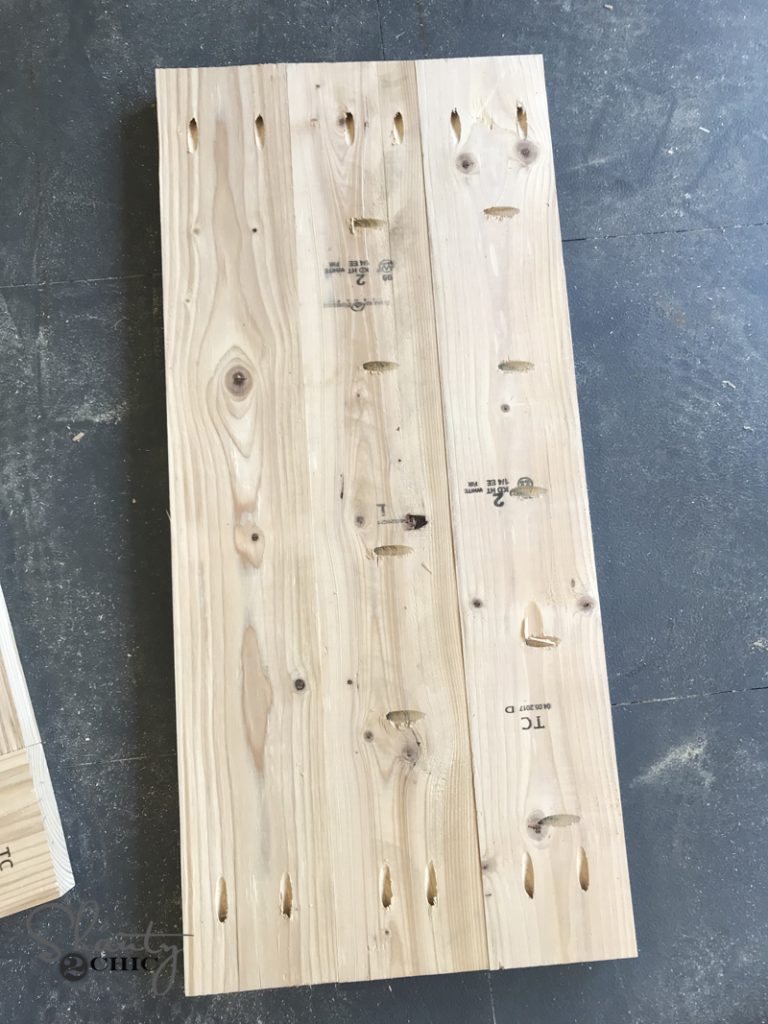
To build the table top, we used our Kreg Jig to create 1.5” pocket holes down one side of 4 of our 5 longer boards, and also at both ends of all 5 boards. Attach the 5 boards to each other first with 2.5“ pocket hole screws, and then attach the breadboards with 2.5” pocket hole screws.
Create the shelf assembly of the table the same way! Attach the three boards to each other using 2.5” pocket hole screws. Don’t forget to add the pocket holes on each end to attach this to the leg assembly later.
Step 3: Attaching the Runner
Now attach the horizontal runner that will go between each leg assembly. This is attached using wood glue and 2.5” pocket hole screws into each assembly. You will also attach the bottom shelf to both sides on this part. Make sure your pocket holes are facing down.
Step 4: Attaching the Table Top
Final step is attaching the top to the table sides! Line the top up evenly on the base. Set the top face down on the ground and attach the base through the horizintal runner using wood glue and 2.5” wood screws.. You can also add a few 2” nails through the top and into the bases.

Step 5: Staining the Rustic X Coffee Table
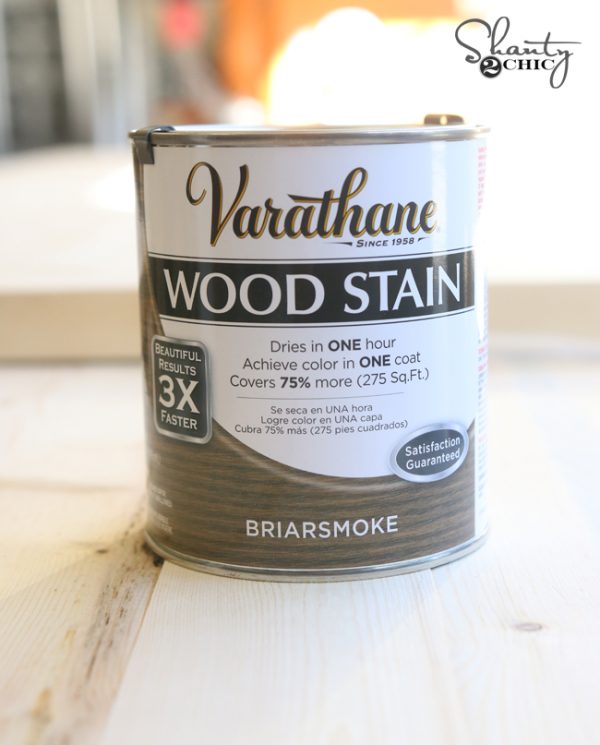
Once I finished the full assembly, I stained the table using Varathane Briarsmoke stain and I mixed it with half natural stain to lighten it up just a bit. I did a 50/50 mix. Just stir it really good. It’s my favorite stain color combination right now. You can find it HERE on Amazon.
I added the decorative hardware last. I found that at Hobby Lobby. This is a link to one of their corner pieces.
And here is my beautiful table all finished!
I found the glass vases HERE!
I found the flower stems HERE!
The tutorial for the sign can be found HERE!
The tutorial for the corner corbel can be found HERE!
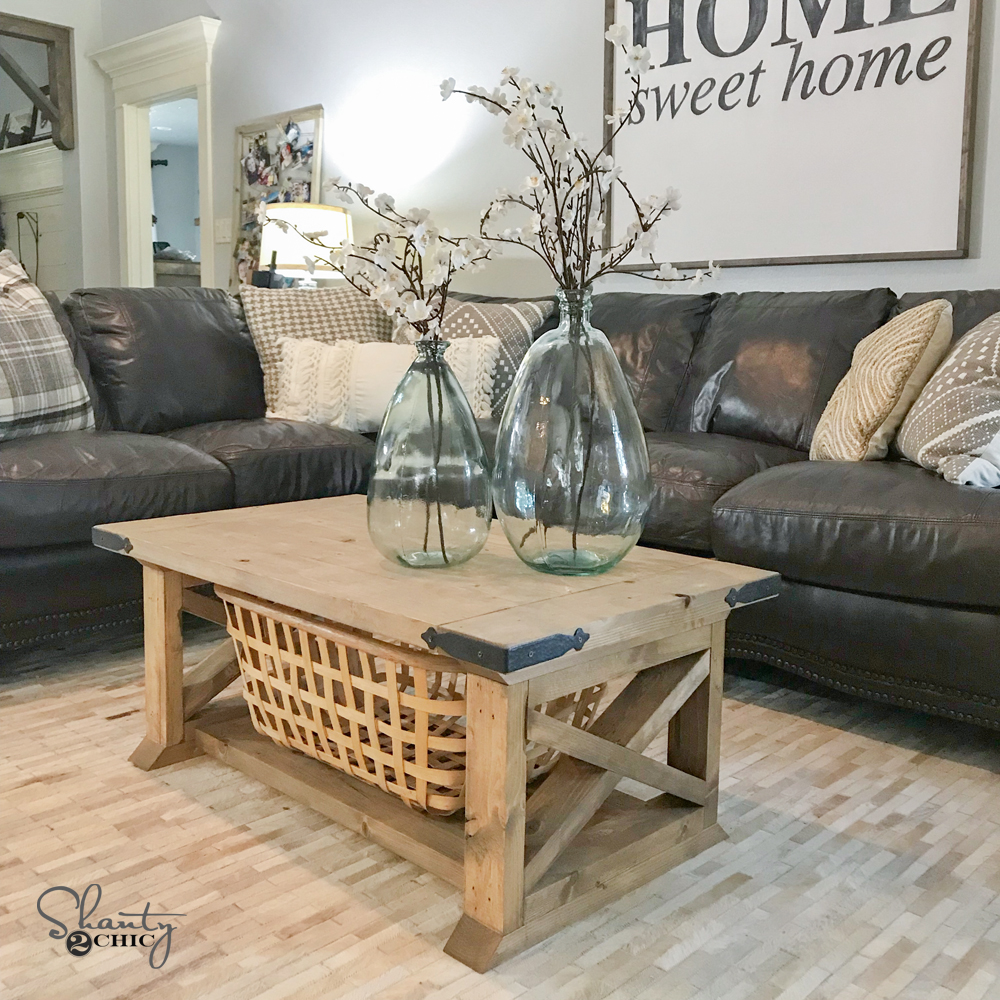
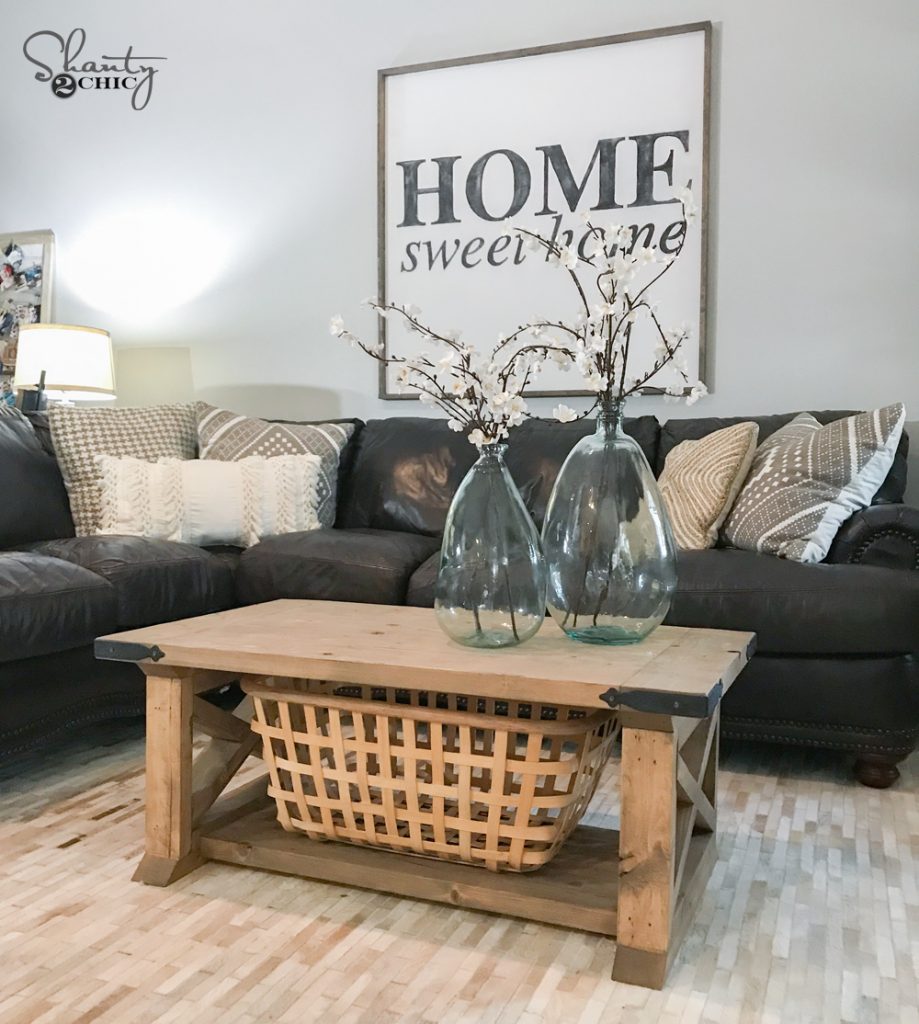
I LOVE how this one turned out! It’s the perfect mix of rustic and modern farmhouse design, the durability, with the framing lumber, is kids-friendly and you really can’t beat the price too! You can download and print the FREE PLANS HERE!


LOVE THIS!!!! Does anyone know where the basket underneath the table came from? I’d like to get something similar. Thank you!
Ikea
What is the final height and width.
I love the color and just want to verify how you got it. You mixed 50% natural premium Varathane (none fast drying) with 50% Varathane Briarsmoke (fast drying). Is this correct?
I used Gunstock stain and matte poly. It looks gorgeous.
I need some help with the x’s! I can not get the diagnol cuts right.
How do I get the material and cut sheet?
It’s on the free printable plans. There is a link that says click here, towards the top of the page.
Found it!
Thanks you guys, love the channel!
Hi! What are the demensions for this table?! Thanks!
How do I get the material and cut sheet?
It’s on the free printable plans. There is a link that says click here, towards the top of the page.
Help! I feel like I’m going crazy, what angle is your mitre saw set at to do the cross pieces?! I just wasted 3 2×4’s trying to get them to look right. I did the trick with pencil and everything but they look terrible and don’t line up!
I can’t get it either ?
i cant either!!! there has to be a trick that we are missing
Hi Lorie! You can use an angle finder to get the correct angles on the mitered X’s…. Measure each one after you mark them with a pencil because you will have two different readings with slight variances in each of them. I use a digital angle finder from HD, Husky brand & it works great! Best of luck to you!!
Help! I feel like I’m going crazy, what angle is your mitre saw set at to do the cross pieces?! I just wasted 3 2×4’s trying to get them to look right. I did the trick with pencil and everything but they look terrible and don’t line up!
You have to line up the crosses mark them and cut
And when you cut leave the pencil marks on there so you get a more accurate dimension.
What kind of wood do you use and from where? Been going to home depot and using the framing lumber which splinters like crazy no matter how I cut it. Any suggestions??
What kind of wood do you use and from where? Been going to home depot and using the framing lumber which splinters like crazy no matter how I cut it. Any suggestions??
Could you sexualize your comments anymore? So bad!
Great job, ladies. I’m saving this to build later. Thanks for all your help and ideas.
Great job, ladies. I’m saving this to build later. Thanks for all your help and ideas.
I love, love, love the table! I’m not sure what I’m doing wrong but whenever I have a piece where I need to attach boards together for a table top with 2.5 inch pocket holes and 1.5 inch ph scewsI have a problem with the screws coming through the wood and showing up on the top. Help please.
You may need to check your settings on your jig. Make sure it corresponds with the thickness of the wood you are using.