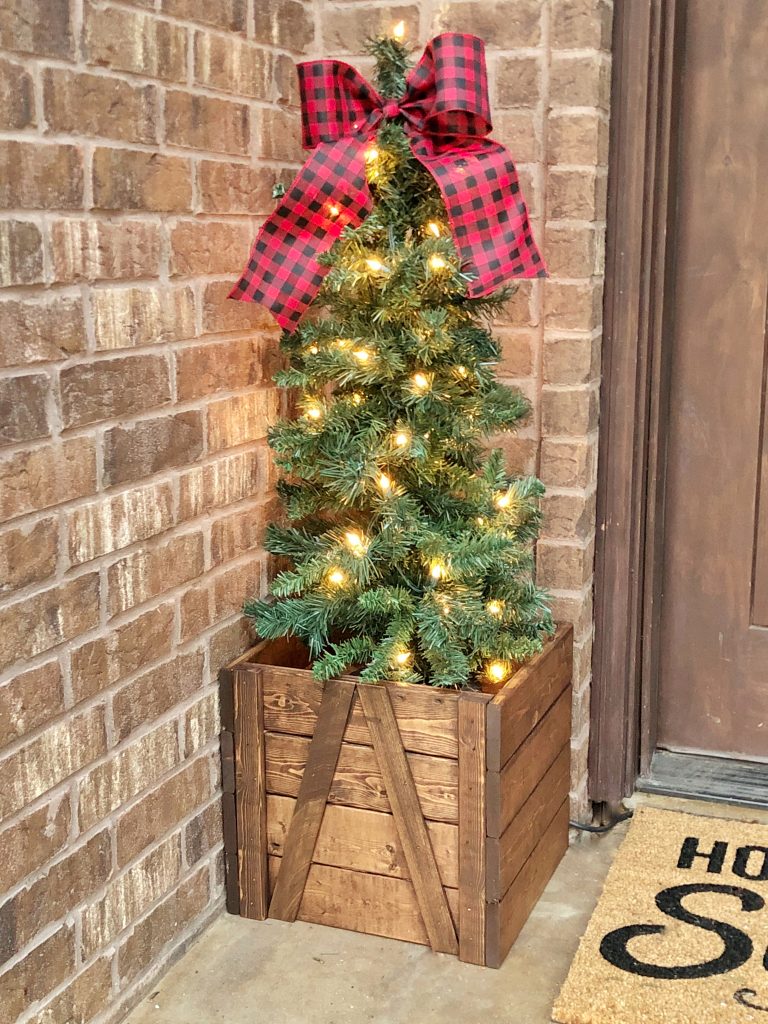
Learn how to build a DIY Farmhouse Porch Planter for less than $15 with just a few boards and a basic tools! These are a great way to get your front porch holiday ready and a great transitional piece through out the entire year!
I love getting my front door dressed up for Christmas! This year I wanted to take my boring porch trees up a notch, so I designed some really cute DIY $15 Farmhouse Porch Planters using furring strips and power tools! How cute are these??
Table of Contents
How to Build a DIY Porch Planter
Supplies
- 3 – 1×4 Furring Strip
- 1 – 1×2 Furring Strip
- 1 – 2×4@45″
- 1 – 1/4″x2x4′ Craft Board
- Wood Glue
- 1 1/4″ Brad Nails
- 3/4″ Brad Nails
Tools
- Miter Saw
- Brad Nailer
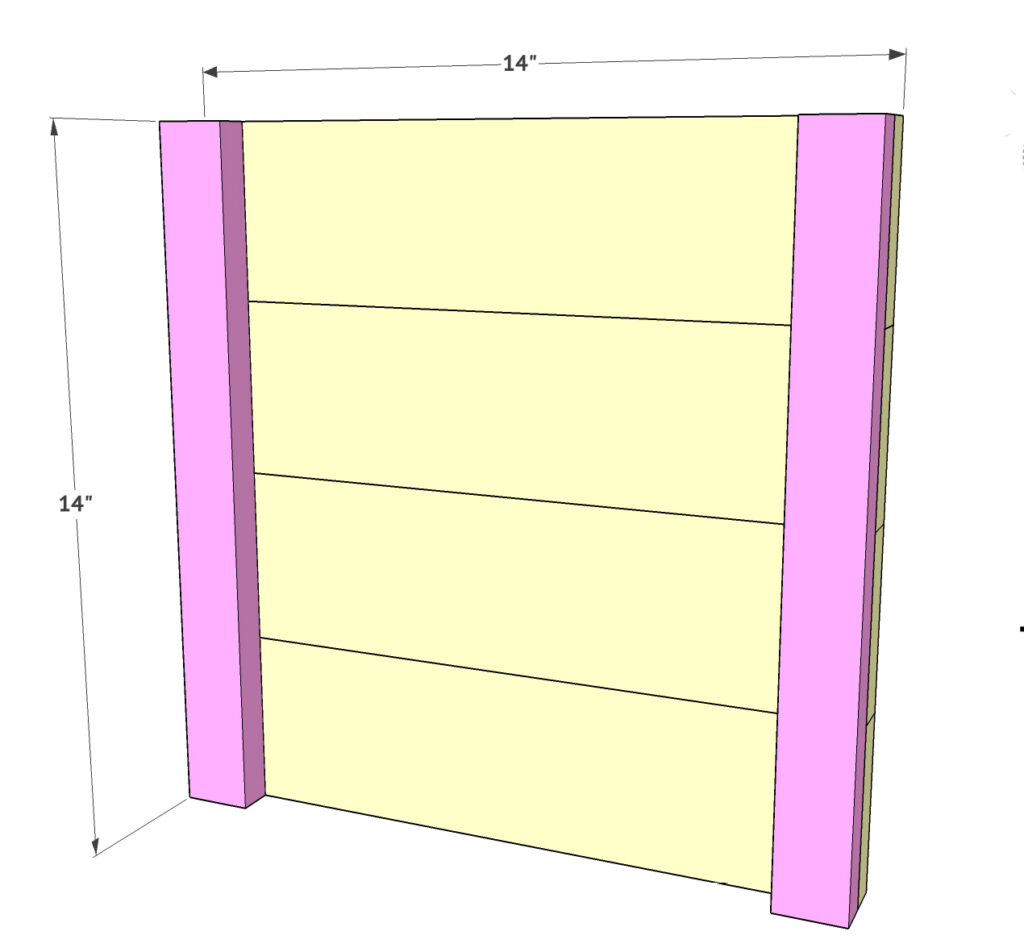
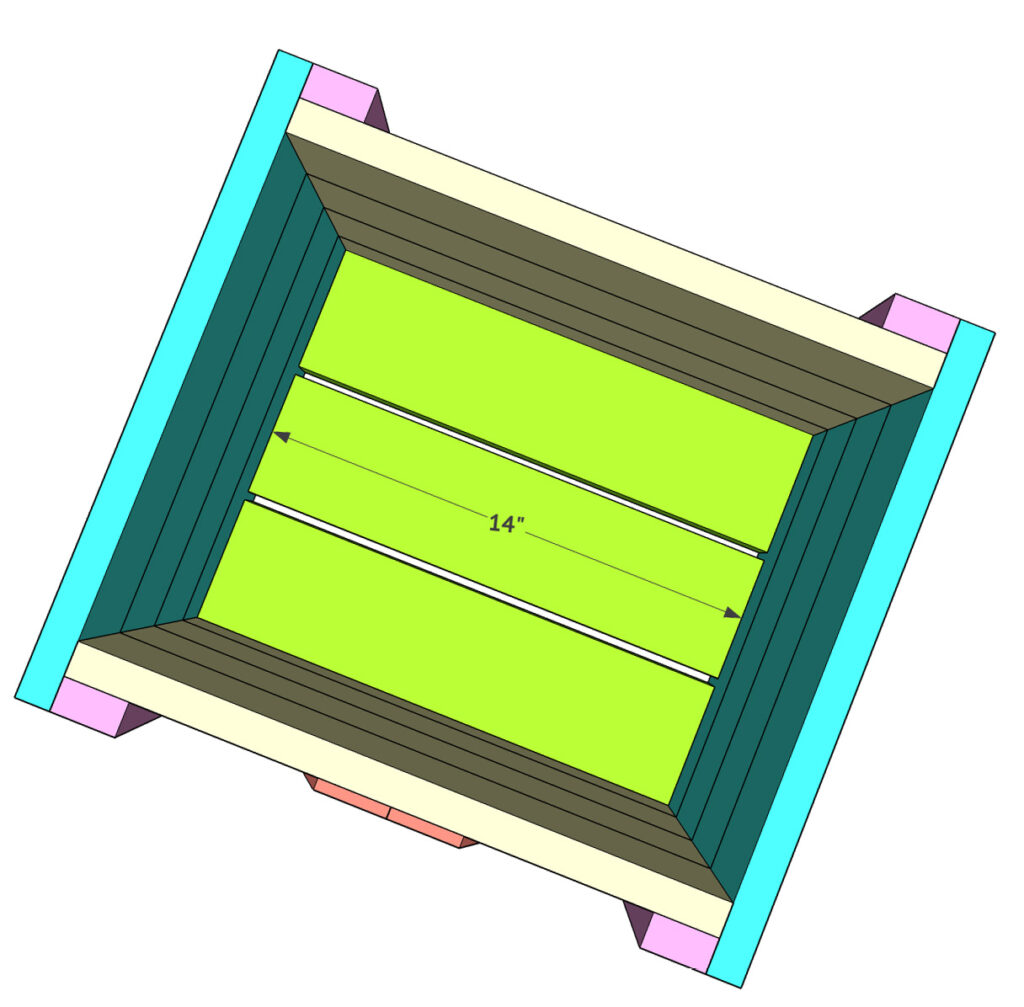
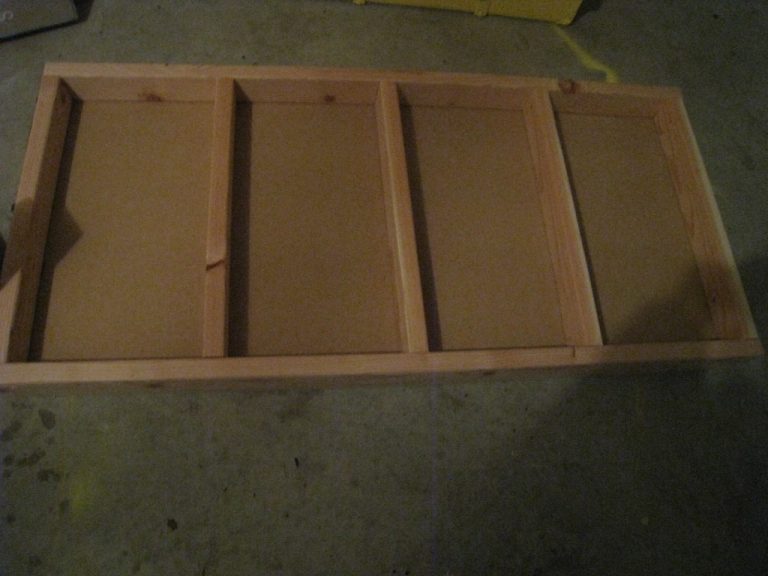
Step 1: Building the Sides of the Planter
Lay four of the 1×4 side by side. Run a line of glue down one side of two 1×2 boards and place the flush on each end like so. Attach the 1×2 boards to the 1×4 boards with the nailer and 1.25″ brad nails. Build two of these.
Step 2: Adding the Trim to the Sides of the Planter Box
Now add the horizontal trim to one of these sides. You can add it to both sides if both will be seen. We like to line the boards up directly on this part and mark where the cut will be to get the most exact fit. Attach these boards using wood glue and 3/4″ brad nails.
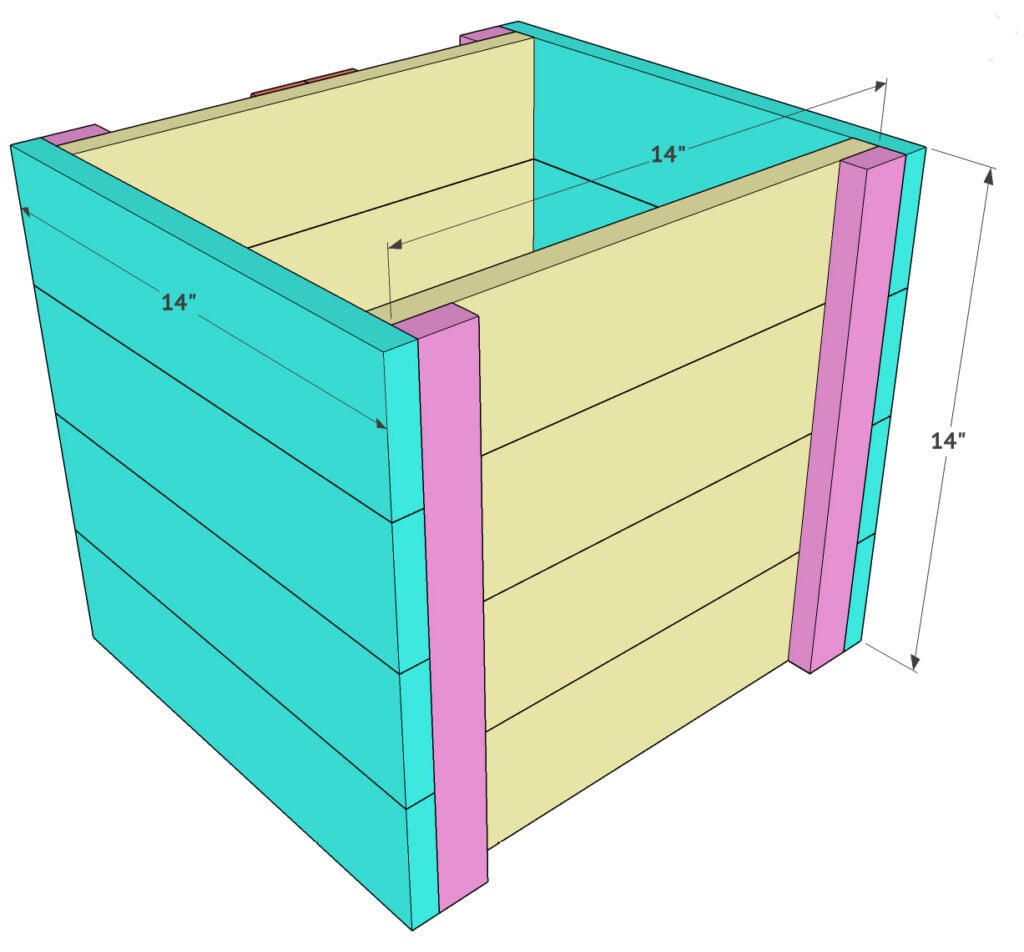
Step 3: Assembling the Frame
Add a line of wood glue on both ends of one of your side pieces and attach each side plank to it. They will line up side by side and flush with the sides you have already built. Attach the side boards using wood glue and 1.25″ brad nails.
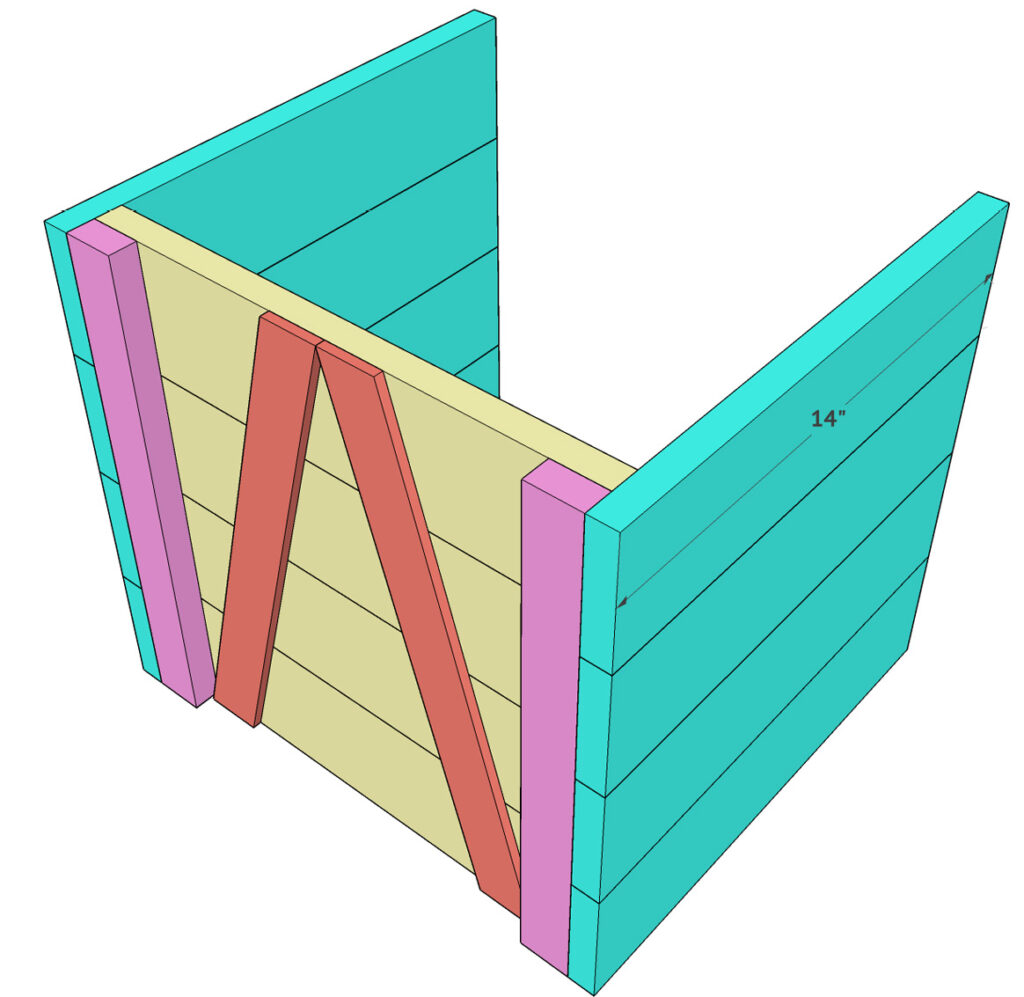
Now attach the other assembly you built in the first step the same way. Make sure to use wood glue in between the joints on the part and attach everything using 1.25″ brad nails.
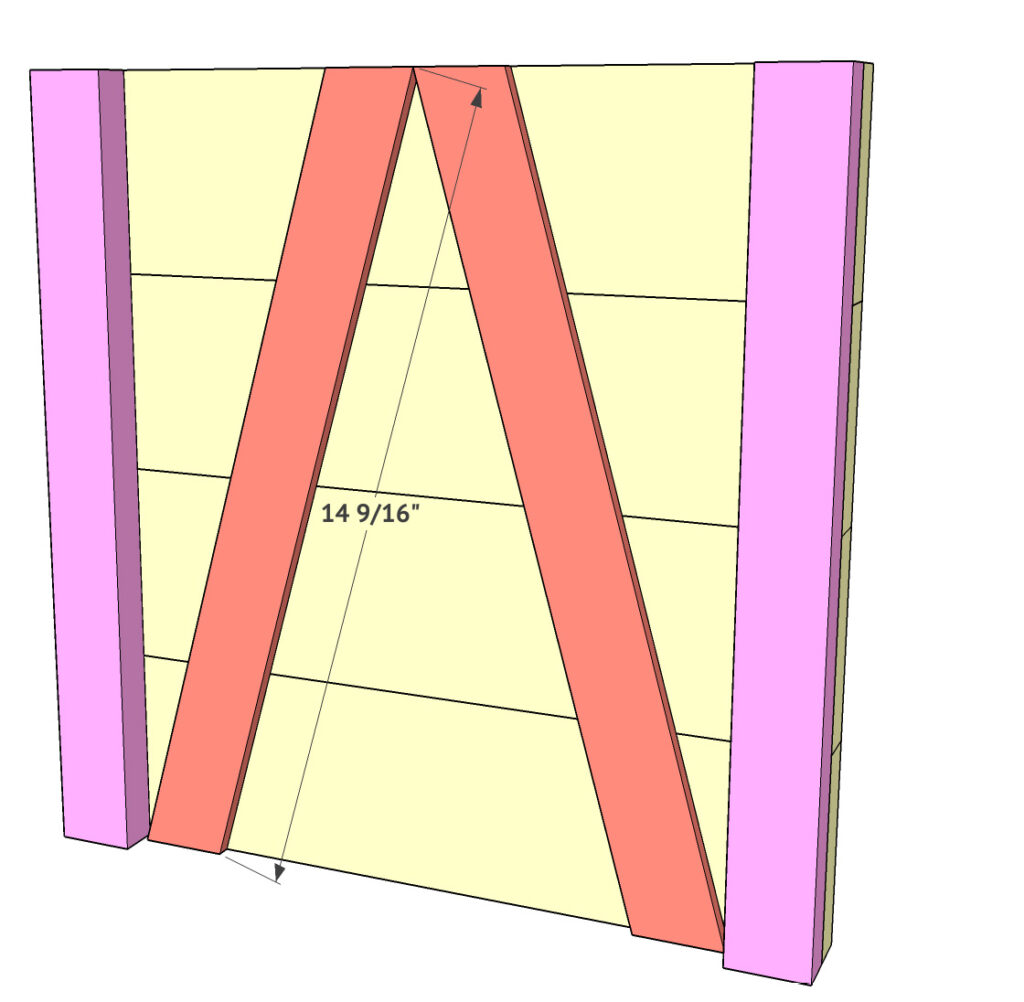
Step 4: Adding the Supports to the Bottom of the Box
The final step is attaching the supports that will go inside the box. I used scrap 2×4 in the plans, but I had scrap 2×6 that i used on my planters. Really, any 2x material will work on this part, so put your scrap pile to use! Fit each support board in place flush with the base of the planter. Attach them with wood glue and 1.25″ brad nails through the sides and into each 2x board.
Make sure to share your finished planters with us! Just add #shanty2chic or tag us in your social post so we can share them!
CLICK HERE FOR THE FREE Porch Planter PLANS!!!
Check out some of our other Holiday Projects with Free Plans

Make sure to follow us on our social media channels so you don’t miss another project!


What Christmas tree or size tree did you use that fits in the box?
Thinking of making something similar to this for around the Christmas tree. Something a little shorter with a faux bottom probably. Do you have plan for that? I’m off to search for some!! Thanks for the inspiration!
The link to the plans isn’t working 🙁
On Ryobi’s website, they don’t list how long the boards are to be cut for this size of planter.
Will the furnitute be made as well as your work or substandard at the factory? You’ve put extra care in all your work; i would be disappointed if it was not up to your expectations in the construction.
Sandy B, Romeo,MI