As promised, I am back with the how-to and free plans for my DIY Barn Door Vent Hood! If you missed my kitchen tour, you can watch it here! Don’t forget to download the FREE Plans – found at the end of this post and follow along with the step-by-step tutorial below!
Note: I based the measurements off of the dimensions of my cabinets. Use the plans as a go-by but make sure to modify based on your own cabinet dimensions.
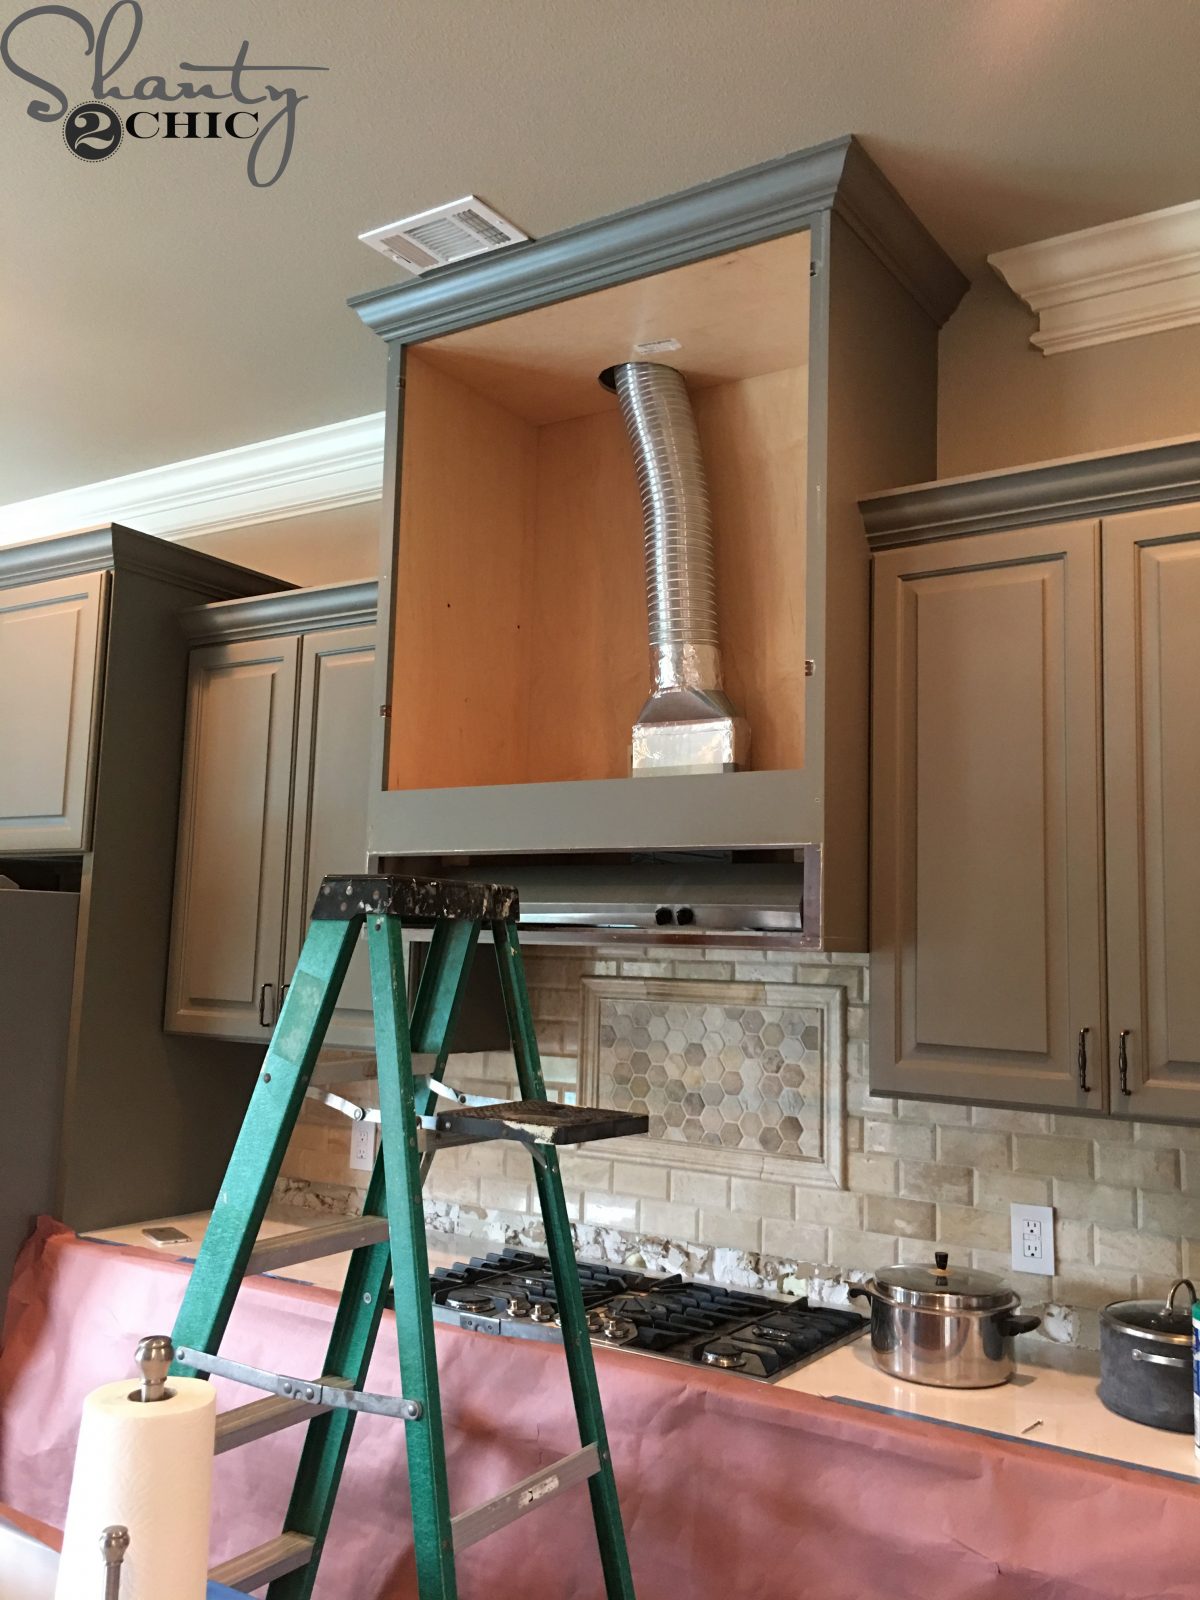
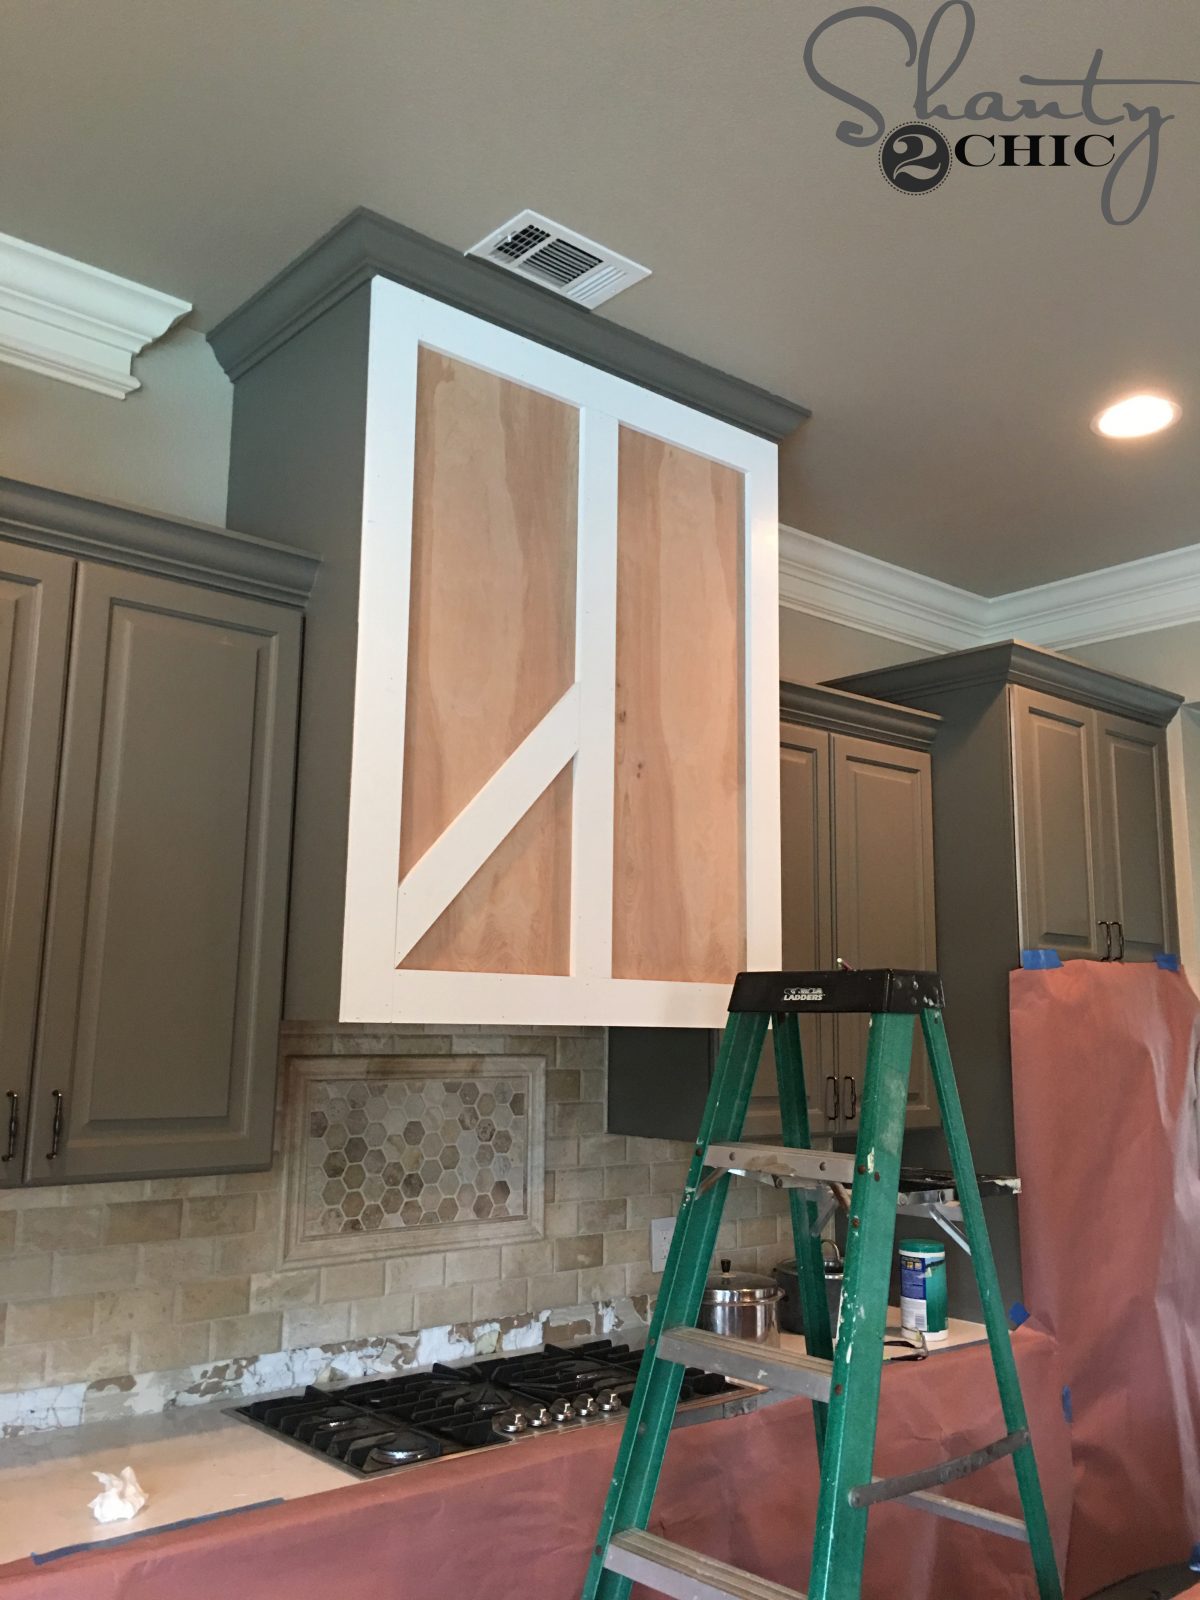
My first step was to remove the cabinet doors. I did save the doors in case I want them back one day!
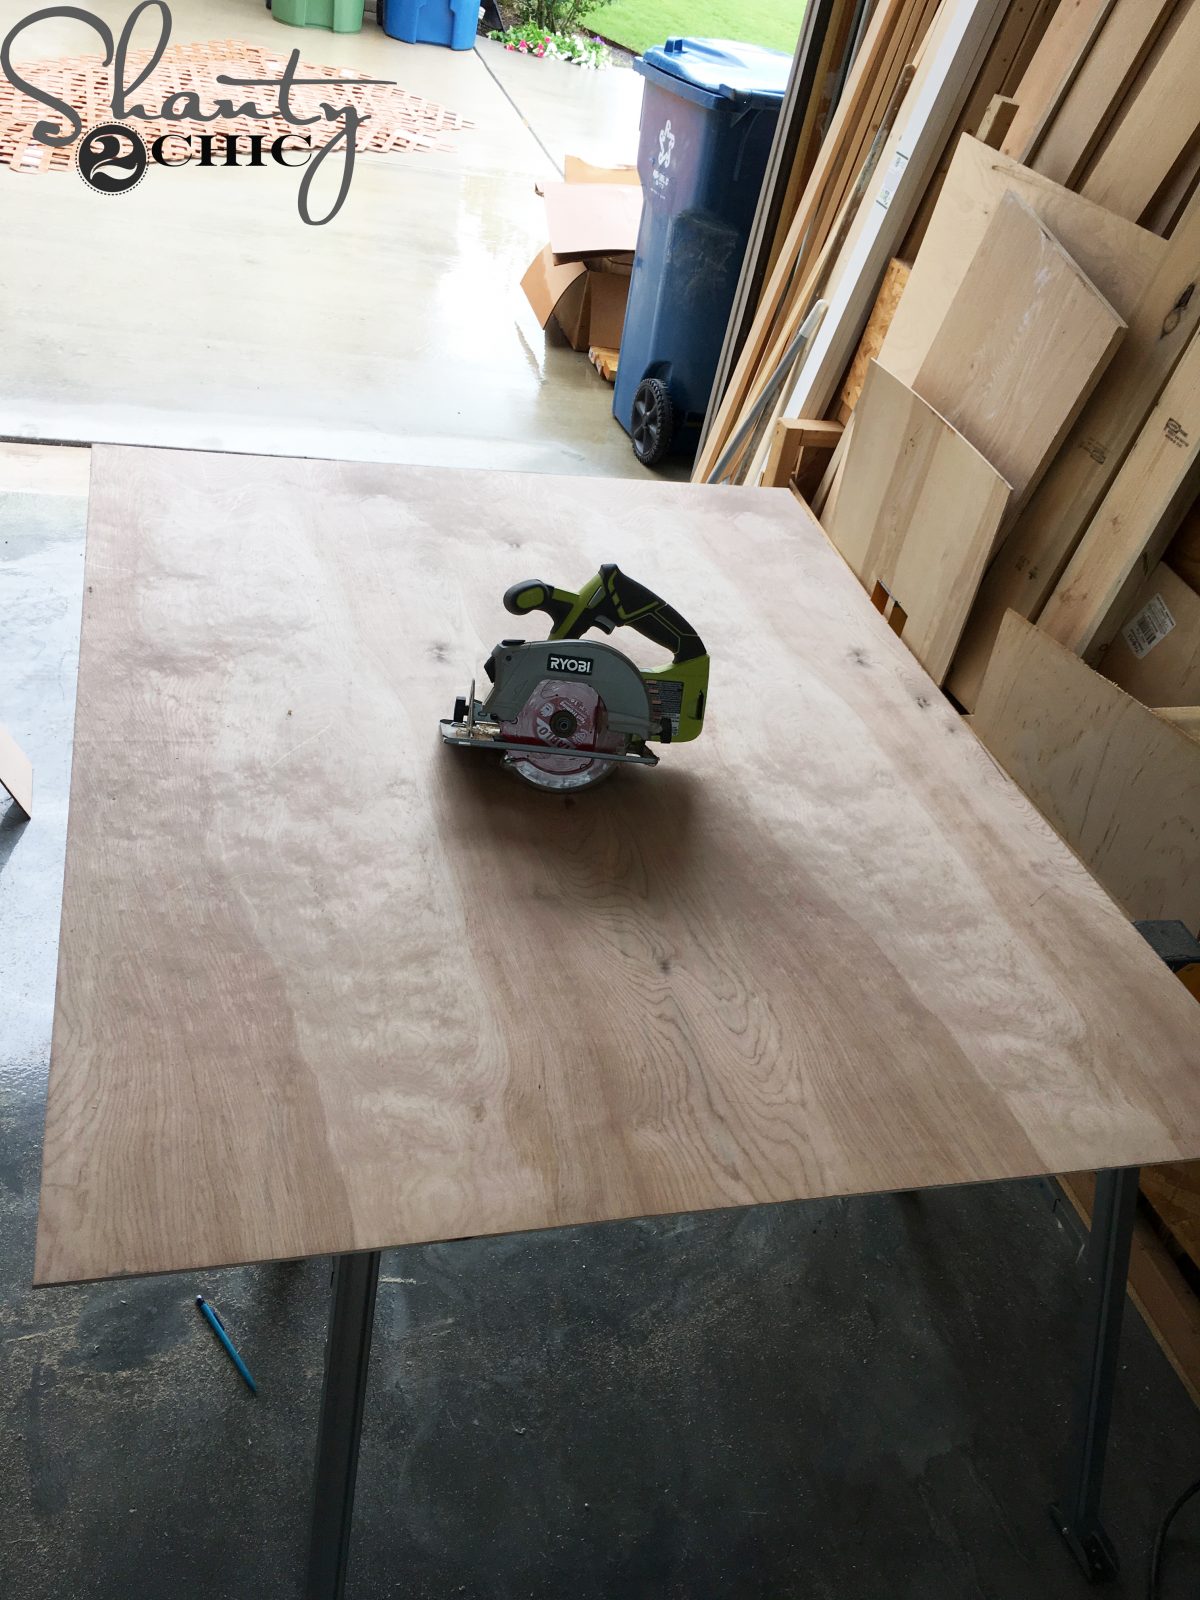
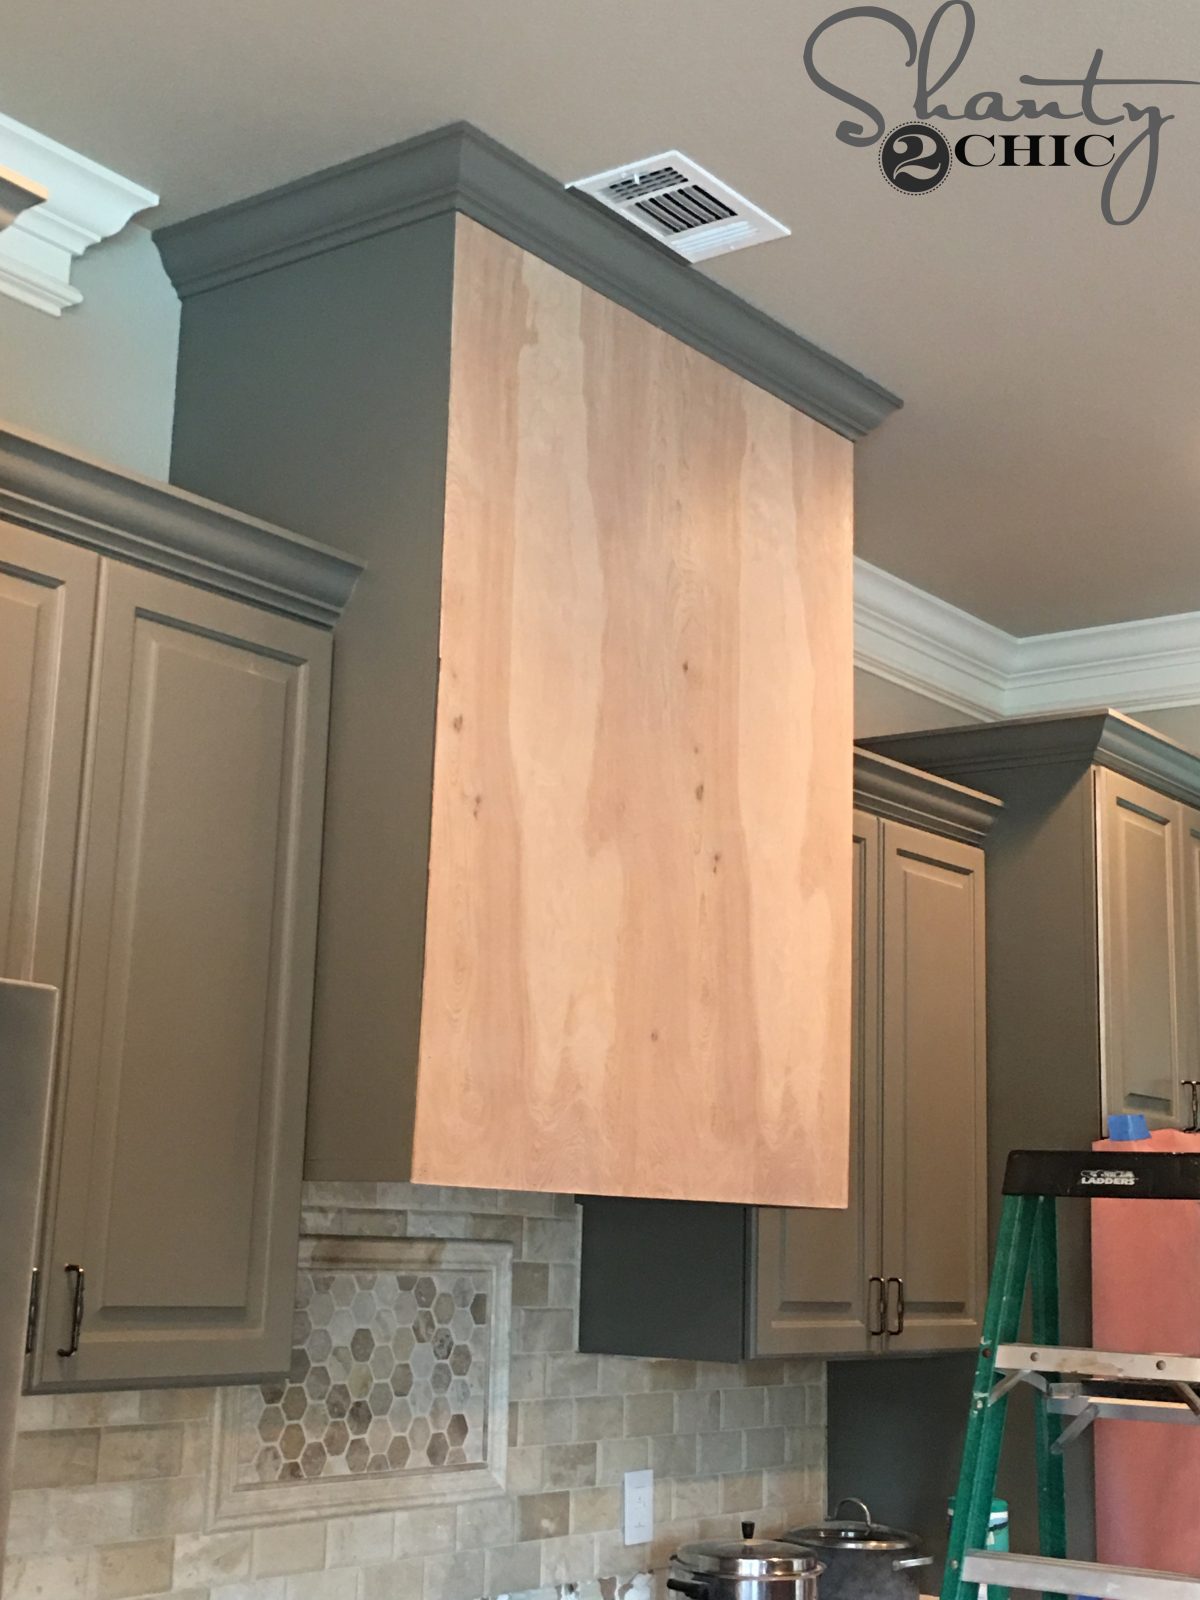
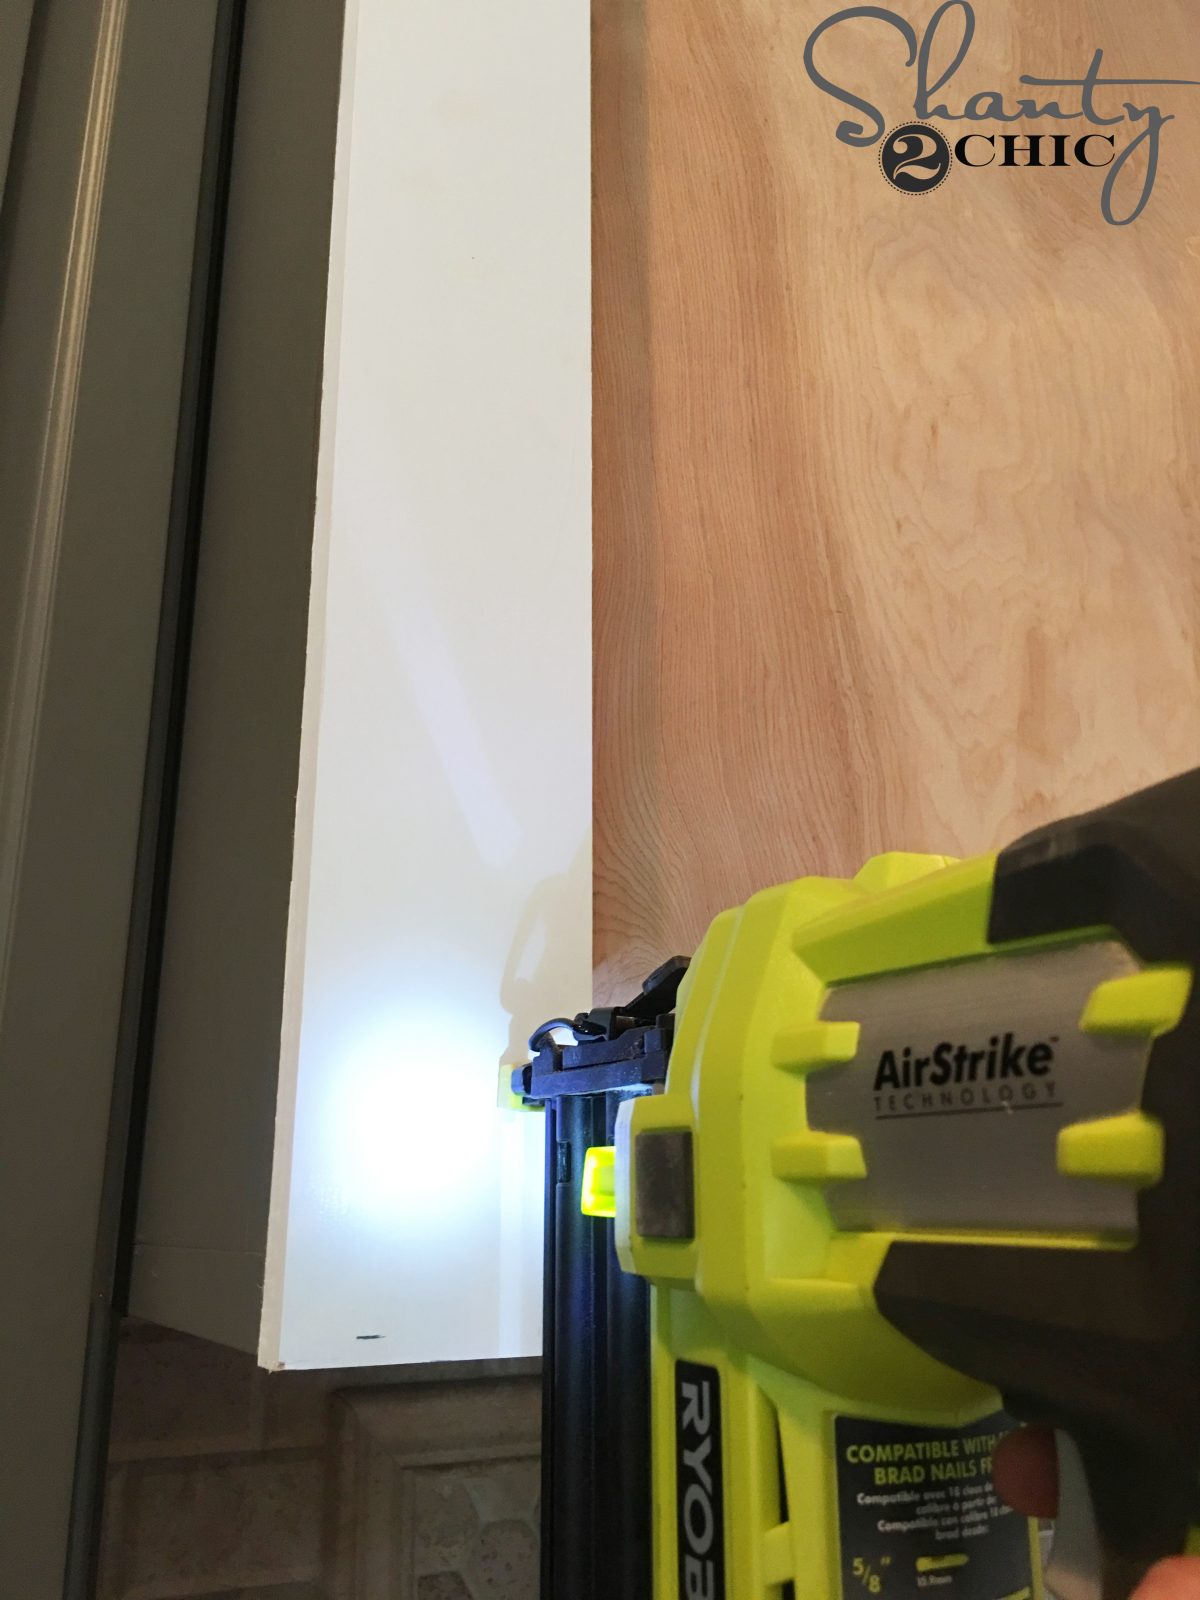
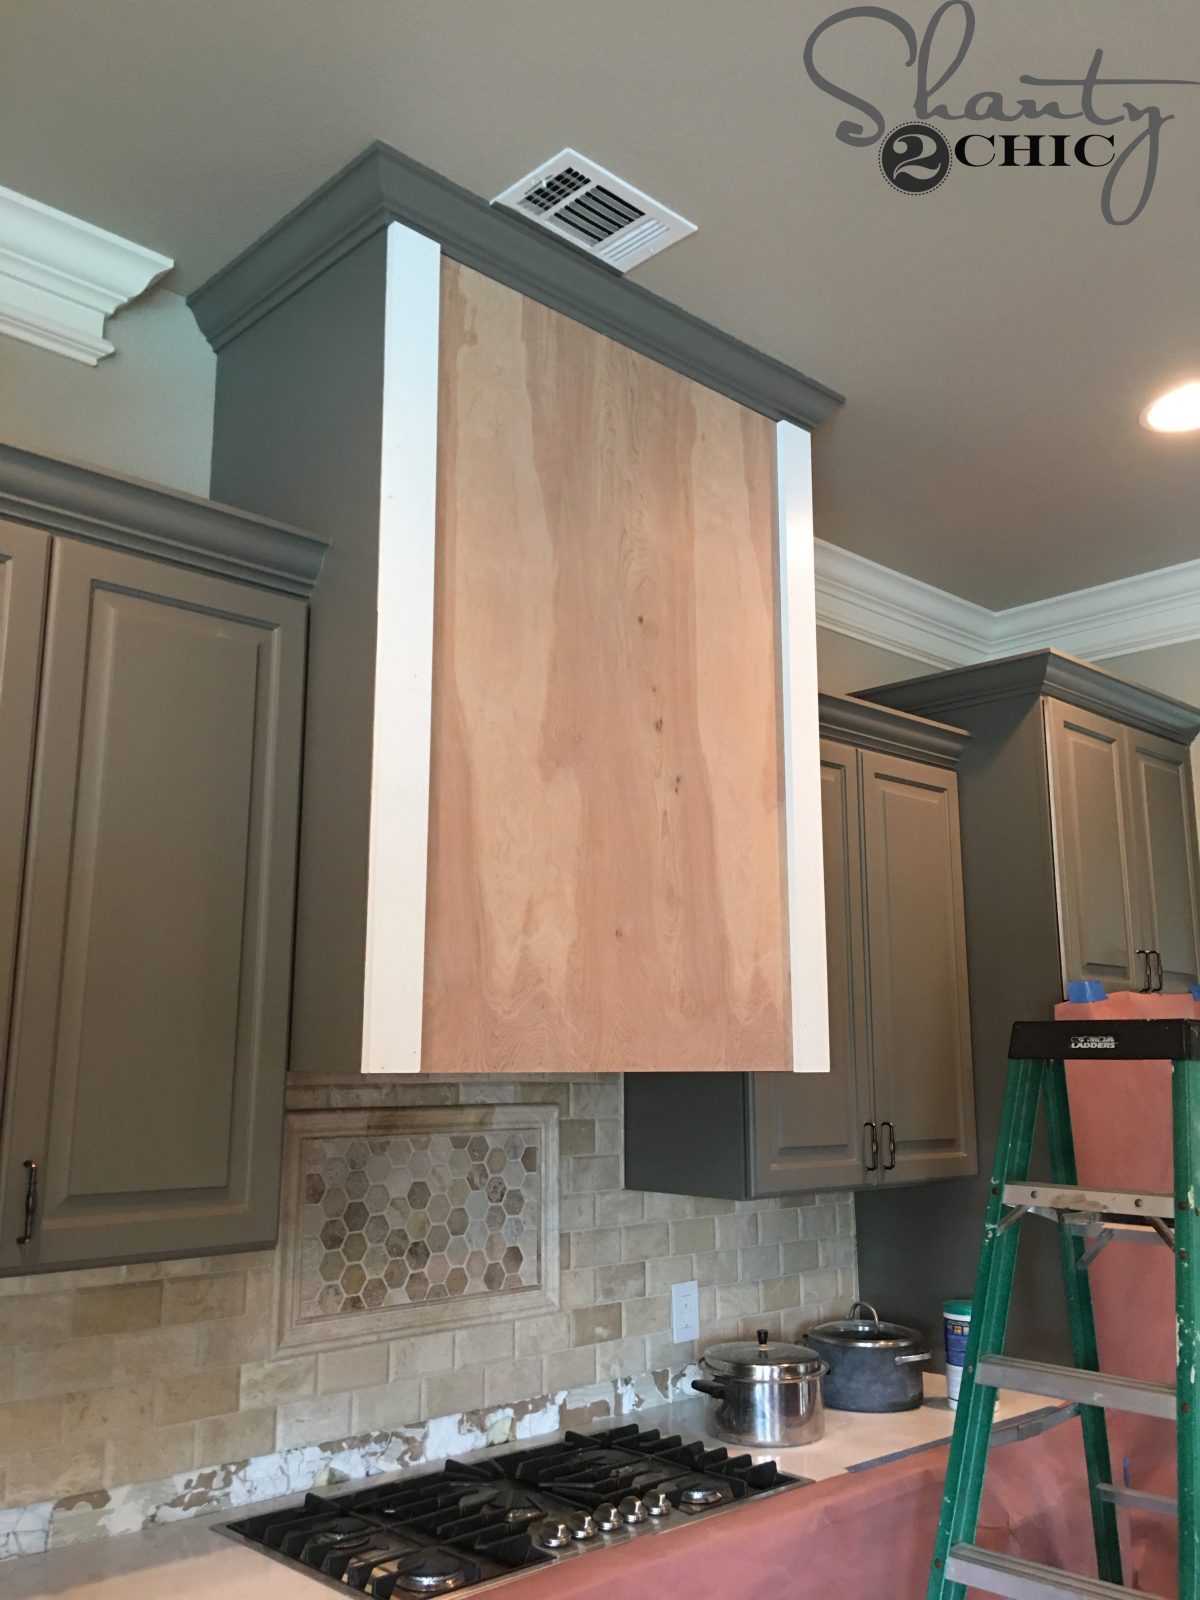
Then, I cut a 1/4″ sheet of hardwood plywood to fit the face frame of my cabinet. I used my Ryobi circular saw to make the cuts but you can have your hardware store cut this piece down for you.
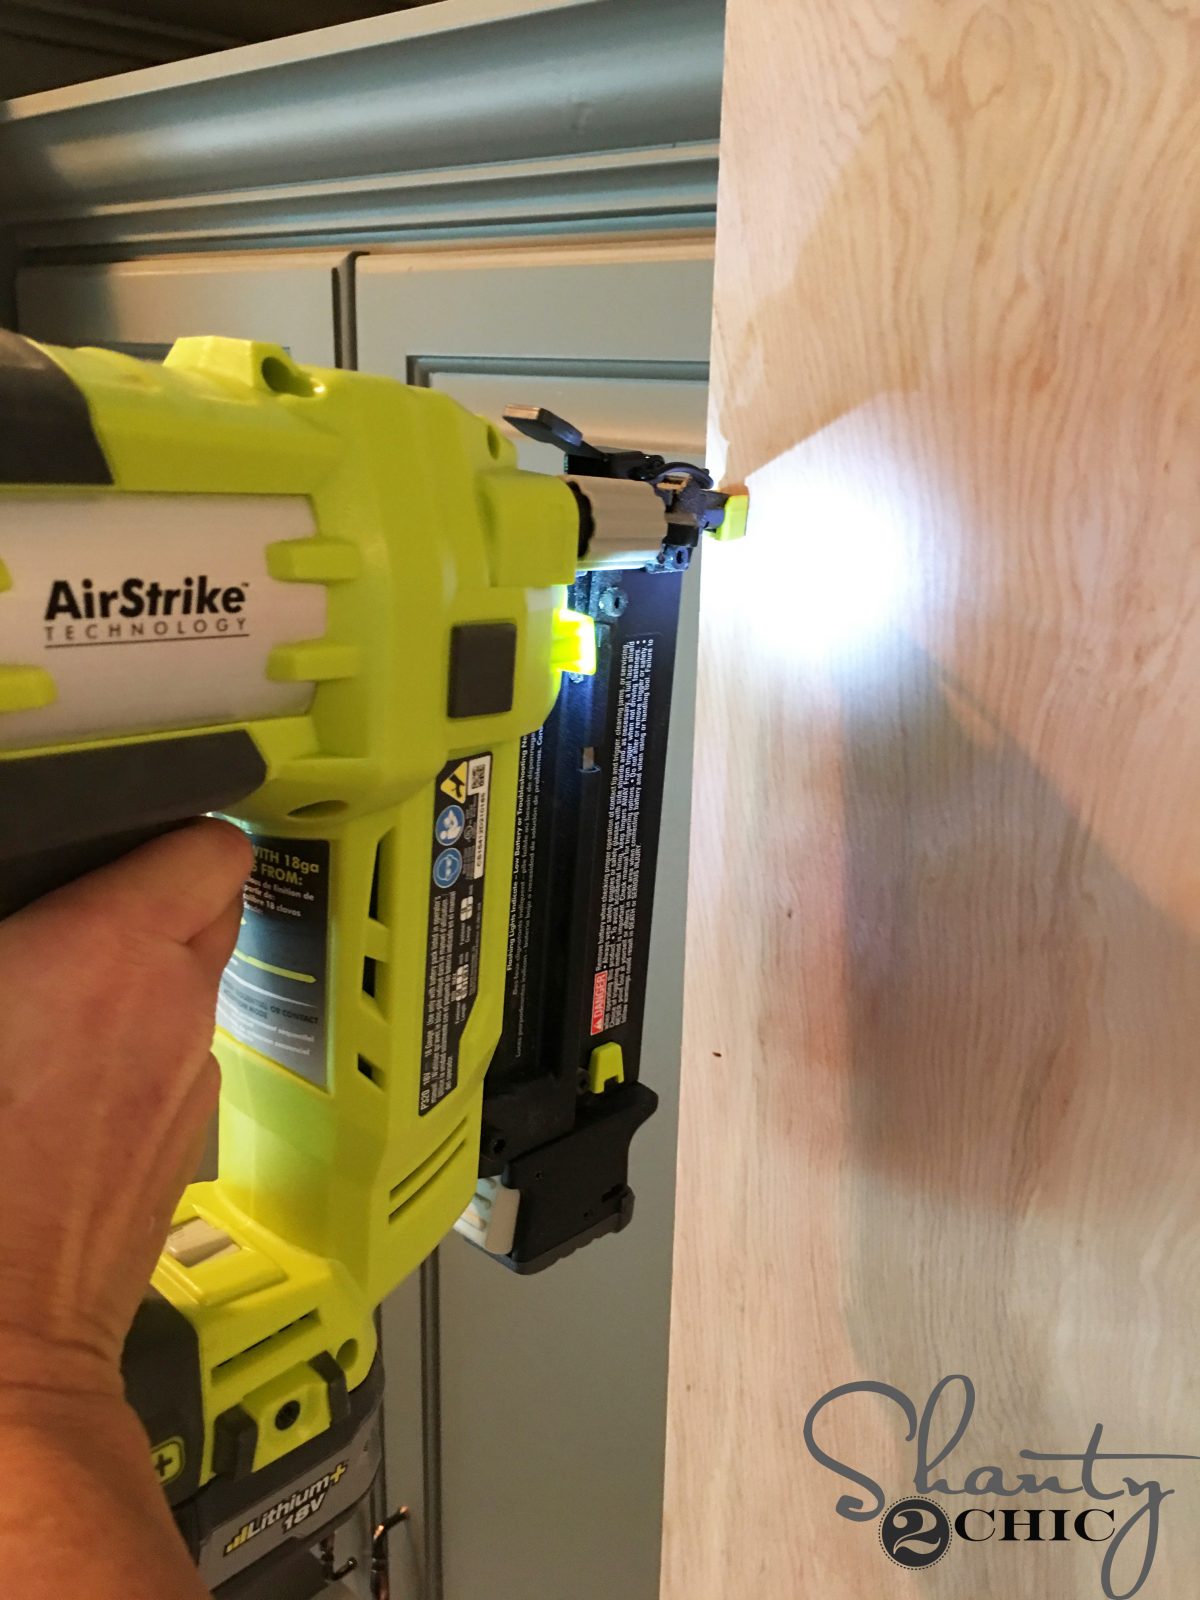
I attached the plywood to the front of the cabinet with 1″ brad nails and wood glue.
Time for the trim!
I cut primed 1×4 MDF boards to fit the length of the cabinet. You can use 1×4 common boards too (if you are staining. I attached the 1×4 to the cabinet with 1 1/4″ brad nails and wood glue.
The 1×4 should be flush with the edges of the plywood.
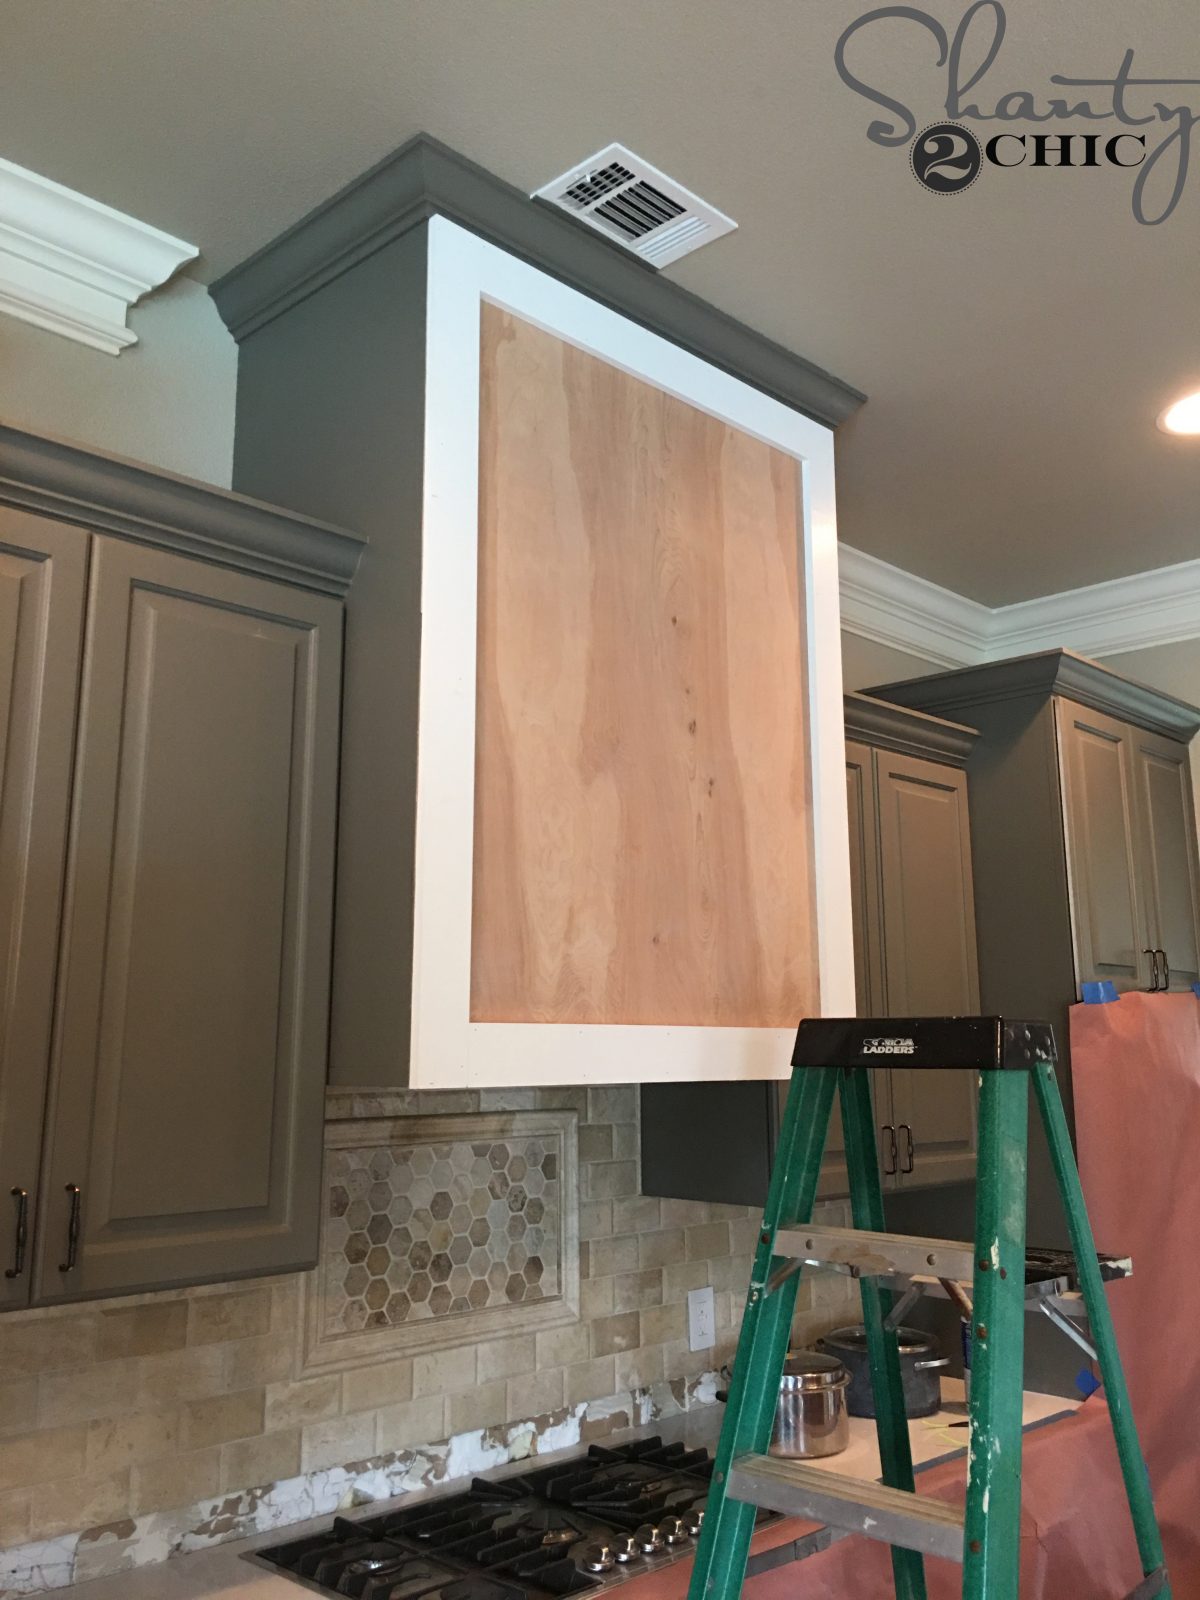
Next, I attached the top and bottom trim pieces.
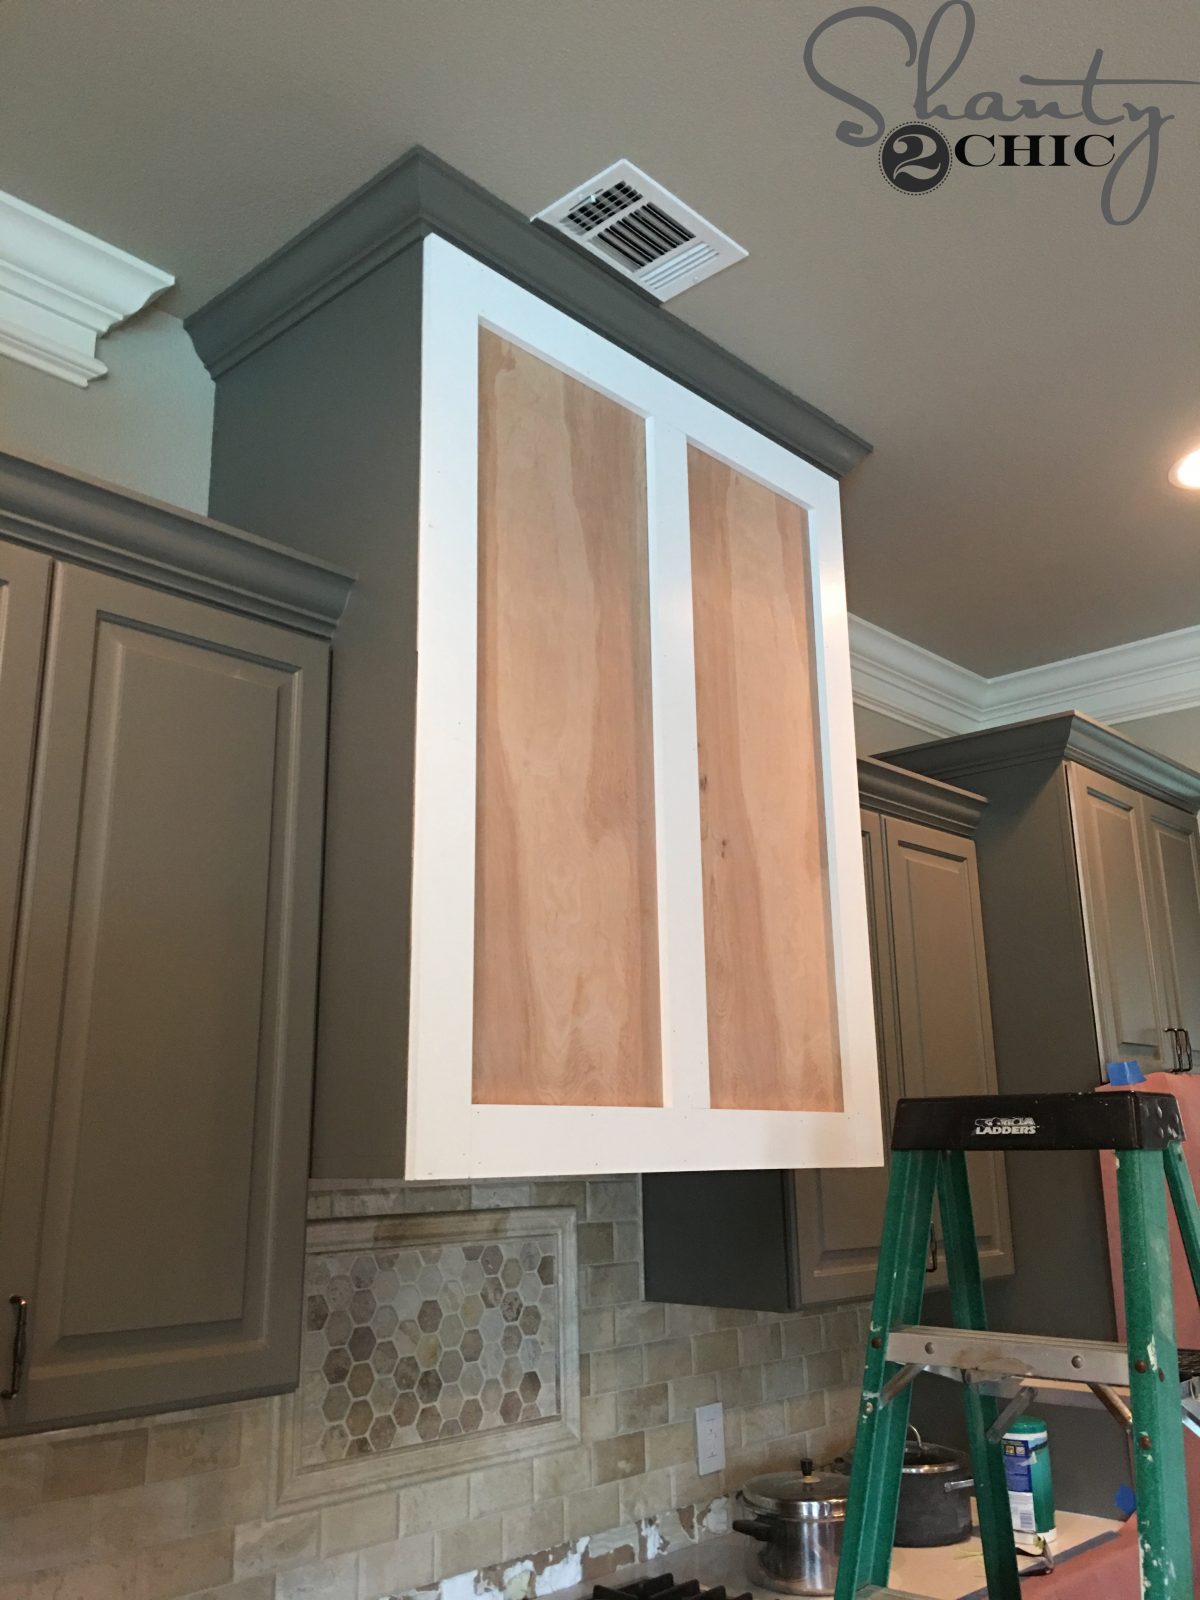
I cut the middle trim piece to size and attached it the same way.
The final cuts are the diagonal trim pieces. This gives the vent hood a barn door look. To do this, I marked center on the middle trim piece and held the 1×4 up where I wanted it to be attached. Then, I marked where the cuts should be made and I lined my miter saw blade up to the marks. My angles came out to be 48° but yours could be different. This is the best way to get a perfect fit on a miter cut!
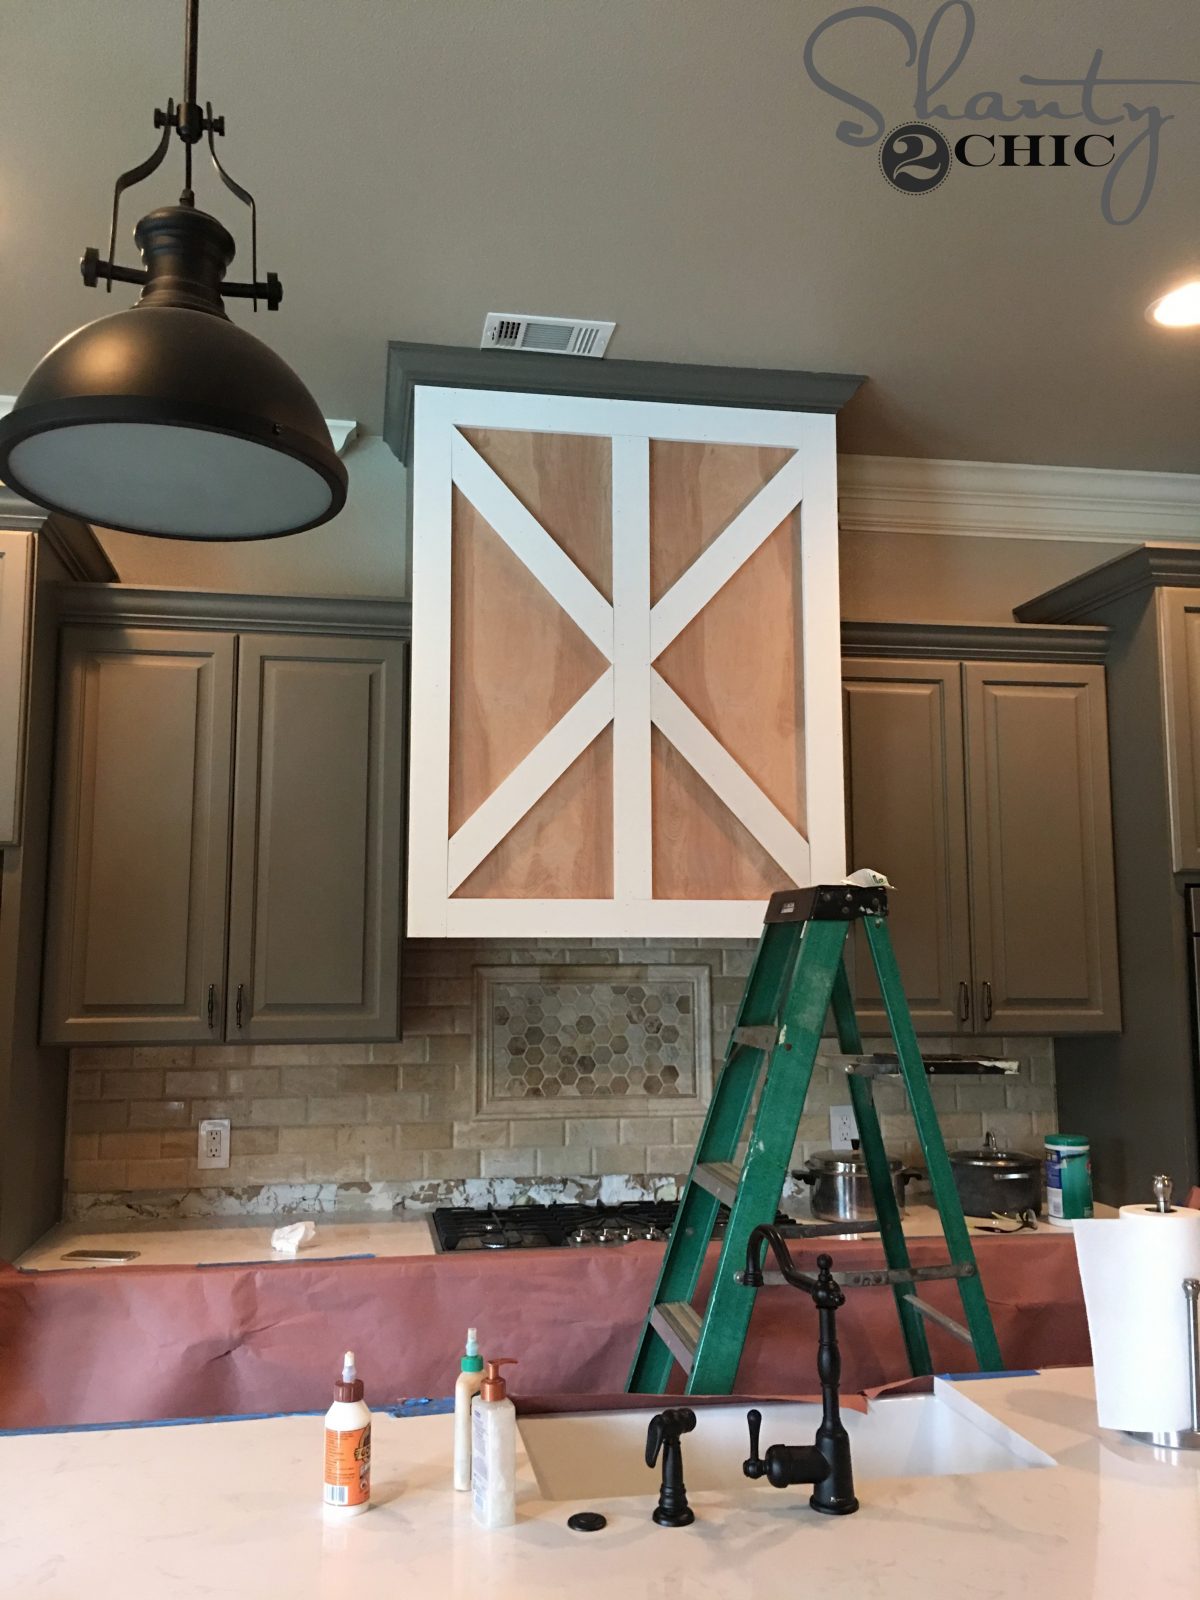
I followed the same steps for the remaining diagonal pieces
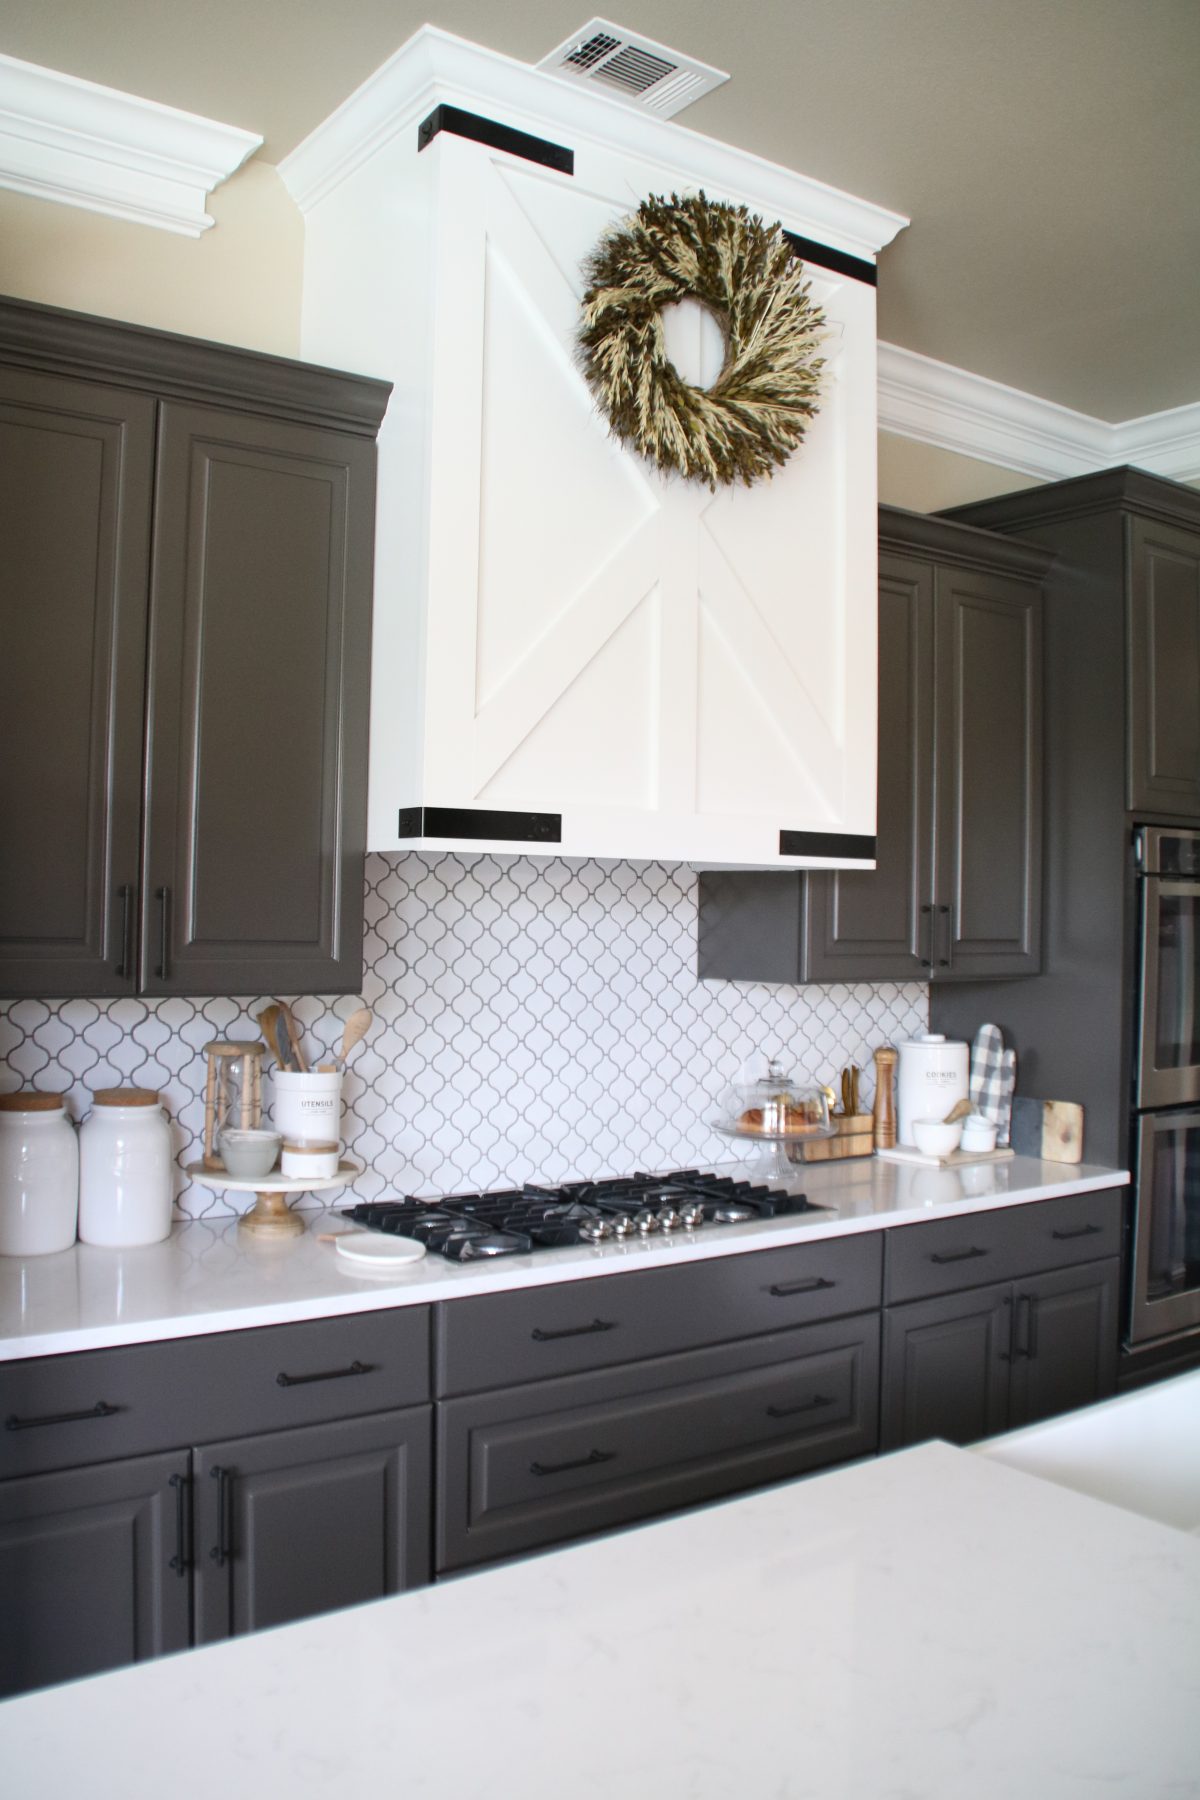
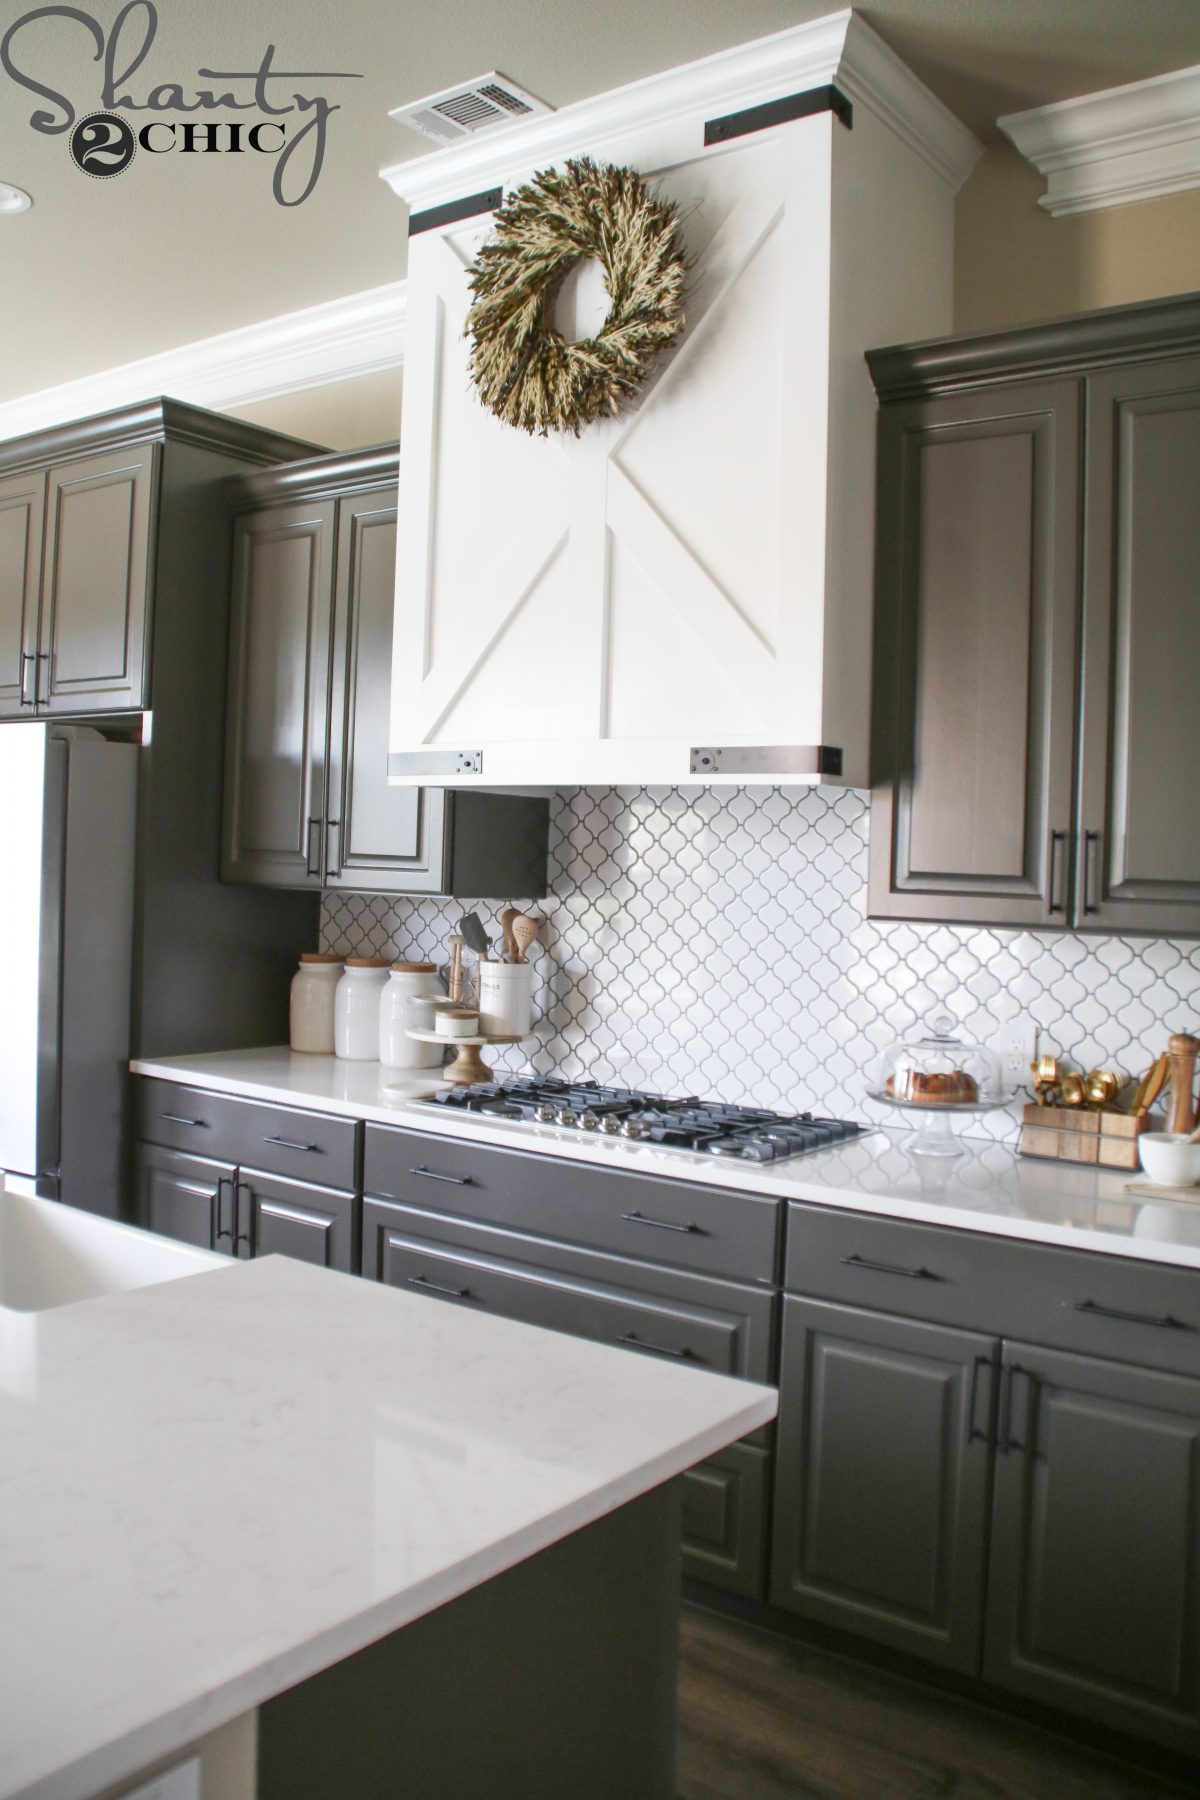
My final step was to fill my nail holes and paint the cabinet. I did this project as part of a full kitchen renovation so, I had my painter paint the hood when he painted the cabinets. Once the paint was dry, I attached 4 metal corner braces. I found the corner braces in the framing section of Home Depot. They are only about $2 each and I spray painted them to make them look fancy 🙂 I attached them with hex screws (also painted black).
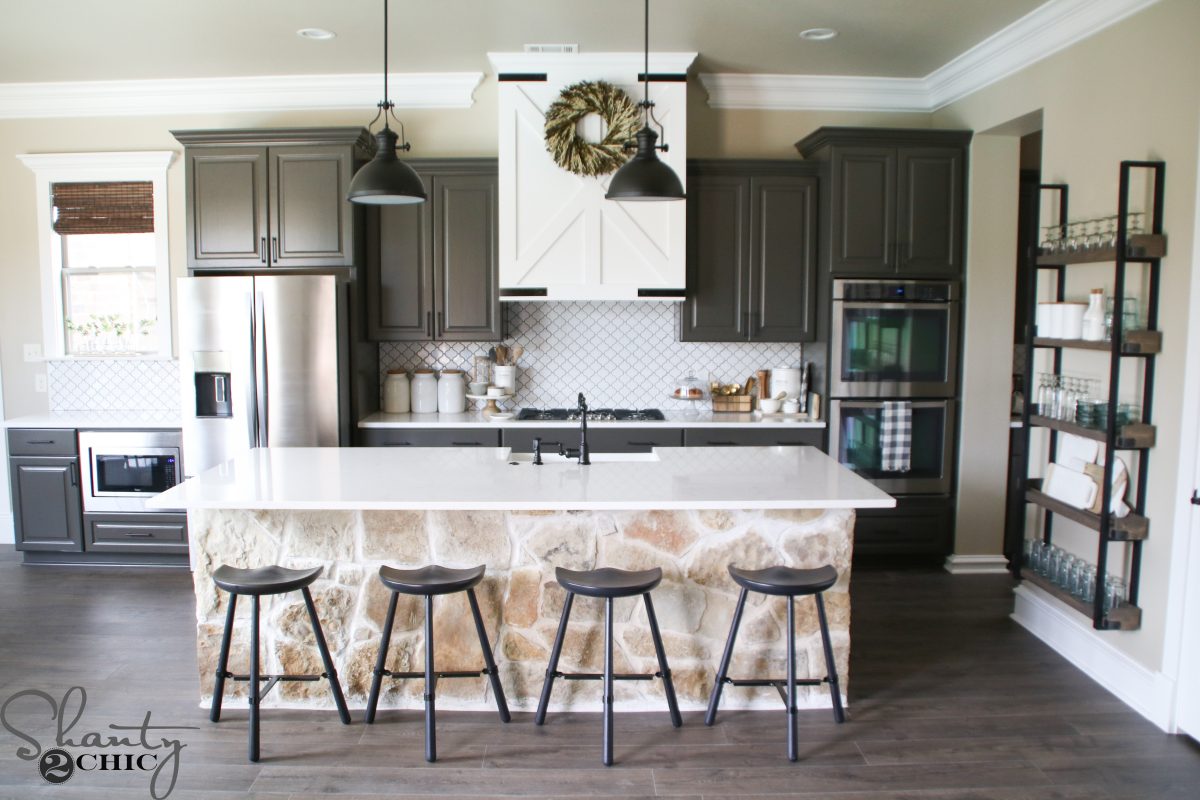
Loving my kitchen so much! I love how the white vent hood breaks up all of the dark gray cabinets!
You can download the FREE Printable Plans HERE!
Get the info on all of the other stuff in this kitchen below!
Cabinet Color – Urbane Bronze by Sherwin Williams
Wall Color – Soft Stones by Valspar
Trim Color – Pure White by Sherwin Williams
Cabinet Pulls: HERE
Counter tops: Torquay Quartz by Cambria
Backsplash Tile: HERE
Stools:HERE
Faucet:HERE
Pendant Lights Over Island: HERE
Paper Towel Holder: HERE
Flooring: HERE
Thanks so much for stopping by!
Happy Building!


Like another viewer, I’m wondering if there is room to turn the vent on.
Upon looking closer at the picture, it appears that the hood itself is set slightly back from the front edge of the cabinet face. Enough so, that you could reach just under the front edge of the cabinet facing to turn the switches on/off
How do you turn the fan on?
Wow, you make it look so easy! Thanks for the new idea!
I enjoy reading an article that will make men and women think.
Also, many thanks for allowing for me to comment!
Good post. I learn something new and challenging on sites I stumbleupon on a daily basis.
It’s always helpful to read through content from other authors and practice something from their web sites.
?
?
✌?✌
?
??
????????
? I built my own using the plans at www. WoodworkPlans.info – highly recommended you check those out too. They are detailed and super easy to read and understand unlike several others I found online. The amount of plans there is mind-boggling… there’s like 16,000 plans or something like that for tons of different projects. Definitely enough to keep me busy with projects for many more years to come haha
www. WoodworkPlans.info ?
????????
haha Cool! I’ve worked with timber doors and windows for many years and this is a new idea I haven’t seen before. The ‘barn door’ style is great, with the corner braces too. We often throw our old doors away but perhaps this will inspire a new way to recycle them. Thank you
I’m sure that the DIY idea will completely change the looking of my kitchen barn door.In a hurry to apply them! Thanks for sharing such a great idea!
What is the paint color of the hood?