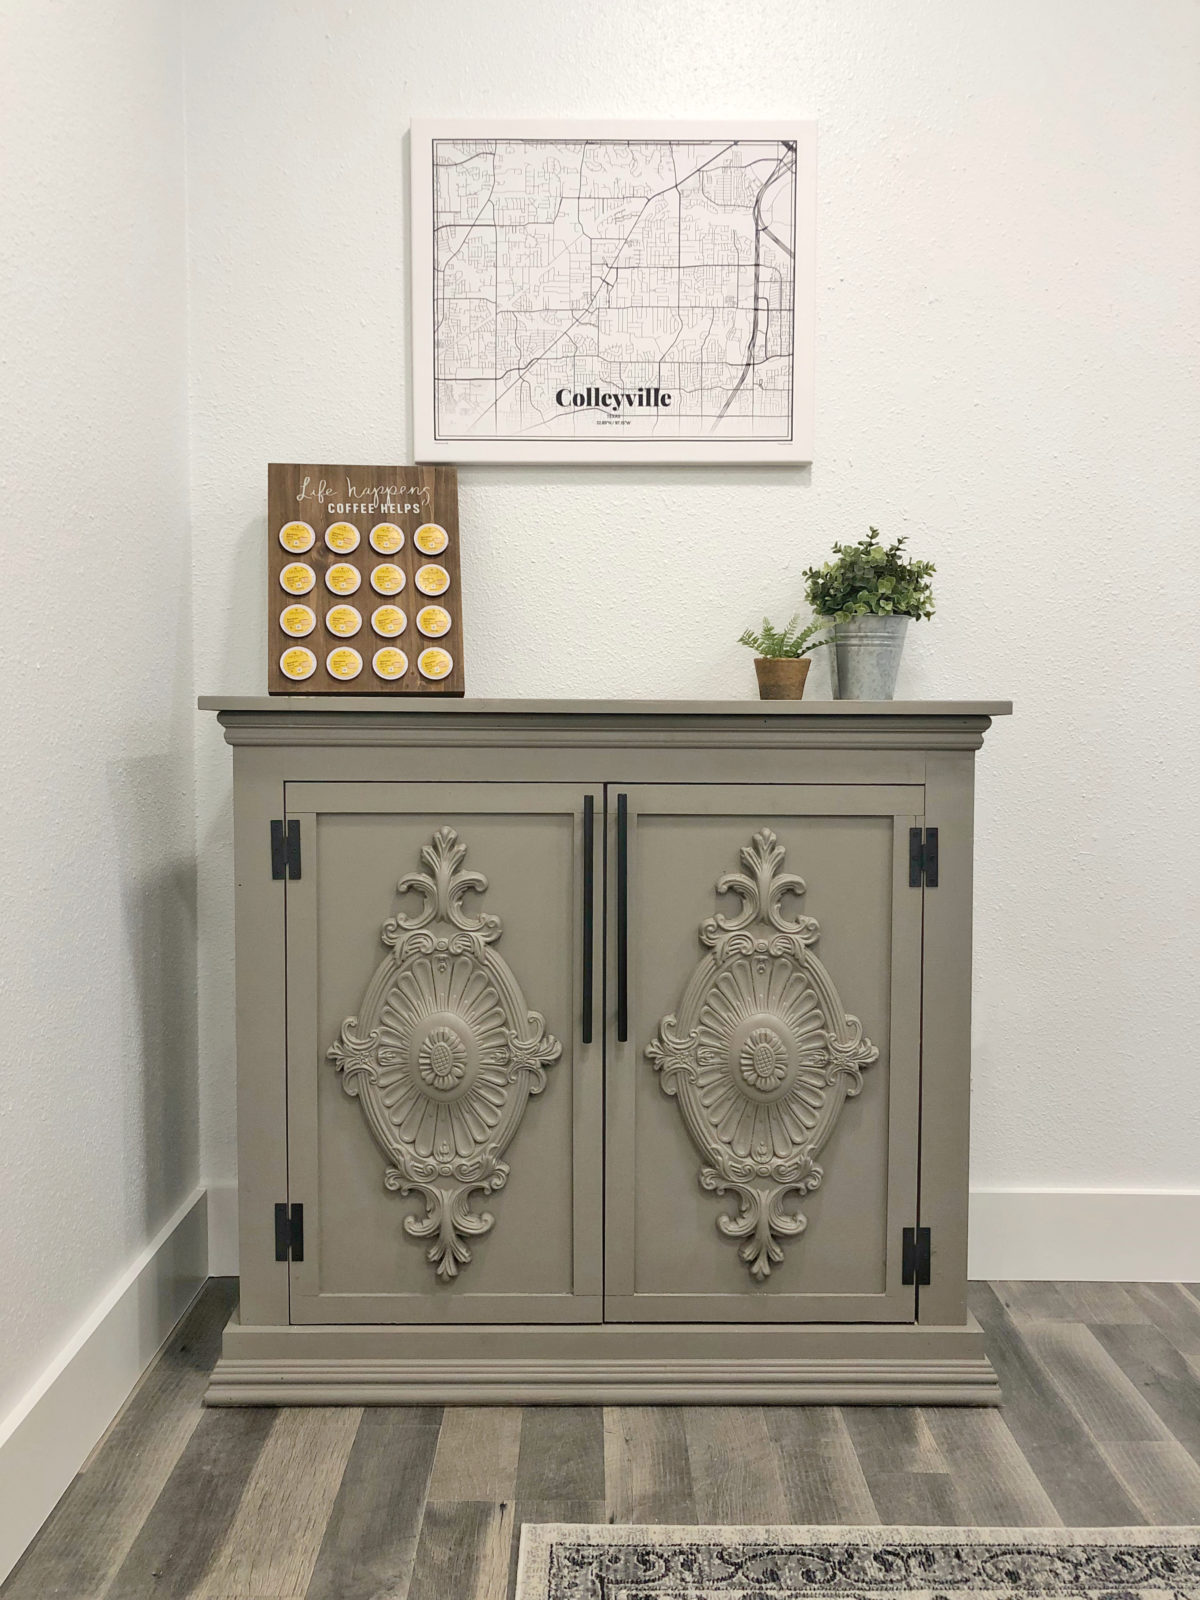
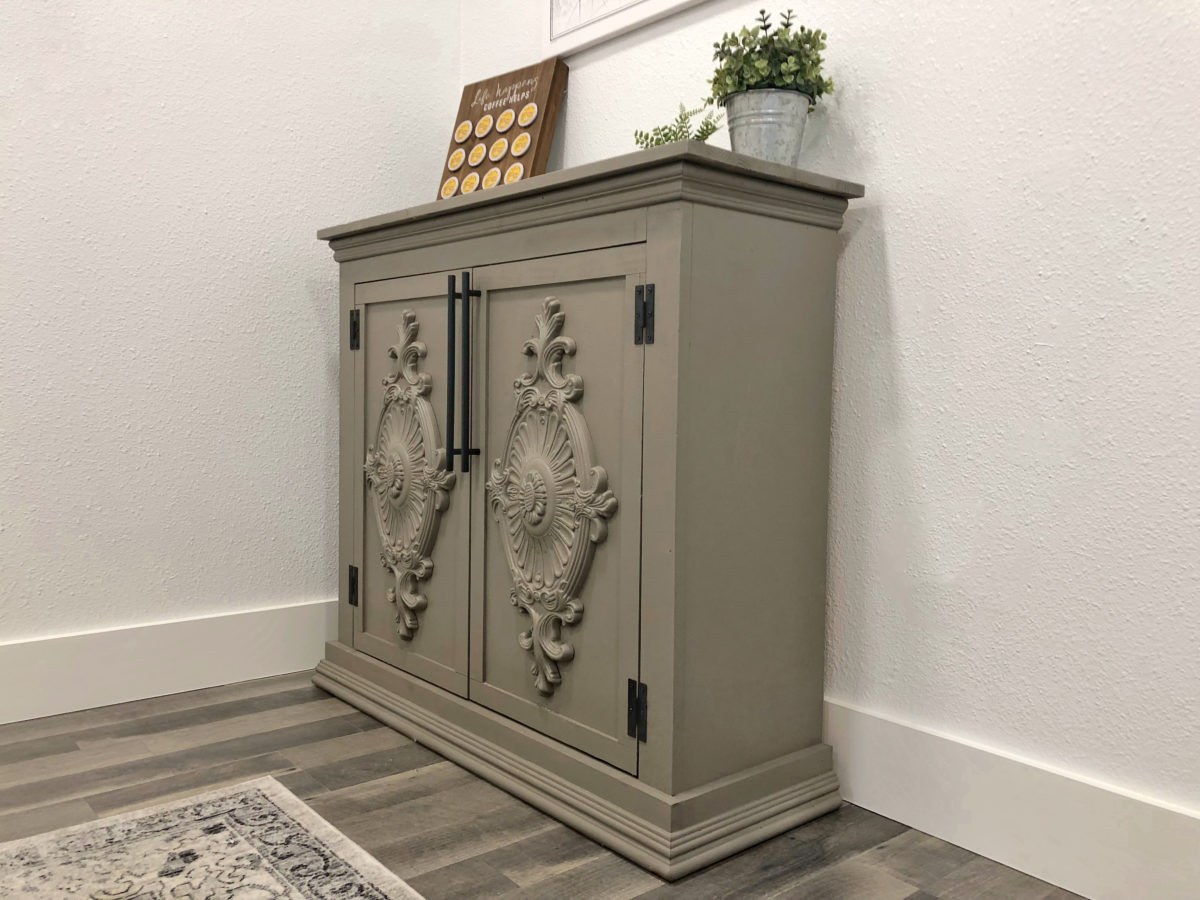
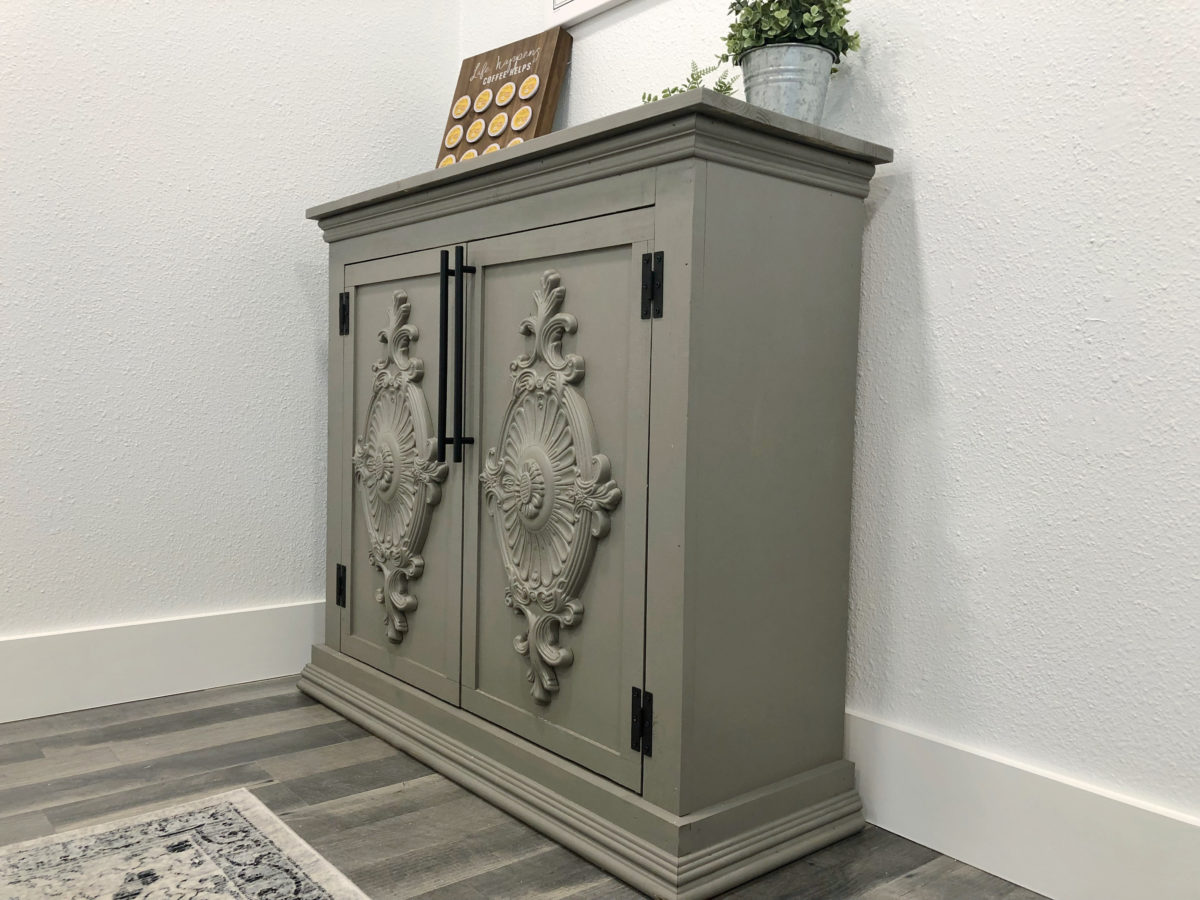
Hey friends! As many of y’all may know, Ashley and I just moved into our first office/studio space and we have been busy fixing her up! One of the first things we knew we needed for this space was a coffee bar 😉 We built this super cute DIY Fancy Farmhouse Console for my house, but we both decided it would make a really cute coffee bar, and that’s just what we did with it! Before I show it to you, check out the DIY YouTube video on how to build it HERE or by clicking below!
Look how cute she turned out!
Before we get started, be sure to download and print the FREE PLANS by clicking HERE!
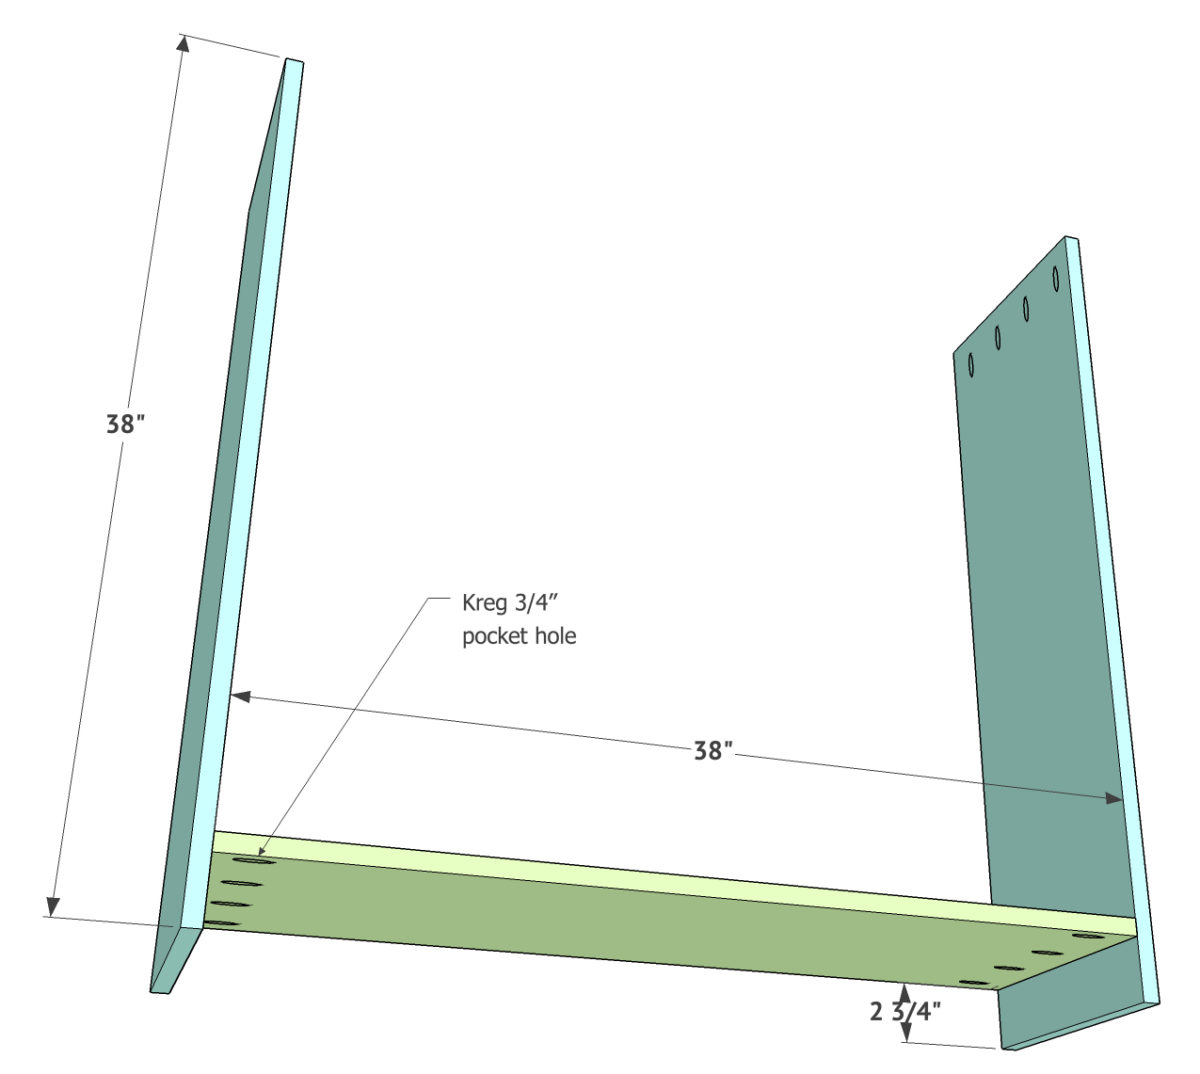
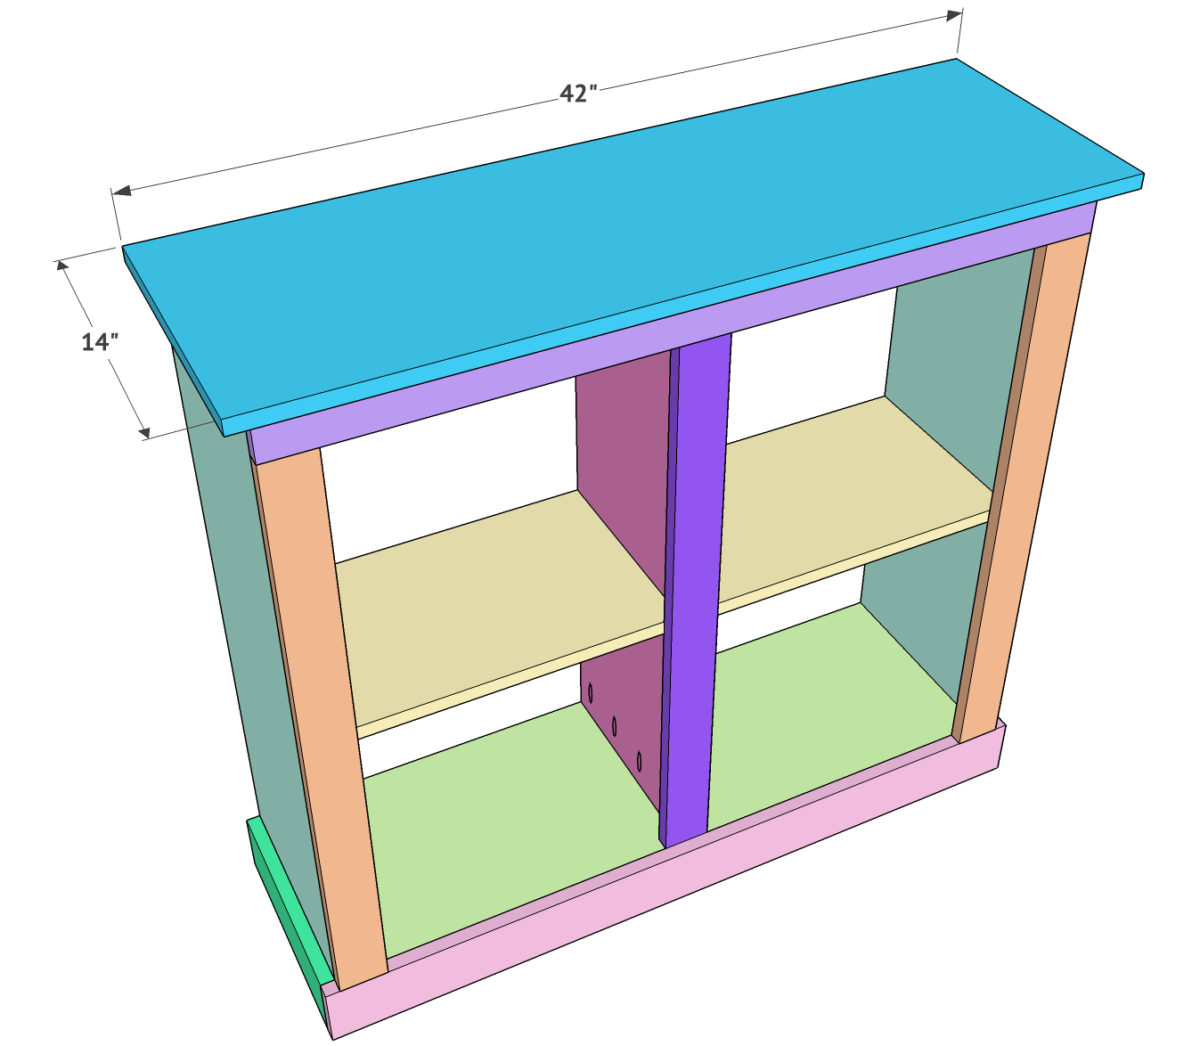
The first step to building this console is to create the box. We used 3/4” hardwood plywood ripped to 12” each to create ours. The base of the cabinet has 3/4” pocket holes on each end. Attach this shelf 3.5” from the base of the two side boards using wood glue and 1.25” pocket hole screws. Make sure to also add 3/4” pocket holes to the top and inside of the side boards as well. We will use these to attach the top in a later step.
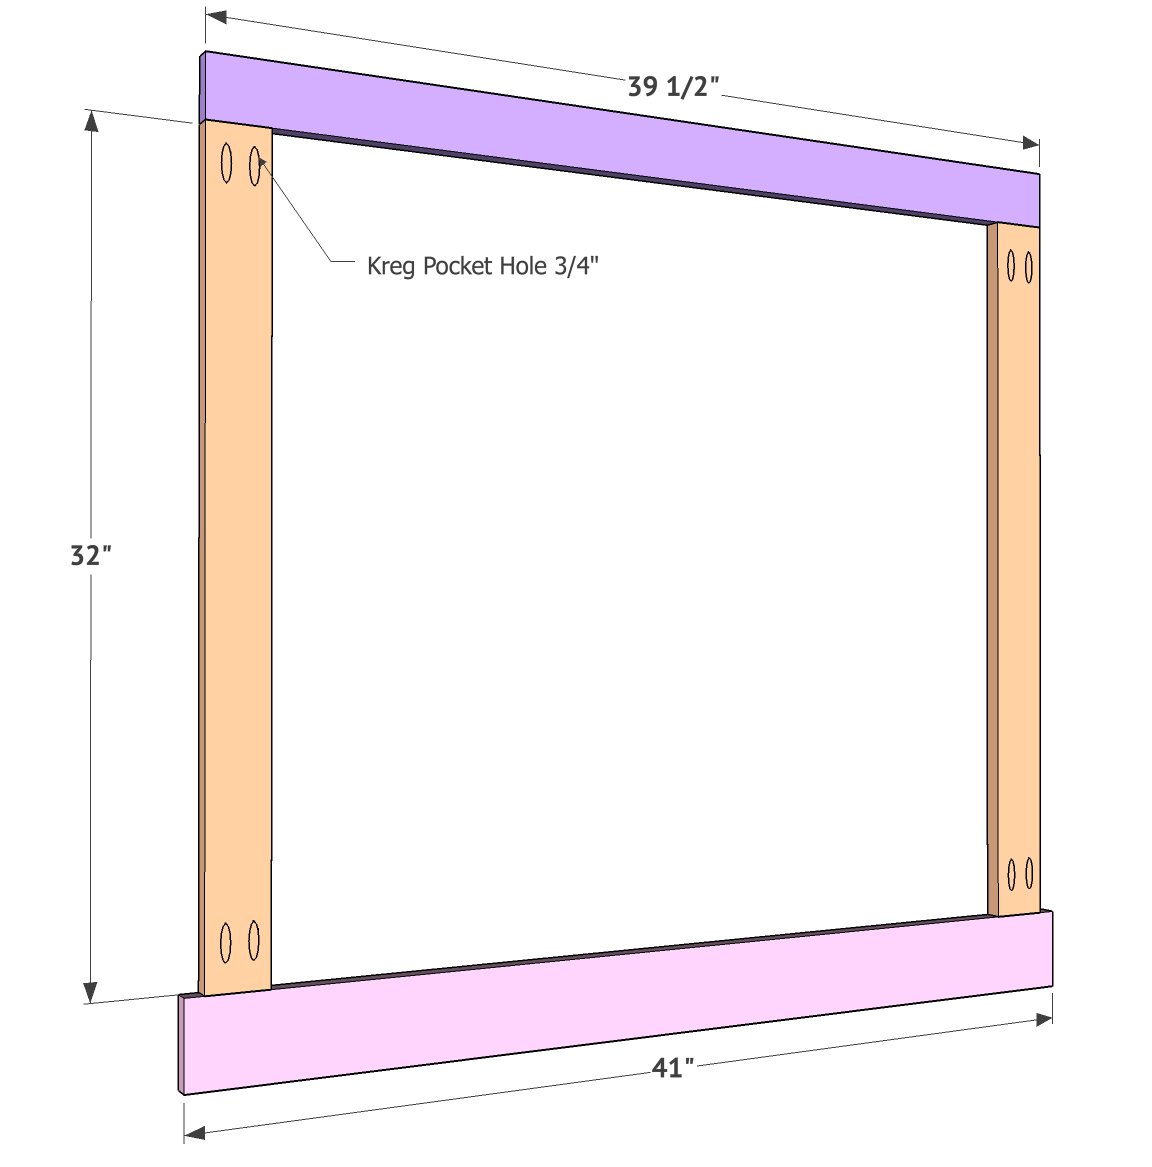
Now build the face frame. Add 3/4” pocket holes to the ends of both of your vertical pieces. Attach them to the horizontal pieces using wood glue and 1.25” pocket hole screws. The bottom horizontal board will overhang 3/4” on each side.
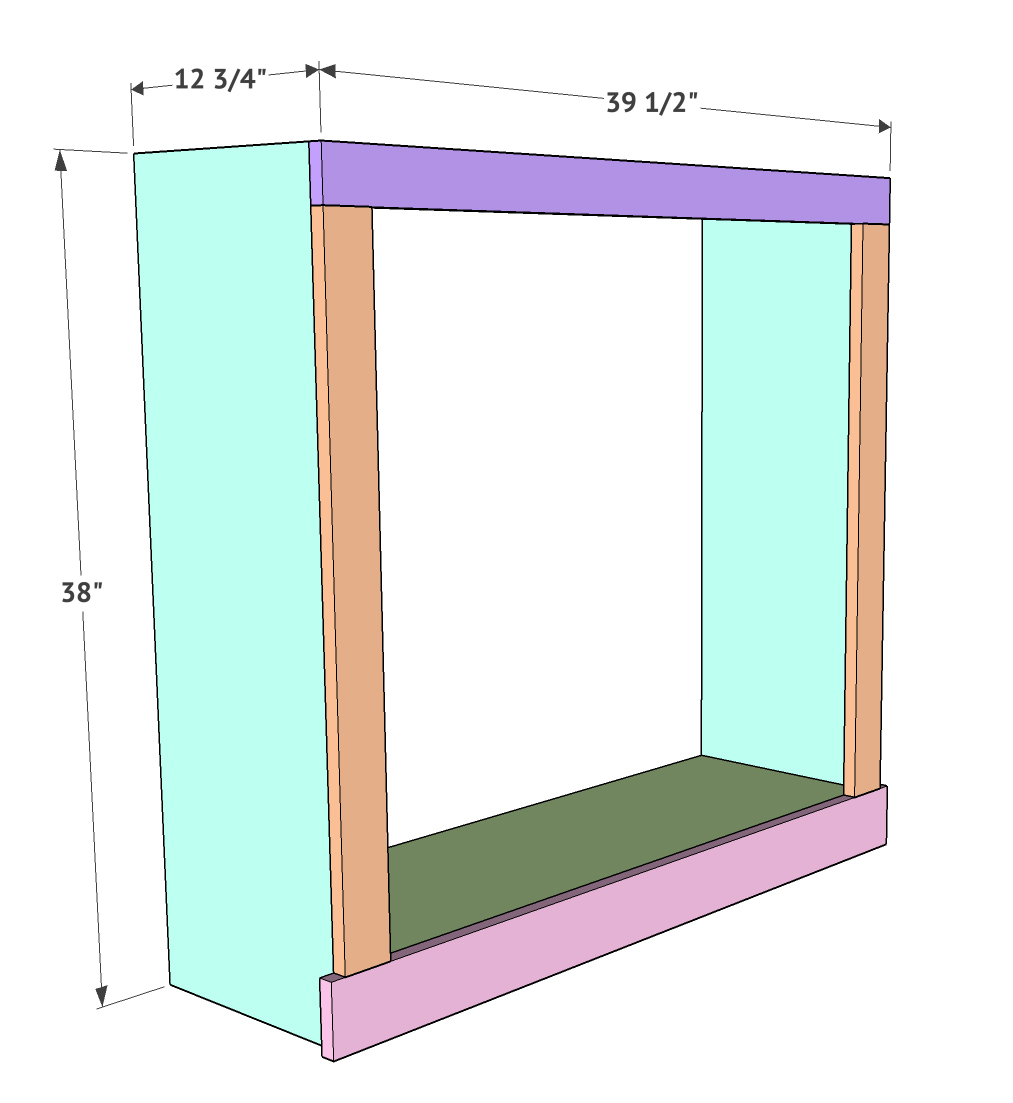
Now attach the face frame to the box Add a line of wood glue to front of the box and line the face frame up flush. Attach the frame using 1.25” brad nails into the box. The bottom board will have a 3/4” overhang on each side.
Now attach the two side base pieces. These are attached using wood glue and 1.25″ brad nails.

Build the middle divider by attaching the 1×3 board to the front of the plywood piece using wood glue and brad nails. Then, attach the plywood to the base of the cabinet using wood glue and 1.25” pocket hole screws. Don’t forget to add pocket holes to the top of this plywood piece as well. Those will also be used to attach the top piece.

We added shelves to our cabinet next. These are totally optional, and they can be placed in the best place to suit your storage needs. Just attach each shelf to the center divider and the outside board using wood glue and 1.25” pocket hole screws.

Next attach the top. We used a laminated project panel for our top and cut it to size. Attach the top by using 1.25” pocket hole screws through the base cabinet and into the top.
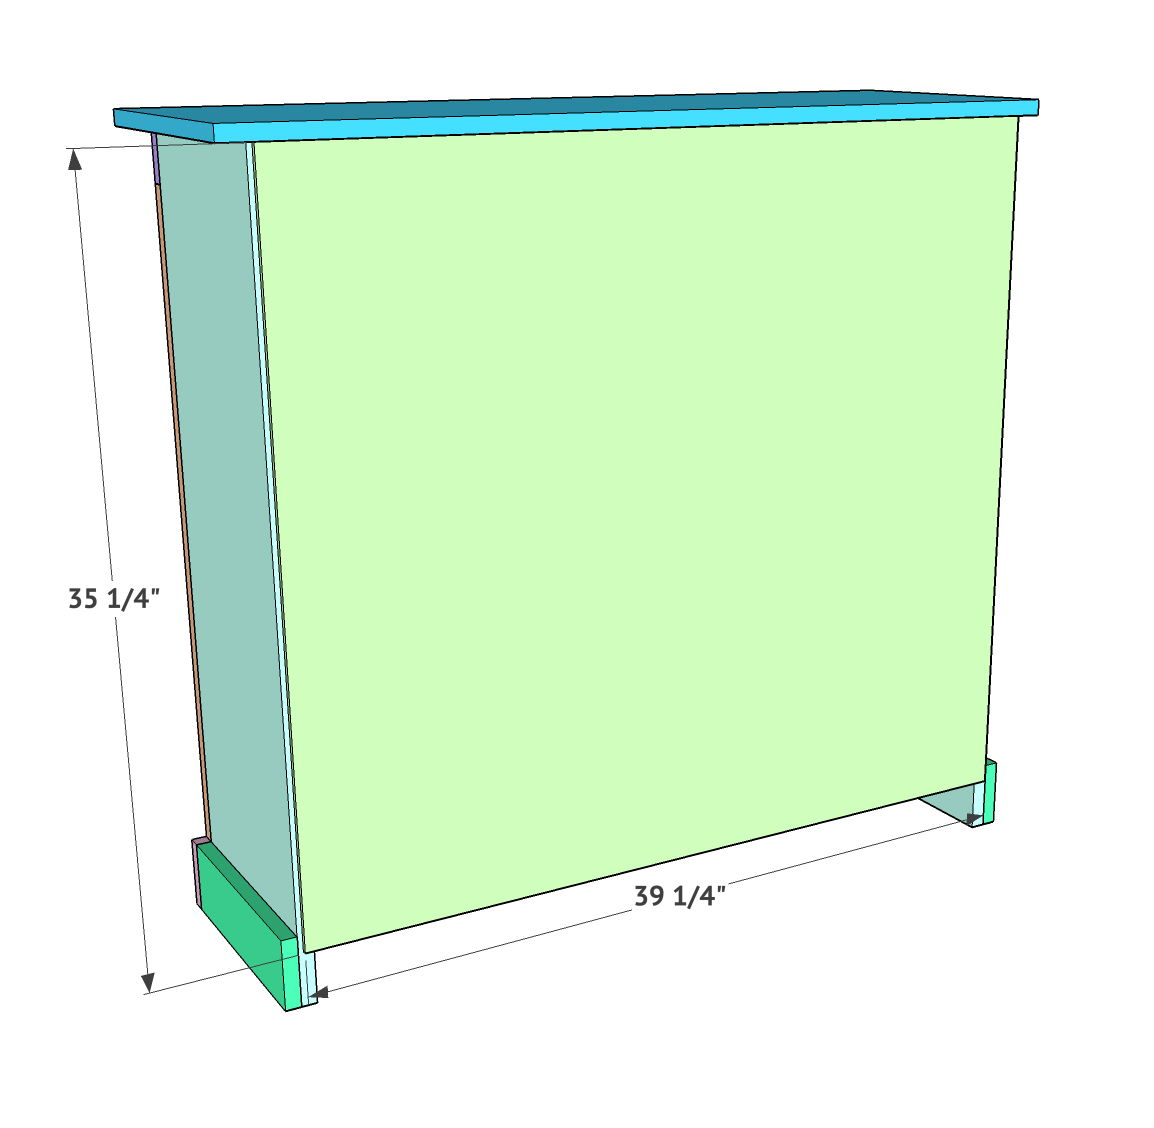
The back of this cabinet is 1/4” hardwood plywood. Cut it to size and attach it to the back of the cabinet using staples or brad nails and wood glue.
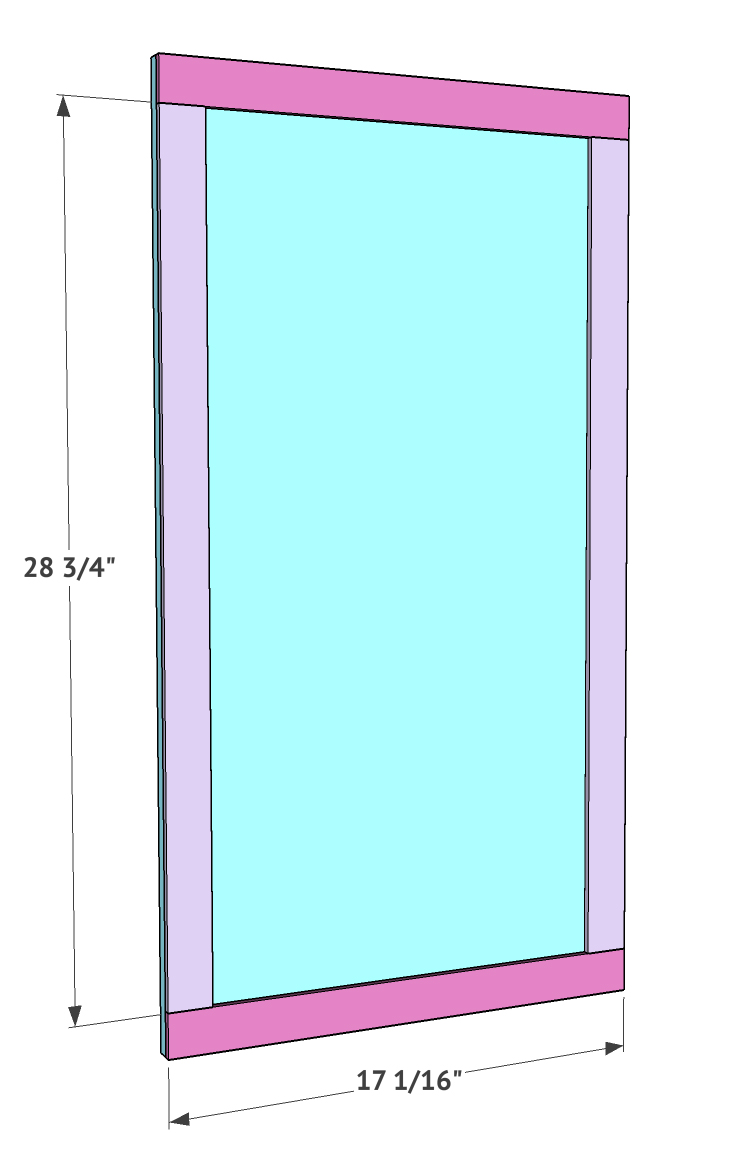
Time for doors! That is the best part on this cabinet! These are 1/2” hardwood plywood panels cut to size. Then, we used 1/4” x 2” pine craft boards to wrap the edges of the front. Attach the trim boards using wood glue and 1/2” pin nails or brad nails.
At this point you can have fun with it! You can add trim to the top and bottom to fancy it up a bit. We used two different kinds of base on the bottom and top. For the top trim, we flipped a base board upside down and butted it to the top of the cabinet.
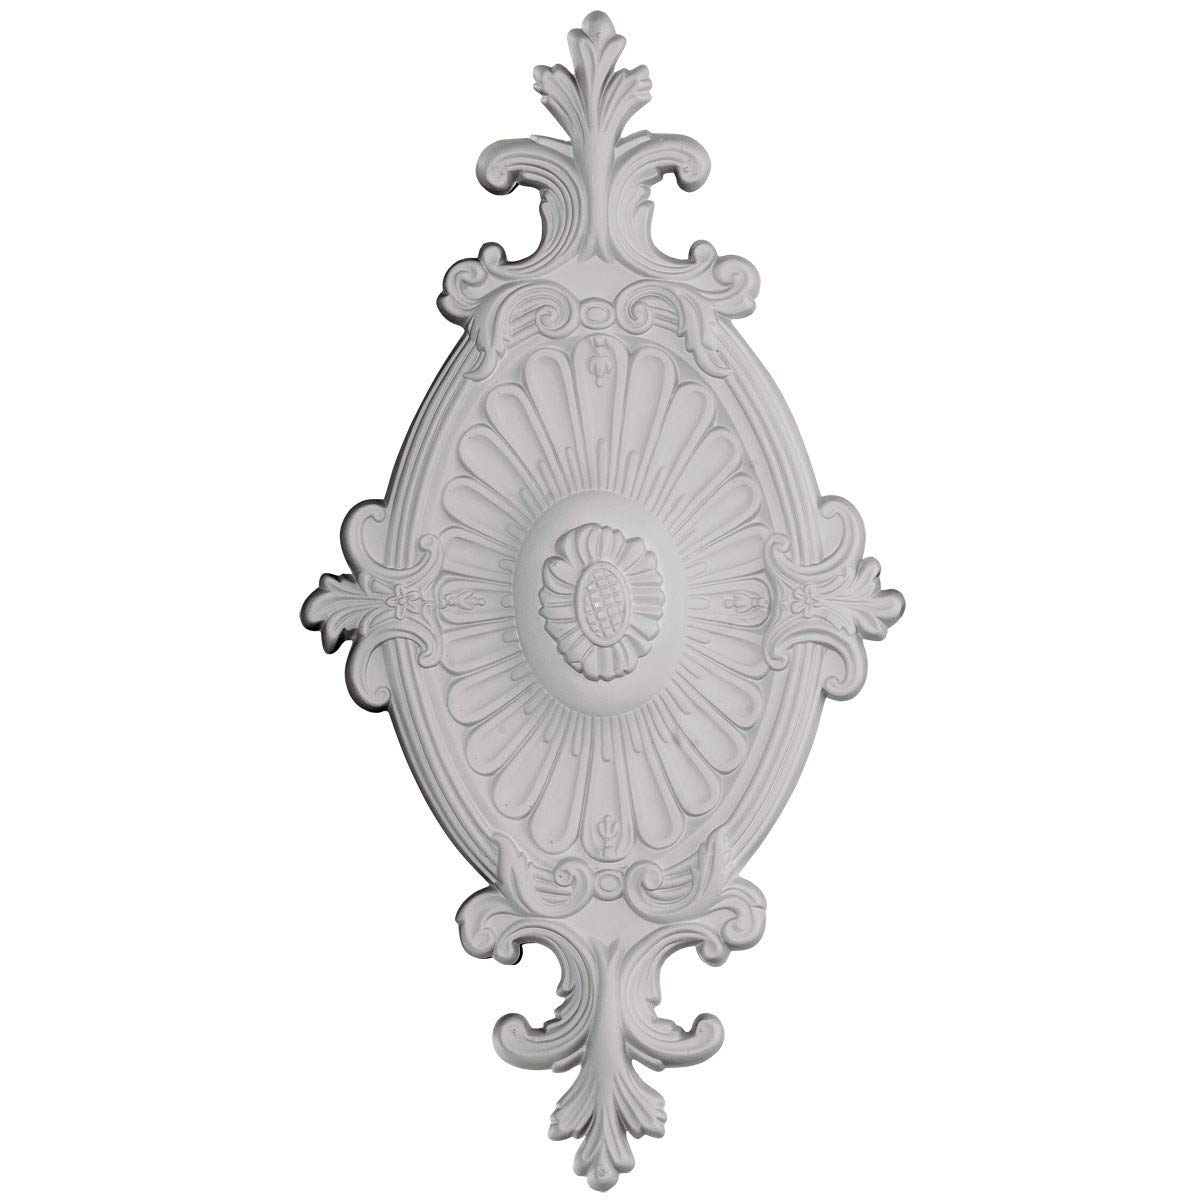
To create the beautiful doors, we found the most amazing and cheap ceiling medallions on Amazon. You can find them by clicking HERE! We glued them to the center of the door and used some brad nails to hold it in place until it dried. The holes easily fill will wood filler.
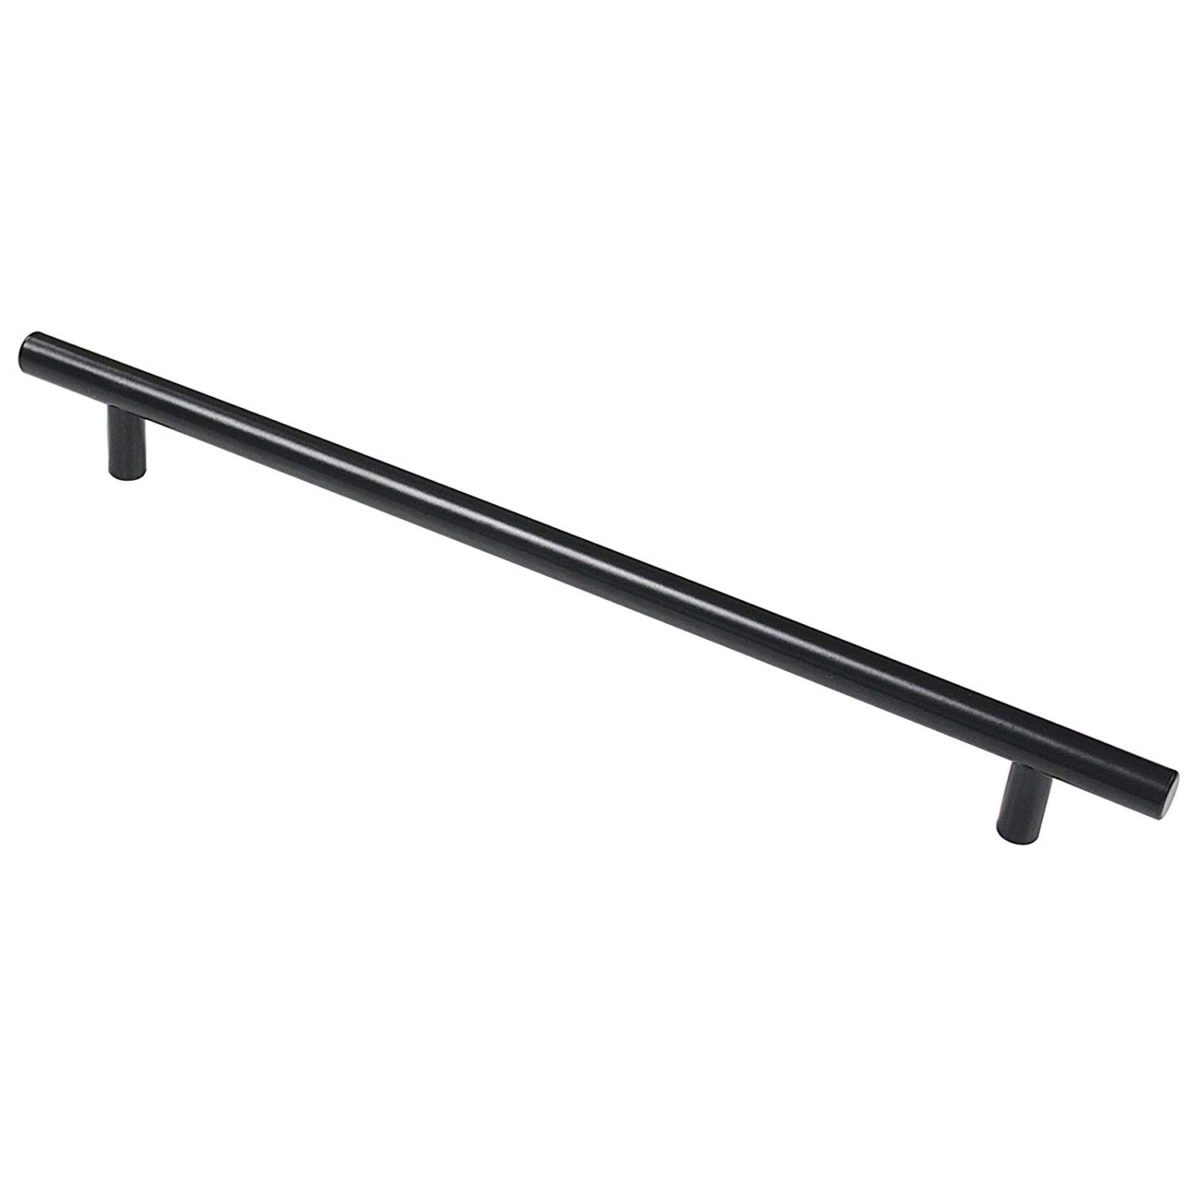
CLICK HERE for the long bar pulls we used on the doors!
And, CLICK HERE for a link to the hinges!

Thanks so much for stopping by guys! Let us know if you have any questions at all and HAPPY BUILDING! Here’s a few more shots of her!


I think everyone that bothered to reply here will feel as I do: Why let us comment…we read this awesome DIY and had comments and you didn’t bother to write back!
I, for one, chose to move on. Shame, because this looks like a great place to learn, but if I can’t get answers I’m moving on.
Come on girls… I’m going to give you the benefit of the doubt and ask if this is a brand new site…you must not realize that making your blog personal is what will draw people to keep coming back.
This seems like a simple notion but maybe you just don’t realize. Or god forbid…you don’t care?
That’s what it feels like…you maybe don’t care.
Frustrated
Beth
Hi! I love building pieces from you plans. 🙂 I was just getting ready to put the doors on the fancy cabinet and it was too thick. The printable plans shopping list (and the cut list) say 1/2″ X 2 X 48 craft board. And come to find out it should be 1/4″ x 2 x 48. So. I had to pry the 1/2″ off and make a trip to Blue. I’ll share a pic as soon as I get it all back together! Thanks for all the great projects.
The coffee pot holder is perfect! Is it one of your designs? If so, are plans coming in the near future?
Coffee “pod” holder..
Paint color please?
FOUR YEARS and you haven’t been answered?! Wow!
What paint and sealer did you use?
Adorable! The plans make it look so easy to make. Thanks for sharing and congrats on your new office space.