We love a good wall treatment and this DIY shiplap around my fireplace is no exception!
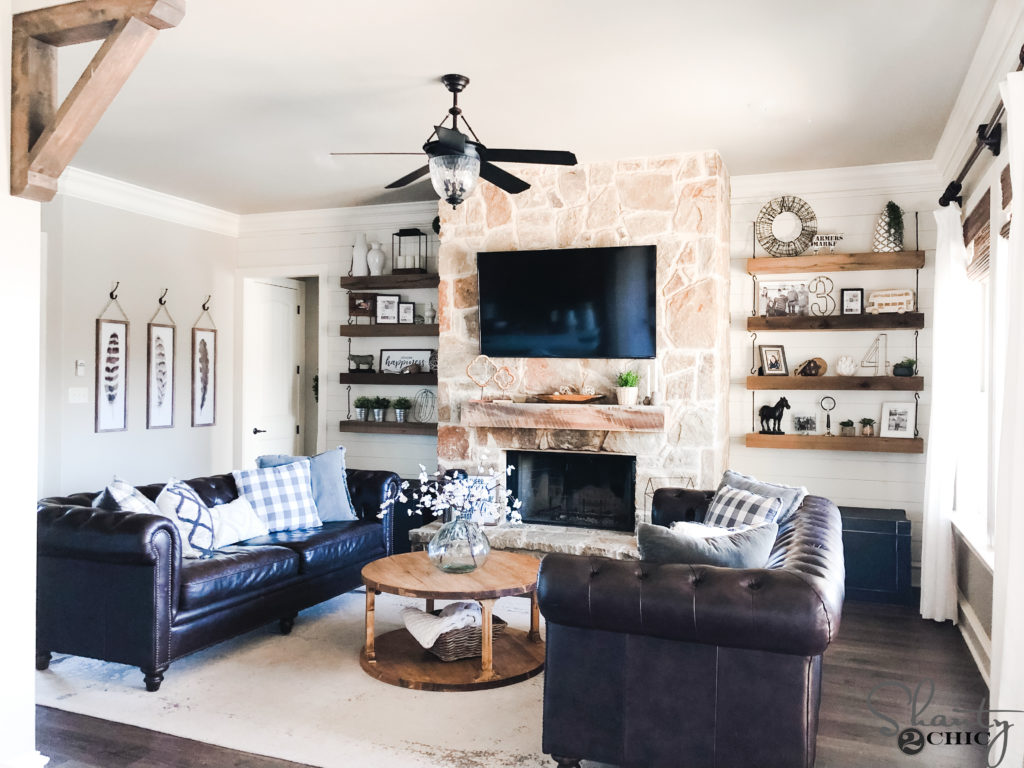
This project is quick, easy and inexpensive! I love how much light it adds to my room and gives it dimension and character! This is a beginner project that requires very few tools so, let’s get to building!
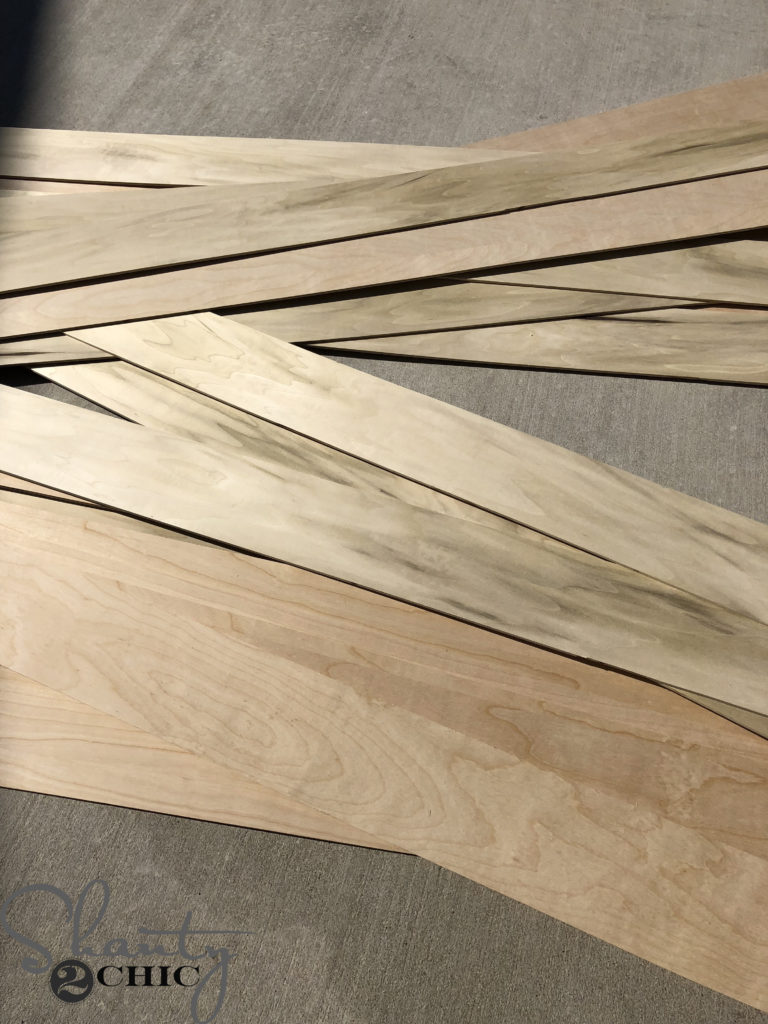
I built the entire wall with scrap 1/4″ plywood that I ripped to 5.5″ wide. So technically this is a faux shiplap wall, which we typically call plank walls! If you don’t have enough scrap plywood, you can buy a 4’x8′ sheets at the hardware store.

I used my table saw but if you don’t have a table saw you can check out our How to Rip Plywood video HERE! All you need is a circular saw!

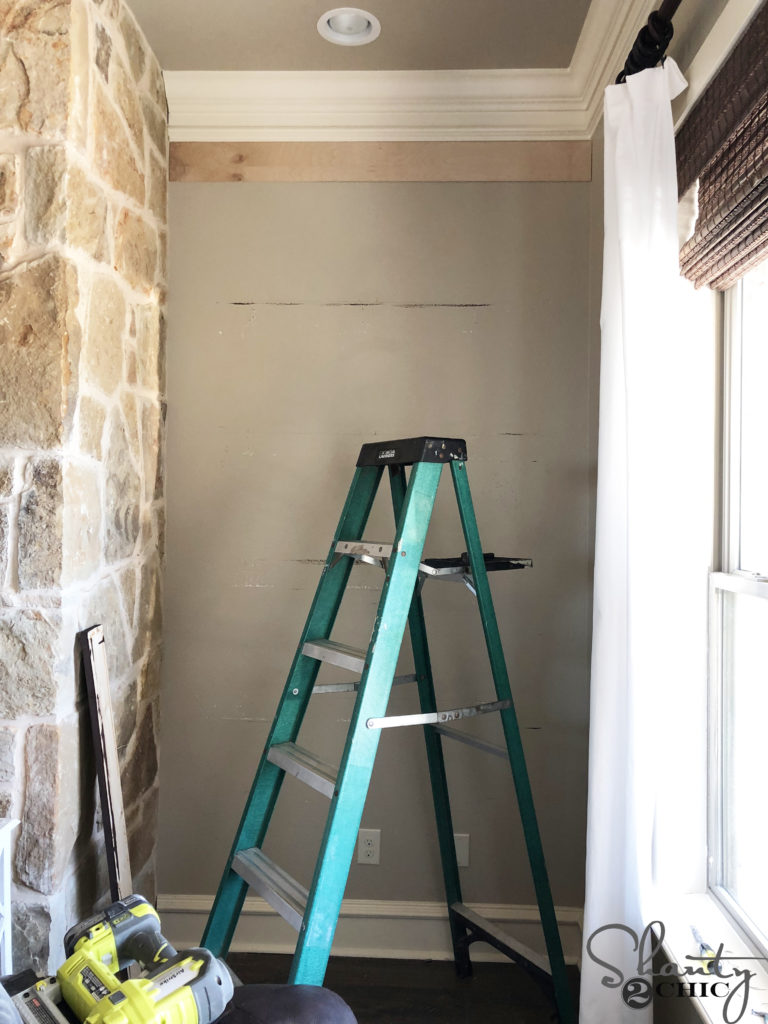
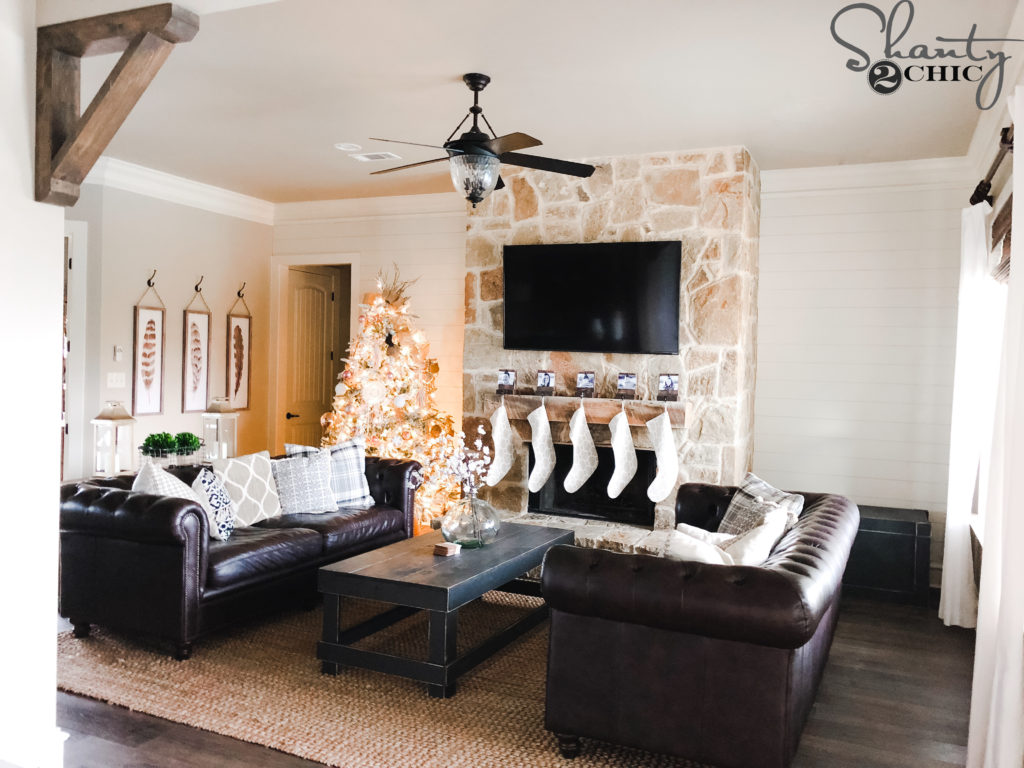
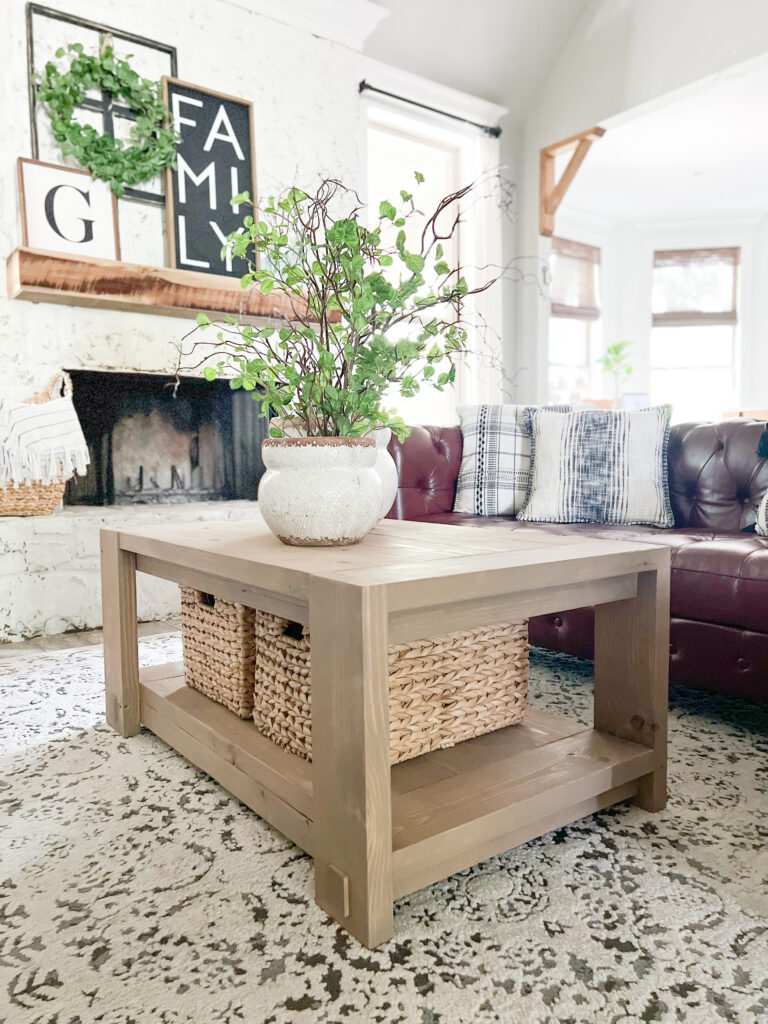
If this space looks familiar, this is my living room. These floating shelves were one of the first projects I did when we moved into our home. I loved them for years but I got an itch to see this space lightened and brightened. I also wanted to make the shelves more shallow, as the original shelves were 12″ deep. You can find the free plans for my original floating shelves HERE!
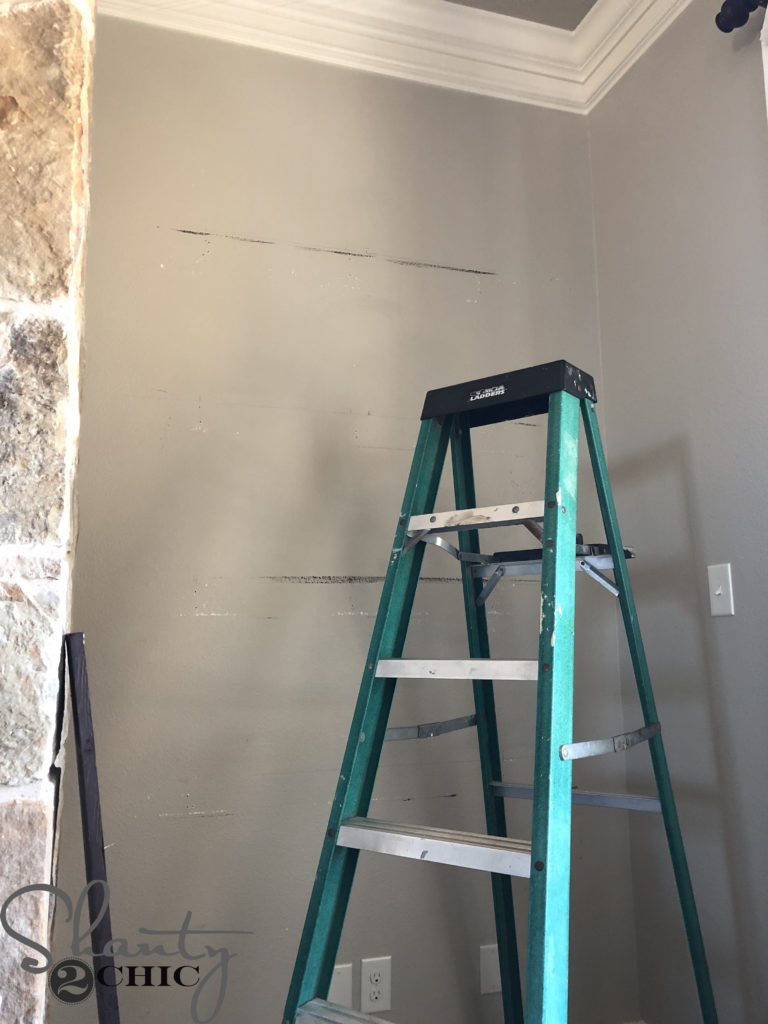
I started by removing the old floating shelves from the wall. I was able to give them to a friend to use so it was totally a guilt-free project 😉
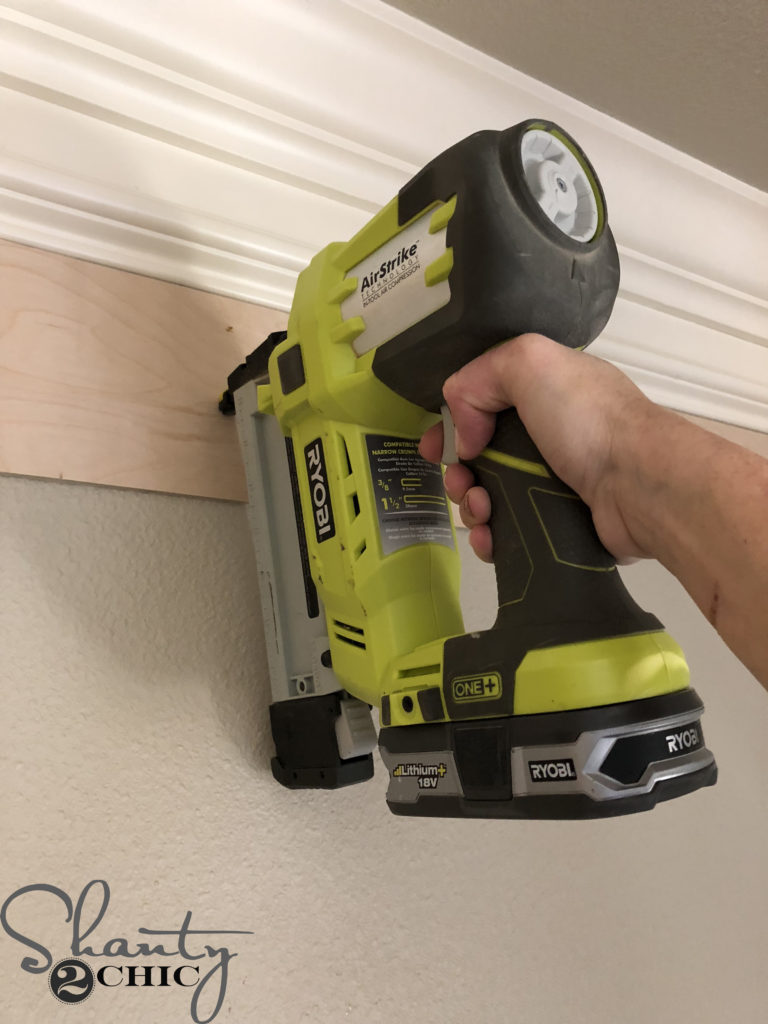
I started at the top of the wall because I wanted a full 5 1/2″ piece at the top. I knew if I got to the bottom of the wall and had to rip a more narrow piece that it wouldn’t be as noticeable. I used my 18-volt stapler to attach the planks. Because this is 1/4″ plywood, I chose to use staples because they grab the thin plywood. If you don’t have a stapler, you can use brad nails or a hammer and nails. This plywood is thin and light so the staples were plenty strong enough to hold the planks in place.
You can find the 18-volt stapler that we use HERE!
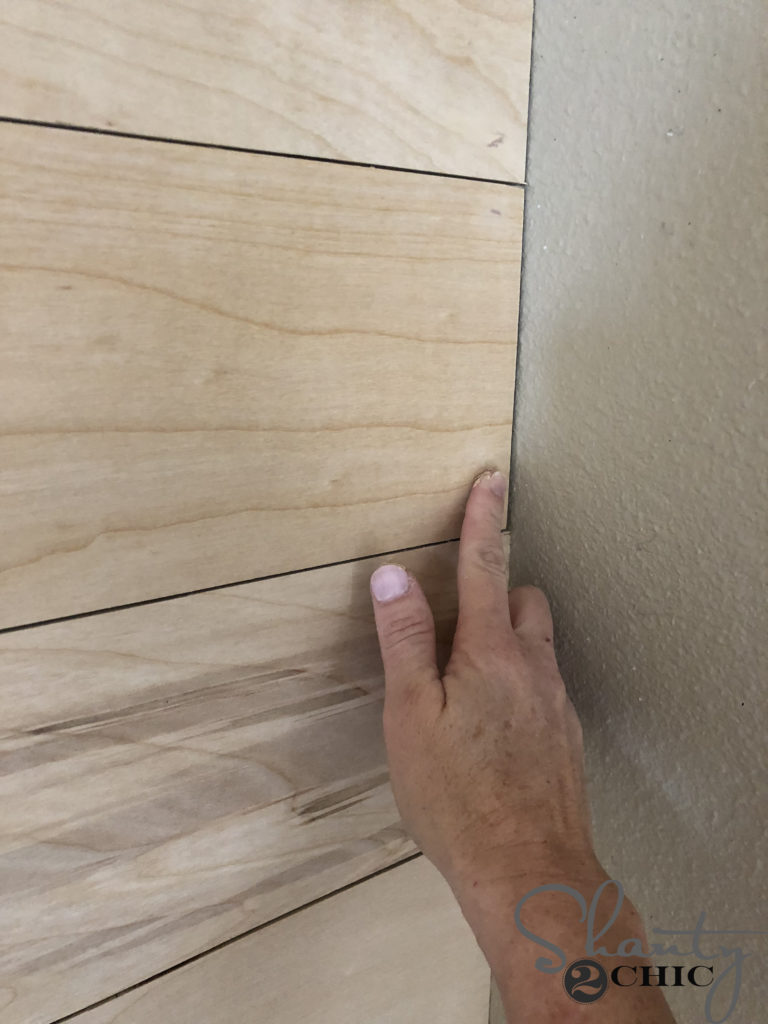
Here it is with one plank attached. Because I was fitting each plank between the stone fireplace and the wall, I had to measure and cut each piece to size.
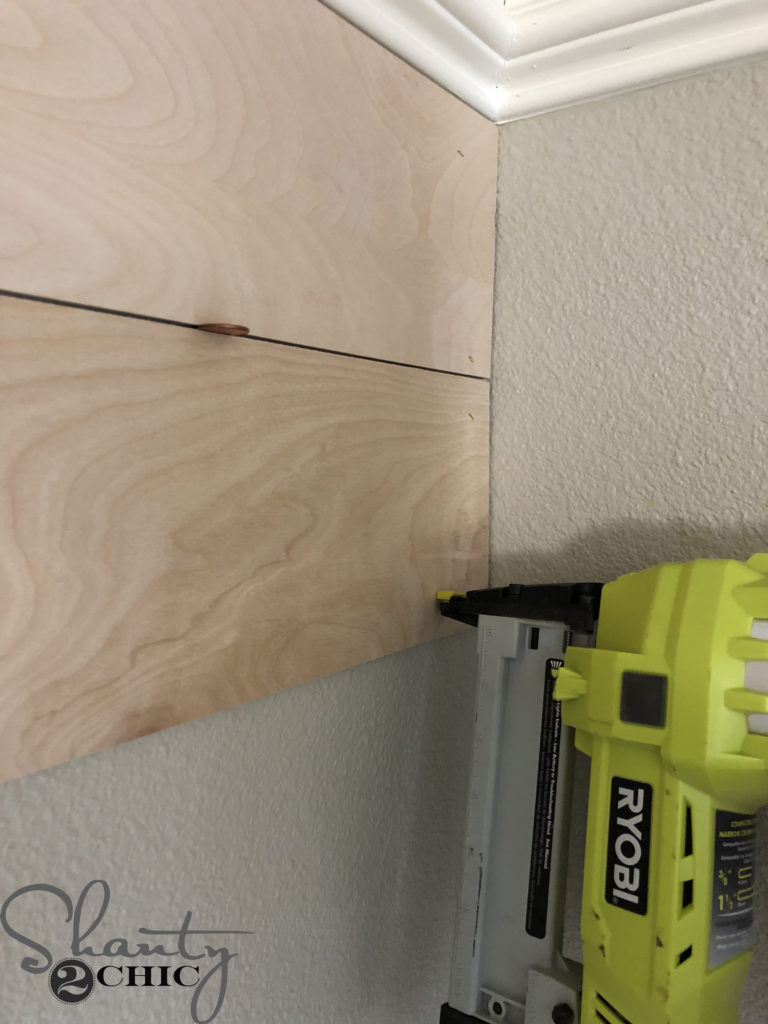
To give the “shiplap” appearance, I used pennies as spacers between each plank.
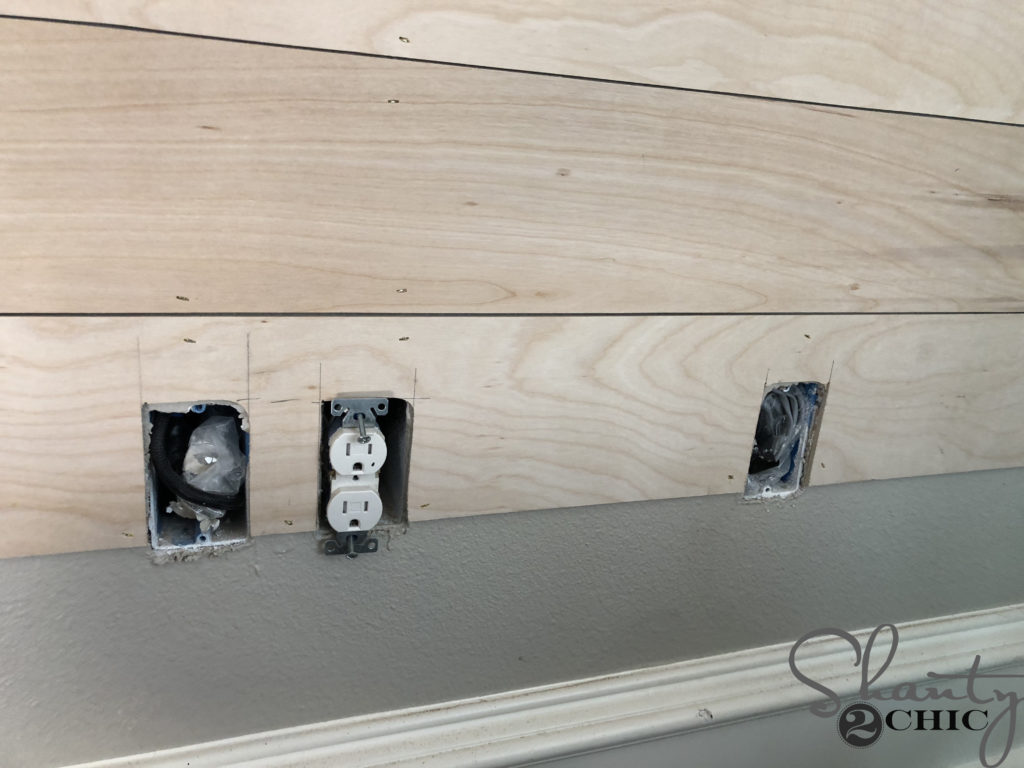
Most walls will have a few outlets that you will need to trim around. The great news is that your cuts don’t have to be perfect because they will be hidden behind the outlet covers. I used a jigsaw to cut for the outlet covers. You can see how we do this in THIS VIDEO and THIS VIDEO.
I finished one side of the fireplace and moved on to the other side.
Once the planks were attached, I filled my staple holes with wood filler.

![]()
You can find our favorite wood filler HERE on Amazon!
Once the wood filler dried, I gave the planks two coats of Ivory Lace paint by Valspar.
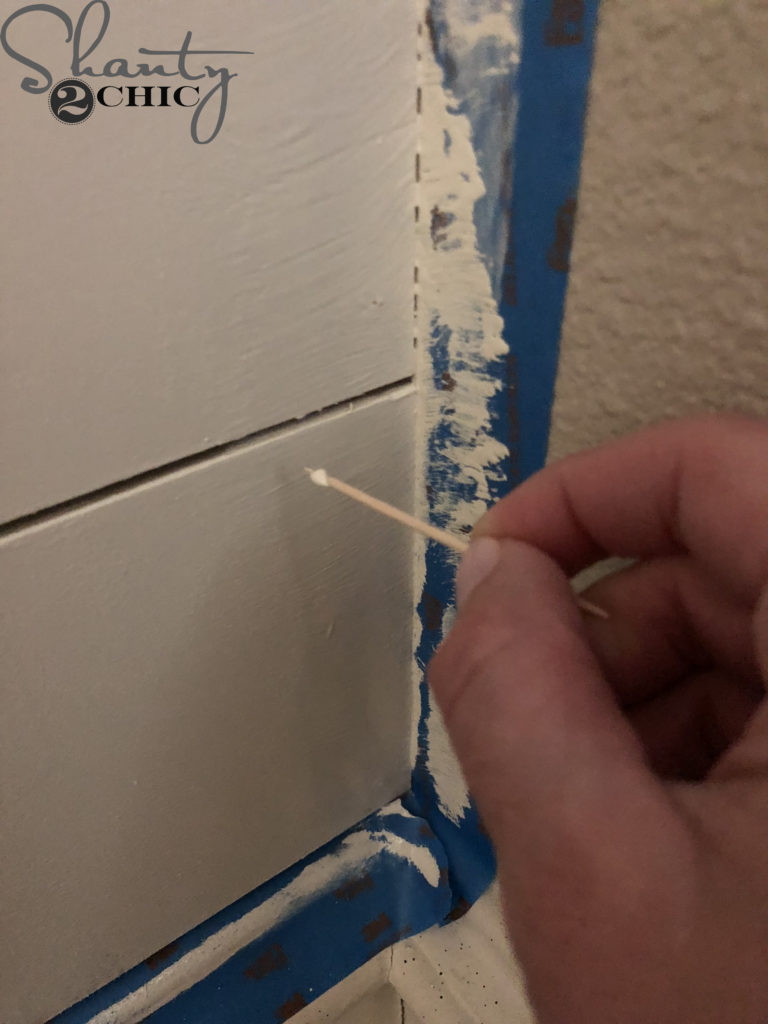
I used a toothpick to clean the paint out of the cracks. If you want to avoid this step, you can paint the planks before installing them. I was challenged with work space to paint them so this was a faster option for me.
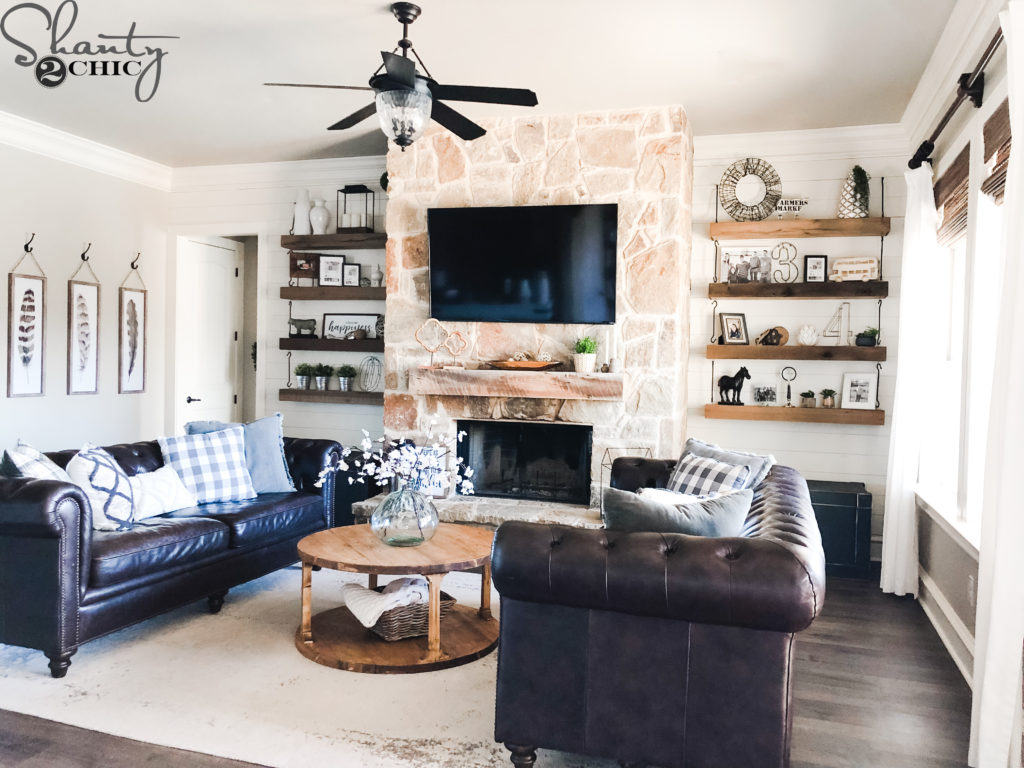
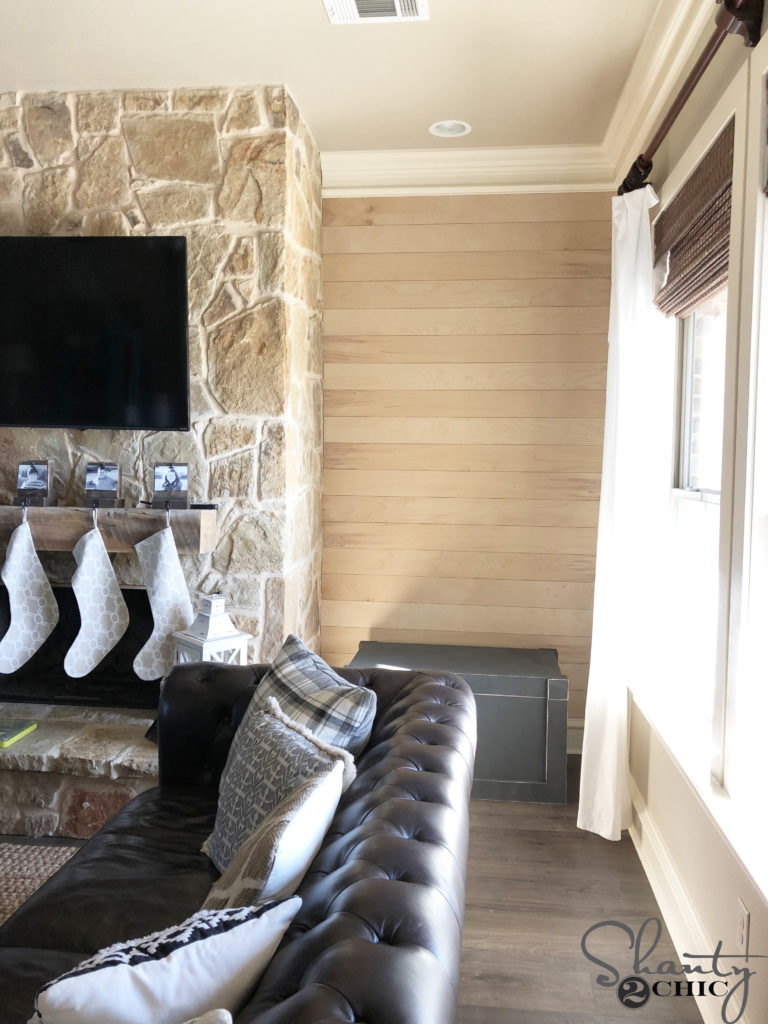
That was it! I build those cute floating shelves to go over the planks and I LOVE the whole look! You can find the free plans for the shelves HERE!
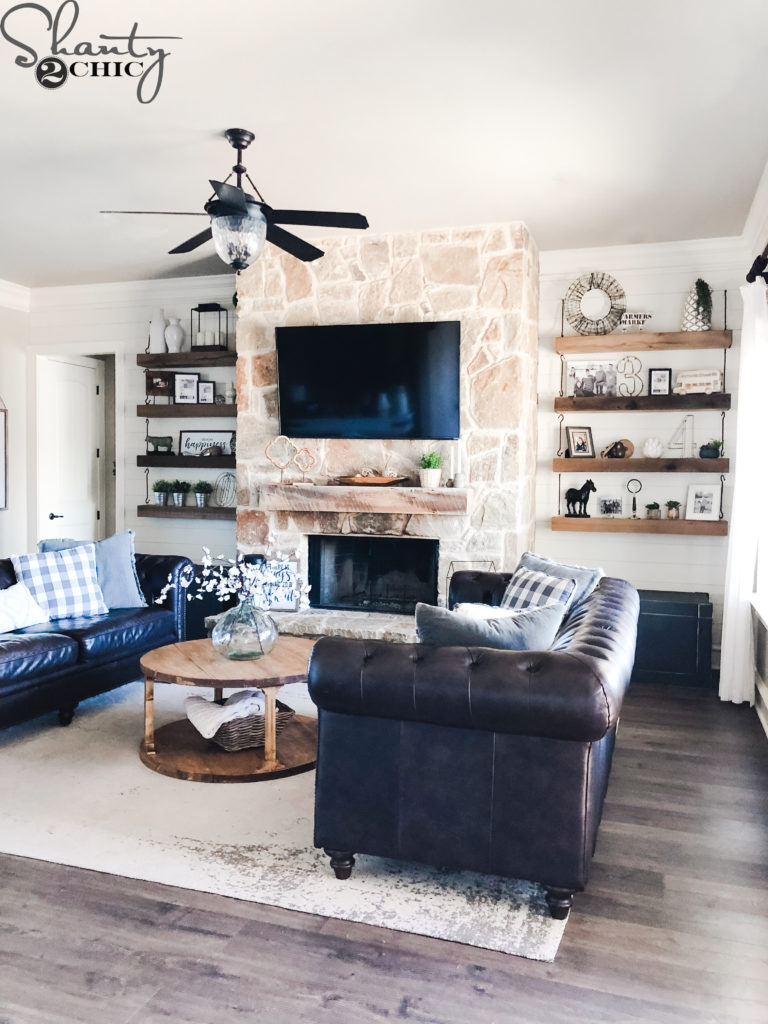
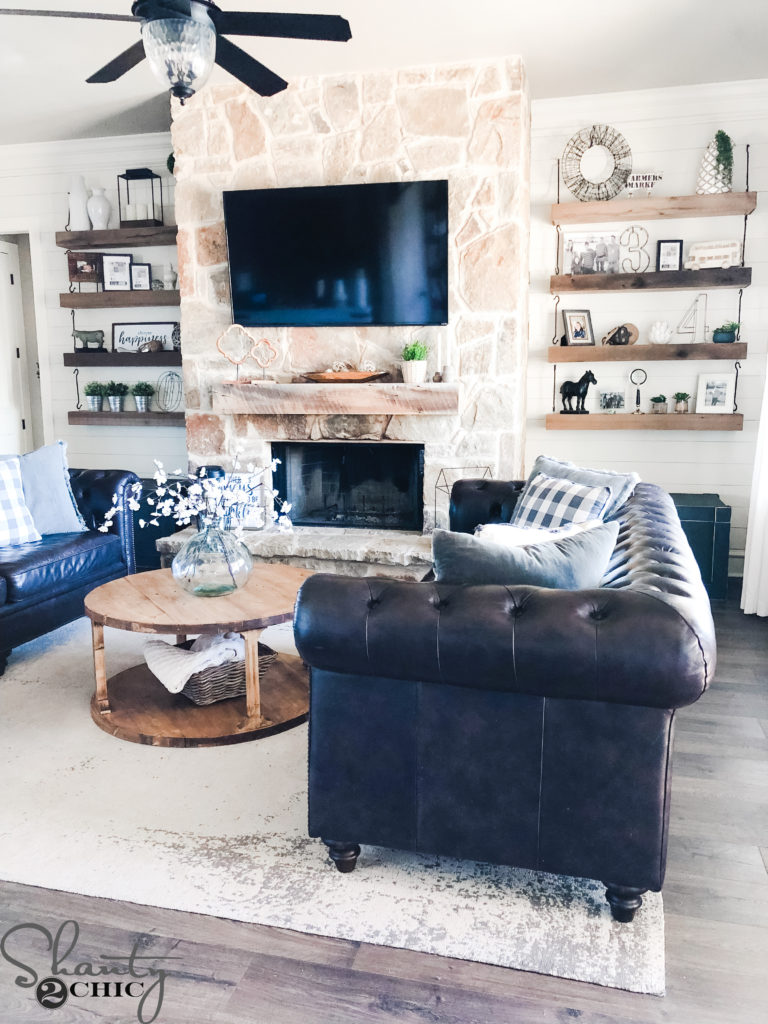

I love my new shiplap around my fireplace and my new shelves! The planks made my living room so much brighter and they added character and dimension! Now I want to plank my entire house 😉
I’m linking to everything in this room below! Thanks so much for stopping by! Happy Building!


Did you put trimming around the edges on the shiplap by your fireplace ??
I’m looking for a tutorial on how you did the updated mantel. When I click on the mantel link it takes me to your original mantel tutorial.
Where we are Home Depot charges 1$ per cut after the first four cuts. It ends up being incredibly expensive. Make sure, if you’re doing this at Home Depot, that they have the machine that holds the plywood as it holds the measure for the full 8’-9’. The stores that measure and cut by hand there is always too much being wasted. Since it’s Home Depot, not RONA, they won’t correct their error and you’ll either have to pay for it or walk away.
I just did a faux shiplap project on three walls in my living and kitchen area. After reading many tutoriasl and reading that Home Depot rips your plywood at no charge, BE WARNED!!!! They DO CHARGE! 75cents for every single rip!! They didn’t tell me this till they were about 6 plywood sheets in!!!!! I was stunned! But apparently it depends on their mood because I know of others where they didn’t charge, but they have every right to! I was furious that we were not warned, then they pointed out a tiny little sign that was actually hidden behind the large plywood. It was a fiasco with about 5 employees ganging up on us! Ultimately one guy literally shut down the machine as the nice guy was cutting and said its a policy that “we don’t cut anything less than 12″ wide!!!” They refused to cut anymore! Just my HUMILIATING experience and wanted anyone doing it to be warned! This is a great tutorial by the way!
Not all Home Depot’s charge. We paid $0.75/rip in San Diego, but now that we are in Gig Harbor it is complimentary.
I have a rock fireplace also. What did u happen to use to mount ur TV up?
Love Shiplap!!! This is my new favorite go to for a project.. I did my fireplace wall and also make a shiplap wall for my dart board!