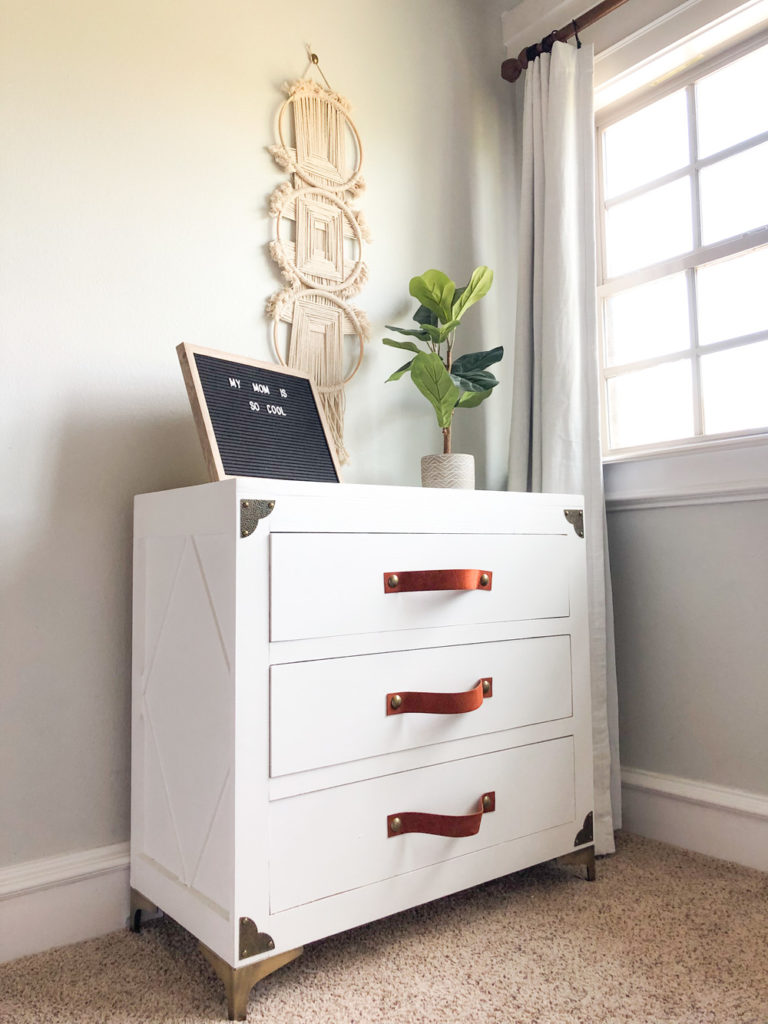
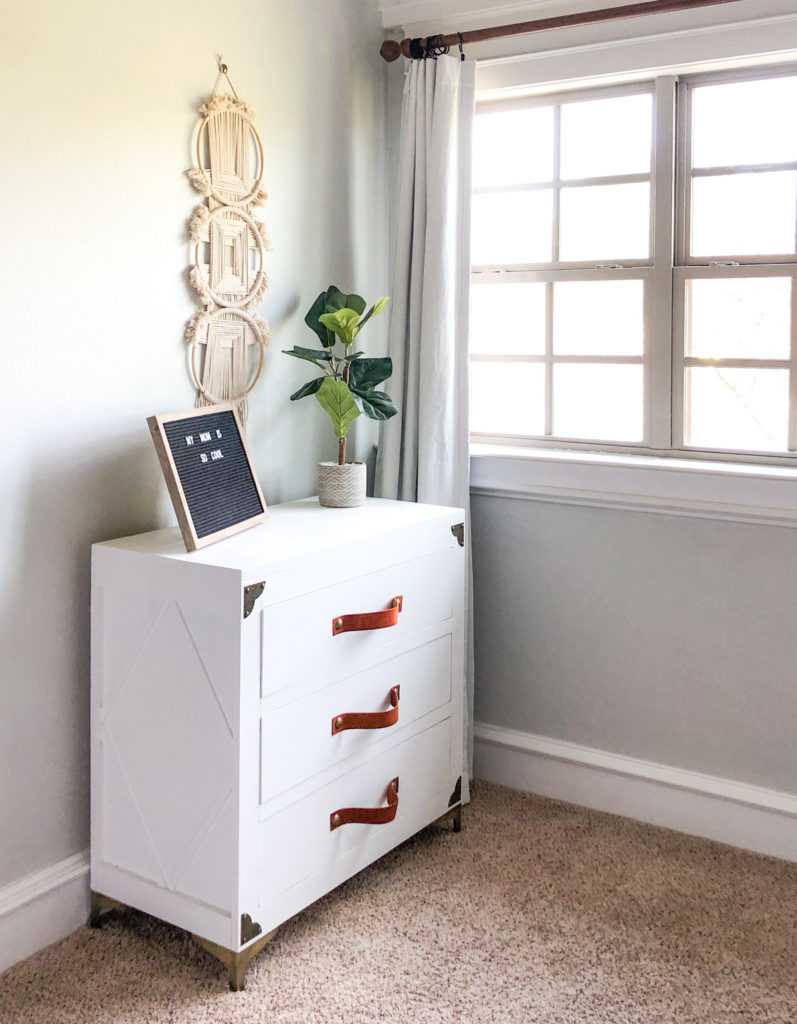
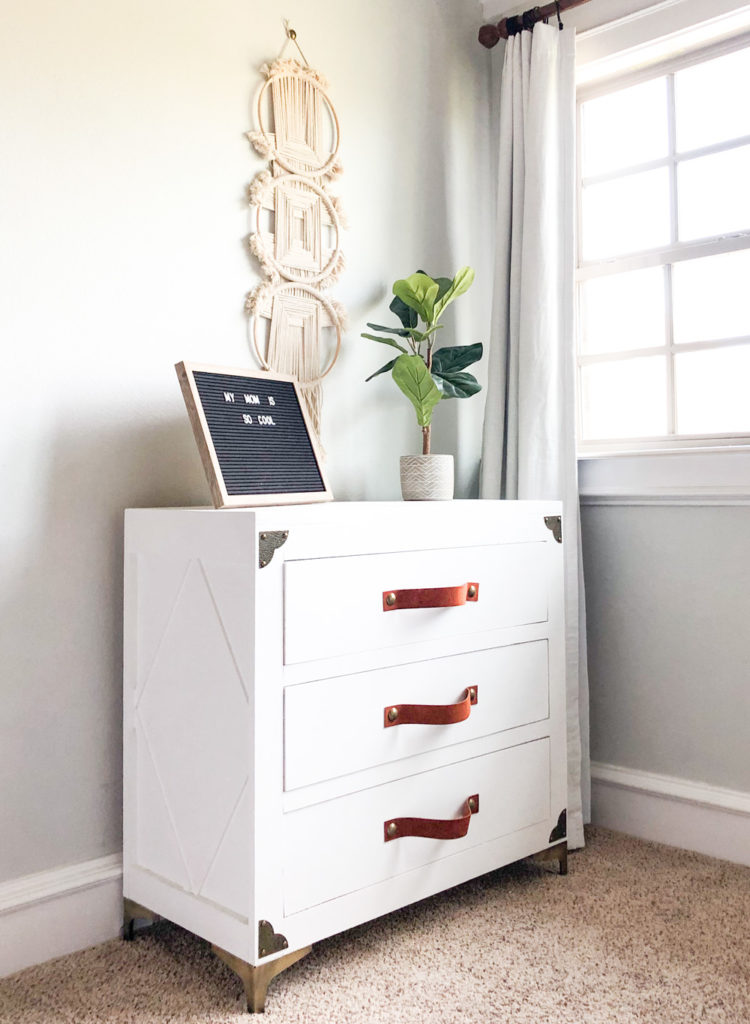
I am LOVING this dresser we designed and built for my daughter! She recently switched rooms with one of my other girls, and we have been fixing up her new space! She was in serious need of clothes storage, and this fits the bill. Check out how cute her DIY Rustic Glam Dresser turned out! You can watch the how-to video below by clicking the play button!
Before we get started, be sure to download and print the FREE plans by clicking HERE!
One of my favorite things about this dresser is the hardware. I was in Joanns a few months back and came across a line by Dritz of the CUTEST hardware! I had no idea they even made hardware. I purchased it with no clue of where I was putting it because I loved it so much haha! The only negative about this hardware is that it’s tricky to find online. You can check stores if you have one, and I also found some great substitutes on Amazon… I got your back ;-). I’ll link to those at the bottom of the post!
Table of Contents
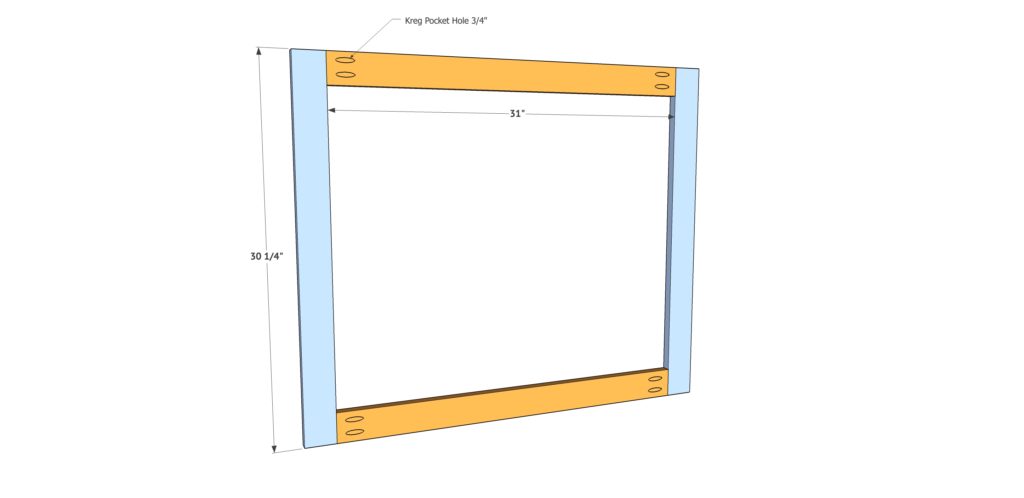
Step 1
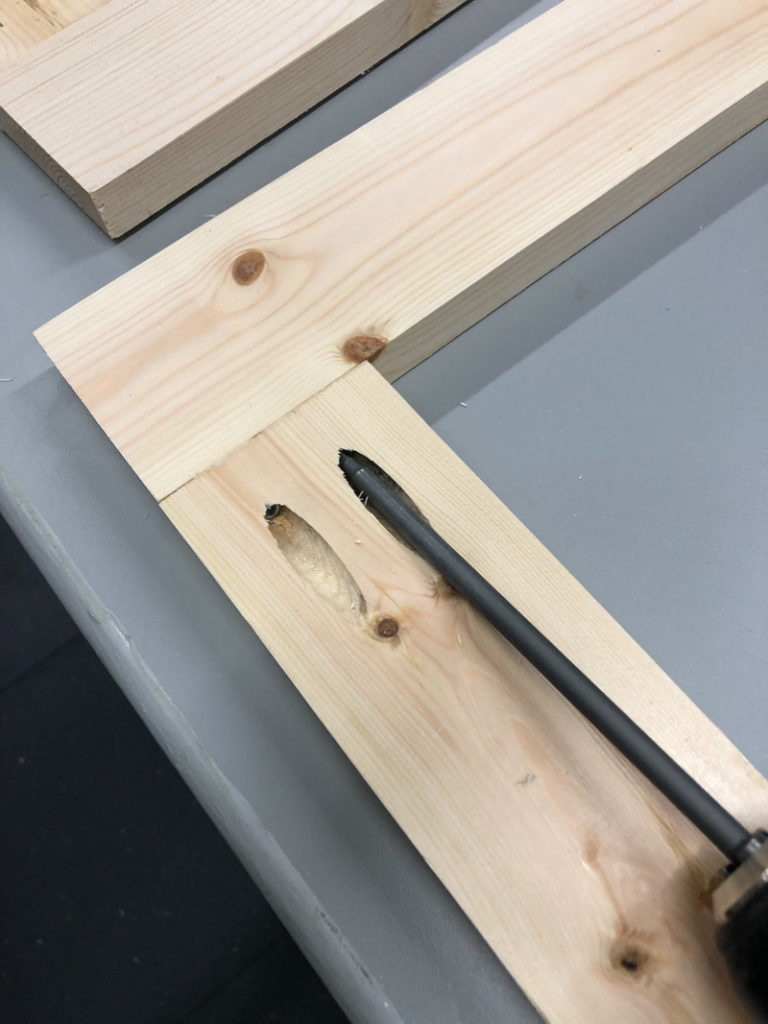
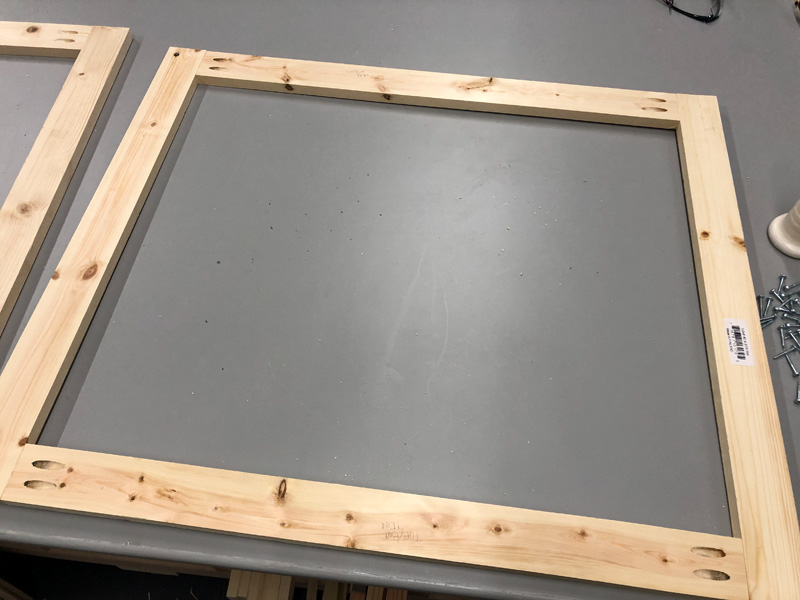
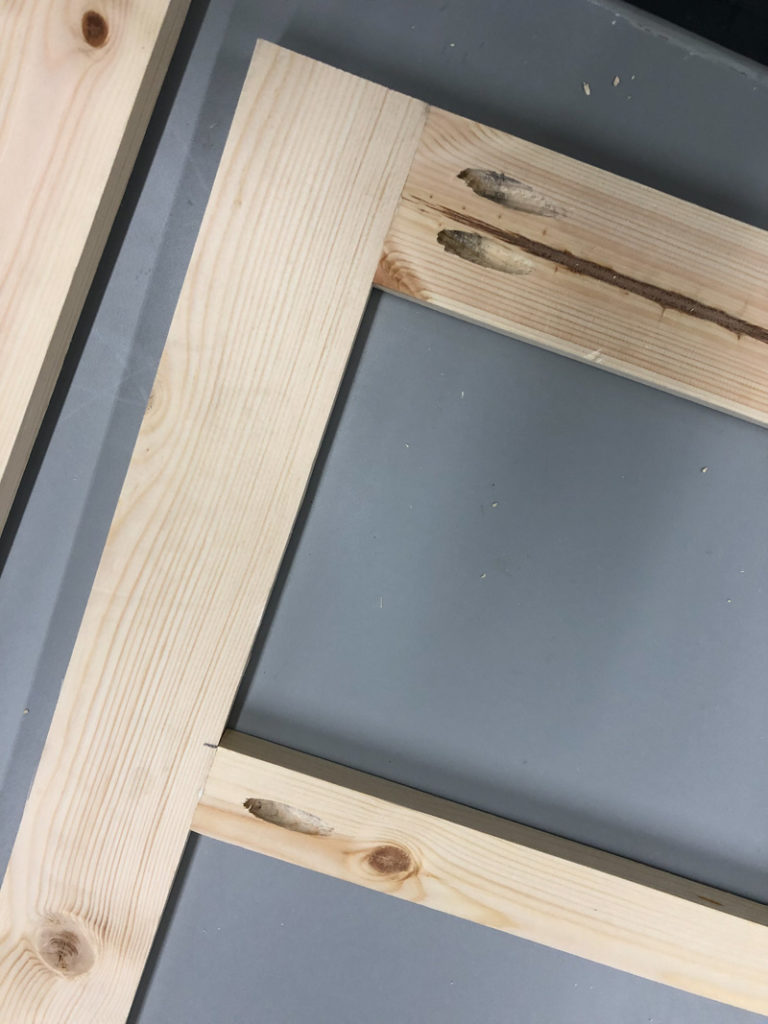
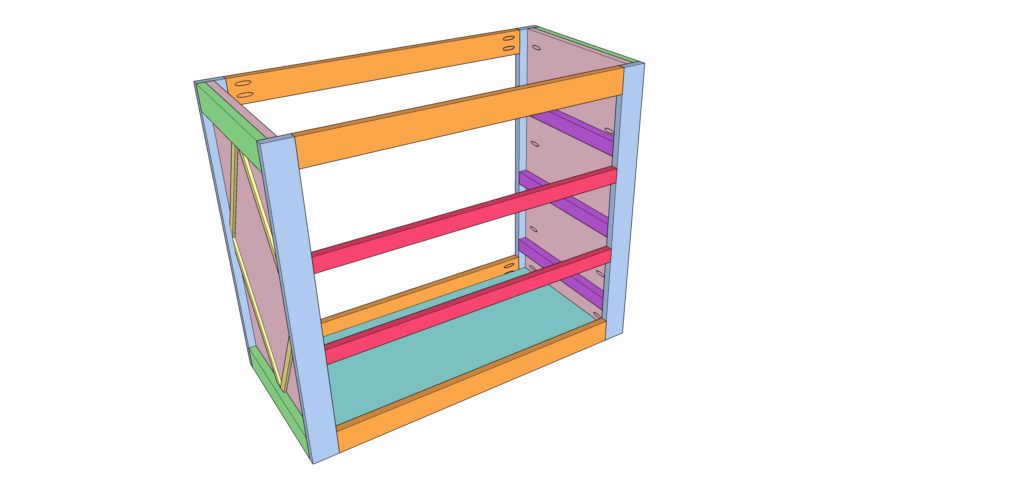
Build the back face frame first. Attach the top and bottom 1×3 boards to the vertical boards using wood glue and 1.25” pocket hole screws through 3/4” pocket holes.
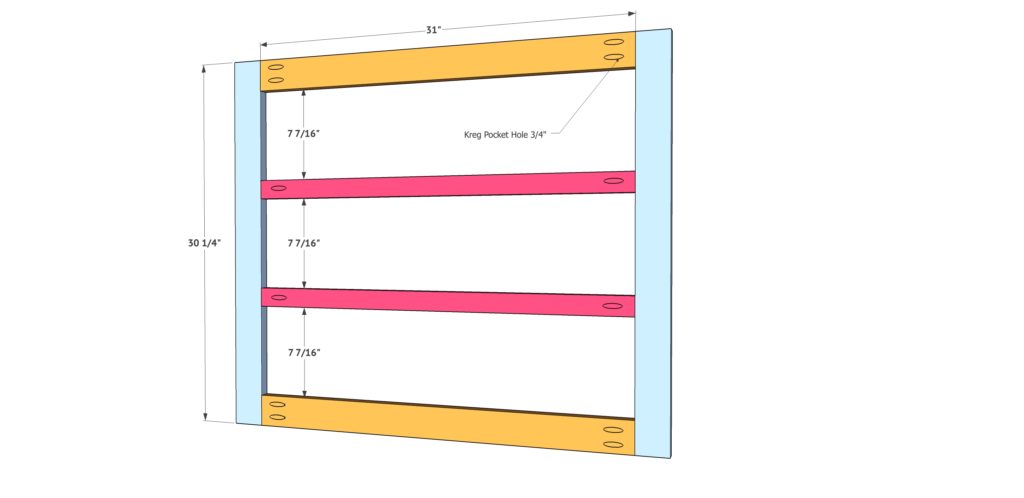
Step 2
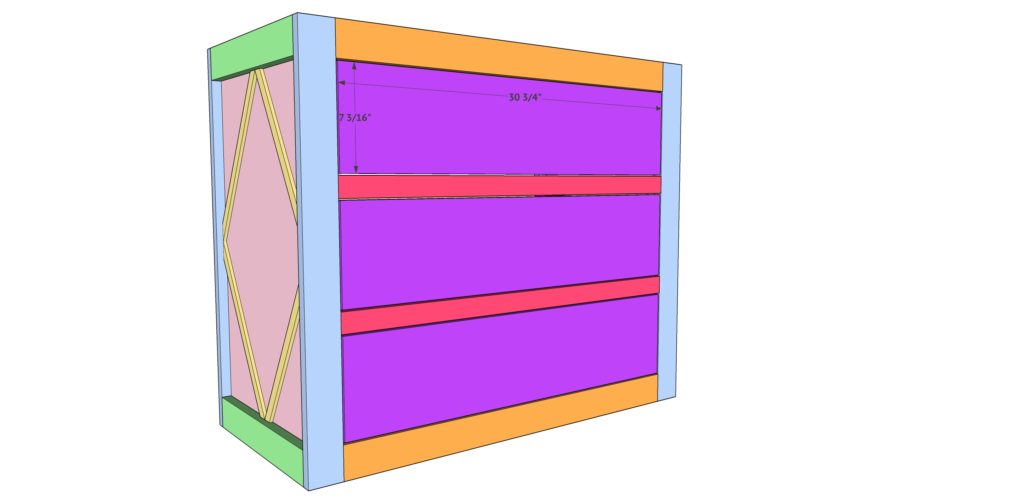
Build the front face frame next. This will be identical to the back face frame, but you will also add two 1×2 boards that will be the drawer dividers. Attach all horizontal boards to the vertical boards using wood glue and 1.25” pocket hole screws through 3/4” pocket holes.
Step 3
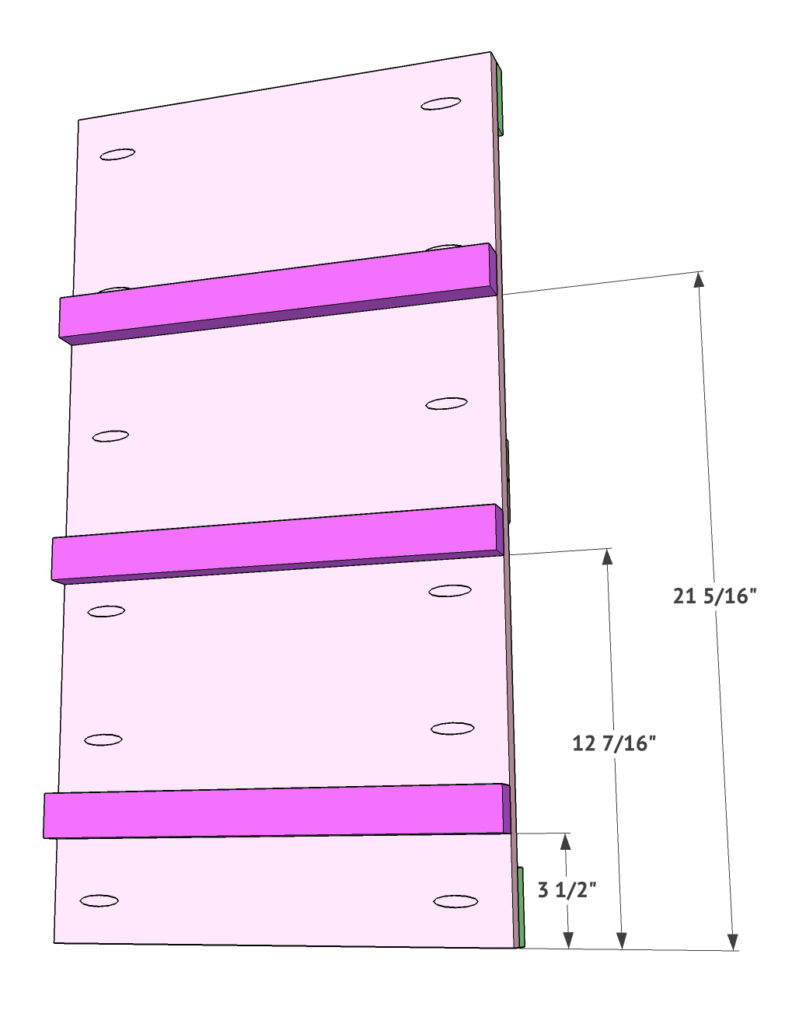
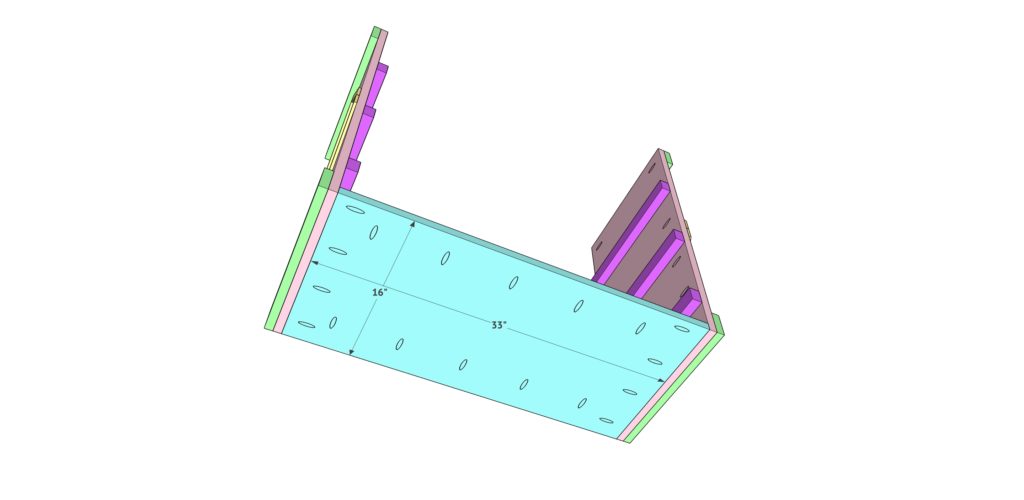
Build the sides of the dresser next. You will build 2 of these that are identical. This is 3/4” hardwood plywood. Add 3/4” pocket holes up each vertical side. Attach the 1×3 trim to the outside of each side using wood glue and 1.25” brad nails. Attach the drawer slide supports to the inside of each side. These are 2×4 boards that I ripped to 1” thick each You can also cut 1.5” strips of the 1/2” plywood used on the drawers and stack it to create the supports. Attach these boards using wood glue and 1.5” wood
screws.

Step 4
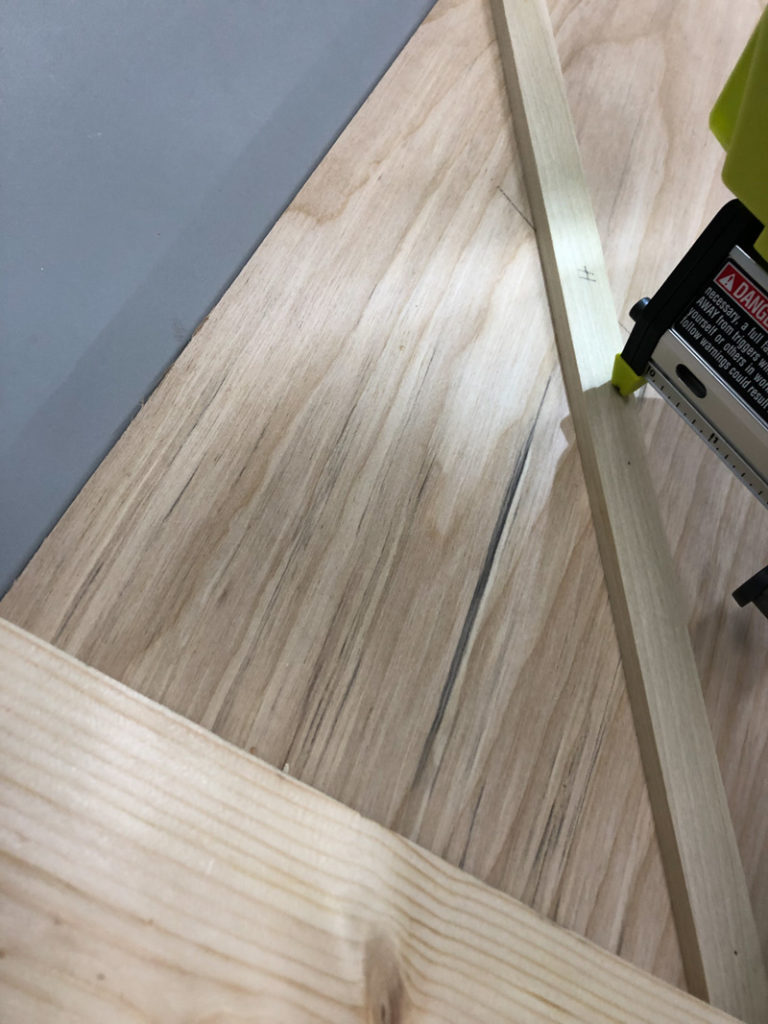
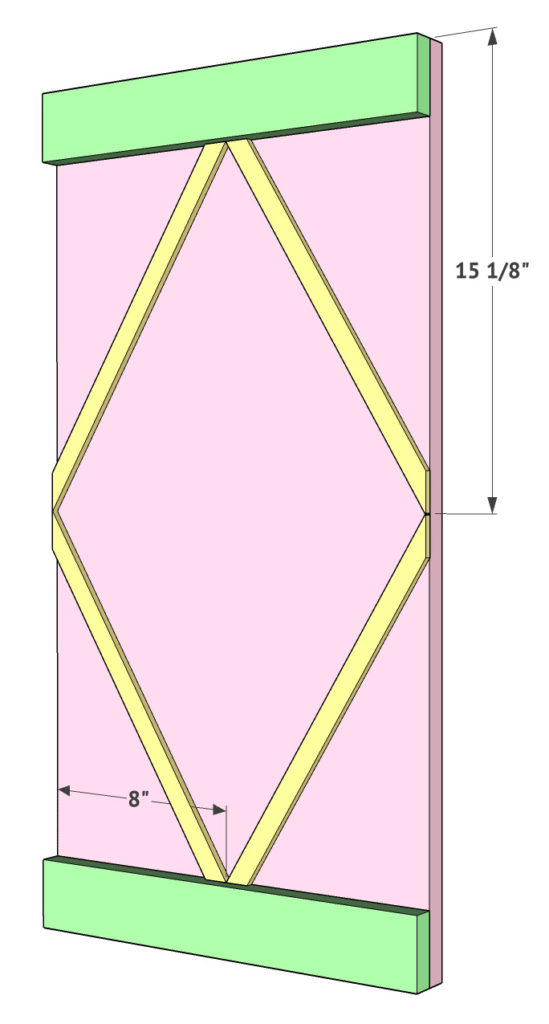
Next add the decorative diamond trim. Any 3/4” wide lattice will work for this part. I chose to create my own by ripping down a 1×6 board. I trimmed
1/2” at a time off of it using my table saw. It saves money too! The easiest way to get these angles and measurements is to hold each piece in place and mark your cut with a pencil. Then, position your miter saw to make the exact cut. Attach the trim using wood glue and 3/4” brad or pin nails.
Step 5
Once both sides are built, attach the base of the dresser. This is also 3/4” hardwood plywood that we ripped to 16” wide. Add 3/4” pocket holes along each side of the base, and attach it to the base of each side using wood glue and 1.25” pocket hole screws.
Step 6
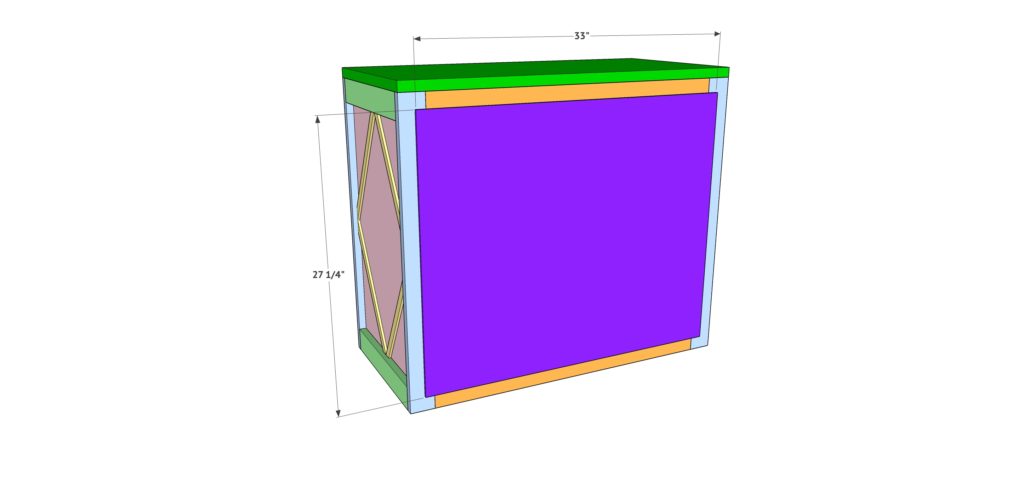
Attach both front and back face frames next. Use wood glue and 1.25” pocket hole screws to attach the face frames through the pocket holes on each side and the pocket holes on the base of the dresser. The top and bottom of the dresser sides will be flush with the top and bottom of the face frames, and the sides of the face frames will be flush with the small 1×3 trim pieces.
Step 7
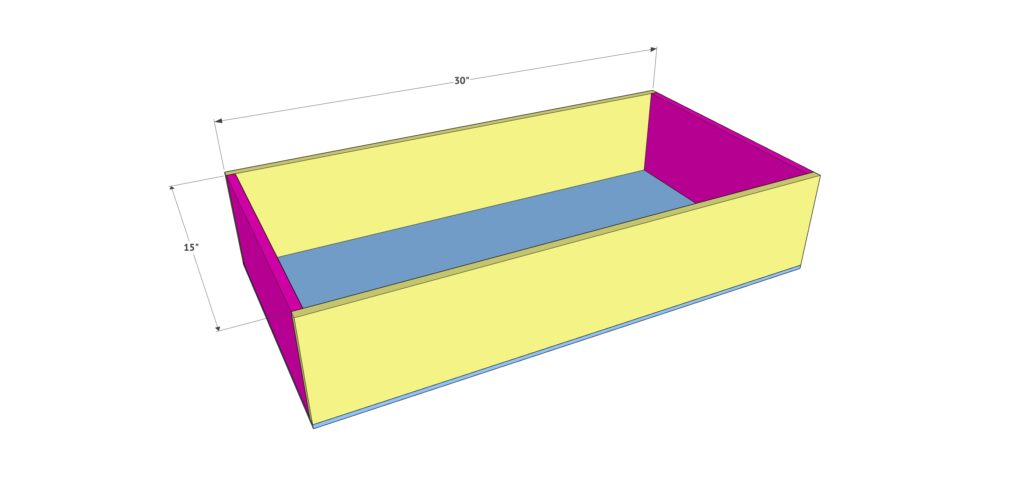
Next build your drawers. The outsides of each drawer are built with 1/2” hardwood plywood. The base of each drawer is built with 1/4” hardwood plywood. Attach each side using wood glue and 1.25” brad nails. Then, attach the base using wood glue and 3/4” staples through the base and into the bottom of each side. Make sure all edges are flush.
Step 8
Create the face frames next. Refer to our video to see
how we installed the drawers. Once all drawers are in place, cut the 3/4” plywood to size. Use cards or coins to space the drawer faces evenly and attach them with wood glue and brad nails.
Step 9
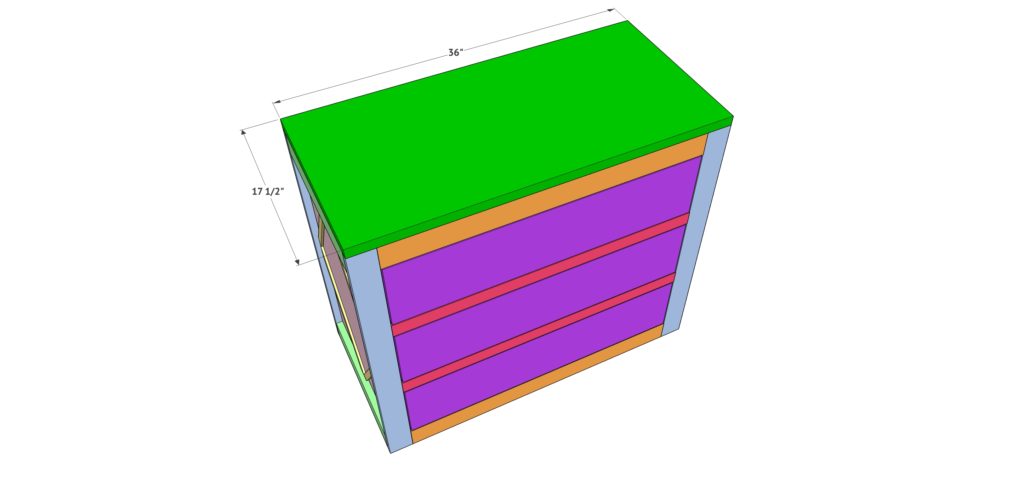
Next, attach the top. This is a 1” thick project panel. These can be found in the board section at the hardware store. They are laminated pine and come in various sizes. I used my table saw to cut mine to size. Attach it to the top of the dresser using wood glue and brad or finish nails through the top and into the sides and face frames of the dresser.
Step 10
The final step of building this dresser is attaching the back. This is 1/4”
hardwood plywood cut to size. Attach it to the back of the dresser using
3/4” staples through the plywood and into the back face frame.
Now let’s talk hardware!
Here are the drawer slides we used!
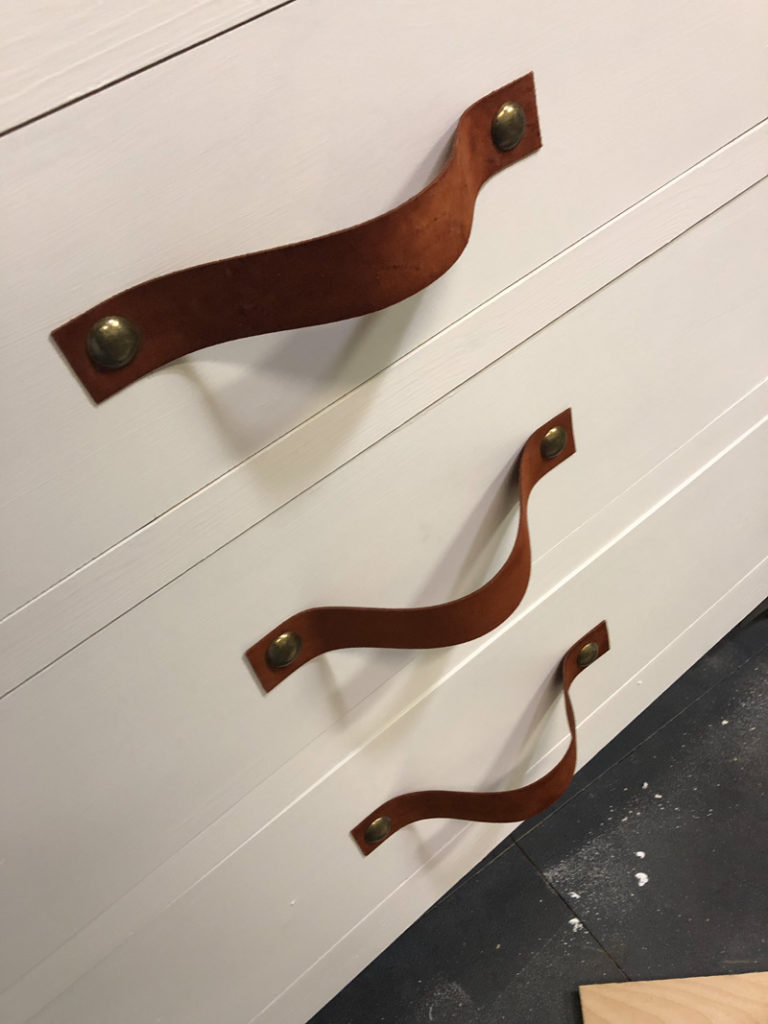
To create the leather pulls, we found this leather!
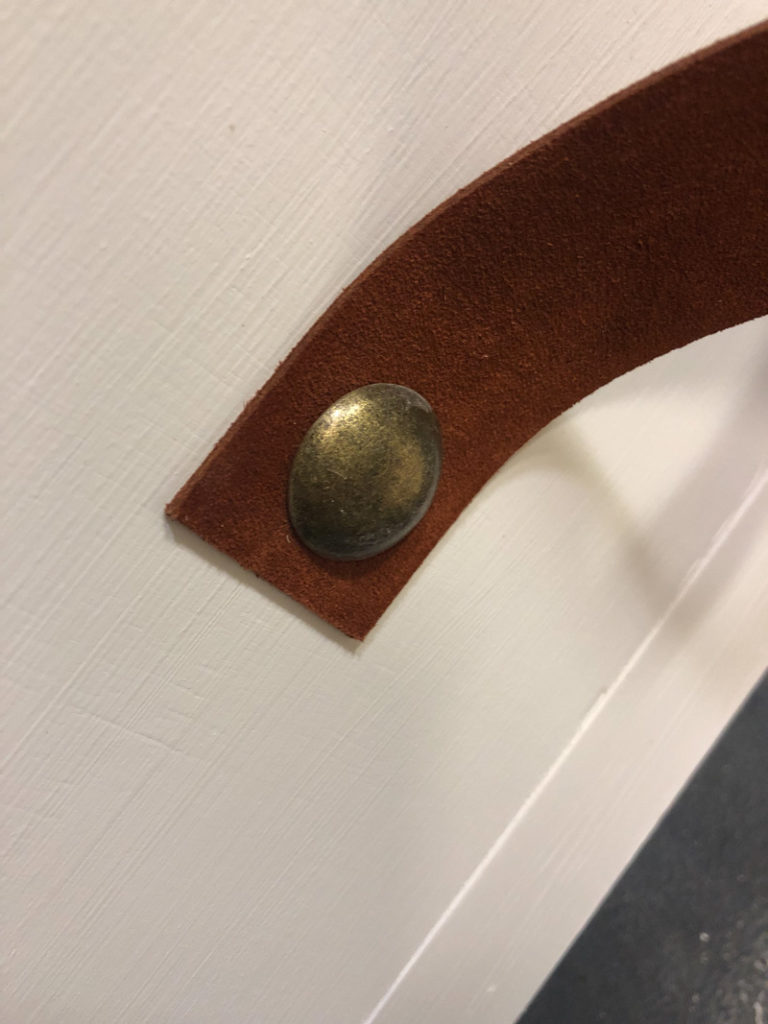
I cut 3 pieces of leather the same size, around 12″. I drilled small holes in the end of each leather piece.
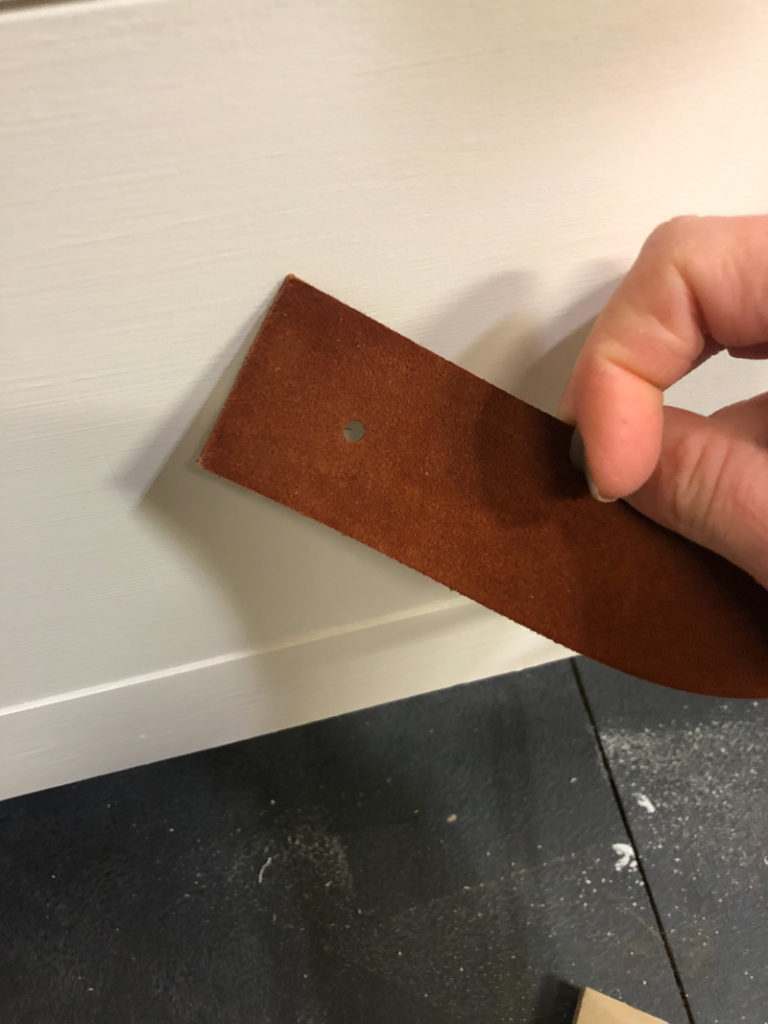
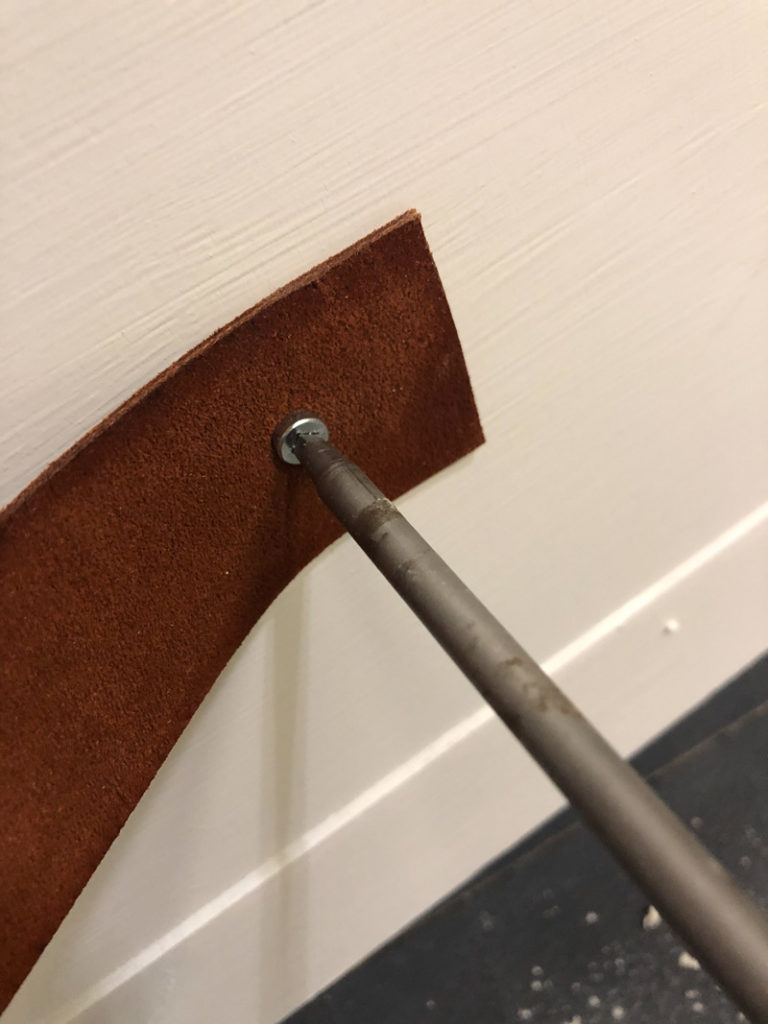
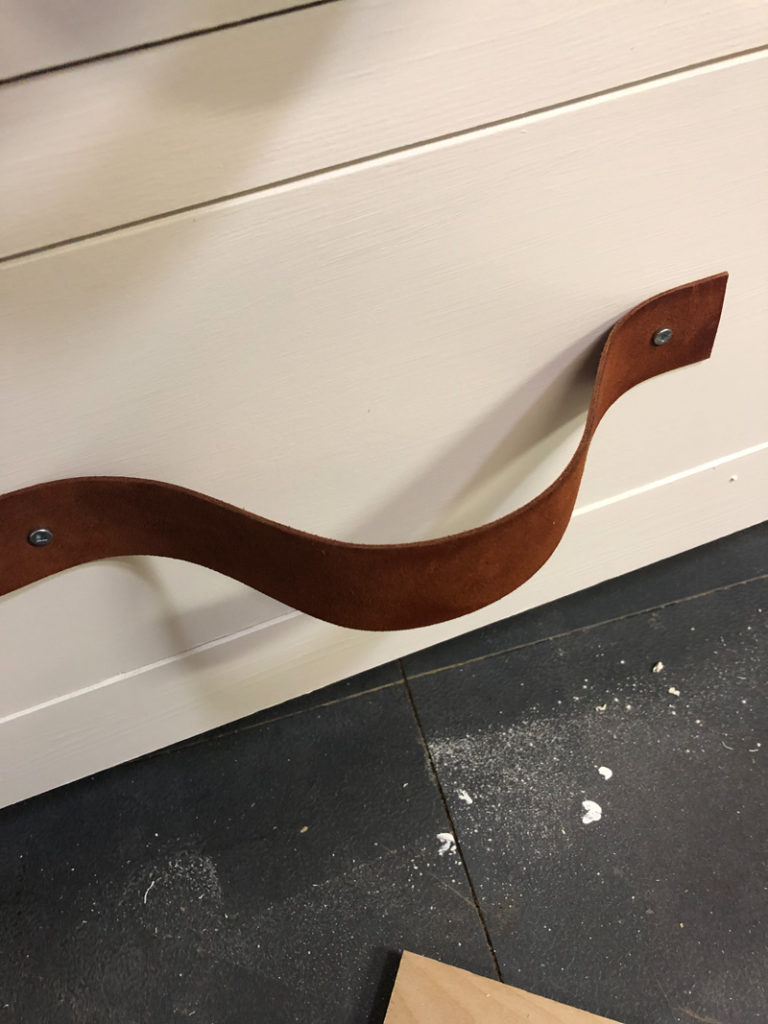
Next, I found center on the drawer face, and attached the leather using Kreg screws. You want to leave enough slack in the leather to create the pull.
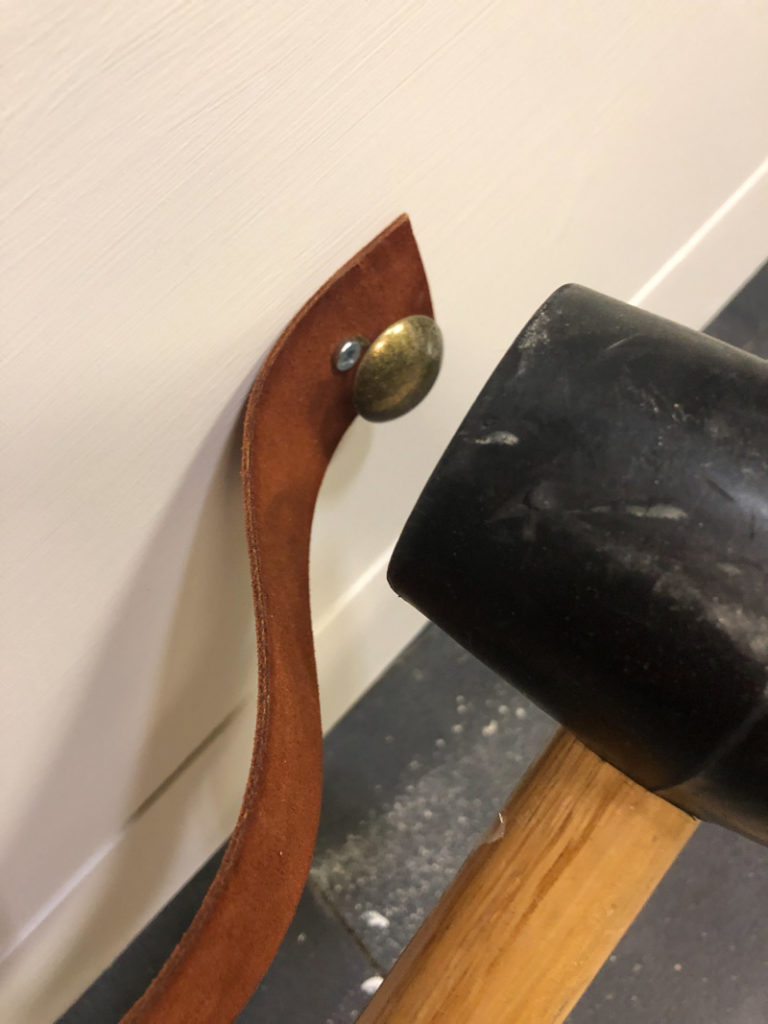
Then, I used a mallet to cover the screws with these super cute nail heads I found! Click HERE to find the nail heads on Amazon.
The feet are from the Dritz line, but again super hard to find! I did find some really cute similar ones on Amazon.
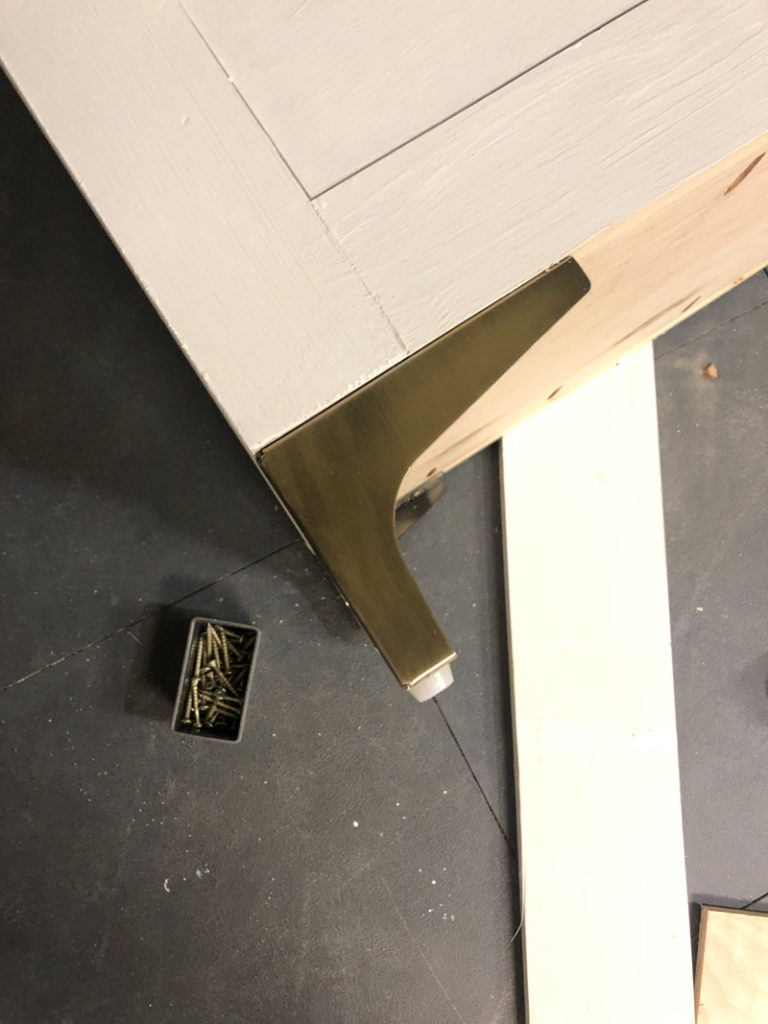
These feet are the same style but black finish!
These feet are the same style and are a brass finish!
The metal corners are also from the Dritz line… but I wasn’t able to find similar styles. Here is the link on Joann’s site so you can see if your local store carries them!

Now to recap… How stinking cute is this dresser!


Wow! exactly done, looks really good and premium.
How much does it typically cost to construct something like this?
Love this! Just wondering what type of paint you used on this?
Around about how much did this cost to build?
Yes how much is the average price to build this?
Are the drawer boxes (1/2″ Ply) the same height as the drawer face?
Drawer face is listed as 7 3/16″
Thanks Girls!