Hey friends! We had so much fun crashing our sister’s new house a few weeks ago. We built her a ton of things! Today we are showing you how to build the cutest, and possibly the DIY simple square coffee table! She has a new loft space upstairs, and needed a coffee table. We knew a square one would fit perfectly, so that’s just what we did. I found the most awesome (and cheap!) metal base on Amazon. You can find it HERE! It actually comes with a top, but we are only using the base for this project. Before we get started, go check out our video tutorial below!
This really is the most simple build! And, you can totally change it up to make it fit your style. You can download a free printable plan of this table top HERE.
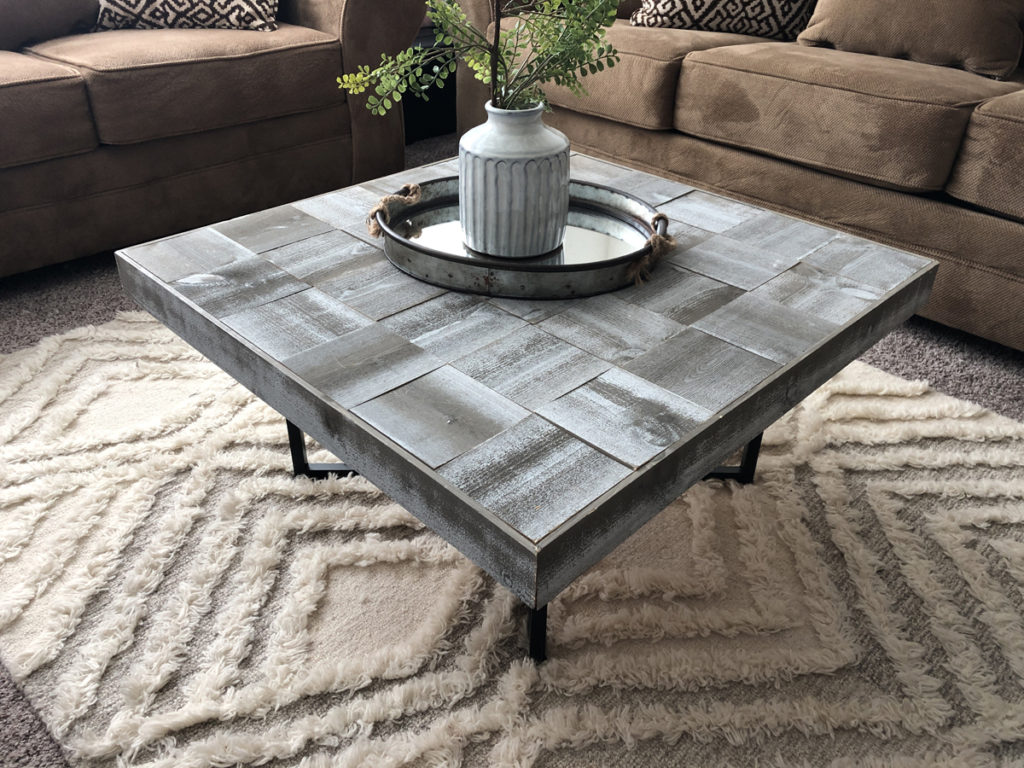
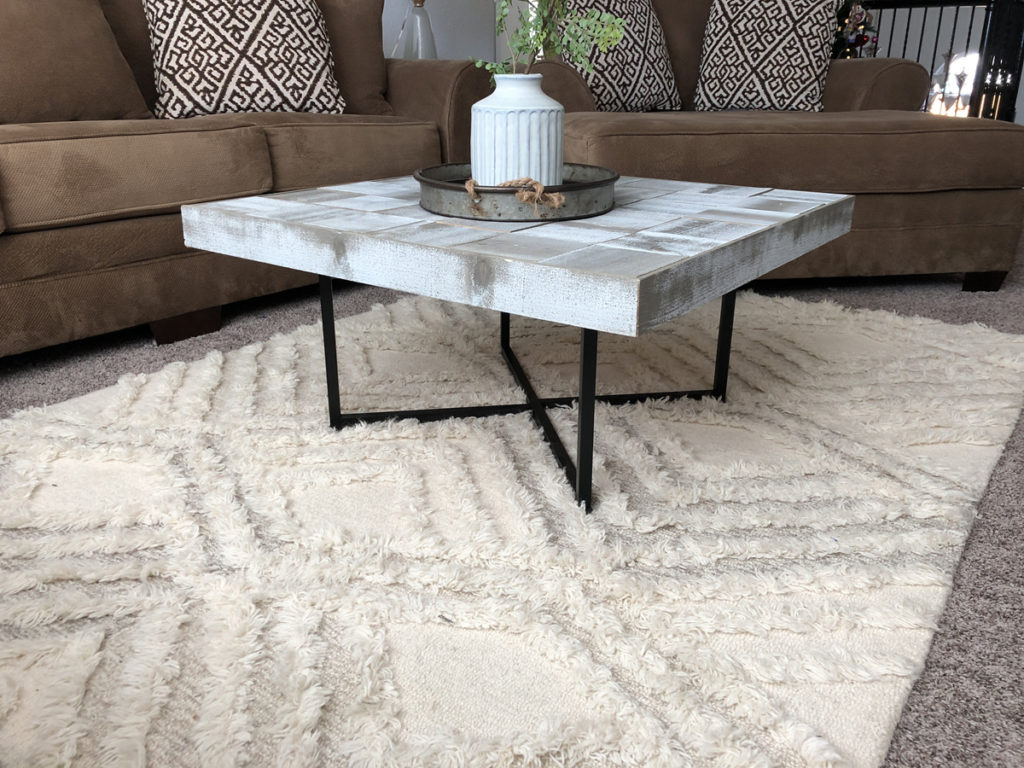
Table of Contents
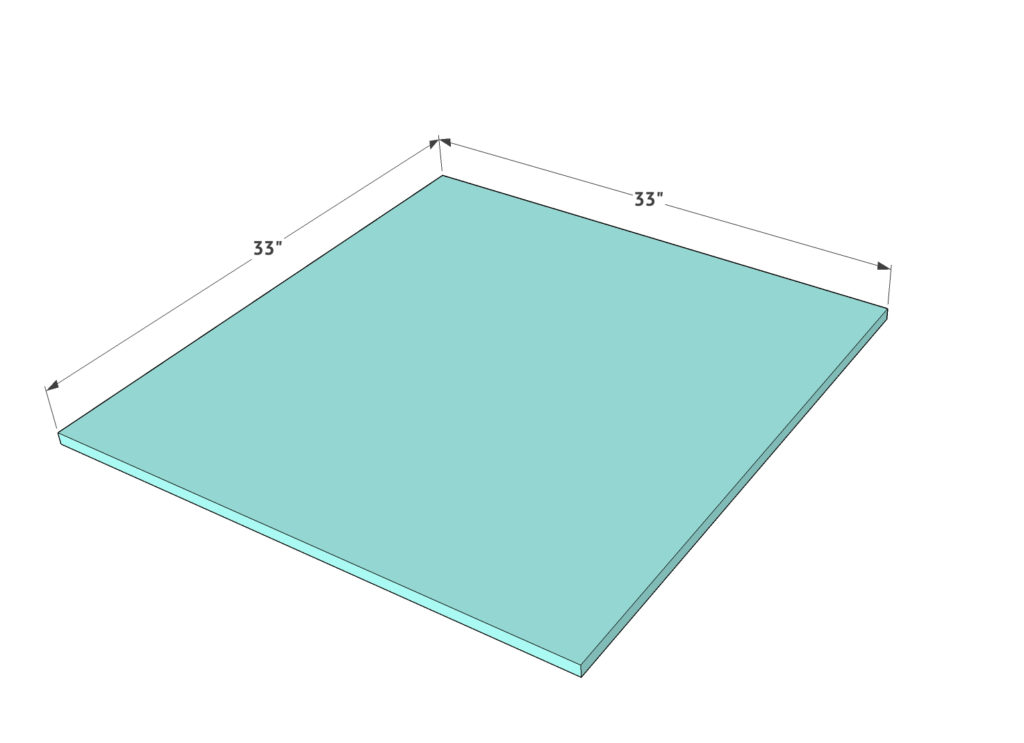
Step 1
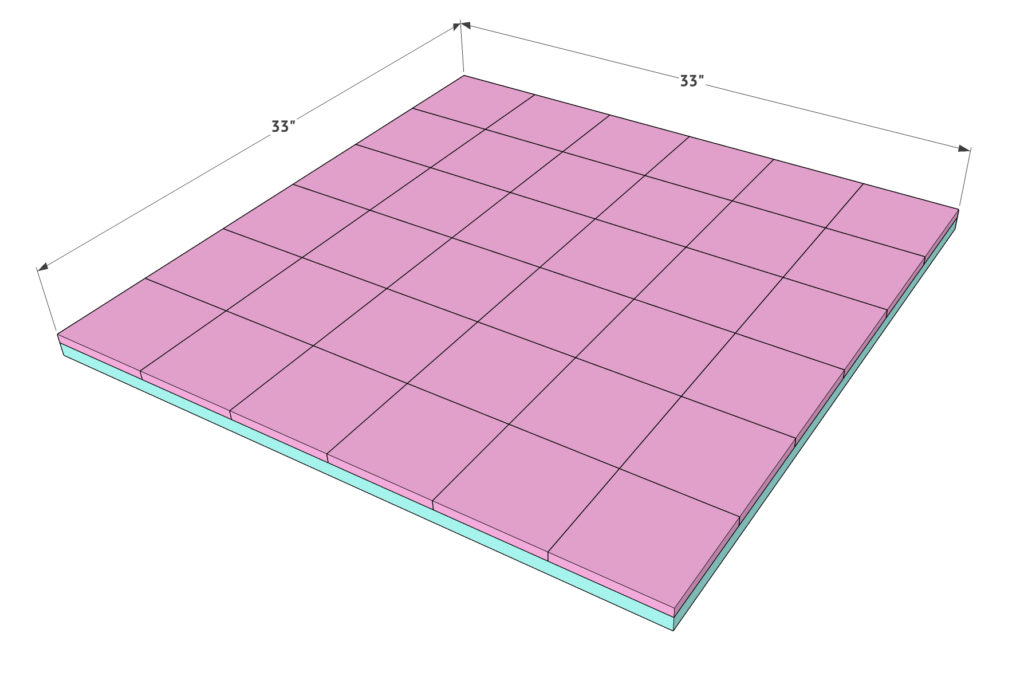
The top of this coffee table is constructed with plywood that is covered in boards. This is 3/4” plywood cut to size. I used the cheapest plywood the hardware store offered.
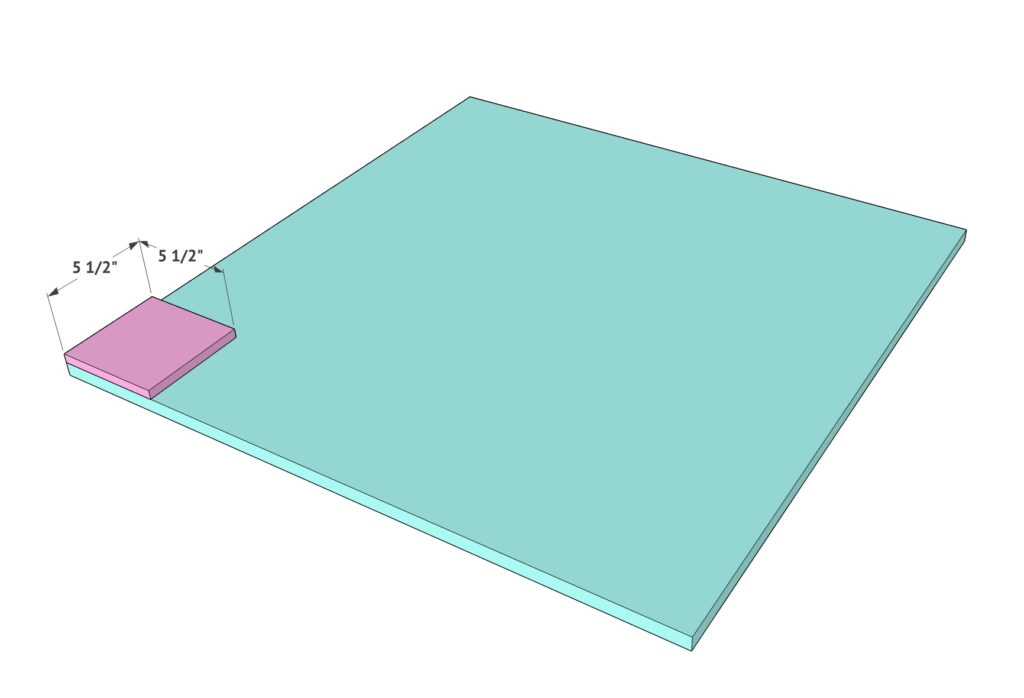
Step 2
The top of the table is 1×6 boards cut to squares. Each board is 5.5” x 5.5”. You can use any type of wood for this part. Even a 1×6 pine board works perfect, and you can stain it your color of choice. Attach the squares to the plywood using wood glue and 1.25” brad nails.
Step 3
Attach the remaining squares the same way. Make sure each board is flush and next to one another with no spacing between any of the squares.
Step 4
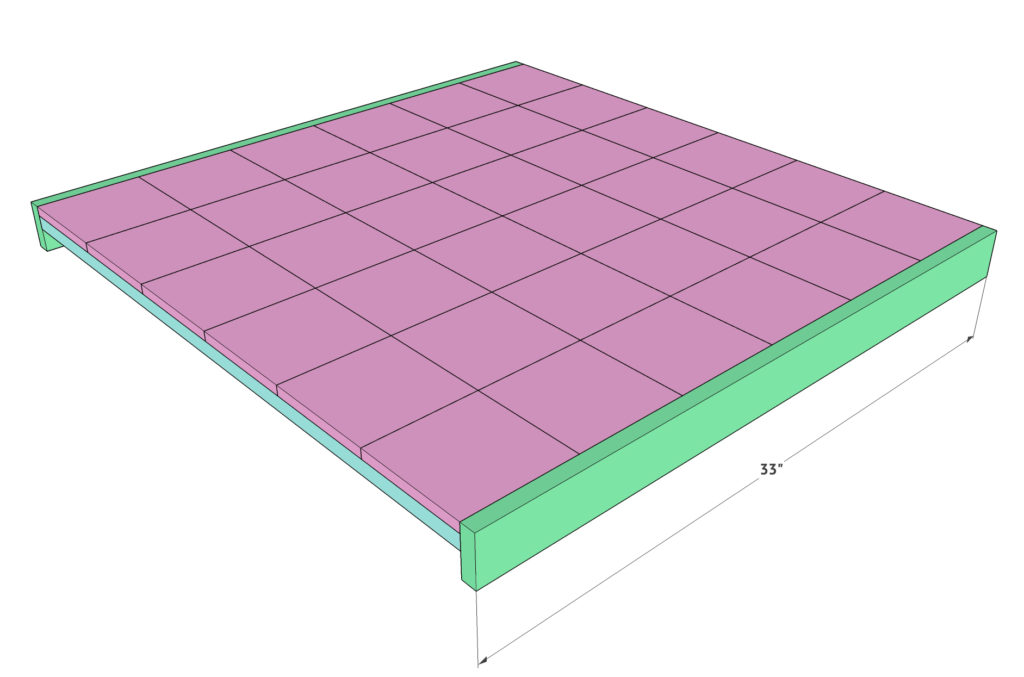
Time to add the trim! These are 1×3 boards. We used the table saw to rip ours to 2.5” wide each. Cut two 1×3 at 33” long each and attach to opposite ends of the table top using wood glue and 1.25” brad nails.
Step 5
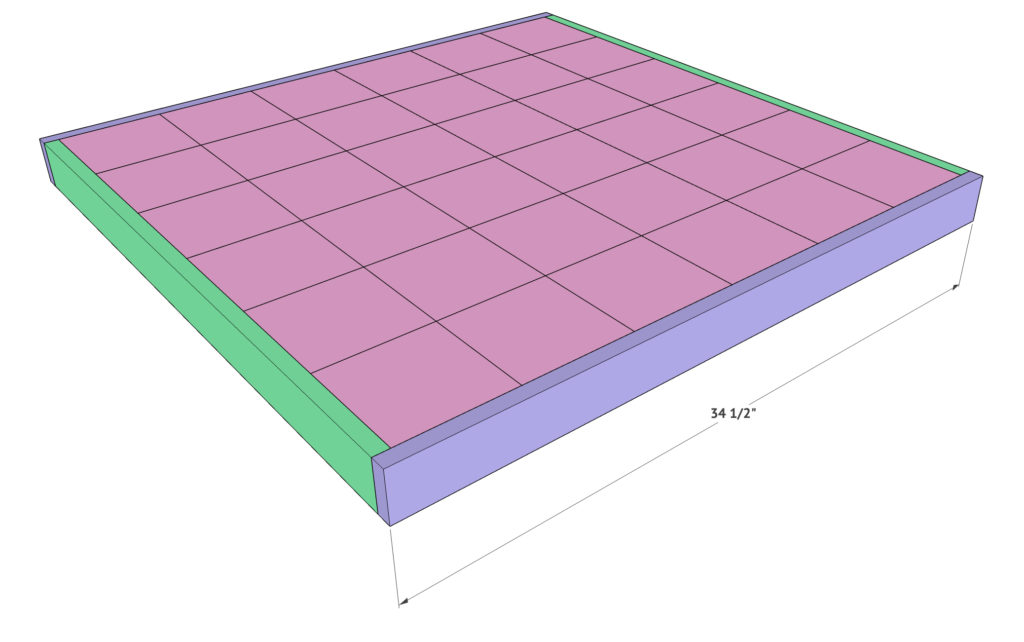
The final step of this table top is addind the final pieces of trim. Cut two 1×3 boards at 34.5” each and attach them to the table top using wood glue and 1.25” brad nails.
At this point, you will attach your table base. Refer to our video to see how we attached ours!


Although I’ve read other posts regarding bloggers, I think this one is very well written. Please keep it up.
I love this Do you have a long for the wood you used? I love this wood!