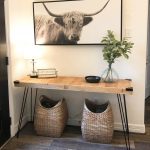
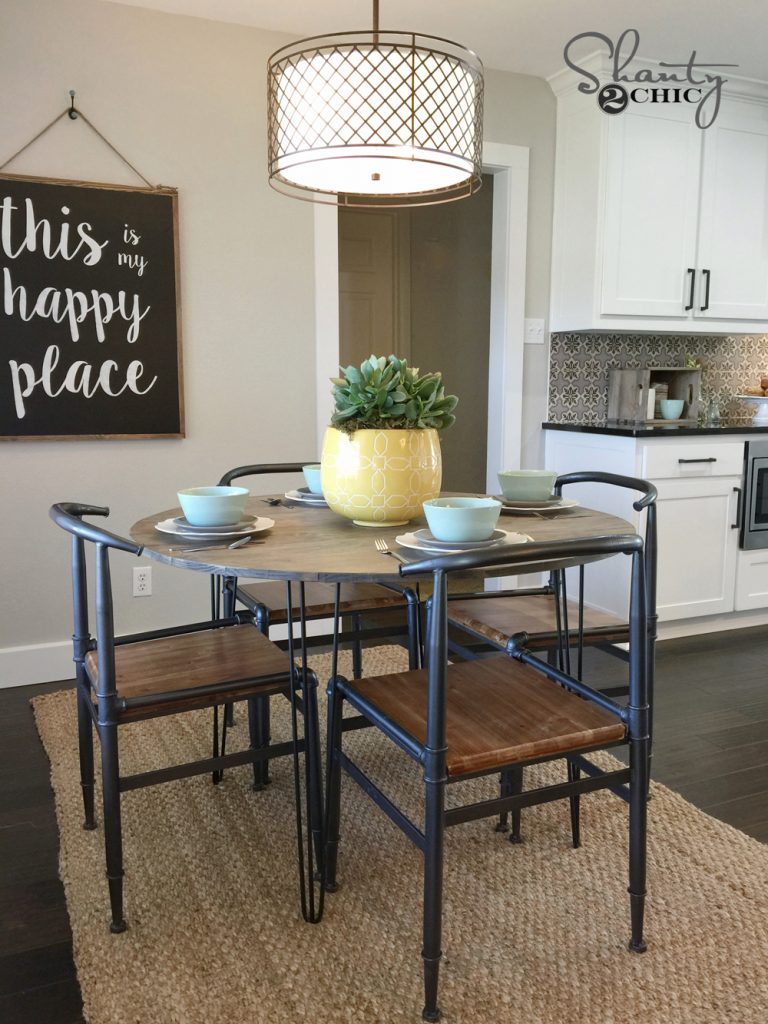
We had so much fun fixing our sister’s new home up for her! One of our favorite projects we built for her is this DIY Hairpin Console Table! It’s simple yet so chic at the same time! The open base allows space for baskets to hide all the things, and it would be perfect in any room. This is a super simple build, that requires minimal boards and tools! Come check out the video tutorial below!
I love how cute this little table turned out in our sister’s new home!

The hardware really makes this piece! We found the legs for a crazy good price on Amazon and you can find them HERE!

The corner pieces are a little pricey, but considering what we built the table for, we didn’t mind the splurge! You can find them on Amazon HERE!

Table of Contents
DIY Hairpin Console Table Step by Steps
Step 1
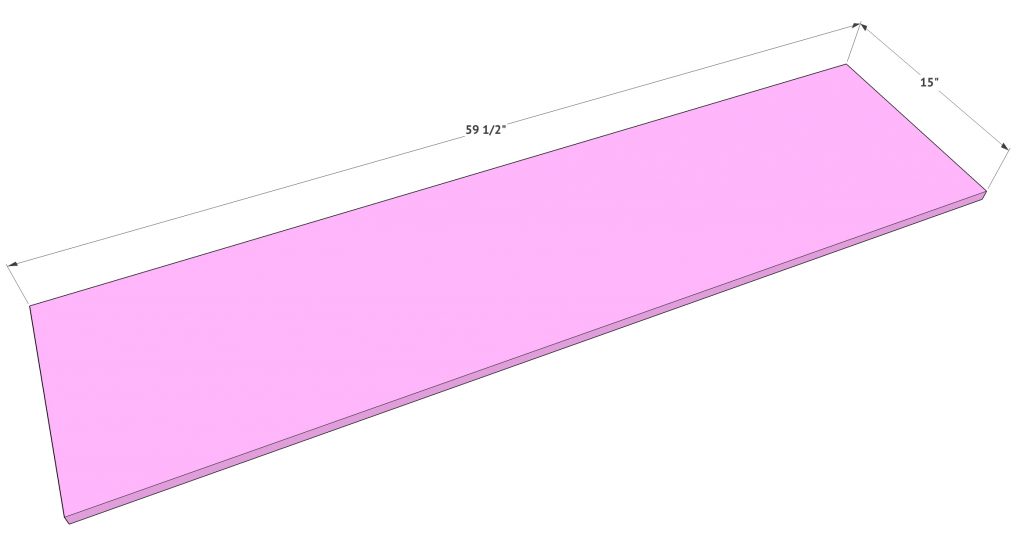
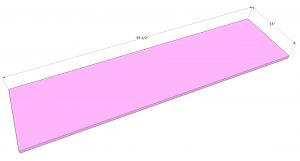
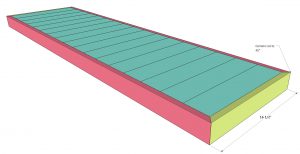
The base of the table top is created with 3/4” plywood. You can use any plywood for this part because it will be covered completely with trim. Cut the board to size.
Step 2
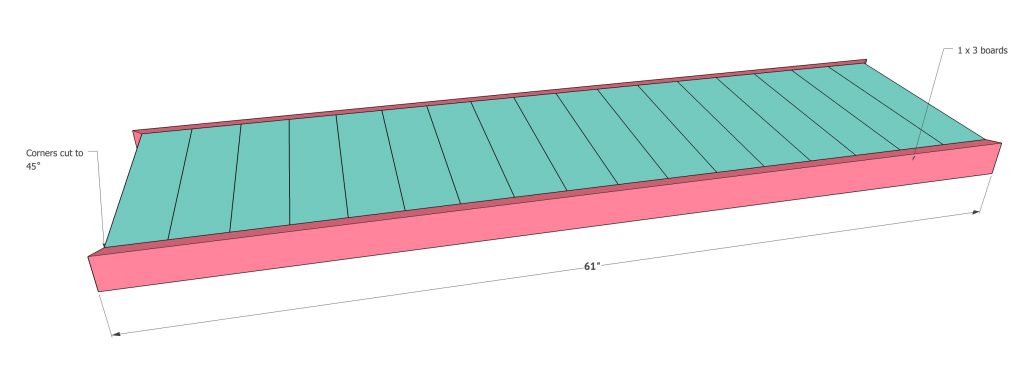
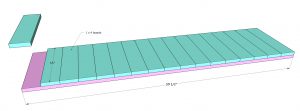
Now it’s time to attach the planks to the top of the plywood. These are 1×4 boards we cut to 15” long each. After making the cuts, attach each board flush on the plywood using wood glue and 1.25” brad nails.

Step 3
Measure and cut for the trim pieces next. These are 1×3 boards. Each corner is cut at a 45˚ angle. Attach each longer trim piece using wood glue and 1.25” brad nails through the trim boards and into the planks and plywood. Make sure the top of the trim boards are flush with the top of the planks.
Step 4
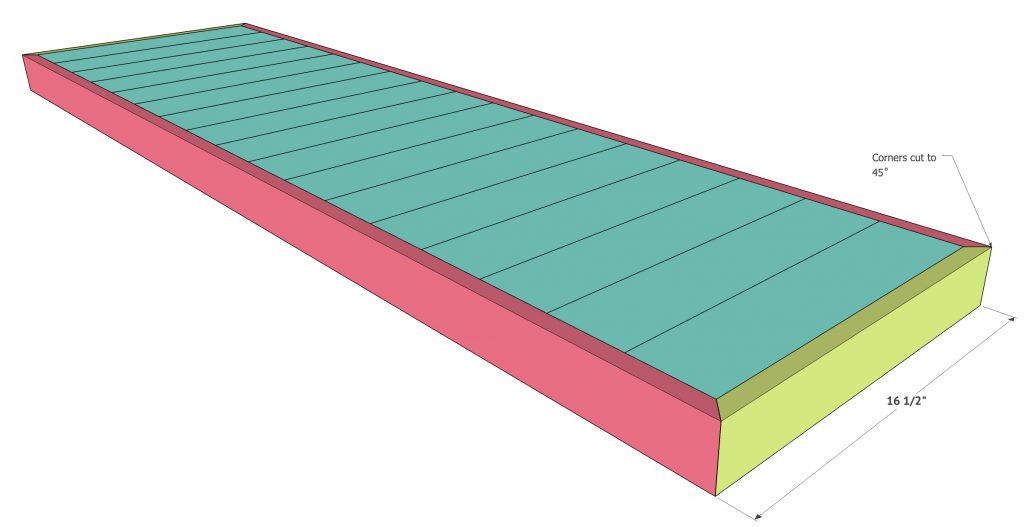
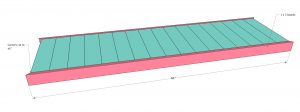
Now attach the smaller trim pieces. These are also 1×3 boards cut to size. Attach them using wood glue and 1.25” brad nails through the trim and into the planks and plywood.
Step 5
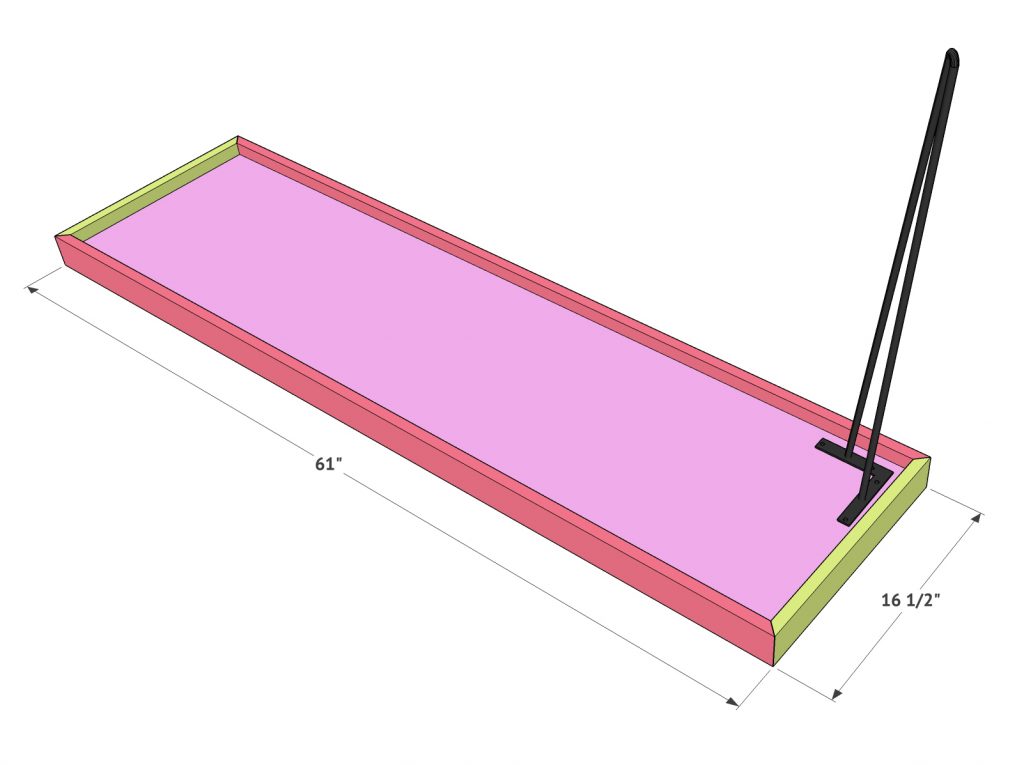
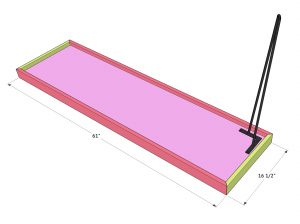
The final step is attaching your legs and hardware. You want to be sure and paint our stain your table top before putting the hardware on.
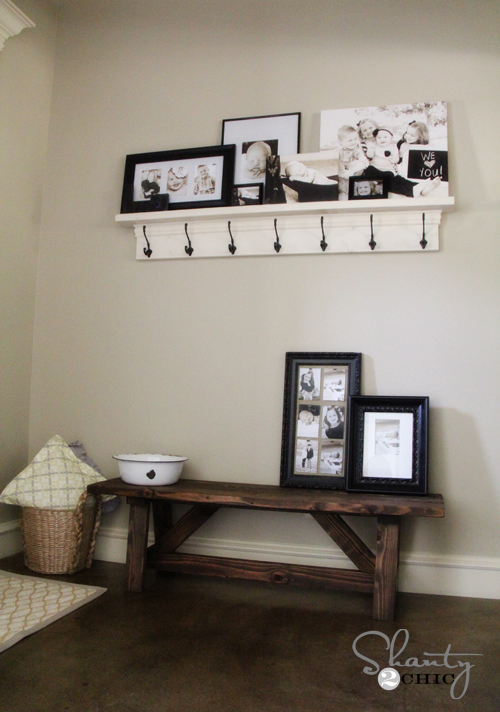
We found the cute cow print at Target. Unfortunately it’s sold out now but we found a very similar one below!
We found the baskets at Kirkland’s!
Free Plans!
DIY Hairpin Console Table
Supply List
- 3 1 x 4 x 8 pine or whitewood
- 2 1 x 3 x 8 pine or whitewood
- 1 3/4" plywood panel 15" x 59.5"
- wood glue
- 1.25" finish or brad nails
Instructions
- The base of the table top is created with 3/4” plywood. You can use any plywood for this part because it will be covered completely with trim. Cut the board to size.

- Now it’s time to attach the planks to the top of the plywood. These are 1×4 boards we cut to 15” long each. After making the cuts, attach each board flush on the plywood using wood glue and 1.25” brad nails.

- Measure and cut for the trim pieces next. These are 1×3 boards. Each corner is cut at a 45˚ angle. Attach each longer trim piece using wood glue and 1.25” brad nails through the trim boards and into the planks and plywood. Make sure the top of the trim boards are flush with the top of the planks.

- Now attach the smaller trim pieces. These are also 1×3 boards cut to size. Attach them using wood glue and 1.25” brad nails through the trim and into the planks and plywood.

- The final step is attaching your legs and hardware. You want to be sure and paint our stain your table top before putting the hardware on.


I have been searching forever!!! This is exactly what I’ve been looking for!…any insight on the stain?
Could you please tell me what stain you used. Your console is so beautiful.
Made one for my daughter in law 16 x 96 x 34 but had to modify the aprons to 2 x4 with rabbet/ dado to support plywood so it wouldn’t sag. My D.I.L loved it.
Loved the look of this so I built one for my daughter. Super easy and she loves it.
This table looks so good! I have not seen such legs before and now I want to add this to my wish list. While we have a lot of free time, I think it is worth spending this time with benefit and doing something interesting for the home, I think such a table will not be difficult to make and it will look great. Thank you for sharing your drawings, have a nice day!
love the table! Finishing up one now. Where did you get the baskets?
On the YouTube video they posted a link to target for the baskets.
I love this look! Could the table be wider than 15”? Would the legs be able to support more weight?
Thank you!
Love the table! But I need those baskets please!
Hey. I love this! What color stain/finish type did you use?
The link for the stain ?
Thanks for sharing!
Are you worried about wood expansion? Is that what the corner pieces are for? Great piece. Looks wonderful.
Love this table! I’d like to put this on my make list! Also, do you have some links to the other items in the picture? Great baskets and sign!
Meant to ask, where did you get the baskets? They look great!
Nice table! Thank you for sharing