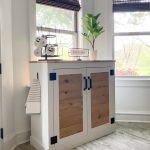
Happy Friday guys! It’s been such a crazy last few weeks. We hope and pray that all of you are safe, and enjoying this unexpected downtime with family. That’s exactly what we have been doing. I am a project oriented person, and that’s what I have been doing each day. Rather than running to the lumber store like I usually am able to do, I’ve decided it’s time to revamp some older projects I still love, and it’s also time to put a dent in my scrap pile. This will be a win win! The first project I tackled was my coffee cabinet. I LOVE my coffee cabinet. She has been very good to me since I designed and built her years ago. This piece has received so much love from you guys, and I’m sure that is because it’s so versatile and can work in so many spaces. This week I gave her a makeover! For those of you that follow us on Instagram, I shared the whole process HERE in our stories! And, here she is all set up!
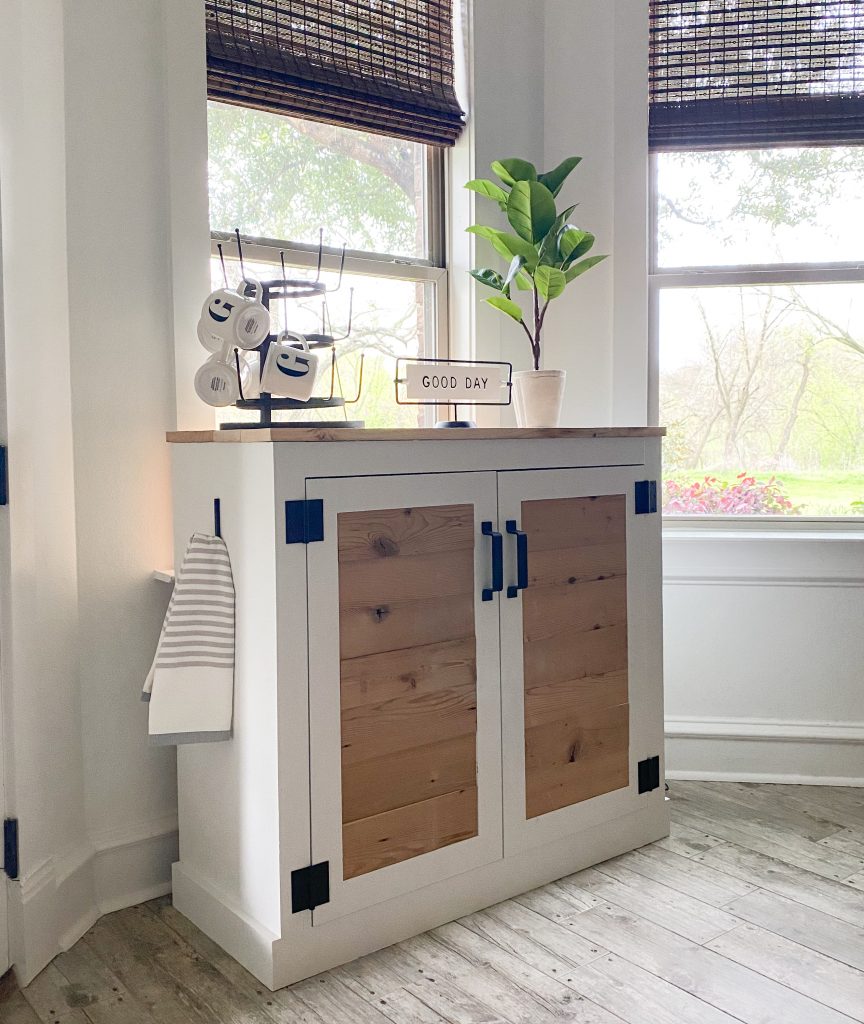
Before we get started, be sure to download the FREE plans for the coffee cabinet at the bottom of this post! The only modification will be how you do your doors, which I have noted on the plans! Here we go!
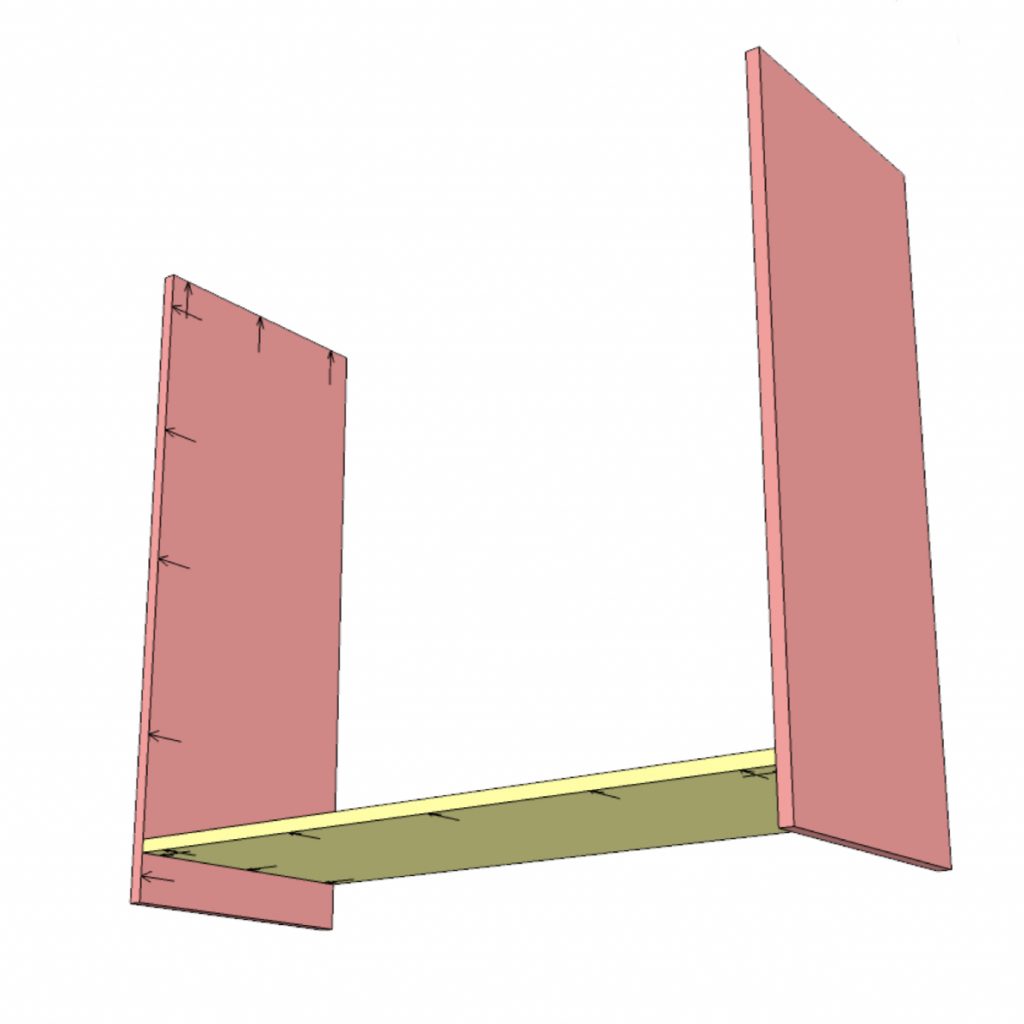
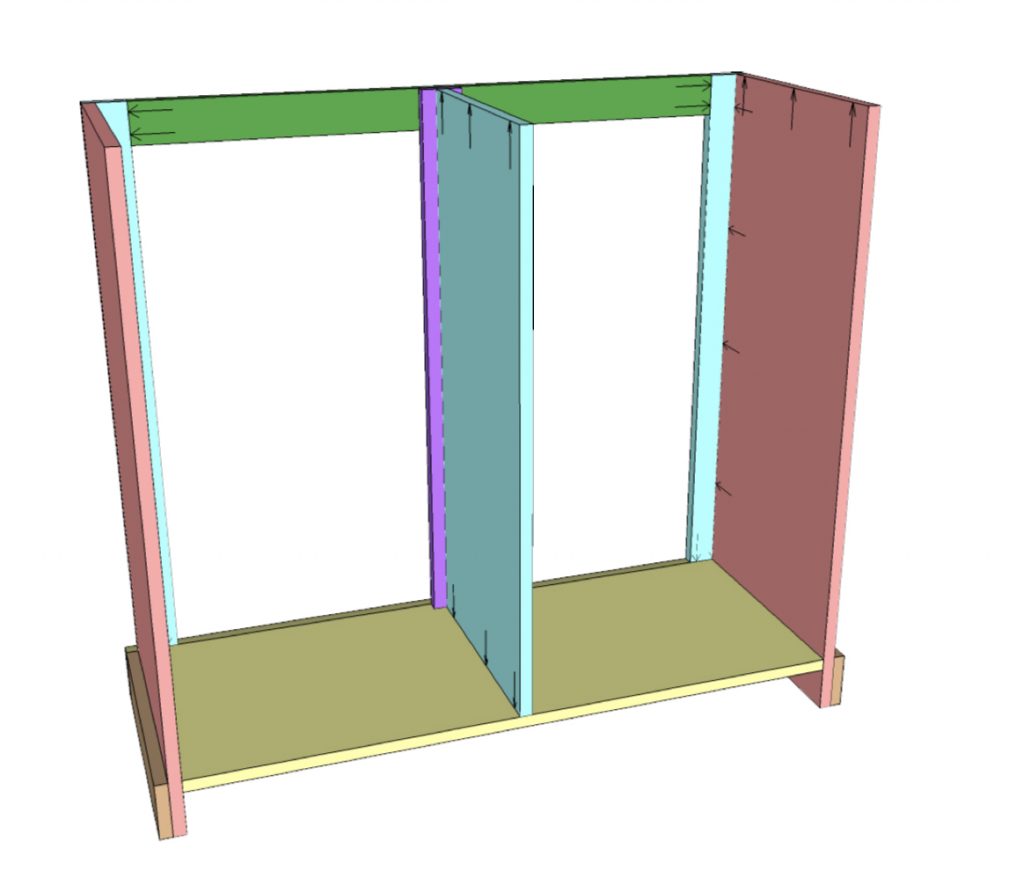
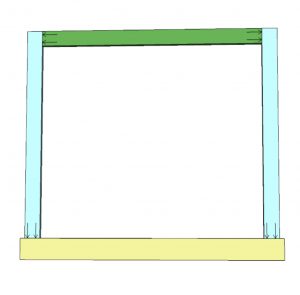
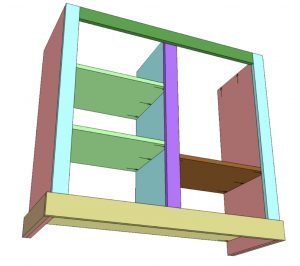
Use wood glue at every joint in this project. Secure the bottom panel to to side panels. Make sure the pocket holes are positioned on all of the pieces to later attach the front face frame. The top of the bottom shelf should be 3-1/2” from the ground.
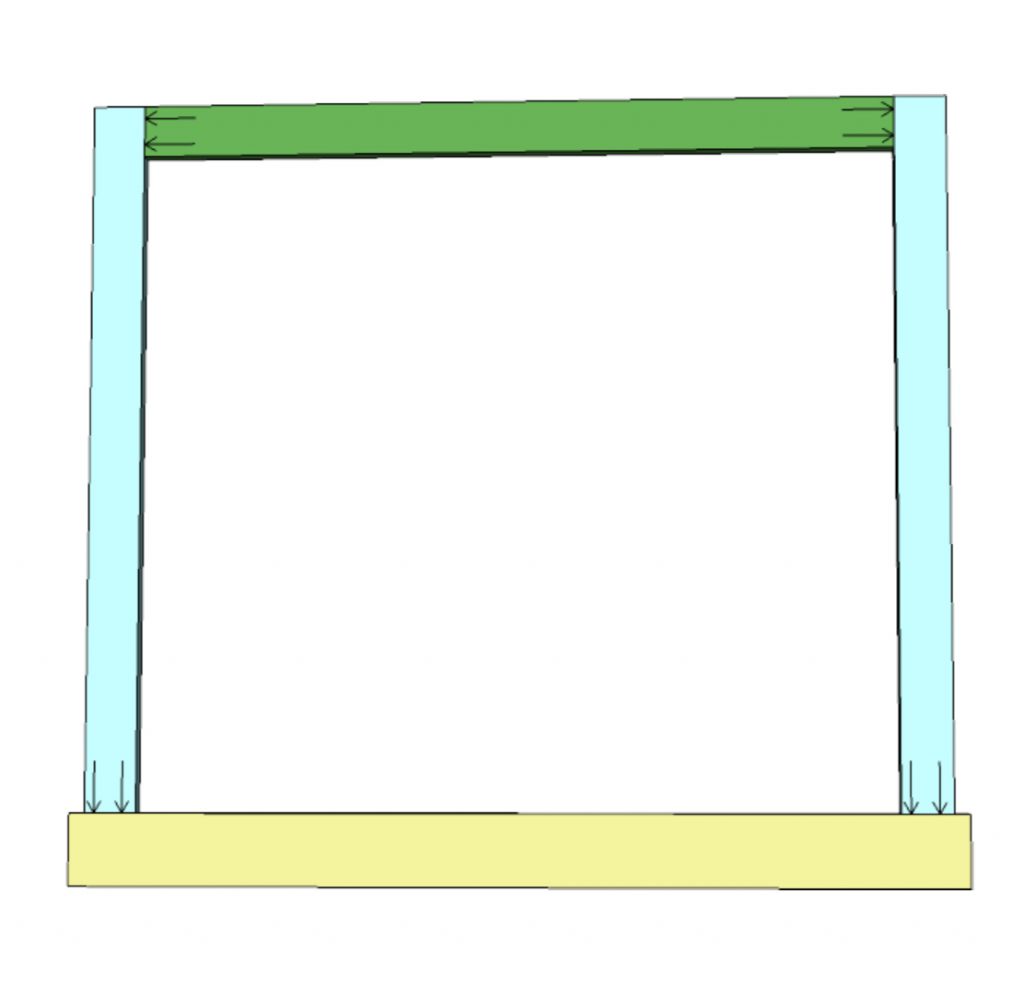
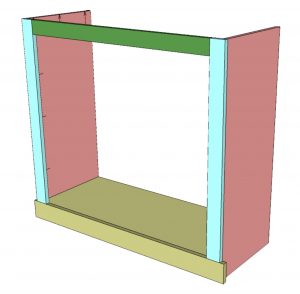
Assemble the face frame with pocket hole screws. The bottom board is centered with 3/4” overhang on both ends.
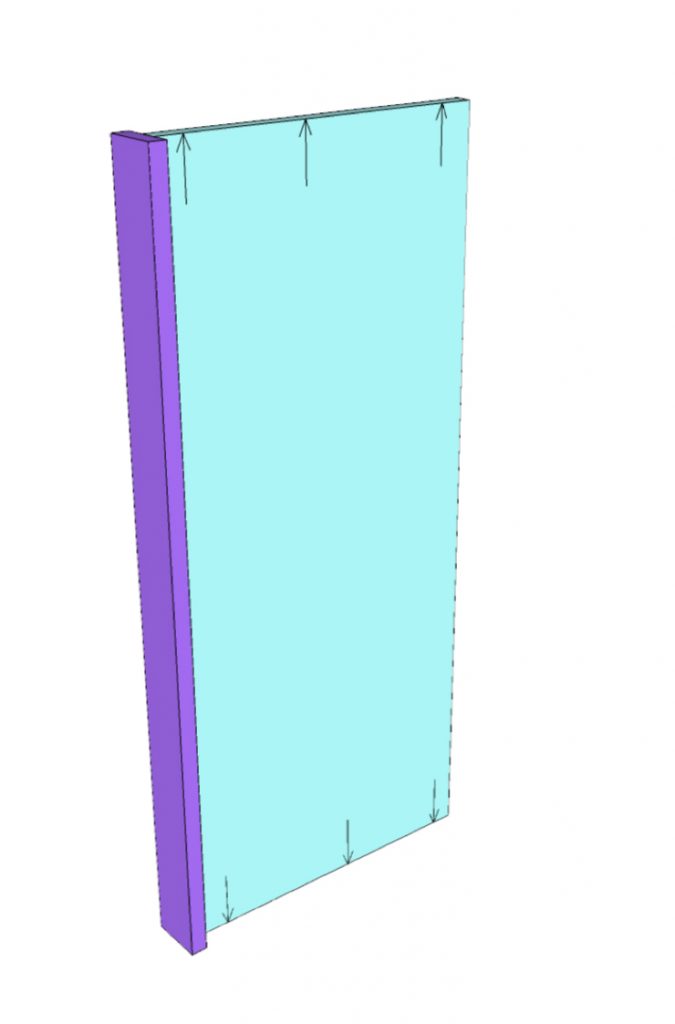
Glue and screw the front face frame onto the plywood panels.

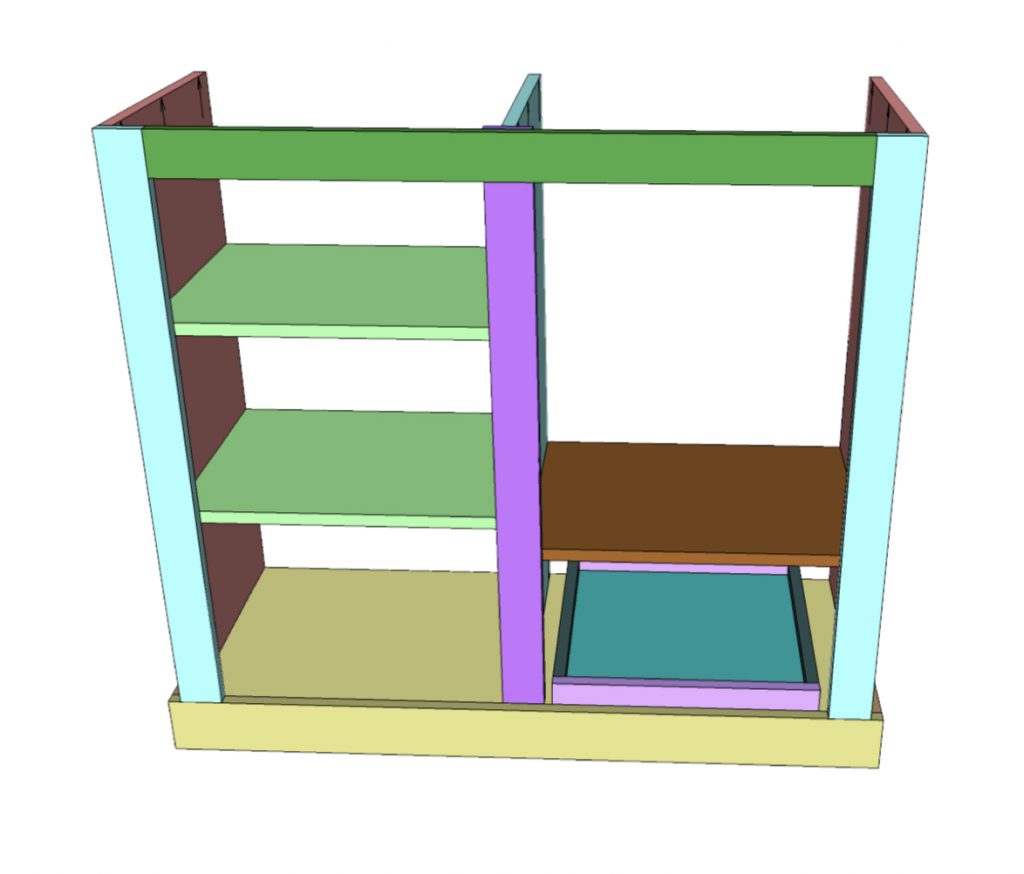
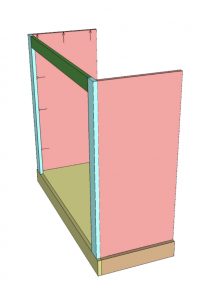
Using glue and brad nails, attach the lower side trim boards.

Using glue and brad nails, attach the center trim board to the middle divider. This trim board should be centered on the plywood.
Secure the center divider in place with pocket hole screws on the bottom end with brad nails through the top of the center trim board into the top of the face frame.
Add the shelves. One side should have two shelves spaced evenly and the other should be positioned to allow room for whatever you want to put on it. I spaced my shelf for my Keurig machine.

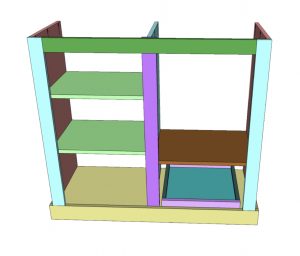
Assemble the shallow drawer and install it with drawer runners on the bottom. The drawer itself is nothing more than a piece of 3/4” plywood trimmed out with 1 x 2 strips. This plan calls for pocket holes on the bottom of the plywood but you can use brad nails if you want.
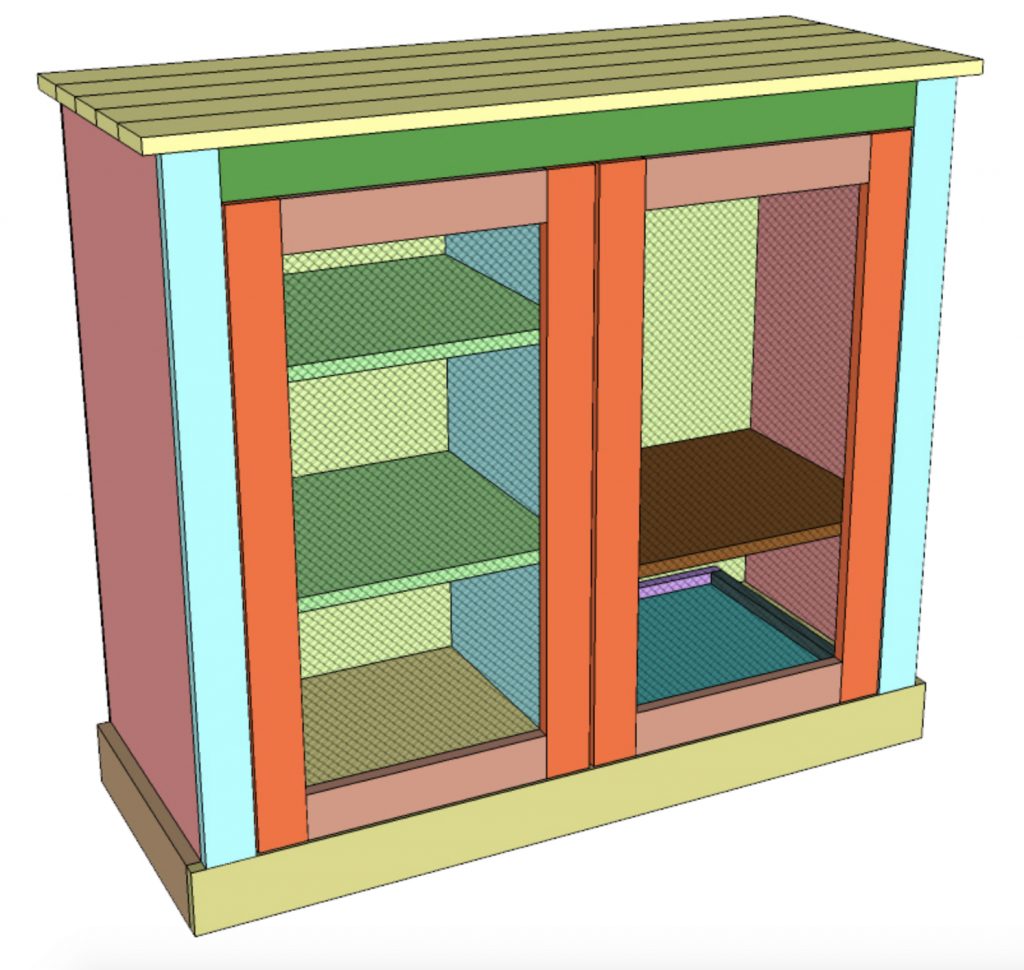
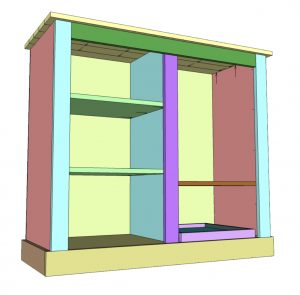
Use pocket hole screws to assemble the planked top. Then center it on the cabinet and attach it with pocket hole screws through the vertical sides and center divider. Attach your 1/4” plywood panel for the back with glue and brad nails.

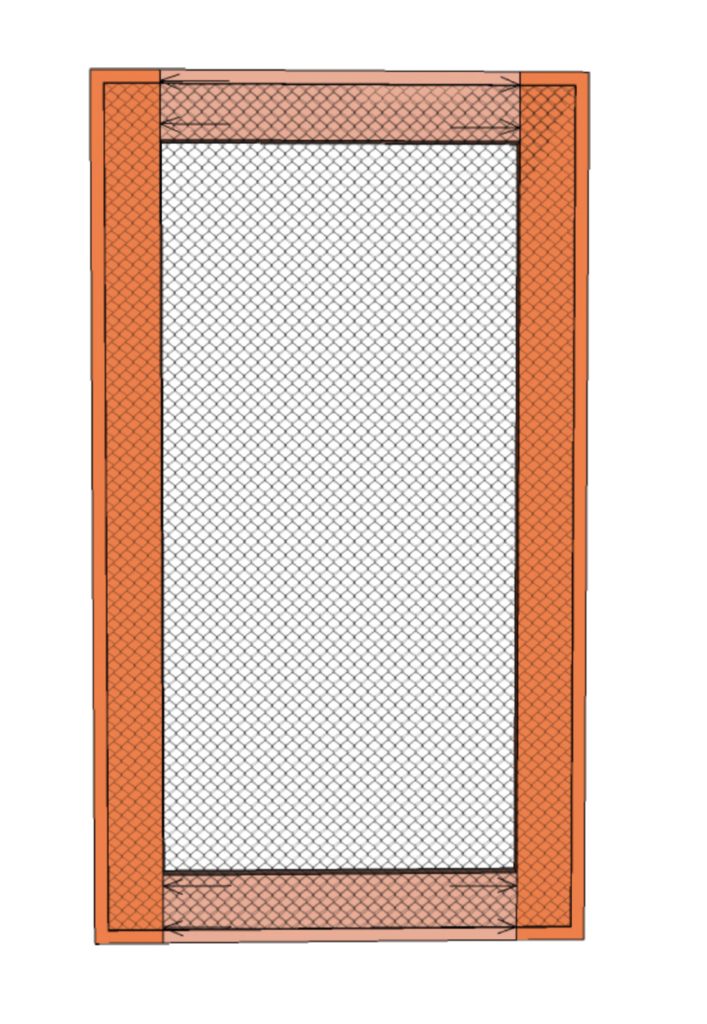
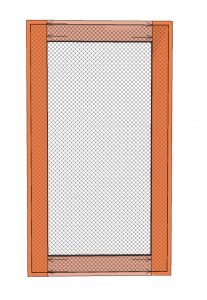
Assemble both door frames with glue and pocket hole screws. Adjust your dimensions as needed. The measurements in this plan will leave a 1/8” spacing around the door. Before you attach the 1/2” hardware mesh sand and finish the door. Then staple the wire mesh to the inside of the door panels.
Fill any nail holes, sand, and apply your finish of choice. Then attach the doors to the cabinet with your decorative hinges. Add any door puls you wish to use and personalize it however you wish. Make it look awesome! Be sure to stop by our website and let us know if you decided to make one of these super easy coffee cabinets.
Modern Farmhouse Coffee Cabinet
Supply List
- 3 1 x 4 x 8’ Pine or whitewood board
- 1 1 x 4 x 6’ Pine or whitewood board
- 2 1 x 3 x 8’ Pine or whitewood board
- 2 1 x 3 x 6’ Pine or whitewood board
- 1 1 x 2 x 6’ Pine or whitewood board
- 1 41-1/2” x 38” x 1/4” plywood
- 1 48” x 96” x 3/4” plywood
- 1-1/4” pocket hole screws
- Brad nails
- 2 1/2” wide drawer pulls
Instructions
- Use wood glue at every joint in this project. Secure the bottom panel to to side panels. Make sure the pocket holes are positioned on all of the pieces to later attach the front face frame. The top of the bottom shelf should be 3-1/2” from the ground.

- Assemble the face frame with pocket hole screws. The bottom board is centered with 3/4” overhang on both ends.

- Glue and screw the front face frame onto the plywood panels.

- Using glue and brad nails, attach the lower side trim boards.

- Using glue and brad nails, attach the center trim board to the middle divider. This trim board should be centered on the plywood.

- Secure the center divider in place with pocket hole screws on the bottom end with brad nails through the top of the center trim board into the top of the face frame.

- Add the shelves. One side should have two shelves spaced evenly and the other should be positioned to allow room for whatever you want to put on it. I spaced my shelf for my Keurig machine.

- Assemble the shallow drawer and install it with drawer runners on the bottom. The drawer itself is nothing more than a piece of 3/4” plywood trimmed out with 1 x 2 strips. This plan calls for pocket holes on the bottom of the plywood but you can use brad nails if you want.

- Use pocket hole screws to assemble the planked top. Then center it on the cabinet and attach it with pocket hole screws through the vertical sides and center divider. Attach your 1/4” plywood panel for the back with glue and brad nails.
- Assemble both door frames with glue and pocket hole screws. Adjust your dimensions as needed. The measurements in this plan will leave a 1/8” spacing around the door. Before you attach the 1/2” hardware mesh sand and finish the door. Then staple the wire mesh to the inside of the door panels.

- Fill any nail holes, sand, and apply your finish of choice. Then attach the doors to the cabinet with your decorative hinges. Add any door puls you wish to use and personalize it however you wish. Make it look awesome! Be sure to stop by our website and let us know if you decided to make one of these super easy coffee cabinets.


I was wondering where you got the hardware for this design?
I can see based on the other comments that were left that you don’t reply back, so i’m sure this will likely and unfortunately go unanswered as well.
The design with the planked doors looks great! When installing the 1/4″ plywood to the back of the cabinet doors are is the length the entire width of the door frame? Or are is the width just the inside of the door frame?
I just made this and do not make my mistake. You should put the plywood right around the frame not the entire door. My doors do not shut all the way. It isn’t flush with the trim because of the backing. They hit the middle trim piece. I still love it though! Hope that helps!
I was wondering what size hinges those are. The ones I ordered from the link are 2.5 in and look way smaller than yours. Yours look better.
hyy man thanks for this i really like this keep it up your good work.
I really like the concept of farm house. I’m very thrilled by the way you are giving us this data for free.
I am wanting to know the dimensions of this cabinet, trying to figure out if it will work in my bathroom!!! Thanks so much
Am I missing something??
The instructions above call for hardware mesh for the doors. But the picture for the cabinet shows it has what looks to be shiplap??
Yes I’m also wondering what type of wood and sizes used for the doors instead of the mesh. Looks way better they way you two built it. Thanks!
The plans are the original design, while the pictures are showing her updates design within the last week. She took it apart and redid the doors and top. It might still be in their Instagram or YouTube account.
Can you tell me what the total dimensions of this cabinet are? We need to build two to go on each side of our fireplace and we are looking for a cabinet that is 40x38x19. Wondering if we can make this one work for our space. Thanks for the free plans!!