Learn how to easily refinish furniture with these simple steps and how-to video.
We get so many questions from you guys wondering how we got started building furniture! When we first started Shanty2Chic, we actually didn’t build, we refinished and rehabbed old, solid wood furniture! Whitney and I would dumpster-dive and turn someones trash into our treasure. After making necessary repairs, sanding and painting, we thought we could try our hand at building with bare wood from scratch, and that’s how it all began! This project brings me back to our beginning! My oldest son asked me if I would refinish some furniture that he had inherited. It is very sentimental to him and of course I said YES! He dropped it off for me and I got to work! There are so many ways to refinish furniture but I thought it would be helpful to show you all how we do it!
Just click play in the box below to watch me refinish this dresser!
So easy and what a transformation! Check out the step-by-step process below!
Table of Contents
Refinishing Furniture Tutorial
Supplies:
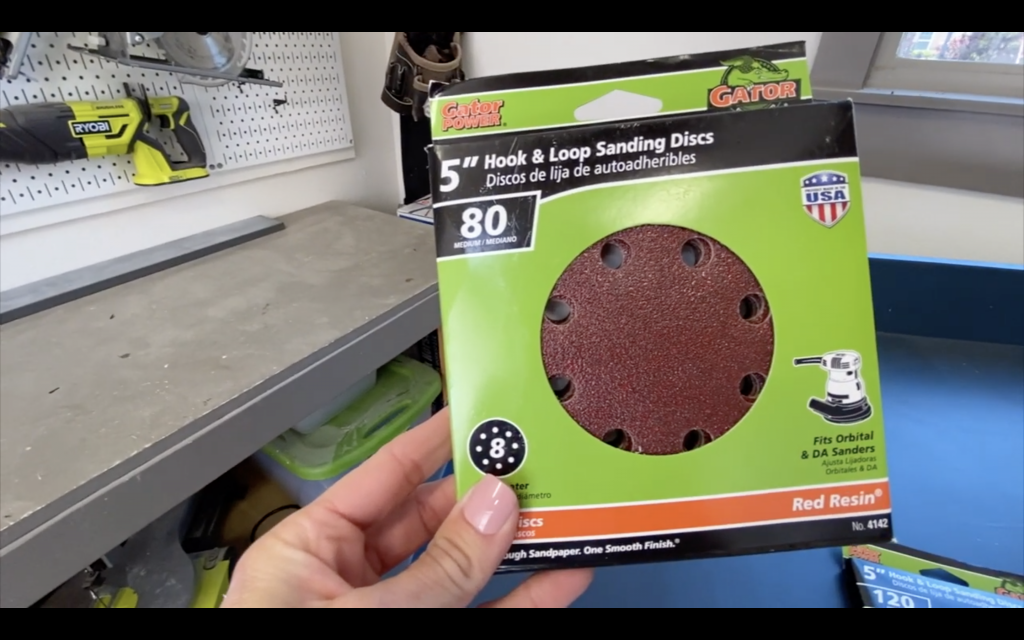
- Sandpaper in Coarse, Medium and Fine Grit
- Clean Rags
- Paint Roller
- Paint Brush
- Rubber Gloves
- Eye Protection
- Wood Glue
- Orbital Power Sander
- Sanding Block
- Paint

Step 1: Prep the Piece of Furniture
I started by stripping the old paint with a coarse sandpaper. I used my orbital sander with an 80-grit sanding pad. You’ll also want a sanding block handy to get inside all the nooks and crannies.
Because I am painting, rather than staining this piece, I didn’t need to use a paint stripper.
Note: If you are planning to stain old wood furniture, chemical strippers will do best to remove all of the old finish. Just make sure to have adequate ventilation when you use these chemicals.
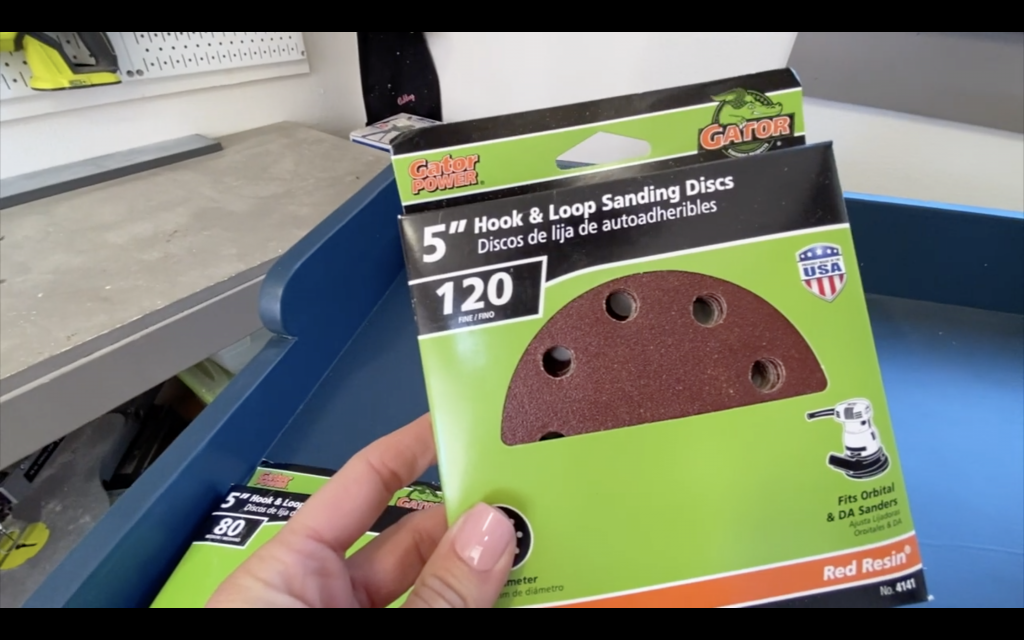
Once I got the initial layer of varnish off, I followed with a medium grit sandpaper at 120-grit.
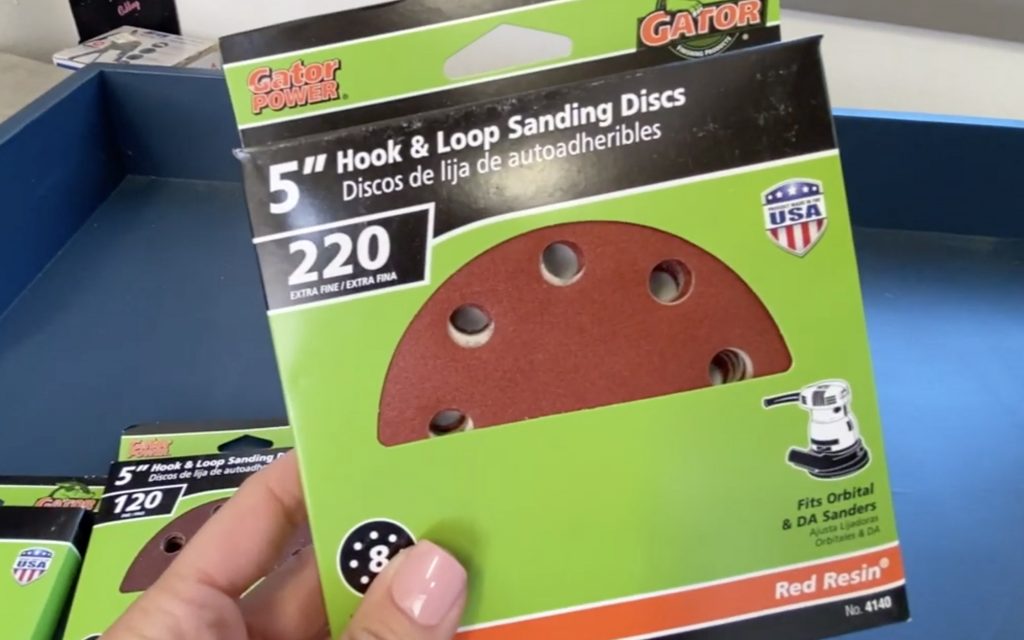
Finally, to smooth everything out, I followed with a fine grit sandpaper at 220-grit.
There was a heavy coat of paint on this dresser. Complete removal of the old finish wasn’t possible but I gave it a good enough sanding so that it was smooth and it would give the new paint something to stick to.

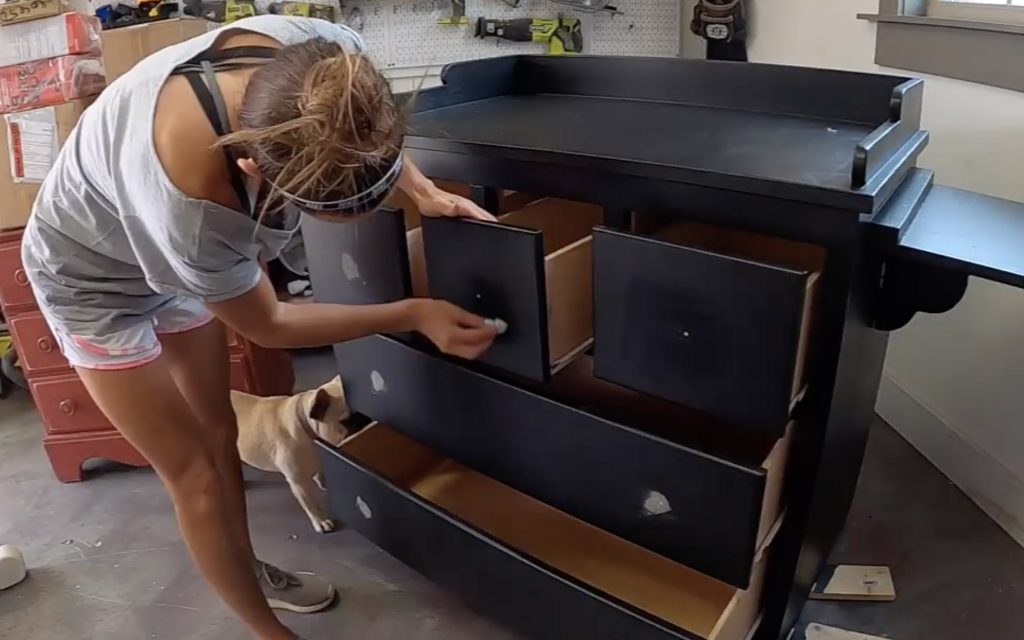
After sanding the dresser, I moved on to the drawers. I removed the original knobs because my son asked for new hardware. This made sanding the drawers super easy.
Once I finished the sanding process, I used a damp cloth to wipe all of the dust off the dresser and the drawers.
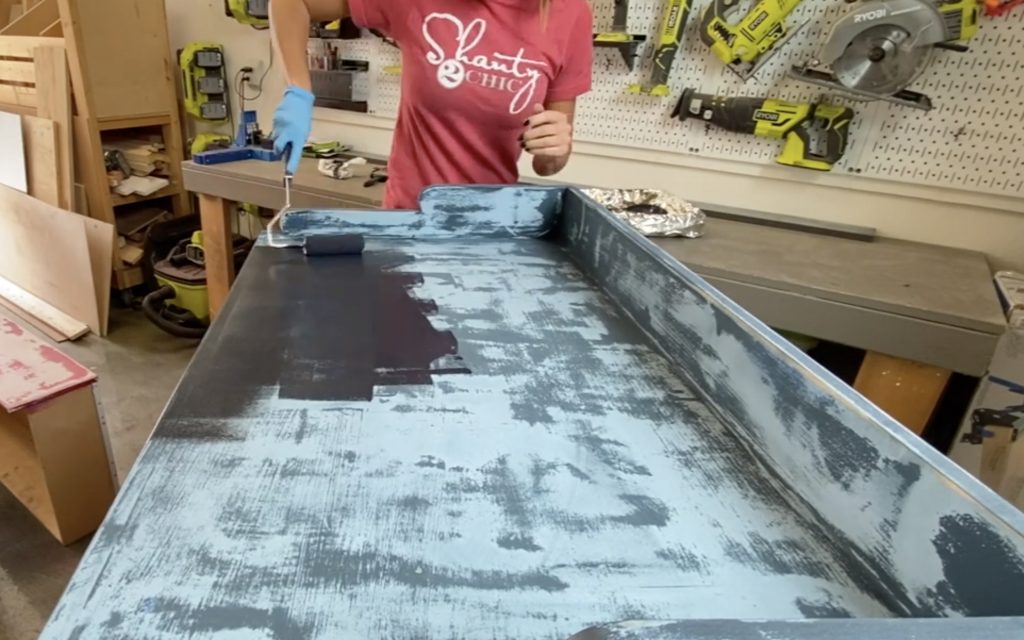
Step 2: Paint
Now for the paint. I chose a favorite, Tricorn Black by Sherwin Williams in a satin finish. Because this paint was darker than the original paint color, there was no need to prime.
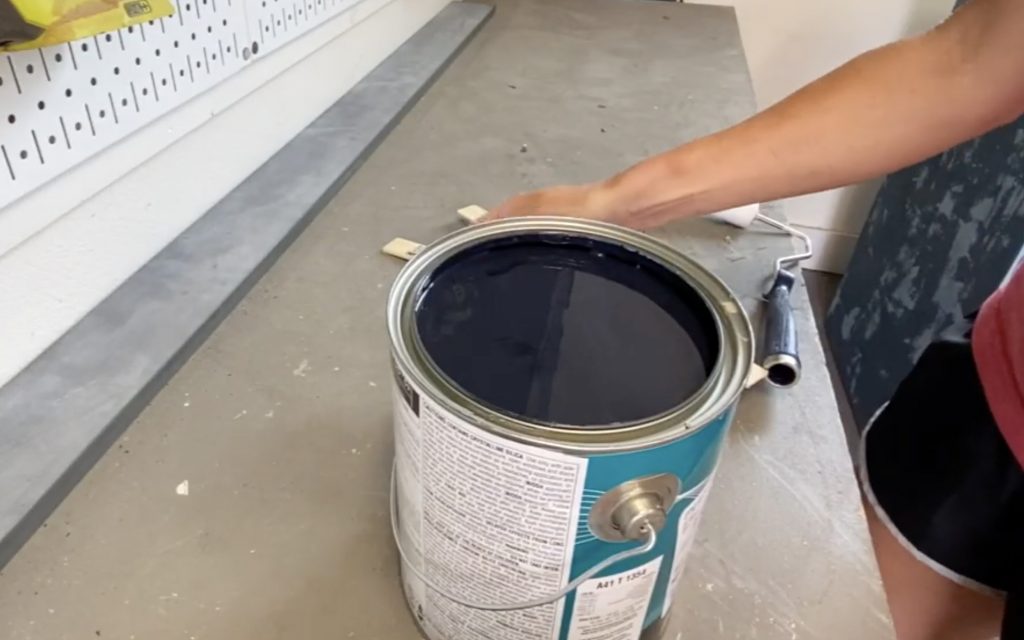
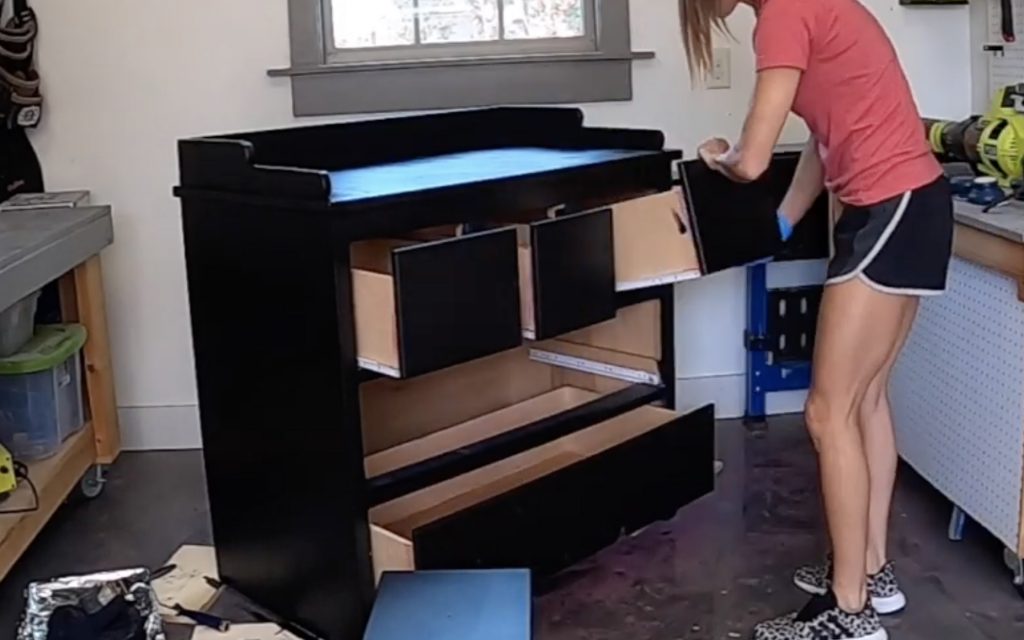
I used a foam roller and paint brush to apply about 2 1/2 coats of paint on the dresser and the drawers.
When the paint dried, I put the drawers back in the dresser and moved on to the hardware!
Step 3: Replacing Old Hardware on Antique Furniture
The new hardware that I picked for the dresser had two widespread holes so I used our favorite wood filler to fill the original knob holes. I used a putty knife to wipe it over the holes.
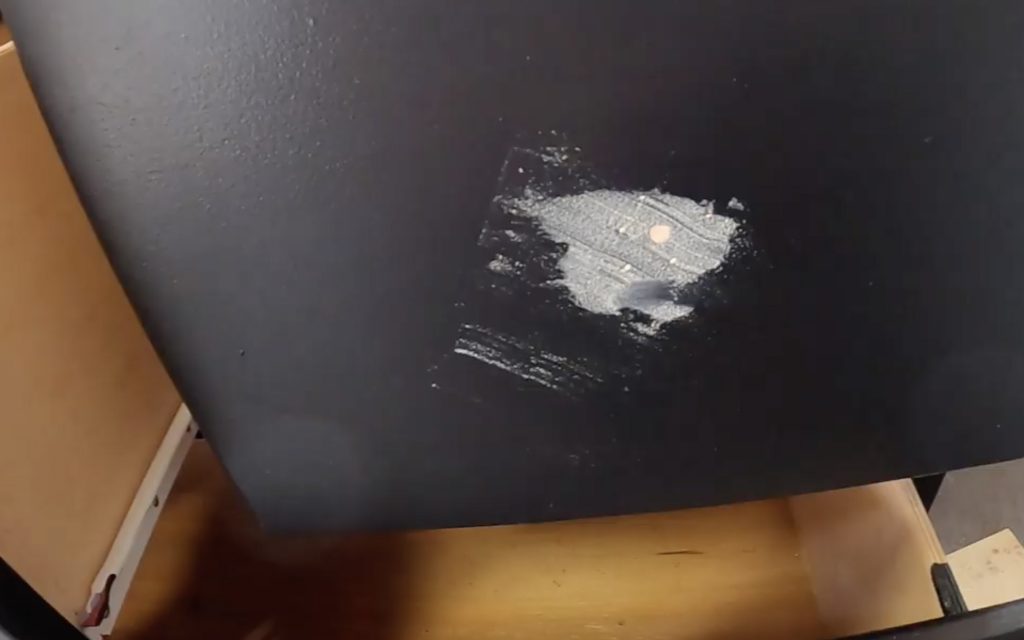
Before the wood filler dried, I used a damp cloth to clean up the excess filler.
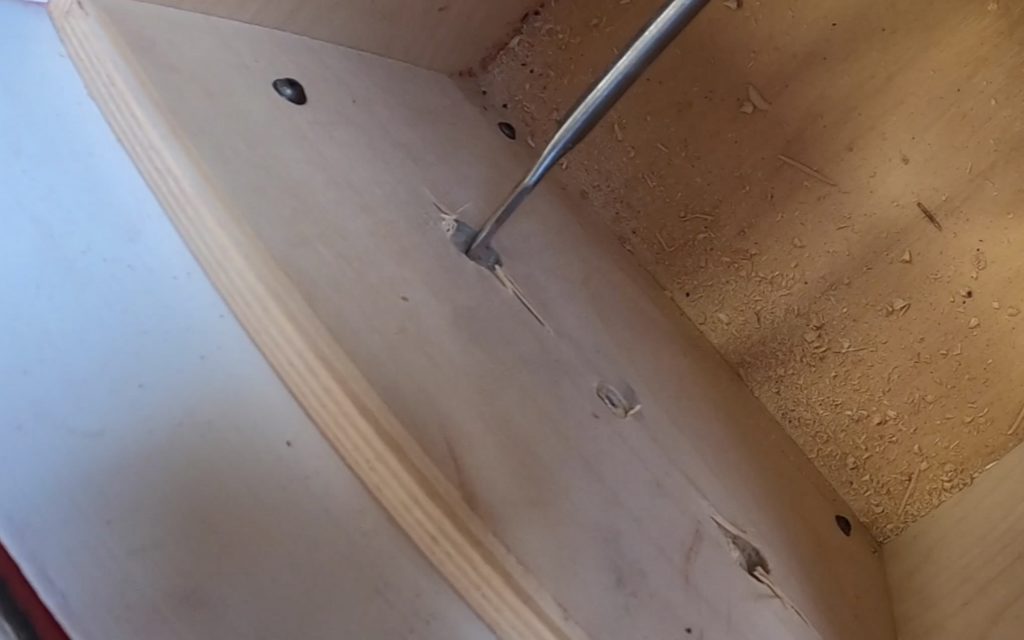
Once the wood filler dried, I touched up those spots with paint, then I measured and drilled for the new hardware.
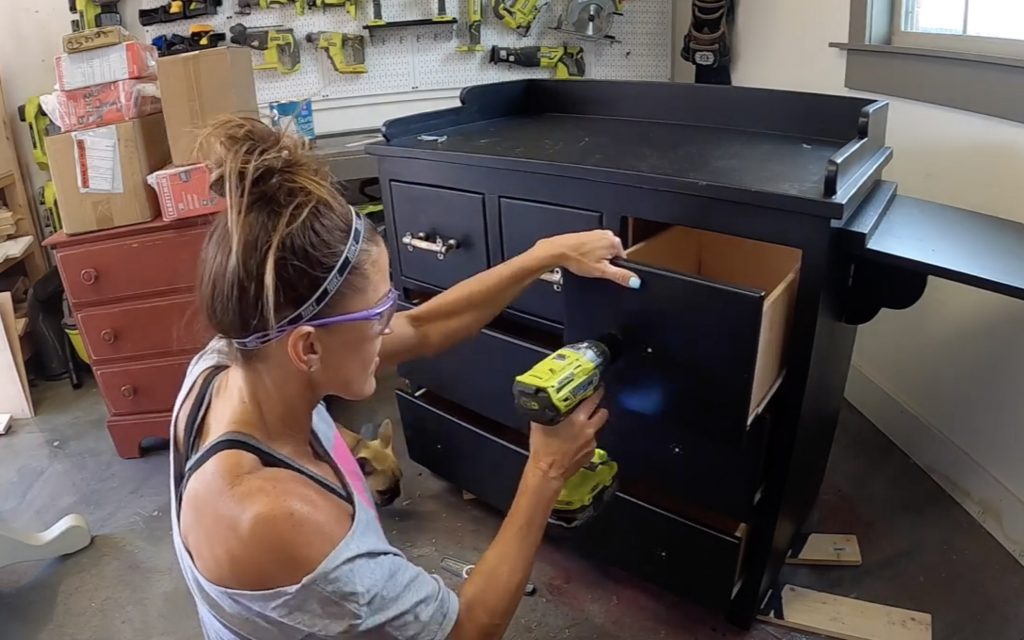
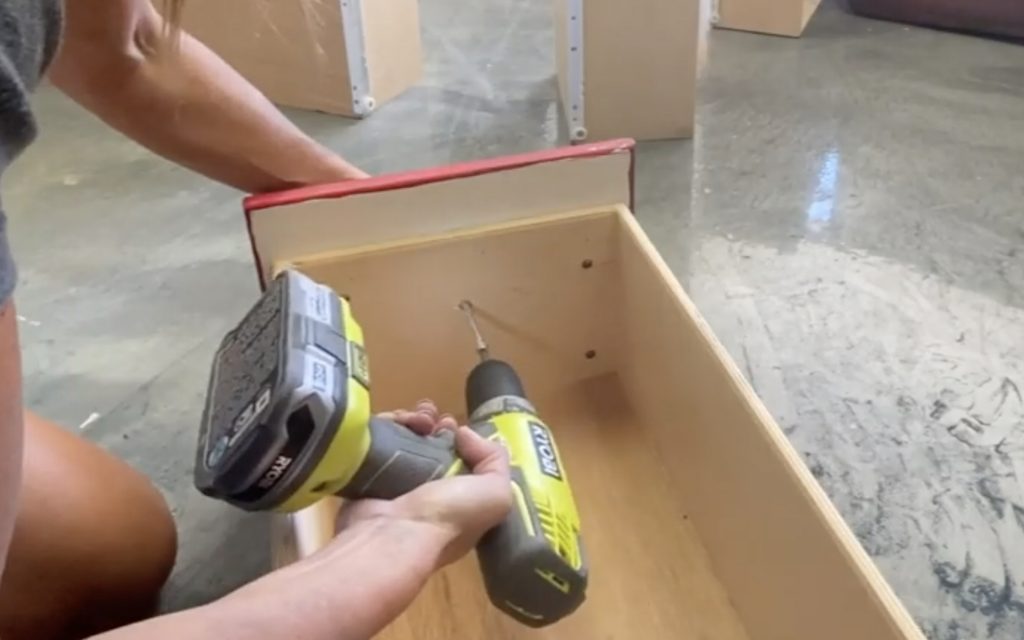
The screws that came with the hardware weren’t long enough to fit through the drawer faces. When this happens, rather than running to the store for longer screws, I use a paddle bit to bore out some of the hole on the inside of the drawer.
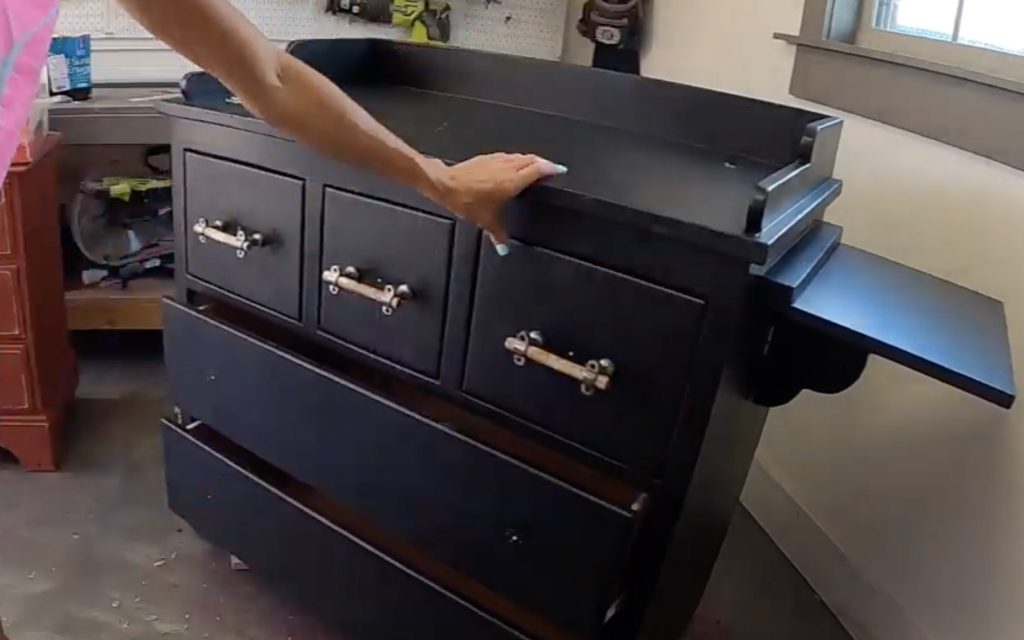
I installed the new hardware and that was it! I found this hardware at Hobby Lobby and bought them when they were 40% off!
Here she is before…
And here she is after!
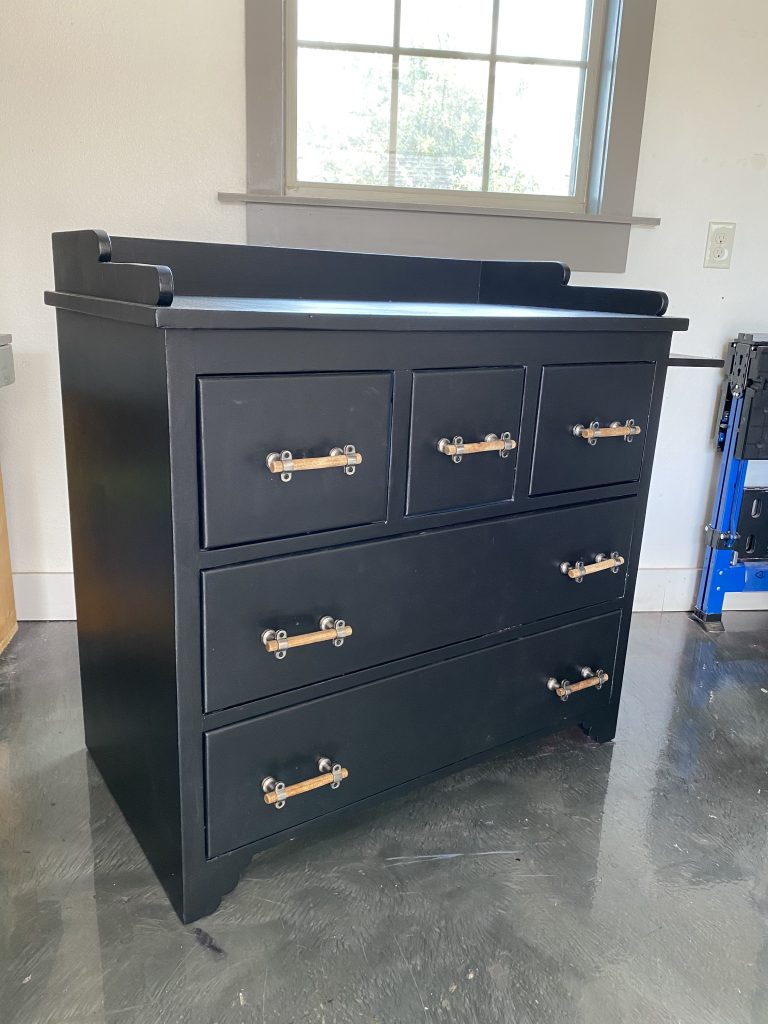
My son loves his new dresser and plans to use it as a TV stand! I love that he asked me to do this for him and I can’t wait to refinish the rest of the pieces he dropped off!
Happy Building!


I have a big dining room table that I want to refinish. The original stain is orange-ish and I would like to make it darker. It’s a mission-style (with lots of spindles). It seems overwhelming. Any advice?
Please!!!!! Stop!!!!! With!!!! The!!! Exclamation marks!!!!!
Do you have a favorite topcoat for pieces that need a little more protection?
Can you fill the hole before painting? I am just aftaid of messing a project up like this and want the color to cover it all.
You can do that step before your paint- I’m surprised they waited until after painting, but that doesn’t mean that I think I know more, by any means. I would be afraid of messing up my paint job.
She didn’t mention it in the written post, but on the video she did all the painting and then says she didn’t have hardware yet. Sounded like she hadn’t even chosen it, so she didn’t know she’d need different holes.
Agree! I usually fill holes before sanding to make sure I have a truly flat surface where the old holes were. Then mark and drill the new holes – again before sanding to make sure I have a nice flat surface before I paint! I’ve drilled more than one crooked hole in my life and would hate to do that after I had painted.