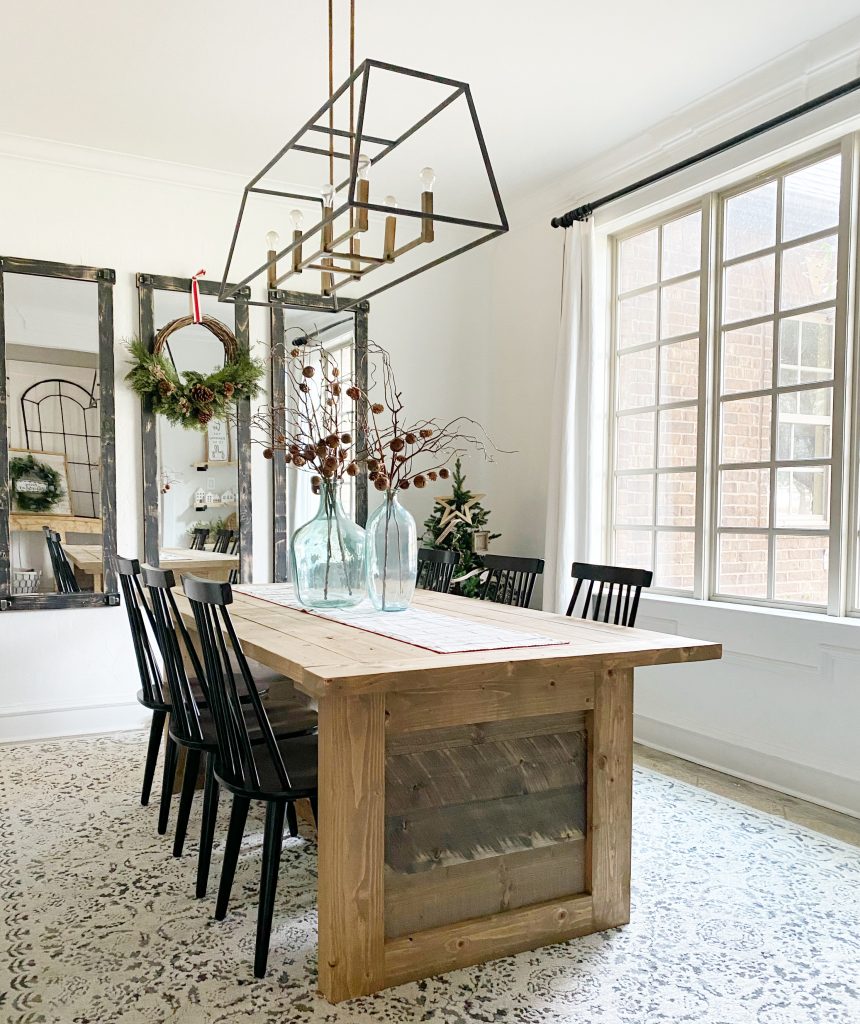
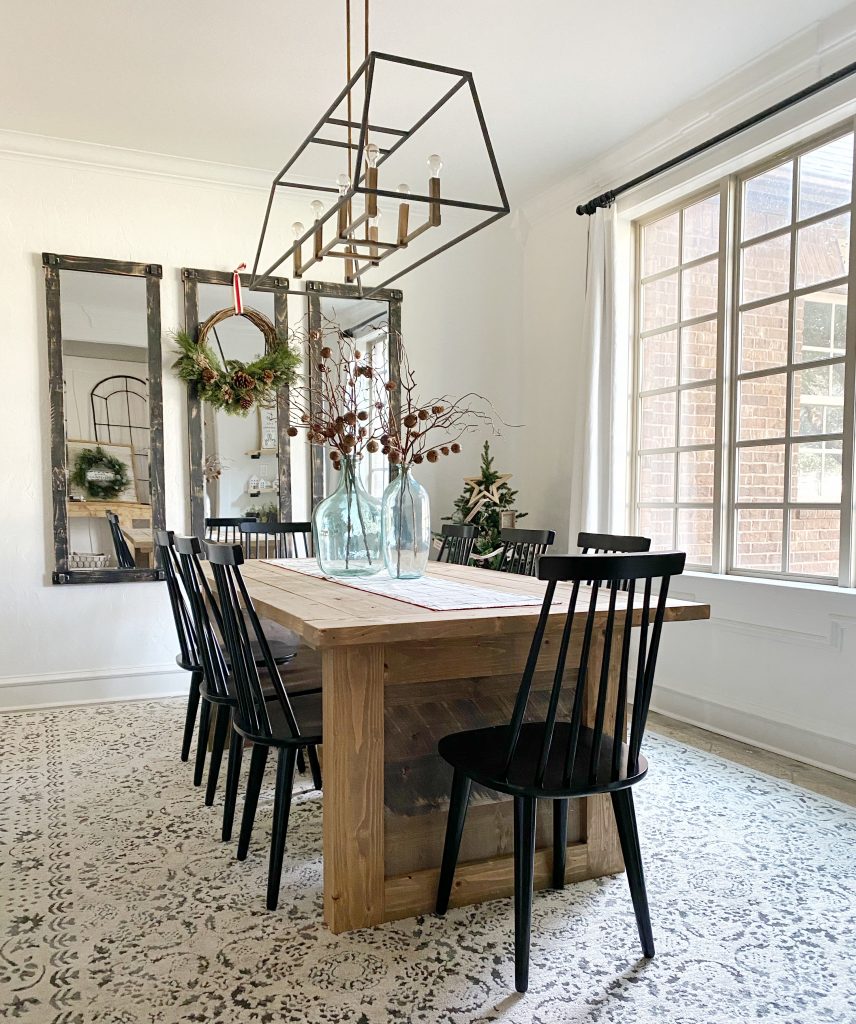
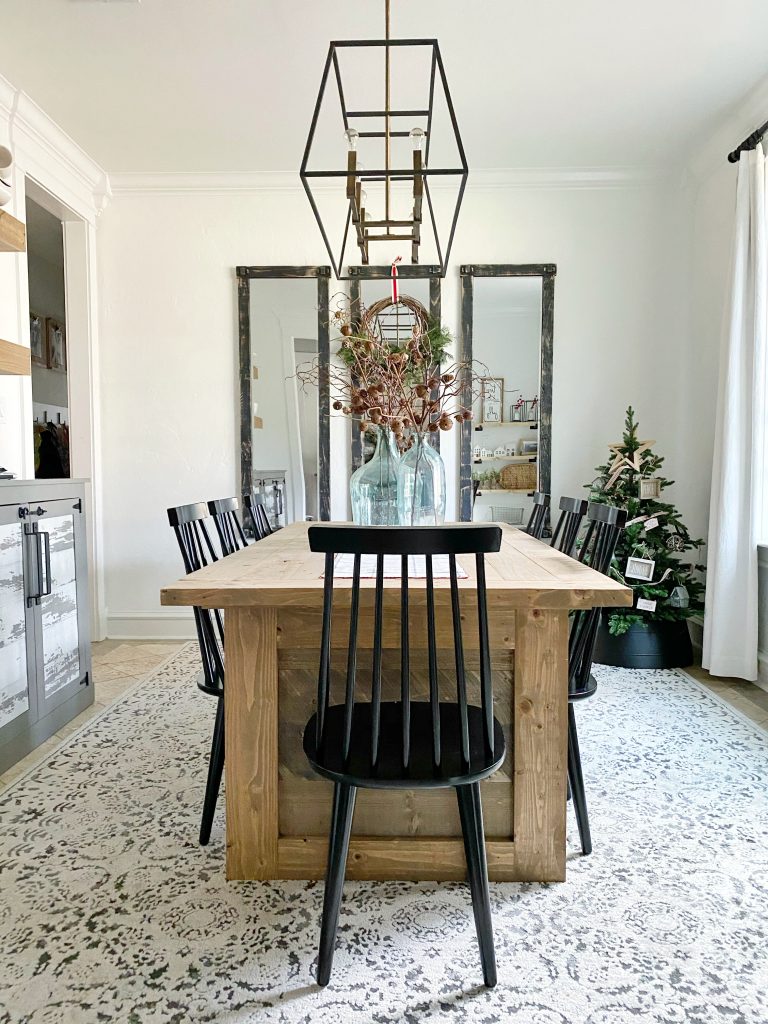
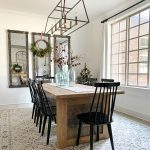
Happy Thanksgiving friends! I am so happy to share today’s project! When things went crazy back in March, my dining room became more of a home office for our family. I have 6 kiddos, 5 of them in school. As plans continued to change, I got rid of my old dining table I built to make room for desks. We are now in a different place, and the schooling situation has changed for all of my children. I decided it was time to take back my dining room. First step… A new dining table baby! I designed this DIY Farmhouse Panel Dining Table using only 2×6 boards, 1 small sheet of scrap plywood and some beautiful barn wood! Look how cute she turned out!
Before we start, check out the DIY video on this table below! You can also grab the free printable plans at the bottom of this post.
Also, I want to share where I found some of the goodies!
I chose to use THIS BARN WOOD from Lowe’s. It was inexpensive and I did the whole table with 1 box and some to spare. LOVE it.
The chairs were a steal! I found the HERE on Amazon!
I used my AMAZING Kreg Foreman for this build!
You can find the face clamps I used HERE!
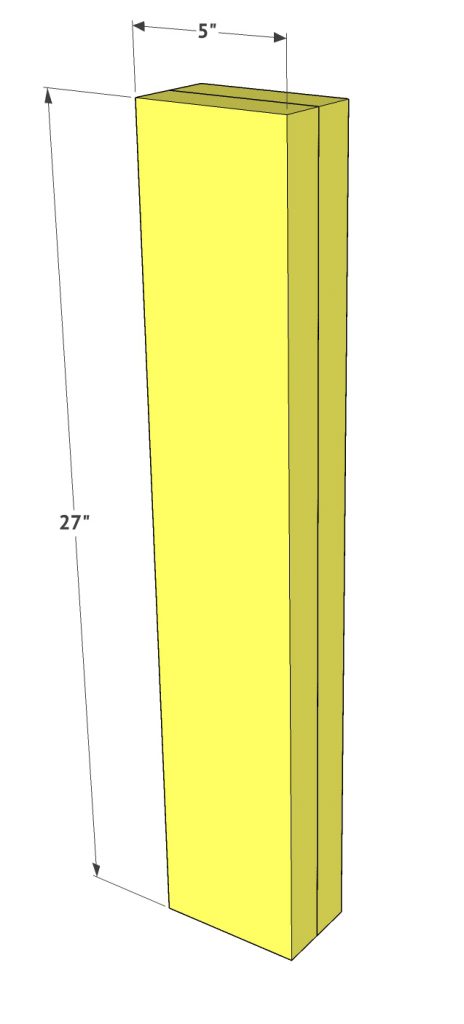
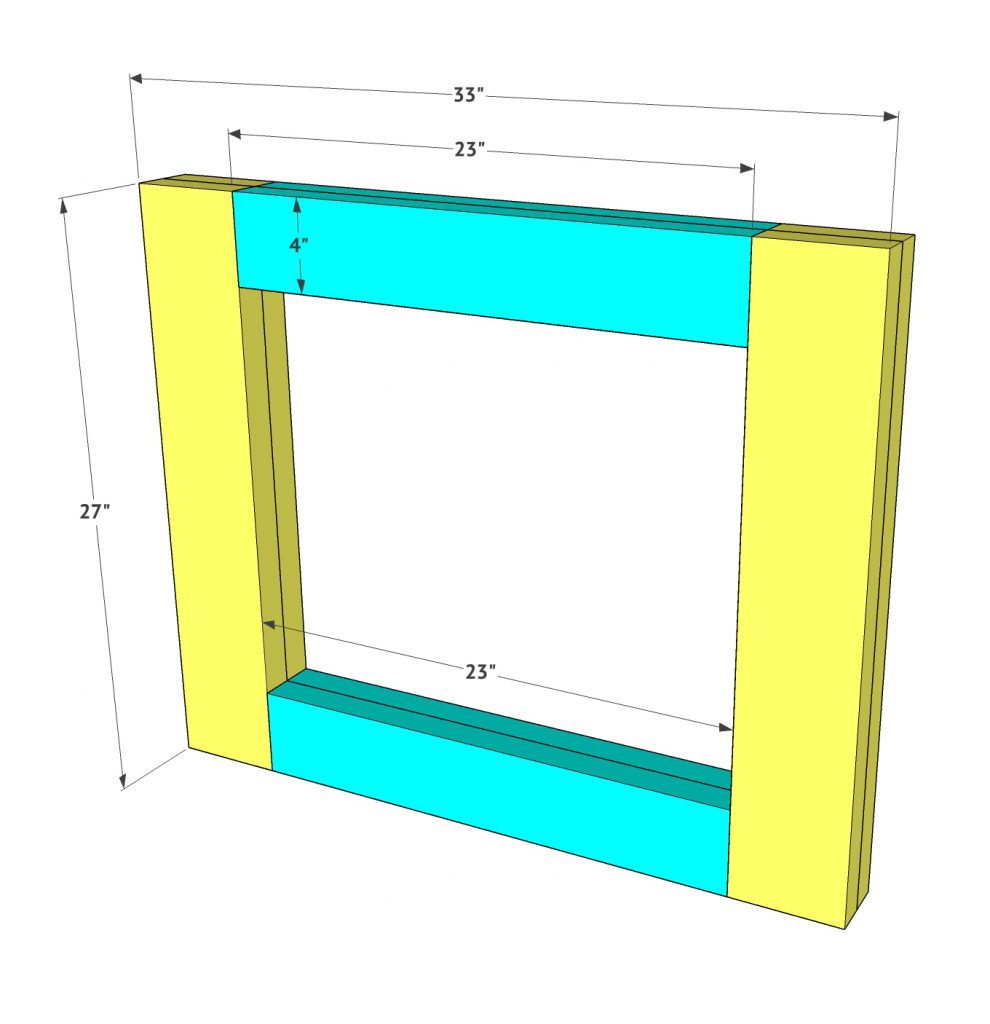
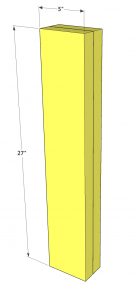
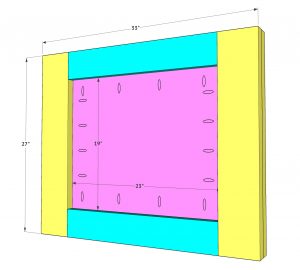
This entire table is built with 2×6 boards that I ripped down to 5” and 4”. Make the cuts for the legs first and then rip each board to 5” wide. Glue 2 boards together and clamp to form a leg. You will build 4 of these legs.
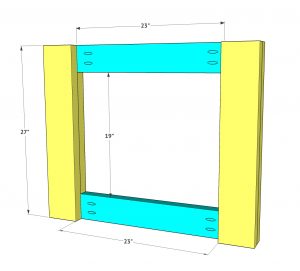
Once the legs are dry, you can start attaching to form your base. The horizontal boards will be ripped to 4” wide each. Attach them to the legs using wood glue and 2.5” pocket hole screws through 1.5” pocket holes. You want them flush with the ends of the leg boards and flush with one side of the legs. You will repeat the step to form 2 bases.

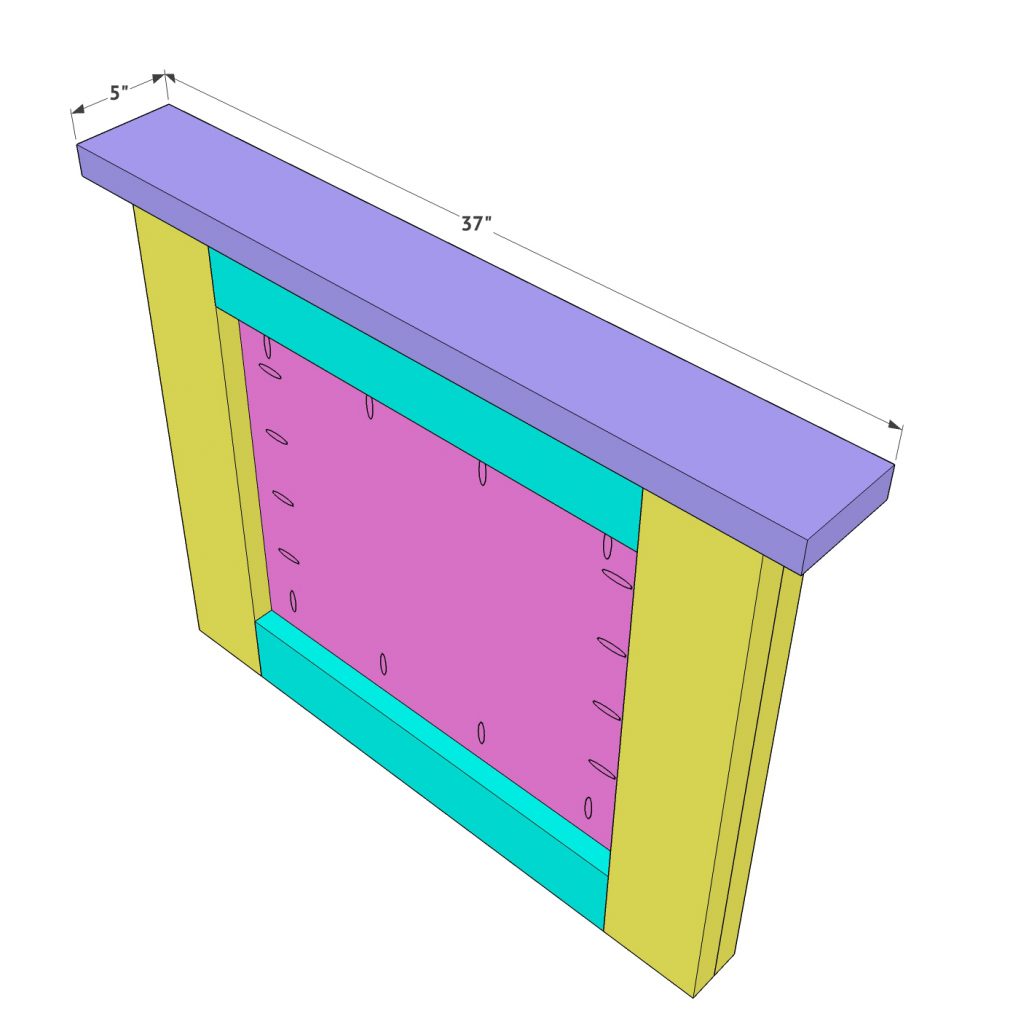
Place the matching boards on top of the pocket holes from your other boards you just attached. Attach these boards using wood glue and 2” finish nails. Repeat this step on the second base.
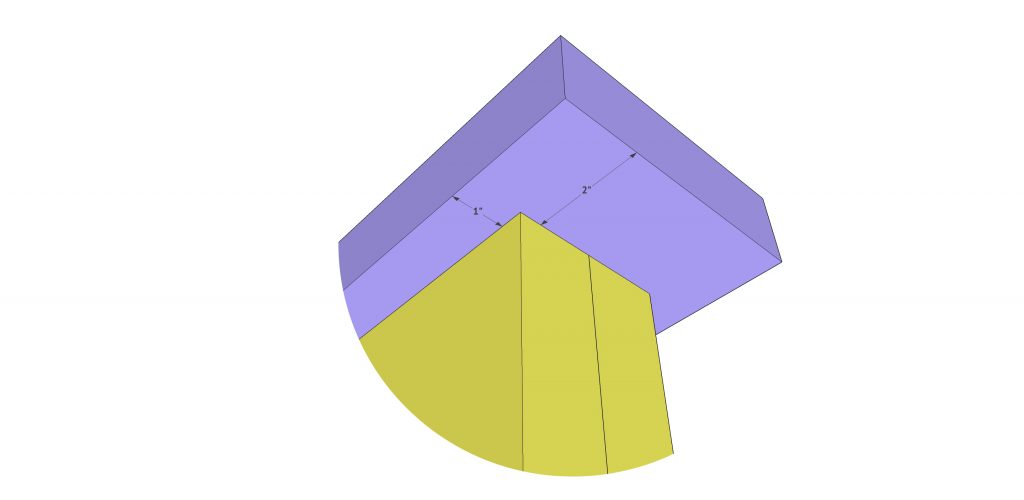
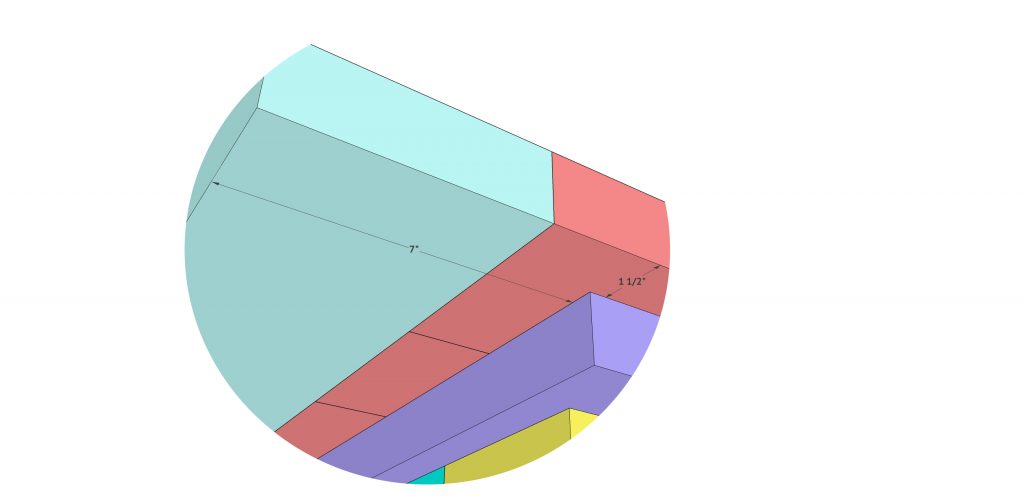
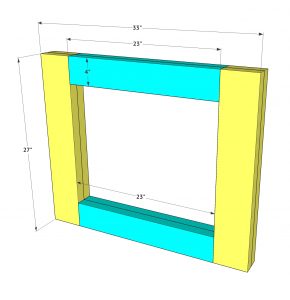
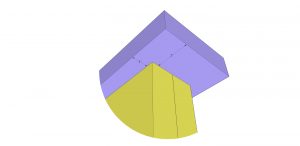
Now attach the plywood centers to both bases. Add 3/4” pocket holes around all edges of the plywood and attach into the base using wood glue and 1.5” pocket hole screws. The panels will be set back 1 1/8” from the outside edges of the legs.


Now add the top 2x board to each of your bases. These are ripped to 5” each. Attach the to the top and center of each base using wood glue and 2.5” wood screws through the top of the board and into each base.
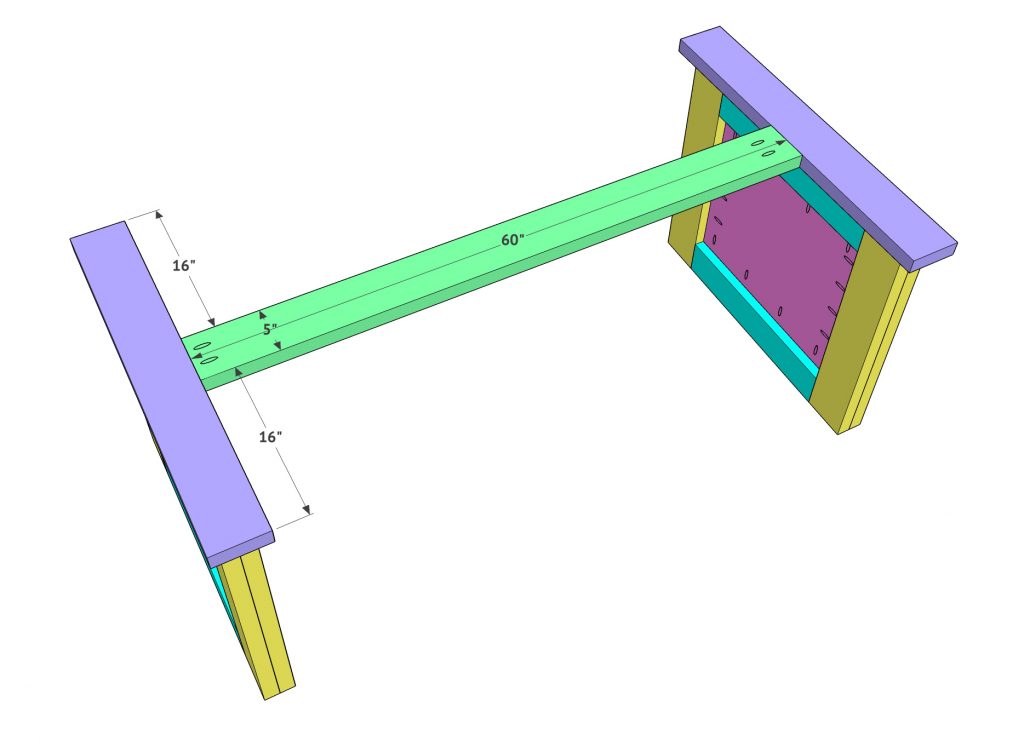
Now attach the top runner to both bases. This board is ripped to 5” wide. Attach it to the center of each base using wood glue and 2.5” pocket hole screws through 1.5” pocket holes and into the top of each base.
The first bottom runner will be attached the same way. Line it up centered and flush with the bottom of the bases. Attach them to the bases using wood glue and 2.5” pocket hole screws through 1.5” pocket holes.
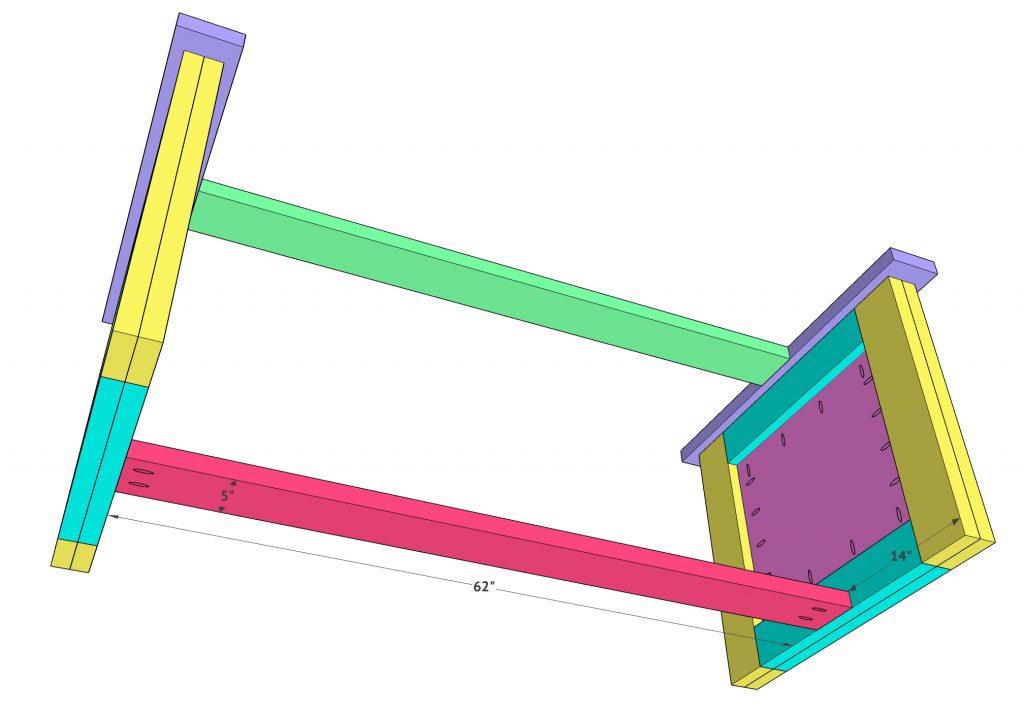
The second runner is identical to the first one you just attached. It’s also ripped to 5”. Add wood glue top of the attached runner and set the second one on top of it. Clamp them together making sure they are flush and attach with 2.5” wood screws from the bottom of the bottom runner and into the top one.

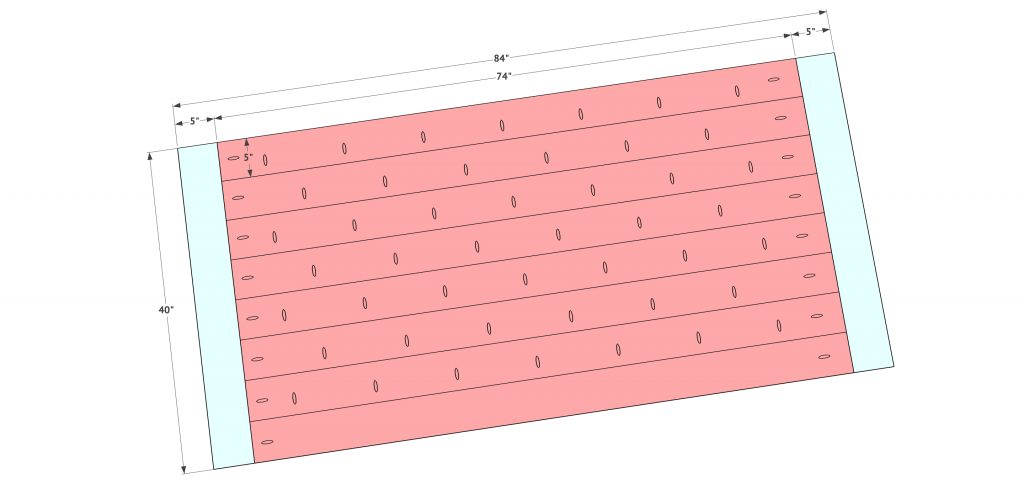
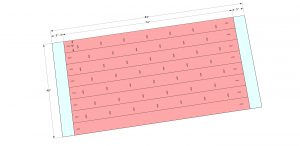
Build the table top next. These boards are all ripped to 5” wide. Attach the planks using 2.5” pocket hole screws through 1.5” pocket holes. Then, attach each breadboard using 2.5” pocket hole screws through the 1.5” pocket hole at the end of each board.
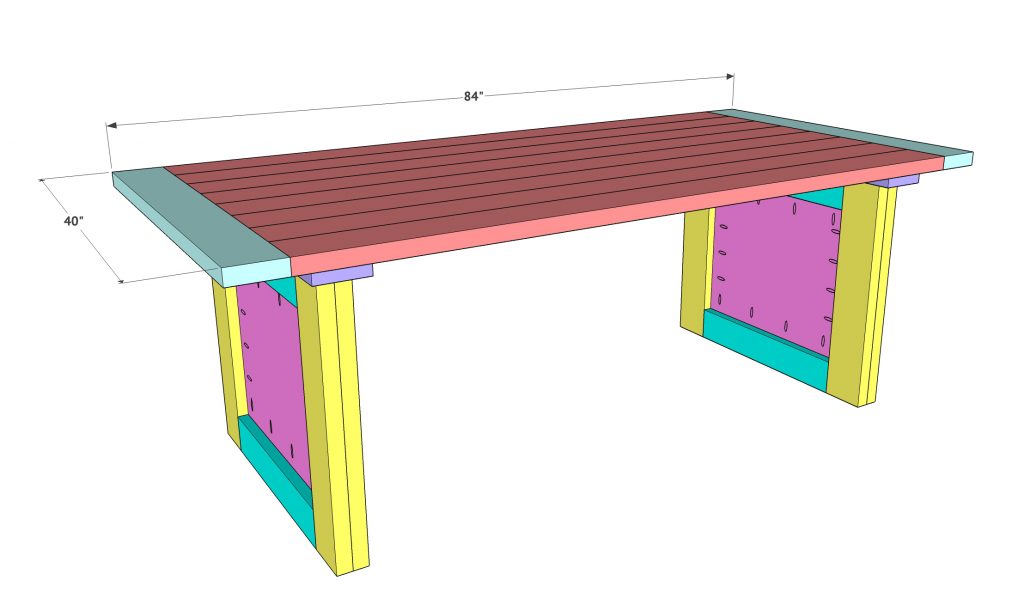
The final step is attaching the top. I wait until I get the table moved into
the space where it will stay, and attach at that point which makes moving a lot easier. I also don’t use wood glue on this part so that I am able to move it again later. Attach the top through the runner and top support boards on each base using 2.5” wood screws.
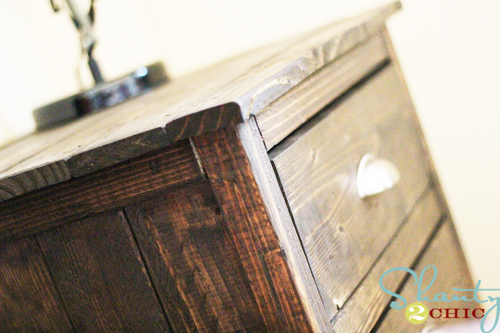
You can add barnwood or any kind of planks you want to on the plywood panels. Check out our video to see how I attached mine. This is the perfect table to customize and make your own. Be sure to share your builds with using #shanty2chic!
DIY Farmhouse Panel Dining Table
Instructions
- This entire table is built with 2×6 boards that I ripped down to 5” and 4”. Make the cuts for the legs first and then rip each board to 5” wide. Glue 2 boards together and clamp to form a leg. You will build 4 of these legs.

- Once the legs are dry, you can start attaching to form your base. The horizontal boards will be ripped to 4” wide each. Attach them to the legs using wood glue and 2.5” pocket hole screws through 1.5” pocket holes. You want them flush with the ends of the leg boards and flush with one side of the legs. You will repeat the step to form 2 bases.

- Place the matching boards on top of the pocket holes from your other boards you just attached. Attach these boards using wood glue and 2” finish nails. Repeat this step on the second base.

- Now attach the plywood centers to both bases. Add 3/4” pocket holes around all edges of the plywood and attach into the base using wood glue and 1.5” pocket hole screws. The panels will be set back 1 1/8” from the outside edges of the legs.

- Note the spacing.

- Now add the top 2x board to each of your bases. These are ripped to 5” each. Attach the to the top and center of each base using wood glue and 2.5” wood screws through the top of the board and into each base.

- Note the spacing.
- Now attach the top runner to both bases. This board is ripped to 5” wide. Attach it to the center of each base using wood glue and 2.5” pocket hole screws through 1.5” pocket holes and into the top of each base.

- The first bottom runner will be attached the same way. Line it up centered and flush with the bottom of the bases. Attach them to the bases using wood glue and 2.5” pocket hole screws through 1.5” pocket holes.

- The second runner is identical to the first one you just attached. It’s also ripped to 5”. Add wood glue top of the attached runner and set the second one on top of it. Clamp them together making sure they are flush and attach with 2.5” wood screws from the bottom of the bottom runner and into the top one.
- Build the table top next. These boards are all ripped to 5” wide. Attach the planks using 2.5” pocket hole screws through 1.5” pocket holes. Then, attach each breadboard using 2.5” pocket hole screws through the 1.5” pocket hole at the end of each board.
- The final step is attaching the top. I wait until I get the table moved intothe space where it will stay, and attach at that point which makes moving a lot easier. I also don’t use wood glue on this part so that I am able to move it again later. Attach the top through the runner and top support boards on each base using 2.5” wood screws.

- Note the spacing.


Happy Building!

Can you provide the stain you used?
can i use 1×6 decking boards instead?
Looks great! What color of stain did you use? Thx
Hola un trabajo muy bonito y profesional explicado de manera muy fácil la felicito