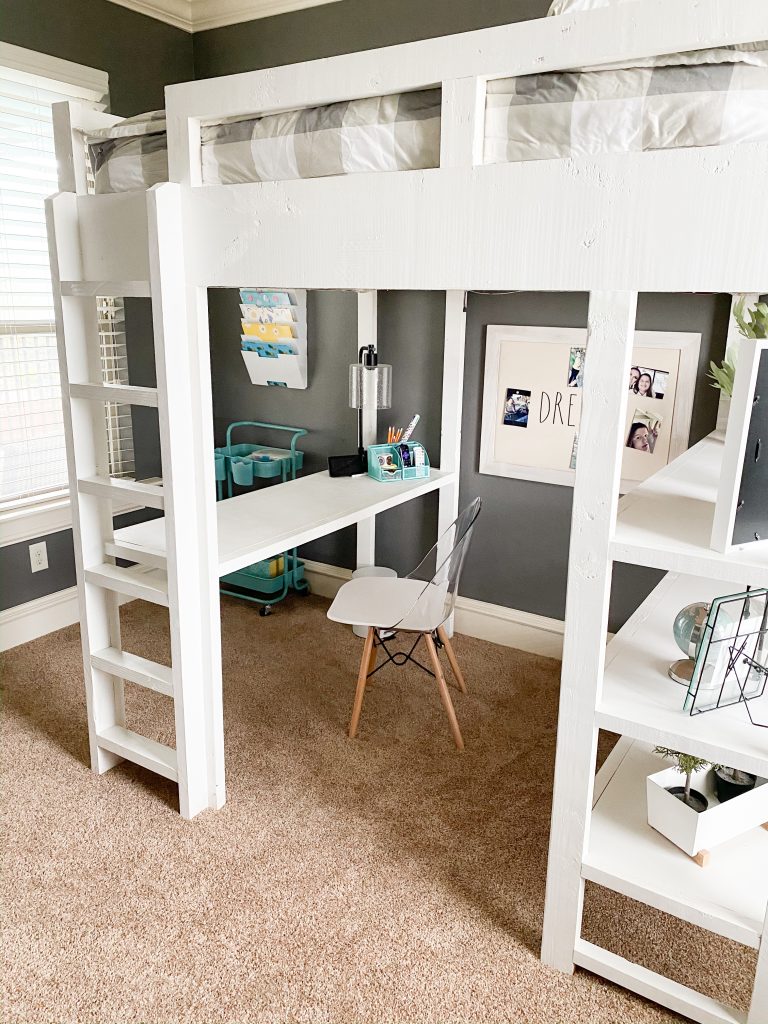
Learn how to build this DIY Loft Bed with free plans and how-to video by Shanty2Chic!
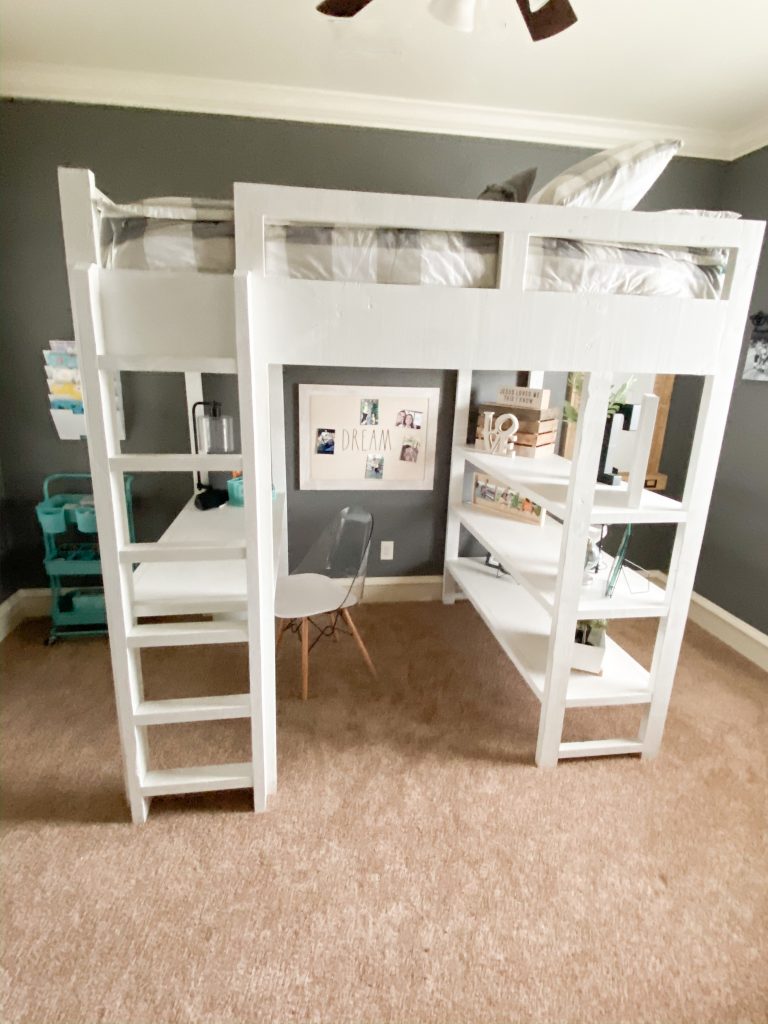
I am so excited to share part two of this DIY Loft Bed build! With my daughter beginning remote learning, for this school year, I wanted to give her a space she was excited to work in. She’s been begging me to build her a loft bed with a desk so this was the perfect time to build it! I was able to build three pieces of furniture in one for about $300 in lumber! This is a great build for beginners and it only requires four tools!
So, let’s get to building!
You can get the free printable plans here!If you missed part 1 of this build you can find it here!
Check out this how-to video to see how easy it was to build!
Table of Contents
DIY Loft Bed Part Two
Tools
Supplies
- 4 – 2x10x8 Framing Lumber
- 14 – 2x4x8 Framing Lumber
- 11 – 2x2x8 Framing Lumber (I ripped from 2×4’s)
- 12 – 1x4x8 Pine or Common Boards
- 2 – 3/4″x48″x96″ Hardwood Plywood (I used Birch)
- 1 1/4″ Pocket Hole Screws
- 2 1/2″ Pocket Hole Screws
- 1 1/4″ Brad Nails
- 3″ Wood Screws
- 1 1/4″ Wood Screws
- Wood Glue
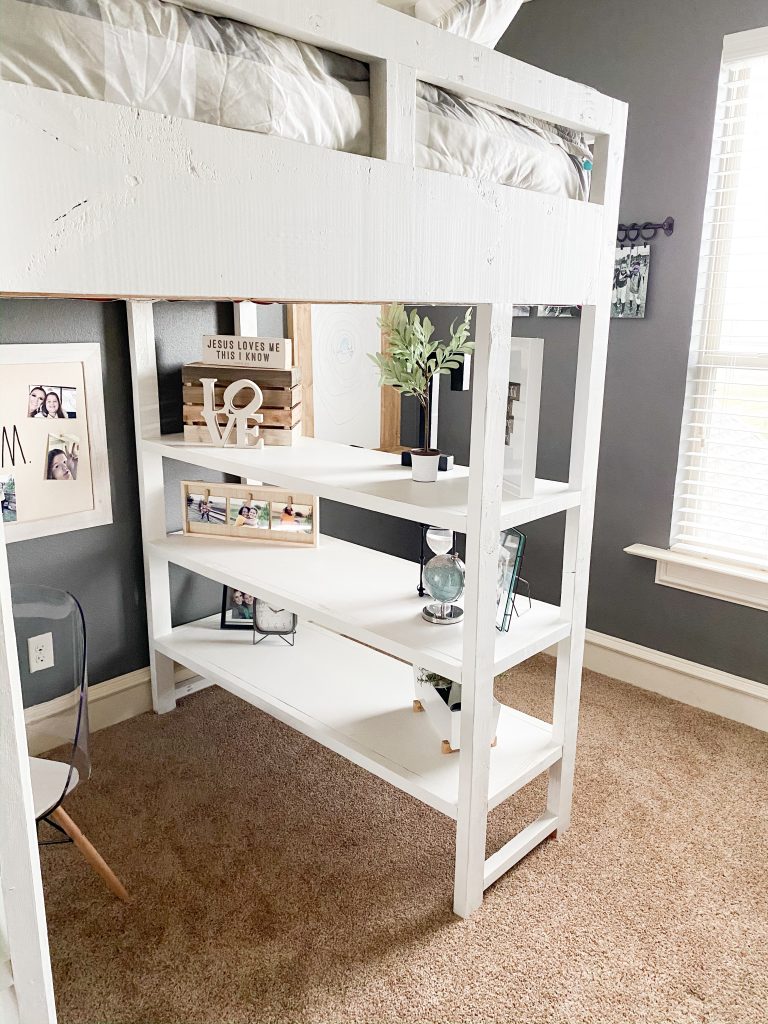
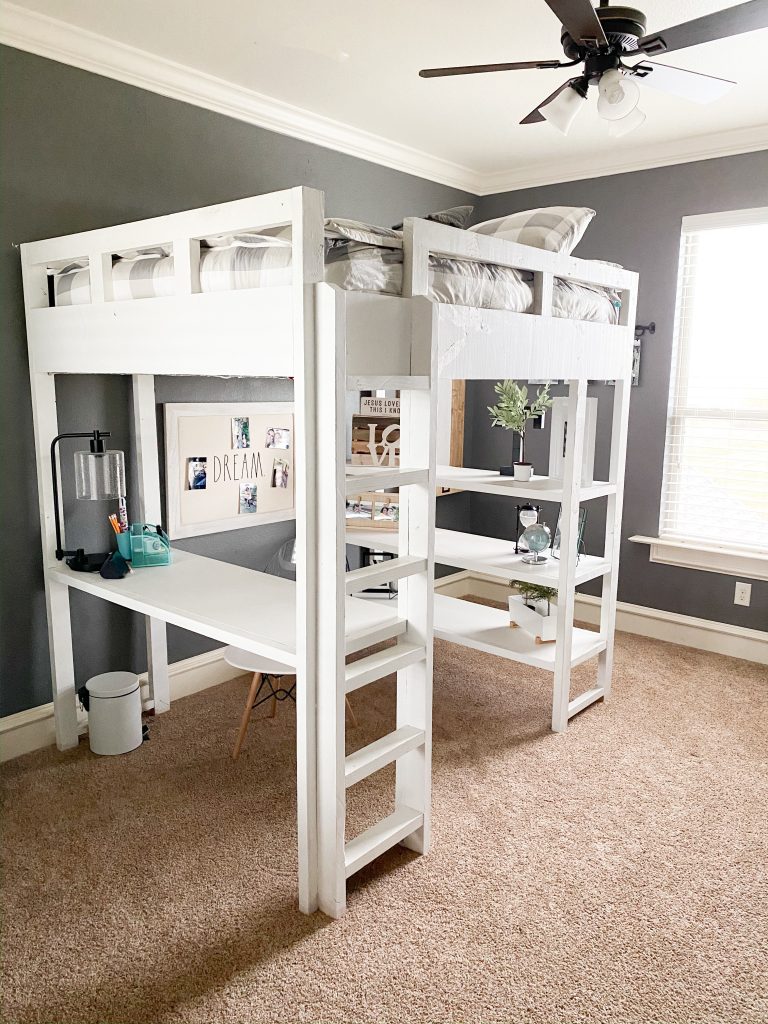
Assembling the Desk and Shelves
Step 1

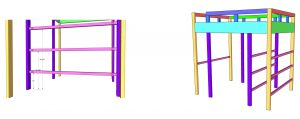
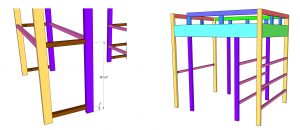
Cut the front shelf trim pieces to size and drill 1 1/2″ pocket holes on each end. Attach them to the leg supports with 2 1/2″ pocket hole screws and wood glue.
Step 2

Cut the front desk trim piece to size and drill 1 1/2” pocket holes in each end. Attach it to the leg supports with 2 1/2” pocke hole screws and wood glue.
Step 3
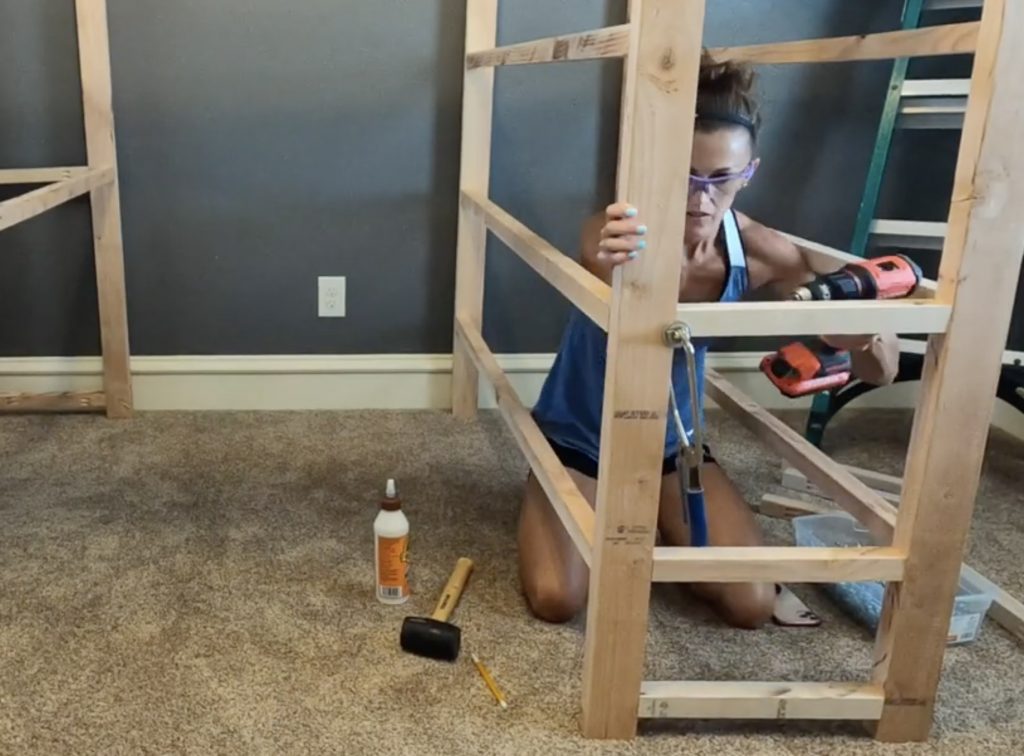
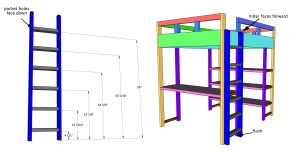
Cut the short shelf pieces to size and drill 1 1/2” pocket holes in both ends. Attach them to the leg supports with 2 1/2” pocket hol screws and wood glue. The pocket holes on the bottom pieces will face in and the rest will face down.
Step 4
Cut the short desk pieces to size and drill 1 1/2” pocket holes in both ends. Attach them to the leg supports with 2 1/2” pocket hole screw and wood glue. The pocket holes on the bottom pieces will face in and the rest will face down.
Step 5
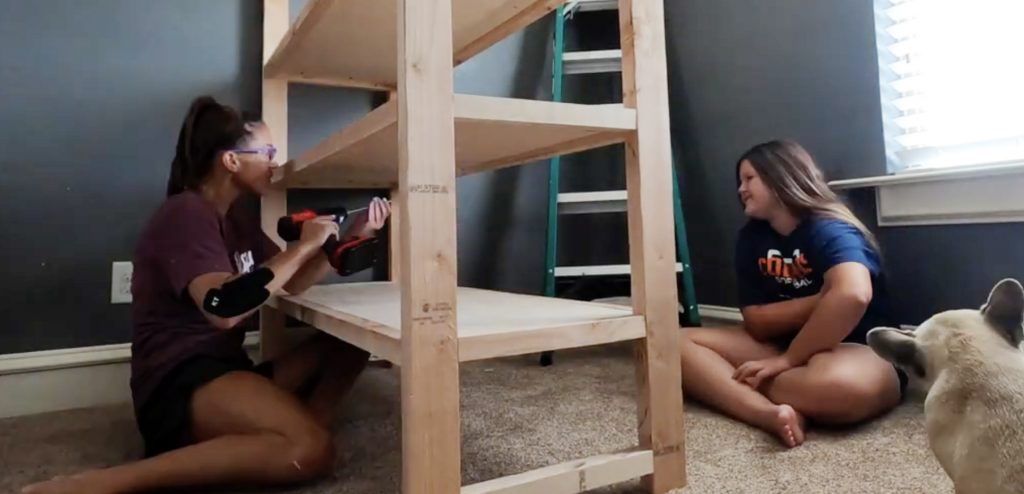
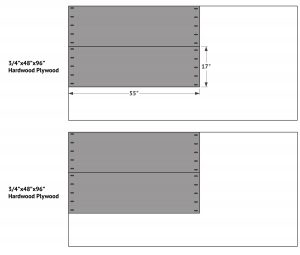
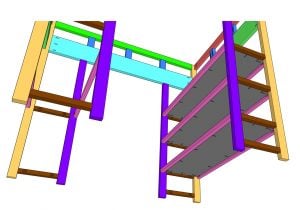
Measure and cut the plywood for the shelves. Drill 3/4” pocket holes around all edges and attach it to the shelf trim with 1 1/4” pocket hole screws. The plywood should be flush with the top of the trim.
Step 6
Measure and cut the plywood for the desk. Drill 3/4” pocket holes around all edges and attach it to the shelf trim with 1 1/4” pocket hole screws. The plywood should be flush with the top of the trim.
Assembling the Ladder
Step 1
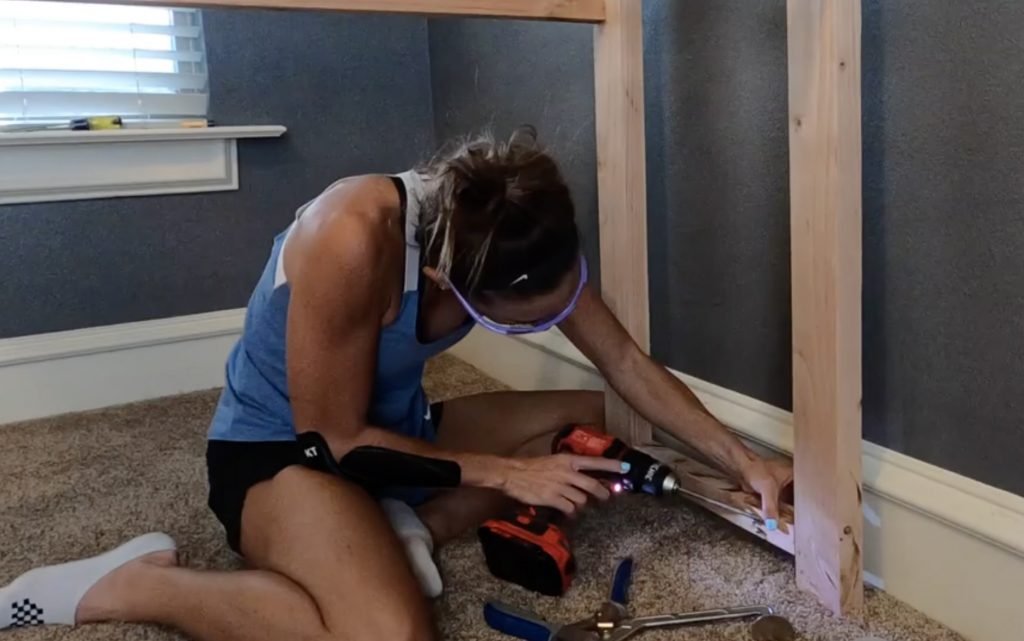
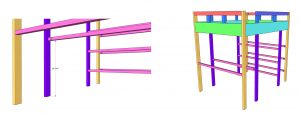
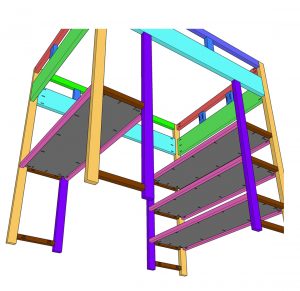
Cut the ladder pieces to size. Drill 1 1/2” pocket holes on both ends of each rung. Attach the rungs to the ladder legs with 2 1/2” pocket hole screws and wood glue.
Attach the ladder to the loft bed with 3” wood screws, from the back of the leg supports and into the ladder.
Attaching the Slats
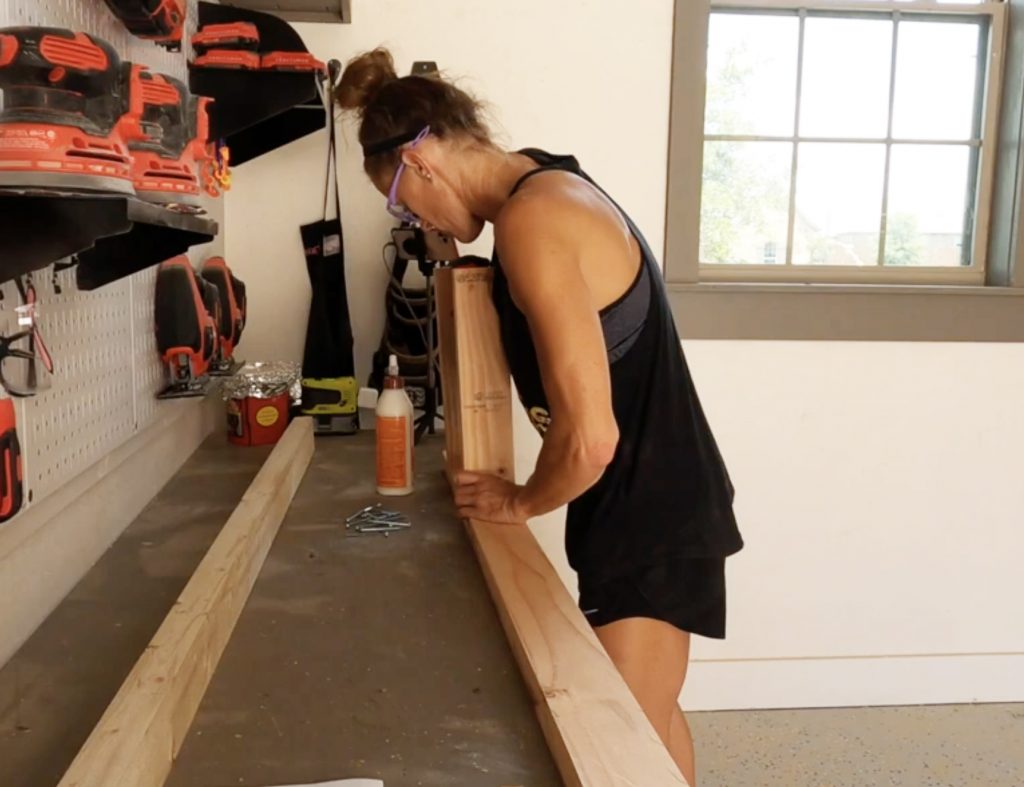
Step 1

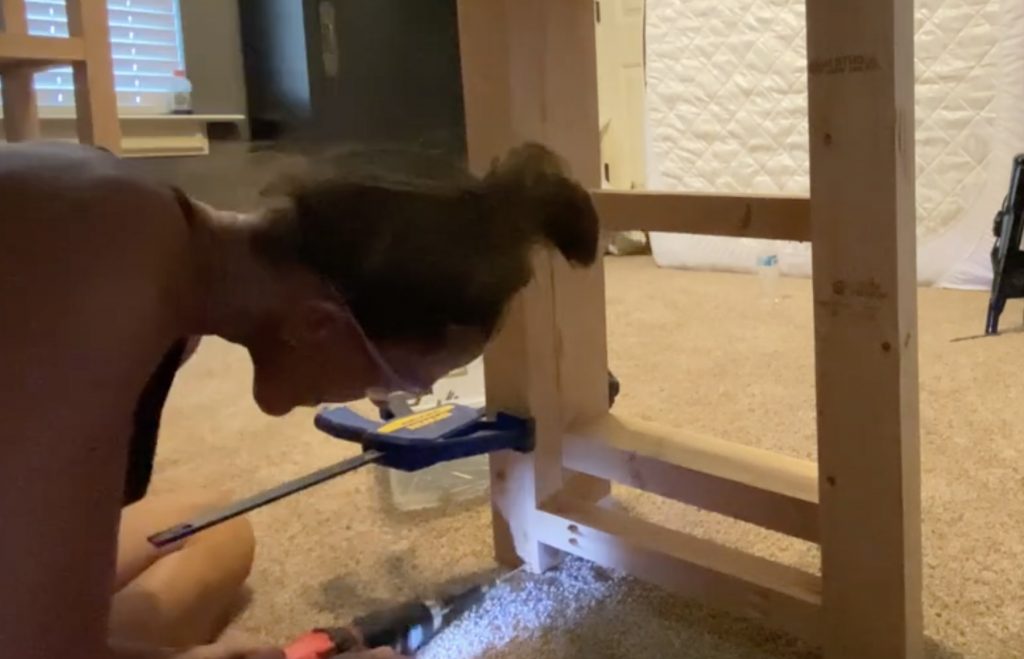
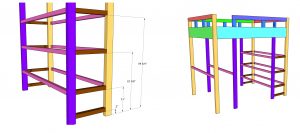
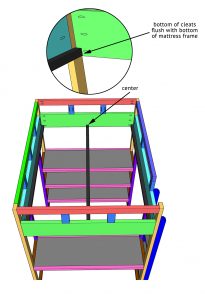
Cut the cleats to size and drill 1 1/2” pocket holes at both ends. Attach one to each side of the bed with 2 1/2” wood screws and 2 1/2” pocket hole screws and wood glue. Attach the center cleat with 2 1/2” pocket hole screws and wood glue.
Step 2
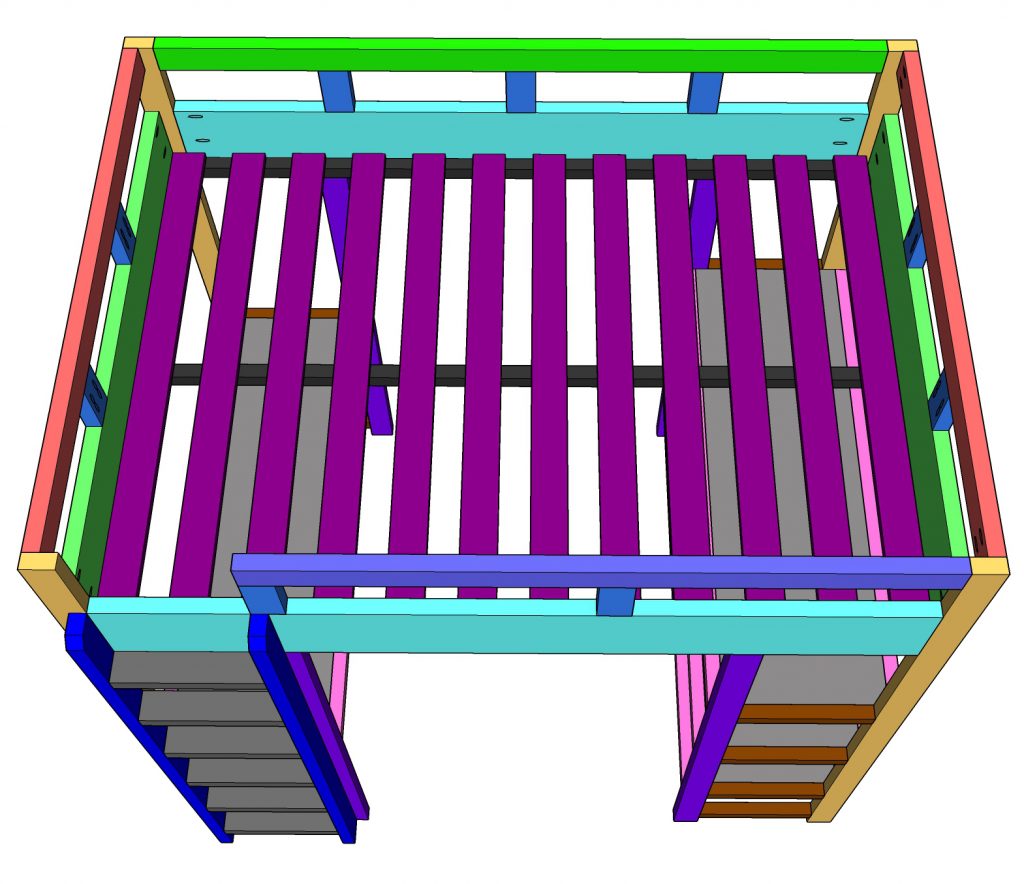
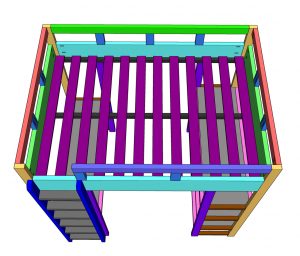
Cut the slat pieces to size. Even space them out across the cleats and attach them to the cleats with 1 1/4” wood screws.
The Finish!
Step 1

Now just fill your exposed pocket holes, sand it down and add a finish!
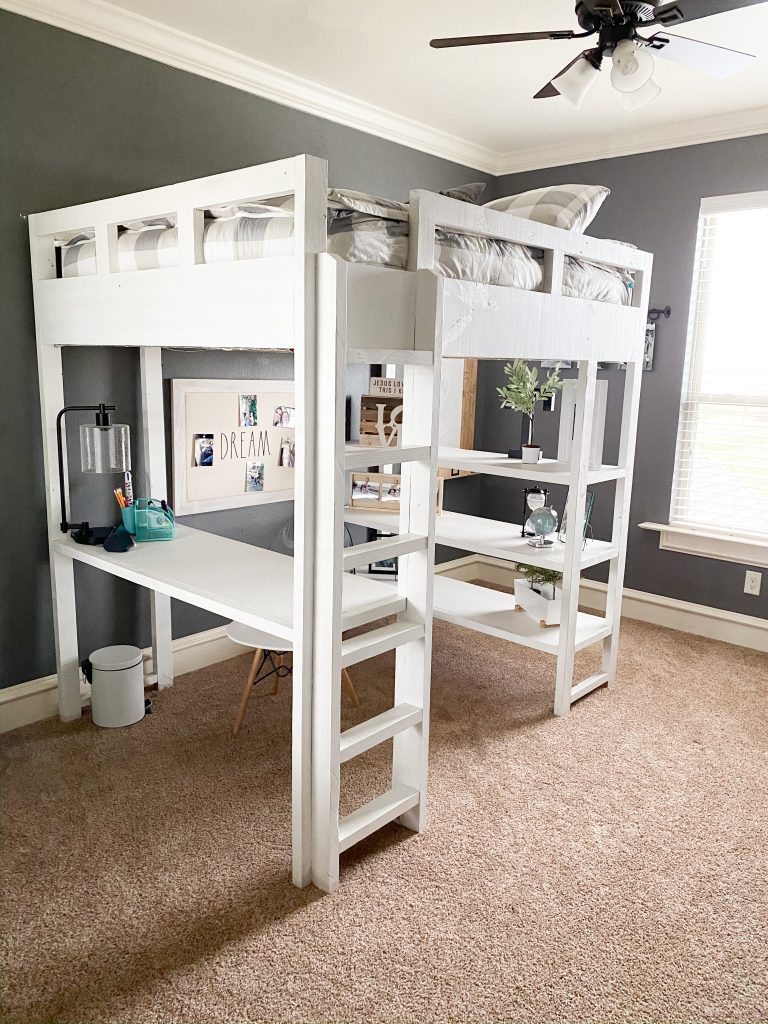
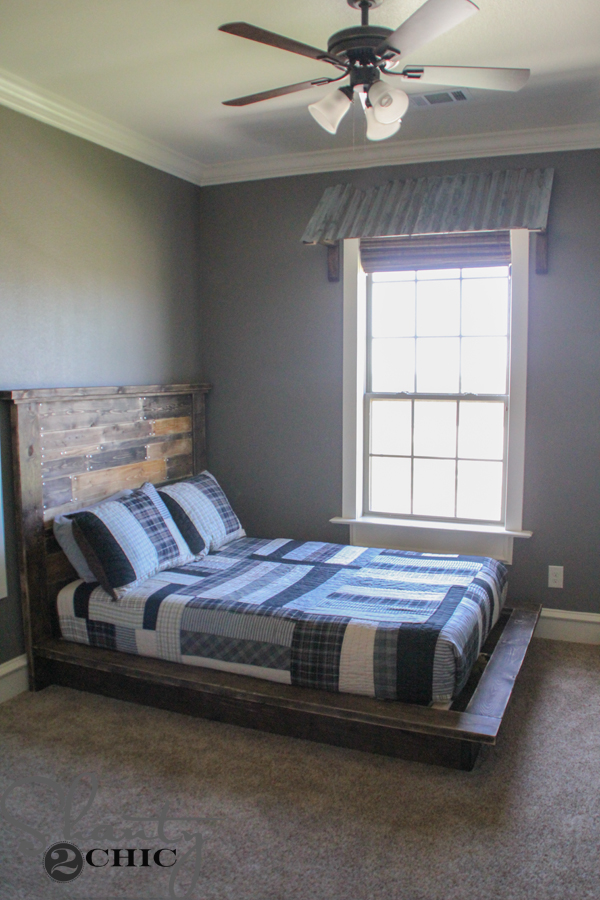
It’s the perfect combination of form and function and my daughter is loving it for her remote learning!
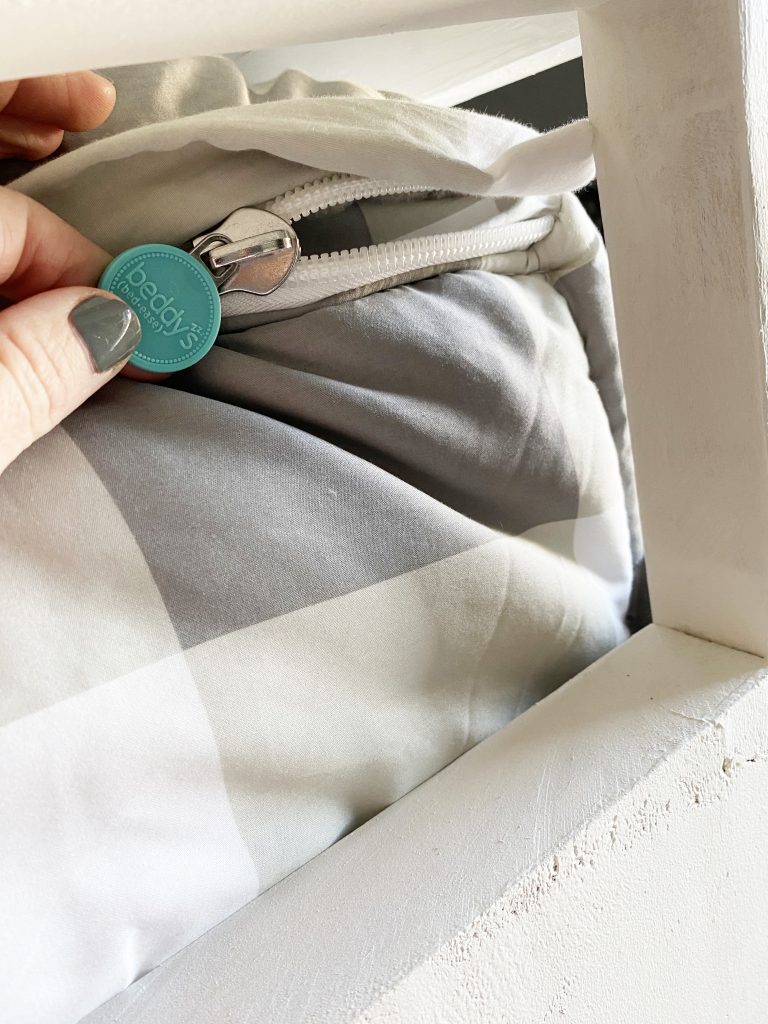
I found the perfect bedding for her bed from Beddy’s! Their bedding is so smart! The comfortor wraps around the mattress like a fitted sheet and it has a minky blanket that you unzip from the top making it super easy for kids to make their beds! Super handy for a bunk bed too and the quality is amazing!
They have so many patterns and color options and the most adorable throw pillow covers!
- You can check out the whole line of Beddy’s products here and use SHANTY2CHIC at checkout for 20% off!
Make sure to share your builds with us on social media and use #shanty2chic so we can share them too!Happy Building!
DIY Loft Bed – Part Two
Tools
- Table Saw (optional)
- Miter Saw
- Drill
- Kreg Jig
Supply List
- 4 2x10x8 Pine or Common Board
- 14 2x4x8 Pine or Common Board
- 11 2x2x8 Pine or Common Board
- 12 1x4x8 Pine or Common Board
- 2 3/4"x48"x96" Hardwood Plywood
- 1 1/4" Pocket Hole Screws
- 2 1/2" Pocket Hole Screws
- 1 1/4" Wood Screws
- 3" Wood Screws
Instructions
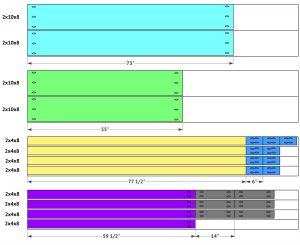
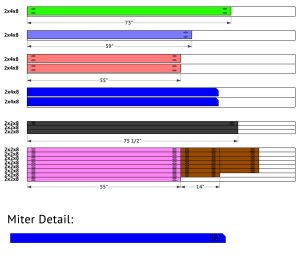
Cut List
- Cut List 1

- Cut List 2

- Cut List 3

- Cut List 4


Assembling the Desk and Shelves
- Cut the front shelf trim pieces to size and drill 1 1/2" pocket holes on each end. Attach them to the leg supports with 2 1/2" pocket hole screws and wood glue.

- Cut the front desk trim piece to size and drill 1 1/2” pocket holes in each end. Attach it to the leg supports with 2 1/2” pocke hole screws and wood glue.

- Cut the short shelf pieces to size and drill 1 1/2” pocket holes in both ends. Attach them to the leg supports with 2 1/2” pocket hol screws and wood glue. The pocket holes on the bottom pieces will face in and the rest will face down.

- Cut the short desk pieces to size and drill 1 1/2” pocket holes in both ends. Attach them to the leg supports with 2 1/2” pocket hole screw and wood glue. The pocket holes on the bottom pieces will face in and the rest will face down.

- Measure and cut the plywood for the shelves. Drill 3/4” pocket holes around all edges and attach it to the shelf trim with 1 1/4” pocket hole screws. The plywood should be flush with the top of the trim.

- Measure and cut the plywood for the desk. Drill 3/4” pocket holes around all edges and attach it to the shelf trim with 1 1/4” pocket hole screws. The plywood should be flush with the top of the trim.

Assembling the Ladder
- Cut the ladder pieces to size. Drill 1 1/2” pocket holes on both ends of each rung. Attach the rungs to the ladder legs with 2 1/2” pocket hole screws and wood glue. Attach the ladder to the loft bed with 3” wood screws, from the back of the leg supports and into the ladder.

Attaching the Slats
- Cut the cleats to size and drill 1 1/2” pocket holes at both ends. Attach one to each side of the bed with 2 1/2” wood screws and 2 1/2” pocket hole screws and wood glue. Attach the center cleat with 2 1/2” pocket hole screws and wood glue.

- Cut the slat pieces to size. Even space them out across the cleats and attach them to the cleats with 1 1/4” wood screws.

The Finish
- Now just fill your exposed pocket holes, sand it down and add a finish! Make sure to share your builds with us on social media and use #shanty2chic so we can share them too!Happy Building!


Do you have plans for twin size?
Would love to make this for my girls room. Do you have plans for a twin size?
Is this sturdy without the desk, bookshelf? I am wanting to build without first and possibly add later?
How do you disassemble it if you move?
How were you able to sand and paint it all assembled IN THE ROOM?
What is the weight limit?
The link to plans for part 2 gives you the part 1 plans again =)
Hi! Can you tell me what your mattress thickness is?
This is such a great idea. We’re planning for our kiddos room right now and I have two that will be sharing a smaller room. I have been looking at loft beds with desks to really maximize the space that they have so this would be a great project but I don’t have the space for the full size… I would need to do twin beds. Do you happen to have the modifications to make this a project for a twin size instead of a full?
Thank you so much for your ideas and videos. They really inspire me to tackle things I would never dream of doing on my own.
The loft bed looks amazing! We are planning on making this loft bed as well, but we don’t have room for a full size bed. Do you have plans for making it to fit a twin size instead? Thanks so much.
Did you use standard mattress? Need to know if we can use one we have or if we need to adjust plans.