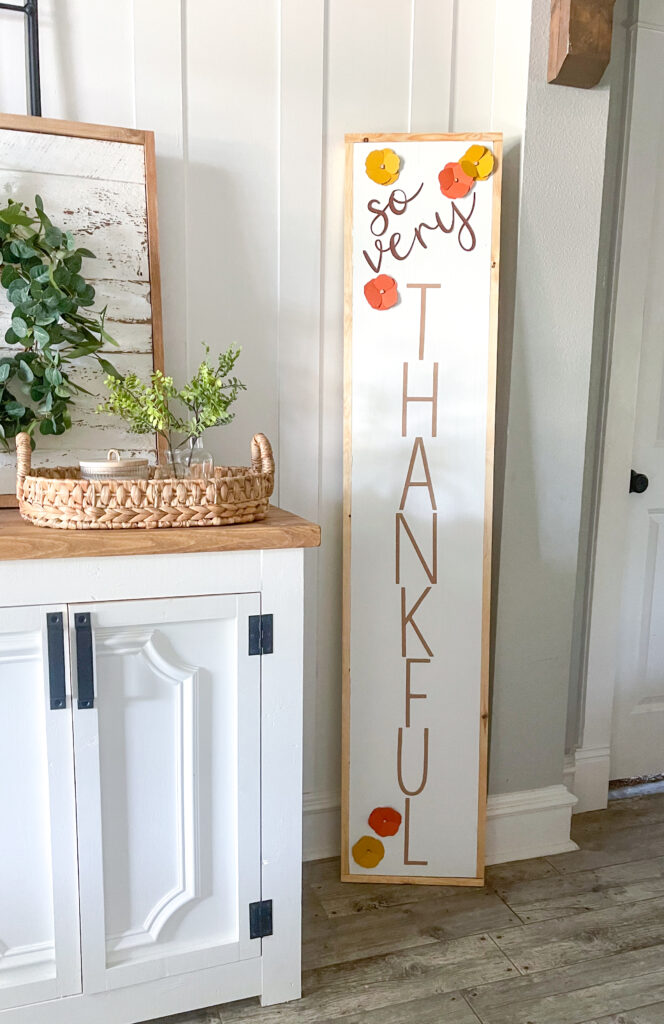
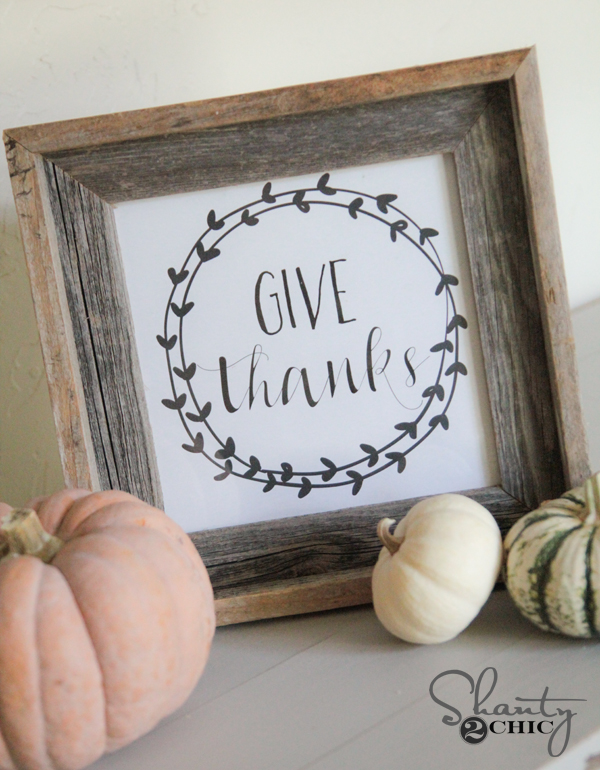
We love creating fun pieces of art throughout the year to customize our home decor! We made this rustic DIY Wood Sign for Fall, and we love how it turned out!
The cooler weather is finally giving us some inspiration to decorate for Fall! DIY Signs are so much fun to make, they are an easy way to personalize your space and making them yourself can make large signs very affordable. Some people use stencils, but we love using our Cricut cutting machine to make the project so much easier! Just follow the step-by-step tutorial below!
Cricut Cutting Machine
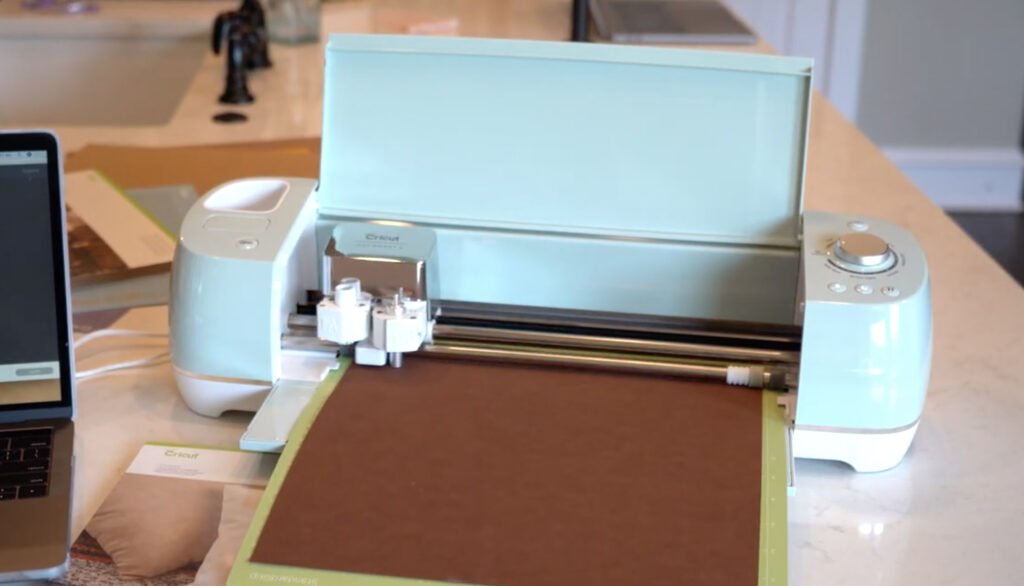
We used our Cricut Explore Air to create this sign. You can find it HERE on their website! We have both owned multiple Cricut machines and they are all so user friendly! We love the Cricut Design Space program which is the platform you will use to make all of your designs. Today we made a sign, but we have made SO many other things using the machines as well… Clothing, jewelry, throw pillows, coffee mugs, coasters just to name a few.
How to Build a DIY Farmhouse Wood Sign
Table of Contents
Step 1: Painting the Farmhouse Style Sign
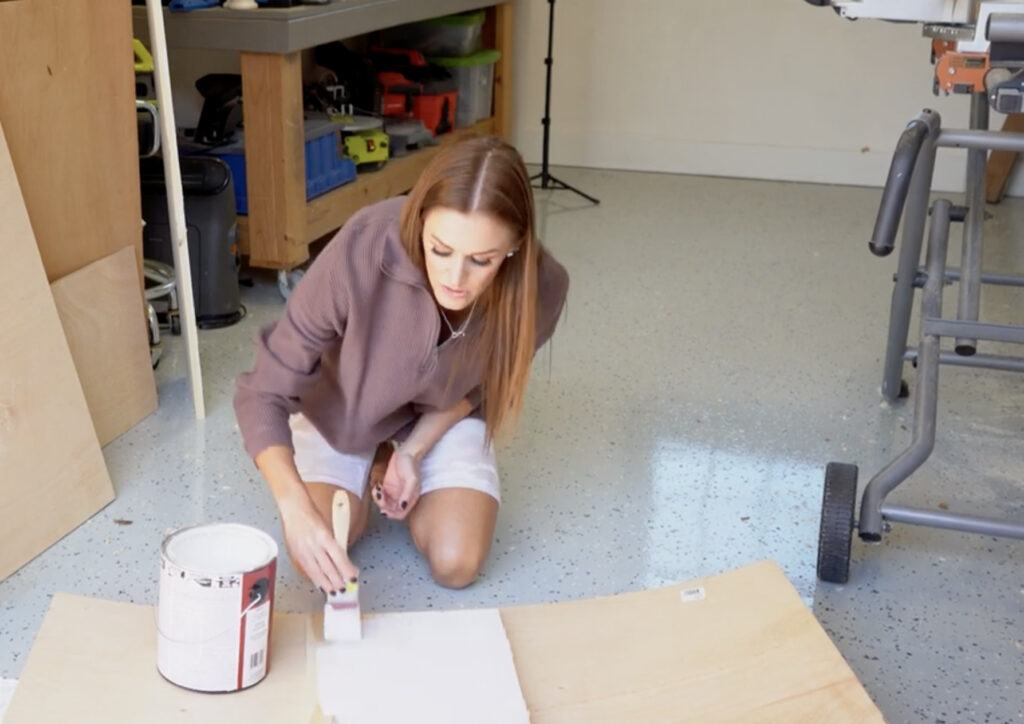
We started making this DIY wood sign with a project panel for this project. You can find them at Home Depot with the pine boards. They are typically close to the plywood section. The panel we purchased was 16 inches wide by 6 feet long. We painted one side of the panel with white paint (latex) and a paint brush and allowed it to dry.
This is also a great project for scrap wood! You can use scraps for the trim pieces or a scrap piece of plywood, instead of the project panel.
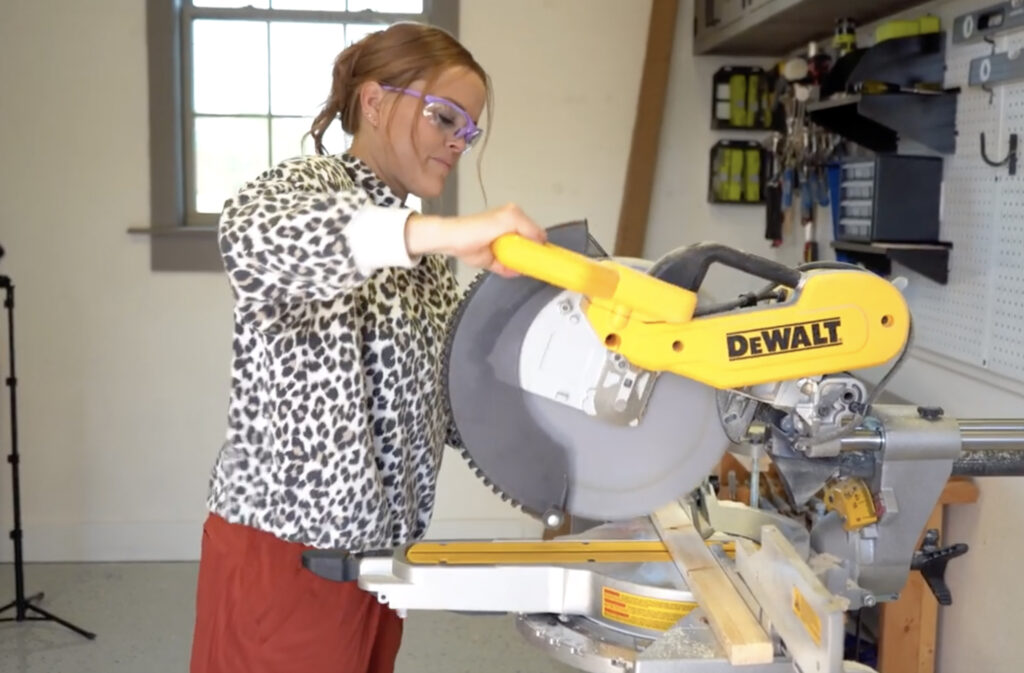
Step 2: Building the Wood Frame
While that was drying, we cut 1×2 boards, with our miter saw, to frame out the outside of the sign. We stained these pieces of wood with a light wood stain before attaching them. To attach the frame pieces, we used wood glue and our brad nailer, with 1 1/4″ brad nails, through the trim pieces and into the project panel.
Step 3: Create the design on the Cricut Machine
While the sign was drying, we used Cricut Design Space to design our letters. This is so simple! The software itself comes with hundreds of fonts, but you can also download any font from your computer to use. Once you lay out your letters, the program makes it super simple to click and drag to get your design the size that needs to be. Once you have the design made, cutting is just a click of a button. This machine is great for cutting leather, paper, vinyl and craft board!
Cricut Materials we used:
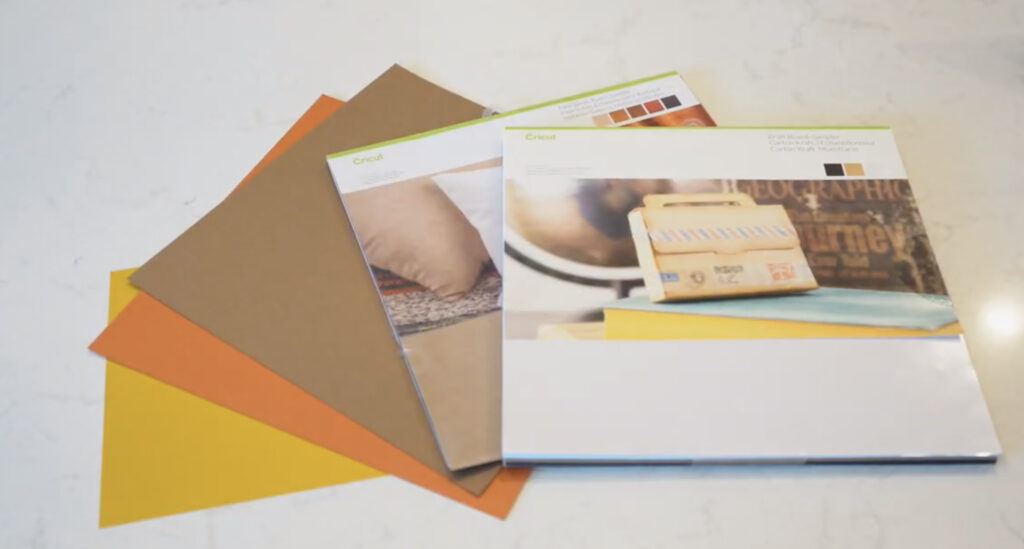
Here is a list of the Cricut materials we used to create the sign.
Step 4: Designing the Wall Art
Once the designs were cut out, we moved on to the last step – attaching them. We used a hot glue gun to attach all the pieces to our sign. So simple!
Cricut Made it easy!
This was such a fun, simple and cute way to get our houses ready for fall and customize our home decor. The Cricut machine made it so simple and our kids love to use it too. It is one of our very favorite tools for customizing our projects and adding character! You can let your creativity run wild and make any sign your own! We can’t wait to start on our wooden signs for Christmas! Cricut sponsored this project, but all opinions and words were entirely our own.
Check out some of our other Wall Signs


This is an art. I would love to decore my house but unfortunately i could not the reason is shortage of time
I love home decoration. I often do decoration for my house and happy to see that more people are like me who love decoration. this is my type of platform
If I hadn’t seen what you two, as sisters, built for us to see and follow along with no prior knowledge, I’d have no idea what equipment I’d need to start a woodworking hobby. You make it look so simple and delightful to watch and follow along with.
I have no idea what equipment I’d need to begin a woodworking hobby if I didn’t see what you two, as sisters, build for us to see and follow along with no prior knowledge, make it look so simple and enjoyable to watch and follow along with.
Good Morning! I just wanted to mention both of you are amazing and the things you built with such amazing equipment… As a beginner I wouldn’t know what tools to even consider on starting a wood crafting hobby with the many things you both as sisters make for us to watch and follow through with no experience it’s nice to see that you both make it so easy and fun making it together…Collaborating as family does bring you closer, I’m not sure if you would have a list of what a beginner should have just starting out. As I am 100% Disabled, and as a Veteran it does make it difficult to actually find with same interest when everyone is so busy trying to keep their life’s above poverty level!!! Stay Warm, and have a Merry Christmas…
This is a cute project! What fonts did you use?
There was another wood sign on your site that had similar dimensions but had ‘JOY’ on one side and ‘HOME’ or ‘WELCOME’ on the other side for use the rest of the year. I couldn’t find it. Is it still on your site?