Learn how to build this DIY Craft Cabinet with free plans, a step-by-step tutorial and a few basic power tools!
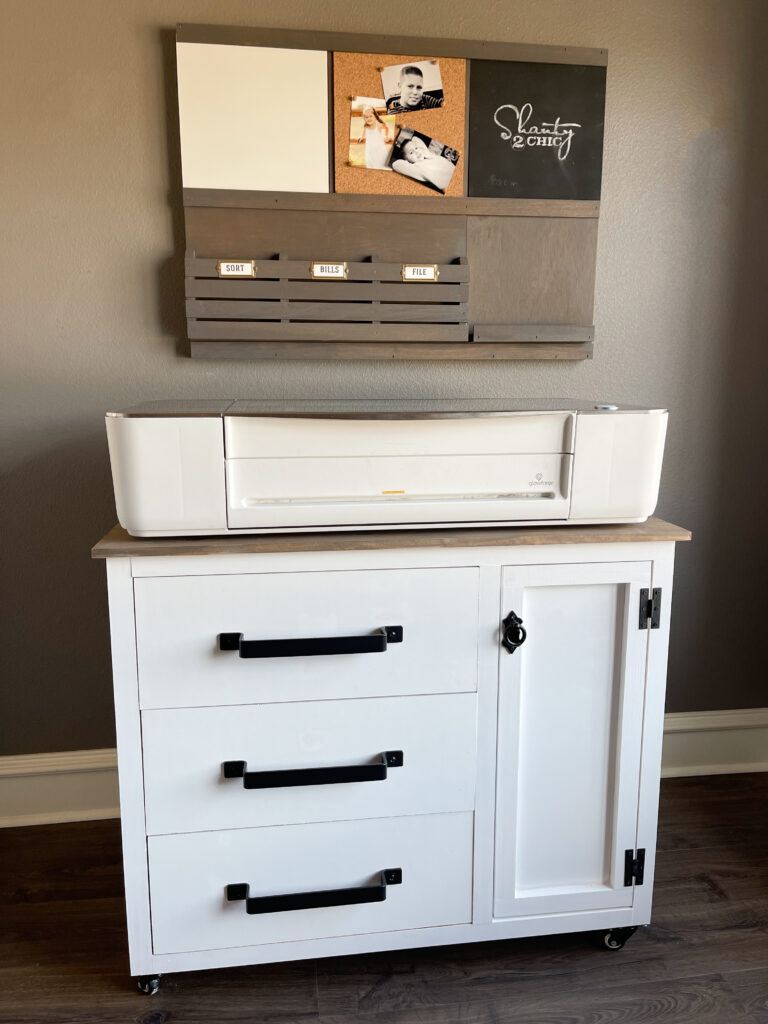
I say it about almost every one of my DIY Projects but this DIY Craft Cabinet is one of my favorites! I was in need of some serious storage solutions for my home office, especially after I welcomed my new Glowforge Pro to the space.
If you missed our Glowforge Pro review video, you can find it here.
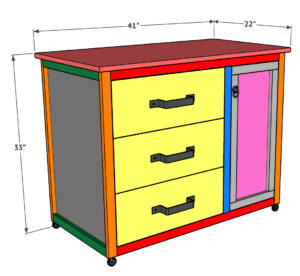
I’ve been using my Glowforge on the ground, which is not ideal, until I got a good sense of the type of storage that would suit it best, based on the ways I use it. My goal in this design process was to maximize the storage space, make it easy to move and take up as little space in my office as possible. I designed the drawers large enough to hold the proof grade 20″ panels and the cabinet door space large enough to house the air filter. If you don’t have a Glowforge machine, this would make the perfect craft cabinet for small spaces!
This is a very simple build and as always, we have the free printable plans!
Click here to jump to the free printable plans!You can also follow along in the step-by-step tutorial below!
How to build a DIY Craft Cabinet
Table of Contents
Tools:
- Miter Saw
- Drill
- Kreg Jig
- Table Saw (optional)
- Brad Nailer
- Stapler (optional)
- Pin Nailer (optional)
Supplies:
- 3 – 1x4x8 Pine or Common Boards
- 1 – 3/4″x48″x96″ Hardwood Plywood (Birch)
- 1 – 1/2″x48″x48″ Hardwood Plywood (Birch)
- 1 – 1/4″x48″x48″ Hardwood Plywood (Birch)
- 1 – 3/4″x24″x48″ Laminated Pine
- 1 1/4″ Pocket Hole Screws
- 1 1/4″ Brad Nails
- 5/8″ Brad Nails
- 3/4″ Staples (optional)
- 1″ Pin Nails
- 3 Drawer Slides
- 3 Drawer Pulls
- 1 Cabinet Pull – found at Hobby Lobby
- 2 Cabinet Hinges
- 4 2″ Casters
- Wood Glue
Now, let’s get to building!
Building the Cabinet Frame
Step 1:
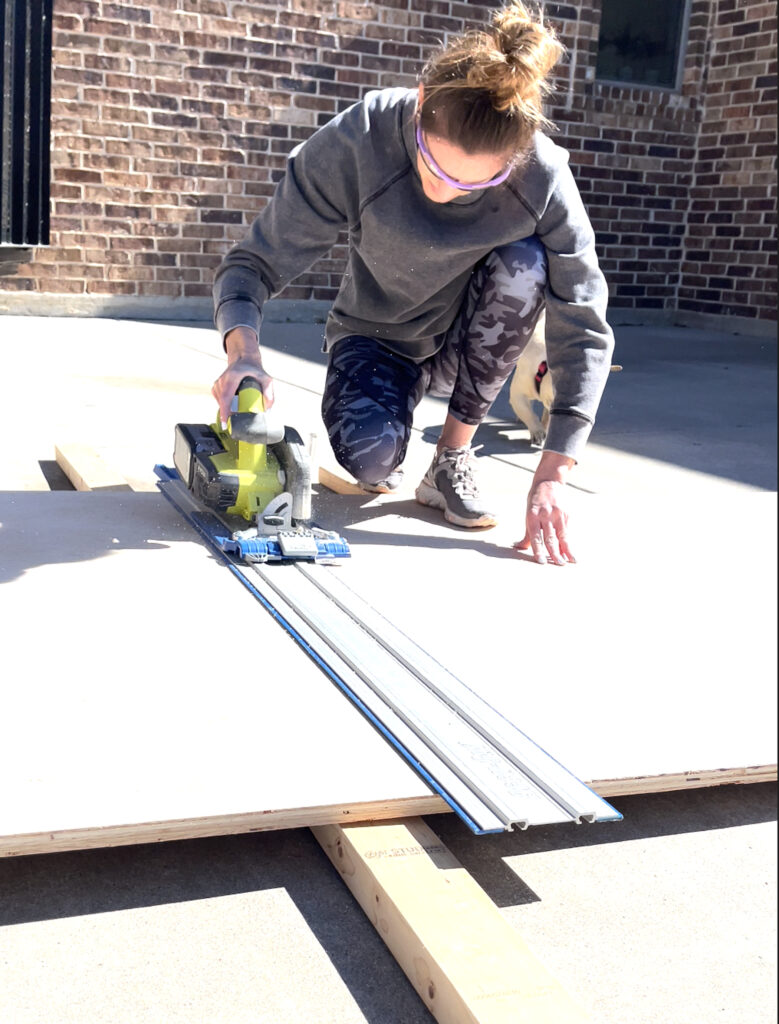
I used my Kreg Tools Accu-Cut to rip my plywood panels. This is a great alternative to a table saw. It comes at a fraction of the cost, requires very little storage space and it will give you a clean straight cut every time!
- You can find the Kreg Accu-Cut here.
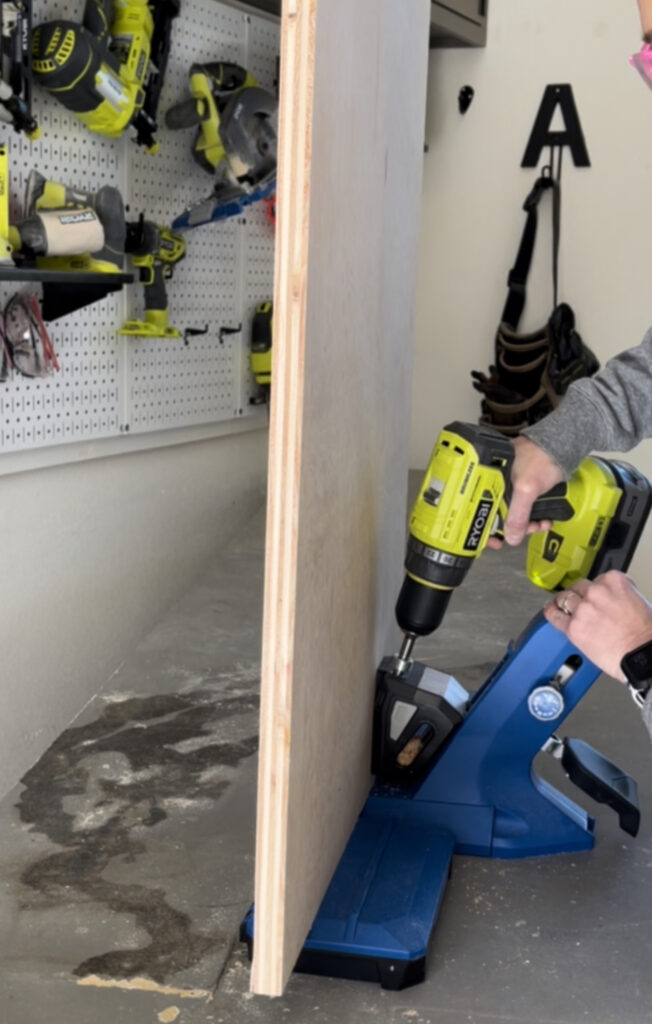
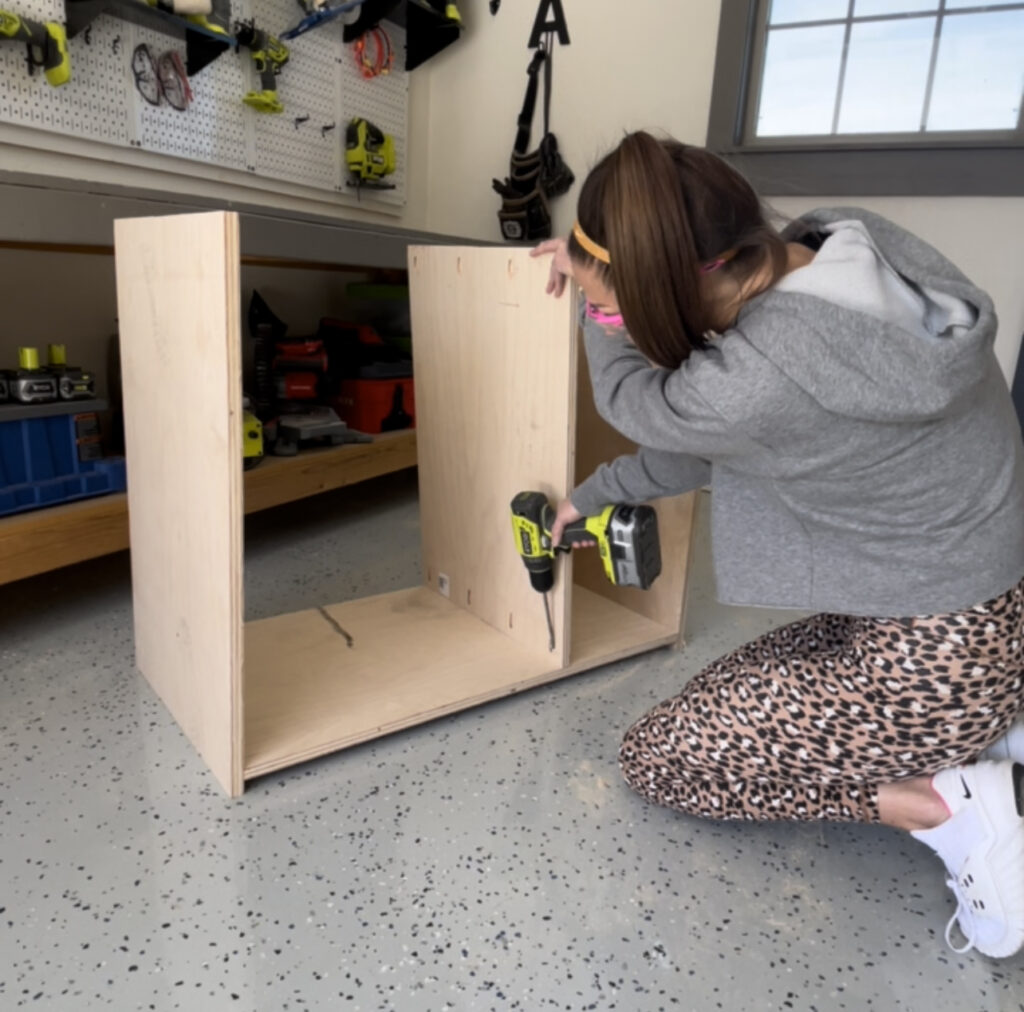
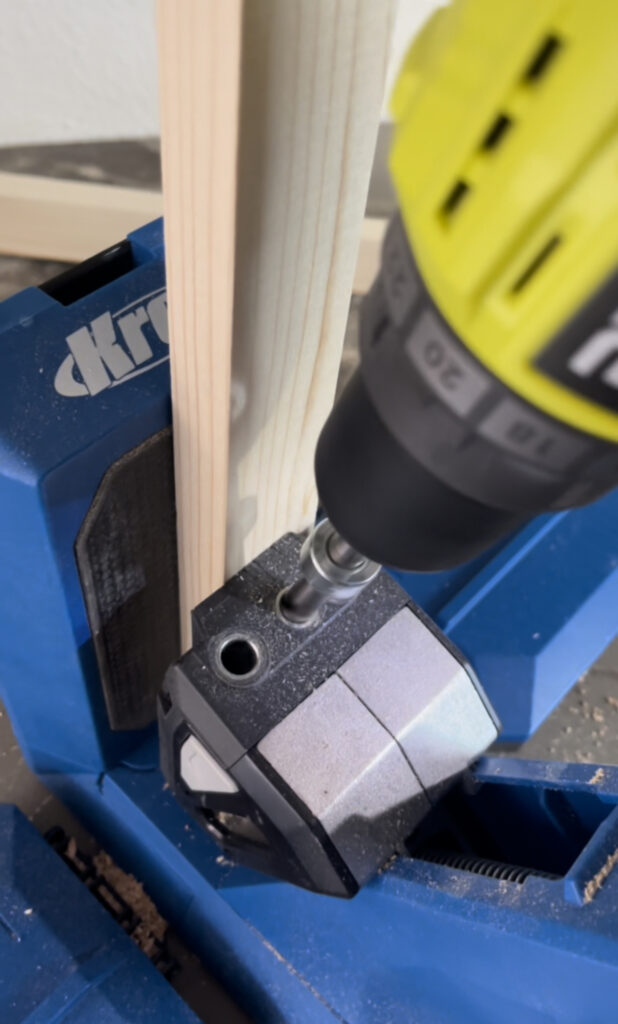
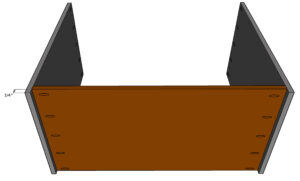
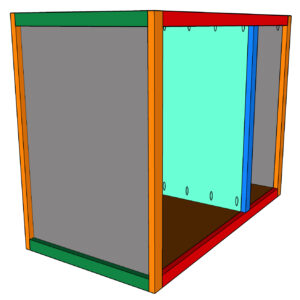
Once my panels were cute, I used my Kreg Jig to drill 3/4″ pocket holes at both ends of the bottom board and the top ends of the side pieces.
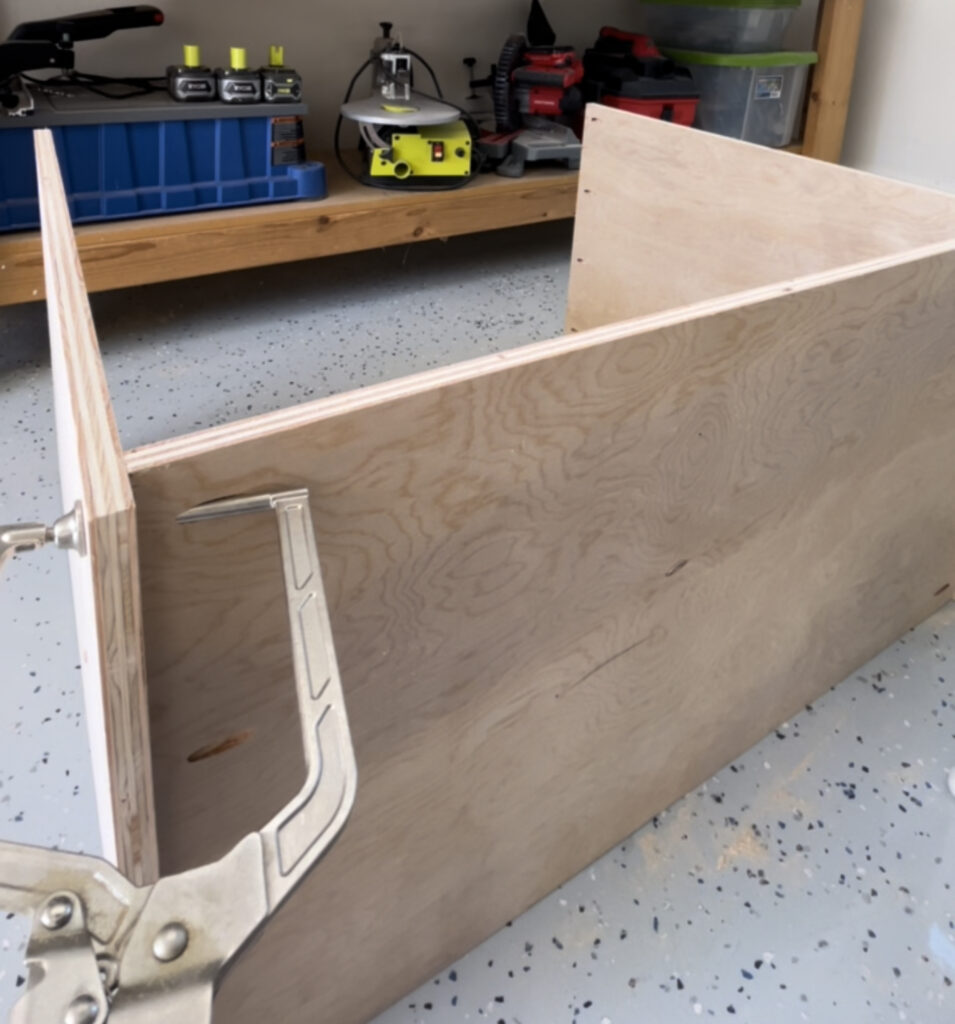
Next, I attached the side panels to the bottom panel with 1 1/4″ pocket hole screws and wood glue.
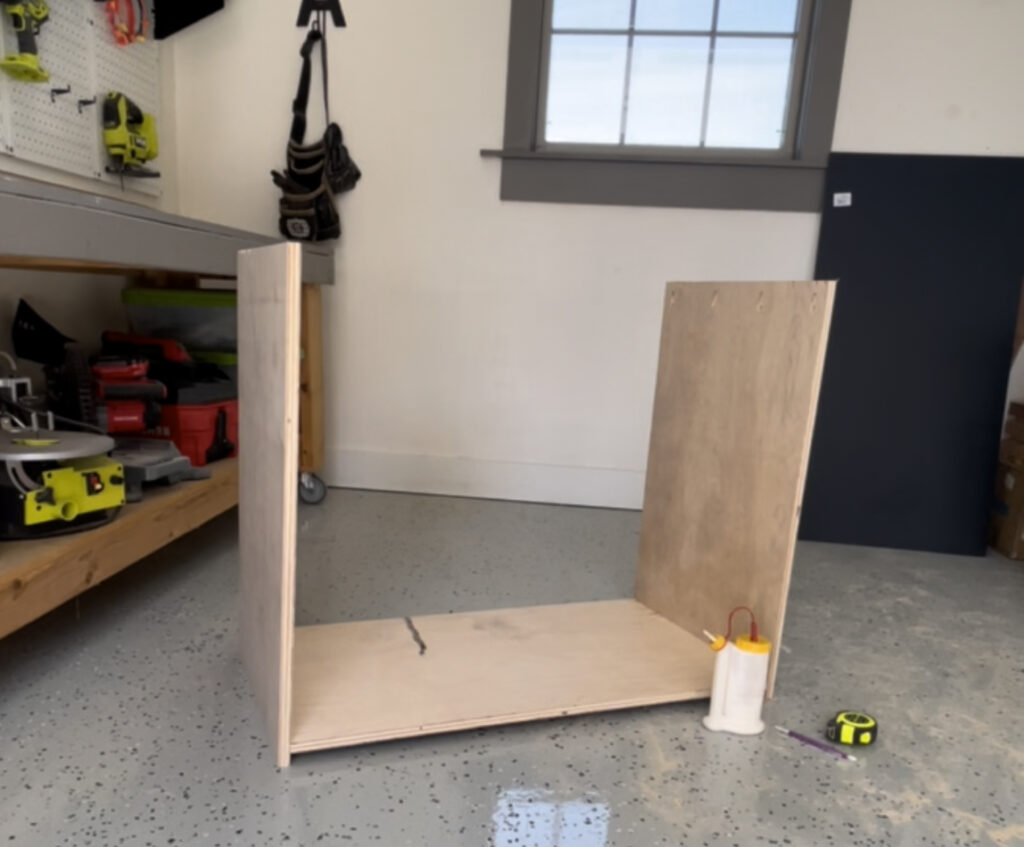
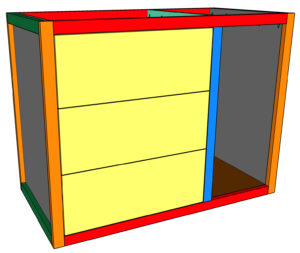
Leave a 3/4″ space at the bottom. This is what your craft storage cabinet should look like at this point.
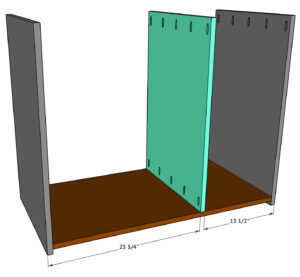
Step 2:
Now, for the middle divider. Cut the middle divider to size. Drill 3/4″ pocket holes at both ends and attach it to the bottom panel with 1 1/4″ pocket hole screws and wood glue.
Building the Face Frame
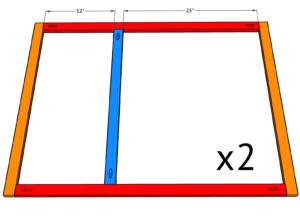
Step 1:
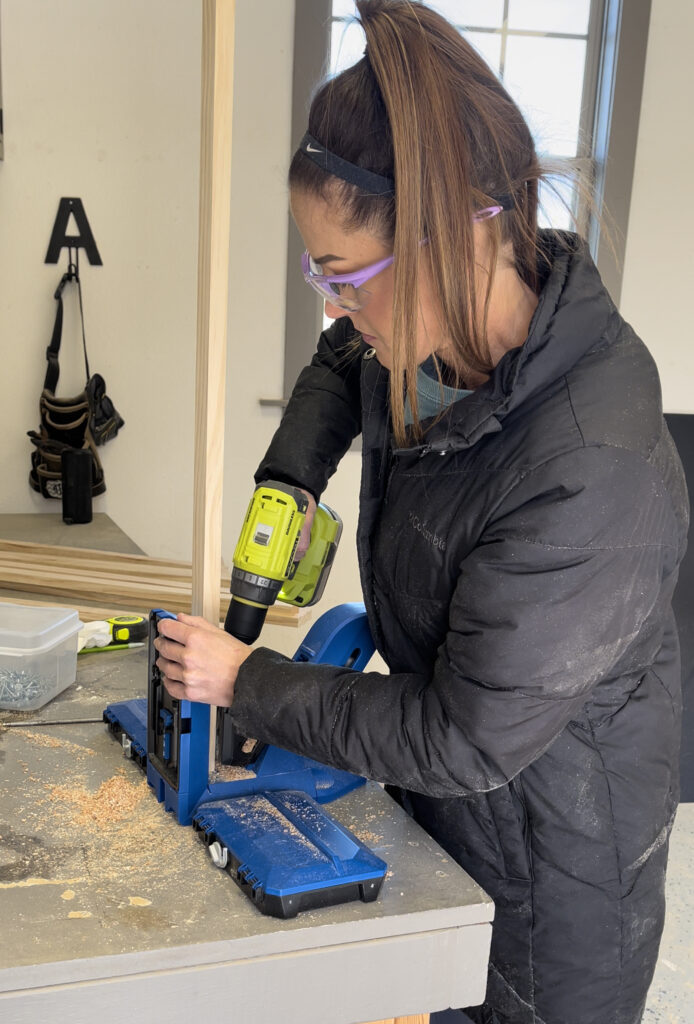
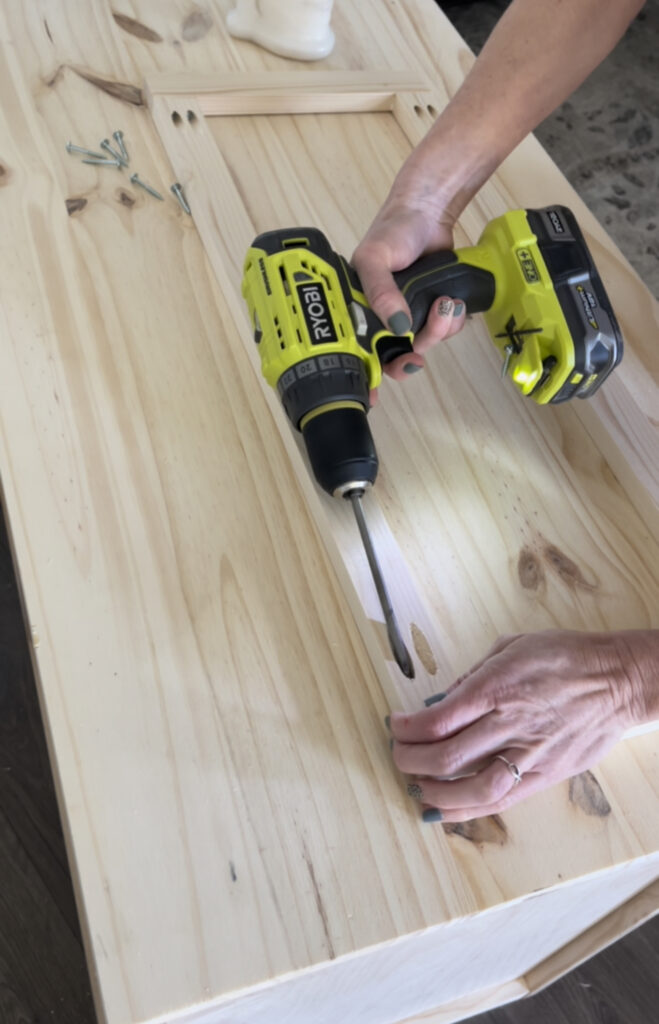
It’s time to add trim. Cut the face frame pieces to size and drill 3/4″ pocket holes at both ends of the top, bottom and middle pieces.
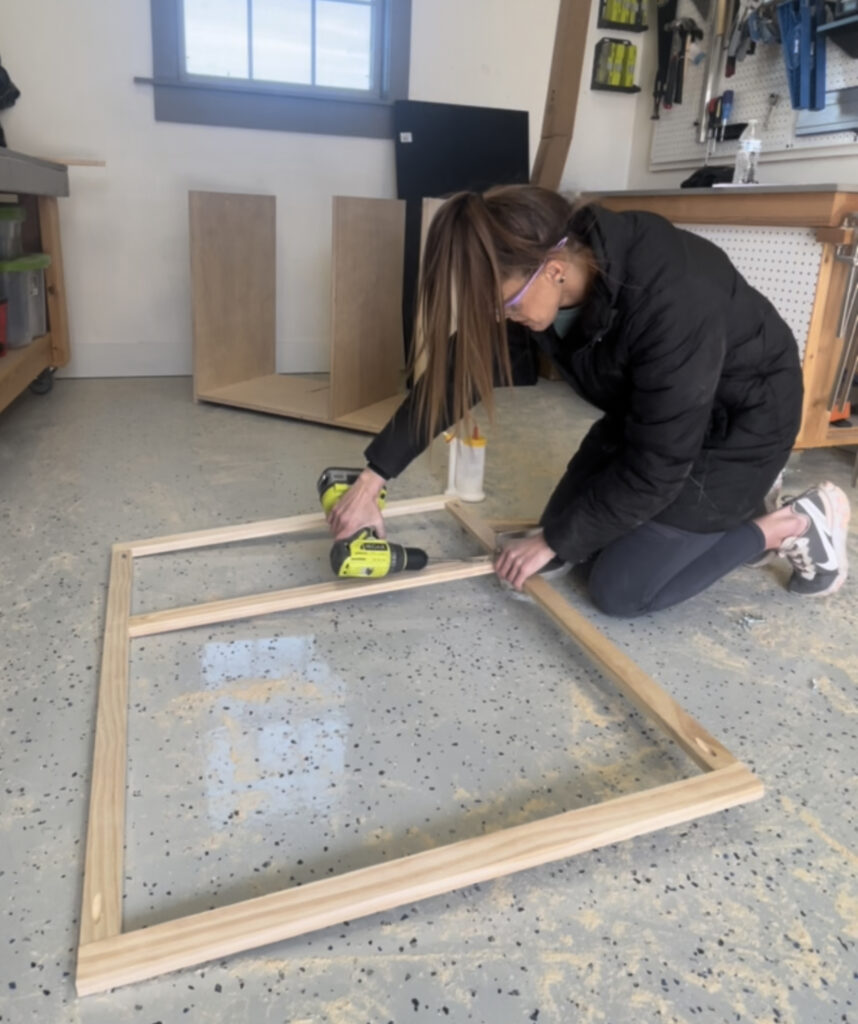
Attach them together with 1 1/4″ pocket hole screws and wood glue. Build 2 face frame assemblies.
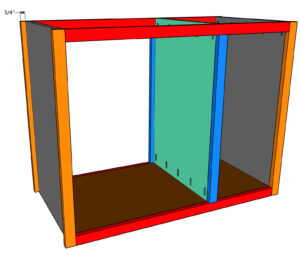
Step 2:
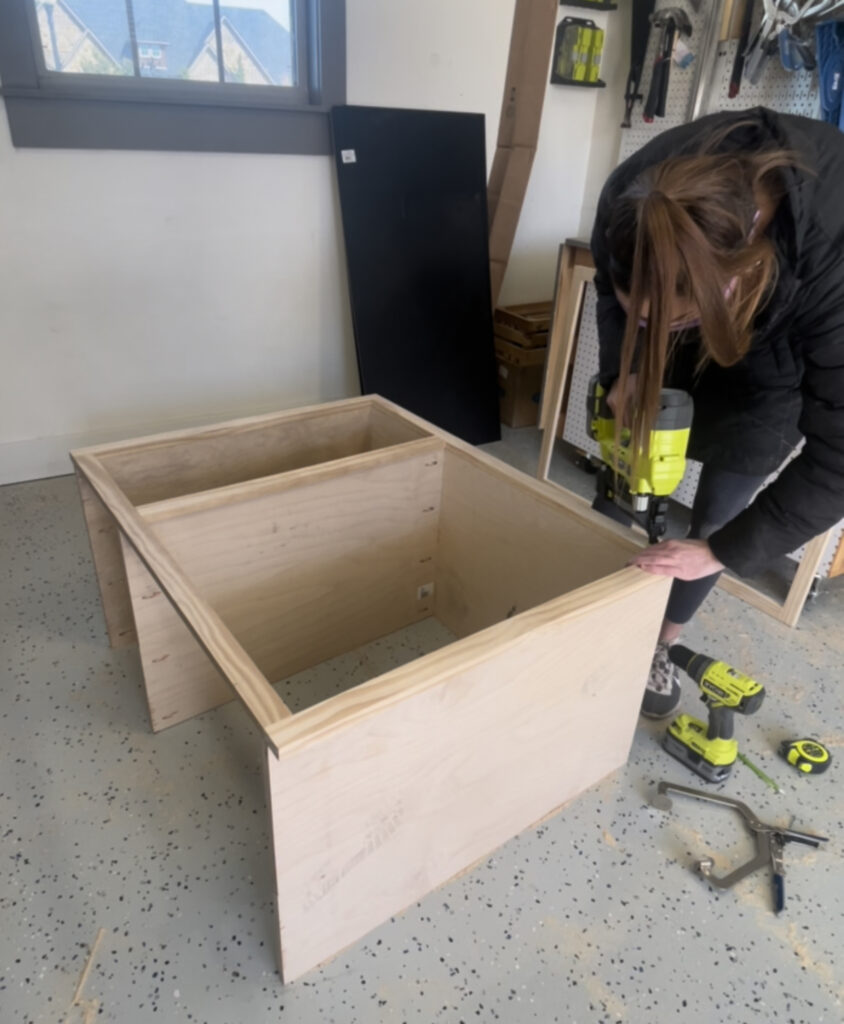
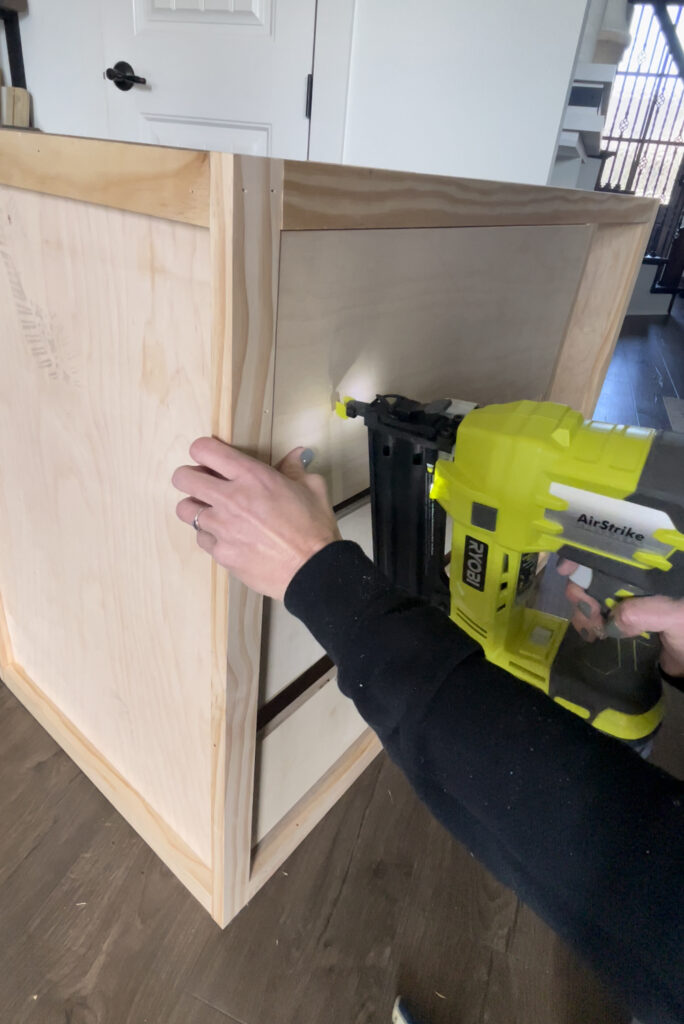
Attach the face frames to the front and back of the cabinet with 1 1/4″ brad nails and wood glue. The side face frame pieces should be flush with the inside of the side panels.
Attaching the Side Trim
Step 1:
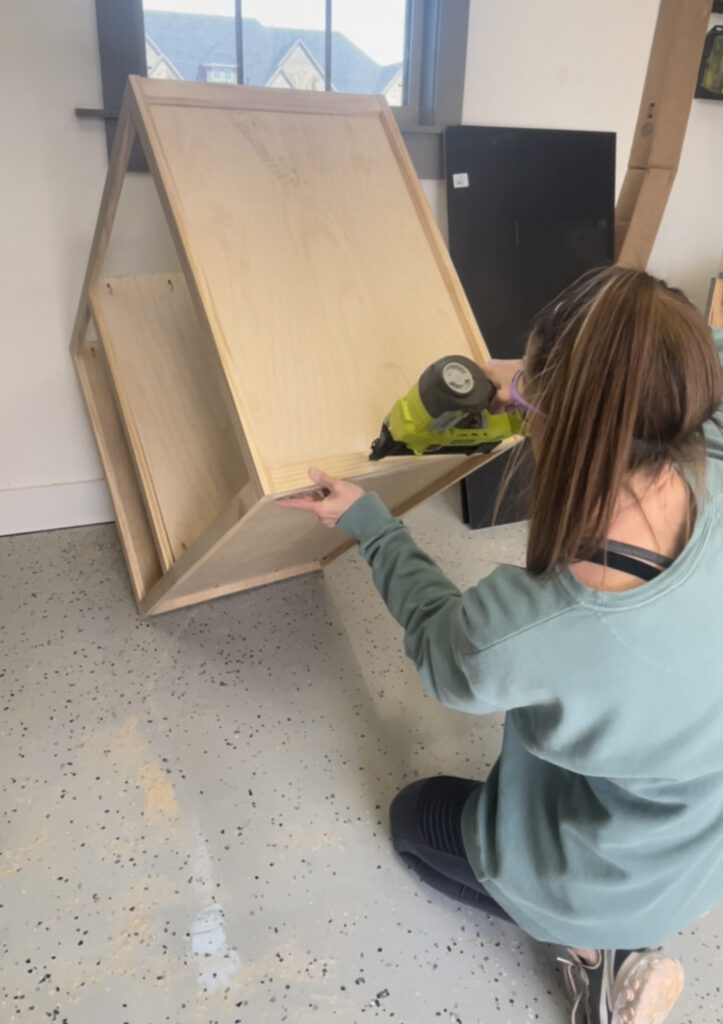
Measure and cut the side trim pieces to size. Attach them to the top and bottom of both side panels with 1 1/4″ brad nails and wood glue.
Drawers
Step 1:
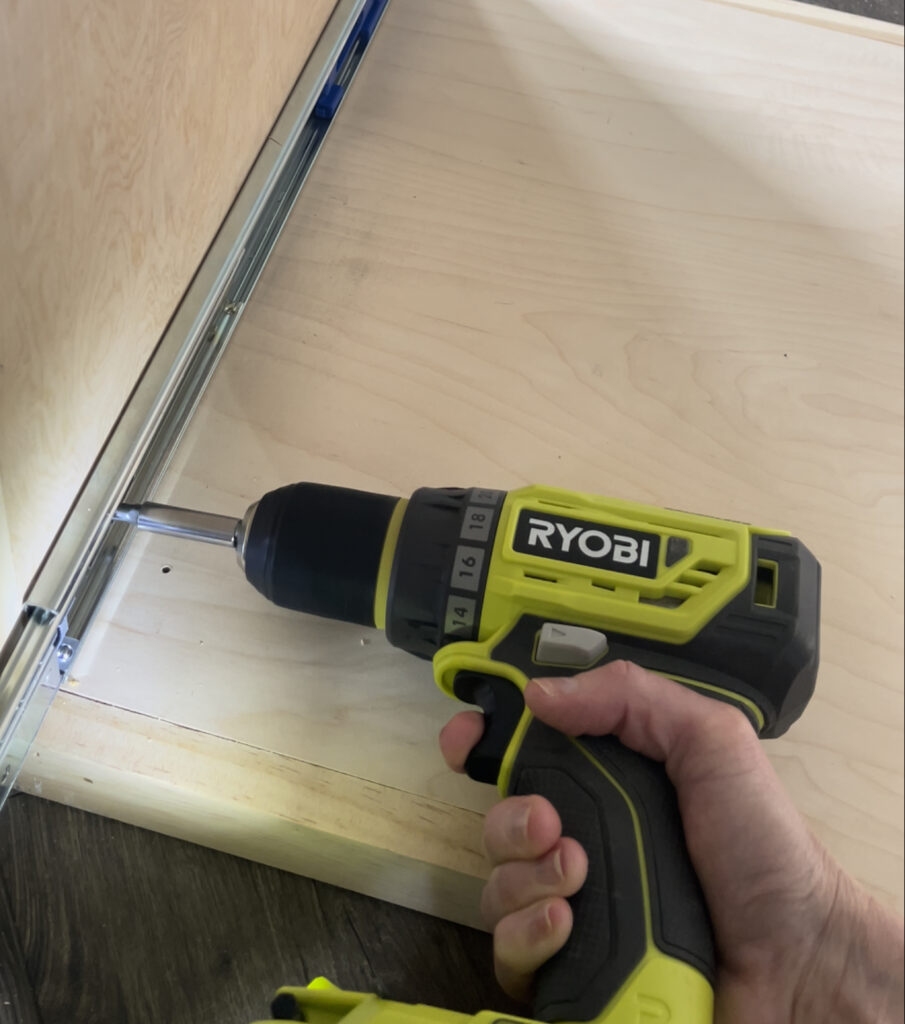
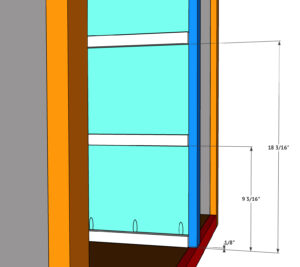
Attach the drawer slides according to the manufacturers instructions. The front of the drawer slides should be flush with the front of the divider.
Step 2:
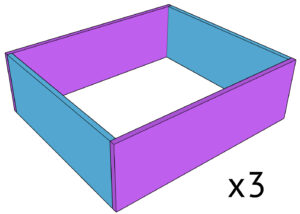
Cut the drawer pieces to size and attach them together with 5/8″ brad nails and wood glue.
Step 3:
Cut the drawer bottom to size and attach it to the bottom of the drawer frame with 3/4″ staples and wood glue. Build 3 drawers.
Step 4:

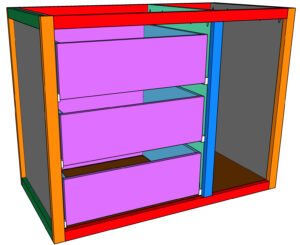
Install the drawers with the drawer slides.
Step 5:
Measure and cut the drawer faces to size. Attach them to the front of the drawers with 1″ pin nails and wood glue. There should be a 1/8″ gap around all sides of the drawer faces.
Door
Step 1:
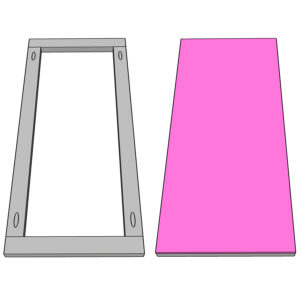
Cut the door frame pieces to size and drill 3/4″ pocket holes at both ends of the side pieces.
Attach them together with 1 1/4″ pocket hole screws and wood glue.
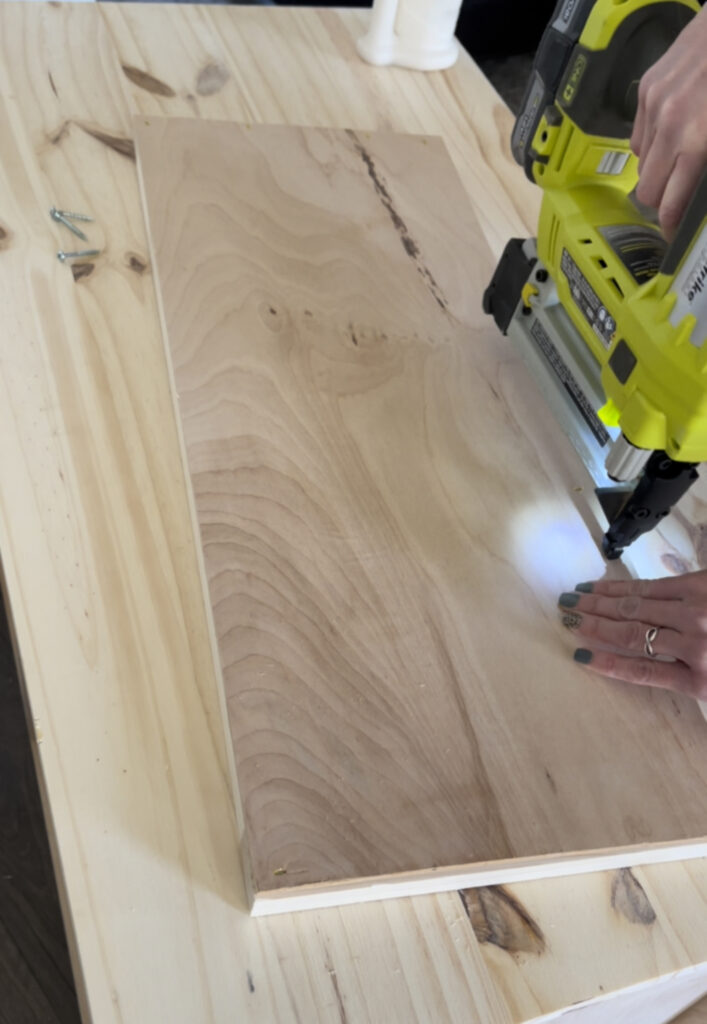
Cut the door panel to size and attach it to the back of the frame with 3/4″ staples and wood glue.
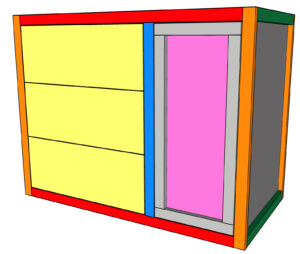
Step 2:
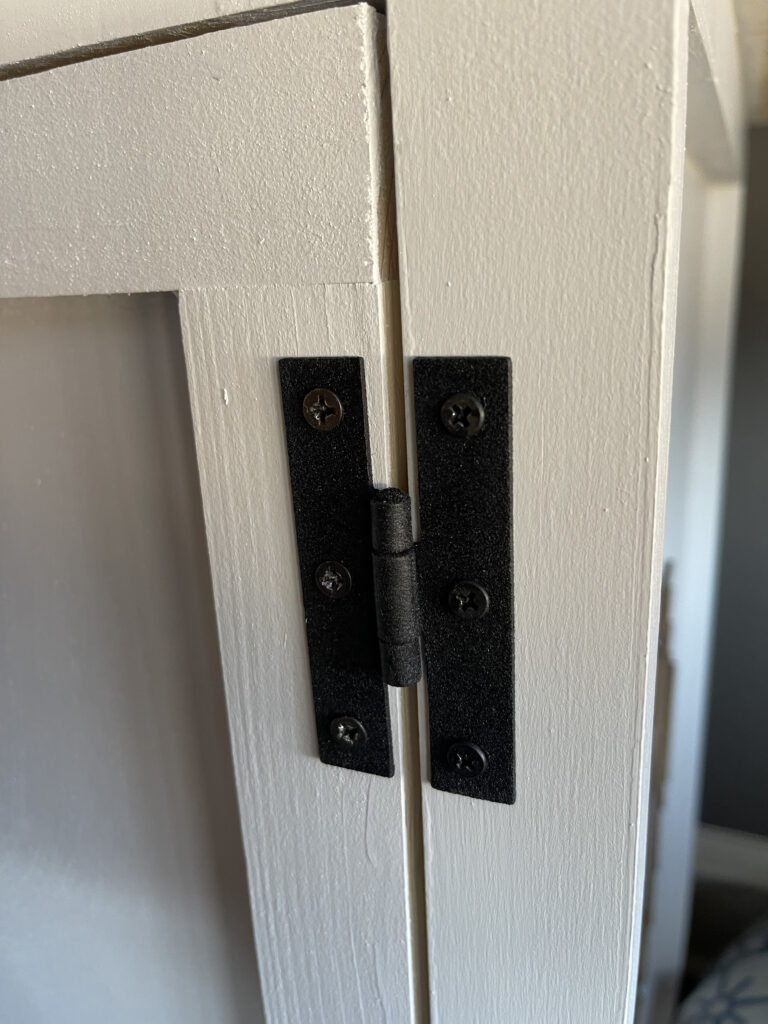
Attach the door to the cabinet with cabinet door hinges. There should be a 1/8″ gap around all sides.
Attaching the Top
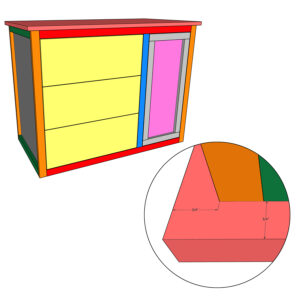
Step 1:

Cut the project panel to size and attach it to the top of the cabinet with 1 1/4″ pocket hole screws and wood glue.
The Finish!
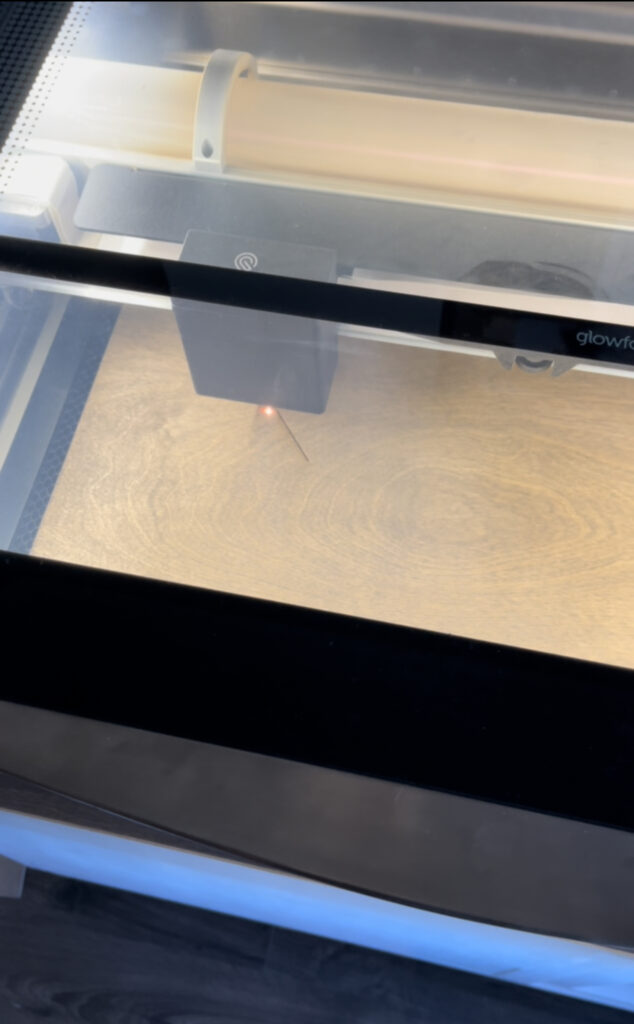
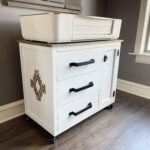
I decided to get a little creative by adding a design to the side of the cabinet. I stained my proofgrade panel and used my Glowforge to cut the design out.
- You can find the file that I used for the design here.
- You can find out more about the Glowforge 3D Laser Printer here.
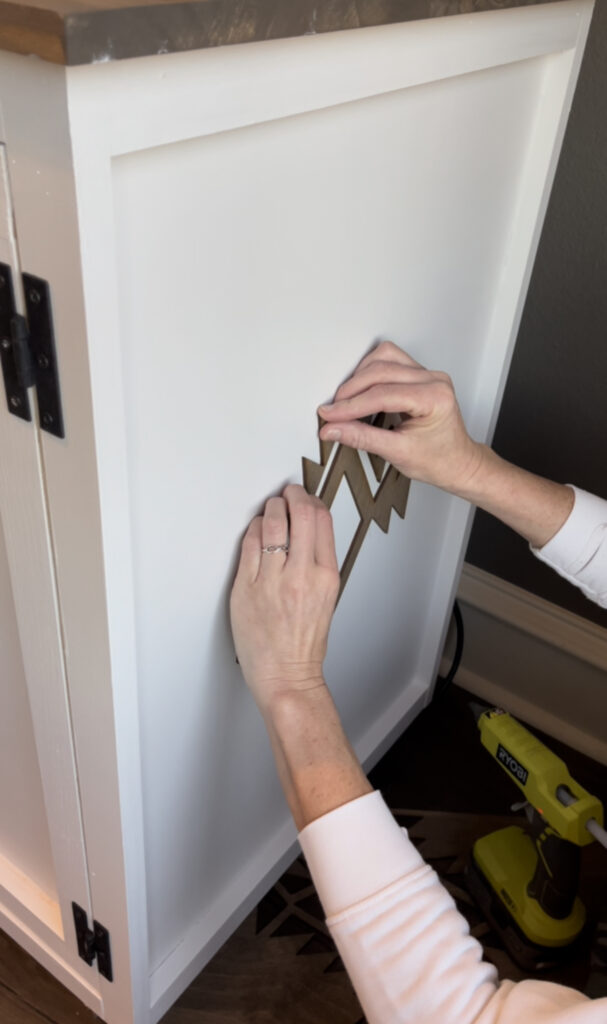
This material is so light weight that I decided to hot glue the design to the side of the cabinet, to attach it.
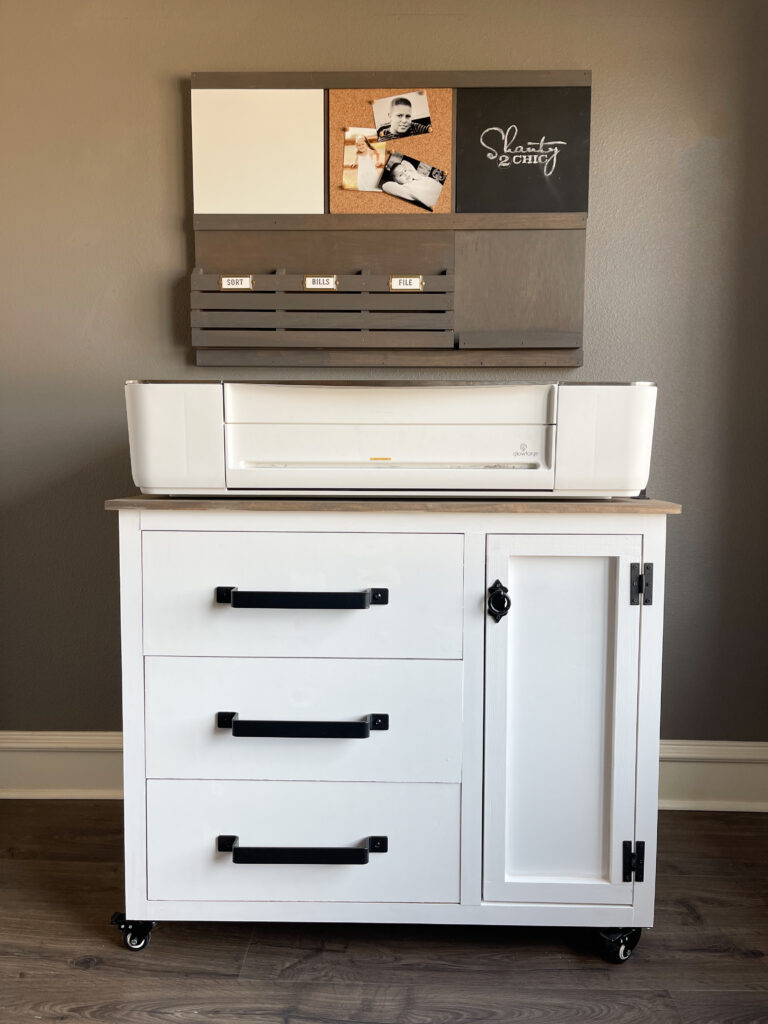
Finally, I added a finish and hardware and that was it!
- You can find the drawer handles that I purchased here.
- You can find the cabinet door pull that I purchased here.
- You can find the casters that I purchased here.

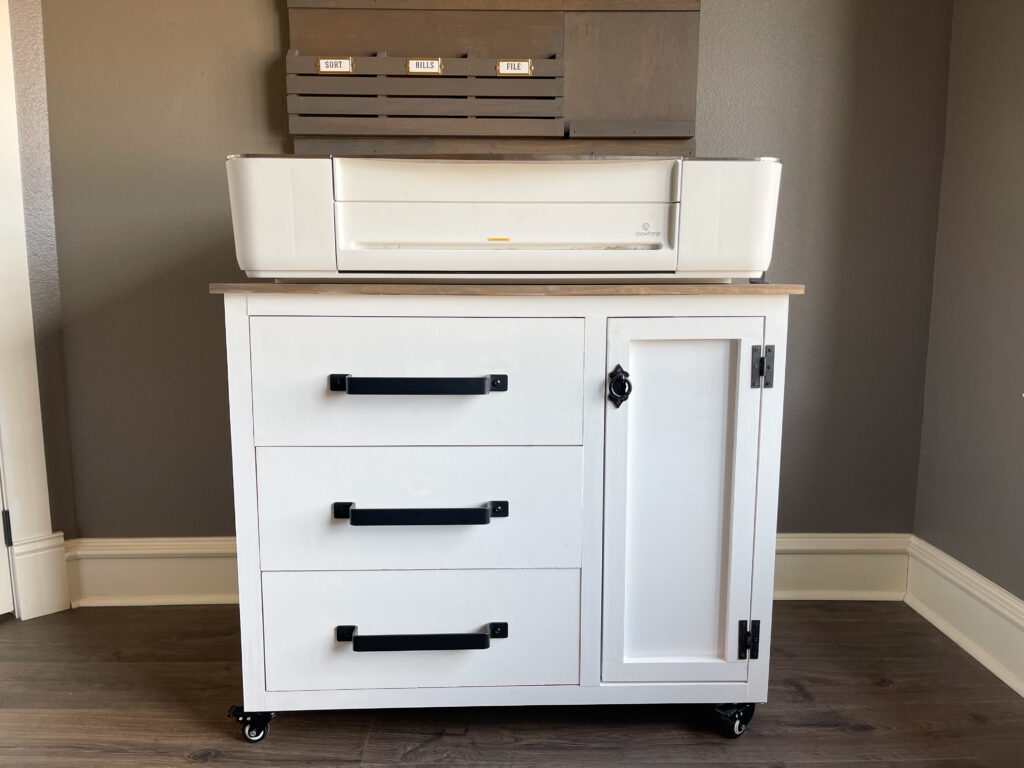
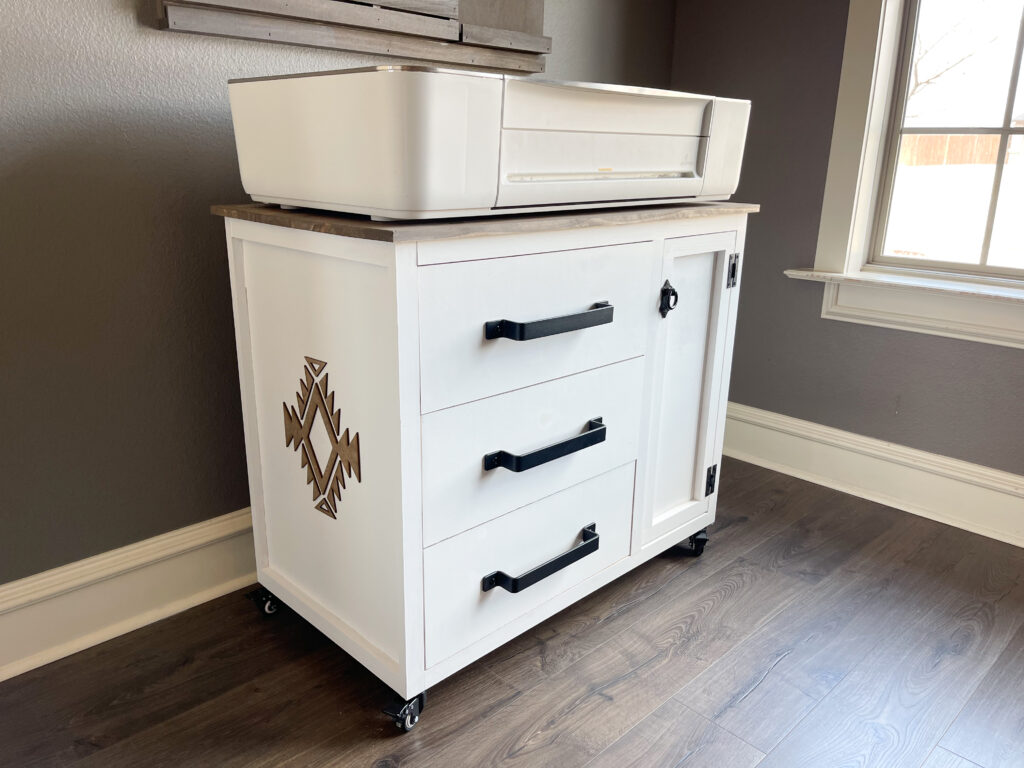
I am so excited to use my new craft desk in for my Glowforge! I designed this piece so that it would store all of the supplies I use for my Glowforge but also wanted to give you all a great, large craft table or console!
There are so many storage ideas!
The drawers would be perfect to store ribbon, scrapbook paper, markers, scissors, pens, the list goes on, there are so many storage ideas possible! You can add a shelving inside the cabinet door for even more craft supplies storage. If you like to sew this would make the perfect storage for a sewing machine and/or sewing supplies. Leave the shelf out for gift wrapping storage. This piece really is a great universal storage console!
Get creative with it and make it your own!
Make sure to share your builds with us on social media and use #shanty2chic so we can share them too!
Happy Building!
DIY Craft Cabinet
Tools
- Miter Saw
- Drill
- Kreg Jig
- Table Saw (optional)
- Brad Nailer
- Stapler (optional)
- Pin Nailer (optional)
Supply List
- 3 1x4x8 Pine or Common Boards
- 1 3/4"x48"x96" Hardwood Plywood (Birch)
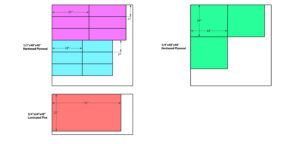
- 1 1/2"x48"x48" Hardwood Plywood (Birch)
- 1 1/4"x48"x48" Hardwood Plywood (Birch)
- 1 3/4"x24"x48" Laminated Pine
- 1 1/4" Pocket Hole Screws
- 1 1/4" Brad Nails
- 5/8" Brad Nails
- 3/4" Staples (optional)
- 1" Pin Nails
- 3 Drawer Slides
- 3 Drawer Pulls
- 1 Cabinet Pull
- 2 Cabinet Hinges
- 4 2" Casters
- Wood Glue
Instructions
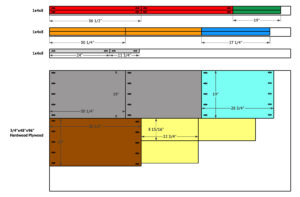
Cut List
- Cut List 1

- Cut List 2

Building the Cabinet Frame
- Cut the bottom and side panels to size. Drill 3/4" pocket holes at both ends of the bottom board and the top ends of the side pieces. Attach them side panels to the bottom panel with 1 1/4" pocket hole screws and wood glue. Leave a 3/4" space at the bottom.

- Cut the middle divider to size. Drill 3/4" pocket holes at both ends and attach it to the bottom panel with 1 1/4" pocket hole screws and wood glue.

Building the Face Frame
- Cut the face frame pieces to size and drill 3/4" pocket holes at both ends of the top, bottom and middle pieces. Attach them together with 1 1/4" pocket hole screws and wood glue. Build 2 face frame assemblies.

- Attach the face frames to the front and back of the cabinet with 1 1/4" brad nails and wood glue. The side face frame pieces should be flush with the inside of the side panels.

Attaching the Side Trim
- Measure and cut the side trim pieces to size. Attach them to the top and bottom of both side panels with 1 1/4" brad nails and wood glue.

Drawers
- Attach the drawer slides according to the manufacturers instructions. The front of the drawer slides should be flush with the front of the divider.

- Cut the drawer pieces to size and attach them together with 5/8" brad nails and wood glue.

- Cut the drawer bottom to size and attach it to the bottom of the drawer frame with 3/4" staples and wood glue. Build 3 drawers.

- Install the drawers with the drawer slides.

- Measure and cut the drawer faces to size. Attach them to the front of the drawers with 1" pin nails and wood glue. There should be a 1/8" gap around all sides of the drawer faces.


Door
- Cut the door frame pieces to size and drill 3/4" pocket holes at both ends of the side pieces. Attach them together with 1 1/4" pocket hole screws and wood glue. Cut the door panel to size and attach it to the back of the frame with 3/4" staples and wood glue.
- Attach the door to the cabinet with cabinet door hinges. There should be a 1/8" gap around all sides.

Attaching the Top
- Cut the project panel to size and attach it to the top of the cabinet with 1 1/4" pocket hole screws and wood glue.
The Finish!
- Add a finish and hardware and that's it! Be creative and make it your own! Be sure to share your builds with us on social media and use #shanty2chic so we can share them too!Happy Building!


I’ve been using my Glowforge on the ground, which is not ideal until I got a good sense of the type of storage that would suit it best based on the ways I use it.
I want to make this cabinet for my Cricut machines. What did you rip the 1×4’s down to, to make the face frame? The plans give the lengths but not the width. Thanks!
I’m so sorry about that! The 1×4’s are tipped to 1×2’s (1.5”). Thank you for letting us know!!!
Very detailed information! thanks
Is there a back?
Great blog with helpful tips. That is what I need.
Great blog with helpful tips. That is what I need. Thank a lot.
Vw=ery clever -precise and minimal steps!!