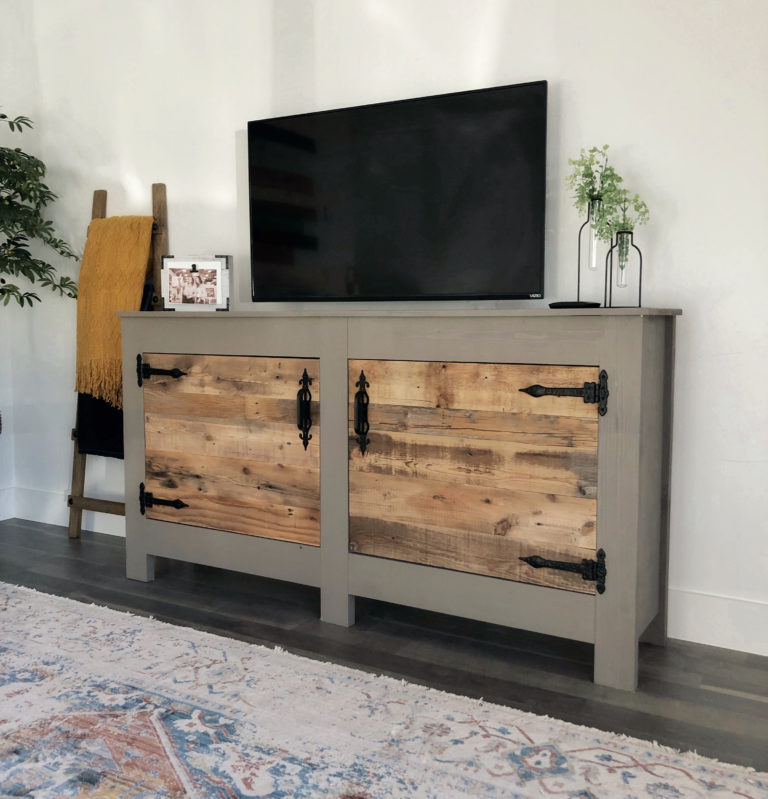
How to build a DIY dresser with free plans, instructions and tutorial! This DIY dresser is so cute and offers open shelves at the top for baskets, decor, media storage and more.
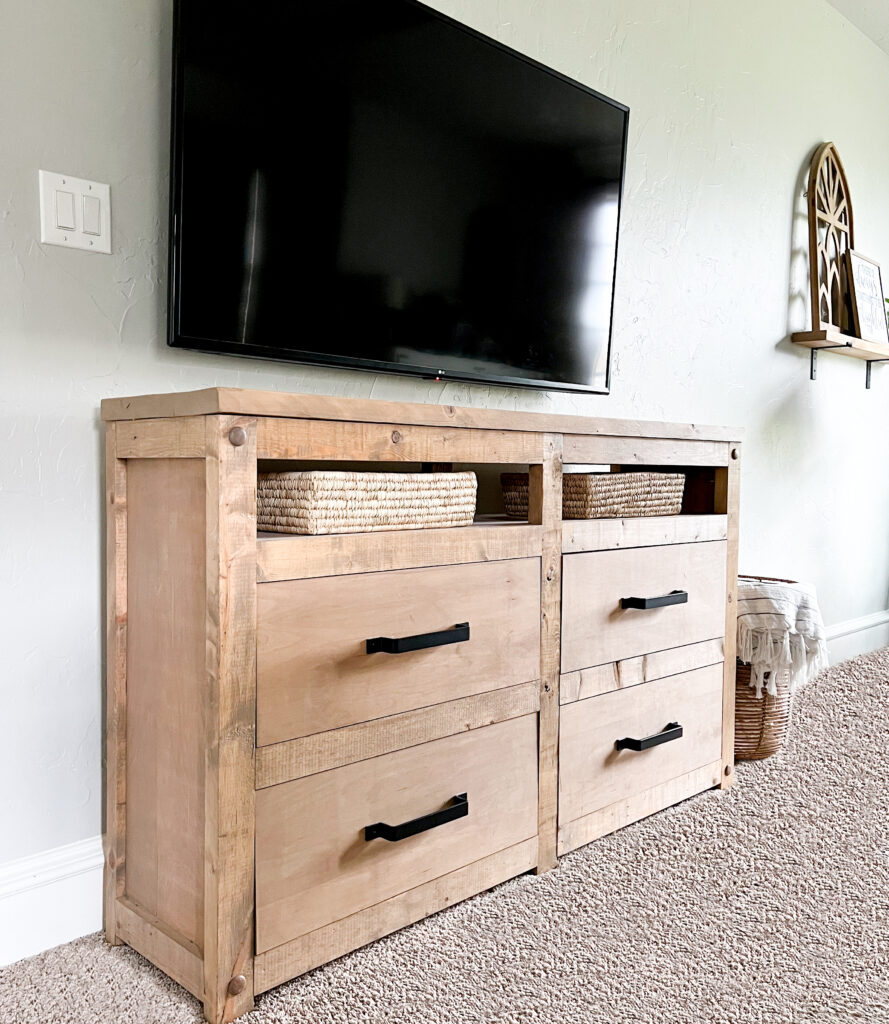
Table of Contents
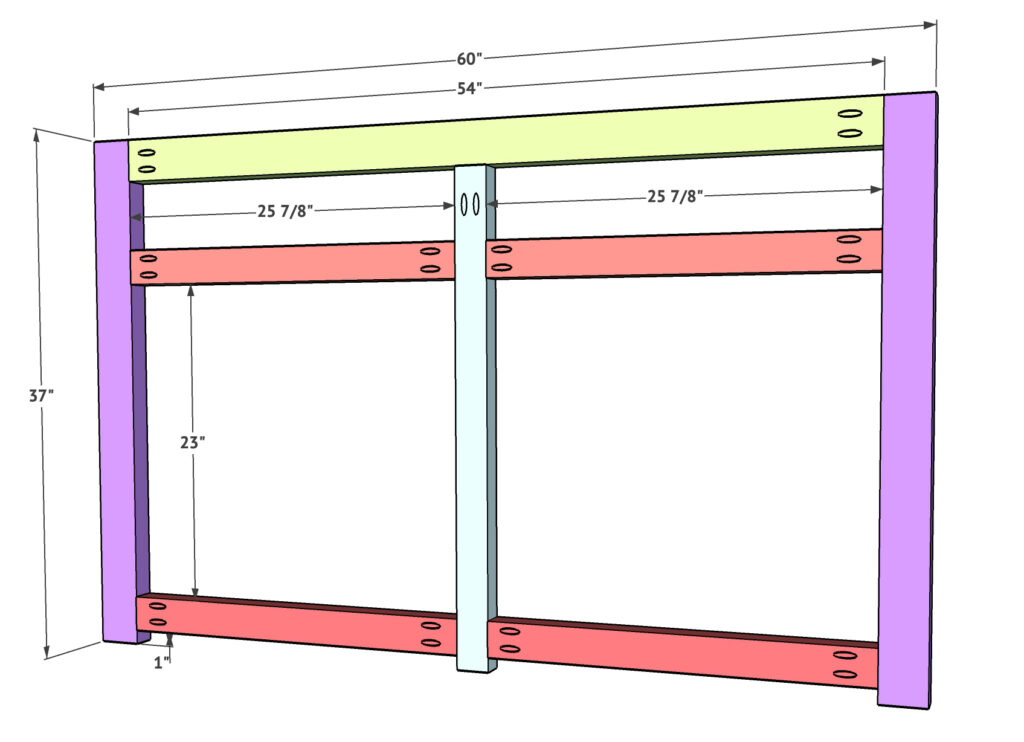
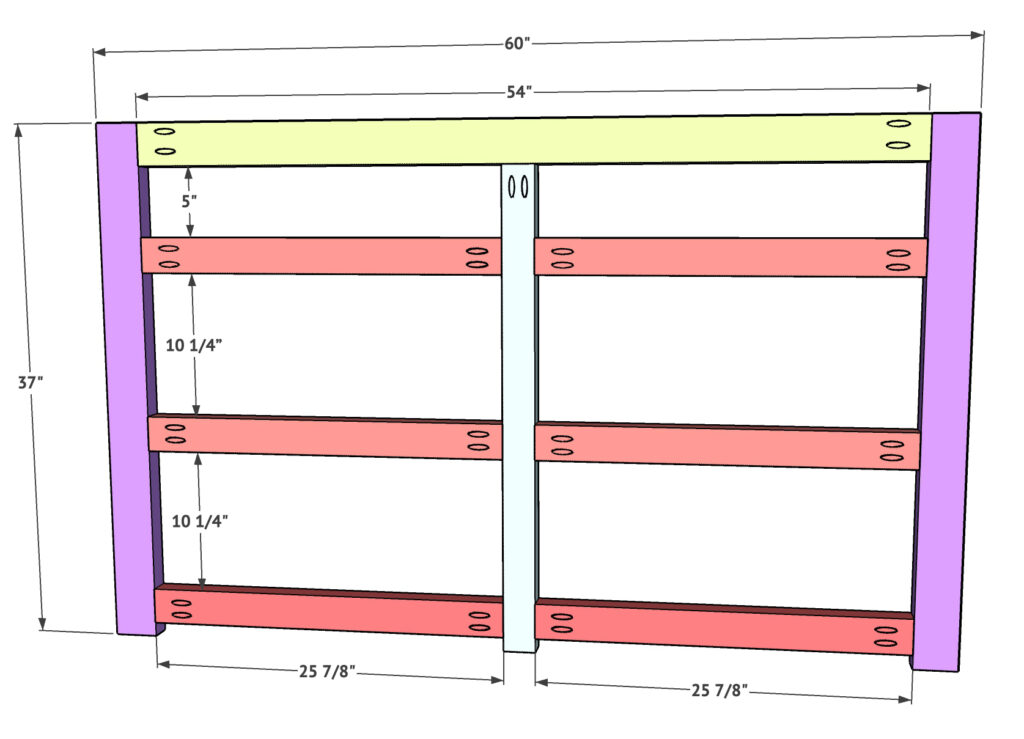
Building the face frames
I built both the front and back face frames for the dresser first.
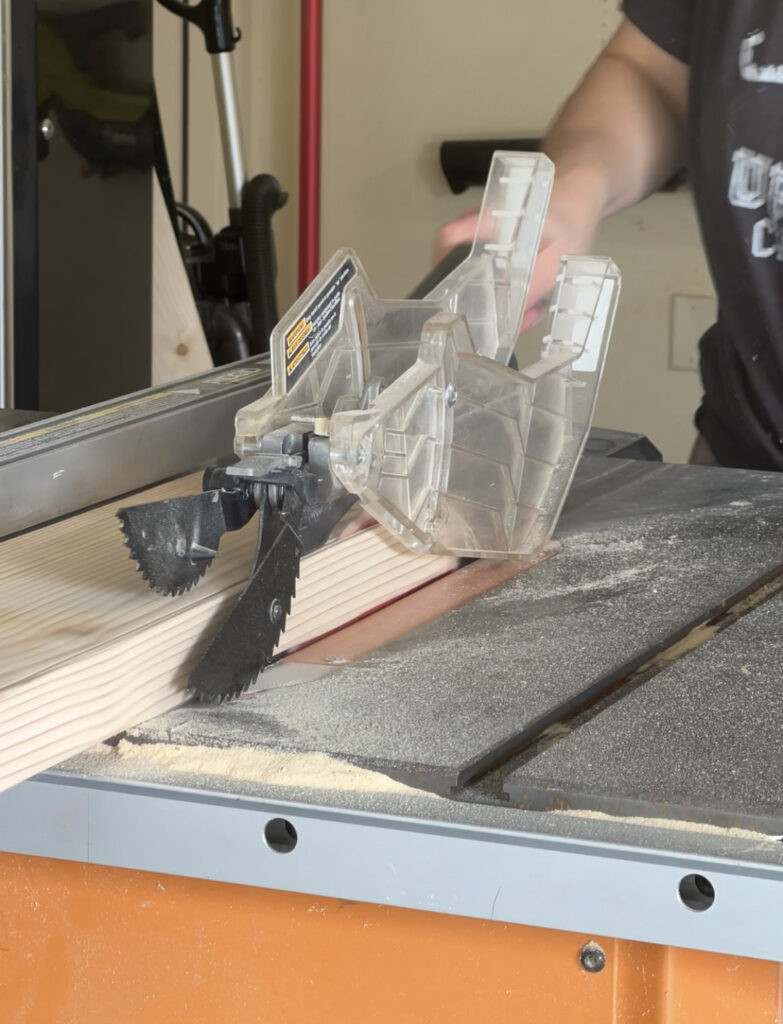
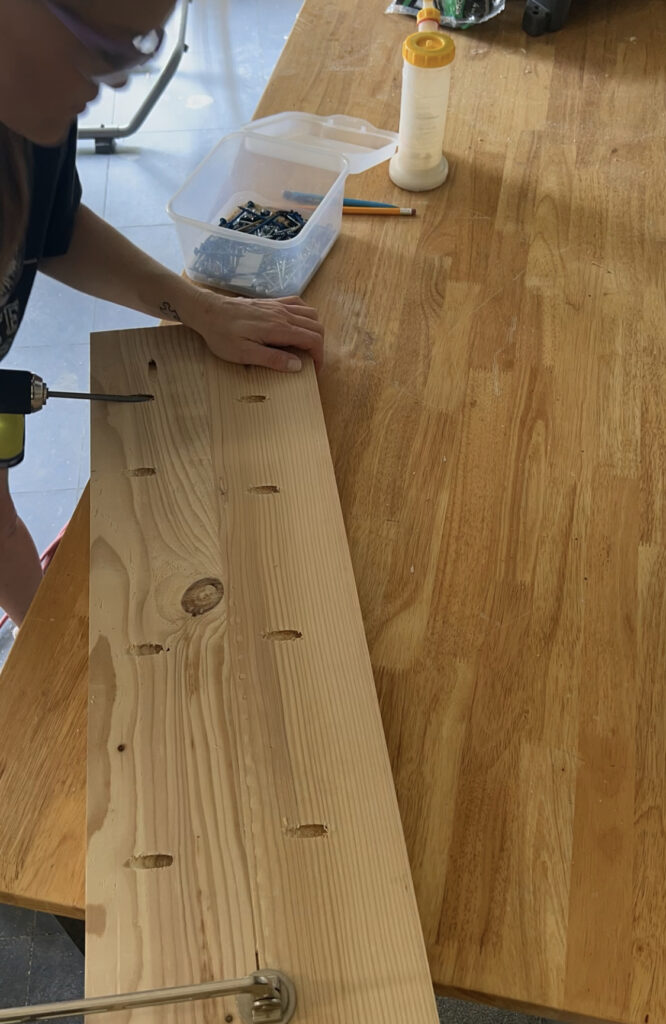
Ripping the lumber
Build the face frames first. Both face frames are created using 2×4 that are ripped down to different sizes. I like to make my shorter cross cuts first and then rip them down to the proper width on the table saw. Once you have the pieces cut to size, add pocket holes as shown in the plans. You can check out our post on how we rip 2x boards for our builds HERE! These are 1 1/2” pocket holes. Attach the pieces together to form the face frame using wood glue in 2 1/2” pocket hole screws.
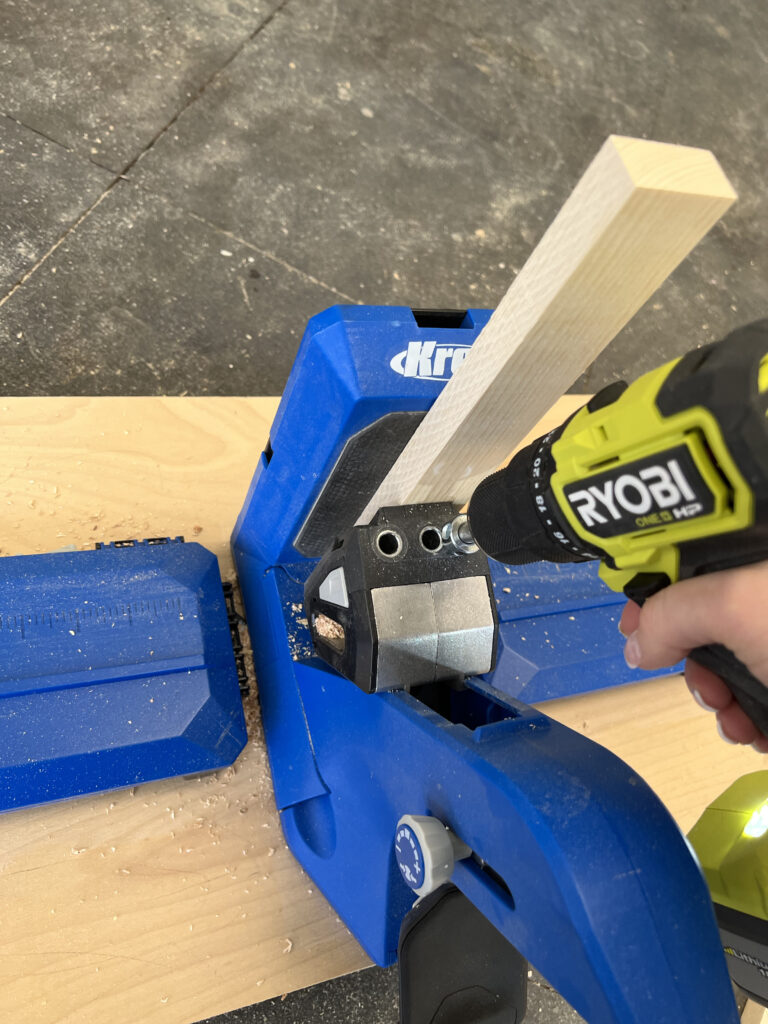
KREG POCKET HOLE JIG
One question we get asked consistently is, “What tools do I need to start building furniture”, We have always recommended three basic tools for beginners to get started, a miter saw, a drill and a Kreg Jig.
What is a Kreg Jig? A Kreg Jig is a tool that drills pocket-hole joints. It makes joining two boards faster and gives you stronger and cleaner joints than countersinking a wood screw. Ash and I discovered them shortly after we starting building furniture and it was a HUGE game changer for our furniture building! We were so impressed with how user-friendly they are and the strong joints it gave our builds! For this table, we used two different Kreg Jig models to show you a little bit about both! We used the Kreg 720Pro and the Kreg Foreman!
I used my Kreg Jig 720PRO for this project. You can find it HERE ON SALE NOW on Amazon! I really loved using it for this build because of the ease of switching different thicknesses of lumber. Because I was using plywood along with 2x boards, using the 720PRO saved me lots of time! You can check out our post about which Kreg Jig model is best for you here!
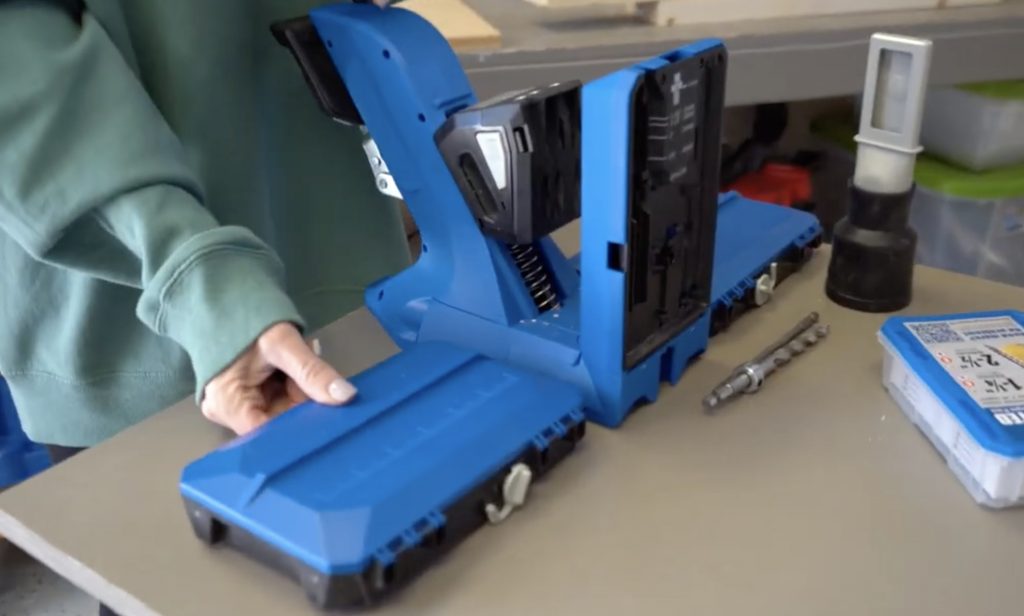
720PRO MODEL

The Kreg Jig 720Pro is hands-down our favorite pocket hole jig! The Automaxx dual Clamp self-adjusts to your material thickness making it so fast and efficient for furniture building! It has built-in material support wings on the docking station for large panels like plywood, tons of storage features and includes a clamp to hold it in place to your workbench. Some additional accessories are a dust port with a vacuum adaptor, 160 pocket hole screws, It also folds up compact so it’s perfect for small shops.

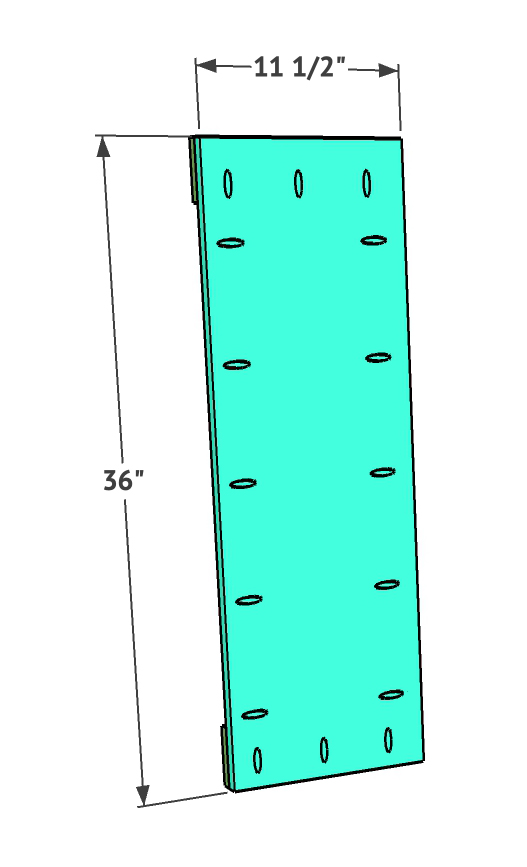
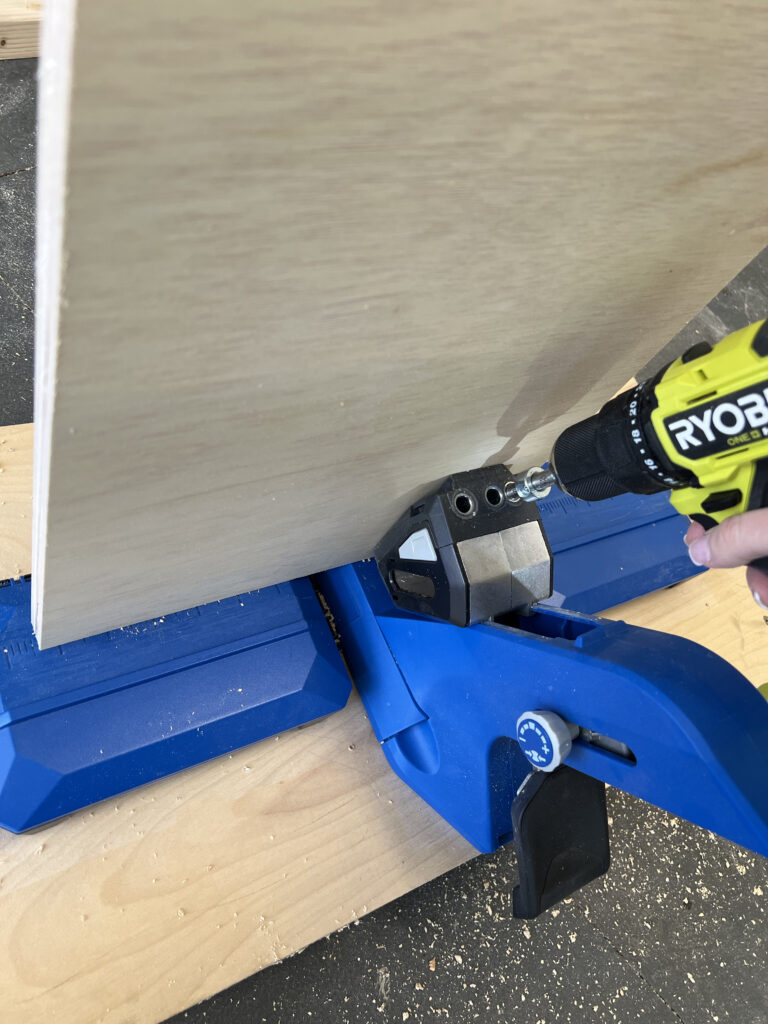
Build the side frames
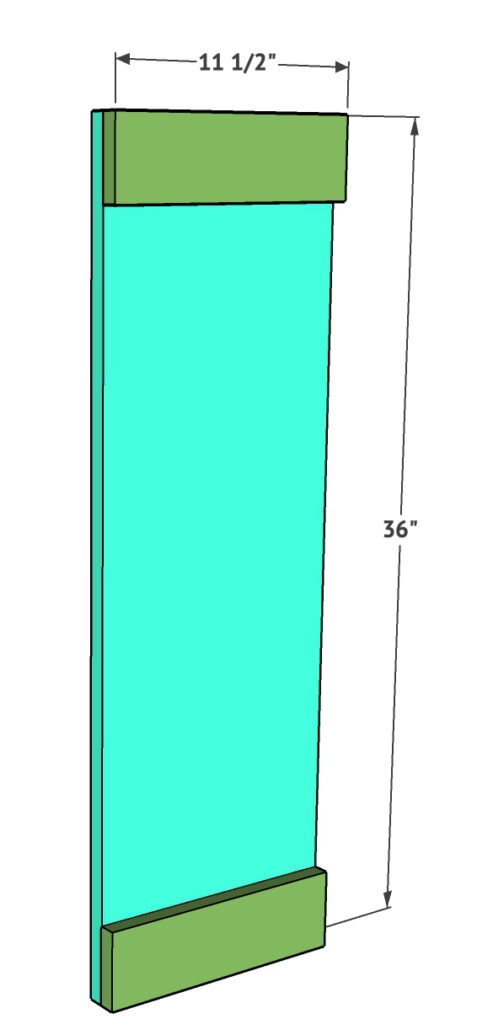
Next, create the two side pieces. These are 3/4” hardwood plywood ripped down and cut to size. Add 3/4” pocket holes down both sides and also along the top and bottom of these boards. Then, attach the trim pieces to the top and bottom of the other sides using wood glue and 1 1/4” brad nails. The trim pieces are 1×4 boards and they will line up flush with the top and bottom of each side piece. You will have two identical side frames.


Attach the sides to the front face frame
Now attach the side frames to the front face frame using wood glue and 1.25” pocket hole screws through the pocket holes on the side frames and into the face frame. You want the trim on the side frames to be flush with the edge of the face frame on both sides. The tops of the side frames will also be flush with the top of the face frame.
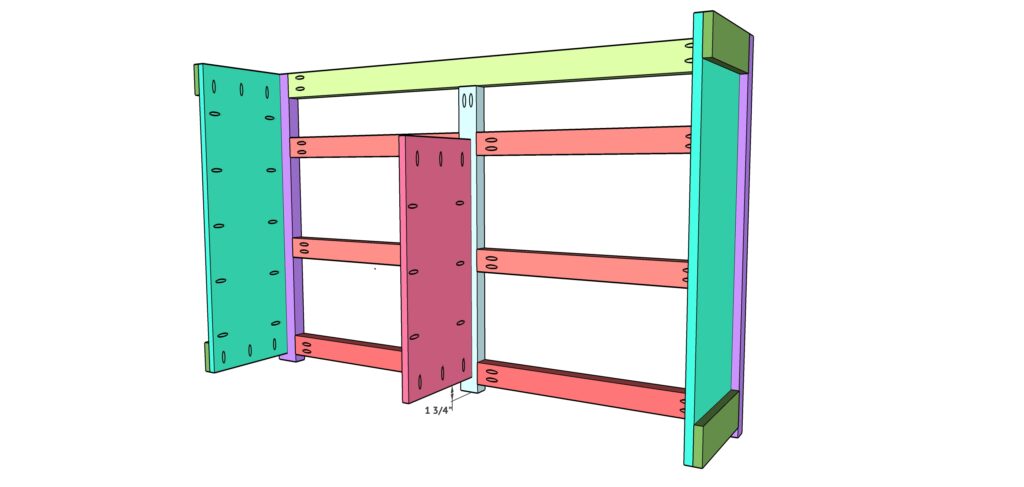

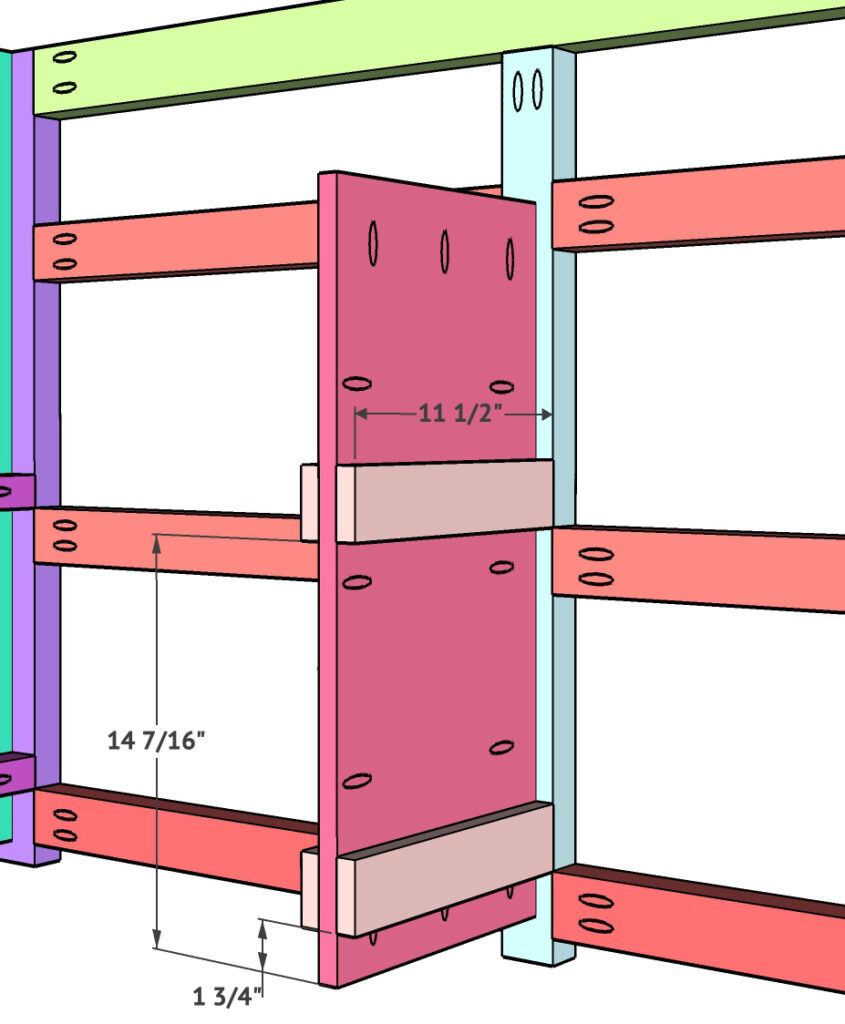
Attach the middle divider
Attach the middle divider next. This is 3/4” hardwood plywood cut to size. Add 3/4” pocket holes around all edges, and then attach it to the middle leg using wood glue and 1.25” pocket hole screws. Make sure the middle divider is centered on the leg and it will sit 1 3/4” from the base of the leg.
Attach the outside cleats
I like to add the cleats for the drawer slides now before closing the dresser in more. This allows more space making them easier to attach. For the outside cleats, I used 2×2 boards that I ripped from the 2×4 boards. Add a 1.5″ pocket hole on the end of each each cleat and attach it with wood glue and 2.5″ pocket hole screws into the front face frame.

Attach the inside cleats
The inside cleats are cut from the 1×4 board. Attach two cleats to each side using wood glue and 1.25” brad nails.
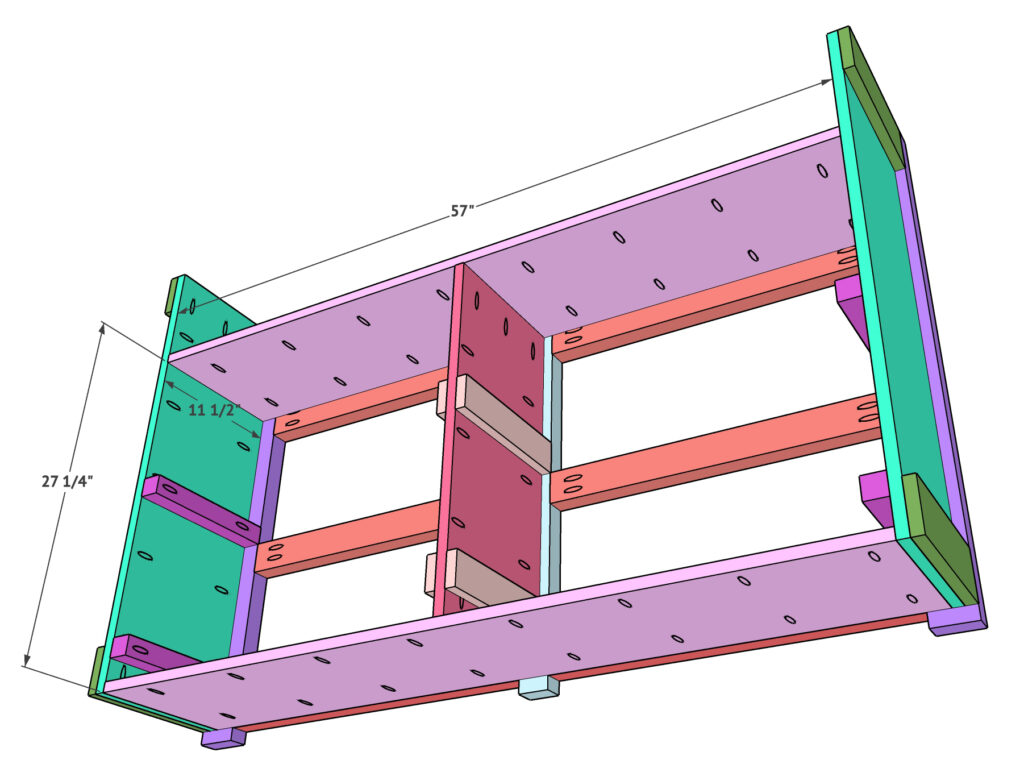
Adding the plywood shelves
Attach the plywood shelves next. These are both 3/4” hardwood plywood cut to size. Add 3/4” pocket holes down all four ends of both pieces and attach them in place as shown. Attach to the sides and face frame using 1.25” pocket hole screws and wood glue.
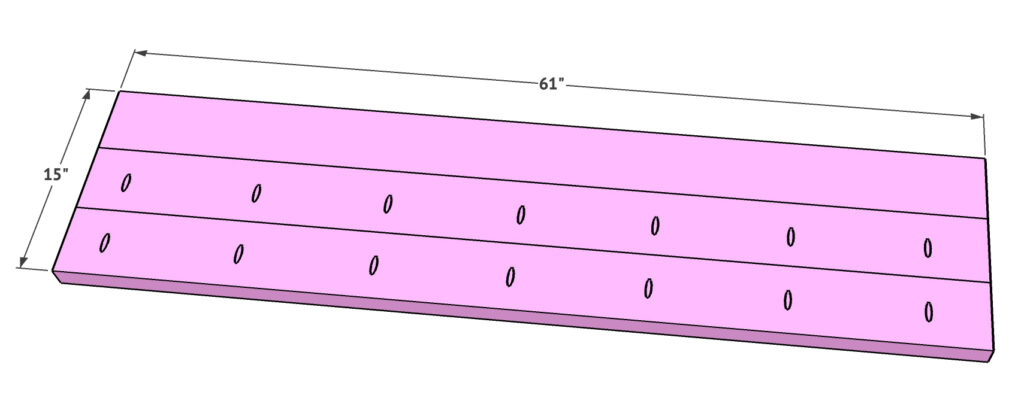
Build the dresser top
Next build the dresser top. This is built using three 2 x 6 boards rips to 5” wide each. Add 1.5” pocket holes down two of the three boards and plank all three together using 2 1/2” pocket hole screws.
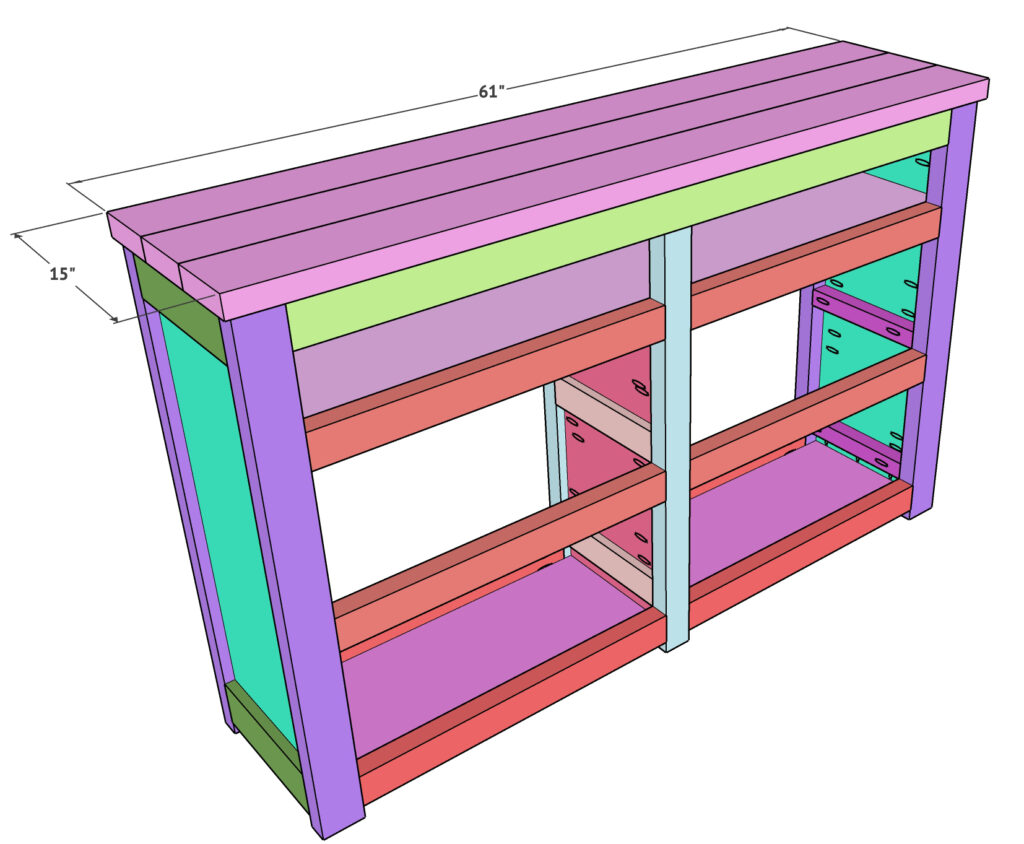
Attach the planked top to the dresser
Attach the planked top to the top of the dresser using pocket hole screws through the pocket holes on the base of the dresser and up into the planked top. You will have a 1/2” overhang all the way around.
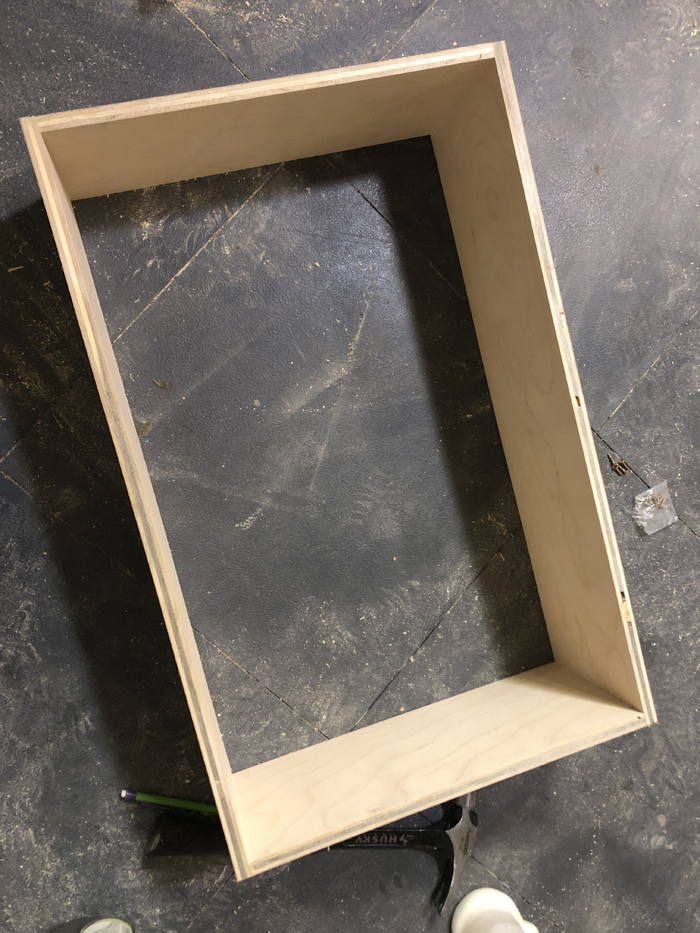
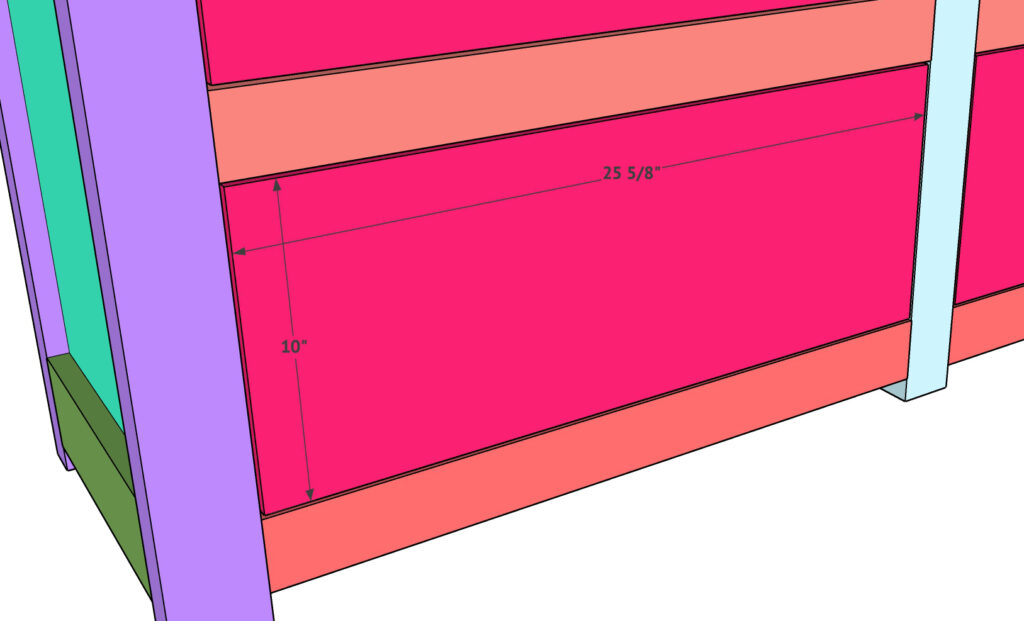
Build the drawers
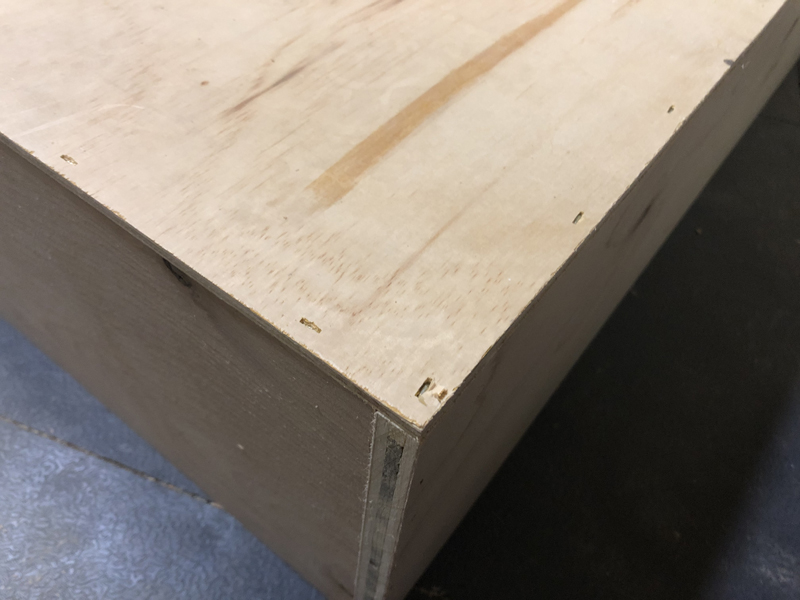
Build the drawers next. Be sure to measure each of your openings to get the best fit! The frame of these drawers are built with 1/2” hardwood plywood. Rip the plywood to 8.75” wide and then make your cross cuts. Attach the pieces together at the corners using wood glue and 1.25” brad nails.
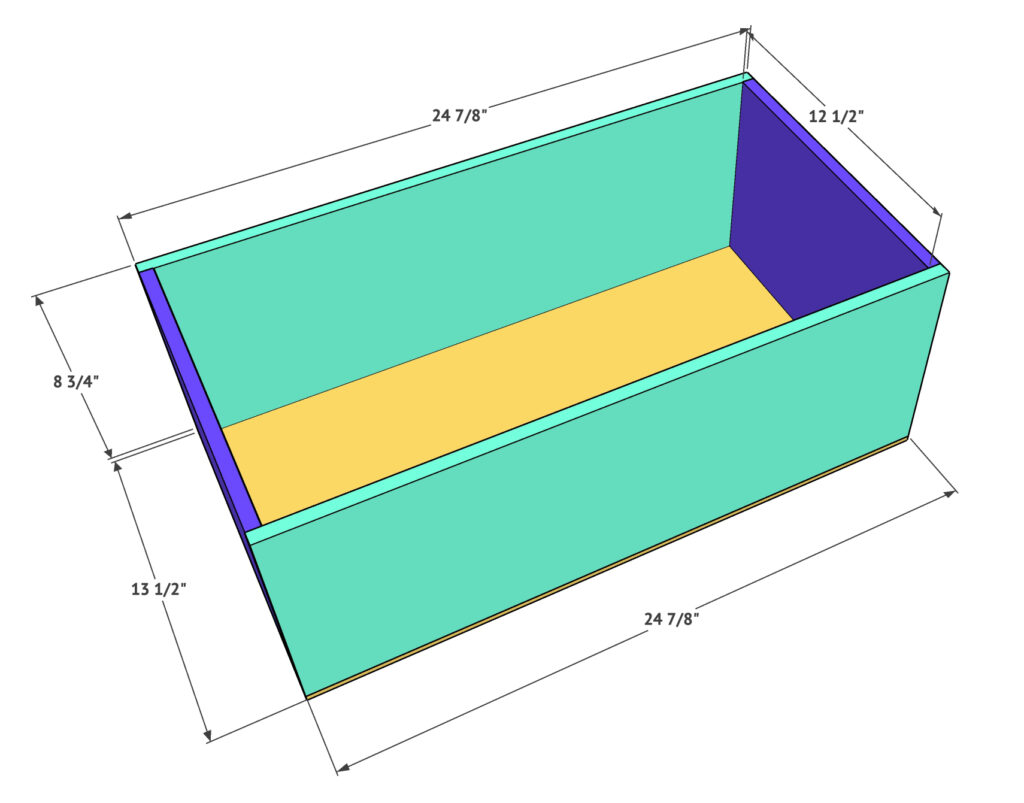
The bottom of the drawers are 1/4” hardwood plywood. Cut each to size, and then attach to the frame using wood glue and 1” staples or 1.25” brad nails. Staples are good on this part to hold that in place because it is a thinner material.

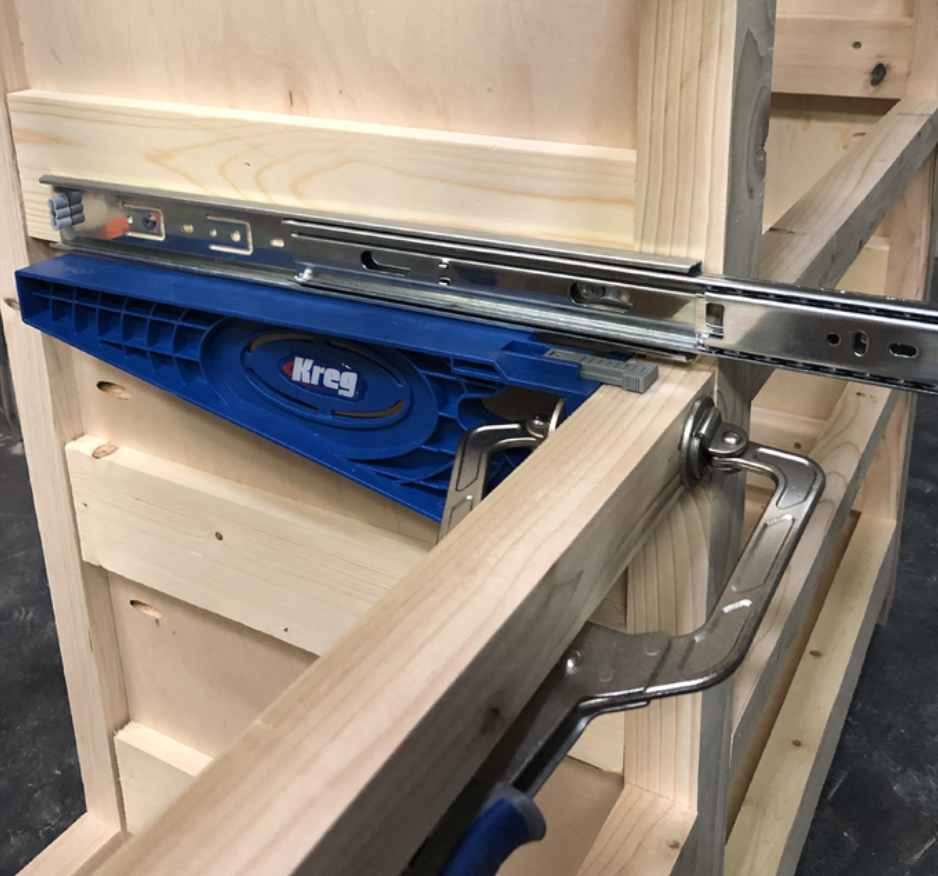
Attach the drawer slides
Time to attach the drawers. For this dresser I chose to use a new FAV tool. You all need to buy them right now… You will thank me. You can find it HERE on Amazon or click the picture!
I lined the Kreg drawer slide jigs up on the inside first. I used the face frame to hold them in place and I set the drawer slide on top. I used THESE DRAWER SLIDES for my dresser and I love them so much.
I lined them up 1″ from the front of the face frame and extended the slide to attach the inside piece first.
Then, I flipped the drawer jigs around and attached them facing out where they act as a surface to hold the drawer in place while you attach the extensions. Literally, genius.
I lined the front end of the drawer slide extension up 1/4″ from the front of my drawer front and attached the extension to drawer. Then, I repeated this 4 times 😉
Attach the drawer faces
Finally, cut the drawer fronts. I chose to use hardwood plywood again. I love the way that it stains and how straight the boards are to work with especially when building drawers. Cut each to size and use playing cards or other types of spacers to line each drawer up in place. I like to nail them in place from the front 2 times and then open the drawer and use screws from the inside of the drawer and into each face frame. Don’t forget to use wood glue as well!
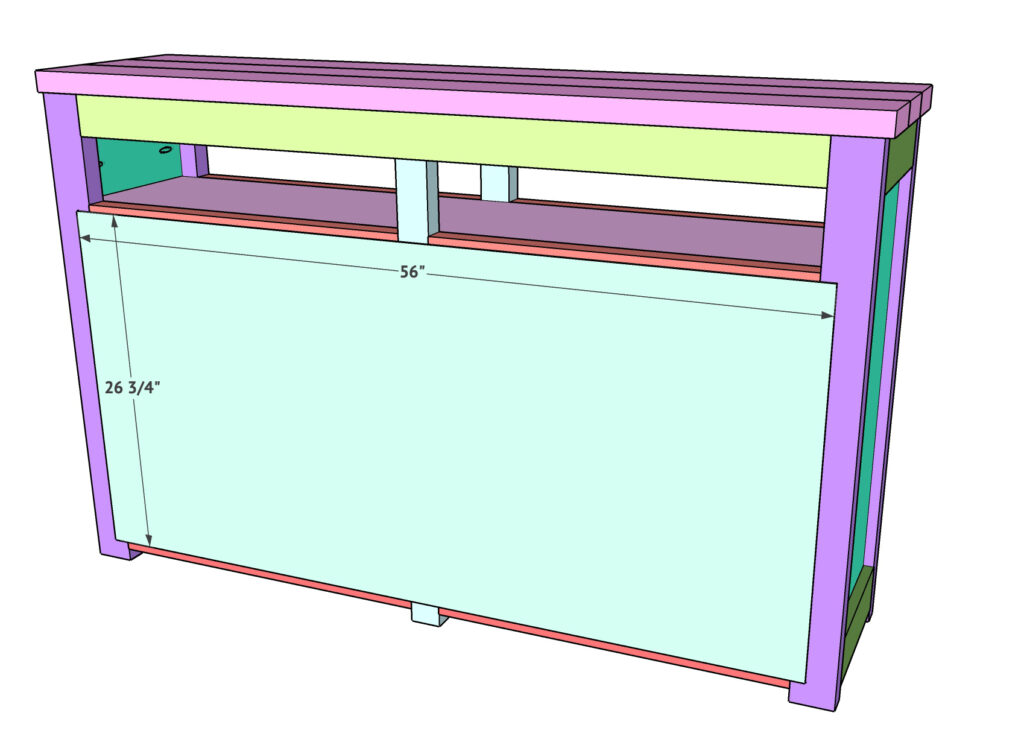
Attach the back of the dresser
Final step is adding your back! This is just 1/4” hardwood plywood cut to size. Attach it to the back of the dresser using wood glue and 1” staples or nails.
Barn Door Pulls
Now… Let’s talk about that hardware! How amazing are the pulls? Here they are! I think they are so affordable for their size and they are super strong and easy to attach. I also think they make this dresser… You can find them HERE on Amazon!
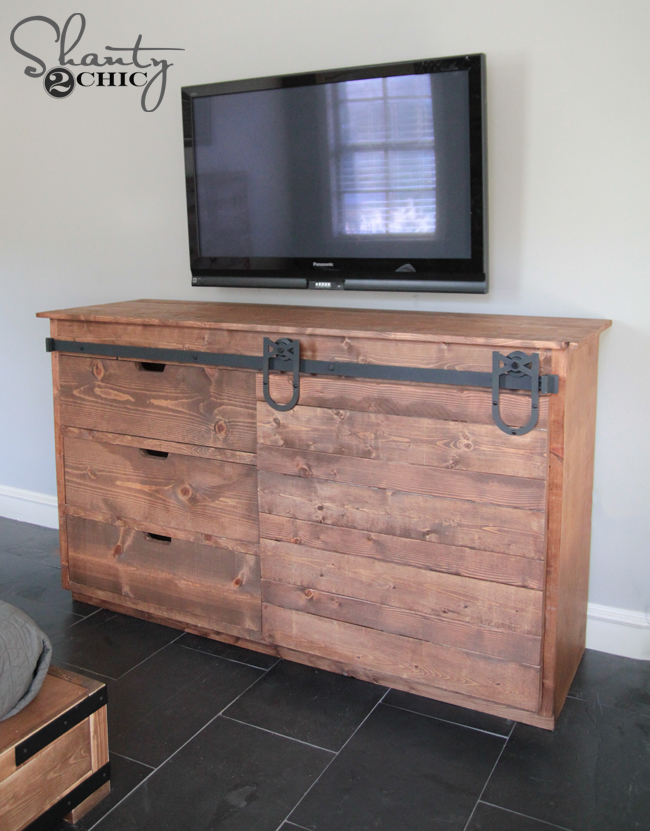
Stain for the dresser
Now let’s talk about the finish! I really wanted to brighten the room up, and I sampled several finishes before I decided to mix my own. This is SO easy. It’s like cooking.
I used 5 parts of this stain… You can find it HERE on Amazon!

I mixed that with 1 part of this stain… You can find it HERE!
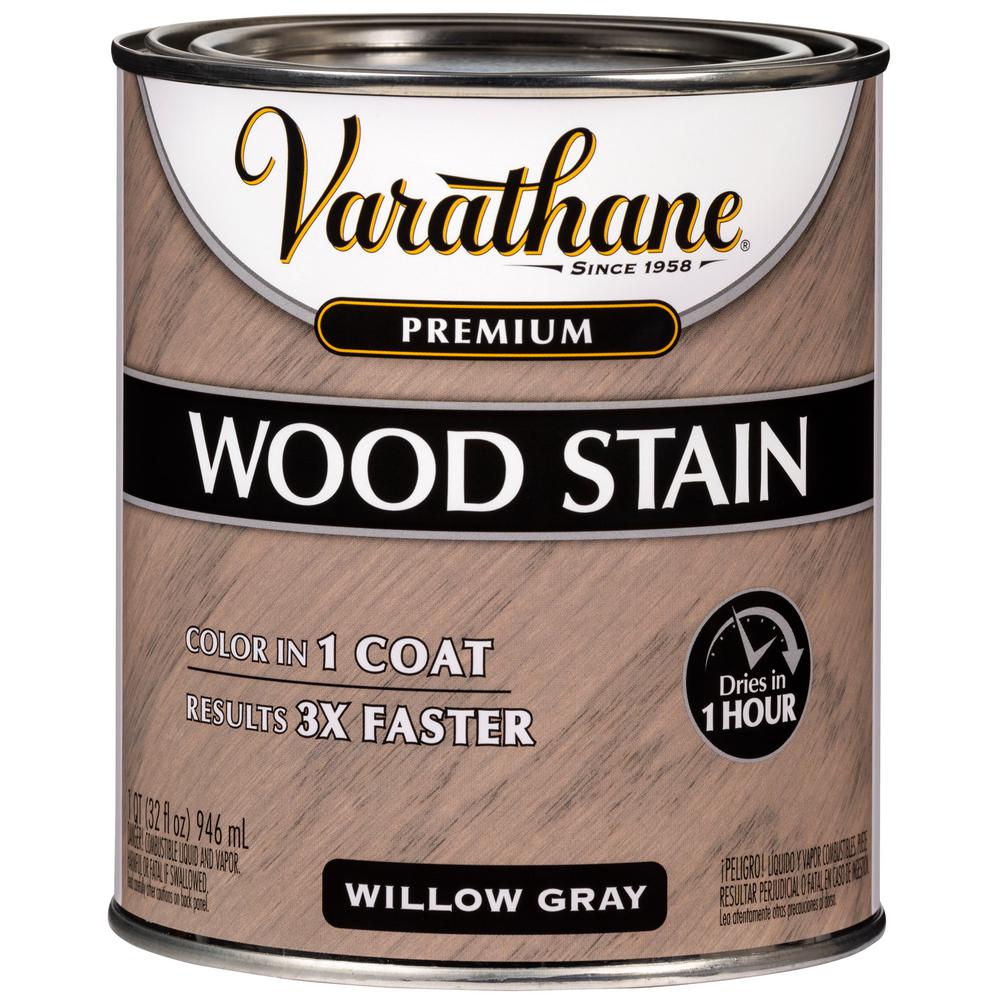
All you have to do is pour the parts into tray or cup and then mix them with a stir stick. So, you could mix 1 1/4 cups of Golden Oak with 1/4 cup of Willow Gray to get the finish I created. It’s PERFECTION!
The small round decorative pieces I used can be found on Amazon HERE! I loved how they looked on my DIY King Bed and DIY Nightstands so I carried the idea over to this piece. I just used a special bit to put a small round notch where each piece would go and then attached them with wood glue.

The Forstner bit I used is AMAZING. It cuts so quickly and clean. You can find it HERE on Amazon!

Here it is all finished up! I love how it turned out! You can grab the FREE printable plans to build your own dresser HERE!
Happy Building!

Do you think the top should go on before the shelf? Im just thinking it will be hard to get drill up there to screw on top with the top shelf already there. Make sense? Just need a clasrification. Thanks
Thank you for providing very nice information.
How many kg can it suffer?
How far down are the 2x4s being ripped down too?
Nvm. Saw the dimensions after looking over the plans again. Smh