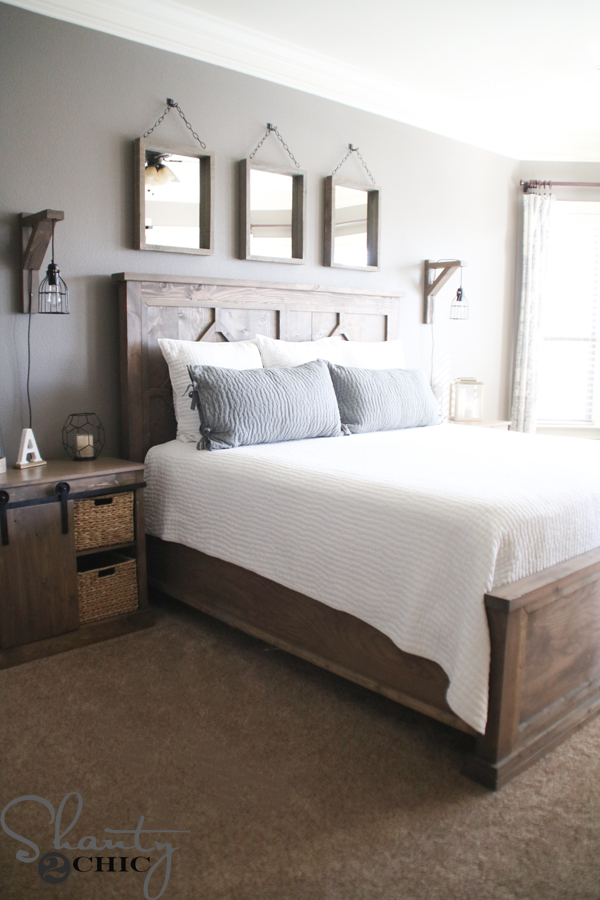
Learn how to build this DIY Full Size Bed with a Fancy Headboard with free plans, step-by-step tutorial and a how-to video by Shanty2chic!
I am so excited about this build! My oldest son has moved out and I’m converting his room into a guest room! I cleared the whole room out and gave it a fresh coat of paint! I like to design the bed first, in a room renovation, because it sets my style for the whole space. So, I designed the bed, made my shopping list and headed to my local hardware store.
Come build it with us in Whitney’s shop! Just click the play button below to watch!
How easy was that?! You can also follow along in the step-by-step instructions below! Make sure to download the free printable plans too!
Click here to jump to the free printable plans!How to Build a DIY Full Size Bed
Table of Contents
Tools:
Supply List:
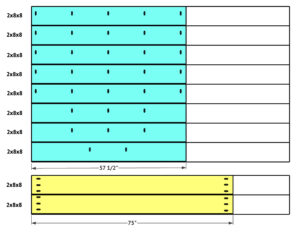
- 12 – 2x8x8 Framing Lumber (Pine or Douglas Fir)
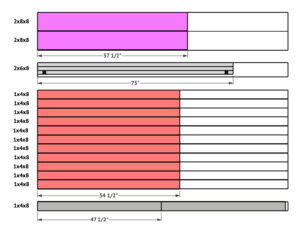
- 1 – 2x6x8 Framing Lumber (Pine or Douglas Fir)
- 12 – 1x4x8 Furring Strips
- 4 – Furniture Feet
- 2 1/2″ Pocket Hole Screws
- 1 1/4″ Wood Screws
- 2 1/2″ Wood Screws
- 4″ Wood Screws
- Wood Glue
Building the Headboard
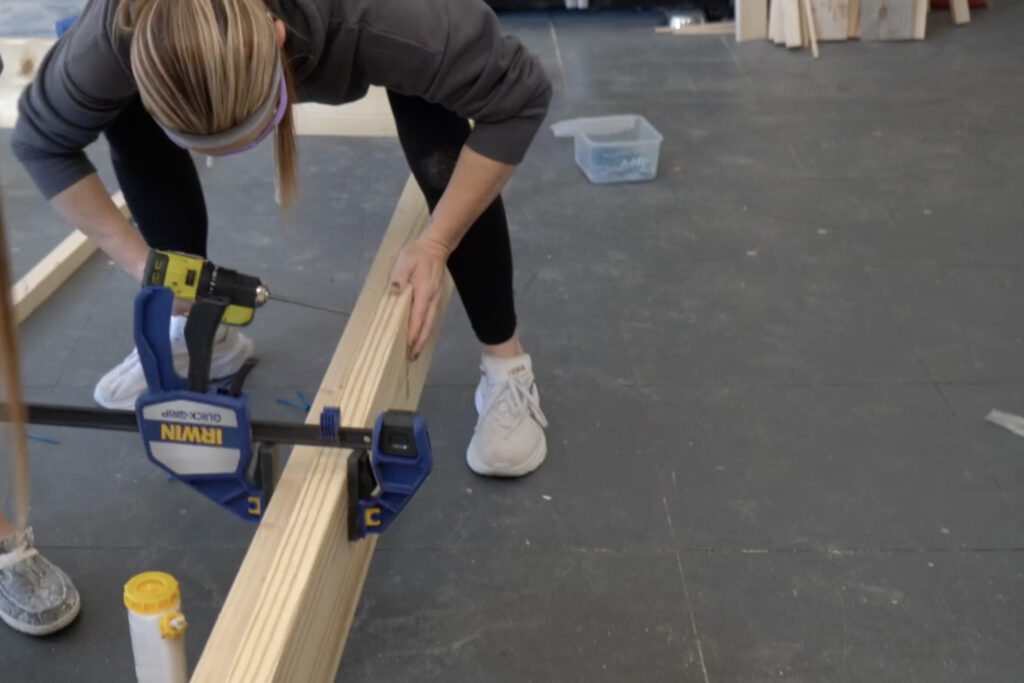
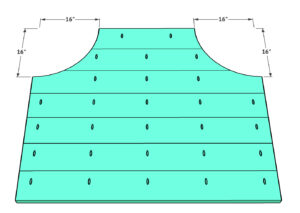
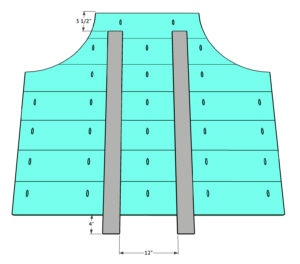
Step 1: Planking the Headboard
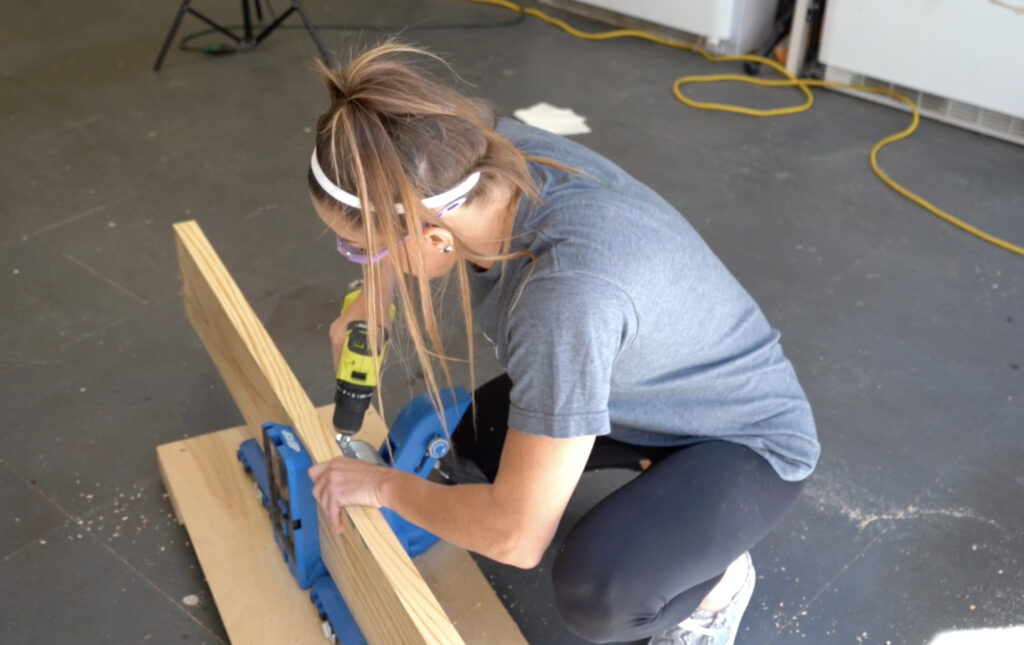
First, we cut the headboard planks to size. Then, we used our Kreg Jig to drill 1 1/2″ pocket holes in all of the planks except one (note the placement of the pocket holes in the diagram on the free plans).
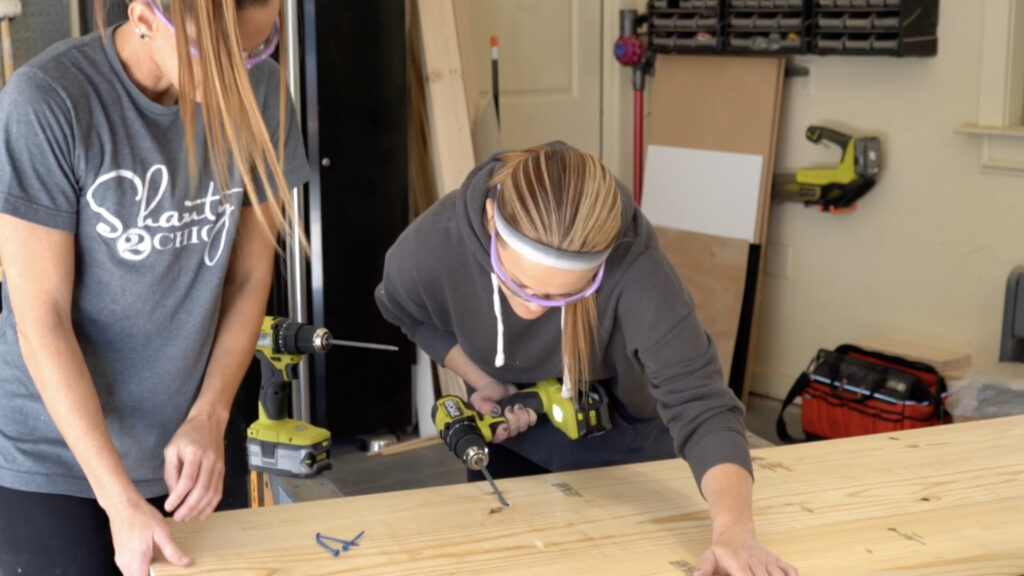
Next, we attached 7 of the planks together with 2 1/2″ pocket hole screws.
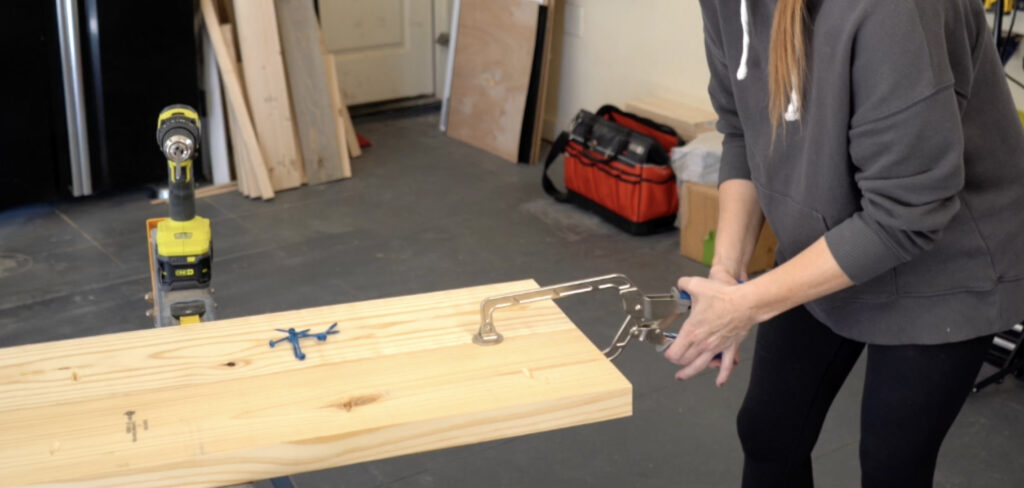
We get so many questions asking us how we get our table tops and planked headboards so smooth between the planks. We use these Kreg Face Clamps! Just move them down the planks as you drill your pocket hole screws in.
- You can find the Kreg Face Clamp we use here
Step 2: Cutting the Arcs
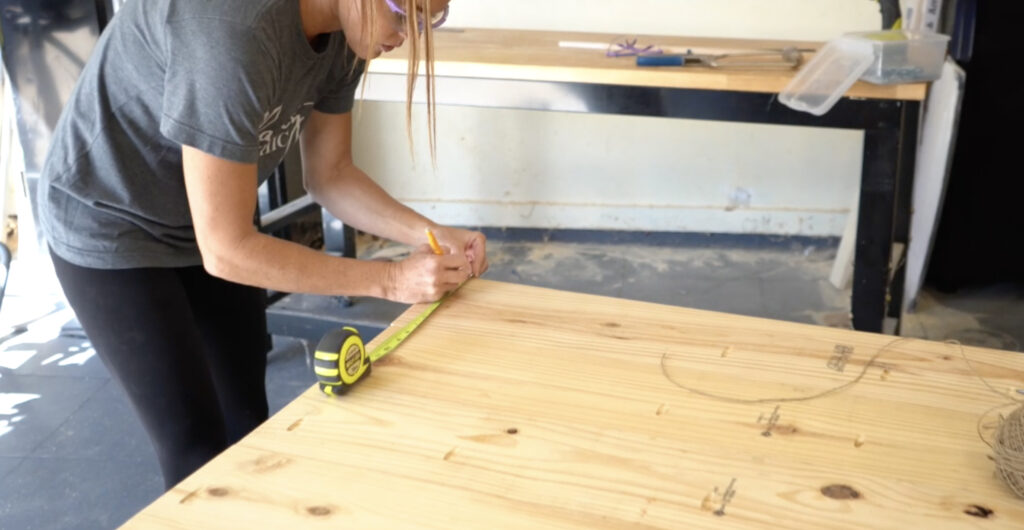
Mark 16″ on the top corners of the headboard.
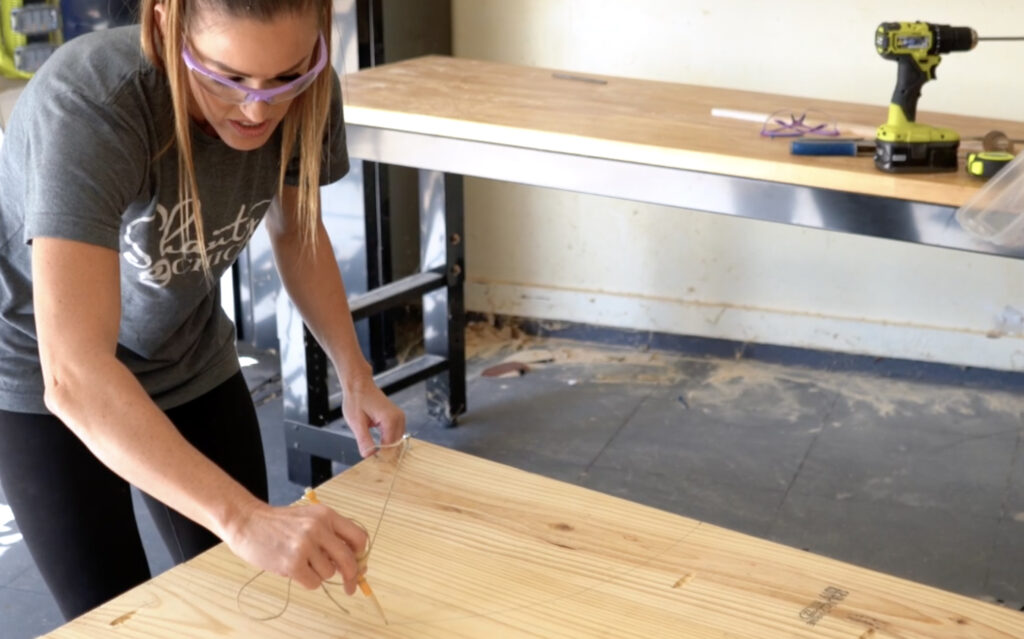
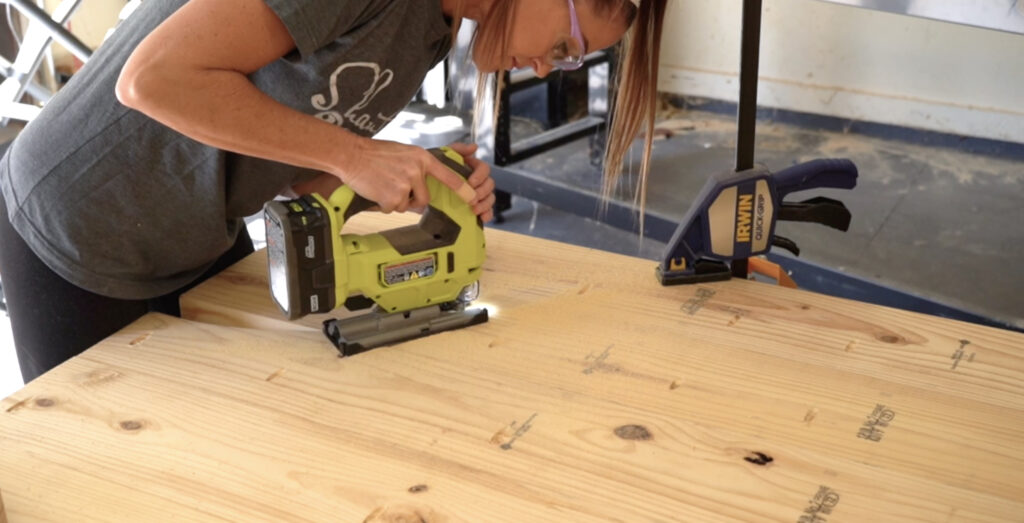
Draw an arc from one point to the other and cut the arcs with a jigsaw. Watch our how-to video for more detail on how we made these cuts!
Step 3: Attaching the Back Supports
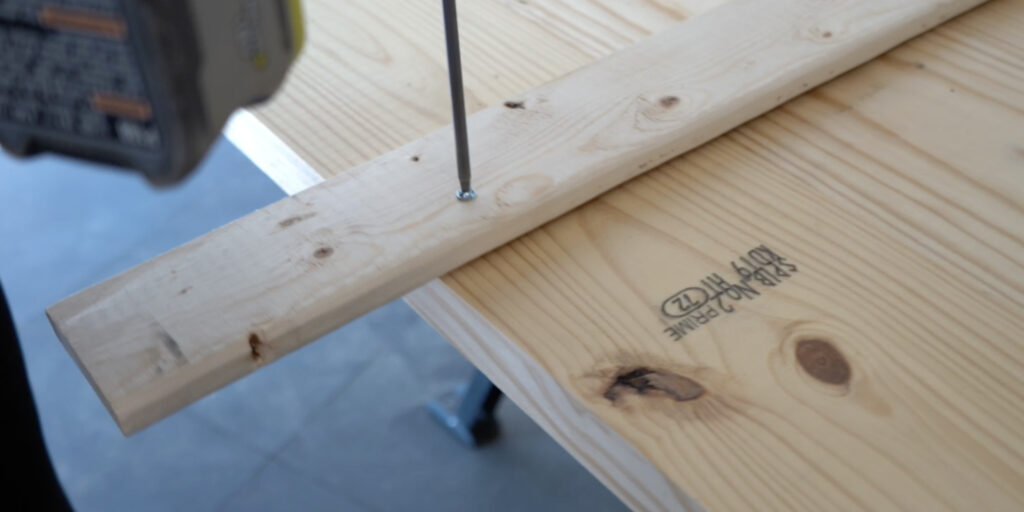
Cut the back supports to size and attach them to the back of the headboard with 1 1/4″ wood screws and wood glue.
Building the DIY Bed Frame
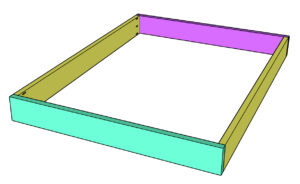
Step 1: Attaching the Side, Top and Back Rails
Cut the bed frame pieces to size and drill 1 1/2″ pocket holes at both ends of the side rails. Attach the side rails to the headboard and footboard pieces with 2 1/2″ pocket hole screws and wood glue.
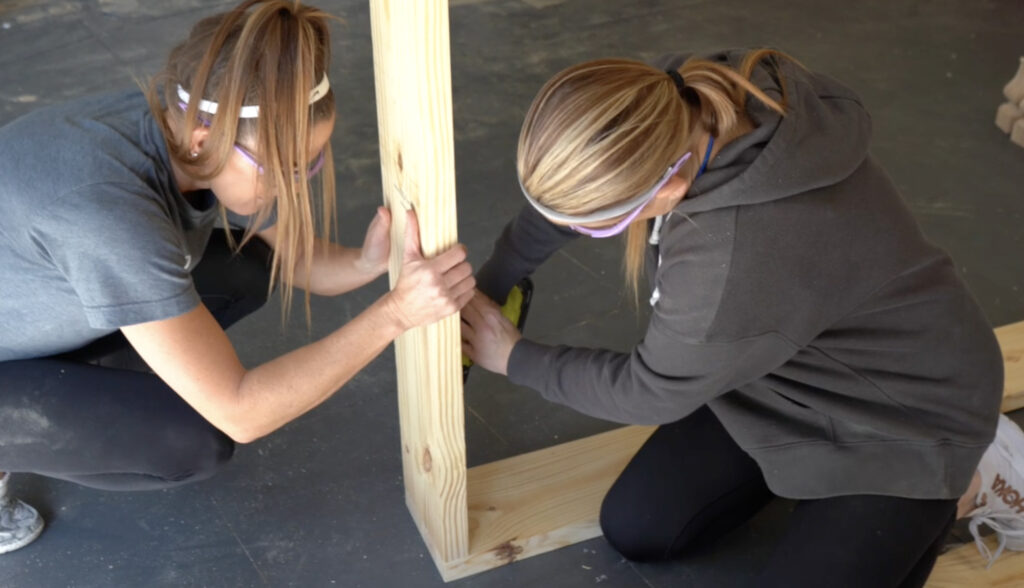
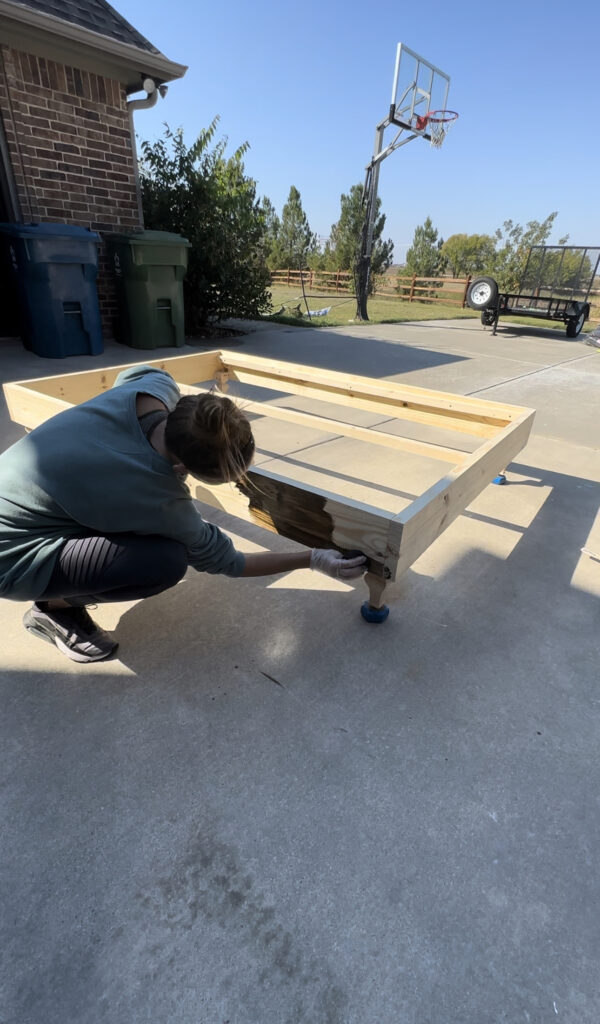
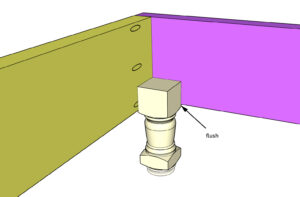
Step 2: Adding the Feet
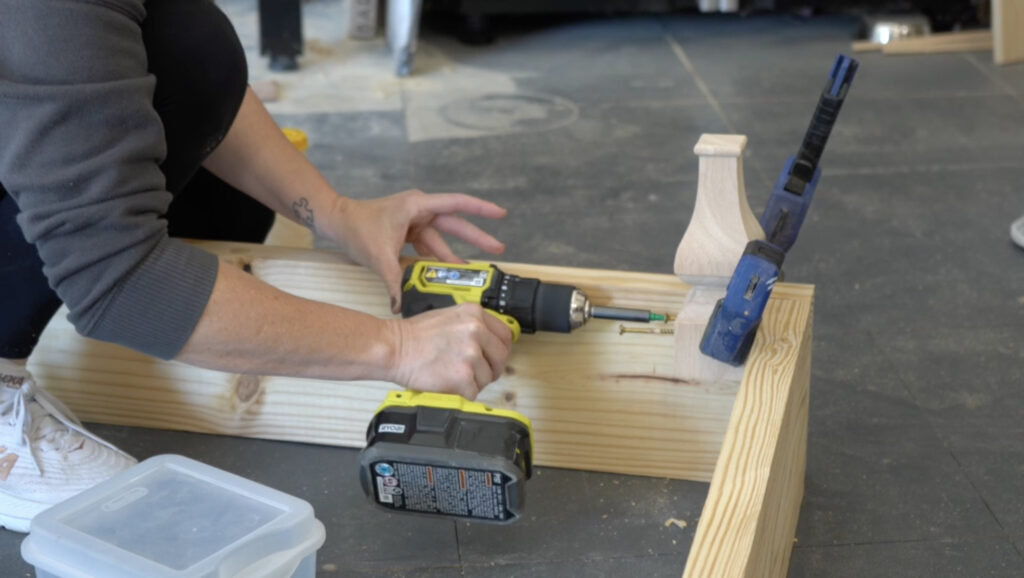
Attach the feet to the inside corners of the bed with 4″ wood screws and wood glue. The bottom of the block, at the top of the feet, should be flush with the bottom of the bed frame.
Step 3: Cleats
Cut the cleats to size and drill 1 1/2″ pocket holes at both ends of the center cleat. Attach the side cleats with 2 1/2″ wood screws and wood glue, to each side of the bed.
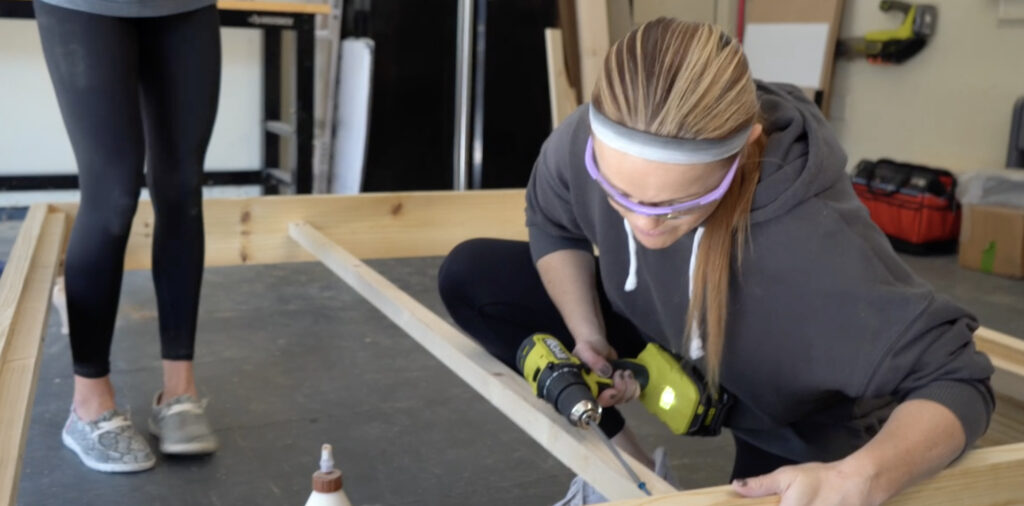
Attach the center cleat with 2 1/2″ pocket hole screws and wood glue.
Assembling the Full Size Bed Frame
Step 1: Attaching the Headboard
*Note: I added a finish before assembling the bed. This made it easier to get inside the house.
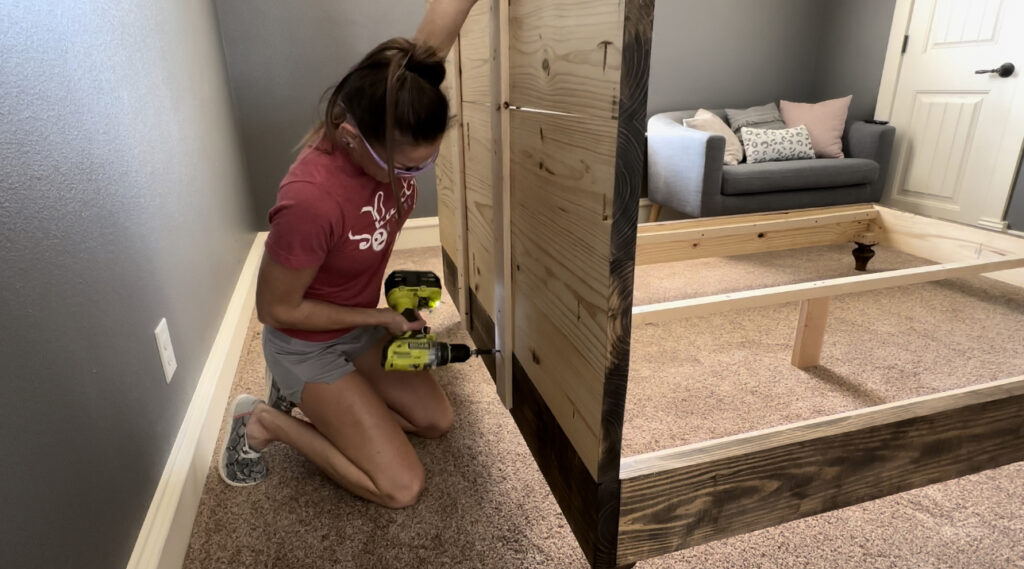
Rest the headboard on top of the bed frame and attach it to the back rail with 2 1/2″ wood screws, through the back supports and into the back of the bed frame.
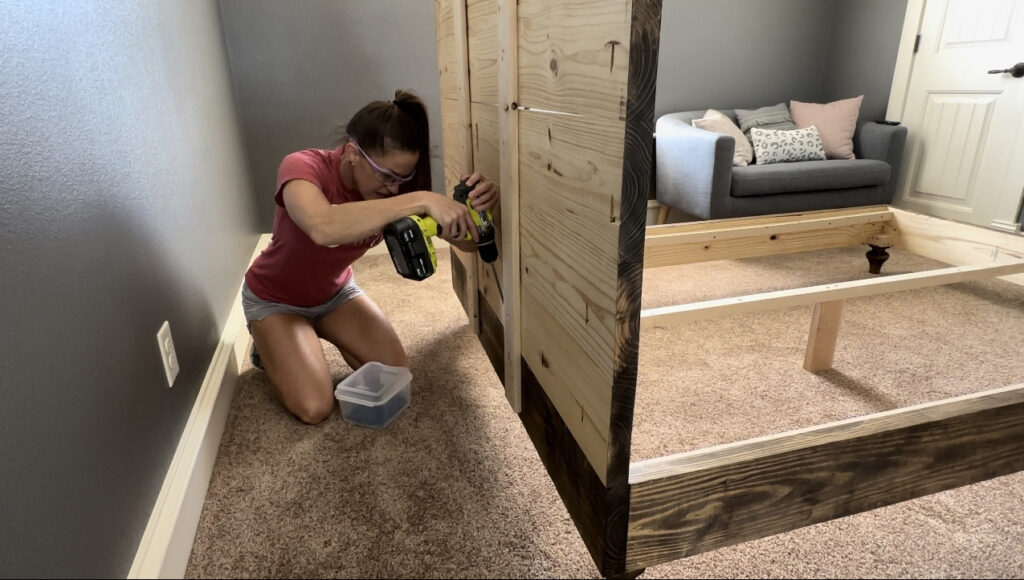
Then, follow up with the 2 1/2″ pocket hole screws, from the bottom headboard plank into the back rail for added support.
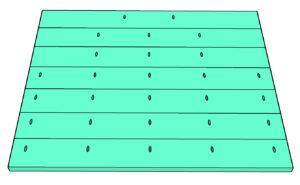
Step 2: Slats
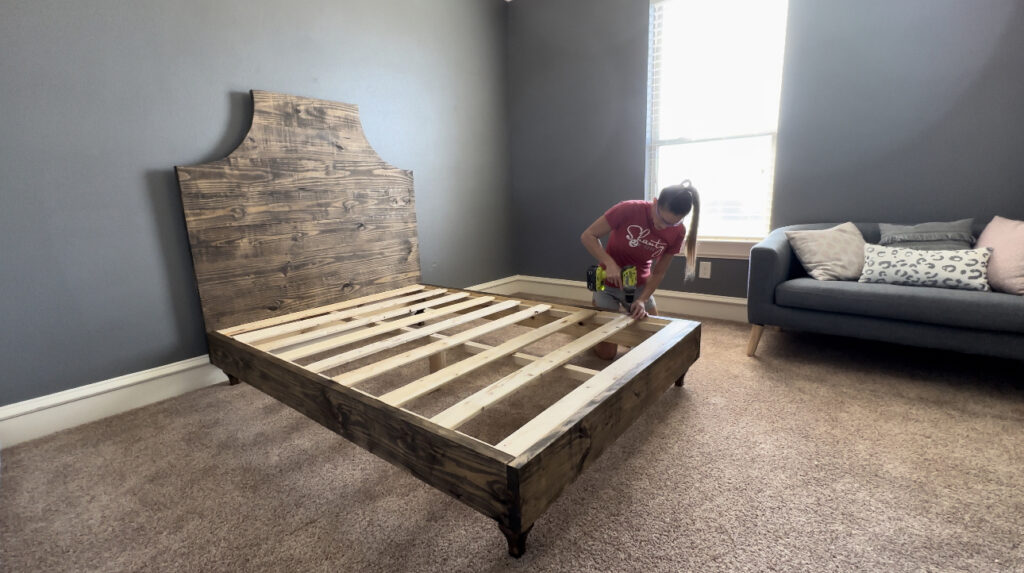
Cut the bed slats to size and attach them to the cleats with 1 1/4″ wood screws and wood glue.
The Finish
Step 1: Sanding and Staining
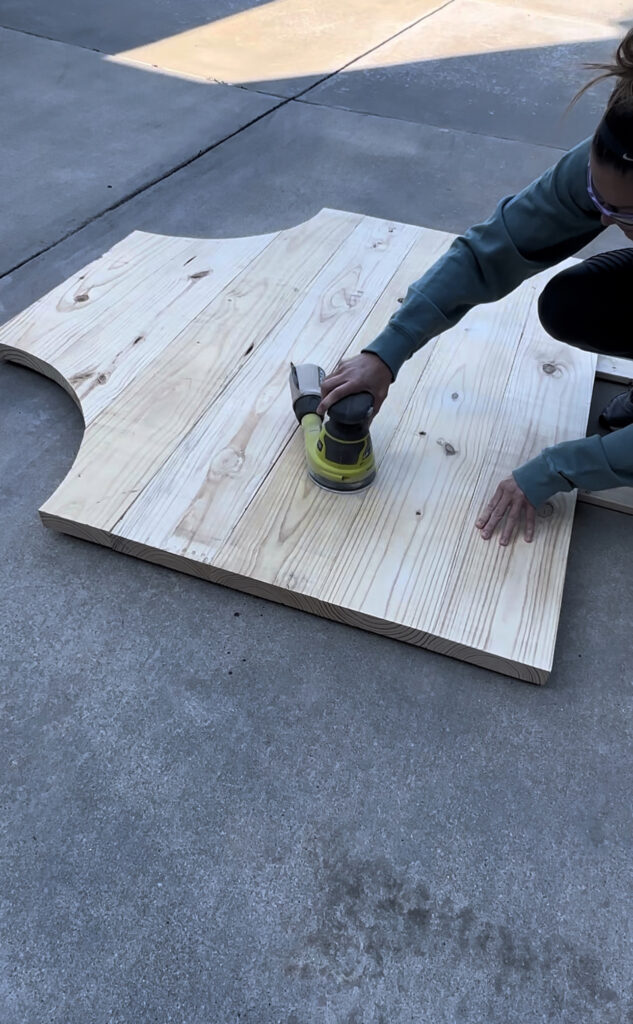
Give the entire bed a good sanding, I used my orbital sander.
Fill any exposed holes with wood filler and add a finish! I like to use my Kreg Project Blocks to prop up my builds when I’m adding a finish! They make it so much easier and they’re under $20!
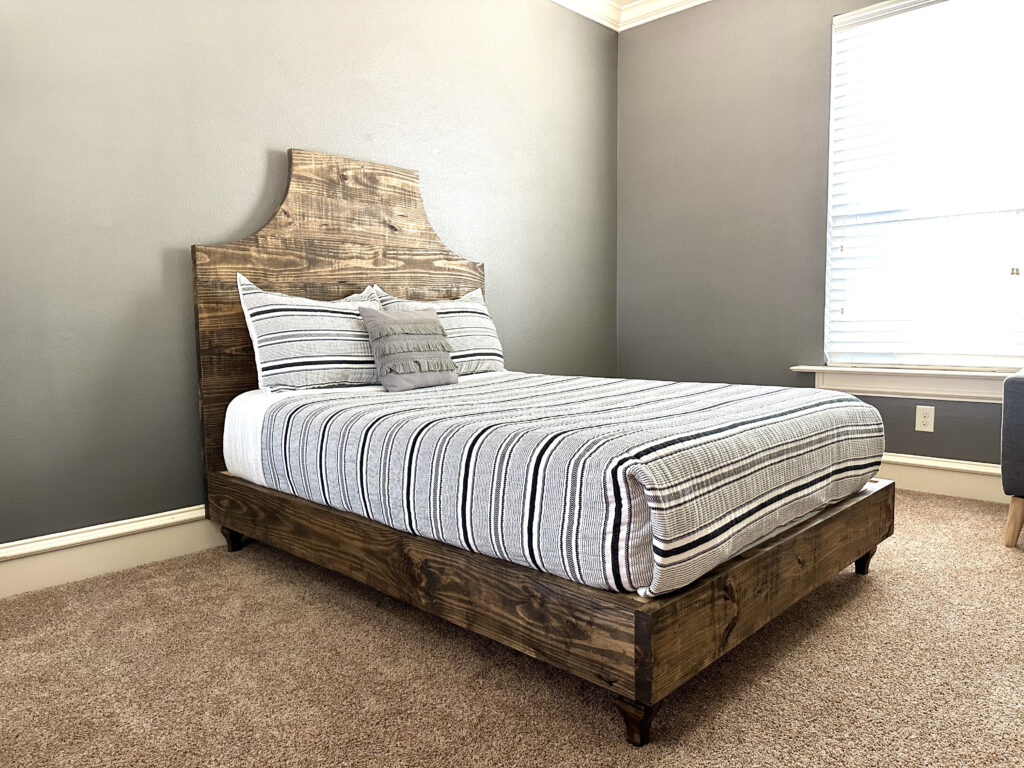
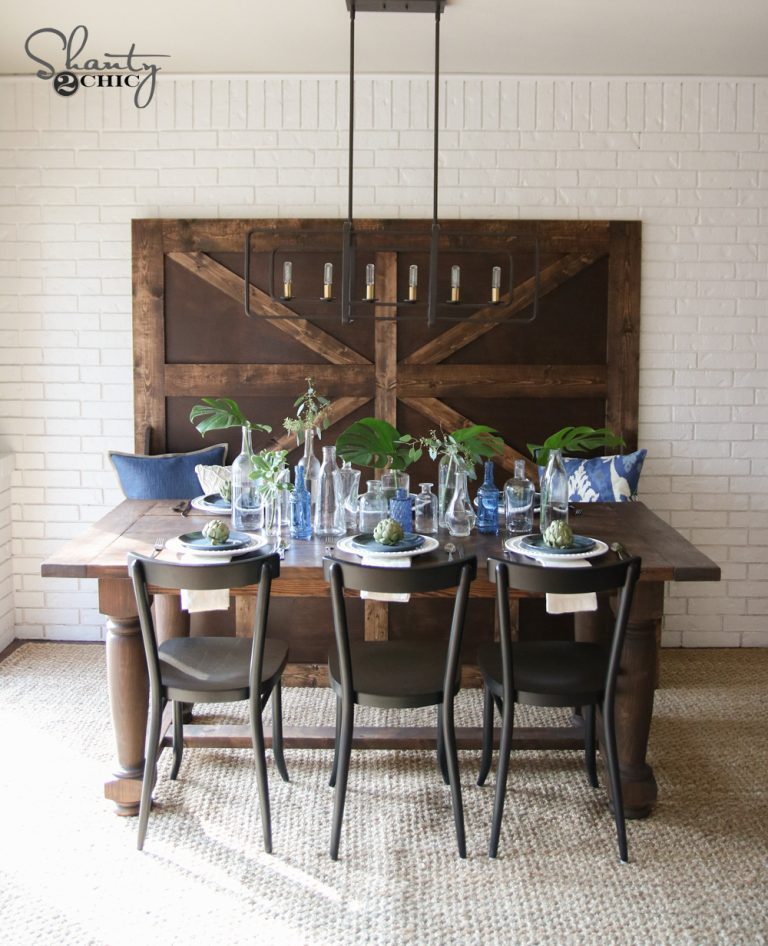
I love the look of this fancy headboard and the mix of a simple bed frame!
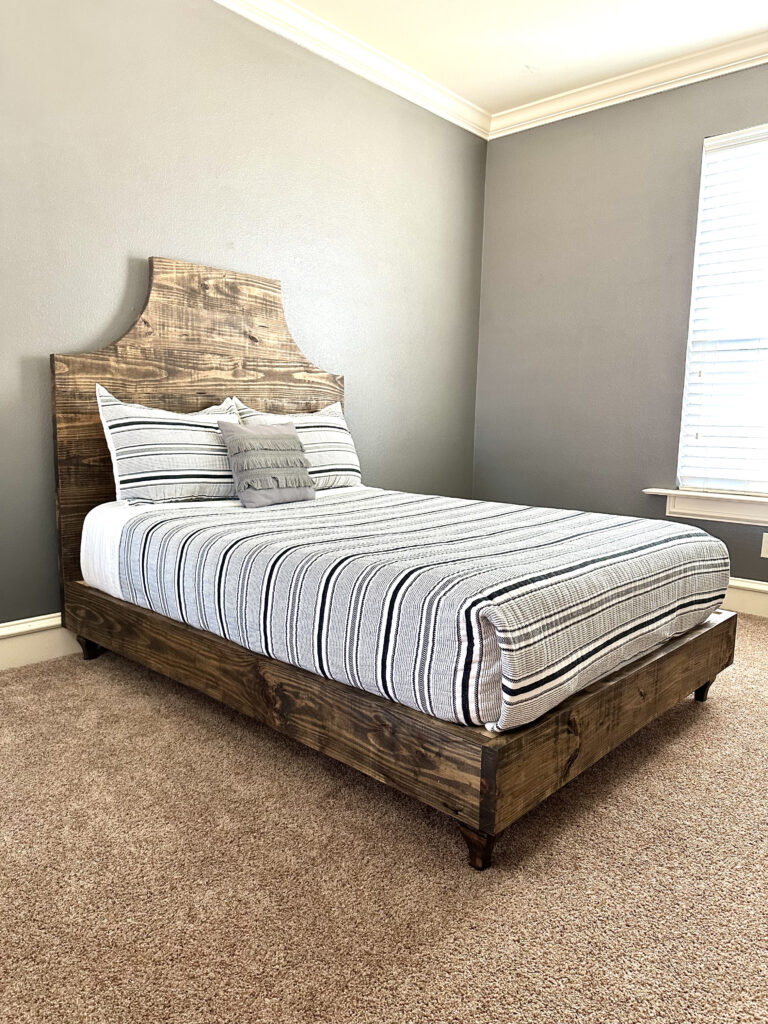
It gives a beautiful vintage but modern style and I can’t wait to get the rest of the room finished!
Make sure to share your builds with us on social media and use #shanty2chic so we can share them too!
Happy Building!
Modifications
If you need plans for a different size bed, that is a very easy modification. Here are the dimensions for each size mattress.
Twin – 75″Lx38″W
Full (this plan) – 75″Lx54″W
Queen – 80″Lx60″W
King – 80″Lx76″W
You will modify the width and the length of the boards depending on what size mattress you are building.
For example, for a twin bed you would subtract 6″ from the headboard planks, headboard and footboard rails and trim and well as the slats that run the width of the bed.
For a queen-sized mattress, you would add 5″ to the side rails, trim and cleats as well as add 6″ to the boards that run the width.
Check out some of the other bed frame project we’ve designed!
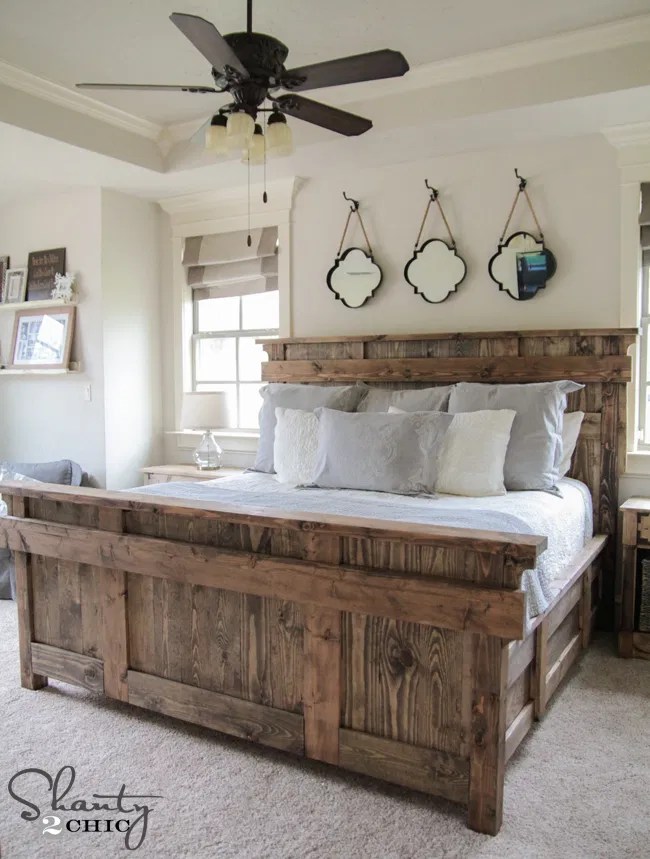

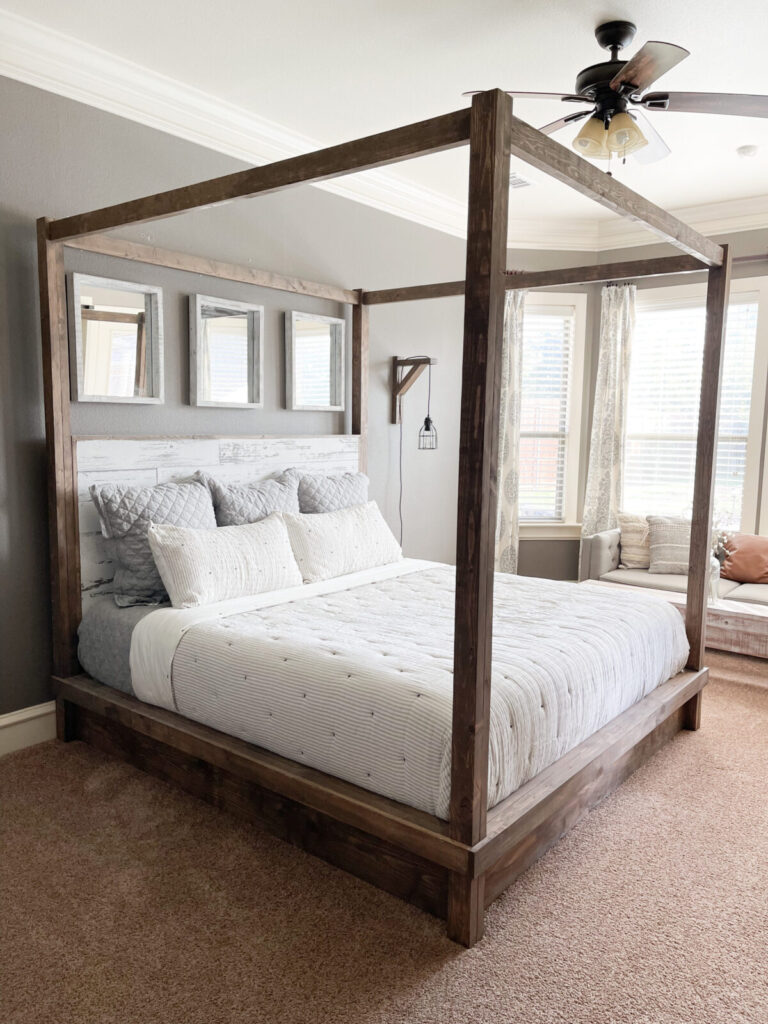

Full Bed with Metal Hardware and and Drawers
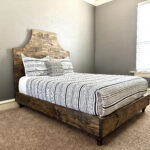
DIY Full Size Bed with Fancy Headboard
Tools
- Miter Saw
- Drill
- Kreg Jig
- Table Saw (optional)
- Jigsaw
- Sander
Supply List
- 12 2x8x8 Framing Lumber
- 1 2x6x8 Framing Lumber
- 12 1x4x8 Furring Strips
- 2 1/2" Pocket Hole Screws
- 1 1/4" Wood Screws
- 2 1/2" Wood Screws
- 4" Wood Screws
- Wood Glue
Instructions
Cut List
- Cut List 1

- Cut List 2

Building the Headboard
- Cut the headboard planks to size and drill 1 1/2" pocket holes in all of the planks except one (note the placement of the pocket holes in the top three planks). Attach 7 of the planks together with 2 1/2" pocket hole screws.

- Mark 16" on the top corners of the headboard. Draw an arc from one point to the other and cut the arcs with a jigsaw. Watch our how-to video for more detail on how we made these cuts!

- Cut the back supports to size and attach them to the back of the headboard with 1 1/4" wood screws and wood glue.

Building the Bed Frame
- Cut the bed frame pieces to size and drill 1 1/2" pocket holes at both ends of the side rails. Attach the side rails to the headboard and footboard with 2 1/2" pocket hole screws and wood glue.

- Attach the feet to the inside corners of the bed with 4" wood screws and wood glue. The bottom of the block, at the top of the feet, should be flush with the bottom of the bed frame.

- Cut the cleats to size and drill 1 1/2" pocket holes at both ends of the center cleat. Attach the side cleats with 2 1/2" wood screws and wood glue. Attach the center cleat with 2 1/2" pocket hole screws and wood glue.


Assembling the Bed
- Rest the headboard on top of the bed frame and attach it to the back rail with 2 1/2" wood screws, through the back supports and into the back of the bed frame. Then, follow up with the 2 1/2" pocket hole screws, from the bottom headboard plank into the back rail for added support.

- Cut the slats to size and attach them to the cleats with 1 1/4" wood screws and wood glue.


The Finish
- Give the entire bed a good sanding, fill any exposed holes with wood filler and add a finish!Make sure to share your builds with us on social media and use #shanty2chic so we can share them too!Happy Building!


Thanks for providing detailed instructions
It’s great, thanks for posting this.
This idea is great to follow.