Learn how to build this DIY Medicine Cabinet with just a few tools, five pine boards and free plans by Shanty2Chic!
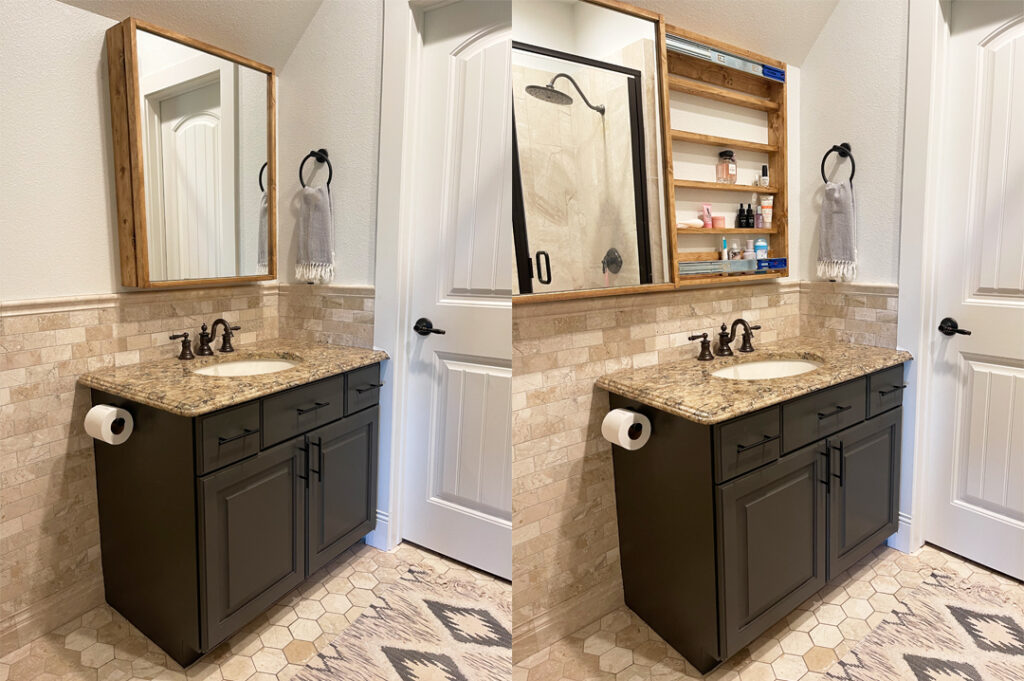
My daughter has a small bathroom and there’s not very much storage space other than her bathroom vanity cabinet. That hasn’t been much of an issue until now. She’s in middle school and loves beauty products. I decided to give her a little bathroom makeover and thought a hidden storage behind her vanity mirror would make the perfect spot to hide her bottles and tubes! I got busy designing and built her this DIY Bathroom Mirror with Hidden Storage!
This is a very easy build and perfect for beginners! As always, we’ve got the free printable plans and a step-by-step tutorial for you to follow along with, as well!
Click here to jump to the free printable plans!Table of Contents
How to Build a DIY Medicine Cabinet with Storage
Tools:
- Miter Saw
- Kreg Jig
- Drill
- Brad Nailer
- Sander
- Stud Finder
- Table Saw (optional)
Supplies:
- 5 – 1x4x8
- 1 1/4″ Pocket Hole Screws
- 1 1/4″ Brad Nails
- 3″ Wood Screws
- 2 – 24″ Drawer Slides
- 1 – 24″x30″ Frameless Mirror
- Construction Adhesive
- Wood Glue
- Wood Filler
- Wood Finish
- Polyurethane
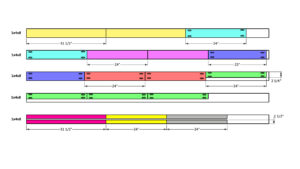
Note: I was able to build this with five 1×4’s. I used my table saw to rip the width of the shelf boards to 1×3’s and the front cleats and mirror trim to 1×2’s. If you do not have a table saw, you can use 1×3’s for the shelves and 1×2’s for the front cleats.
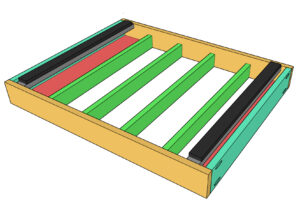
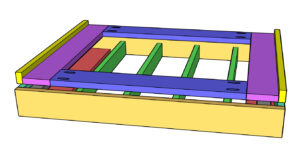
Building the DIY Medicine Cabinet Frame
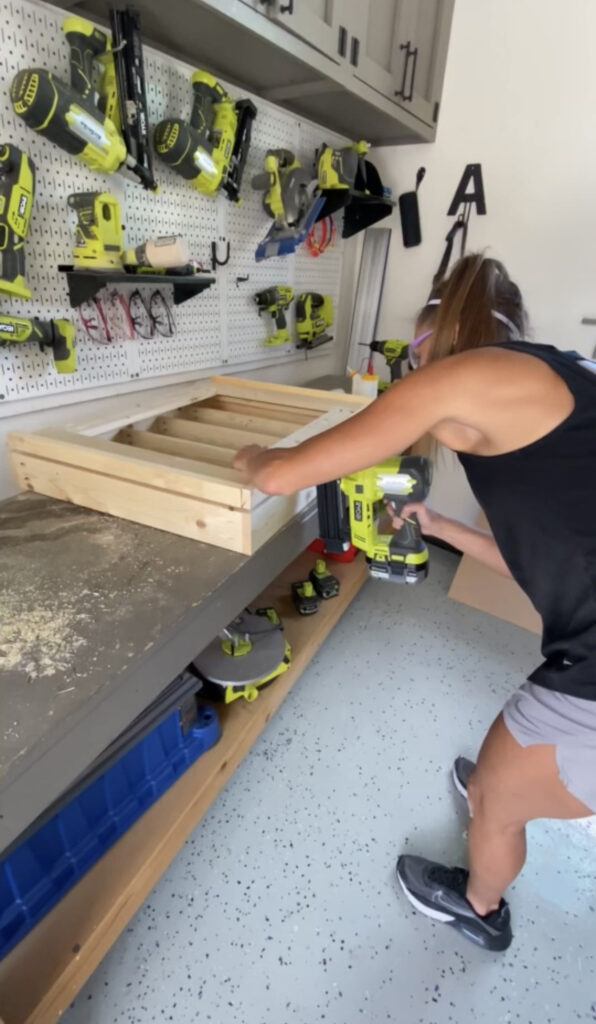
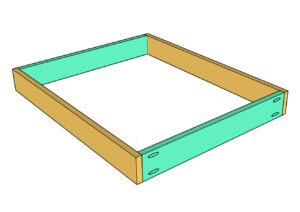
Step 1:

Cut the cabinet frame boards to size, according to the cut list and use your Kreg Jig to drill 3/4″ pocket holes at both ends of the top and bottom pieces.
- You can find our favorite Kreg Jig model here
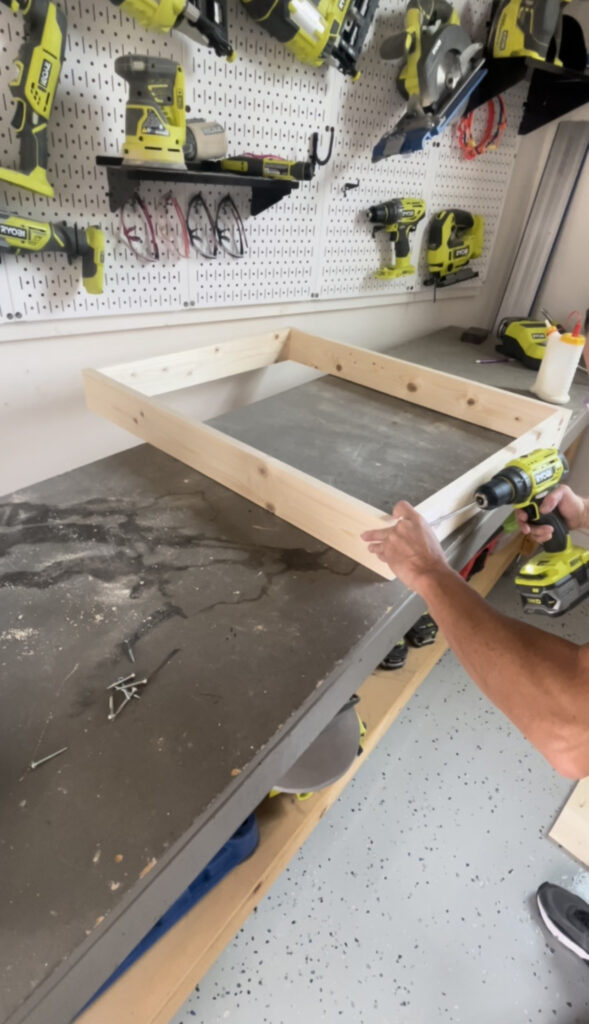
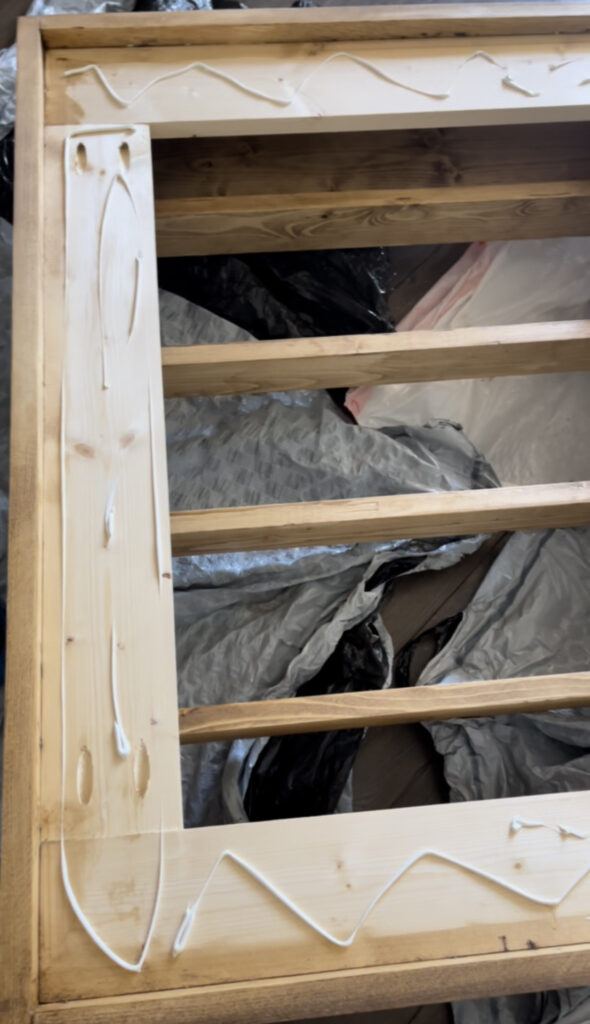
Attach the boards together with 1 1/4″ pocket hole screws and wood glue.
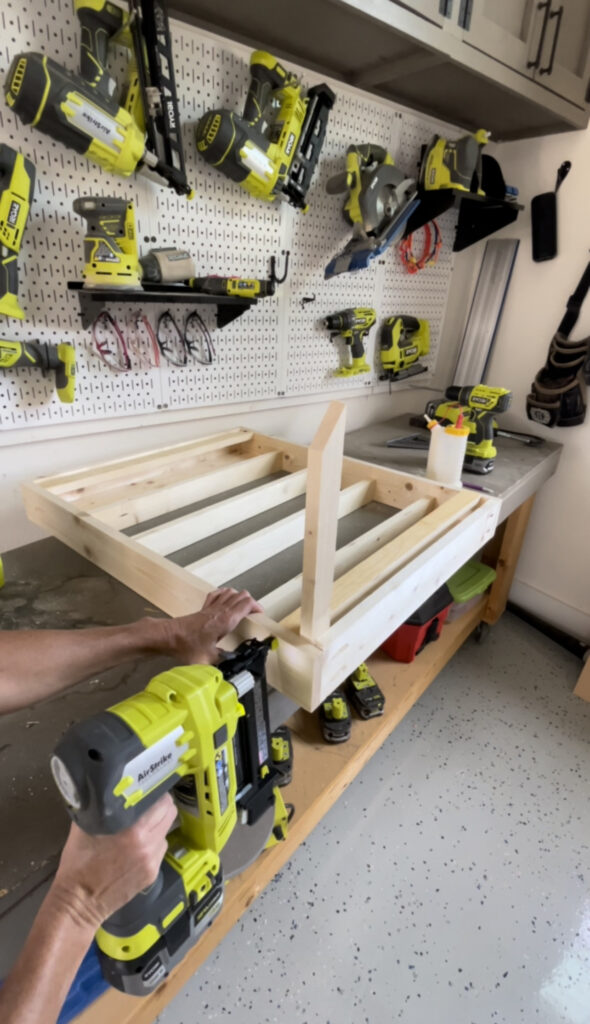
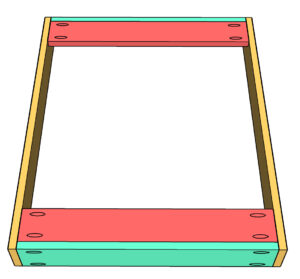
Step 2:

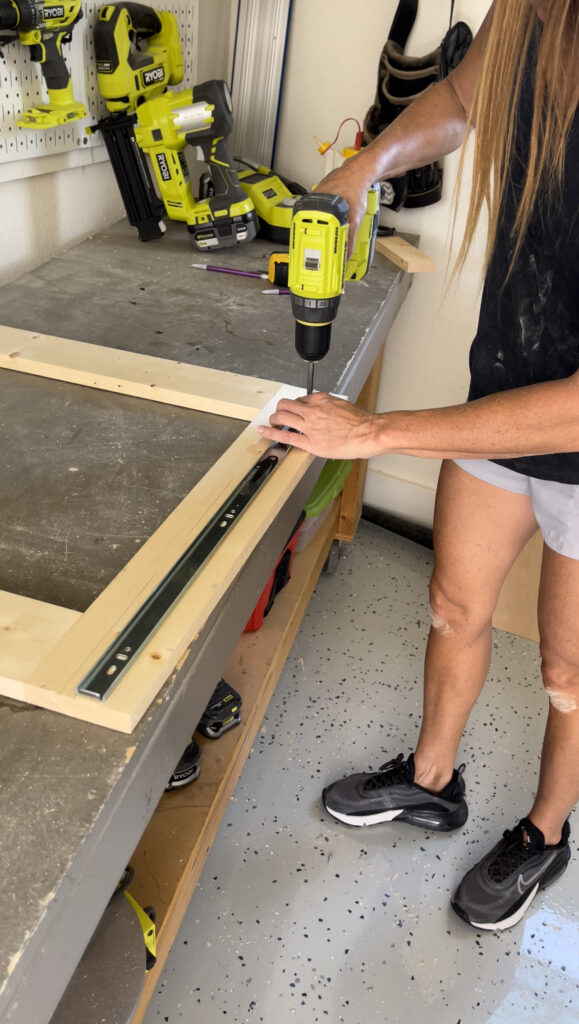
Cut the back cleats to size and drill 3/4″ pocket holes at both ends. Attach them to the back of the frame with 1 1/4″ pocket hole screws and wood glue. The pocket holes should face the back of the frame and be flush with the back of the frame.
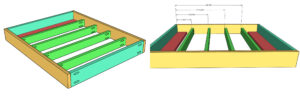
Step 3:
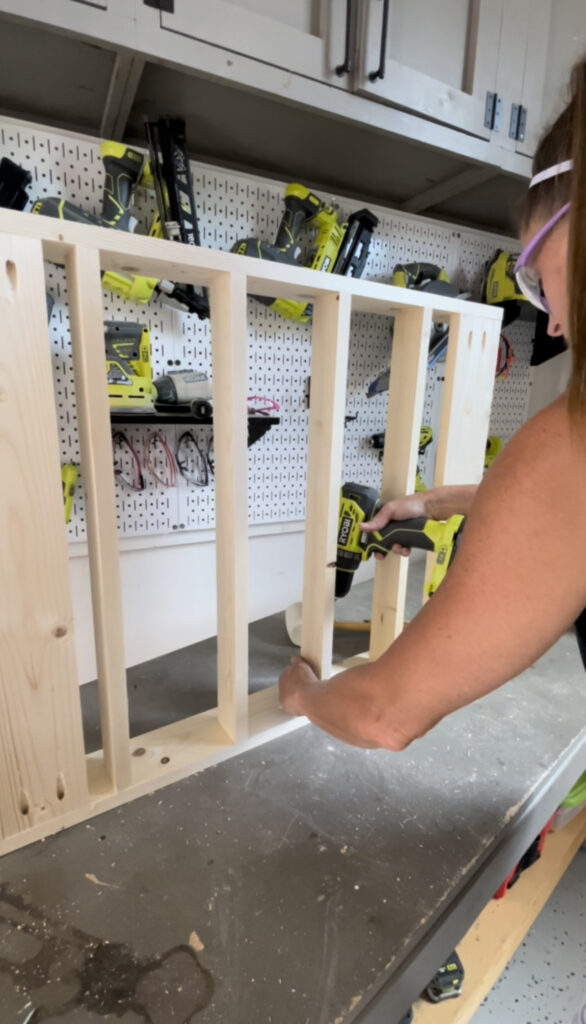
Cut the shelf boards to size and drill 3/4″ pocket holes at both ends. Attach them to the inside of the shelf frame with 1 1/4″ pocket hole screws and wood glue. The back of the shelf boards should be flush with the back of the frame.
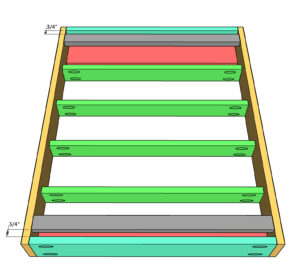
Step 4:
Cut the front cleats to size and attach them to the inside of the front of the frame with 1 1/4″ brad nails and wood glue. They should be attached 3/4″ from the top and bottom frame boards and flush with the front of the frame. I used a scrap 1x piece as a spacer.
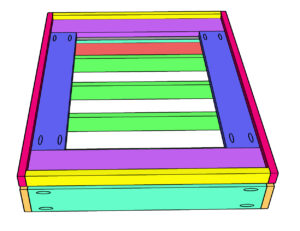
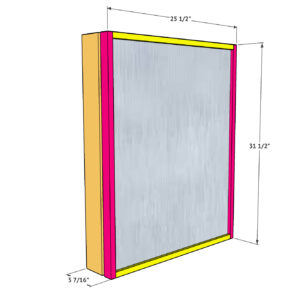
Building the Mirror Frame
Step 1:
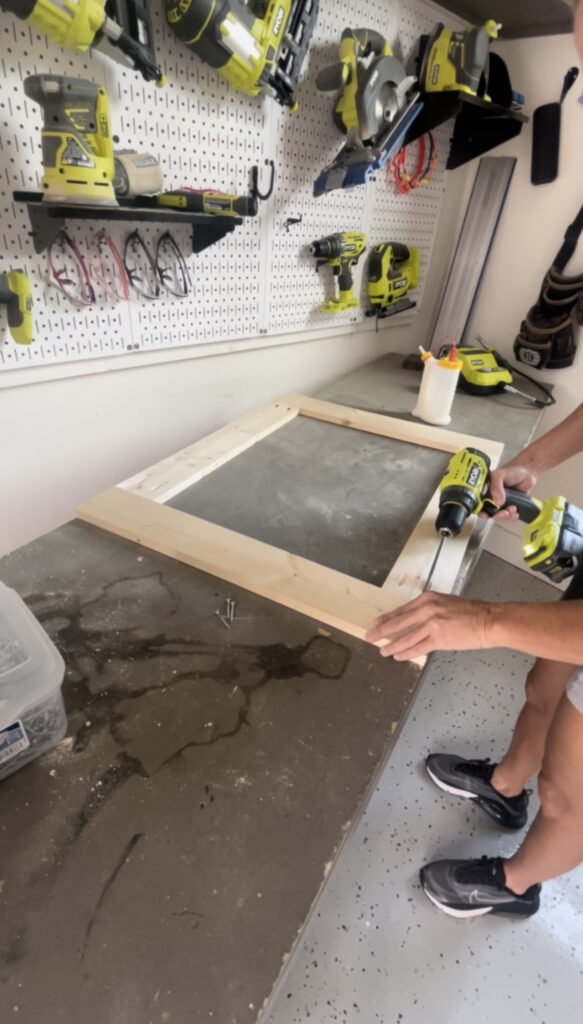
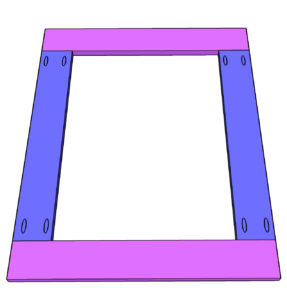
Cut the mirror frame pieces to size and drill 3/4″ pocket holes in the side boards. Attach the boards together with 1 1/4″ pocket hole screws and wood glue.
Attaching the Drawer Slides
Step 1:
Flip the mirror frame over and attach the inside piece of the drawer slides to the back of the mirror frame. They should be attached where the front cleats of the shelf are attached. Dry-fit with the shelf cleats and the other part of the drawer slides for a perfect fit.
Step 2:
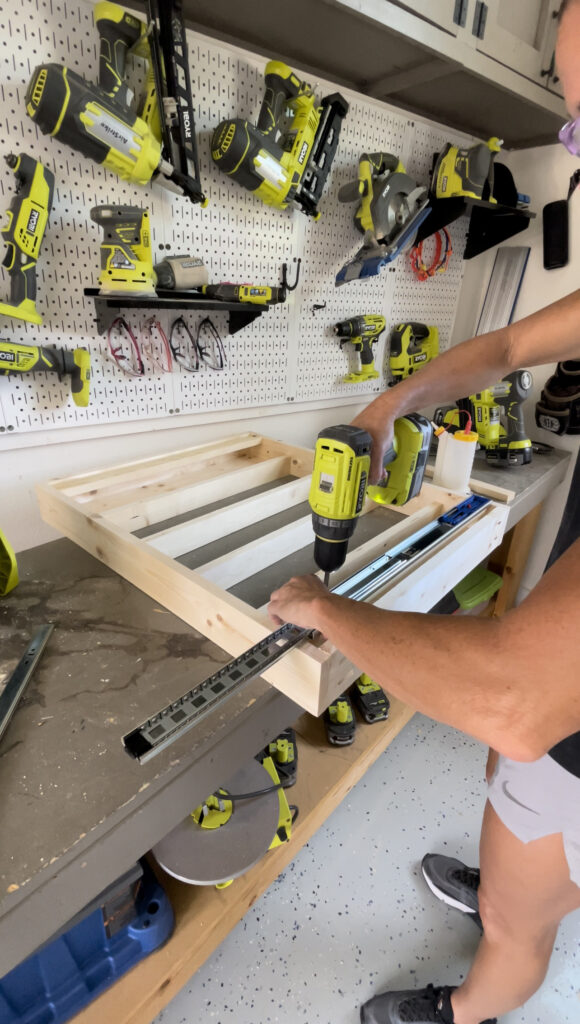
Center the main piece of the drawer slides on top of the front cleats and attach with the hardware provided. Make sure to dry fit them with the drawer slides on the mirror frame for a perfect fit.
Step 3:
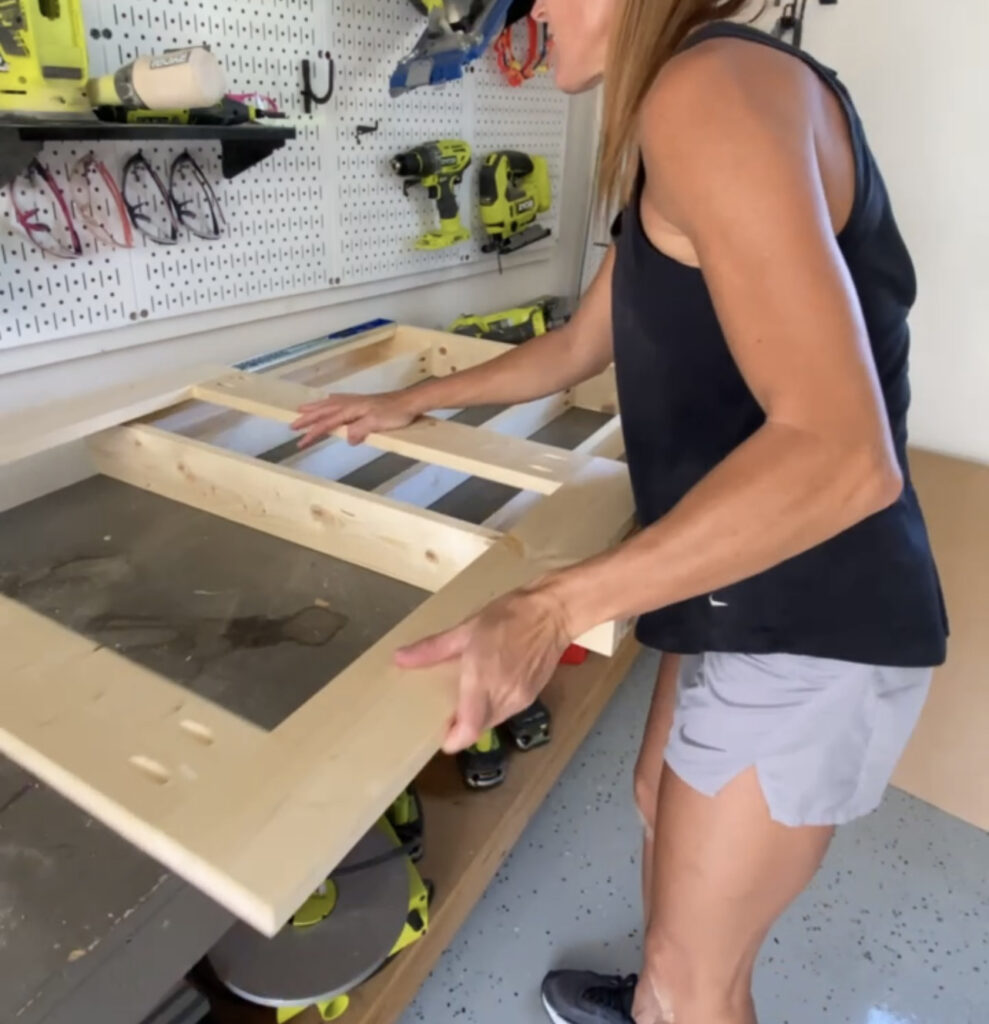
Slide the mirror over the shelf fame with the drawer slides.
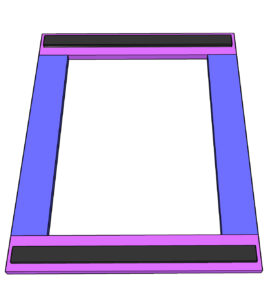
Adding the Trim to the Mirror
Step 1:
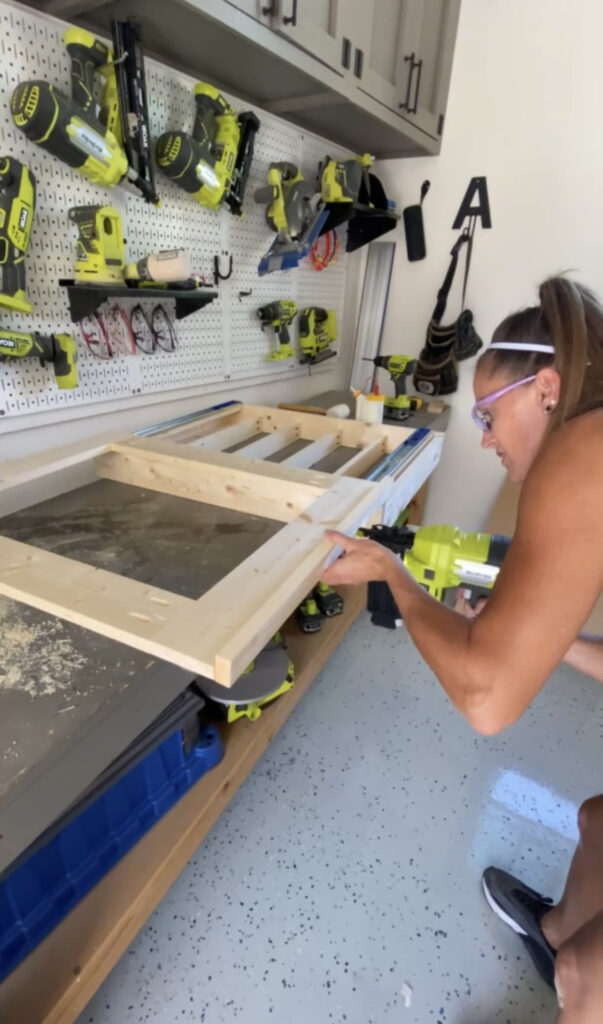
Measure and cut the top and bottom mirror trim pieces to size. Attach them the mirror frame with 1 1/4″ brad nails and wood glue. The bottom of the trim pieces should be flush with the bottom of the mirror frame.
Step 2:
Do the same for the side pieces. Start by measuring and cutting the boards to size. Attach them to the mirror frame with 1 1/4″ brad nails and wood glue.
The Finish
Step 1:
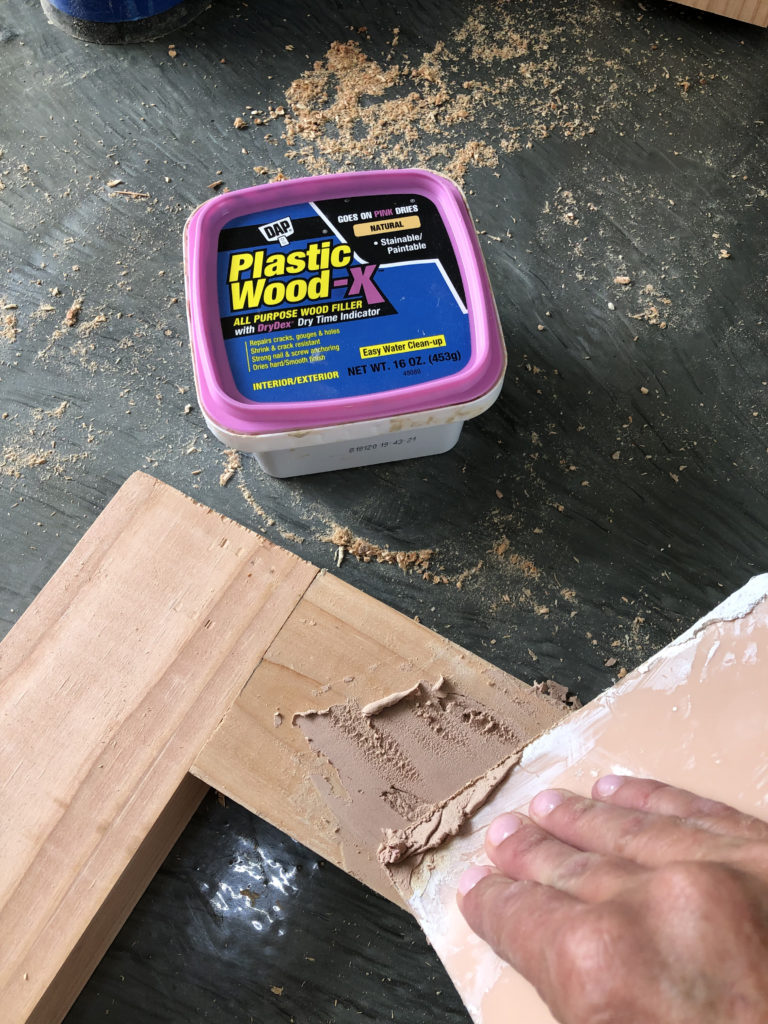
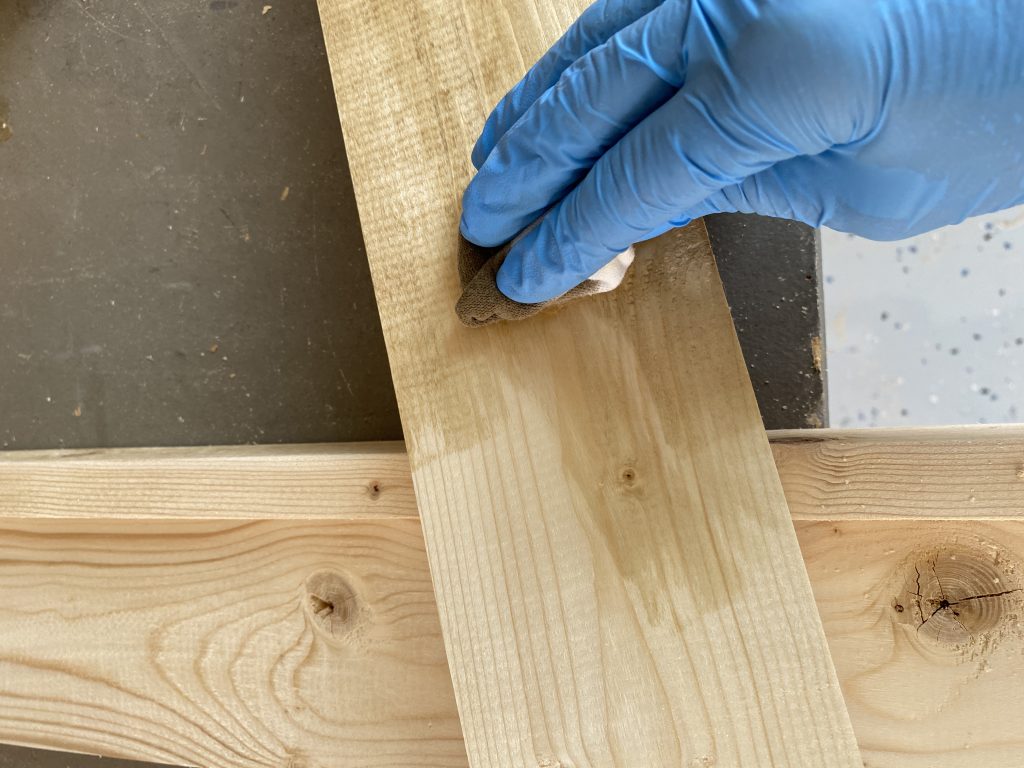
Fill any exposed holes with wood filler and sand down the entire cabinet.
Step 2:
I applied one coat of stain to the entire cabinet.
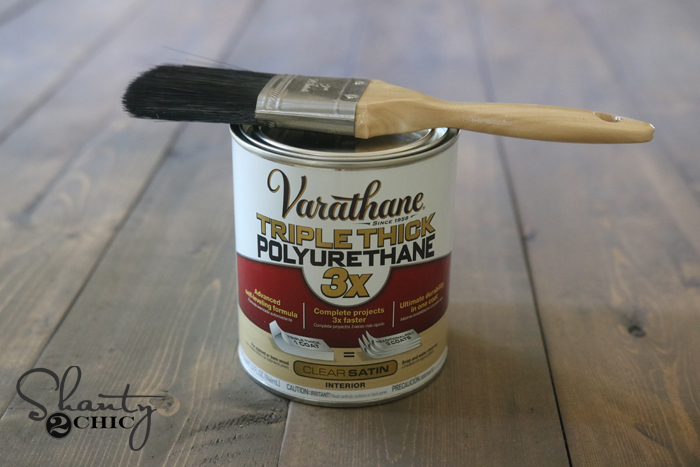
Once the stain is dry, add a protective finish.
Step 3:
When the cabinet finish is dry, it’s time to attach the mirror. I applied a generous amount of construction adhesive to the mirror frame and placed the mirror over the frame. Let the adhesive dry based on the product directions.
How to Hang the DIY Medicine Cabinet
Step 1:
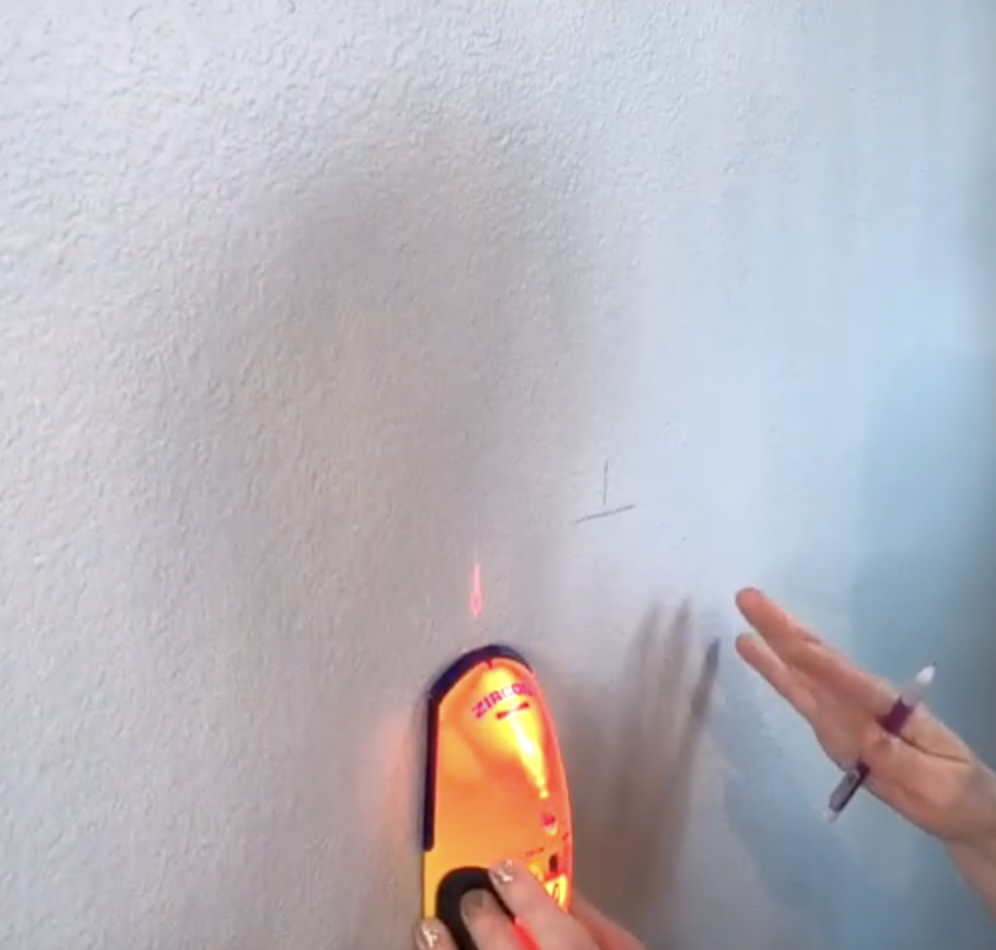
Locate the studs behind the drywall.
Step 2:
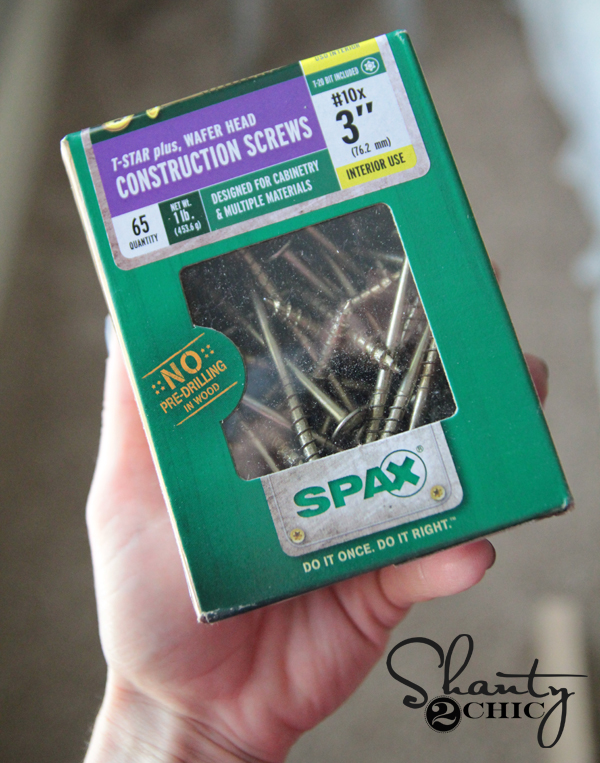
Drive 3″ wood screws from the cleats, into the studs behind the wall. I used two wood screws for each cleat.
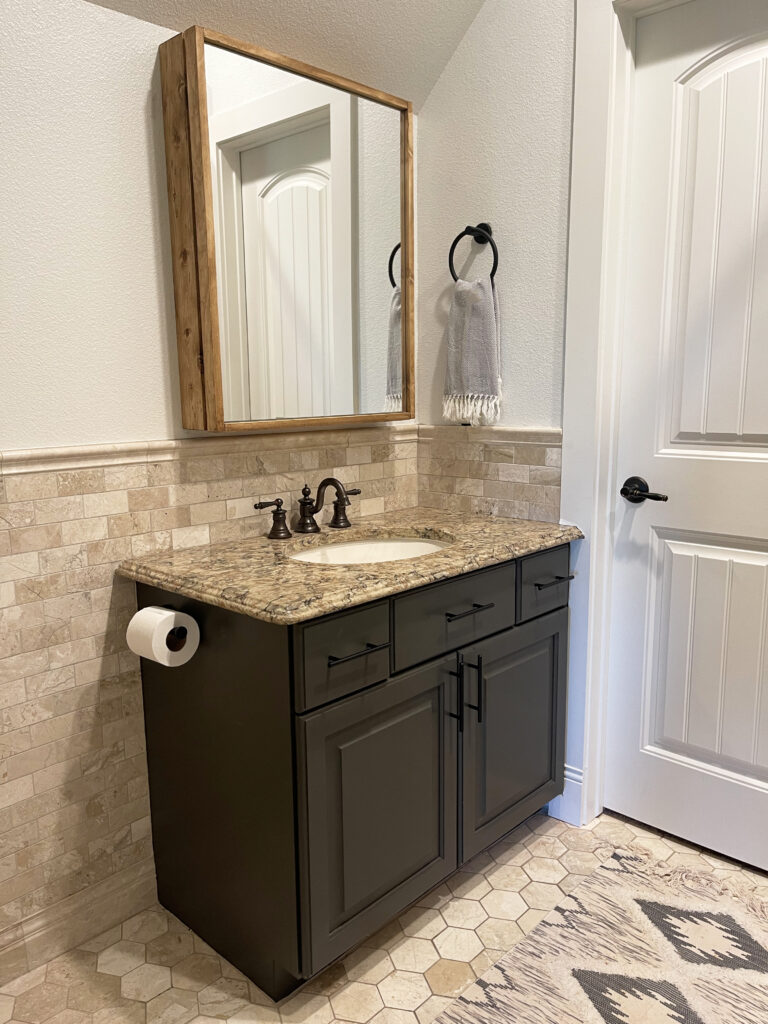
That was it! I’m so thrilled with how her DIY Wooden Medicine Cabinet turned out!
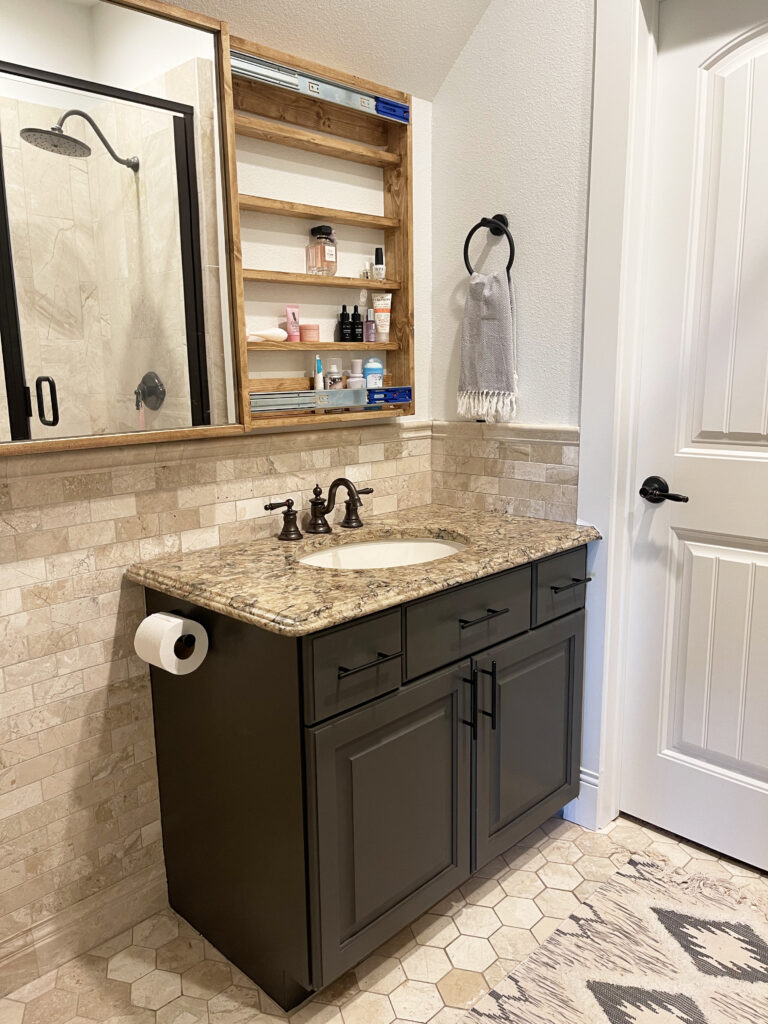
It’s made her bathroom space more functional and I love the hidden storage! It’s the perfect depth for perfumes, nail polish, beauty products and toothpaste!
Make sure to share your builds with us on social media and use #shanty2chic so we can share them too!
Happy Building!
DIY Medicine Cabinet
Tools
- Miter Saw
- Kreg Jig
- Drill
- Brad Nailer
- Sander
- Table Saw (optional)
Supply List
- 5 1x4x8 Pine or Common Boards
- 1 1/4" Pocket Hole Screws
- 1 1/4" Brad Nails
- 3" Wood Screws
- 24" Drawer Slides
- 24"x30" Frameless Mirror
- Construction Adhesive
- Wood Glue
- Wood Filler
- Wood Finish
- Polyurethane
Instructions
Cut List
- Cut List

Building the DIY Medicine Cabinet Frame
- Cut the shelf frame boards to size and drill 3/4" pocket holes at both ends of the top and bottom pieces. Attach the boards together with 1 1/4" pocket hole screws and wood glue.

- Cut the back cleats to size and drill 3/4" pocket holes at both ends. Attach them to the back of the frame with 1 1/4" pocket hole screws and wood glue. The pocket holes should face the back of the frame and be flush with the back of the frame.

- Cut the shelf boards to size and drill 3/4" pocket holes at both ends. Attach them to the inside of the shelf frame with 1 1/4" pocket hole screws and wood glue. The back of the shelf boards should be flush with the back of the frame.

- Cut the front cleats to size and attach them to the inside of the front of the frame with 1 1/4" brad nails and wood glue. They should be attach 3/4" from the top and bottom frame boards and flush with the front of the frame.

Building the Mirror Frame
- Cut the mirror frame pieces to size and drill 3/4" pocket holes in the side boards. Attach the boards together with 1 1/4" pocket hole screws and wood glue.

Attaching the Drawer Slides
- Flip the mirror frame over and attach the inside piece of the drawer slides to the back of the mirror frame. They should attached where the front cleats of the shelf are attached. Dry-fit with the shelf cleats and the other part of the drawer slides for a perfect fit.

- Center the main piece of the drawer slides on top of the front cleats and attach with the hardware provided. Make sure to dry fit them with the drawer slides on the mirror frame for a perfect fit.

- Slide the mirror over the shelf frame with the drawer slides.

Adding the Trim to the Mirror
- Measure and cut the top and bottom trim pieces to size. Attach them to the mirror frame with 1 1/4" brad nails and wood glue. The bottom of the trim pieces should be flush with the bottom of the mirror frame.

- Measure and cut the side trim pieces to size. Attach them to the mirror frame with 1 1/4" brad nails and wood glue.

The Finish
- Sand down the entire cabinet and add a finish! Once the finish is dry, attach the mirror to the inside of the mirror frame with an adhesive.To attach the cabinet to the wall, locate the studs behind the wall and drive 3" wood screws from the cleats into the studs behind the wall. I used two wood screws for each cleat.Make sure to share your builds with us on social media and use #shanty2chic so we can share them too!Happy Building!


Great tutorial! I’m curious, what type of hinges did you use for the mirror? I want to make sure the cabinet is sturdy and secure. Thanks!
Thank you! The slides are linked under supplies at the top 🙂
The space is extremely good and very spacious and the guidance is great.
Looks amazing and a wonderful space saver!