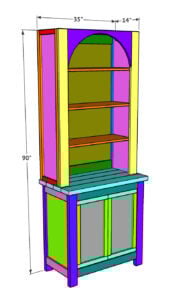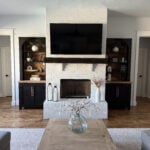
DIY Arched Bookcase: Free Printable Plans and Step-by-Step Tutorial
Learn how to build a DIY arched bookcase with free printable plans and a step-by-step tutorial. Includes tools, cuts, and in-process photos for beginners. Click here for the free printable plans including the shopping list.
Equipment
- Miter Saw
- Drill
- Kreg Jig
- Jigsaw
- Brad Nailer
- Sander
- Kreg Rip Cut w/ Circular Saw or Table Saw
- Kreg Shelf Pin Jig (optional)
Ingredients
- 4 1x4x8 Primed MDF
- 1 1x12x8 Primed MDF
- 2 1x4x8 Pine or Common Boards
- 4 2x4x8 Framing Boards
- 2 2x6x8 Framing Boards
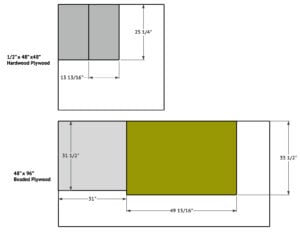
- 1 3/4" x 48" x 96" MDF
- 1 1/2" x 48" x 48" Hardwood Plywood
- 1 48"x96" Beaded Plywood
- 2 Cabinet Pulls
- 4 Cabinet Hinges
- Shelf Pins (optional)
- Wood Glue
- Finish
Instructions
Cut List
- Cut List 1
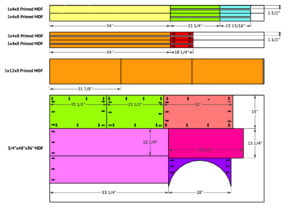
- Cut List 2
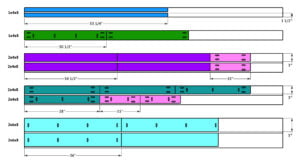
- Cut List 3
Building the Cabinet
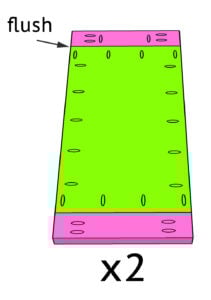
- Cut the side aprons and side panels to size. Drill 3/4 pocket holes on all sides of the panel and 1 1/2" pocket holes on bot ends and one edge of the top apron. Attach the panel to the 2x4 pieces with 1 1/4" pocket hole screws and wood glue. The back of the panel should be flush with the back of the aprons. Build two side assemblies.
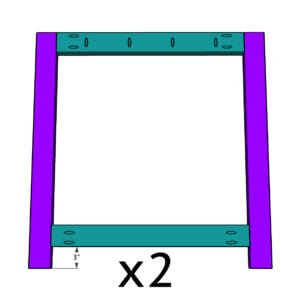
- Cut the cabinet frame pieces to size and drill 1 1/2" pocket holes at both ends of the horizontal pieces and one edge of the top horizontal piece. Attach them together with 2 1/2" pocket hole screws and wood glue. The bottom horizontal piece should be 3" from the bottom of the legs. Build 2 frames.
- Attach a side panel to each side of the cabinet frame with 1 1/4" pocket hole screws and wood glue. The side aprons should be flush with the frame legs and the top aprons should be flush.
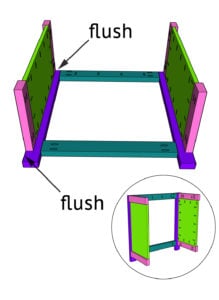
- Attach the second cabinet frame to the side panels with 1 1/4" pocket hole screws and wood glue.
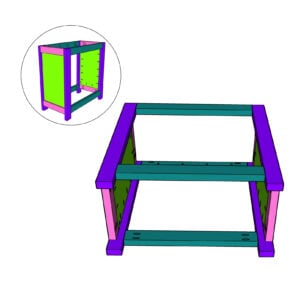
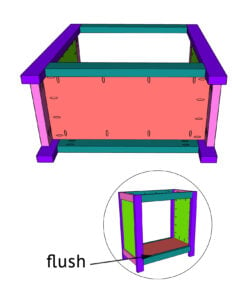
- Measure and cut the bottom panel to size. Drill 3/4" pocket holes around the edge and attach it to the inside of the cabinet frame with 1 1/4" pocket hole screws and wood glue. The bottom panel should be flush with the top of the bottom apron.
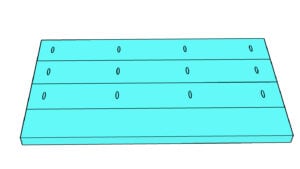
- Cut the top planks to size and drill 1'1/2" pocket olds on one edge of three of the boards. Attach them together with 2 1/2" pocket holes.
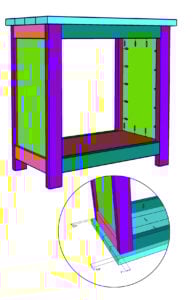
- Attach the top to the cabinet base with 2 1/2" pocket holes from the inside of the aprons and into the planked tops. There should be a 1" overhang on both sides, 1 1/4" on the front and 3/4" on the back.
Building the Hutch
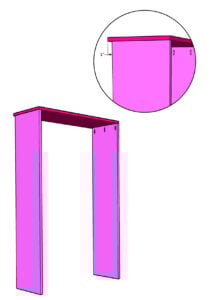
- Cut the hutch side panels and top to size. Drill 3/4" pocket holes at one end of both side pieces. Attach the top to the side pieces with 1 1/4" pocket hole screws and wood glue. The front of the top piece should be flush with the front of the side panels. The back of the top piece should overhang a 1".
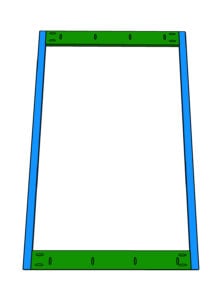
- Cut the hutch back frame pieces to size and drill 3/4" pocket holes at both ends and one edge of the horizontal pieces. Attach them to the vertical pieces with 1 1/4" pocket hole screws and wood glue.
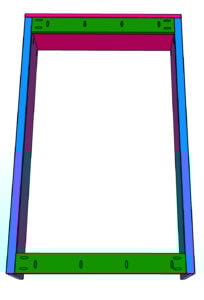
- Flip the hutch on it's front side (so that the overhang is facing up) and attach the back frame to the hutch. Use 1 1/4" pocket holes and wood glue to attach the frameto the top of the hutch and 1 1/4" brad nails and wood glue to attach it to the side panels. the side of frame should be flush with the side panels.
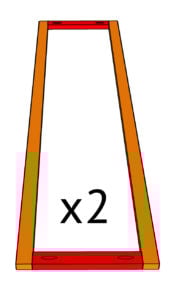
- Measure and cut the side trim pieces to size and drill 3/4" pocket holes at each end of both short trim pieces. Attach them to the long trim pieces with 1 1/4" pocket hole screws and wood glue. Build two side frame assemblies.
- Attach the side trim assemblies to the sides of the hutch with 1 1/4" brad nails and wood glue.
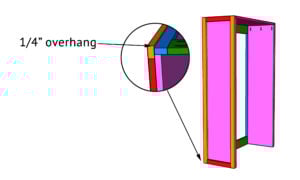
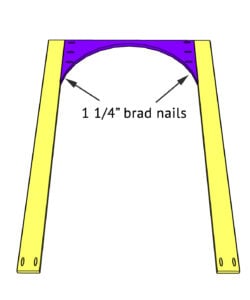
- Measure and cut the hutch face frame pieces to size. Drill 3/4" pocket holes at the ends of both of the arch piece and one end of the long boards. Attach the long face frame pieces to the arch with 11/4" pocket hole screws and wood glue. Add a few 1 1/4" brad nails towards the bottom of the arch, securing the arch to the long trim pieces.
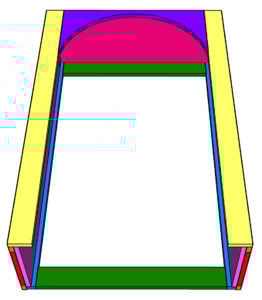
- Attach the hutch face frame to the front of the hutch with 1 1/4" brad nails and wood glue.
- Cut the beaded plywood to size and attach it to the back of the hutch with 1" staples and wood glue. I stained the beaded plywood before attaching it.
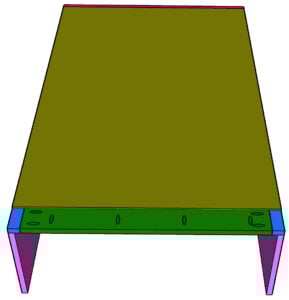
Creating the Cabinet Doors
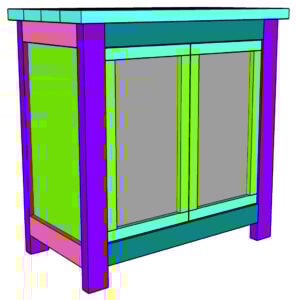
- Cut the door panels to size then measure and cut the door trim size. The doors should have a 1/8" gap around all sides. Attach the door trim to the door panels with 1 1/4"brad nails and wood glue.
- Attach the doors to the cabinet with the cabinet hinges. I waited until after painting the cabinet to attach.
The Finish
- Attach the hutch to the cabinet base with 1 1/4" pocket hole screws through the pocket holes on the back frame of the hutch and into the cabinet top. Follow up with 1 1/4" pocket holes from the inside of the hutch face frame and into the cabinet top.Fill any exposed nail holes and sand the entire piece down, then add a finish and hardware!Make it your own! Make sure to share your builds with us on social media and use #shanty2chic so we can share them too!Happy Building!