DIY Craft Cabinet
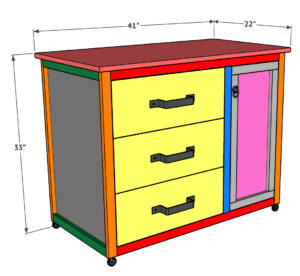
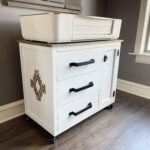
Learn how to build this DIY Craft Cabinet with free plans, a step-by-step tutorial and just a few basic tools! Click here to download and print the full set of plans!
Equipment
- Miter Saw
- Drill
- Kreg Jig
- Table Saw (optional)
- Brad Nailer
- Stapler (optional)
- Pin Nailer (optional)
Ingredients
- 3 1x4x8 Pine or Common Boards
- 1 3/4"x48"x96" Hardwood Plywood (Birch)
- 1 1/2"x48"x48" Hardwood Plywood (Birch)
- 1 1/4"x48"x48" Hardwood Plywood (Birch)
- 1 3/4"x24"x48" Laminated Pine
- 1 1/4" Pocket Hole Screws
- 1 1/4" Brad Nails
- 5/8" Brad Nails
- 3/4" Staples (optional)
- 1" Pin Nails
- 3 Drawer Slides
- 3 Drawer Pulls
- 1 Cabinet Pull
- 2 Cabinet Hinges
- 4 2" Casters
- Wood Glue
Instructions
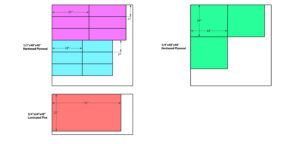
Cut List
- Cut List 1
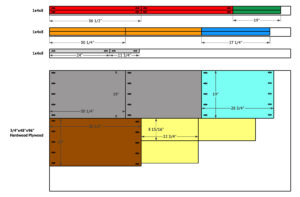
- Cut List 2
Building the Cabinet Frame
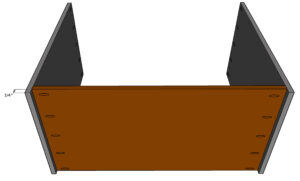
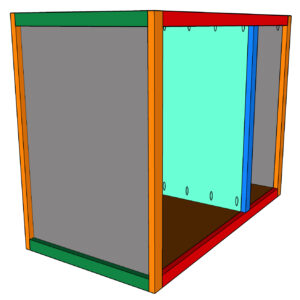
- Cut the bottom and side panels to size. Drill 3/4" pocket holes at both ends of the bottom board and the top ends of the side pieces. Attach them side panels to the bottom panel with 1 1/4" pocket hole screws and wood glue. Leave a 3/4" space at the bottom.
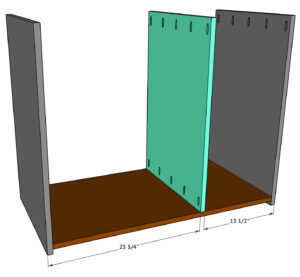
- Cut the middle divider to size. Drill 3/4" pocket holes at both ends and attach it to the bottom panel with 1 1/4" pocket hole screws and wood glue.
Building the Face Frame
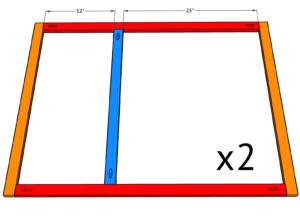
- Cut the face frame pieces to size and drill 3/4" pocket holes at both ends of the top, bottom and middle pieces. Attach them together with 1 1/4" pocket hole screws and wood glue. Build 2 face frame assemblies.
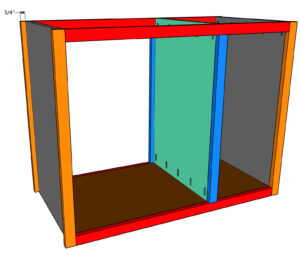
- Attach the face frames to the front and back of the cabinet with 1 1/4" brad nails and wood glue. The side face frame pieces should be flush with the inside of the side panels.
Attaching the Side Trim
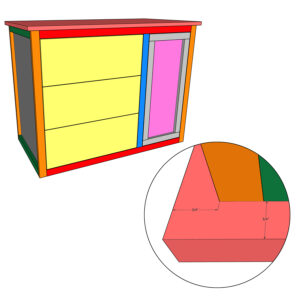
- Measure and cut the side trim pieces to size. Attach them to the top and bottom of both side panels with 1 1/4" brad nails and wood glue.
Drawers
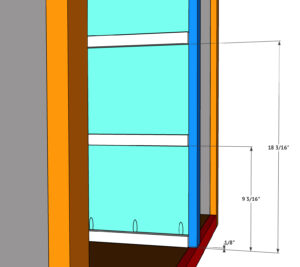
- Attach the drawer slides according to the manufacturers instructions. The front of the drawer slides should be flush with the front of the divider.
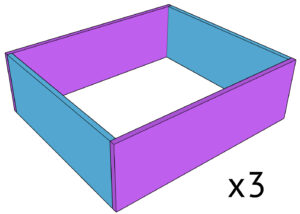
- Cut the drawer pieces to size and attach them together with 5/8" brad nails and wood glue.
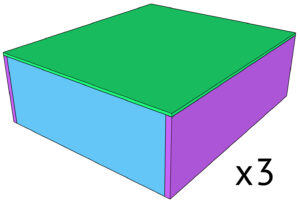
- Cut the drawer bottom to size and attach it to the bottom of the drawer frame with 3/4" staples and wood glue. Build 3 drawers.
- Install the drawers with the drawer slides.
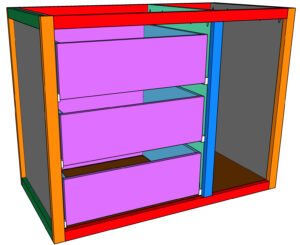
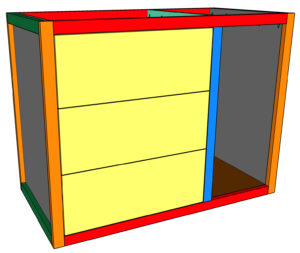
- Measure and cut the drawer faces to size. Attach them to the front of the drawers with 1" pin nails and wood glue. There should be a 1/8" gap around all sides of the drawer faces.
Door
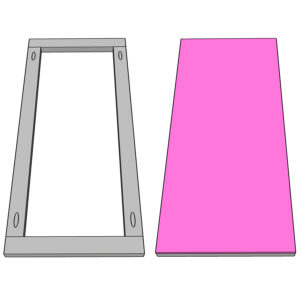
- Cut the door frame pieces to size and drill 3/4" pocket holes at both ends of the side pieces. Attach them together with 1 1/4" pocket hole screws and wood glue. Cut the door panel to size and attach it to the back of the frame with 3/4" staples and wood glue.
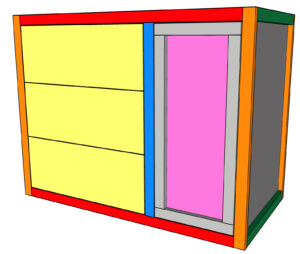
- Attach the door to the cabinet with cabinet door hinges. There should be a 1/8" gap around all sides.
Attaching the Top
- Cut the project panel to size and attach it to the top of the cabinet with 1 1/4" pocket hole screws and wood glue.
The Finish!
- Add a finish and hardware and that's it! Be creative and make it your own! Be sure to share your builds with us on social media and use #shanty2chic so we can share them too!Happy Building!