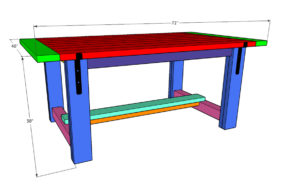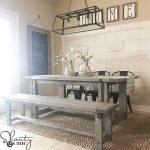
DIY Industrial Farmhouse Dining Table
Build this simple DIY Industrial Farmhouse Table with only framing materials and five tools! Click the link to download and print the free plans!CLICK HERE TO PRINT THE FULL SET OF PLANS
Ingredients
- 9 2x6x8 Pine or Framing Lumber
- 1 2x6x10 Pine or Framing Lumber
- 3 2x4x8 Pine or Framing Lumber
- 1 4x4x8 Pine or Framing Lumber
- 2 1/2" Pocket Hole Screws
- Spax Screws
- Wood Glue
- Decorative Metal Pieces
Instructions
- Cut List
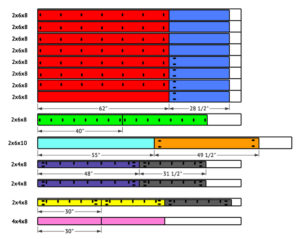
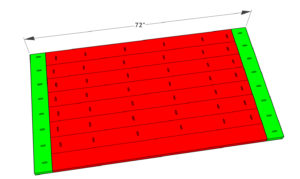
- Cut the boards for the planks. Then, drill 1 1/2" pocket holes into 7 of the planks. Attach the planks with 2 1/2" pocket hole screws.
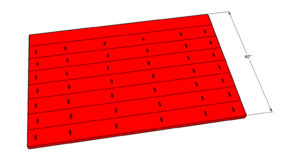
- Now, measure and cut the breadboard pieces to fit. Drill 1 1/2" pocket holes into the boards and attach them to the planks with 2 1/2" pocket hole screws and wood glue.
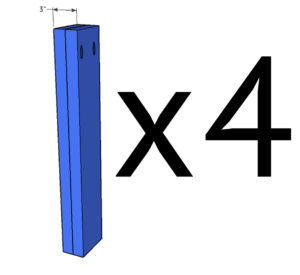
- To create the legs, cut the boards to size, drill 1 1/2" pocket holes in 4 of the pieces. Then, glue two pieces together (one with pocket holes and one without), clamp and let them sit for 24 hours.
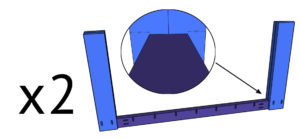
- Cut the long apron pieces and drill 1 1/2" pocket holes. Attach them to the legs with 2 1/2" pocket hole screws and wood glue. The aprons will be centered on the legs where the pieces are joined together and flush with the top of the legs.
- Cut the short runners to size, drill 1 1/2" pocket holes and attach them with 2 1/2" pocket hole screws and wood glue. Center the short aprons on the wide side of the legs.
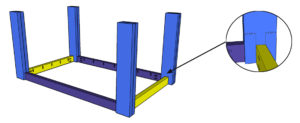
- Cut the support pieces to size and drill 1 1/2" pocket holes into each board. Attach to the inside of the long aprons with 2 1/2" pocket hole screws and wood glue.
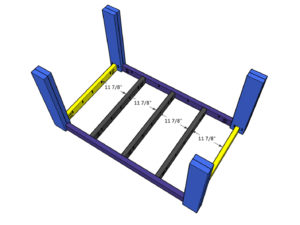
- Now, cut the 4x4 pieces and run between the legs. You can use 3.5" Spax screws to attach the runners from the outside of the legs or use a Kreg HD to drill 1 1/2" pocket holes. Make sure to use wood glue and fill screw holes if not using the Kreg.
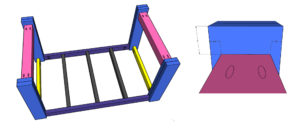
- Next, cut the short runner. Drill 1 1/2" pocket holes in each end and attach with 2 1/2" pocket hole screws and wood glue.
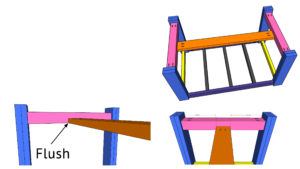
- Keep the base upside down and cut the long runner to size. Attach it underneath the short runner with wood glue and 2 1/2" brad nails from the bottom of the short runner. This will hide the nail holes. The long runner should sit 3/4" from the ned of the leg runners.
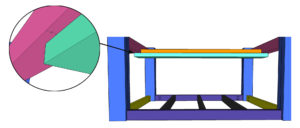
- Set the table base on top of the table top and attach it to the table top with 2 1/2" pocket hole screws from the aprons and supports into the table top.
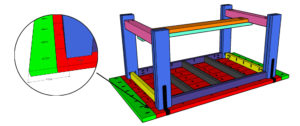
- Flip the table over and add decorative hardware We used framing brackets and spray painted them black.
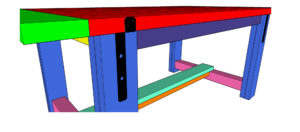
- All finished! Now you can paint or stain it to get the look you want. Try adding different hardware to really make it your own. Be sure to share your builds with us on social media and use #shanty2chic so we can share them too! Happy Building!