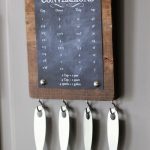
DIY Kitchen Conversion Chart
Make a handy kitchen conversion chart with a free 4×6 printable, a small piece of wood, and cup hooks for hanging measuring spoons. It’s a quick scrap wood project that can be mounted right on the refrigerator.
Servings: 1 Piece
Cost: $5–$10
Equipment
- Saw
- Sanding block
- 220-grit sandpaper
- Hammer
- Scissors
Ingredients
- Free 4×6 kitchen conversion chart printable
- 1 ×8 whitewood board cut to 5 inches long
- Wood stain such as Rust-Oleum Ultimate Wood Stain in Early American
- 4 cup hooks
- 4 furniture tacks
- 2 Command Strips
Instructions
- Print the free 4×6 conversion chart and trim it with scissors.
- Cut a 5-inch-long piece from a 1×8 board.
- Smooth the edges and corners with 220-grit sandpaper and remove the sanding dust.
- Apply one coat of wood stain and let it dry completely.
- Install four cup hooks evenly along the bottom edge of the board.
- Center the conversion chart on the wood and secure each corner with a furniture tack.
- Attach two Command Strips to the back and mount the finished chart to the refrigerator.
Notes
- The printable can also be placed directly into a 4×6 frame if you want to skip the wood version.
- Make sure the Command Strips are rated to support the weight of the finished board and measuring spoons.
- Drying time can vary depending on the stain used and room conditions.