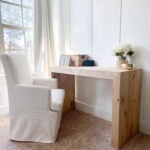
DIY Waterfall Writing Desk
Create this beautiful waterfall writing desk with a few tools and simple steps! Download and print the free plans HERE!
Cost: $100
Ingredients
- 3 boards 2 x 4 x 8 ripped to 3" wide each
- 5 panels 16" x 48" edge glued pine panels
Instructions
- Cut List

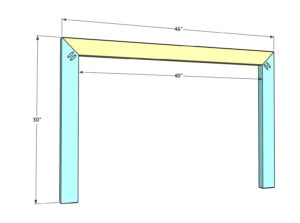
- After ripping the 2x4 boards to 3” wide each, make cut the boards at a 45º angles to create a frame. You will create 2 identical frames. Add 1.5” pocket holes at the edge of the 45º angles on eachside board. Attach the side boards to the top boards using wood glue and 2.5” pocket hole screws and wood glue to create the frames.
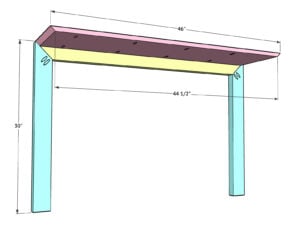
- Add the top of the desk next. Add 3/4” pocket holes down both long sides of the bottom of the desk top. Add a line of glue to the top edge of one frame and attach the table top flush with top of the frame using 1.25” pocket hole screws.
- Now add the outside side panels of the desk. The top of these are also cut at 45º angles. Add 3/4”pocket holes down both long sides of the insides of these boards. Add a line of woodglue to the edge of the side frame pieces and attach the outside boards using 1.25” pocket hole screws. The outside of the desk side piece will be flush with the outside of the frame board.
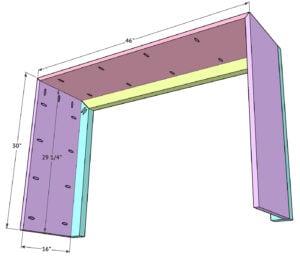
- Next, add the support boards to the insides of the desk sides. These are scraps cut from your extra panels. I cut 4 pieces each around 3” wide. Line the top supports up at the top of the desk and place the second set closer to the bottom. Attach the first board with wood glue and 1.25” brad nails and then add the second on top of it also attaching with wood glue and brad nails. Repeat thiswith the remaining 6 boards. Make a small mark on the edge of the panels on the outside to have a visual of where these boards are when they are covered on the final step.
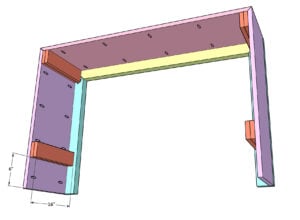
- Attach the other frame now to the desk body you have built. Add a line of wood glue around all flush outer edges of the back of the frame and attach the desk to it using 1.25” Kreg pocket hole screws. Make sure all outside edges of the frame and desk body are flush at this point.
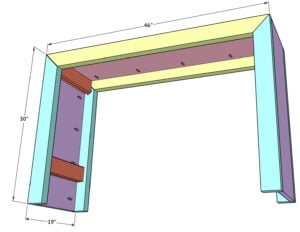
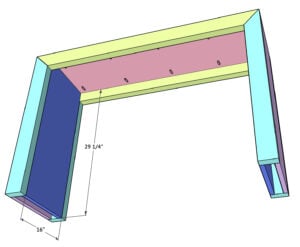
- The final step is attaching the inside panels to hide all of the pocket holes and supportboards. These boards will give you that waterfall look. They are also edge glued panels cut to size. Add wood glue to the tops of each inside support board and attach the panels using 1.25” brad nails.
Notes
You can download and print the free plans by clicking HERE!