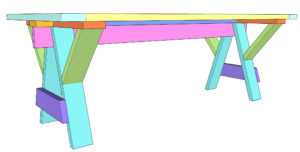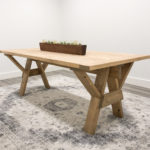
Sawhorse Base Farmhouse Table
Cutest farmhouse dining table you can build for under $80 in lumber! Click HERE to print these plans!
Cost: $80
Ingredients
- 13 2x6x8 Framing Lumber rip each board to 5" wide each
- several Kreg Pocket Hole Screws 2.5"
- 1 wood glue
- several 2" and 2.5" finish nails
Instructions
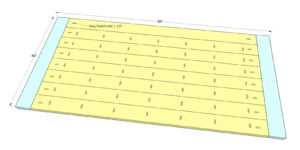
- The first step to building this table is creating the table top. These are 2×6 boards that we ripped down to 5”. We added 1.5” pocket hole screws down one long side of all but 1 of our plank boards, and also at the ends of each plank board. We attached the plank boards together first using 2.5” pocket hole screws. Once all plank boards are attached, line of the boards on each end and mark the exact measurement of the breadboards. Attach the breadboards using 2.5” pocket hole screws.
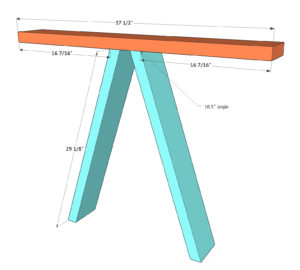
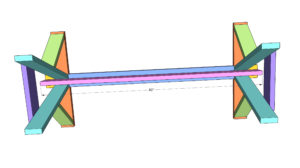
- Moving on to the base assemblies! You will build two of these that will be identical to each other. Start by cutting the leg pieces. These will have an 18.5˚ angles parallel to each other on each end. Mark their placement with a pencil on the top runner board and attach them with 2 or 2.5” Spax screws and wood glue through the runner and into each leg.
- Next, you will add the diagonal braces. The easiest way to get the angles on this part is to hold the board up on top of your assembly and use a pencil to draw the cuts. You will do this on each side, and attach the braces using wood glue and 2” finish nails. You can also add Spax screws through the top runner at an angle and also through the legs and into the bases if you need added support.
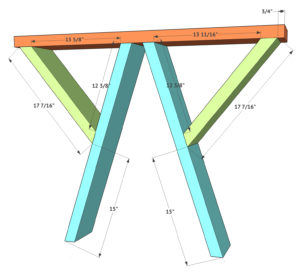
- Mark and cut the leg braces next. Again, the easiest way to get this measurement is to hold the board in place and draw lines along the edges of the legs. Attach these boards using wood glue and 2” finish nails through the supports and into each leg.
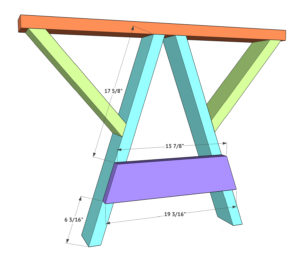
- Attach leg assemblies together with the runner. Add 1.5” pocket holes at both ends of the runner and attach it to the center of both leg assemblies using wood glue and 2.5” pocket hole screws. It is helpful to turn the leg assemblies upside-down on this part and lay the brace flat on the floor to attach it if you don’t have a good clamp.
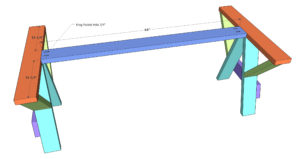
- Cut the small end supports and attach them using wood glue and 2.5” pocket hole screws through 1.5” pocket holes. These boards will help support your breadboards as well.
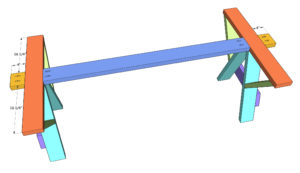
- Now attach the long runner. This will sit in between each leg assembly and flush with the bottom of the top runner. Attach this runner with 2.5” Spax screws and wood glue through the top runner and small side pieces and into the bottom runner.
- The final step is attaching your table top. Lay the table top upside down on the floor and turn the base assembly upside down on top of it. Don’t use wood glue on this part! Attach the top through the supports and runners and into the top using 2.5” Spax screws. Now you are ready for the finish!