DIY Bathroom Vanity
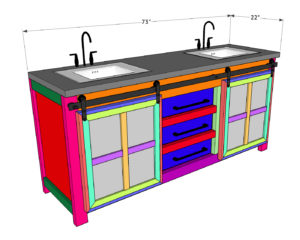
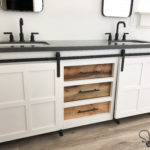
Learn how to build this DIY Bathroom Vanity with free plans by Shanty2Chic. This vanity has two sliding barn doors and three drawers making it functional and a beautiful piece for any bathroom in your home!CLICK HERE TO DOWNLOAD AND PRINT THE FULL SET UP PLANS INCLUDING THE SUPPLY LIST
Equipment
- Miter Saw
- Kreg Jig
- Drill
- Nailer
- Pin Nailer (optional)
- Table Saw (optional)
- Kreg Drawer Slide Jig (optional)
Ingredients
- 2 3/4"x48"x96" Hardwood Plywood (Birch)
- 1 1/4"x48"x96" Hardwood Plywood (Birch)
- 1 2x6x8 Framing Lumber
- 3 2x4x8 Framing Lumber
- 1 2x2x8 Pine or Ripped from a 2x4
- 1 1x8x8 Whitewood or Common Boards
- 4 1x6x8 Whitewood or Common Boards
- 4 1x4x8 Whitewood or Common Boards
- 1 1x3x8 Whitewood or Common Boards
- 4 1x2x8 Whitewood or Common Boards
- 4 1/4"x2"x48" Craft Boards
- 2 1/2" Pocket Hole Screws
- 1 1/4" Pocket Hole Screws
- 1 1/4" Brad Nails
- 3/4" Pin Nails
- Sliding Barn Door Hardware
- 3 Pulls
- 1 Countertop
- 2 Faucets
- Wood Glue
Instructions
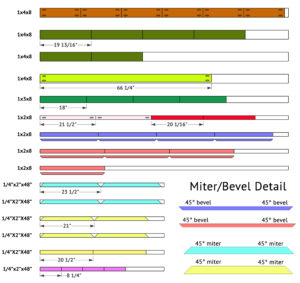
Cut Lists - Note: I ripped the round edges off of some of the 2x boards. The width of the boards is noted in the cut list. This is not a necessary step but if you choose not to rip your boards, adjust the plans accordingly.
- Cut List 1
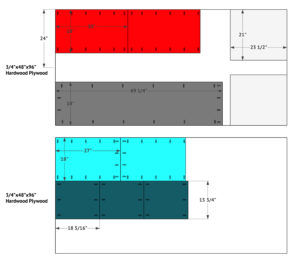
- Cut List 2
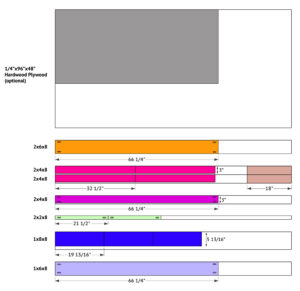
- Cut List 3
Cabinet
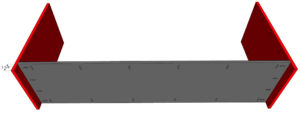
- Cut the cabinet sides and bottom to size and drill 3/4" pocket holes on all sides of the bottom and piece and both edges of the side panels. Attach the bottom piece to the side panels with 1 1/4" pocket hole screws and wood glue. The panels should extend 2 1/4" from the bottom of the bottom piece.
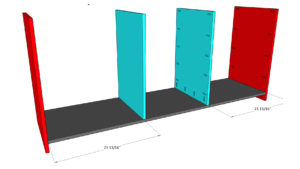
- Cut the middle cabinet pieces to size and drill 3/4" pocket holes on the front and bottom edges. Attach them to the bottom of the cabinet with 1 1/4" pocket hole screws and wood glue.
Face Frame
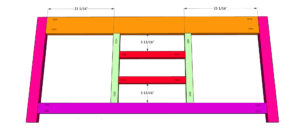
- Cut the legs and front, top and bottom aprons to size. Drill 1 1/2" pocket holes into both endds of the apron pieces. Attach the apron pieces to the egs with 2 1/2" pocket hole screws and wood glue. The top apron should be flush with the top of the legs. The bottom apron should be attached 2 1/2" from the botto of the legs.
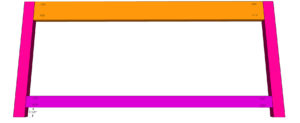
- Cut the middle face frame pieces to size and drill 1 1/2" pocket holes at the ends. Attach the vertical pieces to the top, bottom and the horizontal pieces to the vertial pieces with 2 1/2" pocket hole screws and wood glue.
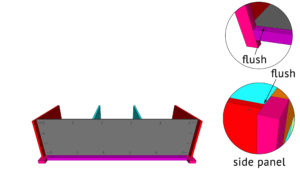
- Attach the front face frame to the cabinet with 1 1/4" pocket hole screws and wood glue, from the cabinet bottom, side and middle panels and into the face frame. The cabinet bottom should be flush with the bottom apron. The side panels should be flush with the top of the legs and inset 3/4".
Back Frame
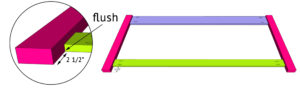
- Cut the back apron pieces to size. Drill 3/4" pocket holes into the ends of both apron pieces. Attch them to the 2 remaining legs with 1 1/4" pocket hole screws and wood glue. The top apron should be flush with the top and front of the legs. The bottom apron should be flush with the front of the legs and 2 1/2" from the bottom of the legs.
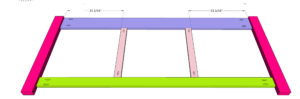
- Cut the middle pieces to size and drill 3/4" pocket holes at both ends. Attach them to the top and bottom apron pieces with 1 1/4" pocket hole screws and wood glue.
Drawers
- Cut the drawer bottoms and side pieces to size. Drill 3/4" pocket holes around the edges of the bottom pieces and 3/4" holes at both ends of the side pieces. Attach the side pieces to the drawer bottom with 1 1/4" pocket hole screws and wood glue.
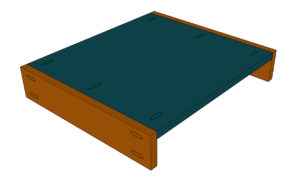
- Cut the front and back pieces to size and attach them to the bottom and side pieces with 1 1/4" pocket hole screws and wood glue.
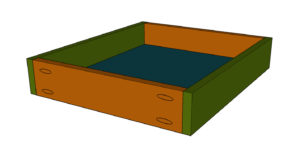
- Install the drawers inside the cabinet with drawer slides. You can refer to the tutorial in this post for more detailed instructions on how we installed our drawers.
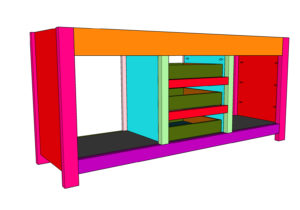
- Cut the drawer faces to size and attach them to the drawers with wood glue and 1 1/4" brad nails from the inside of the drawer and into the back of the drawer faces.
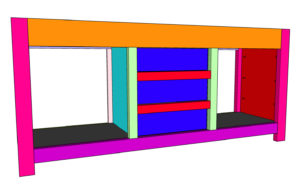
Side Panel Trim
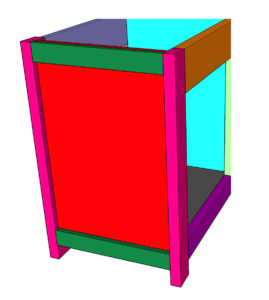
- Cut the side trim pieces to size and attach them to the sides of the vanity with 1 1/4" brad nails and wood glue. The top and bottoms of the side trim pieces should be flush with the top and bottom of the vanity.
Doors
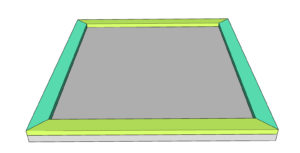
- Cut the door panels to size. The, measure and cut the front trim to size. Attach the front trim to the door panels with 3/4" pin nails and wood glue.
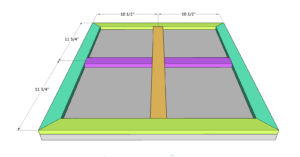
- Cut the decorative door trim to size. Center the vertical piece and attach it to the door panel with 3/4" pin nails and wood glue. Center the two horizontal pieces and attach them the same way.
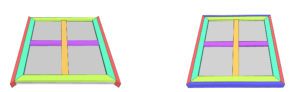
- Cut the door trim pieces to size and attach them to the sides of the doors with 1 1/4" brad nails and wood glue. Measure and cut the top and bottom door trim pieces to size and attach them the same way.
The Finish
- Now, you can add a finish! Once the finish dries, you can attach the countertop, sinks, faucets and hardware! We share more detail on how we attached all of these pieces in the post! If you plan to have a back on the vanity, now is the time to attach it!